
Terrys87 86 4Runner with a 2nd Chance
 Jan 23, 2012 | 04:02 AM
#61
Thread Starter
Super Moderator
iTrader: (1)
Joined: Aug 2008
Posts: 11,787
Likes: 28
From: Anderson Missouri
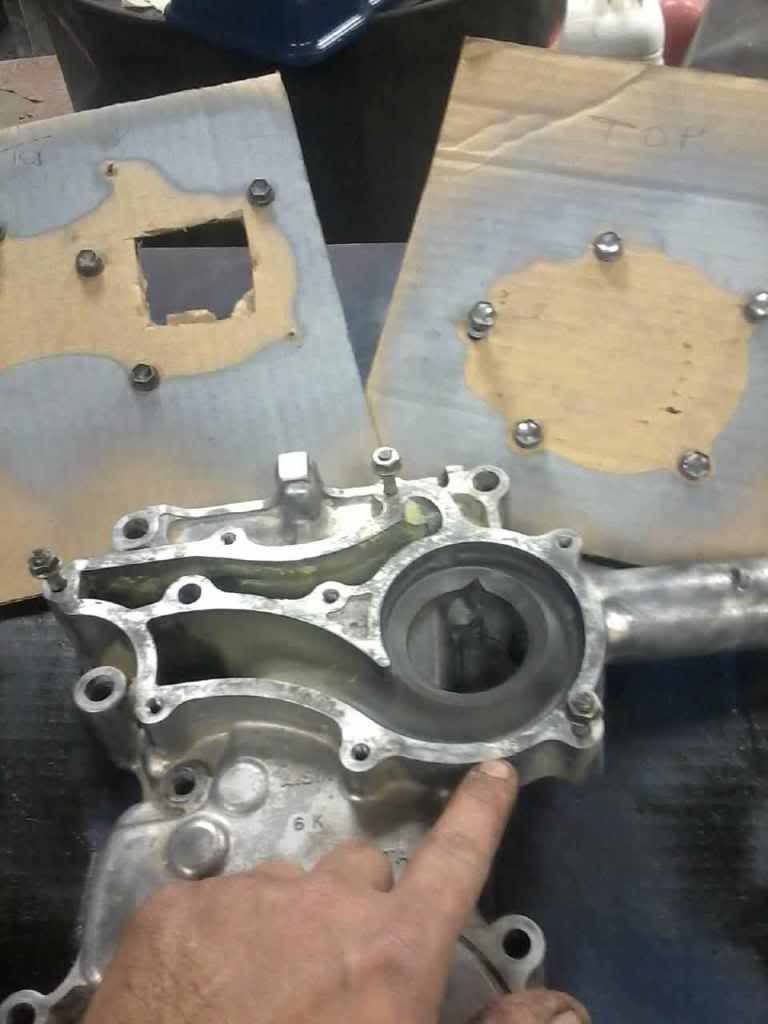
I got everything cleaned and together minus the gaskets and seals. I have to wait for a timing chain and get the head done. I will be replacing my Timing Cover as it is pitted in the water pump area.
Think it is why I found stop leak in it. A good gasket and gasket sealer might would fix it, but I have a couple of 22rs in the shop that I am hoping is good and will fit on a 22re. I believe they will as the gasket kits seem to be the same.
I will use this old cover to help keep the bolts in order. I made some cardbord templates that I will eventually transfer to a small sheet of plywood for the oil and water pump.
Where it is pitted. Doesnt show in picture but it is deep and has a path for water to go all the way from inside to the outside.
Templates for future use, these did make it so much easier keeping track of which bolt went where.
Jan 23, 2012 | 01:38 PM
#62
Thread Starter
Super Moderator
iTrader: (1)
Joined: Aug 2008
Posts: 11,787
Likes: 28
From: Anderson Missouri
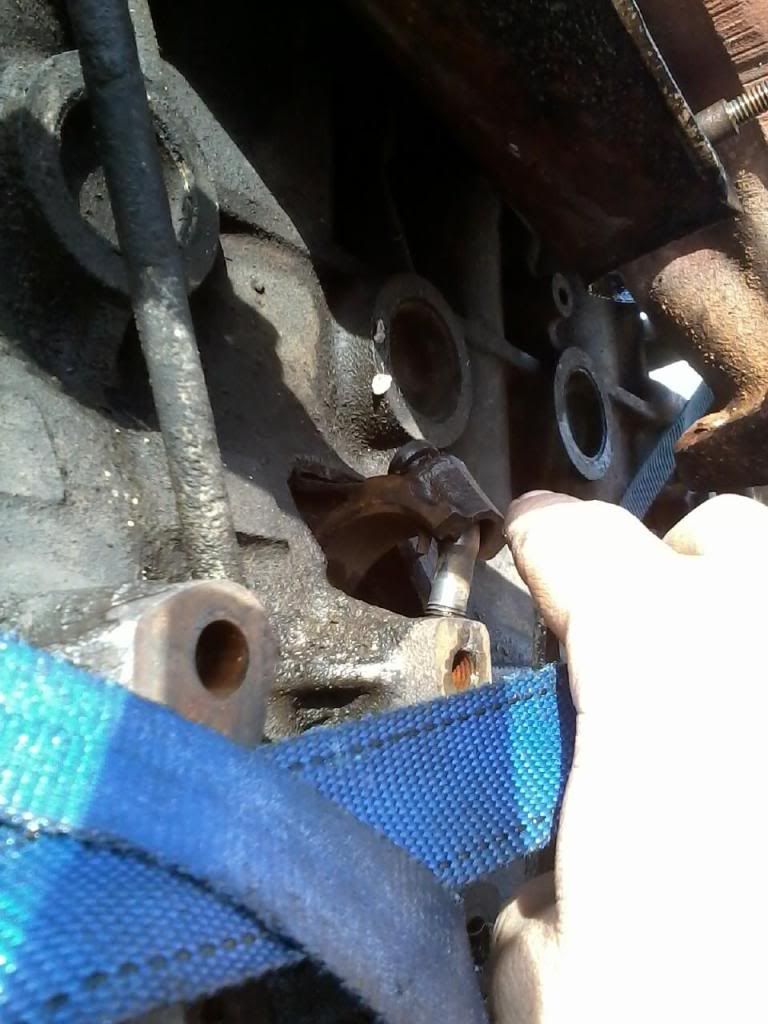
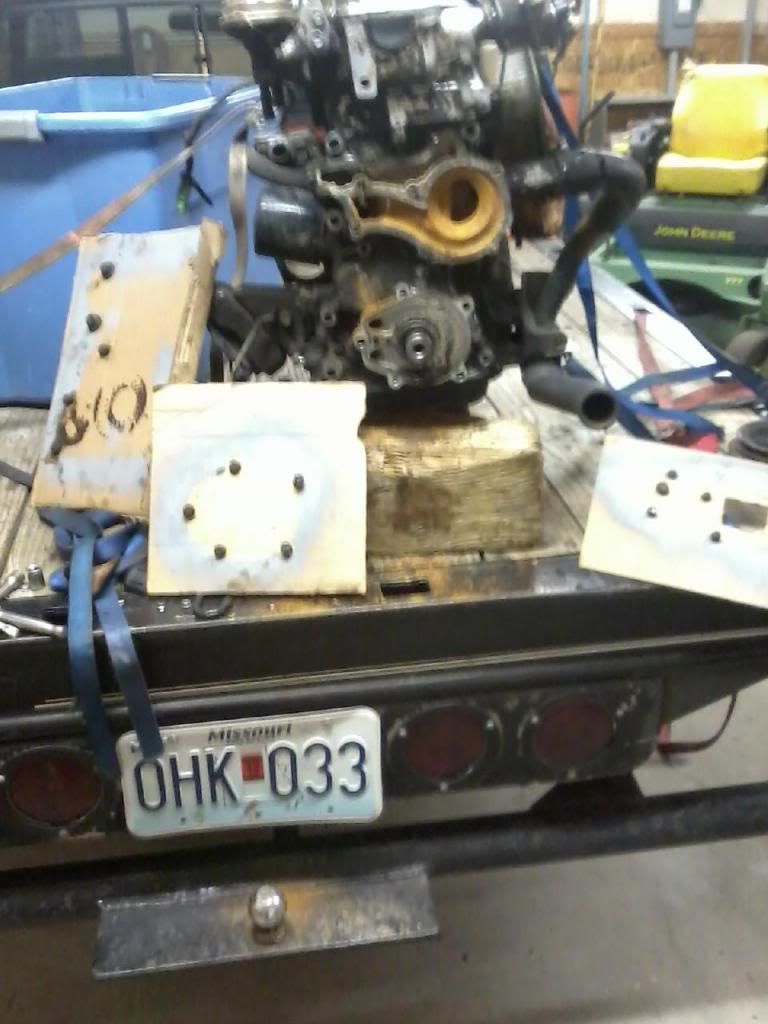
I went to one of my spare motors and found out why the orginal owner just gave it away. It has a rod through the block. Works fine for me. I needed a Timing Cover anyways and awhile back I had to buy an oil pan for my pick up build. Sure it will have a few more parts that will be needed eventually. I will break it down and save the good parts off of it.
Thought it would be a quick job of just grabbing the Timing Cover. It will actually take me some time. I will clean the parts as I go.
Rod sticking out.
Here is a picture of the Window Relay. This controls the rear glass and defrost. When I had a bad one on my 88, the Defrost light wouldnt light and the rear wiper wouldnt work. It is one way of getting an idea if it is good or bad. Will need to do more testing if this is the case, but might help some one out. My 88 build I put alot of info on troubleshooting and cheap way of replacing the relays from Radio Shack I had found but hadnt tried.
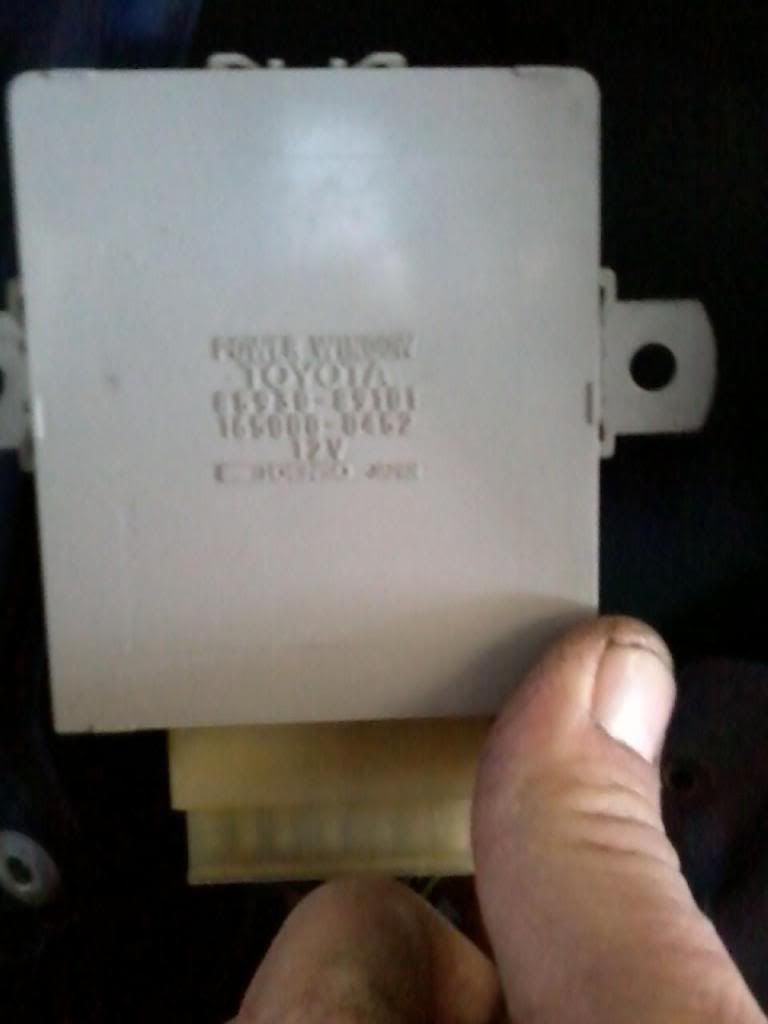
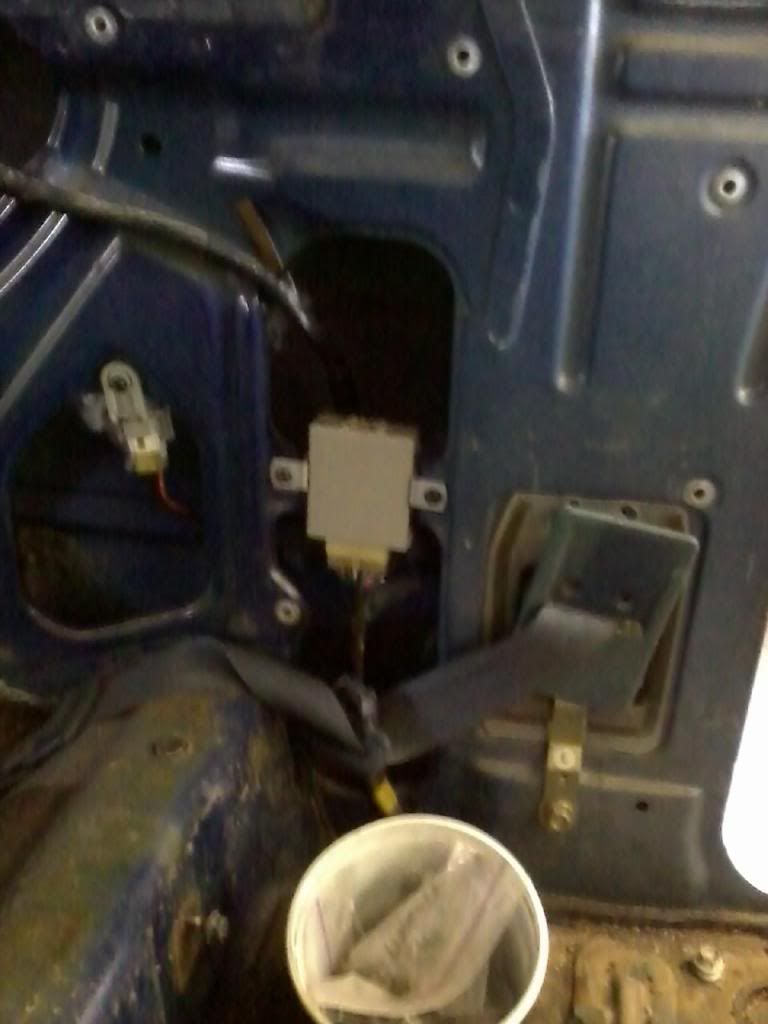
If this part is bad it is expensive, if parting a runner, it is located behid the driver just behind the drivers seat belt. I used the orginal one out of this one to fix my 88. My parts truck had a good one in it so after I used some Peel and Seal I had that was taking up shelf space, I went ahead and put it in.
Thought it would be a quick job of just grabbing the Timing Cover. It will actually take me some time. I will clean the parts as I go.
Rod sticking out.
Here is a picture of the Window Relay. This controls the rear glass and defrost. When I had a bad one on my 88, the Defrost light wouldnt light and the rear wiper wouldnt work. It is one way of getting an idea if it is good or bad. Will need to do more testing if this is the case, but might help some one out. My 88 build I put alot of info on troubleshooting and cheap way of replacing the relays from Radio Shack I had found but hadnt tried.
If this part is bad it is expensive, if parting a runner, it is located behid the driver just behind the drivers seat belt. I used the orginal one out of this one to fix my 88. My parts truck had a good one in it so after I used some Peel and Seal I had that was taking up shelf space, I went ahead and put it in.
Last edited by Terrys87; Mar 25, 2012 at 12:47 PM.
 Jan 23, 2012 | 02:26 PM
#64
Registered User


Joined: Oct 2011
Posts: 2,731
Likes: 344
From: Denver CO
Coming along pretty good dude, nice work on the motor paint! And for your hands I really don't have a good suggestion but I use lotion with an SOS pad. Works good sounds weird works for me but my hands are leather. So I assume no responsibility for this technique.
Jan 24, 2012 | 06:58 AM
#65
Thread Starter
Super Moderator
iTrader: (1)
Joined: Aug 2008
Posts: 11,787
Likes: 28
From: Anderson Missouri
Hello Zs Confederate Toy...That is a creative use for the old engine, maybe I will think of something for it. I can see you stripped that block really good. Been trying to get thru all 3 of your threads. 3 projects keep you busy. I go 2 trucks and a getting the shop I just got recently kind of counts as a 3rd project, I feel your pain.lol.
Hello Discombobulated..Thanks, I am hoping next the funds will loosen a little and I can make some big progress. I have 2 days off starting tomorrow so I plan on trying to get some small things done that will add up in the long run.
I hear you on the leather hands. I will try that also. Been trying lotion to help feel the cracks.
Jan 24, 2012 | 07:12 AM
#66
Thread Starter
Super Moderator
iTrader: (1)
Joined: Aug 2008
Posts: 11,787
Likes: 28
From: Anderson Missouri
I got my new to me Timing cover. I got it cleaned up and it actually looks really good. The block my not look like much, but when I first started working on Toyotas and didnt have any parts and relied on the salvage, it really added up.
I always get the correct bolts back in to where they first belong. I have ran into several truck that have hardware store bolts in them and that is a pet peeve of mine. I have made several trips to the bone yard just for the correct bolt.
I remember spending $60 just for a pan,water pipe, pickup tube, dipstick and some other odds and ends. I will strip it and put the parts up as I am sure I will use them for something later on. Its a never ending process.
My cardboard templates have really been coming in handy. Flatbed makes a really good work bench. I have the next 2 days off and supposed to have some good weather. Probably just cleaning and rattle can painting and trying to get everything ready so when I do get a dollar or two that I can make some big progress.
Once I get the head checked and timing chain, I will get the motor in and start putting the front fenders, core support,radiator and anything else that I can. It will make some big progress once I just get a few parts. I have all the engine kit but head and timing chain is holding up the show for now.
Jan 24, 2012 | 12:28 PM
#67
Registered User
Joined: Mar 2009
Posts: 1,169
Likes: 0
From: (LSD) Lower Slower Delaware
Terry, let me know if you are missing anything, I got parts from the 87 22R and a complete 85 22R. I think I still have the head from the 87.
other wise, looks great, hope it works well...............
other wise, looks great, hope it works well...............
Jan 25, 2012 | 12:04 AM
#69
Thread Starter
Super Moderator
iTrader: (1)
Joined: Aug 2008
Posts: 11,787
Likes: 28
From: Anderson Missouri
Thanks RMP8080..I havent gotten to send my head to the machine shop and it is looking like next week before that happens, if some reason my head is bad I would be interested in the head if it is for a 22RE.
Thanks Yotaman85, I have actaully used dirt to clean my hands of thick grease or build up but havent tried it with the deep ground in stains that get into the cracks. I have used dirt to clean up oil spills. It works great for that too.
Thanks Yotaman85, I have actaully used dirt to clean my hands of thick grease or build up but havent tried it with the deep ground in stains that get into the cracks. I have used dirt to clean up oil spills. It works great for that too.
Jan 25, 2012 | 02:34 AM
#70
Thread Starter
Super Moderator
iTrader: (1)
Joined: Aug 2008
Posts: 11,787
Likes: 28
From: Anderson Missouri
I had another post wrote out and my laptop died on me so will try this again. I drove the wifes 88 and it started cutting out once I above 2500 RPMs. Once it warms up it gets better. The first time I thought it was an air filter or fuel filter but when it warms up, I dont feel that is the problem.
I did change the air filter. The tune up items on it now are just over a year old. I am going to change plugs and fuel filter and see what happens. I dont think this will fix it as it seems to be a temperture problem. It does have 32,000 miles since getting it running. I dont have a check engine light and no loose vacuum hoses that I can see or find.
I havent gotten the manual out yet to start troubleshooting yet and just wondering if anybody else has experienced something similar. I can tear a motor down, but the fine tuning or little things like this can stump me.
I can say I really enjoy driving the 88 when I get the chance. It is just a fun little truck to drive and is what I am shooting for on this 86 build. Hoping to get it to run just as good as the 88. The 88 was in worse shape then this truck I am now working on. The reason for the 88 getting done before this one is that I had title issues on the 86, but now that I have it worked out, I am really wanting to get my truck going.
I will look into seeing why the 88 isnt running like it should, just seeing if someone has a quick fix for it. It gets to 60 mph and then as it warms up, I can get it to 70 and then to 80. I am thinking fuel or air issue or maybe a electronic issue. The temperture has been in the high 40s and low 50s. It starts great and revs up to 2500 great and then hesitates after that. Thanks
Jan 26, 2012 | 03:02 AM
#73
Thread Starter
Super Moderator
iTrader: (1)
Joined: Aug 2008
Posts: 11,787
Likes: 28
From: Anderson Missouri
Hello RMP8080..lol..I have two 22r heads. If I had spare 22re heads I would need a 22r, seems like that is how it goes. I have a sawsall but no way of welding it back up so I will be taking it tothe shop tomorrow. The guy in town just charges a few dollars to fix it.
I am convinced it is the cat as it just runs to good otherwise. Only thing has me concerened is why it just recently plugged. Definitely could be just time and age of it but hoping it isnt running rich or something else causing it to plug. No black smoke or any other problems. May just been its time to wear out.
I am convinced it is the cat as it just runs to good otherwise. Only thing has me concerened is why it just recently plugged. Definitely could be just time and age of it but hoping it isnt running rich or something else causing it to plug. No black smoke or any other problems. May just been its time to wear out.
Jan 26, 2012 | 03:16 AM
#74
Thread Starter
Super Moderator
iTrader: (1)
Joined: Aug 2008
Posts: 11,787
Likes: 28
From: Anderson Missouri
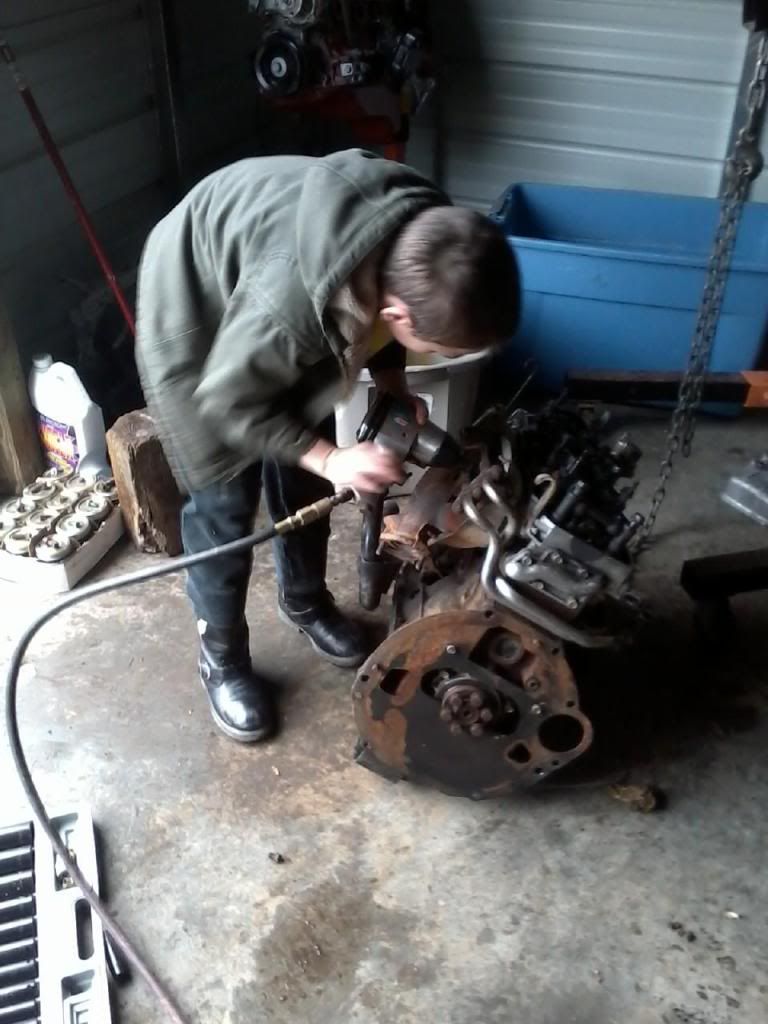
Had one of the little ones up the nite before sick so he got to stay home from school. Later on during the day he got to feeling better and I was out tinkering in the garage and just started tearing down the 22r and had the impact wrench on it and he wanted to run the wrench.
It was a pretty good time. I would switch out the different size sockets as we needed them and he zipped them off. He is always teasing me about working on trucks,( I always tease him about working on bikes),I asked if he had fun and he wouldnt answer me.hehe..He knew where I was going with my next comments.
He did good and was ready to tear down another motor. Anytime I run a drill or have some bolts he likes to be out there. Trying to show him the basics for now.
My dad got me some tools when I came home a year ago form over seas and I had them put up so when I got my shop, I found where I had them. Also found my spare EGR valve that I will use but will block off just to keep it all together. I like finding stuff. Its like Christmas all over again.
Justin getting after it.
Jan 26, 2012 | 08:57 AM
#75
Thread Starter
Super Moderator
iTrader: (1)
Joined: Aug 2008
Posts: 11,787
Likes: 28
From: Anderson Missouri
I will keep updating and going back and adding to this post as I get the info. I will also pull info from the 88s build on the rear awindow. When I first started working on these back glasses, I was intimidated and know several questions come up about this problem.
I have learned alot and is one area I have been able to answer quite a few questions that other have had on the Main Page when they pop up.
I bought a backglass off of Craigslist from a member here in Kansas City. My back hatch has the back glass broken out of it and the PO had it all disassembled so I am piecing it back together.
Here is all that is need to get the window togther. A battery, gear mechanisim, window, and tailgate.
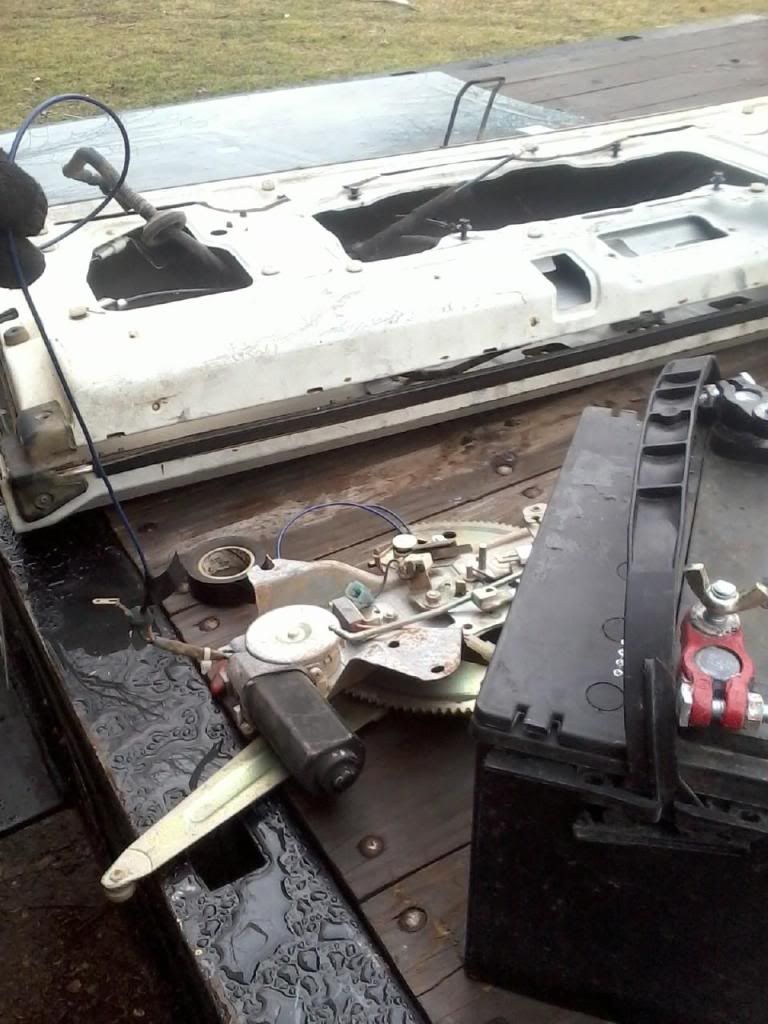
Take some wire and coming off of the window motor and run a length of wire to each terminal. By switching the polarity of the wires on the battery it will control the direction goes form UP or Down. ( Pic above is only one, but both need it). If your window glass isnt broken but not operating, I have done the same thing, but run enough wire to the front of the cab that I can use the cigaretter lighter hot wire on the backof it, and a good ground to operate the window. It is really handy having the backglass operating.
Operate the motor to where levers that go into the window tracks are flat. Then work the assembly into the hatch.
I found it easier to remove the weather seal from the tailgate.( I am misssing the other window seal so cant tell you about it). Push the tabs toward the back of the tailgate (license plate side direction). These are BRITTLE and more then likely you will break a few no matter how gentle you are.
Slide the window into the tracks of the tailgate about halfway down to where it meets the wheels and the cutout on the tracks. (Here is what I forgot about. I still need a refresher but think you will see it when you get to it.)
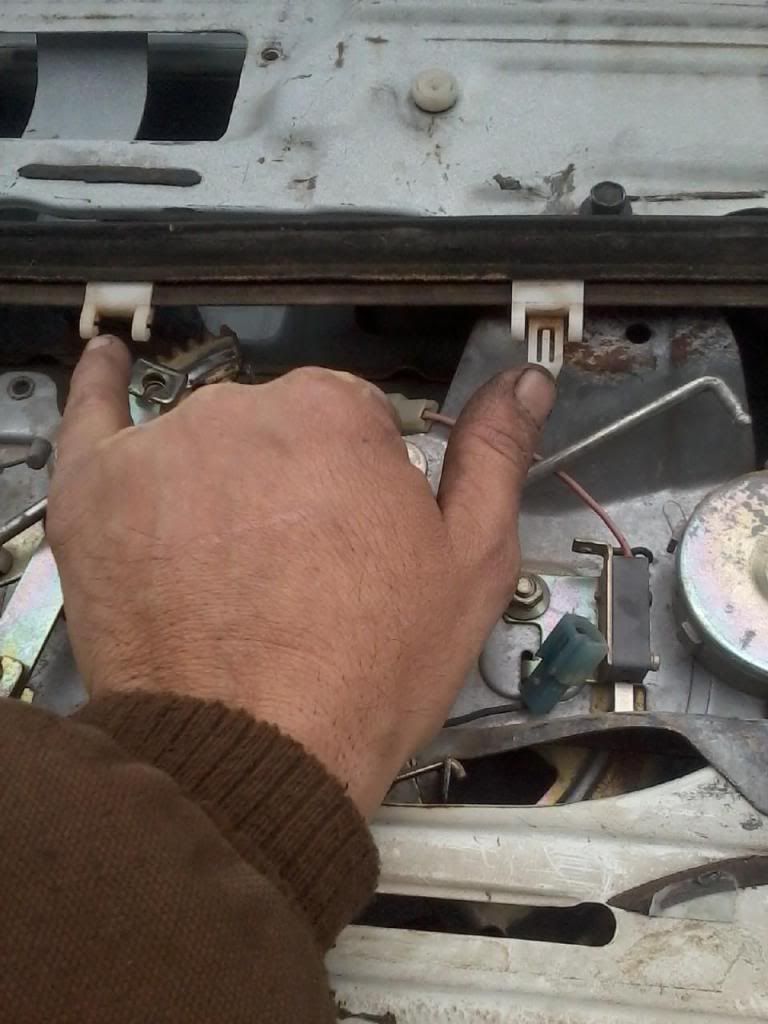
I tried to show tabs and how the motor should be facing you. With the gear assembly not bolted, you can slide it side to side enough to get the wheels in the tracks. My tracks are really rusted and I will be working on that but wanted to help take some of the scare out of the tailgate. Still have some more work to do to this and will keep updating as I figure it out.
[IMG]http://i1098.photobucket.com/albums/g377
I have learned alot and is one area I have been able to answer quite a few questions that other have had on the Main Page when they pop up.
I bought a backglass off of Craigslist from a member here in Kansas City. My back hatch has the back glass broken out of it and the PO had it all disassembled so I am piecing it back together.
Here is all that is need to get the window togther. A battery, gear mechanisim, window, and tailgate.
Take some wire and coming off of the window motor and run a length of wire to each terminal. By switching the polarity of the wires on the battery it will control the direction goes form UP or Down. ( Pic above is only one, but both need it). If your window glass isnt broken but not operating, I have done the same thing, but run enough wire to the front of the cab that I can use the cigaretter lighter hot wire on the backof it, and a good ground to operate the window. It is really handy having the backglass operating.
Operate the motor to where levers that go into the window tracks are flat. Then work the assembly into the hatch.
I found it easier to remove the weather seal from the tailgate.( I am misssing the other window seal so cant tell you about it). Push the tabs toward the back of the tailgate (license plate side direction). These are BRITTLE and more then likely you will break a few no matter how gentle you are.
Slide the window into the tracks of the tailgate about halfway down to where it meets the wheels and the cutout on the tracks. (Here is what I forgot about. I still need a refresher but think you will see it when you get to it.)
I tried to show tabs and how the motor should be facing you. With the gear assembly not bolted, you can slide it side to side enough to get the wheels in the tracks. My tracks are really rusted and I will be working on that but wanted to help take some of the scare out of the tailgate. Still have some more work to do to this and will keep updating as I figure it out.
[IMG]http://i1098.photobucket.com/albums/g377
Last edited by Terrys87; Mar 8, 2014 at 03:39 PM.
Jan 28, 2012 | 07:51 AM
#76
Thread Starter
Super Moderator
iTrader: (1)
Joined: Aug 2008
Posts: 11,787
Likes: 28
From: Anderson Missouri
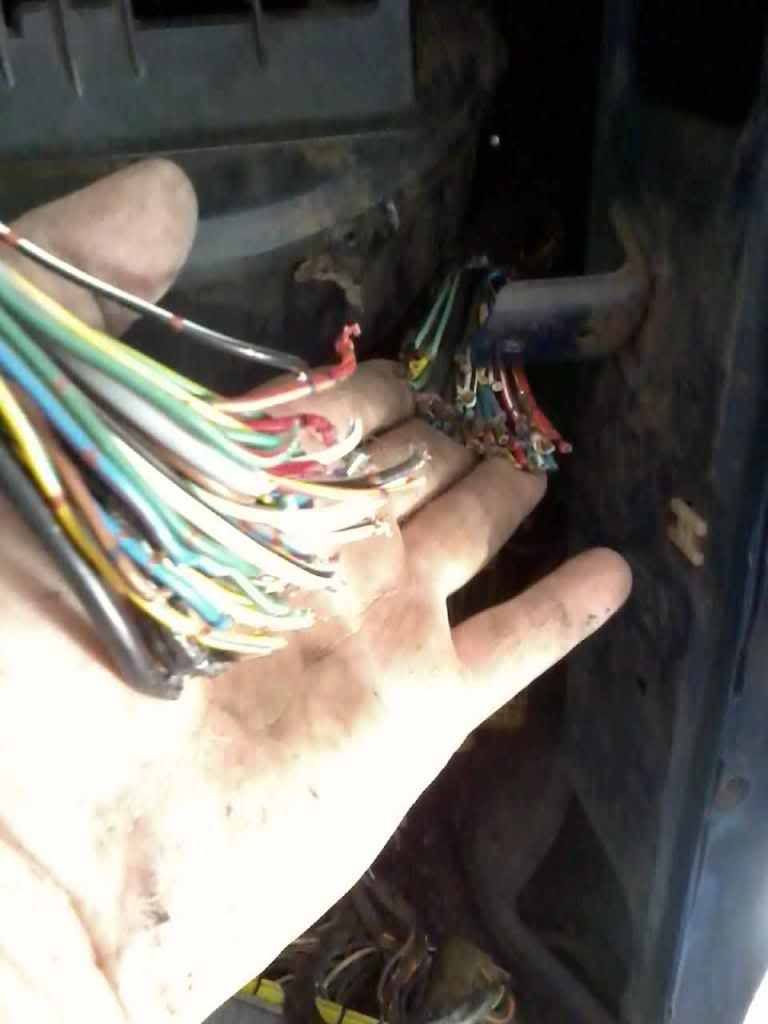
Not anything really picture worthy, but did have to pull the windshield Found 3 chewed wires and the PO did a poor job of seeling up the windshield when they apparently have replaced it in the past. Will need to get a new windshield gasket.
This truck is about down to bare bones, but after I get the 3 wires fixed, I can start reassembling some of the things on it. Finallyyyyy getting to start bring it back together.
Got all of the ventilation ducting clean and get to start putting it back in and then the dash. I need to get another heater control assembly as mine is broken in the typical broke lever area.
I have been soldering all of the chewed or PO poor wiring job and feel good about my soldering, but the electrical is my biggest concern of the whole build. As long as it goes alright I can get everything else in order.
The motor and transfer case in the past had some bad leaks and being a Florida truck it spent some time on the beach. It has oil/sand/oil build up and have spent alot of time getting all of that cleaned off.
Did find the drivers rear wheel has a bad leak either in the axle shaft or wheel cylinder so it will be needing fixed in the near future.
Hoping to get the timing chain this coming week and then I can get the bottom end sealed up and put it in the truck. Do the starter and get the flywheel on. It is small but steady steps. I am patiently going through it getting everything as far as I can so when funds do loosen up,it will come together quick.
Jan 30, 2012 | 04:28 AM
#77
Thread Starter
Super Moderator
iTrader: (1)
Joined: Aug 2008
Posts: 11,787
Likes: 28
From: Anderson Missouri
I started to put it back found some wires that eliminated some of my splices with factory connections and thought I had solved alot of my wiring problems. Got alot of cleaning and painting done on parts and everything was going great. WAS..I started to put the passenger side vent and electrical connections in and then I saw my wiring harness is chewed up.
I have an 87 wiring harness and need to see if I have an 87 computer or not. I will also look for an 86 wiring harness in the boneyard or maybe the net, but until I can come up with one, I will start soldering these back together. I have several different options so will have to wait and see how things go.
As luck would have it, an 87 wiring harness wouldnt work with an 86 computer. They did some changes on the trucks between 86 and 87, one being where you do the jumper to run your engine codes. The part numbers on the wiring harness arent the same.
I got over my setback and have a great day as far as weather wise to get going on it. Even still I was happy getting all of the other wires found and replaced and after this i am finally done with disassembly and into the assembly stage. I felt good for a moment til I found this. Once this is done alot should start happening.
Thinking I can atleast get my timing chain this week and get the motor in and start getting the starter and other things in and done. Still dont know about getting the head done just yet, but there is still alot of cleaning and painting that I can do.
Last week I was on another members thread and he talked about accidently cutting his main harness. Oh well, I will just keep at it.
Jan 30, 2012 | 01:57 PM
#78
Thread Starter
Super Moderator
iTrader: (1)
Joined: Aug 2008
Posts: 11,787
Likes: 28
From: Anderson Missouri
There are 49 wires to splice if I counted right. Job really isnt to bad except for the colors I am really having to pay attention to. Some wires are quite similar. I got 19 wires completed so far. I figure 10 or so a day and I will get it done. Got a little system of splice,solder and shrink wrap.
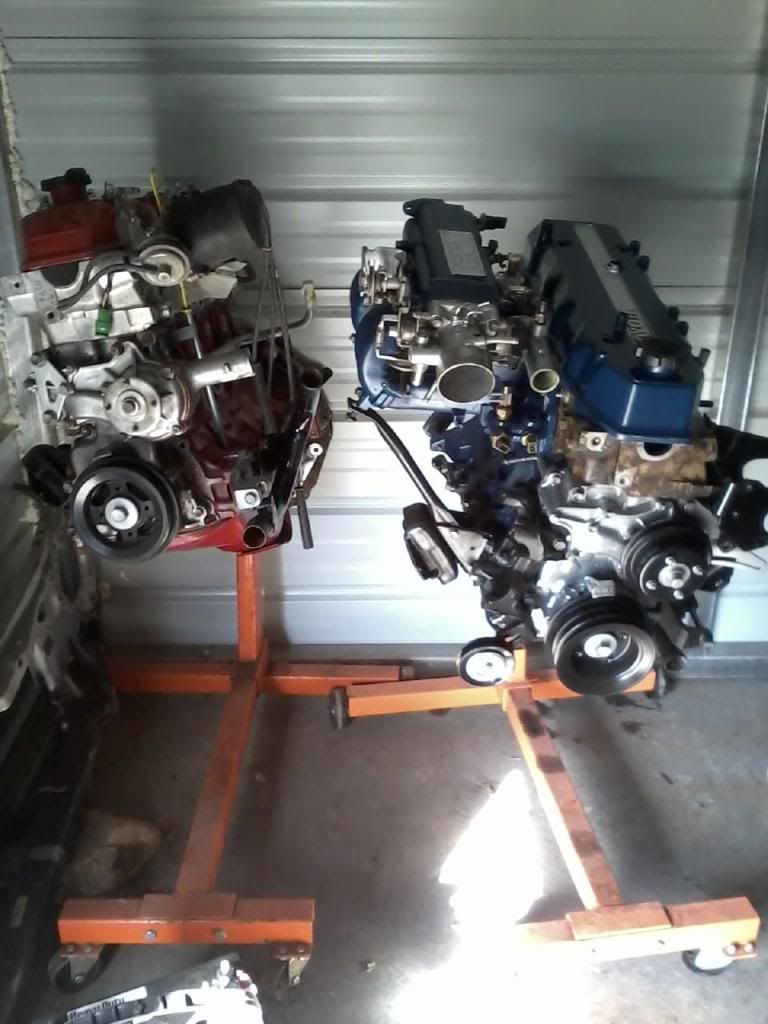
I have been putting the motor back together on what piecs I can until I get the head and timing chain. Helps keep all of the parts together and organized. Most of the parts that will need to come back off are just hand tightened.
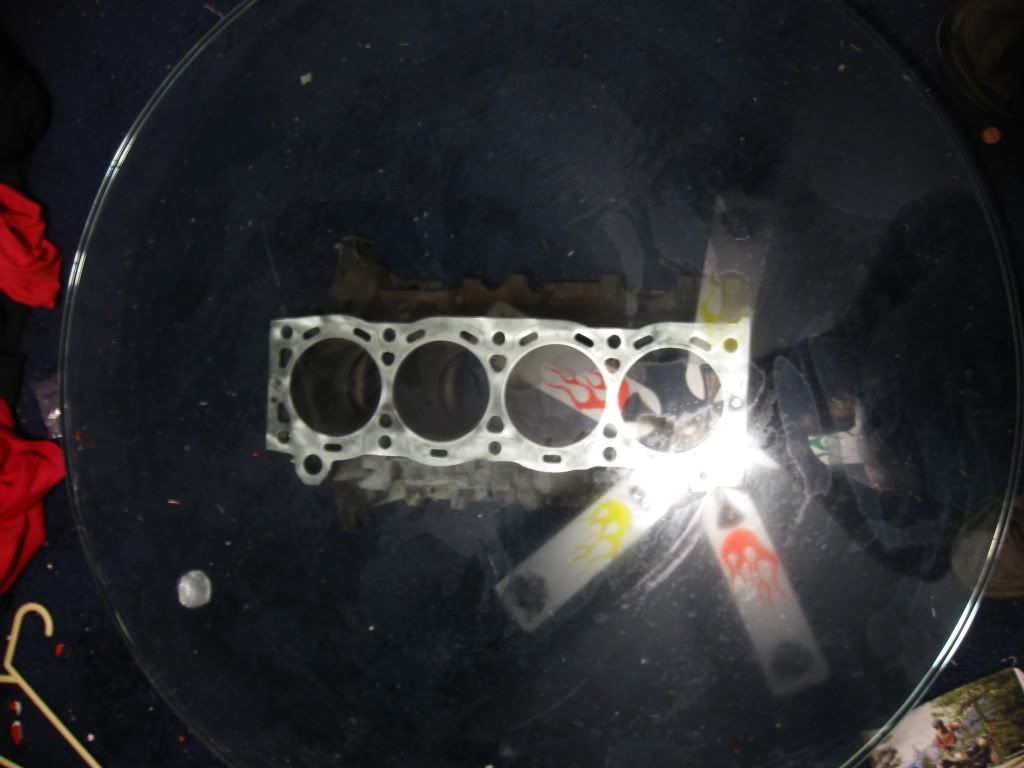
One on the left is 22r and ready to go into the truck when I get the engine bay cleaned up. Right is for the 86, just waiting for head work and timing chain, and clutch and it will be ready to go in.
I have been putting the motor back together on what piecs I can until I get the head and timing chain. Helps keep all of the parts together and organized. Most of the parts that will need to come back off are just hand tightened.
One on the left is 22r and ready to go into the truck when I get the engine bay cleaned up. Right is for the 86, just waiting for head work and timing chain, and clutch and it will be ready to go in.
Jan 30, 2012 | 02:13 PM
#79
Registered User
Joined: Mar 2009
Posts: 1,169
Likes: 0
From: (LSD) Lower Slower Delaware
nice work on the 22's, I like the one on the right...LOL
MY V6 4.3 wire harness is also cut so I to have to solder it together, but I will wait until the engine returns from being rebiuld (oh has left yet) soon.
nice work Terry
MY V6 4.3 wire harness is also cut so I to have to solder it together, but I will wait until the engine returns from being rebiuld (oh has left yet) soon.
nice work Terry
Jan 30, 2012 | 02:25 PM
#80
Thread Starter
Super Moderator
iTrader: (1)
Joined: Aug 2008
Posts: 11,787
Likes: 28
From: Anderson Missouri
Thanks RMP8080, I am going to have my Masters in splicing wires when done with the wiring. Hope your wires arent to bad. When you go and do your wire splices, really pay close attention to the stripes and colors. They use the same colors and with different markings and easy to get them crossed with the wrong ones.
Really trying to get it as far along as I can so when I get the parts it go together quick. Really would like to get it at least movable so if I need to do work on another truck I can do it without having to push it in.
Really trying to get it as far along as I can so when I get the parts it go together quick. Really would like to get it at least movable so if I need to do work on another truck I can do it without having to push it in.


