
Ryans 93' Ext Cab 4x4 resto
 Dec 8, 2014 | 07:59 PM
#41
2RZ is home. This is it. Check out the burned up harness...only the cab on the truck was damaged. The salvage yard left me a small section of exhaust to weld the exhaust pipe to as well. I'm missing a few parts, but should have those on Friday.

Miles can't be verified, but this is a 2004 engine and is pretty clean. The only oil seepage on the entire motor is from the cam sensor o-ring.
This plan is in full swing right now. My friend has already got the pinout wiring portion for the 2RZ side figured out. Tomorrow he'll use the 22re electrical wiring book I have to figure out that side and said he'd be done with the harness on Sunday.
My truck is IFS. I spoke with NW Team Toyota and they are starting my custom oil pan. It's expensive to do, but they have to buy 3 OEM parts - 22re pan, T100 rear sump and a 22re 4x4 oil pickup that gets modified. I also ordered the Chilkat engine mount adapters and I ordered a 2003-2004 manual trans ECU. That way there is no auto trans garbage or codes to deal with.
I'll be using an 1985 MR2 a/c compressor clutch so that I can use the 22RE compressor. (MR2 a/c clutch is no longer available through anyone. Idid find entire MR2 compressors online to buy and then I'll sell the a/c compressor off) This will also require some minor cutting of the exhaust side engine mount & bracket due to the 22RE compressor being a bit longer than the 2RZ pump.
I'm gonna have a hydraulic hose shop make a custom power steering pressure hose, probably $60 to do that.
The fuel line..there's a lot of different ways to tackle this so we'll figure it out as we go. We have ideas, but we'll see. Won't be hard though.
The clutch will be the 2RZ 4x4 Exedy clutch kit. It's the same thing as a 3RZ clutch and flywheel which is slightly larger than a 2wd 2RZ truck clutch. I'll use Aisin brand clutch master and 2RZ slave. The clutch line will be a stainless steel line from Driftmotion I've used in the past.
I stripped the harness off first thing. I'm going to seal up the holes and power wash the entire thing. Oh yeah, my Toyota SPX crank tool totally fits the RZ engine. I'm super excited about that. Makes removing and torquing the flywheel and crank bolts super easy.


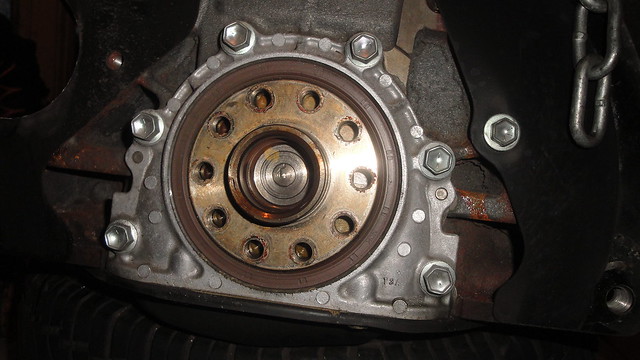
Look how pristine that rear main seal is! I also had no idea there were 10 flywheel bolts...holy cow. I think the mighty 2JZGTE uses only 8 bolts!
Here it sits awaiting further instructions

Miles can't be verified, but this is a 2004 engine and is pretty clean. The only oil seepage on the entire motor is from the cam sensor o-ring.
This plan is in full swing right now. My friend has already got the pinout wiring portion for the 2RZ side figured out. Tomorrow he'll use the 22re electrical wiring book I have to figure out that side and said he'd be done with the harness on Sunday.
My truck is IFS. I spoke with NW Team Toyota and they are starting my custom oil pan. It's expensive to do, but they have to buy 3 OEM parts - 22re pan, T100 rear sump and a 22re 4x4 oil pickup that gets modified. I also ordered the Chilkat engine mount adapters and I ordered a 2003-2004 manual trans ECU. That way there is no auto trans garbage or codes to deal with.
I'll be using an 1985 MR2 a/c compressor clutch so that I can use the 22RE compressor. (MR2 a/c clutch is no longer available through anyone. Idid find entire MR2 compressors online to buy and then I'll sell the a/c compressor off) This will also require some minor cutting of the exhaust side engine mount & bracket due to the 22RE compressor being a bit longer than the 2RZ pump.
I'm gonna have a hydraulic hose shop make a custom power steering pressure hose, probably $60 to do that.
The fuel line..there's a lot of different ways to tackle this so we'll figure it out as we go. We have ideas, but we'll see. Won't be hard though.
The clutch will be the 2RZ 4x4 Exedy clutch kit. It's the same thing as a 3RZ clutch and flywheel which is slightly larger than a 2wd 2RZ truck clutch. I'll use Aisin brand clutch master and 2RZ slave. The clutch line will be a stainless steel line from Driftmotion I've used in the past.
I stripped the harness off first thing. I'm going to seal up the holes and power wash the entire thing. Oh yeah, my Toyota SPX crank tool totally fits the RZ engine. I'm super excited about that. Makes removing and torquing the flywheel and crank bolts super easy.
Look how pristine that rear main seal is! I also had no idea there were 10 flywheel bolts...holy cow. I think the mighty 2JZGTE uses only 8 bolts!
Here it sits awaiting further instructions
Last edited by RyanV; Dec 10, 2014 at 12:05 PM.
Dec 12, 2014 | 08:05 PM
#42
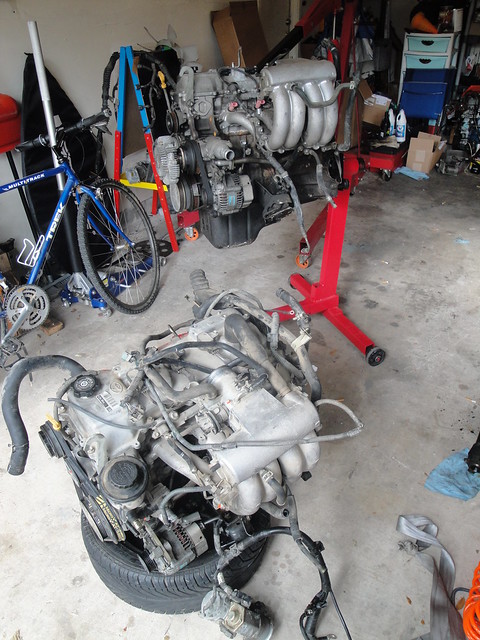
Bought another complete 2RZ today locally. We ninja'd this 2003 2RZ out of a wrecked Tacoma today at the yard. It has 140k, was running when wrecked, recent inspection, fresh gas.
Pretty crazy about finding 2 clean 2003-2004 2RZ's locally in the past week and a half.


Pulled the MAF, extra ECU pigtails, 02 sensors

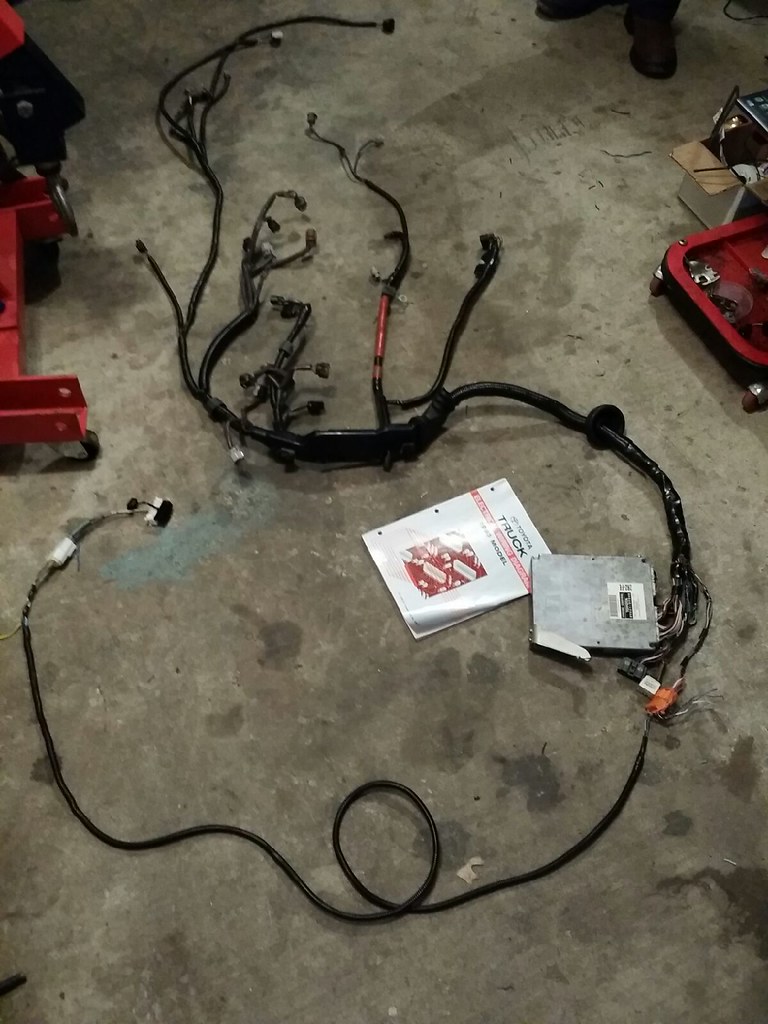
My buddy already started on the harness. He basically pulled all wires that won't be used and unwrapped the entire thing.

Wiring Jedi at work.

I powerwashed the new 2RZ as well today and the darn thing looks fantastic. Don't worry I made sure to seal it up etc..


Tomorrow the harness will be finished from what he was saying. I got the W59 bellhousing and clutch stuff coming, the MR2 a/c clutch is on the way. Should be stabbing this sucker soon.
Pretty crazy about finding 2 clean 2003-2004 2RZ's locally in the past week and a half.
Pulled the MAF, extra ECU pigtails, 02 sensors
My buddy already started on the harness. He basically pulled all wires that won't be used and unwrapped the entire thing.
Wiring Jedi at work.
I powerwashed the new 2RZ as well today and the darn thing looks fantastic. Don't worry I made sure to seal it up etc..
Tomorrow the harness will be finished from what he was saying. I got the W59 bellhousing and clutch stuff coming, the MR2 a/c clutch is on the way. Should be stabbing this sucker soon.
Last edited by RyanV; Dec 13, 2014 at 03:34 AM.


 Dec 18, 2014 | 10:07 PM
#45
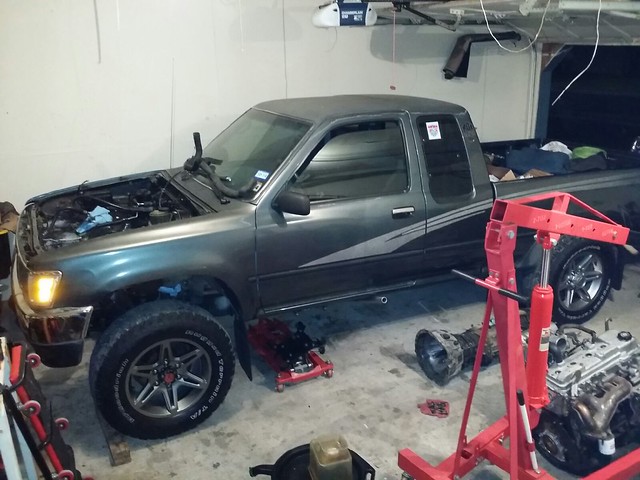
We decided to keep stuff moving while we're waiting on the custom oil pan so we test fit the 2RZ.
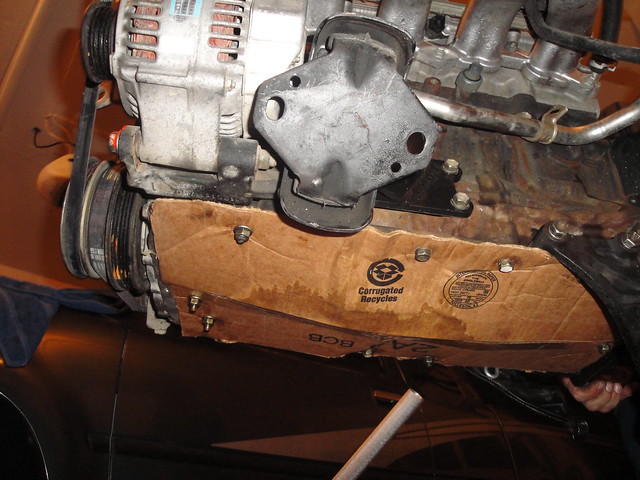
We removed the oil pan and bolted a cardboard piece to the block with no flywheel/clutch to make test fitting the engine easy as possible. The engine is bolted to the trans now so that we can mock everything up. We decided that when its time to install the engine with the clutch and oil pan we're going to remove the transmission to install the engine by itself, and then stab the transmission after. We think it's gonna be really hard to get the motor in at an angle and have the clutch and new rear sump oil pan all line up.
We pretty much have a good idea of what all we're going to do to make each piece of the puzzle work. We found that heater hoses, booster hose, throttle cable can be reused. The alternator plugs right in the chassis harness, radiator hoses work. PS line will be cake, clutch slave will be a pre made 10x1.00 inverted flare straight brake line that I can bend to fit.
Wait til you see what we worked out with the A/C...


The engine is sitting just slightly too much to the left and back. I think it'll be better when I install the new engine mount and trans mounts. My stock trans mount is actually collapsed so that's the main reason the engine is leaning a bit too much.


We removed the oil pan and bolted a cardboard piece to the block with no flywheel/clutch to make test fitting the engine easy as possible. The engine is bolted to the trans now so that we can mock everything up. We decided that when its time to install the engine with the clutch and oil pan we're going to remove the transmission to install the engine by itself, and then stab the transmission after. We think it's gonna be really hard to get the motor in at an angle and have the clutch and new rear sump oil pan all line up.
We pretty much have a good idea of what all we're going to do to make each piece of the puzzle work. We found that heater hoses, booster hose, throttle cable can be reused. The alternator plugs right in the chassis harness, radiator hoses work. PS line will be cake, clutch slave will be a pre made 10x1.00 inverted flare straight brake line that I can bend to fit.
Wait til you see what we worked out with the A/C...
The engine is sitting just slightly too much to the left and back. I think it'll be better when I install the new engine mount and trans mounts. My stock trans mount is actually collapsed so that's the main reason the engine is leaning a bit too much.
Last edited by RyanV; Dec 21, 2014 at 08:31 AM.


 Jan 19, 2015 | 06:57 PM
#50
Thanks!
It's now the 'Texas Edition RZ Pickup'. I've envisioned this moment for about 2 years ever since I first noticed the truck sitting.
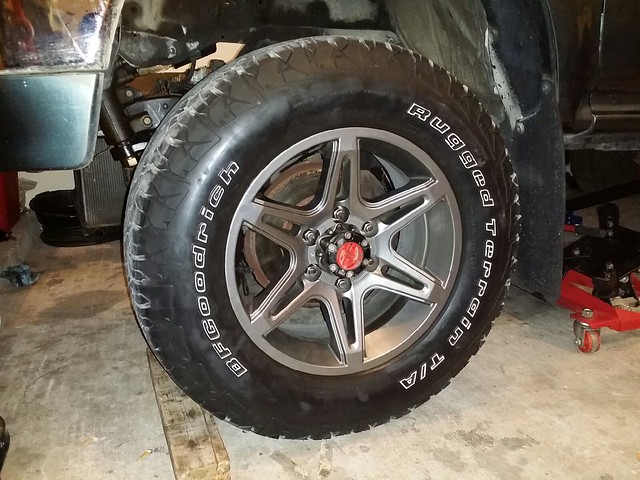
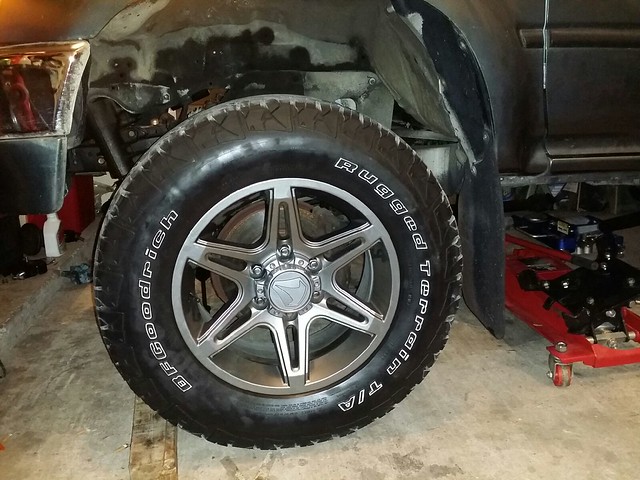
It took some time searching but these old Toyotas have the same hub size as the 6 lug Tacomas, 106mm. I drove to San Antonio like 1.5hrs away to pick them up. They have 25k miles on them.
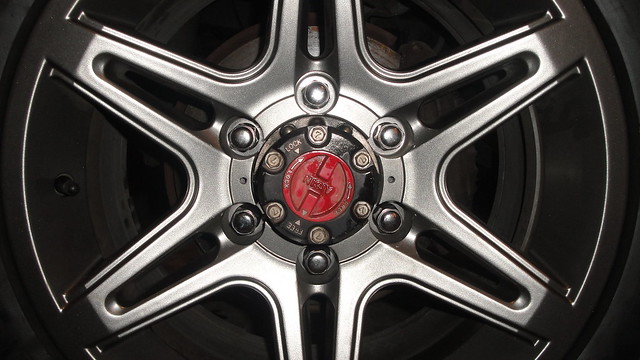
Naked hub
Hidden hub(mainly did this just because)
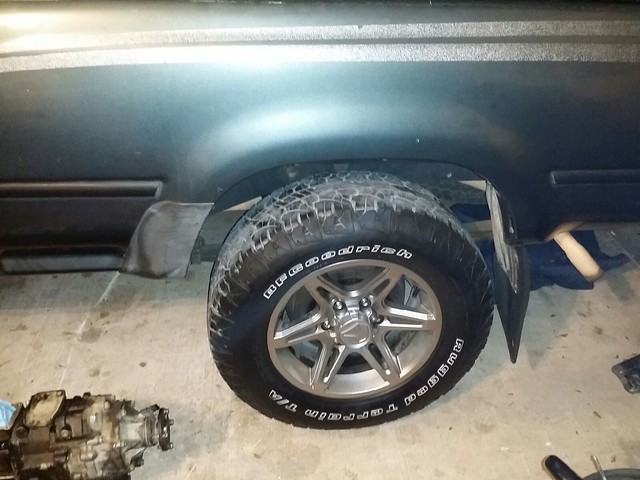

It's now the 'Texas Edition RZ Pickup'. I've envisioned this moment for about 2 years ever since I first noticed the truck sitting.
It took some time searching but these old Toyotas have the same hub size as the 6 lug Tacomas, 106mm. I drove to San Antonio like 1.5hrs away to pick them up. They have 25k miles on them.
Naked hub
Hidden hub(mainly did this just because)
Last edited by RyanV; Jan 23, 2015 at 04:58 AM.
Jan 23, 2015 | 05:11 AM
#51
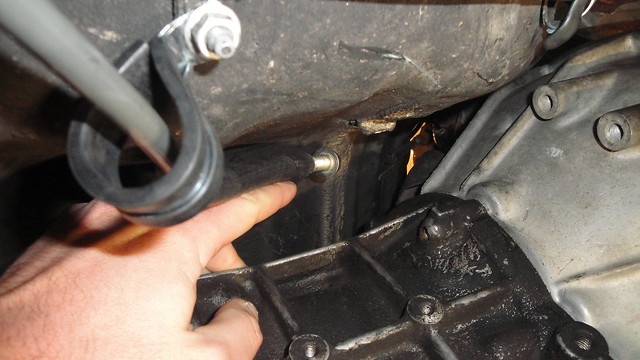
These are the aluminum spacers we made to tilt the motor back to the correct position. So the Chilkat mounts are over .5" off. Just beware if you buy the mounts you'll need to rock the motor back over.


We used washers at first to figure out what it was going to take to rock the motor back over to the correct angle. Luckily this worked, but we did notice the chilkat mounts put a bit of 'twist' into the rubber mounts. What we did was cut off the locator nubs on the rubber mounts and enlarged the rubber mount holes so that we can move the rubber mount some as the engine start putting weight on it.

Slotted out the passenger chilkat bracket. This has to be done because the engine contacts the driver side mount first and then rocks over to the passenger mount. With the alum spacers installed, this slot allows the rubber mount fit. If it wasn't slotted like this, it'd never work.

We used washers at first to figure out what it was going to take to rock the motor back over to the correct angle. Luckily this worked, but we did notice the chilkat mounts put a bit of 'twist' into the rubber mounts. What we did was cut off the locator nubs on the rubber mounts and enlarged the rubber mount holes so that we can move the rubber mount some as the engine start putting weight on it.
Slotted out the passenger chilkat bracket. This has to be done because the engine contacts the driver side mount first and then rocks over to the passenger mount. With the alum spacers installed, this slot allows the rubber mount fit. If it wasn't slotted like this, it'd never work.
Jan 23, 2015 | 05:26 AM
#52
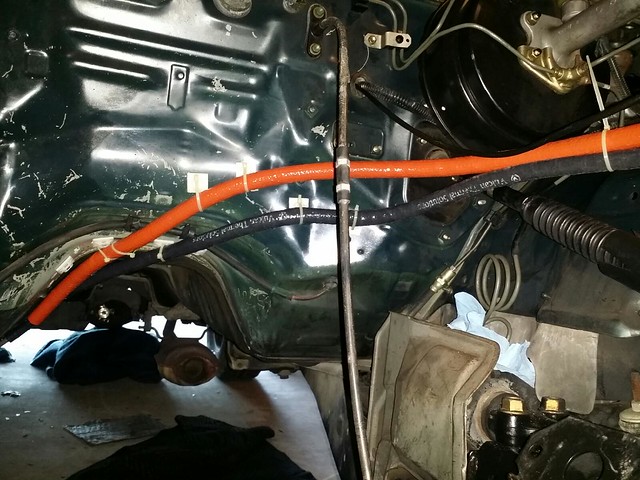
I decided to cut the fuel lines down under the truck. This put them over 5" from the exhaust pipe and allows me to run the lines up over the transmission rather than on the passenger side anywhere near the exhaust manifold area.
I'm covering the rubber fuel line with firesleeve and also heat wrapping the exhaust manifold and downpipe.
I bent the fuel feed with a rope pulley. I made sure to give plenty of clearance from the torsion bar which basically twists in place.

Theres plenty of room for the fuel lines above the trans here even though it doesn't look like it. In the odd case somethign crazy happens and the trans pinch the fuel lines against the truck, they're rubber so it wont be a big deal. The trans won't be moving like that though under normal operation.
This is a test fit of the fuel lines covered with firesleeve. I found some zip tie base mounts at the boat store. They stick really good if you clean the firewall with soap and water and then acetone. I also took the top coat of paint off. They aren't going anywhere. I used like 10 of them, but I think I'm only using like 7. I'm going to cut the firesleeve shorter. I'll post a pic once I tighten the fuel lines down for the final time.
fuel feed and fuel return lines cut. I couldn't bubble flare the fuel return, but it's really low pressure and I don't think it needs it since I'm using fuel injection clamps.
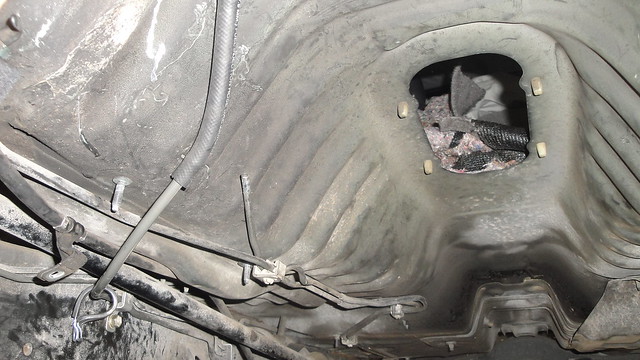
We did a test fit of the engine with the NorthWest TeamYota custom oil pan installed. It fits
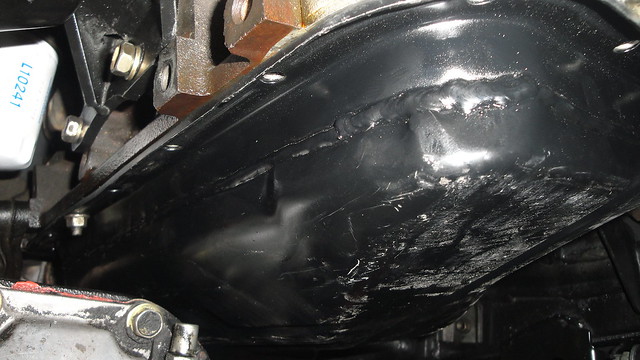

The pan interferes with the steering stabilizer so we're gonna bolt it up like this under the bracket. I actually found te stabilizer is leaking alot so I'm replacing it with a Rancho stabilizer. I almost did the old man emu but it was twice the cost and the Rancho had great reviews.

I'm covering the rubber fuel line with firesleeve and also heat wrapping the exhaust manifold and downpipe.
I bent the fuel feed with a rope pulley. I made sure to give plenty of clearance from the torsion bar which basically twists in place.
Theres plenty of room for the fuel lines above the trans here even though it doesn't look like it. In the odd case somethign crazy happens and the trans pinch the fuel lines against the truck, they're rubber so it wont be a big deal. The trans won't be moving like that though under normal operation.
This is a test fit of the fuel lines covered with firesleeve. I found some zip tie base mounts at the boat store. They stick really good if you clean the firewall with soap and water and then acetone. I also took the top coat of paint off. They aren't going anywhere. I used like 10 of them, but I think I'm only using like 7. I'm going to cut the firesleeve shorter. I'll post a pic once I tighten the fuel lines down for the final time.
fuel feed and fuel return lines cut. I couldn't bubble flare the fuel return, but it's really low pressure and I don't think it needs it since I'm using fuel injection clamps.
We did a test fit of the engine with the NorthWest TeamYota custom oil pan installed. It fits
The pan interferes with the steering stabilizer so we're gonna bolt it up like this under the bracket. I actually found te stabilizer is leaking alot so I'm replacing it with a Rancho stabilizer. I almost did the old man emu but it was twice the cost and the Rancho had great reviews.
Last edited by RyanV; Jan 23, 2015 at 05:30 AM.
Mar 9, 2015 | 09:10 PM
#55
Thanks! That rust spot came out pretty good. I used Krud Kutter must for rust and just kept spraying it down. Then I sanded it and sprayed it with Epoxy primer out of the can.


Thread
Thread Starter
Forum
Replies
Last Post
Seattle_Sign_Guy
95.5-2004 Tacomas & 96-2002 4Runners
0
Jul 12, 2015 12:38 PM
Steezy96yota
86-95 Trucks & 4Runners (Build-Up Section)
1
Jul 6, 2015 10:00 AM


