When you click on links to various merchants on this site and make a purchase, this can result in this site earning a commission. Affiliate programs and affiliations include, but are not limited to, the eBay Partner Network.
Ha, that's really interesting.. so this is a "thing" for these trucks. I mean conceptually it is a dumb design for current to flow through the spring, which just sits against the plastic knob. But you'd think it's low current. Unless the pump starts going back and drawing more? Fascinating.
if you haven't already, spend some time going through @RAD4Runner 's build thread about "ruby tuesday", his former '86 4runner (now his daughter's i believe). he has some excellent insight and advice on how to diagnose/deal with/repair some of the wiring/electrical deficiencies in the 1st gens. i've incorporated several, including adding headlight relays, properly re-wiring the starter relay (it's there, just not correctly wired from the factory), etc.
if you haven't already, spend some time going through @RAD4Runner 's build thread about "ruby tuesday", his former '86 4runner (now his daughter's i believe). he has some excellent insight and advice on how to diagnose/deal with/repair some of the wiring/electrical deficiencies in the 1st gens. i've incorporated several, including adding headlight relays, properly re-wiring the starter relay (it's there, just not correctly wired from the factory), etc.
Thanks, I came across it when I was researching reasons for dead alternators. I'll definitely spend some more time there, looks like a great resource.
Congrats on the 87! I have to be honest, I thought you were joking in the original post because the pictures made it look like a nearly brand new vehicle! I have learned to scrutinize and zoom in on every single picture that these sellers post, and when you do that enough times you start to also see when the pics are 'carefully' taken or cropped. Glad to hear you have the skills to right all these wrongs yourself, but I would definitely look into sending some feedback to BAT, for what it's worth, not super familiar with that site.
As for the washer button, I have not even tried mine, or even know if I have one for that matter. Hasn't crossed my mind as 1) I've only driven it like twice and 2) I don't want washer fluid leaking into the rusty windshield frame above the ECU Best of luck!
Haven't been doing too much other than disassembling and degreasing. Most of the stuff forward of the engine is out (all belt driven accessories, radiator/fan/clutch, etc). Gives me better access to clean and inspect.
There was some engine oil behind the harmonic balancer when I pulled it off, so I ordered a new crankshaft seal just in case.
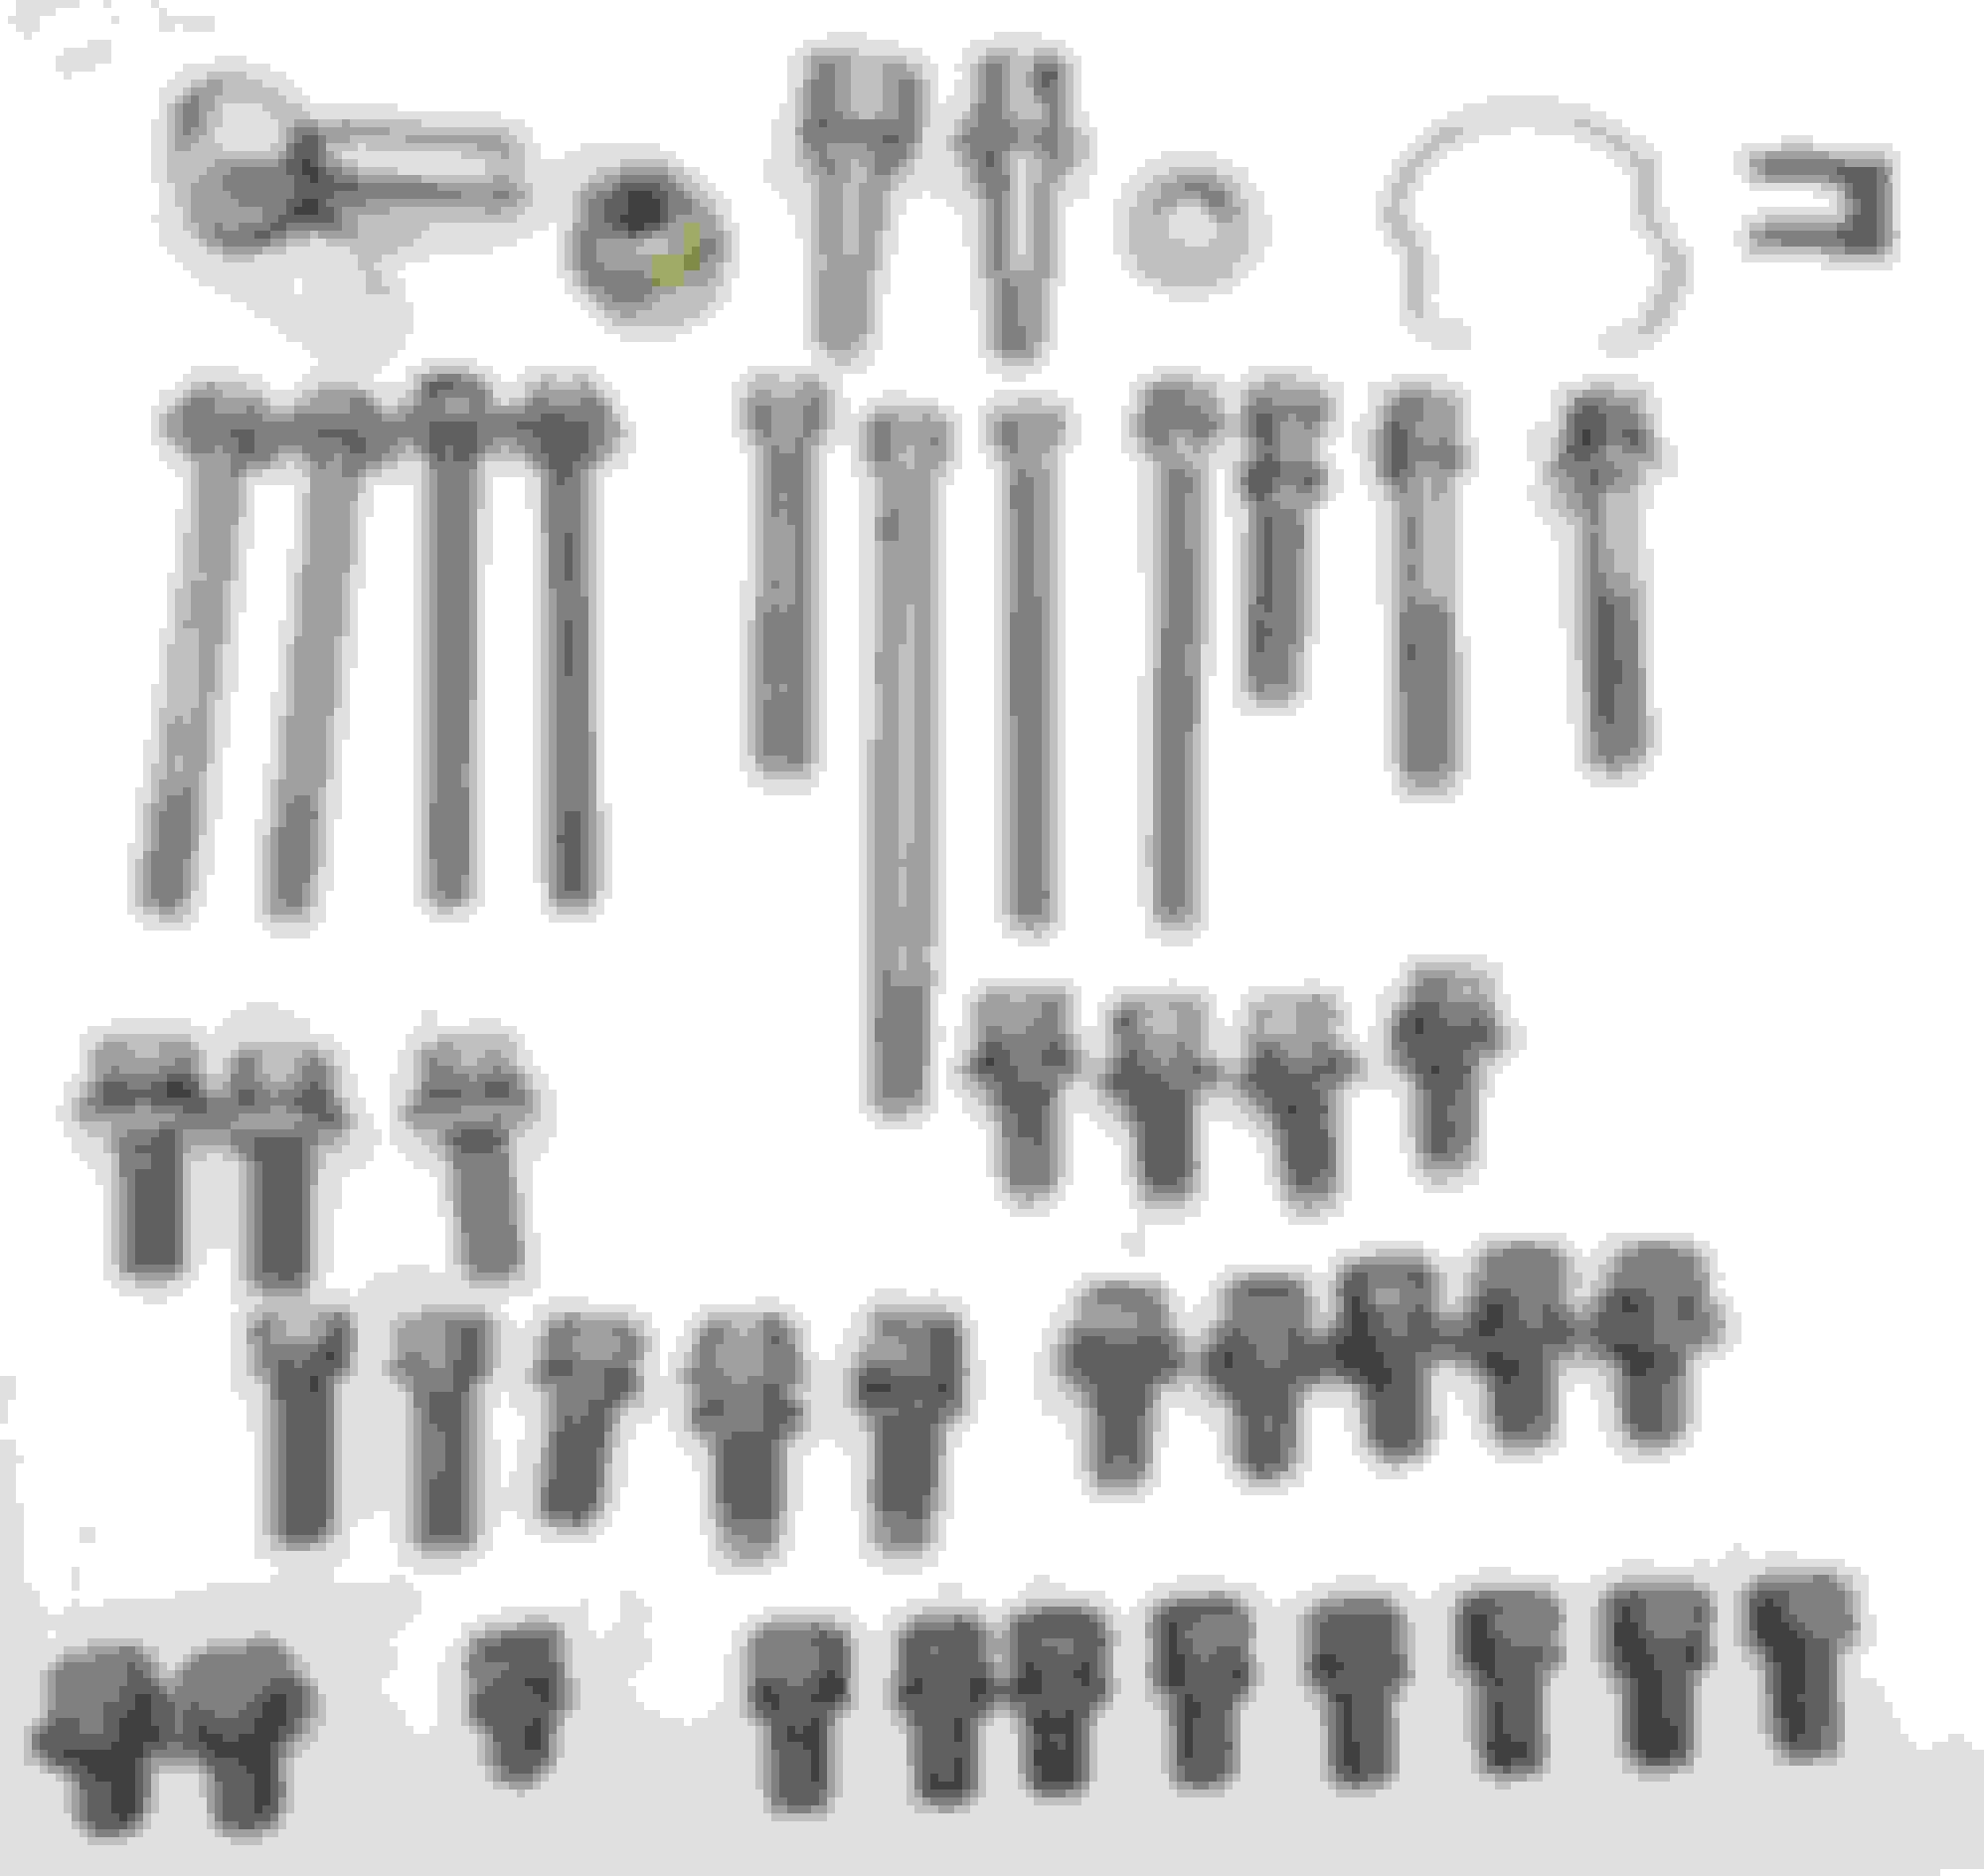
Here's my first batch of parts to go in for powder coating:
I figured out why the radiator fan shroud's lower corners were cut off. Someone put in a radiator that was shorter than OEM (core is supposed to be about 16-3/4", mine is 15-3/4"), so the shroud interfered with the water inlet. So Seller cut off the corners.
Last edited by 4Runner4Leon; Oct 3, 2023 at 01:21 PM.
As is often the case with these projects, progress has been exceedingly slow. While waiting for parts to arrive from Japan, and other parts to come back from powder coating, I found myself just tearing more and more things apart, so moving in the wrong direction.
I'm taking in a bunch of parts today for plating. At least the good news is that we're going away on vacation for the next 10 days, so I won't be able to tear any more things apart while waiting for parts. And when we return, I should be able to start putting things back together. Fingers crossed.
The last photo shows a bunch of brand new Toyota fasteners, but I want them in the original yellow zinc, not the clear zinc they use now.
It is shocking how great the engine top end looked from 3 feet above, then seeing your pics of what it looked like in real life. Dang!! You're well on your way to getting it all immaculate again, and for that I salute you. FYI, I have a good used SofTopper with custom windows if your interested LOL.
It is shocking how great the engine top end looked from 3 feet above, then seeing your pics of what it looked like in real life. Dang!! You're well on your way to getting it all immaculate again, and for that I salute you.
Thank you! I try not to think about the guy who sold the truck to me, I like to think that karma has a way of taking care of things.
Good news is that I got my parts back from the powder coater and the plating shop, and all the new parts have arrived from Japan. So now I'm ready to start putting it all back together, except that I'm heading out of town for a week. Ugh.
Well, at least I'll get the motor mounts back in before I go, I'm tired of having the motor rest on the oil pan.
Here's what I have on hand, hope I remember how things go back together!
Goodies from Amayama and other sources:
Newly plated parts:
OEM engine mounts to replace the aftermarket ones that were in there:
Today I tried to re-cover the black console lid with a gray piece I bought on Ebay. But after taking it apart, I found the foam to be too soft, so I am now in search of some high density foam. Until then, this project is on a backburner.
Not sure if you already took care of this, but i recently did one using the same cover and tried a couple different foam options. Fisrt I bought akneeling pad from Harbor Freight and cut it up. Too hard. Then i tried the gray foam flooring material. Good if you double stack or possibly triple stack it. I settled on a double stack and cotton batting left over from a previous upholstery job. I later noticed Home Depot sells kneeling pads softer than the HF one.
Not sure if you already took care of this, but i recently did one using the same cover and tried a couple different foam options. Fisrt I bought akneeling pad from Harbor Freight and cut it up. Too hard. Then i tried the gray foam flooring material. Good if you double stack or possibly triple stack it. I settled on a double stack and cotton batting left over from a previous upholstery job. I later noticed Home Depot sells kneeling pads softer than the HF one.
Thanks! I did read your thread where you discussed this project. After trying a few things, I was fairly happy with this 1/2" closed cell foam, which I triple stacked -
. It was firm but not too harsh. I found that the replacement cover I bought was too small, so I ended up reusing the black cover that came with the truck. I have no idea what its pedigree is, I'm not at all sure it's from a 4Runner.
Did the 1st Gen lids just have a bunch of foam between the lower plastic piece and the leather cover? That's pretty unusual. Most console lids have some sort of a formed shape, with just a thin piece of foam between that formed shape and the leather, to provide some "gush". With 1.5" of foam, it's pretty hard to create the right shape. This is the best i could come up with, looks like a big dumb rectangle. Not sure I'm all that happy with it:
It's time for the fun part - putting it back together with new/cleaned/painted/plated parts!
First, I replaced the leaking crankshaft oil seal. I was amazed to see that the harmonic balancer seal surface had no noticeable wear. I pressed the new seal about 2 mm in from the front, and used a new bolt, torqued to 116 ft-lbs.
New engine mounts are in (picture taken before the bolts were torqued).
I noticed that the mounts did not want to line up, and traced it to a sagged transmission mount. The sagging mount allowed the transmission to shift sideways, rotating the entire engine assembly. So, in went the new transmission mount, after removing the rear crossmember for better access to bolts.
Last edited by 4Runner4Leon; Aug 6, 2023 at 05:30 AM.
The previous owner did a horrible job painting the engine bay, so while I had so many components out, I decided to hit it with some new basecoat/clear coat. Not perfect, but good enough for a driveway paint job.
I replaced the dipstick and guide tube with new ones. I don't think the dipstick was the right one for this truck anyway. I applied some FIPG to the guide tube before pushing it in place. Looks much better now.
Old guide tube:
New guide tube:
New dipstick:
FIPG applied:
New tube installed:
New dipstick in place:
Last edited by 4Runner4Leon; Aug 19, 2023 at 05:18 PM.
I rebuilt the leaking power steering pump using the OEM rebuild kit. Hopefully that will save me from having to buy a rebuilt unit or an aftermarket pump. Time will tell.
Rebuild/gasket kit:
Pump fully disassembled:
Cleaned and degreased, ready for reassembly:
Last edited by 4Runner4Leon; Aug 20, 2023 at 04:55 PM.

 Jun 4, 2023 | 05:11 AM


 Best of luck!