
Mountain Cop's 1986 4Runner Build-Up Thread - "FireRunner"
 Feb 15, 2010 | 10:08 AM
#61
Thread Starter
Registered User
Joined: Nov 2009
Posts: 504
Likes: 2
From: Central Sierra Nevadas (Oakhurst)
Stupid President's day. My alternator is most likely on a palate in the back of our Post Office (at least according to the tracking number), but there is nobody there to give it to me!
Oh well, at least I can get the windshield in today. Optima is too rich for my blood. Anyone have good battery brand recommendations? I've been told that Interstate is good.
Oh well, at least I can get the windshield in today. Optima is too rich for my blood. Anyone have good battery brand recommendations? I've been told that Interstate is good.
Feb 15, 2010 | 11:25 AM
#63
YotaTech Milestone-Two Millionth Post
Joined: Jan 2009
Posts: 12,009
Likes: 122
From: Northeast Pennsylvania
Feb 15, 2010 | 10:41 PM
#64
Contributing Member
Joined: Mar 2003
Posts: 11,334
Likes: 0
From: COTKU,Ontario,Canada
I use a trade brand from a batt. speciality shop... went for a heavy-duty tow truck batt. (oversize on code spec. but it fits nicely) 1000CCA servicable type. In other words the cell caps are removeable you just top it up with distilled H2O once a yr. and it never fails...
I had a 1200 CCA in my 87 I could leave my 80W/100W headlights on all day (low beam) and it still started right up. Sadly the 1200 does'nt fit in the 94 or I'd still have one of them...
I had a 1200 CCA in my 87 I could leave my 80W/100W headlights on all day (low beam) and it still started right up. Sadly the 1200 does'nt fit in the 94 or I'd still have one of them...
Feb 16, 2010 | 06:39 PM
#65
Thread Starter
Registered User
Joined: Nov 2009
Posts: 504
Likes: 2
From: Central Sierra Nevadas (Oakhurst)
Ended up with a store brand from Kragens. The price was right, and 750 CCA isn't bad. It's warrantied, so if it goes bad, at least I can get it replaced locally.
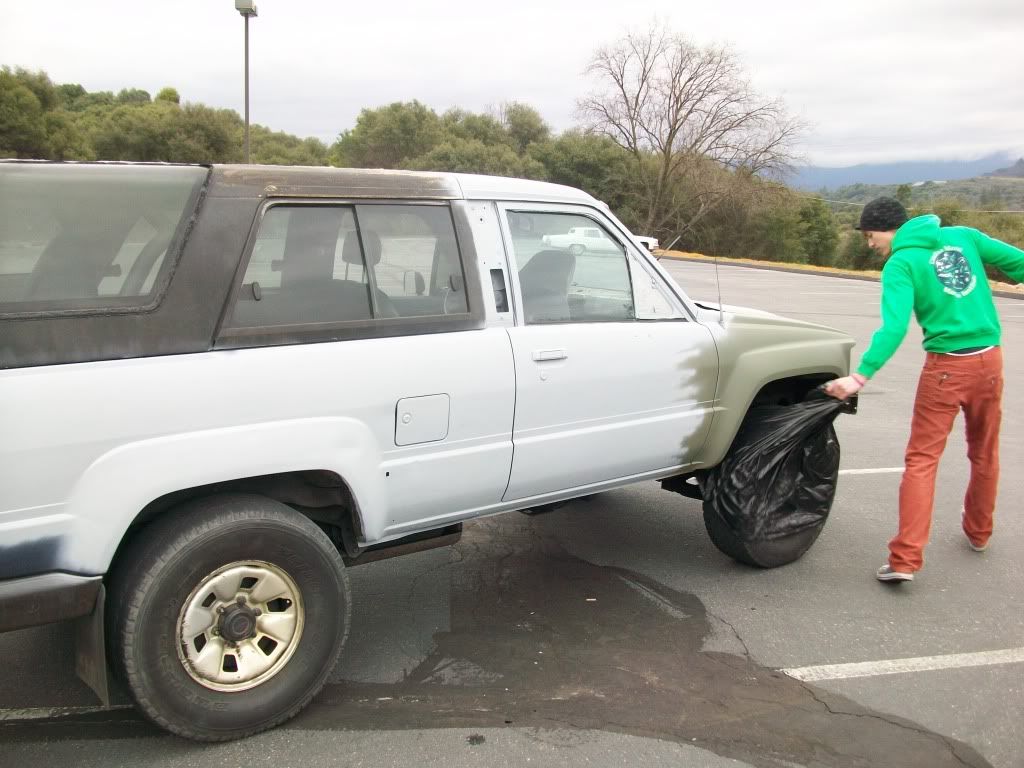
The truck lives! I got the alternator installed today, cleaned the assorted 4runner parts out of the barn and drove 'er home.
When I left the barn, the driver's side high beam was working, and the passenger's side low beam was working. By the time I got home, they were both working. The passenger's side is pretty dim. I'm sitting inside building a new headlight harness that I will install tomorrow. Also on the agenda is determining if the wiper motor still works and trying to get that back on line. For now, I have no illusions of getting the sprayer to work. If I stumble across the parts, I might collect them and put it together in the future. Wipers, though, I have to have.
I put a driver's side mirror on it, so other than the wipers and front signals, it's actually legal.
On the way home, I noticed a couple of new things. The "BACK DOOR" light is always on (even with the rear window up) and the temp gauge doesn't work. The back door idiot light is not really needed, so I'm not too worked up about that. The temp gauge I would like to have. Tonight's mission is to search through here and figure out where the sender is and then have a go at testing it tomorrow. I hope I don't have to pull the dash again. It isn't hard, it just gets a bit tedious. The dash mat was toast, and smelled like melted plastic, so I pulled the foam off of the metal backing piece and just installed the metal. I might just leave it that way after a coat of paint. It certainly isn't high on my priority list right now.
As far as the priority list goes- I need to find taillight lenses and marker lights, resolve the temp gauge issue, and get my wipers running.
I forgot how close the stock Toyota mirrors are. Seems like a terrible design. I will probably switch to a metal style and mount it further forward, perhaps on the fender if I can rig it so that it won't be hit by the door constantly.
The seats are abysmal. I will live with them until I stumble across a replacement option for the right price. I vacuumed at least four pounds of sand out of the car. I'm surprised by how much cleaner it looks now. I still need to get the rest of the carpet out, but I'm going to live with some of the residual adhesive. Hopefully, a bit of primer and Hurculiner will adhere over it and stay down. I'll give it a good once over with a wire wheel first, just to see how it works. If it cleans up well, I might just get some decent rubber floor mats and use those until warmer weather. I imagine that the Hurculiner will cure better that way. I need to pull the rollbar still to get to the stupid blue shag on the wheel wells.
I have the take-off parts. Anyone have opinions about inner fenders? Rust-creators, or protective necessity? Also, if anyone wants the valence from under the front bumper, let me know. It is one of the only pieces that I have removed that is actually still good.
All in all- a good day. It actually feels a bit odd having it at home. I home I can maintain my momentum and keep progressing.
MC
Feb 17, 2010 | 06:30 PM
#66
Thread Starter
Registered User
Joined: Nov 2009
Posts: 504
Likes: 2
From: Central Sierra Nevadas (Oakhurst)
Not much to report today. Turns out a 4" wire wheel is a great way to remove carpet and carpet adhesive. The adhesive looks like house carpet glue. Come to think of it, the carpet looked a bit like that as well. According to a faded tag I found taped under the dash, the carpet was installed prior to sale by the dealer.
I got a couple of ammo cans today to set up as a center console. One looks like a perfect fit.
I got a couple of ammo cans today to set up as a center console. One looks like a perfect fit.
Feb 20, 2010 | 10:54 PM
#67
Thread Starter
Registered User
Joined: Nov 2009
Posts: 504
Likes: 2
From: Central Sierra Nevadas (Oakhurst)
The temperature gauge seems to have resolved itself. I actually got a trailer of firewood from a stash I have in town today. Markers and lenses are enroute thanks to mickeykreg. I started playing with paint options a bit today. I'm thinking of rattle-bombing it in Rustoleum khaki. One fender is that way now, and it looks decent. The interior is going to have to be a summer thing. I don't want to deal with Hurculiner fumes for three weeks in the winter. I guess it couldn't be worse than melted plastic smell though. Looks like a friend has a set of newer bucket seats for me. I replaced the center console with an ammo can. So far I like it. I'm going to need to figure out a way to lock it for summer use. I also need to reattach my windshield wipers. Flipping the switch on and watching two studs rotate back and forth in front of my windshield is somewhat less than useful.
That all gets me pretty close to looking at replacing my bumpers.
That all gets me pretty close to looking at replacing my bumpers.
Feb 21, 2010 | 02:00 AM
#69
Contributing Member
Joined: Dec 2006
Posts: 3,607
Likes: 2
From: maryland
Not sure you realize this or not but the "BACK DOOR LIGHT" STAYS ON IF YOU DO NOT HAVE THE TAILGATE LOCK IN THE DOWN OR LOCKED POSITION may save you some time tracking wires if you have not already locked the rear door
Mar 1, 2010 | 10:40 PM
#70
Thread Starter
Registered User
Joined: Nov 2009
Posts: 504
Likes: 2
From: Central Sierra Nevadas (Oakhurst)
Huh. Thanks OlHarleyMan. (I have a long-term project hard-tailed '71 XLCH as well). I didn't know that. Problem solved.
A little bit of 40 grit and a lot of time took off the worst of the blistered paint. It has been said that prep work makes or breaks a paint job. That does not mix well with my level of patience. I cleaned the truck and set to prime it after church yesterday. I had a couple of very willing assistants. That makes for less wear on my trigger finger, and quicker masking. The local Kragens was in the middle of moving between their old location and a new one, so I could only find one can of self-etching primer. I made do with that and a mixed bag of Rustoleum and Krylon grey primer.
The Krylon and Rustoleum grey primers are drastically different. The Krylon nozzle was better, and the paint was more opaque. It seemed to spray on much easier. The Rustoleum had the old-style nozzle, and was almost an off-white color, which required more coats to acquire coverage. Finger numbness was far more prevalent with the Rustoleum as well.
The forecast of "sunny" gave way to cold, cloudy and windy. I was down to bare metal in a couple of places, though, so I decided to give it a shot and at least protect against rust. We probably wasted a lot of paint, but we got it done.
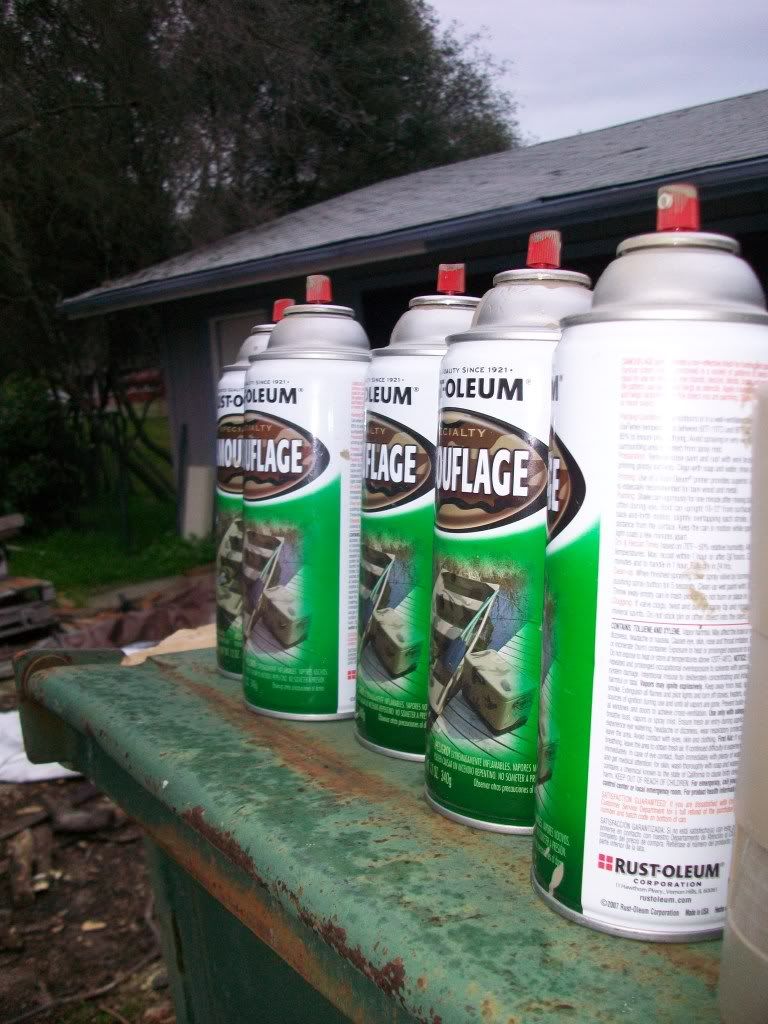
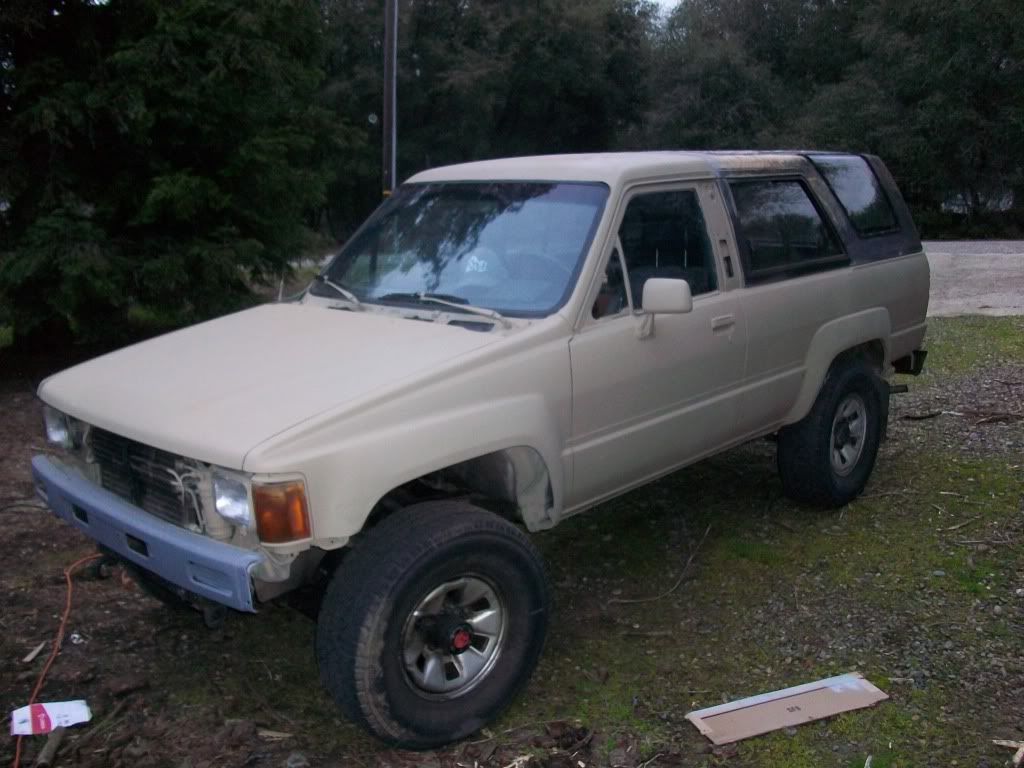
I hit it this morning with some 320 and took the high points off. I washed the residue off and dried the truck before breaking out the rattle cans. The Rustoleum flat "camoflauge khaki" was my choice. I liked the coverage and nozzle design of the Krylon better, but the Krylon flat tan is a lot lighter. I like the darker, sandier coloring of the Rustoleum.
The paint went on quickly. I'm sure that I will want to do some touch up after I give it a couple of days of curing, but overall I'm happy. It took 4 1/2 cans to do the whole rig. I didn't bother with the shell for now. I need to either replace it or refinish it before paint. I didn't have enough left for the front bumper, so it will remain Krylon grey primer for now. It isn't long for this world anyway. Sorry, pics of the finished product will have to wait. It is dark now, so the pics wouldn't do it justice. They would probably hide most of my mistakes!
After primering the rig yesterday, I pulled off the plastic moldings that attach at the ends of the rear bumper. I think the rig looks much better this way.
More pics later. Photobucket is resistant to change.
A little bit of 40 grit and a lot of time took off the worst of the blistered paint. It has been said that prep work makes or breaks a paint job. That does not mix well with my level of patience. I cleaned the truck and set to prime it after church yesterday. I had a couple of very willing assistants. That makes for less wear on my trigger finger, and quicker masking. The local Kragens was in the middle of moving between their old location and a new one, so I could only find one can of self-etching primer. I made do with that and a mixed bag of Rustoleum and Krylon grey primer.
The Krylon and Rustoleum grey primers are drastically different. The Krylon nozzle was better, and the paint was more opaque. It seemed to spray on much easier. The Rustoleum had the old-style nozzle, and was almost an off-white color, which required more coats to acquire coverage. Finger numbness was far more prevalent with the Rustoleum as well.
The forecast of "sunny" gave way to cold, cloudy and windy. I was down to bare metal in a couple of places, though, so I decided to give it a shot and at least protect against rust. We probably wasted a lot of paint, but we got it done.
I hit it this morning with some 320 and took the high points off. I washed the residue off and dried the truck before breaking out the rattle cans. The Rustoleum flat "camoflauge khaki" was my choice. I liked the coverage and nozzle design of the Krylon better, but the Krylon flat tan is a lot lighter. I like the darker, sandier coloring of the Rustoleum.
The paint went on quickly. I'm sure that I will want to do some touch up after I give it a couple of days of curing, but overall I'm happy. It took 4 1/2 cans to do the whole rig. I didn't bother with the shell for now. I need to either replace it or refinish it before paint. I didn't have enough left for the front bumper, so it will remain Krylon grey primer for now. It isn't long for this world anyway. Sorry, pics of the finished product will have to wait. It is dark now, so the pics wouldn't do it justice. They would probably hide most of my mistakes!
After primering the rig yesterday, I pulled off the plastic moldings that attach at the ends of the rear bumper. I think the rig looks much better this way.
More pics later. Photobucket is resistant to change.
Mar 1, 2010 | 10:48 PM
#71
wow...awesome job. been following this thread from day one. when its done its probably gonna look way better than it was before it burnt. so did they give it to you or are you just doing all of this work for them?
Mar 1, 2010 | 11:04 PM
#73
Thread Starter
Registered User
Joined: Nov 2009
Posts: 504
Likes: 2
From: Central Sierra Nevadas (Oakhurst)
Lol, I didn't have a paint booth, the truck was there, I was there and the free labor was there. It worked pretty well. If it wasn't for the wind, it would have been perfect.
Mar 2, 2010 | 02:55 AM
#74
YotaTech Milestone-Two Millionth Post
Joined: Jan 2009
Posts: 12,009
Likes: 122
From: Northeast Pennsylvania
Mar 2, 2010 | 07:34 AM
#75
Registered User
Joined: Nov 2008
Posts: 162
Likes: 0
From: Lake Elizabeth Ca.
good to see a runner saved
let me know if you need anything like moldings or i notice that the plastics on the side of the cab that say "4runner" are missing. you can have mine off my old body and what ever else. let me know, its going to be going to the junk yard so would like to see the most possible go to good use.
let me know if you need anything like moldings or i notice that the plastics on the side of the cab that say "4runner" are missing. you can have mine off my old body and what ever else. let me know, its going to be going to the junk yard so would like to see the most possible go to good use.


 Mar 3, 2010 | 07:19 PM
#78
Registered User
Joined: Dec 2008
Posts: 329
Likes: 0
From: Winston Salem
your "back door" light could be on because the sensor was destroyed in the fire. there is a box/sensor under one of the roof bolts on the far back left. it should be under one of the different looking bolts. if its shot you can just jump the wires going to it together assuming there isnt a short in the wiring before the sensor.
Mar 3, 2010 | 08:45 PM
#79
Thread Starter
Registered User
Joined: Nov 2009
Posts: 504
Likes: 2
From: Central Sierra Nevadas (Oakhurst)
That end of the truck didn't withstand nearly as much heat as the front did. The light is off now, so it could have been as simple as the rear gate being unlocked. No red lights on the dash now.
Thanks for the replies!
MC
Thanks for the replies!
MC


