
Mountain Cop's 1986 4Runner Build-Up Thread - "FireRunner"
 Mar 5, 2010 | 04:49 PM
#82
Registered User
Joined: Oct 2009
Posts: 536
Likes: 0
From: Ahwahnee, CA
When its done, you, Malteserunner, Gunner(thebigdeal), the pharmacist at Vons, and I need to get together to take an Oakhust area 1st gen Runner photo for YT!
Last edited by B4Runner; Mar 5, 2010 at 04:51 PM.
Mar 5, 2010 | 05:05 PM
#84
Registered User
Joined: Oct 2009
Posts: 536
Likes: 0
From: Ahwahnee, CA
Lol. Well I mean when the initial preparations are done and it's ready to go.
And idk about the pharmacist. He has an off white Runner with a body lift. He came over to Malteserunner and I when we were talking about our trucks to introduce himself and talk with us.
And idk about the pharmacist. He has an off white Runner with a body lift. He came over to Malteserunner and I when we were talking about our trucks to introduce himself and talk with us.
Mar 5, 2010 | 08:24 PM
#85
Registered User
Joined: Aug 2004
Posts: 241
Likes: 0
From: Markle, IN
Nice save!!
subscribing...
Awesome resurrection so far! That definitely takes a vision & persistence to pull something like this off.
Glad to see another saved 4Runner!!
I really like the color choice too, I personally haven't seen one in Desert Camo yet, but I am stuck in the Midwest...lol. Don't think I've seen one on here either, but could be wrong.
Mar 6, 2010 | 05:51 AM
#87
Thread Starter
Registered User
Joined: Nov 2009
Posts: 504
Likes: 2
From: Central Sierra Nevadas (Oakhurst)
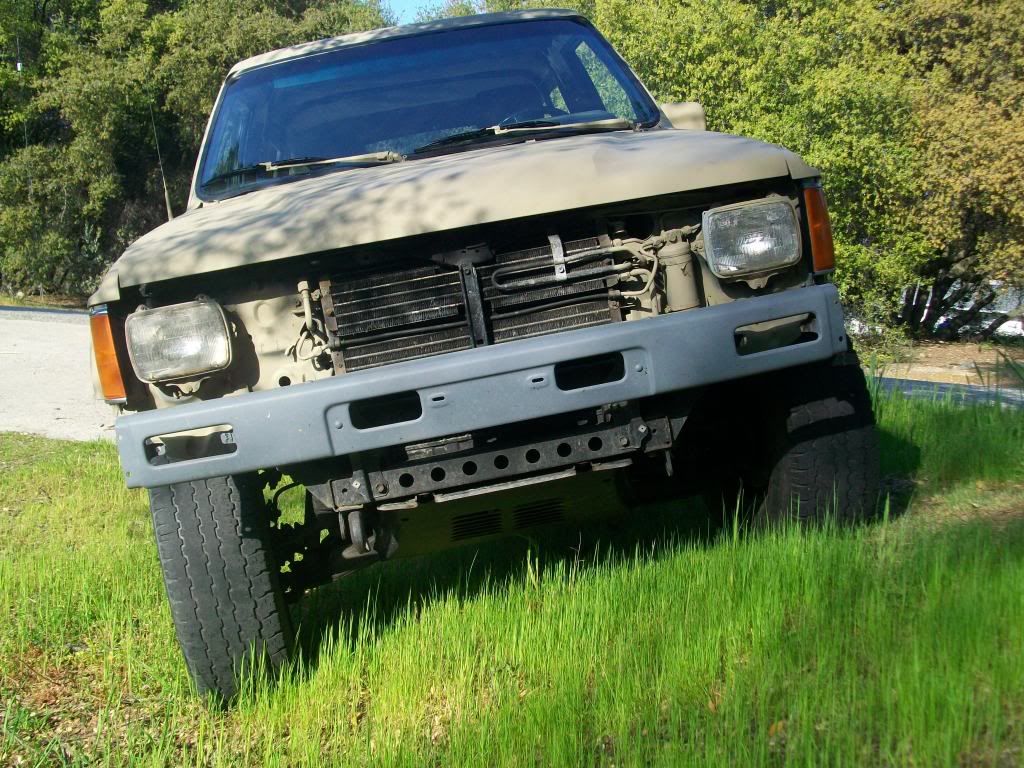
Put the new (to me) taillight lenses and corner lights on yesterday. I'll try to get the wiring done to make the parking lights into turn indicators this afternoon. The left side is done, but the right side wiring got pretty fried in the fire, so I will have to rebuild that. The left side already flashes fast due to the smaller bulb (smaller draw). I'm going to try to find a good LED replacement for the bulb before I put resisters inline to bring the flash rate back down. The taillights look great. I don't think I've ever seen a Toyota that had evenly-faded taillights, and these are no different (though the difference is slight). I may hit them with some of that VHT spray tint, just to smoke them and try to get them even. Having the paint all one color really brings out how mangled the rear bumper is. Design wheels are a turnin.
Thanks for the complements. So far, this has been a really fun project.
Thanks for the complements. So far, this has been a really fun project.
Mar 6, 2010 | 06:12 AM
#88
Registered User
Joined: Aug 2008
Posts: 23
Likes: 0
From: SLC, Utah
I think it is very very cool to save something like this from going to the junk pile, despite the massive job that it is. Huge kudos to you! I'm glad the taillights finally made it, and that i could help out in a small way.
Mar 13, 2010 | 08:34 PM
#90
Thread Starter
Registered User
Joined: Nov 2009
Posts: 504
Likes: 2
From: Central Sierra Nevadas (Oakhurst)
Thanks to Malteserunner, I now have an intake tube that is not completely restricted by melted plastic. I haven't driven it since swapping the tubes, but after looking at just how much the tube shrunk, I am anticipating a noticeable response improvement.
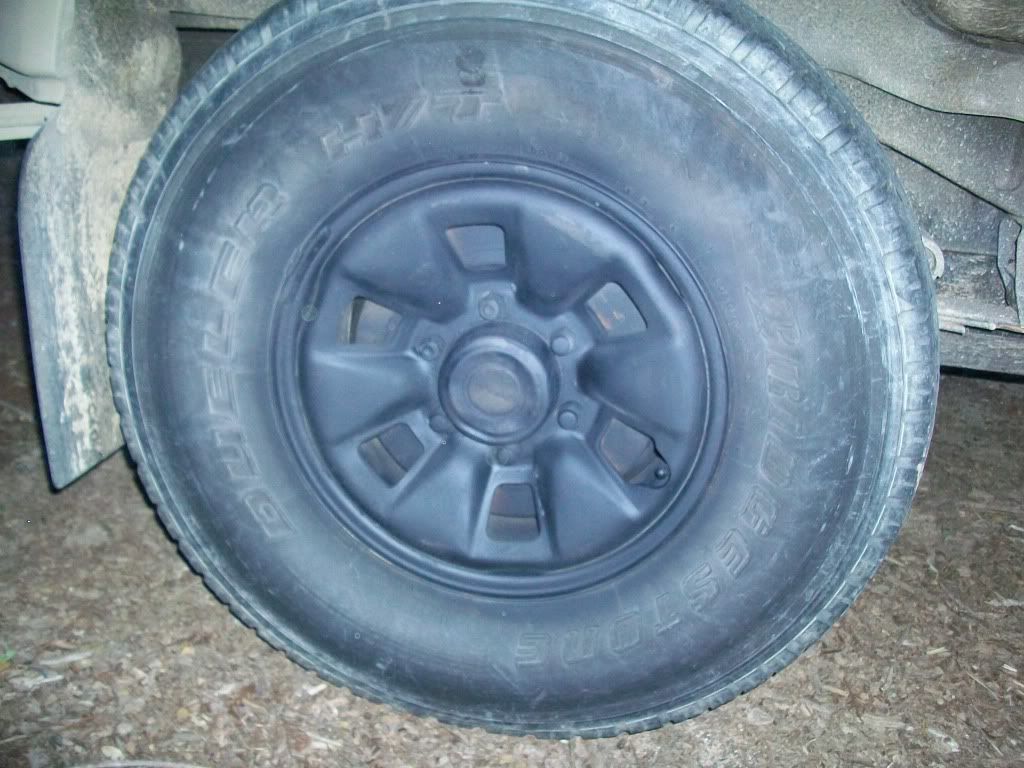
I started stripping the soot and scalded paint off the wheels. I took the easy route and used aircraft stripper. It worked pretty well. I would hate to get that stuff on anything important!
I started stripping the soot and scalded paint off the wheels. I took the easy route and used aircraft stripper. It worked pretty well. I would hate to get that stuff on anything important!
Mar 23, 2010 | 03:31 PM
#92
Thread Starter
Registered User
Joined: Nov 2009
Posts: 504
Likes: 2
From: Central Sierra Nevadas (Oakhurst)
I'm starting on the soft top. The build is in this thead: https://www.yotatech.com/forums/f116.../#post51400262
Mar 24, 2010 | 12:48 AM
#93
Registered User
Joined: Aug 2009
Posts: 64
Likes: 0
From: Far Nor Cal
if my truck wasnt always covered in mud...yes mud is a valid paint job!!...i got an inspirational whim for a paint job from the FireRunner that i might just do some day,
the first pics you posted had a real good mix of dark blue/ burnt charcoal color combo would make for an interesting paint job instead of ghost flames or what not i would like smoke streek from solid dark blue to solid charcoal.
the first pics you posted had a real good mix of dark blue/ burnt charcoal color combo would make for an interesting paint job instead of ghost flames or what not i would like smoke streek from solid dark blue to solid charcoal.
Mar 24, 2010 | 10:36 PM
#95
Thread Starter
Registered User
Joined: Nov 2009
Posts: 504
Likes: 2
From: Central Sierra Nevadas (Oakhurst)
Got a replacement for my rear seat. It is the wrong color, but I am planning on recovering them anyway. I still need the hinges for it though. Work is a bit crazy this week, but I'm hoping to get something done on the ride this weekend. The more I look at things, the more I realize that I need to do the ZUK mod and probably replace at least the front shocks.
Apr 26, 2010 | 08:00 PM
#98
Thread Starter
Registered User
Joined: Nov 2009
Posts: 504
Likes: 2
From: Central Sierra Nevadas (Oakhurst)
Sorry, I've been focusing on the soft top build (link is above), and haven't been doing much else to the firerunner.
So here is the non soft top status:
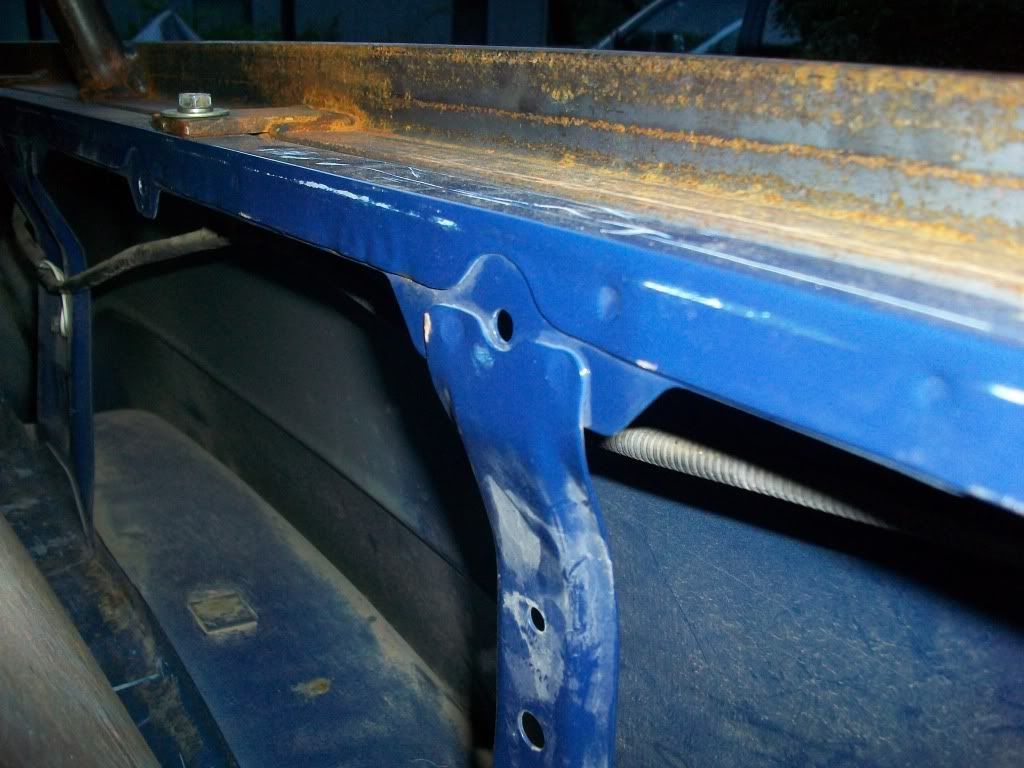
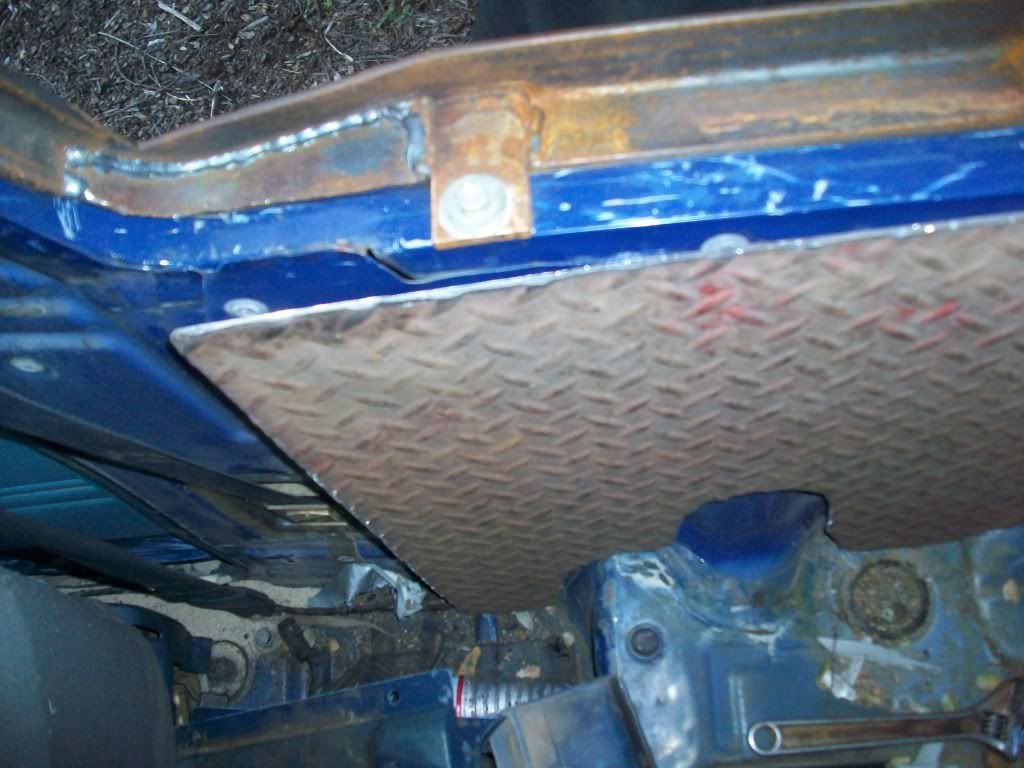
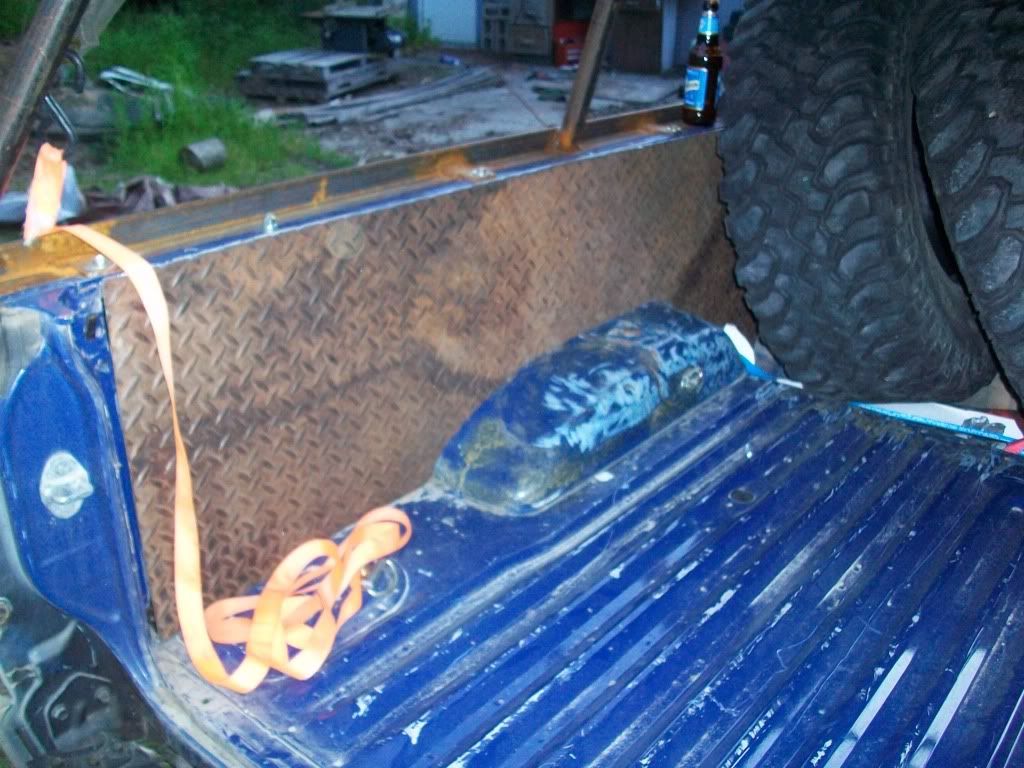
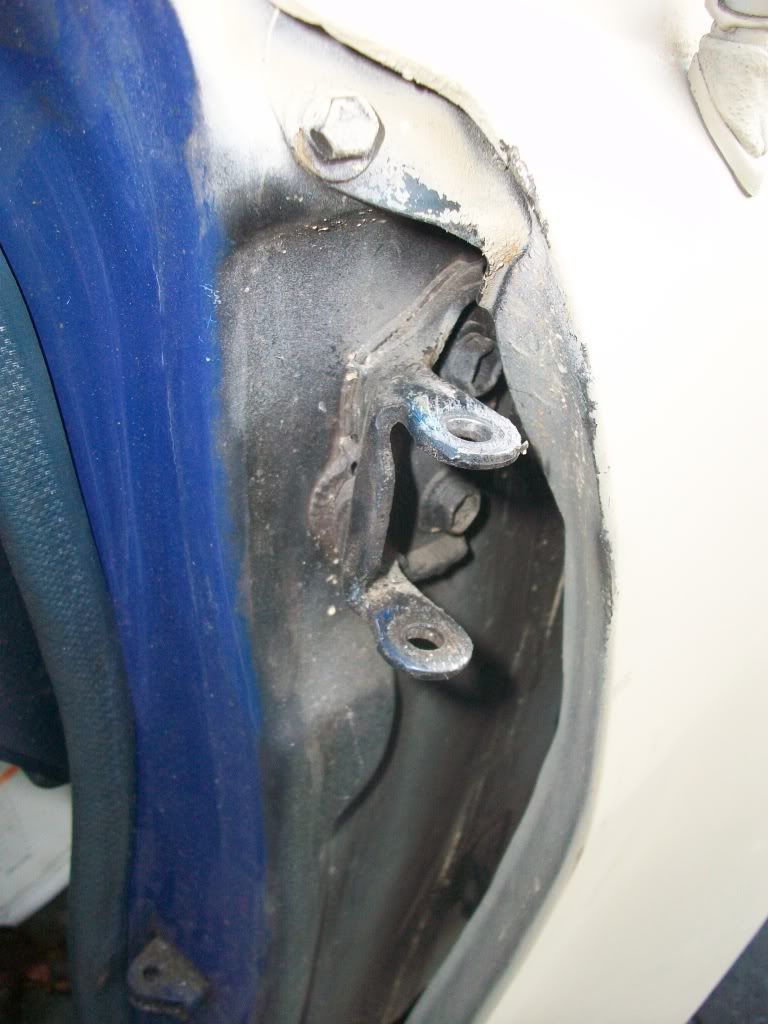
Today I cut out the new interior panels out of 1/8" diamond plate. I now need to figure out what the best way to attach them will be. The two suggestions that I have had so far are, a.) tack nuts to the back of the existing holes or b.) use nutserts in the existing holes. I still think that there is an easier way. I just don't know what it is. Suggestions are appreciated.
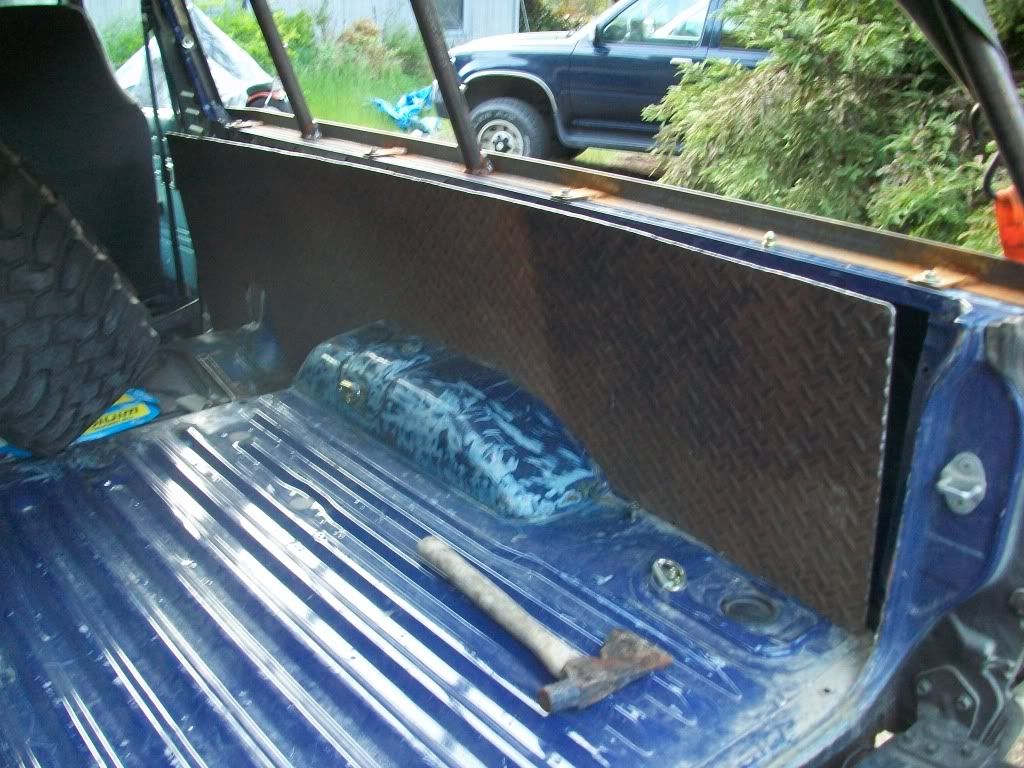
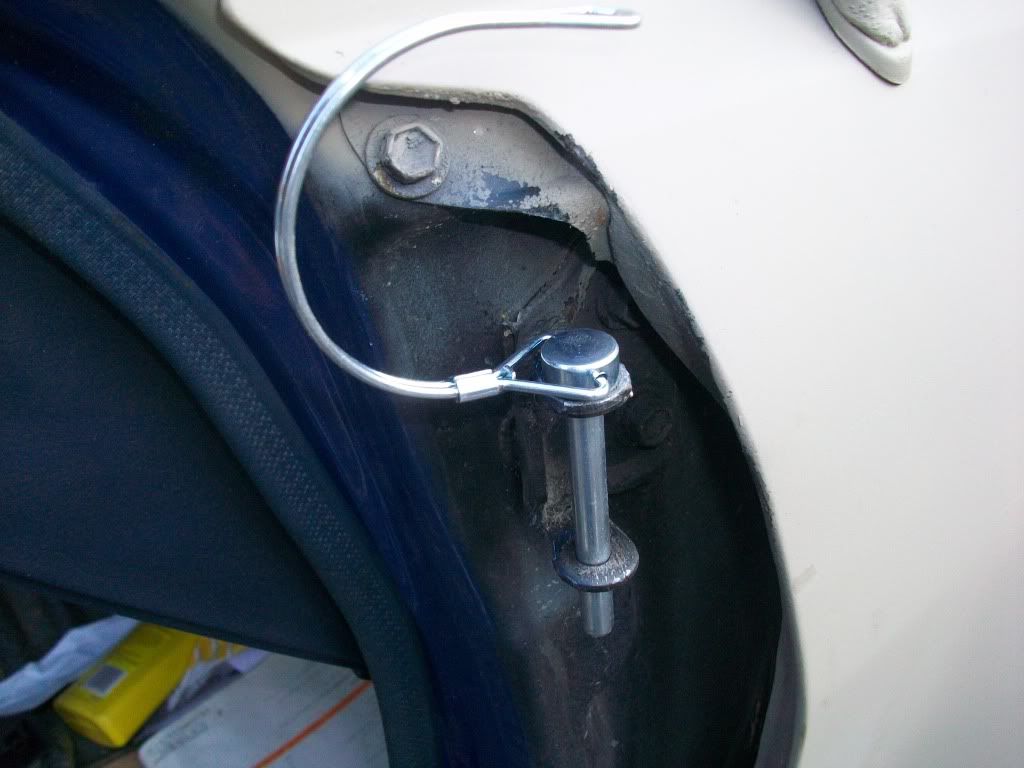
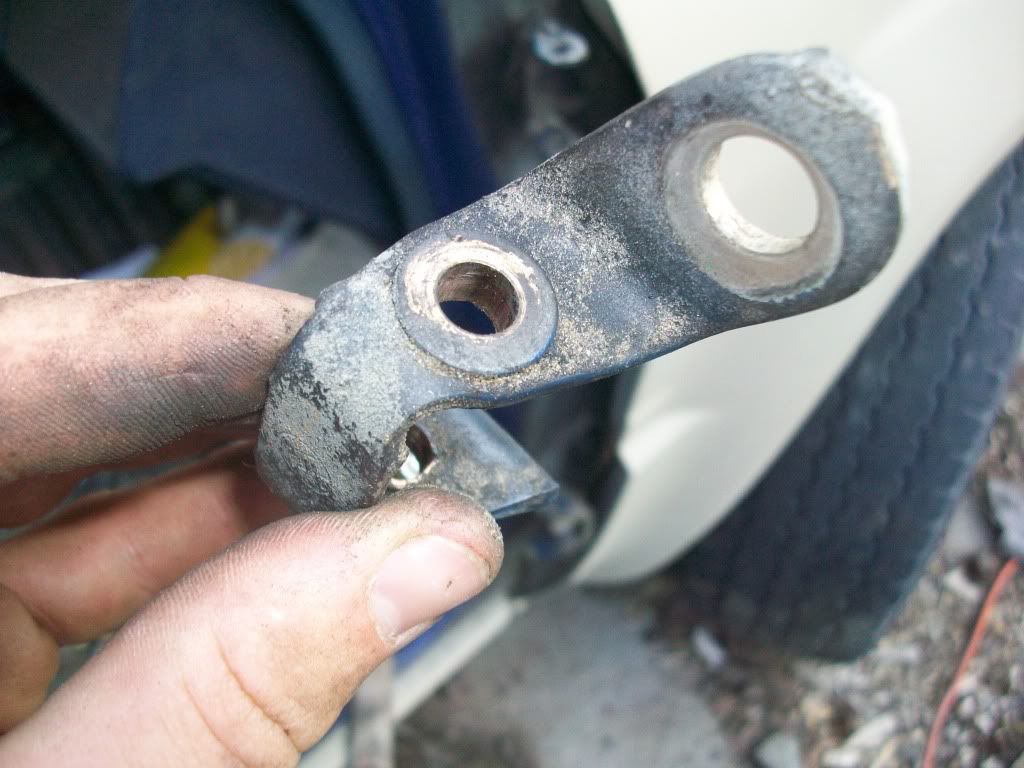
I also experimented with doing my own quick-release hinges. It is such an easy modification that I don't know why I didn't do it before. The only problem was making the pins that I had fit past the bolt heads on the door side hinges. I think I will try to find some bent pins (hitch retaining pin-style) to use, and see if I will be able to insert both from the top, and thus avoid using a retaining pin of any type.
I also sand blasted one wheel and painted it with krylon satin black. I actually like these wheels a lot, when they are painted black.
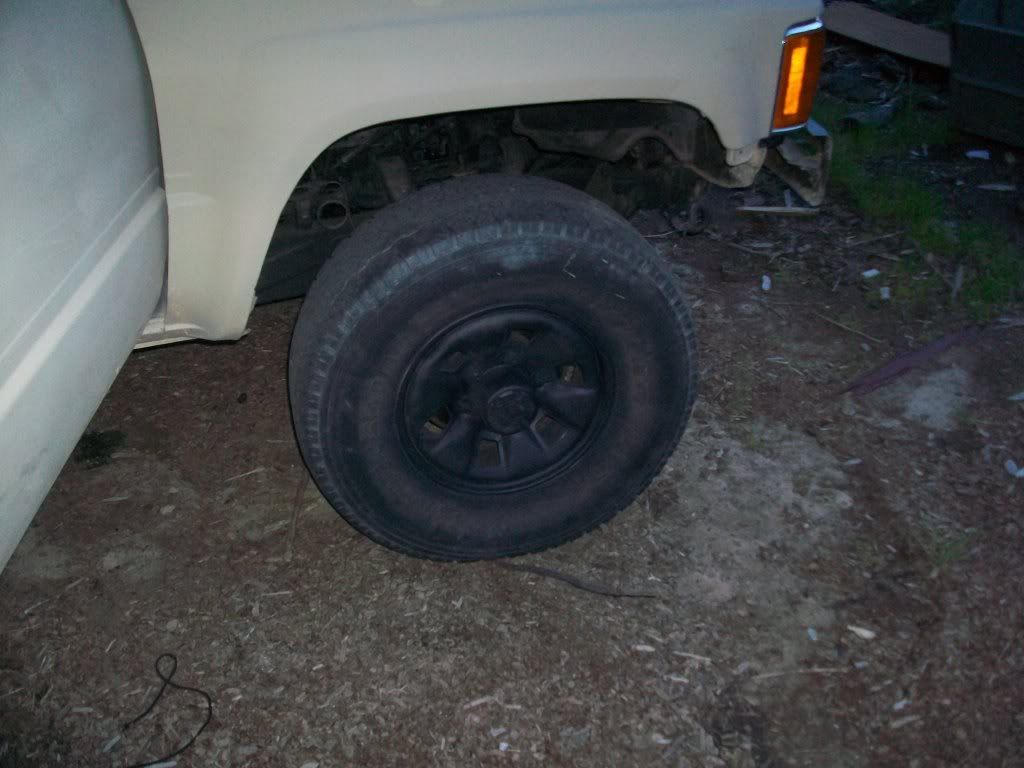
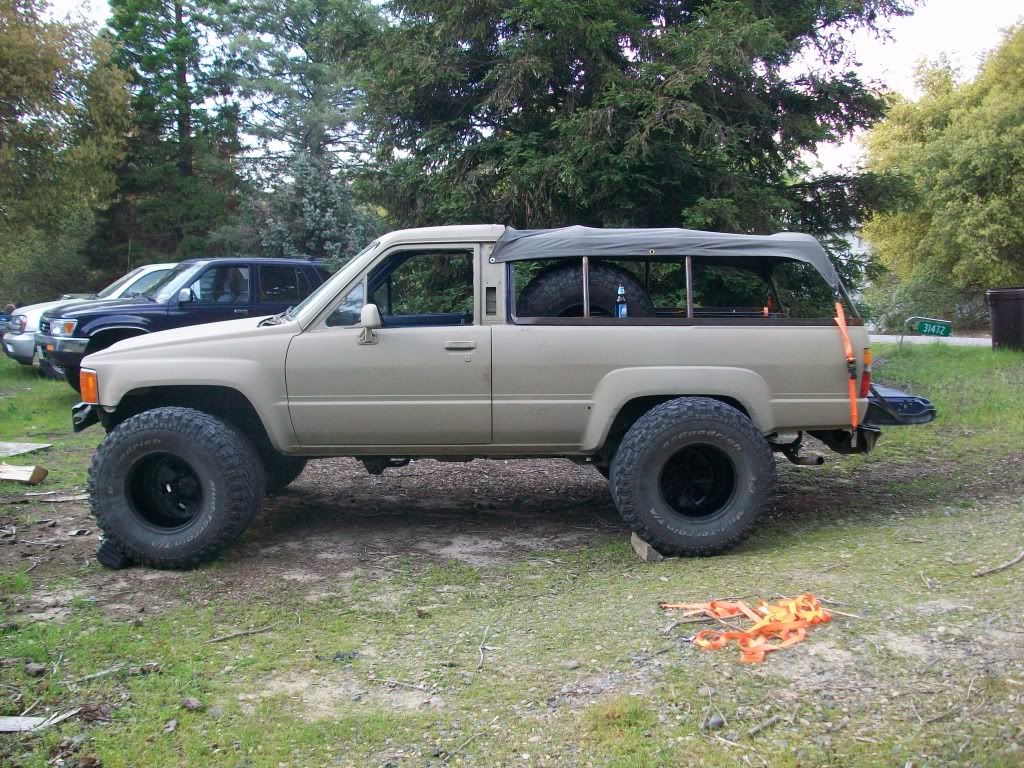
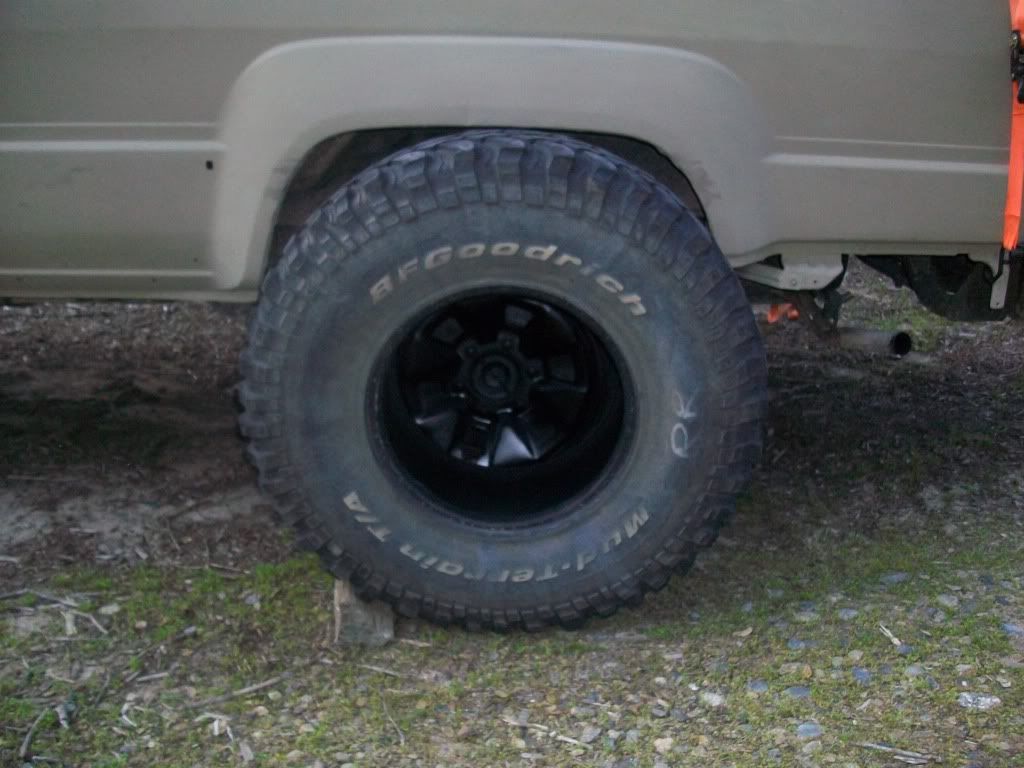
I purchased Malteserunner's 33x12.50r15 tires, since he switched to 33x10.50r15 KM2s, and was going to try to get them mounted today, but got carried away with the bedsides. The general reaction that I get when mentioning that I am planning on mounting them on stock wheels is that it won't work. I could have sworn that people on this forum have done this before. Input is welcome. It will wait until next weekend in any case. I have to go back to work tomorrow. Here they are mocked up.
I think that I will end up having the soft top frame powder coated, and I will have the bedsides media blasted at the same time, probably along with bumpers when that happens. I'm sort of planning simple, mostly square tubing bumpers on either end, with a swing-out tire carrier on the back one, and a full-width removable expanded metal grill attached to the front one. The grill would be painted with bbq paint, and would be retained with lynch pins, so that it could actually be used in camp AS A GRILL. Redneck genius? Oh yeah.
And here is just a shot of stock IFS flex with worn-out shocks on my wife's daisies.
So here is the non soft top status:
Today I cut out the new interior panels out of 1/8" diamond plate. I now need to figure out what the best way to attach them will be. The two suggestions that I have had so far are, a.) tack nuts to the back of the existing holes or b.) use nutserts in the existing holes. I still think that there is an easier way. I just don't know what it is. Suggestions are appreciated.
I also experimented with doing my own quick-release hinges. It is such an easy modification that I don't know why I didn't do it before. The only problem was making the pins that I had fit past the bolt heads on the door side hinges. I think I will try to find some bent pins (hitch retaining pin-style) to use, and see if I will be able to insert both from the top, and thus avoid using a retaining pin of any type.
I also sand blasted one wheel and painted it with krylon satin black. I actually like these wheels a lot, when they are painted black.
I purchased Malteserunner's 33x12.50r15 tires, since he switched to 33x10.50r15 KM2s, and was going to try to get them mounted today, but got carried away with the bedsides. The general reaction that I get when mentioning that I am planning on mounting them on stock wheels is that it won't work. I could have sworn that people on this forum have done this before. Input is welcome. It will wait until next weekend in any case. I have to go back to work tomorrow. Here they are mocked up.
I think that I will end up having the soft top frame powder coated, and I will have the bedsides media blasted at the same time, probably along with bumpers when that happens. I'm sort of planning simple, mostly square tubing bumpers on either end, with a swing-out tire carrier on the back one, and a full-width removable expanded metal grill attached to the front one. The grill would be painted with bbq paint, and would be retained with lynch pins, so that it could actually be used in camp AS A GRILL. Redneck genius? Oh yeah.
And here is just a shot of stock IFS flex with worn-out shocks on my wife's daisies.
Apr 27, 2010 | 02:06 PM
#99
Registered User
Joined: Oct 2009
Posts: 536
Likes: 0
From: Ahwahnee, CA
Looking really good MC! The pic with the mocked up tires is just screaming out that it can't wait to hit a trail.
I don't know the difference between nut tacks and nutsert, but I'd choose which ever option that has a little plastic goody that goes into the existing holes and allows you to screw your bolt or screw into them.
As for the tire clearance, all my research has lead to say that on 84-89 trucks, 32's are the max you can go. I have 31's, and they are sort of tight fit under there.
Apr 27, 2010 | 04:27 PM
#100
Thread Starter
Registered User
Joined: Nov 2009
Posts: 504
Likes: 2
From: Central Sierra Nevadas (Oakhurst)
I've had 31's on there, and there is PLENTY of extra room with them. I may need to ZUK mod the rear to get rid of the sag, and I'm probably going to BFH the inner front a bit. The closest clearance point is the upper control arm. If that rubs, then it is wheel spacer time.


