
Morph
 Jan 19, 2010 | 02:18 PM
#144
Got to love a woman that respects the look of 35's. Plain SEXY. Sorry. Kinda got carried away. I sure love the mountains up there where you guys/gals go wheeling.
The Colorado Rockies are by far the prettiest range I have ever seen. The ride up to Estes Park, and over the divide up to Leadville is my fav.
The Colorado Rockies are by far the prettiest range I have ever seen. The ride up to Estes Park, and over the divide up to Leadville is my fav.
Jan 19, 2010 | 02:52 PM
#145
Contributing Member
Joined: Sep 2005
Posts: 5,400
Likes: 0
From: Clear Lake City, TX
You should see me love some 5.29 gears and ARB lockers then 
We do have it "rough" out here in terms of scenery.
SO Isaac, I had asked Troy if you had brash bushings, and he wasn't sure. But it sounds like you really have to just geed a whole beefier stearing set up huh? I'm sorry I didn't get a chance to ask you about it on Saturday. Are you getting steering box armour then (or is that just a SAC thing?)
Jan 19, 2010 | 03:37 PM
#146
Thread Starter
Contributing Member
Joined: Apr 2004
Posts: 5,464
Likes: 6
From: Arvada, Colorado
I'm reworking everything.
Currently its stock with a brace.
Soon to be new center link, with FJ-80 rod ends, a DOM/brass bushing idler, and likely a relocated and armored steering box/idler.
Currently its stock with a brace.
Soon to be new center link, with FJ-80 rod ends, a DOM/brass bushing idler, and likely a relocated and armored steering box/idler.
Jan 19, 2010 | 05:44 PM
#147

Registered User
Joined: Mar 2007
Posts: 721
Likes: 0
From: Dayton, OH
Just how strong is the stock steering linkage? On the Nissan trucks of similar vintage, that is the first thing that needs to be upgraded. On the Toyotas I haven't heard a lot about the subject.
I am definitely interested in seeing what you come up with that uses the FJ80 TREs. Those are the bomb. I have them on my Samurai using Sky Manufacturing's OTS kit. Upgrading my yota's steering linkage to something more bomb proof would be very worthwhile.
How much trouble would it be to keep your steering box in it's current location? A number of us guys who plan to keep our IFS are interested to see what you come up with, but would like to keep the box where it is.
Last edited by GenXr; Jan 19, 2010 at 05:45 PM.
Jan 19, 2010 | 06:24 PM
#148
Thread Starter
Contributing Member
Joined: Apr 2004
Posts: 5,464
Likes: 6
From: Arvada, Colorado
Leaving the box in its current location is something I'm going to try to do, but its likely going to have to move. The issue is that everything sits back pretty far, hence the bend in the stock inner TRE's.
I'm not interested in replicating the bend, as its weak, difficult to align, and too easy to screw up.
If a straight tie rod will fit in there, then good. If not, I'll shift the box forward.
I'm not interested in replicating the bend, as its weak, difficult to align, and too easy to screw up.
If a straight tie rod will fit in there, then good. If not, I'll shift the box forward.
 Jan 26, 2010 | 11:23 PM
#150
Registered User
Joined: Dec 2006
Posts: 2,880
Likes: 2
From: Olympia, WA
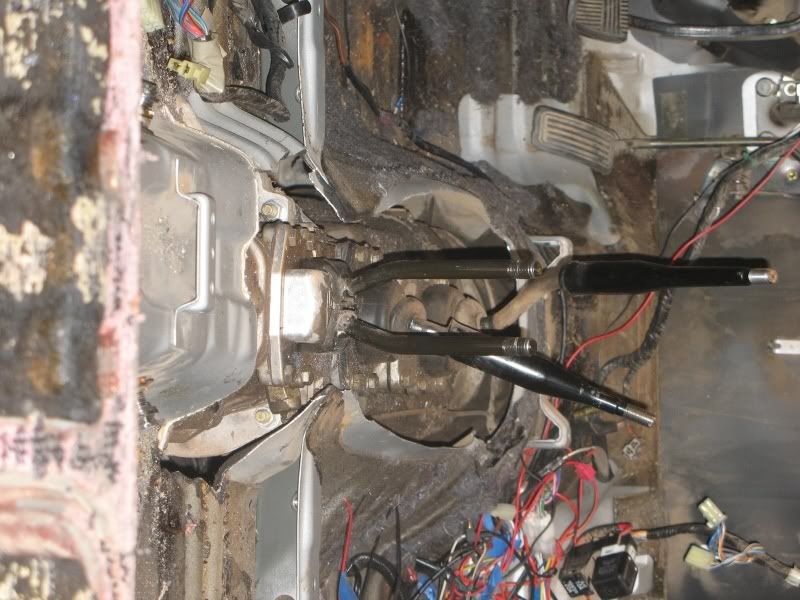
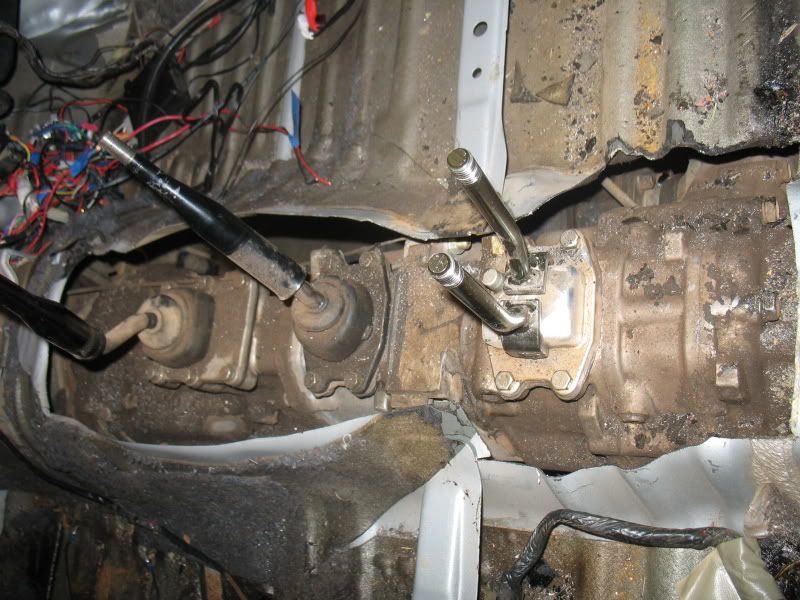
Those are twin sticks (thats actually what they are called) .. allows you to engage the transfercase low gears, have the front hubs locked in and disengage 4wd in the transfercase so you can utilize the low gears in just 2wd. ... without having to have the front hubs unlocked.
It's really beneficial for those who have spooled, welded, or locked front ends and need to steer more easily.
It's really beneficial for those who have spooled, welded, or locked front ends and need to steer more easily.
Jan 27, 2010 | 06:34 AM
#151
Thread Starter
Contributing Member
Joined: Apr 2004
Posts: 5,464
Likes: 6
From: Arvada, Colorado
x2.
Or, if you happen to blow up your front diff/axle/whatever, you can unlock the hubs and run 2wd off the trail, while using low range but not engaging the driveshaft.
Its also handy for those with ARB's, which, when bound up on the rocks, take a little longer to unlock. Shifting into 2wd gets them to unlock faster.


 Jul 4, 2010 | 12:45 PM
#157
Thread Starter
Contributing Member
Joined: Apr 2004
Posts: 5,464
Likes: 6
From: Arvada, Colorado
Finally got it out on the trail:


Soo, for the longest time, I've known that the rig has issues when it comes to steering.
Took it out a few times this year, and on the last time, I bent the relay rod and tie rod.
Pretty sure things aren't supposed to look like this:
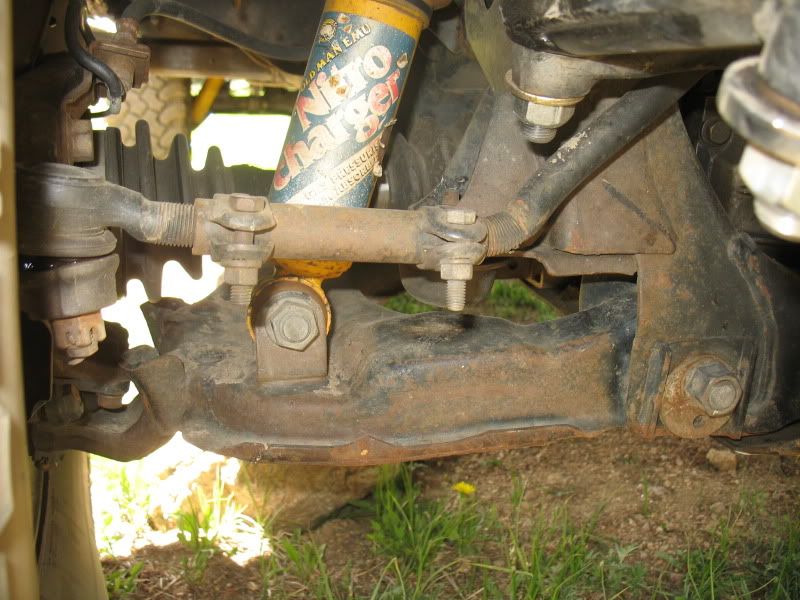
So it was time to start with something different. I messed around for a while trying to keep the locations all stock, but nothing was working out: So I decided I'd move the box and idler forward, beef up the relay rod, and run straight tie rods with FJ - 80 rod ends
Got some good work in today. Got the steering disassembled, and the steering box removed (a huge mess).
Then started measuring, marking and cutting the areas of the front clip that needed to be cut out, and made quick work of it with the plasma:

Then, got the box into position, and marked out where the holes were to go in the new location. Using a long bit for a pilot and then a nice HF step bit (great bang for your buck BTW) the holes were drilled out and the old bungs were ground off so that both sides of the frame had smooth, clean surfaces:

Then, back to scissors and card board, which was then transfered to plate and plasma'd out:

There are two plates, one in the outside, and one on the inside. The outer plate is 1/4" and the inner is 3/16".
The plates were then installed with tubes running through the frame, and everything was welded into place:

Then, the tubes were cut off and the face was ground smooth so the box can mount up flush:

Finally, the box was stuck on, the relay rod, and a yet un-assembled tie rod to check for fitment:

The other thing that will have to happen is that the relay rod will be cut, and sleeved with .250 wall DOM, to make it stronger and lengthen it the appropriate length for the fact that the box, and soon, the idler, will be spaced out 7/16".
From everything I can tell, it is a forged piece, but none the less, I will be heating it to 500F in my barbeque, welding, and then post heating in the barbeque as well, just to be sure that it stays straight and doesn't get brittle.
Tomorrow I will work on mounting the idler arm
Soo, for the longest time, I've known that the rig has issues when it comes to steering.
Took it out a few times this year, and on the last time, I bent the relay rod and tie rod.
Pretty sure things aren't supposed to look like this:
So it was time to start with something different. I messed around for a while trying to keep the locations all stock, but nothing was working out: So I decided I'd move the box and idler forward, beef up the relay rod, and run straight tie rods with FJ - 80 rod ends
Got some good work in today. Got the steering disassembled, and the steering box removed (a huge mess).
Then started measuring, marking and cutting the areas of the front clip that needed to be cut out, and made quick work of it with the plasma:
Then, got the box into position, and marked out where the holes were to go in the new location. Using a long bit for a pilot and then a nice HF step bit (great bang for your buck BTW) the holes were drilled out and the old bungs were ground off so that both sides of the frame had smooth, clean surfaces:
Then, back to scissors and card board, which was then transfered to plate and plasma'd out:
There are two plates, one in the outside, and one on the inside. The outer plate is 1/4" and the inner is 3/16".
The plates were then installed with tubes running through the frame, and everything was welded into place:
Then, the tubes were cut off and the face was ground smooth so the box can mount up flush:
Finally, the box was stuck on, the relay rod, and a yet un-assembled tie rod to check for fitment:
The other thing that will have to happen is that the relay rod will be cut, and sleeved with .250 wall DOM, to make it stronger and lengthen it the appropriate length for the fact that the box, and soon, the idler, will be spaced out 7/16".
From everything I can tell, it is a forged piece, but none the less, I will be heating it to 500F in my barbeque, welding, and then post heating in the barbeque as well, just to be sure that it stays straight and doesn't get brittle.
Tomorrow I will work on mounting the idler arm
 Nice project!
Jul 5, 2010 | 08:24 PM
Nice project!
Jul 5, 2010 | 08:24 PM
#160
Thread Starter
Contributing Member
Joined: Apr 2004
Posts: 5,464
Likes: 6
From: Arvada, Colorado
Yeah, I lurk mostly. I don't have as much advice as I used to, guess I'm getting older and forgetting stuff.
Anyway, today I got the idler side all done up. Got the braces cut off the TC arm, and new ones welded on, so that the braces still bolt to the underside of the frame.
Also, pretty much determined the center link is forged= thank goodness.
Did two tests: Spark test which was simply just grinding on it. Sparks that are bright and scatter quite a bit are indicative of forged steel ( or so says the interwebs). Cast will have very few sparks and they will not scatter (supposedly)
The other is the ring test, so I suspended the relay rod (center link) by a zip tie, and tapped it with a hammer: Rang like a bell.
Also a good sign. Cast steel does not ring.
Also, cast parts generally have very thin marks, or seams, on them from the molds, where as forged parts will have very thick marks, or seams, where the forging hammers came together.
So, I ground down the link, cut it in half, and clearanced it (maybe a 1/32 of material was removed) to fit inside a 1.5 .250 wall DOM tube.
Now, I have to get my barbeque down stairs so I can heat this thing to weld it. Pre and post heat are not critical for forged material, but with a Miller 175 and a 1" thick relay rod, I'm guessing heating it isn't going to hurt anything.
Camera is acting up. I need the cord, which I left at work. Will hopefully have pics up tomorrow.


