
Morph

 Jul 29, 2009 | 12:24 PM
#42
Thread Starter
Contributing Member
Joined: Apr 2004
Posts: 5,464
Likes: 6
From: Arvada, Colorado
this is just flat out sexy. great work and you made the interior look sharp! i was worried about how it was going to look early into the thread, but you pulled it off nicely! i feel you on collecting parts slowly, i already have my sfa but won't be able to do the swap till i'm out of college, thats in like 5 years the way its going lol. oh yeah you remember that skid plate i talked about...? its finally made but just not on, the company put the holes in the wrong place so i'll have to re-drill them.
how's the dual cases treating you?
how's the dual cases treating you?
Dual cases are sweet. I rate them as my second best mod after my ARB air lockers.
Thanks! Maybe this time I won't drive right by you and not recognize you
 LOL Sorry about that again...
Hoping so. We'll see when its out on the trails.
Jul 29, 2009 | 02:24 PM
#44
Registered User
Joined: Apr 2006
Posts: 2,018
Likes: 0
From: Aurora, CO
I'm kind of disappointed that the 80 series arms didn't work. In the only picture of your panhard bar, it looks to be at an angle (front to back). Is it? If so, shouldn't it be level (front to back)?
I want to link my rig so bad and this gives me a good place to start.
I want to link my rig so bad and this gives me a good place to start.
Jul 29, 2009 | 02:40 PM
#45
Thread Starter
Contributing Member
Joined: Apr 2004
Posts: 5,464
Likes: 6
From: Arvada, Colorado
Thanks!
Yeah, I was disappointed too, but they just bound up too much.
The panhard is angled back. It doesn't move in the front to back plane much at all, and the heims have enough travel to account for what little movement there is. It is parallel to the axle, which is important. It had to be angled back so that the frame side mount would clear the spring and the bolt could be removed without removing the springs (trail repair).
The panhard is angled back. It doesn't move in the front to back plane much at all, and the heims have enough travel to account for what little movement there is. It is parallel to the axle, which is important. It had to be angled back so that the frame side mount would clear the spring and the bolt could be removed without removing the springs (trail repair).
Jul 29, 2009 | 03:29 PM
#47
Thread Starter
Contributing Member
Joined: Apr 2004
Posts: 5,464
Likes: 6
From: Arvada, Colorado
The ride is very nice.
The soild drive train mounting does give more vibrations through the body under hard acceleration, but the overall ride is awesome.
I currently have my anti-squat at 60% ish, which is nice for on road, but should help give quite a bit of traction offroad.
The soild drive train mounting does give more vibrations through the body under hard acceleration, but the overall ride is awesome.
I currently have my anti-squat at 60% ish, which is nice for on road, but should help give quite a bit of traction offroad.
Jul 29, 2009 | 08:51 PM
#51
Thread Starter
Contributing Member
Joined: Apr 2004
Posts: 5,464
Likes: 6
From: Arvada, Colorado
Sorry to report, but the ARB was sold several months ago.
Which cross-member are you referring to? They are all holding up well. I will be replacing the transfercase xmember with a piece of angle iron, just because I'm anal, but it is currently working fine.
Jul 30, 2009 | 07:59 PM
#53
Thread Starter
Contributing Member
Joined: Apr 2004
Posts: 5,464
Likes: 6
From: Arvada, Colorado
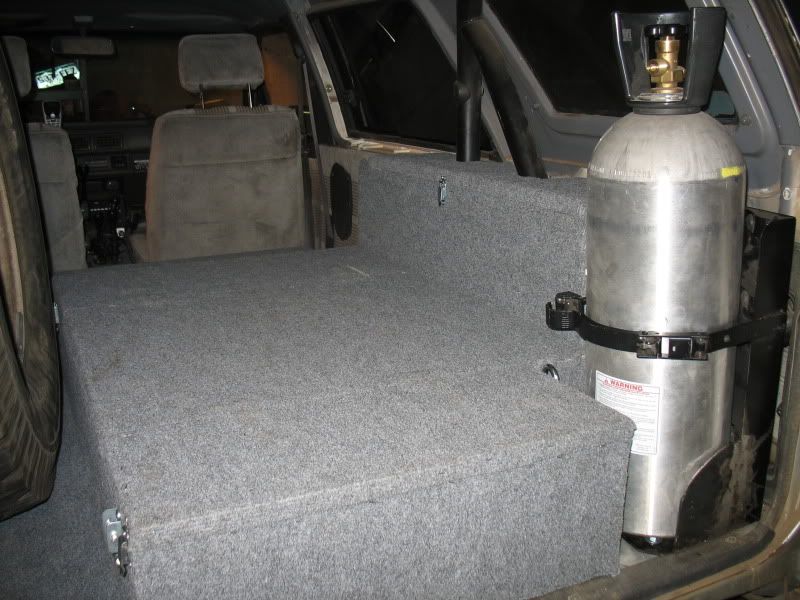
Got my rear deck finished most of the way. I still need to bolt down the tool box and add latches, but it is complete as well.
Rear deck area:
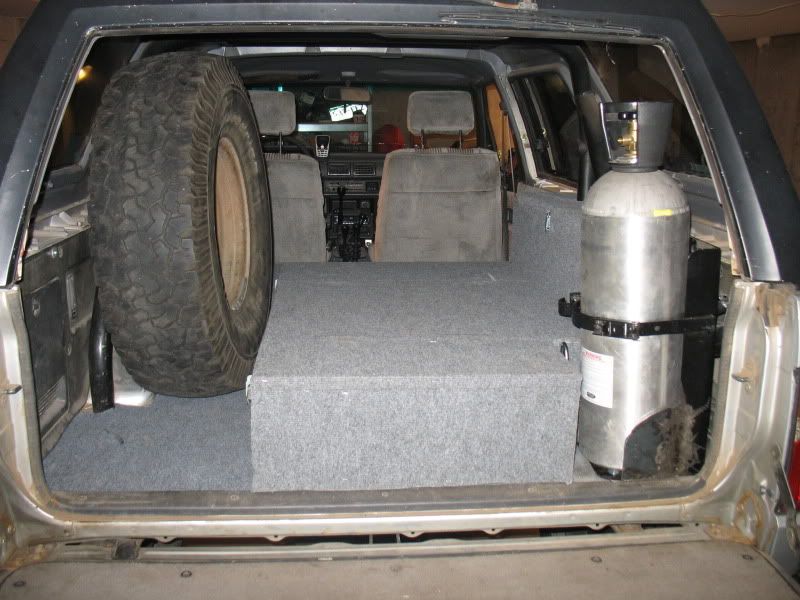
Area for recovery items located by the tail gate for ease of access when on the trail:
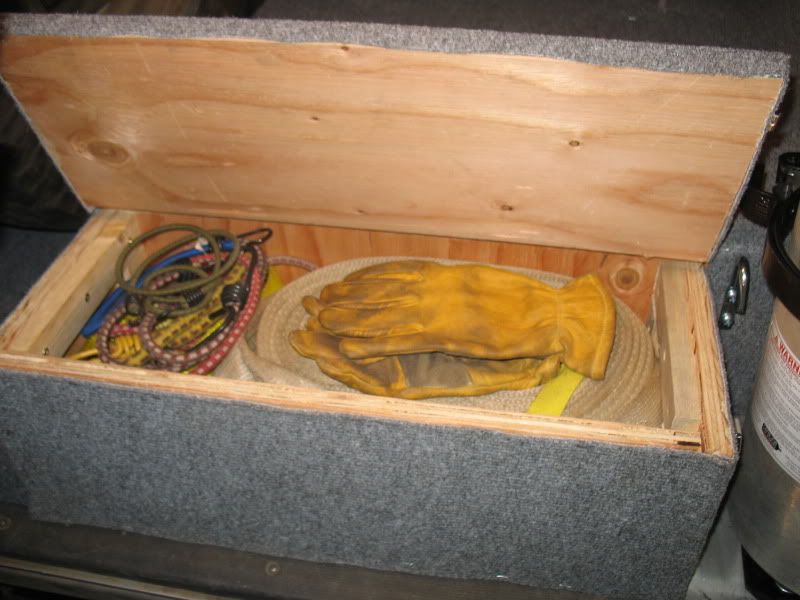
A storage area for fluids and the like:
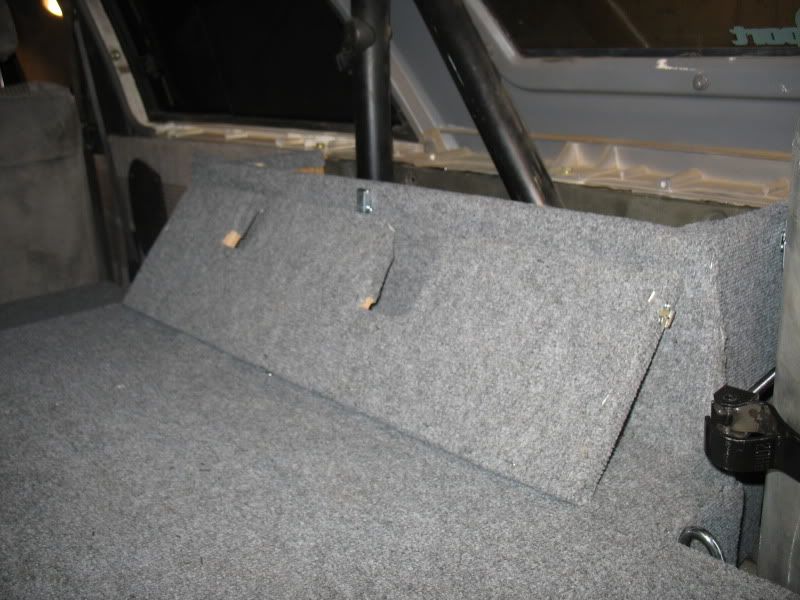
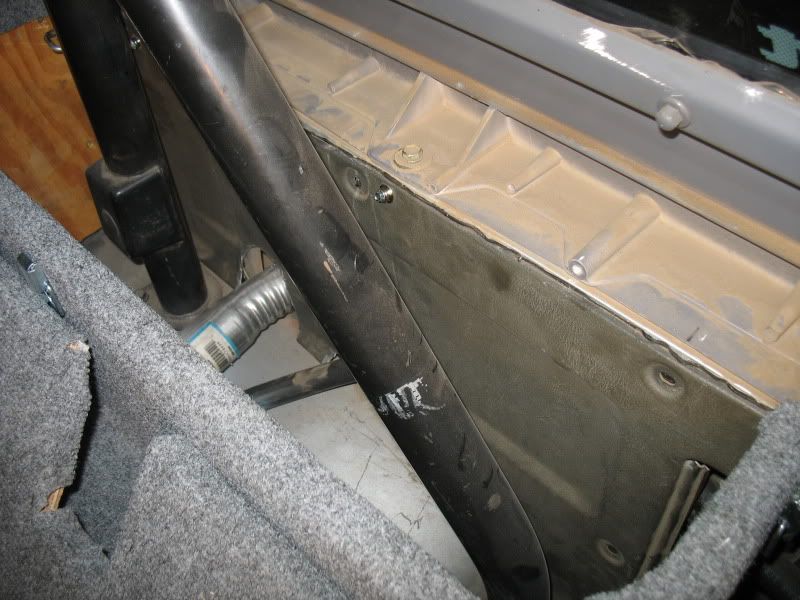
View from behind the seats:
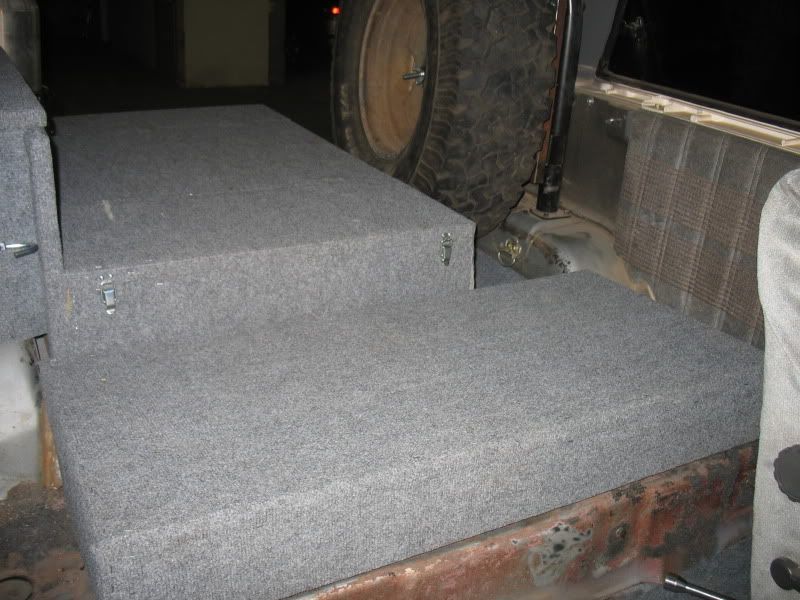
The front box is my tool box, which isn't finished yet.
The area right above that is for storing some spare parts, ie two CV's steering crap, belts, brake line, hubs, fuel line, etc...

Lastly, I finished my belly pan, but couldn't get very good pics of it.
It hangs down just under an inch below the frame:
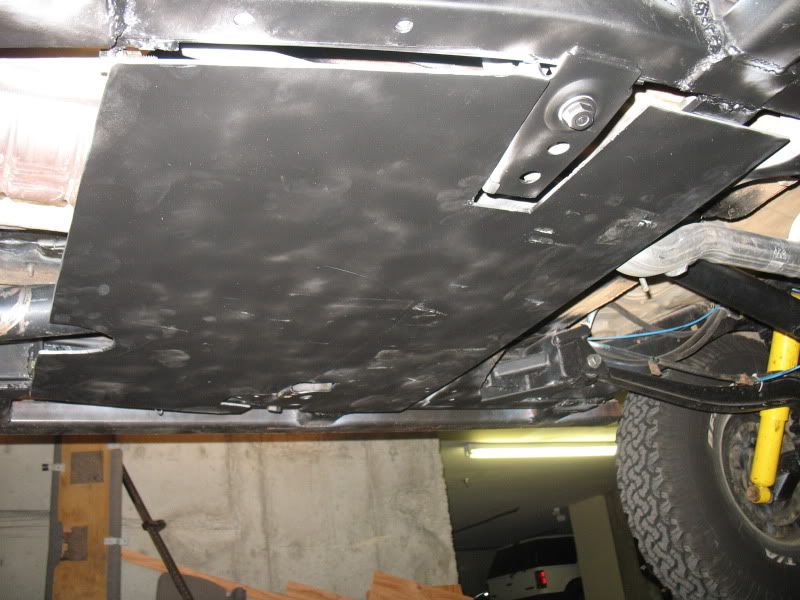
3/16" plate with a checkerboard of tented angle welded to the back side for reinforcement. Super beefy.
Rear deck area:
Area for recovery items located by the tail gate for ease of access when on the trail:
A storage area for fluids and the like:
View from behind the seats:
The front box is my tool box, which isn't finished yet.
The area right above that is for storing some spare parts, ie two CV's steering crap, belts, brake line, hubs, fuel line, etc...
Lastly, I finished my belly pan, but couldn't get very good pics of it.
It hangs down just under an inch below the frame:
3/16" plate with a checkerboard of tented angle welded to the back side for reinforcement. Super beefy.
Last edited by AxleIke; Jul 30, 2009 at 08:00 PM.
Jul 30, 2009 | 08:04 PM
#54
Contributing Member
Joined: Jul 2003
Posts: 9,076
Likes: 1
From: Orlando, FL
Got my rear deck finished most of the way. I still need to bolt down the tool box and add latches, but it is complete as well.
Rear deck area:
Area for recovery items located by the tail gate for ease of access when on the trail:
A storage area for fluids and the like:
View from behind the seats:
The front box is my tool box, which isn't finished yet.
The area right above that is for storing some spare parts, ie two CV's steering crap, belts, brake line, hubs, fuel line, etc...
Lastly, I finished my belly pan, but couldn't get very good pics of it.
It hangs down just under an inch below the frame:
3/16" plate with a checkerboard of tented angle welded to the back side for reinforcement. Super beefy.

Once again, crazy good work dude.
Looks awesome.
Fink

 Jul 31, 2009 | 05:11 AM
#56
Thread Starter
Contributing Member
Joined: Apr 2004
Posts: 5,464
Likes: 6
From: Arvada, Colorado
Thanks!!!!
LOL! I appreciate that, but no. I'm pretty tired of working on this thing now. Thanks though!!
I appreciate that, but no. I'm pretty tired of working on this thing now. Thanks though!!
Jul 31, 2009 | 10:29 AM
#57
Registered User
Joined: Oct 2007
Posts: 5,377
Likes: 5
Psssssst, what's the similarity between AxleIke's truck with a camo-painted frame and a Jeep Cherokee?
.
.
.
.
I can't see no frame!
Awesome work man, its looking great. Tell me why Toyota didn't built the xfer case up higher in the first place?
.
.
.
.
I can't see no frame!
Awesome work man, its looking great. Tell me why Toyota didn't built the xfer case up higher in the first place?
Jul 31, 2009 | 10:59 AM
#58
Thread Starter
Contributing Member
Joined: Apr 2004
Posts: 5,464
Likes: 6
From: Arvada, Colorado
I'm not sure why they didn't put it up a little higher. Flat bottom would have made things tight from the factory, which wouldn't have sold as well. Its not exactly a creature comfort interior now...LOL
Jul 31, 2009 | 11:05 PM
#59
Registered User
Joined: Oct 2007
Posts: 5,377
Likes: 5
It could have been some neurotic Japanese engineer that decided he wanted the trucks to get 400K out of each U joint and wanted the lower angle possible on the driveline. That'd be my guess.
Very impressive work there.
Very impressive work there.
Last edited by Matt16; Sep 6, 2009 at 12:03 AM.


