
Morph
 Jul 27, 2009 | 09:43 AM
#21
Thread Starter
Contributing Member
Joined: Apr 2004
Posts: 5,464
Likes: 6
From: Arvada, Colorado
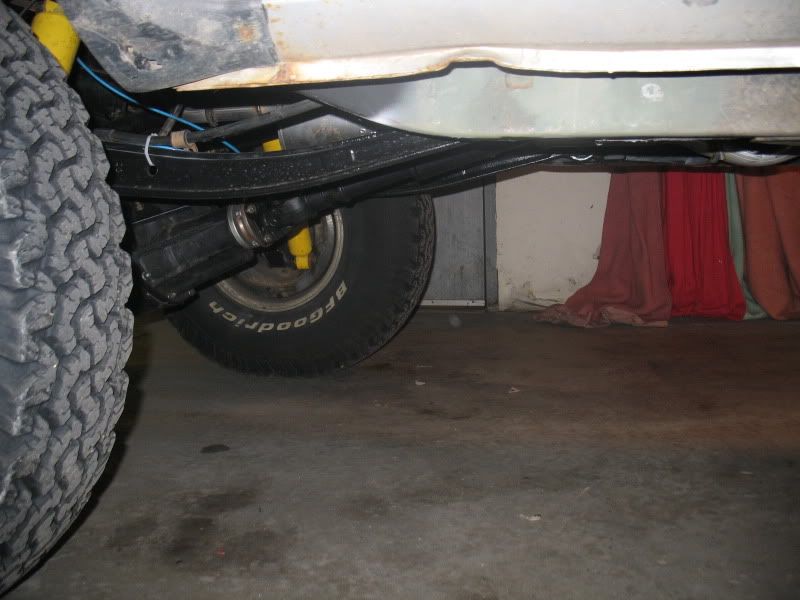
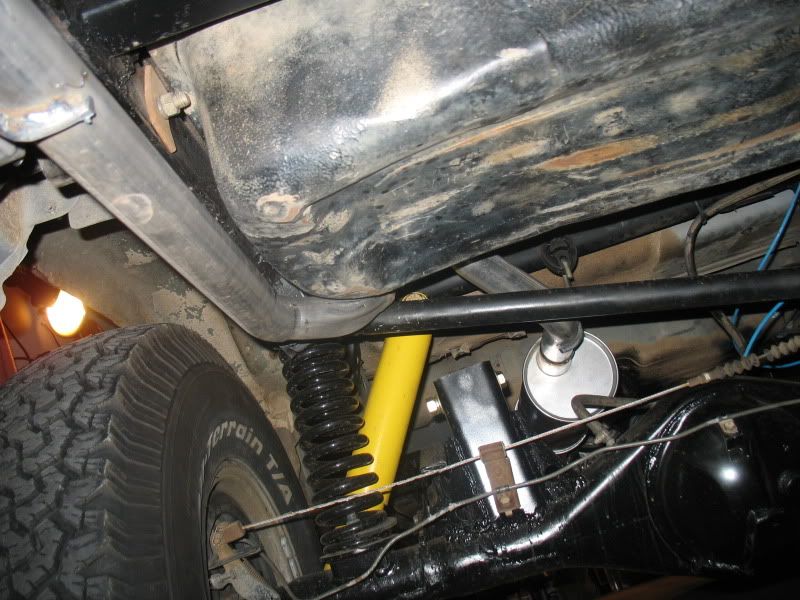
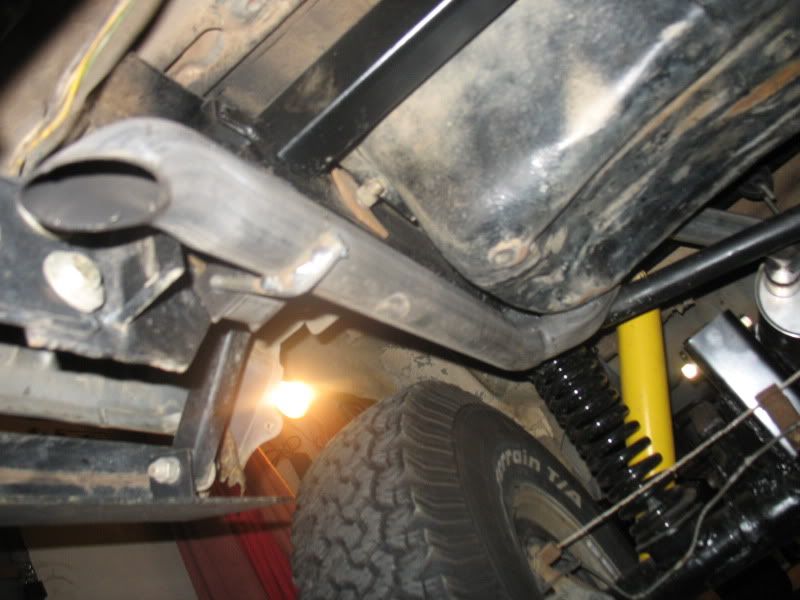
The other major thing that has changed is the rear suspension. I flex tested the truck with the 300 lb/inch springs, and the radius arms. I had all of 4" of travel, which wasn't going to work. The radius arms just bound up too much. Not to worry though.
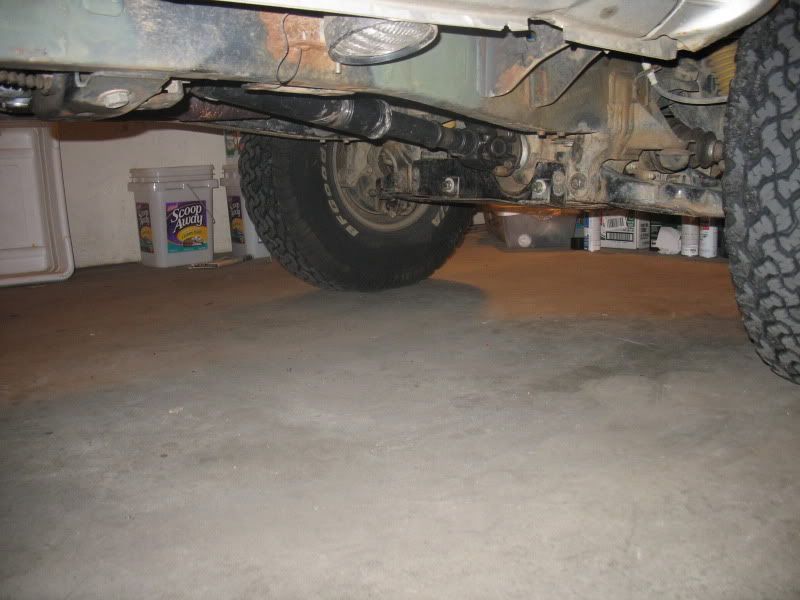
This weekend, I redid the rear suspension and painted the rear axle. It is now a 3 link. I simply cut the back mount off of the radius arms, and added a 3rd, upper link. This corrected my pinion angle, and allowed the truck to flex MUCH better. It now flexes several inches more than the leaf springs. Its not a bunch of flex, but that's okay, because, as I'm still IFS, the rear does not need to flex a ridiculous amount.
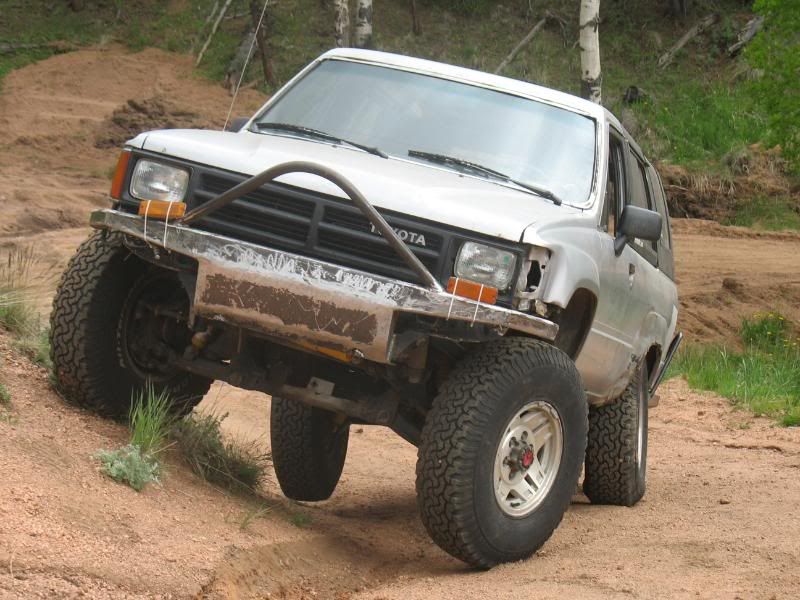
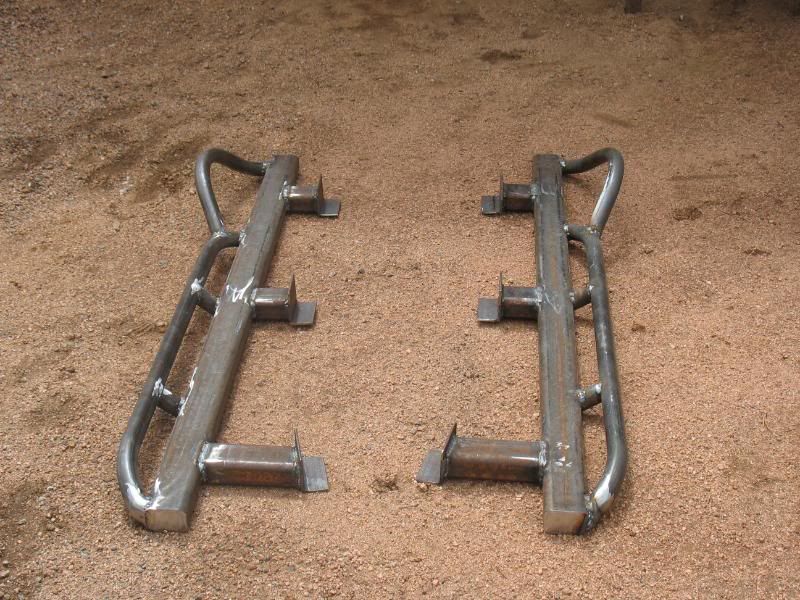
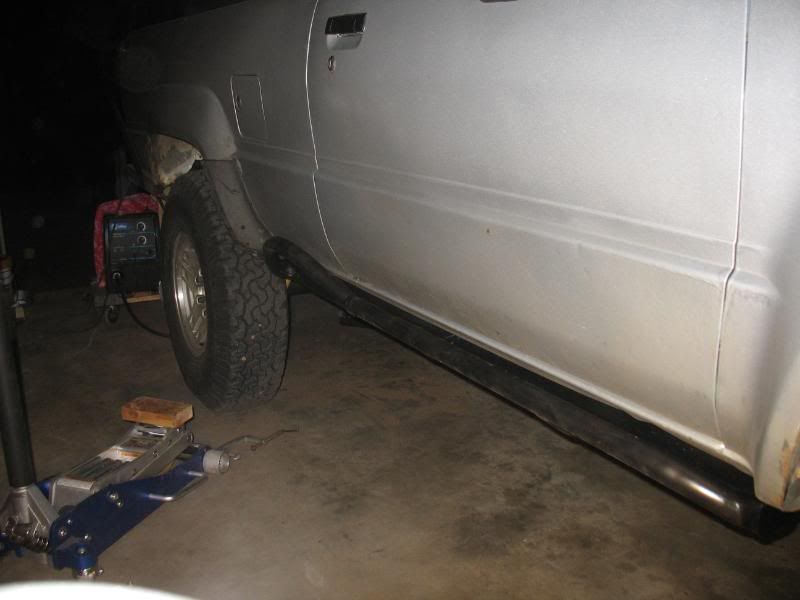
I also built my front bumper, minus my tow hooks, and my buddy Troy built the main beam for my sliders. Bumper is 1/4" thick tube, with 1/4" mount to the frame, and 3/16" bracing. Its a beast, but it should hold up.
I now only have some tube work to finish, and they can go on the truck!!! Then, a belly skid and this sucker is ready to wheel.
On to the pictures.
What the new link started as:
Flexing out, with the new bumper:
Droop:
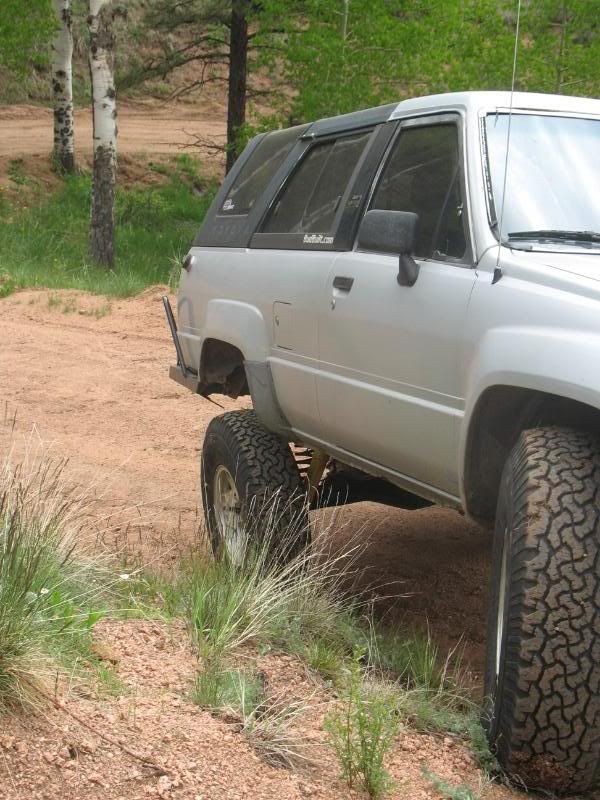
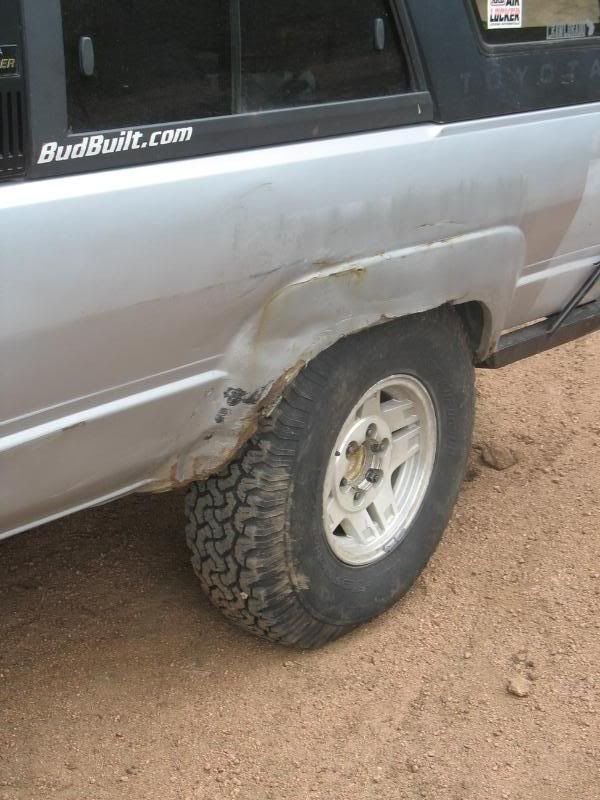
Stuff (actually can stuff a little farther, but the tire was really hitting the back outter corner of the fender, and the hill was just starting to tip the truck. In other situations, it still has another inch to 2 inches of compression):
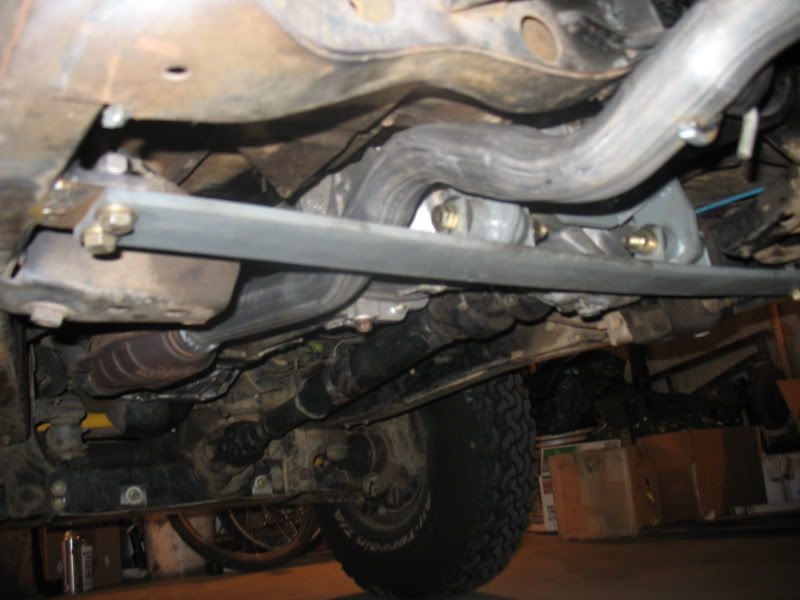
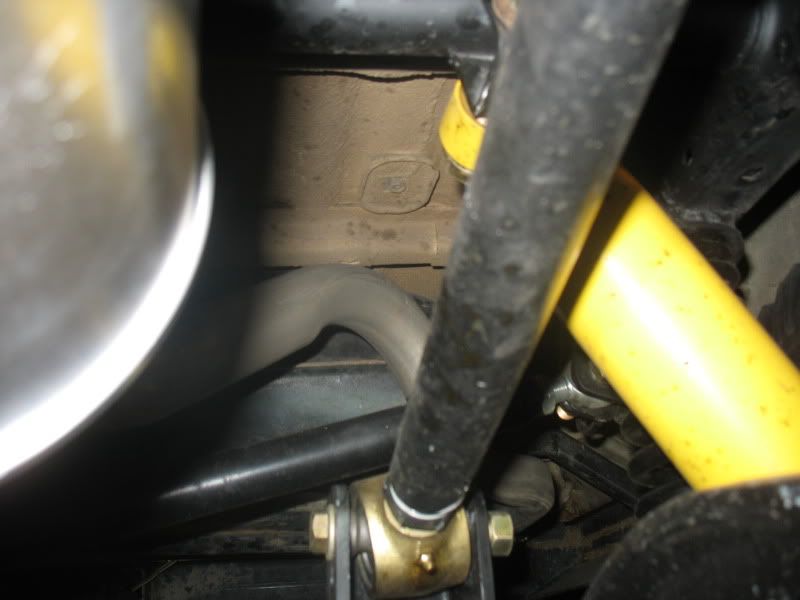
Suspension:
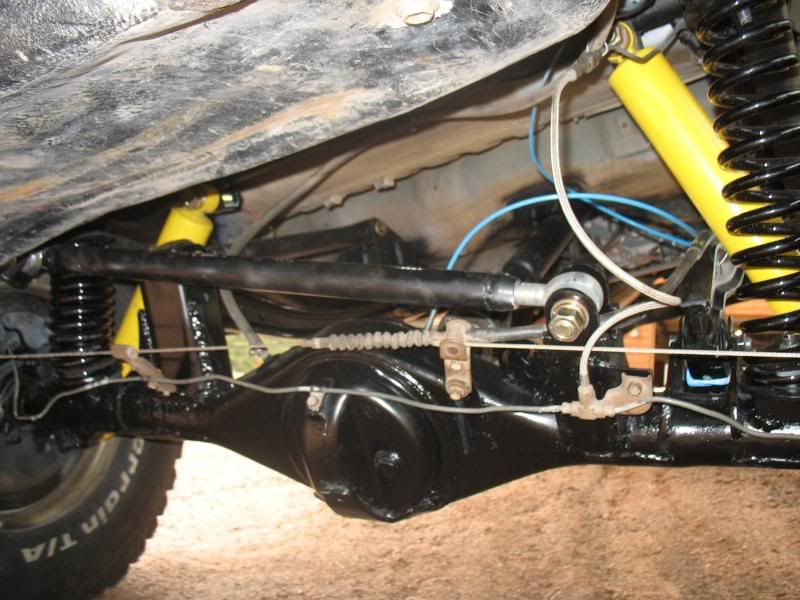
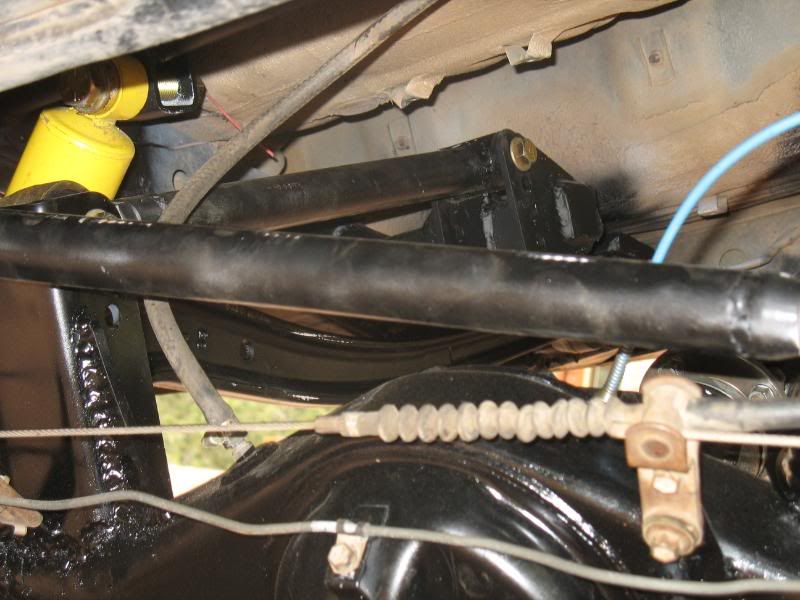
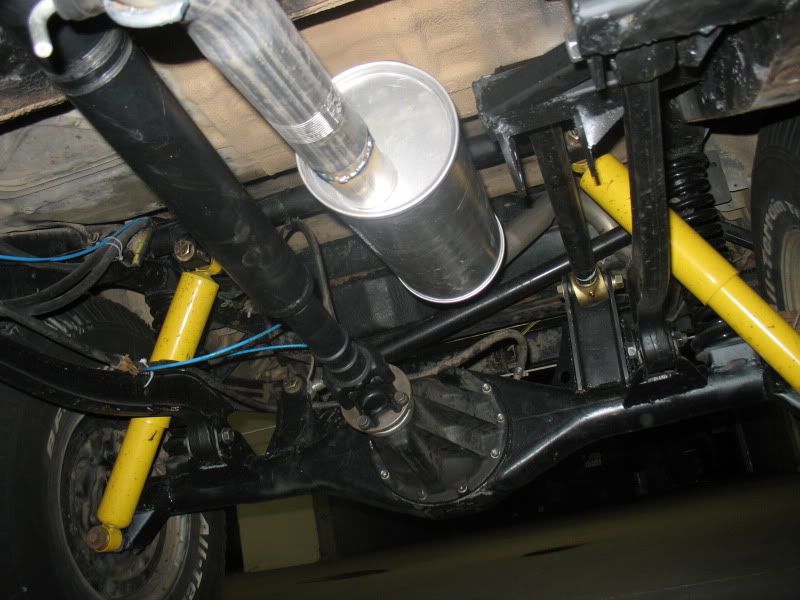
Here you can see the cut off radius arm:
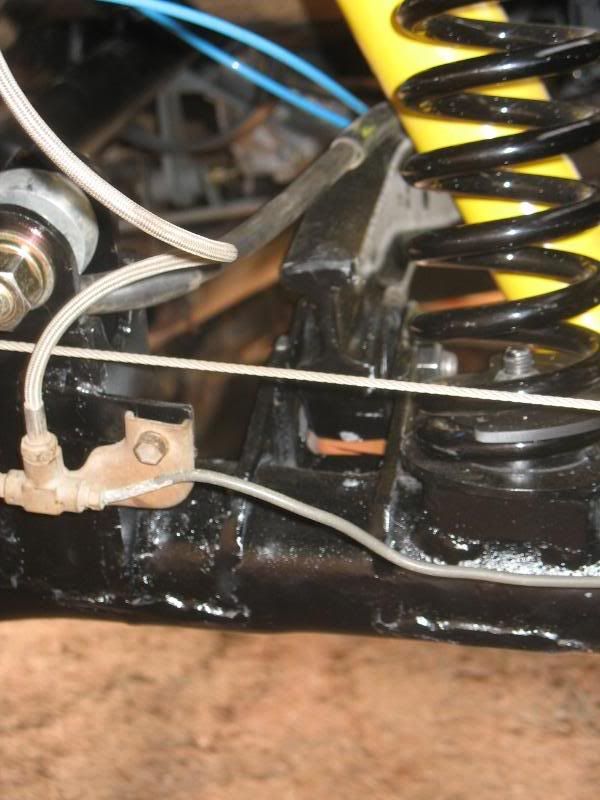
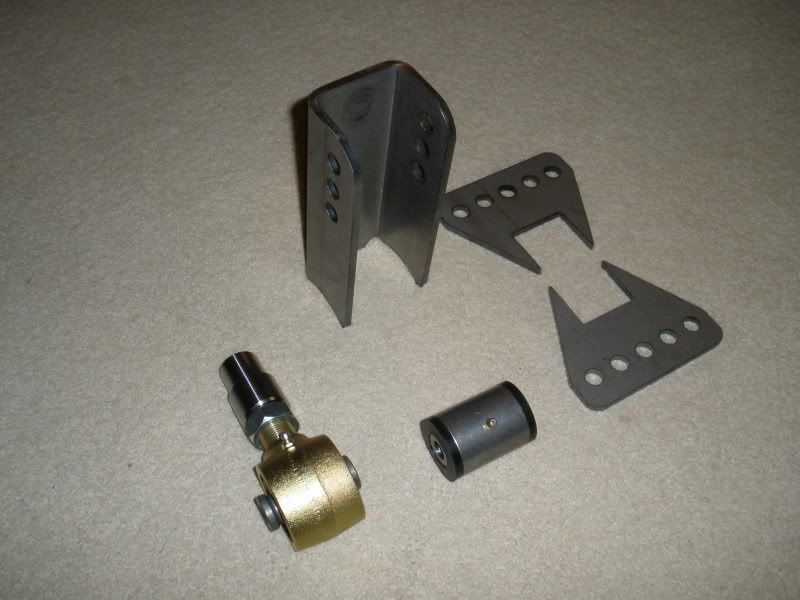
Upper link:
All in all, this gives me the flex I wanted with a TON of clearance. Those radius arms REALLY give nice ground clearance. I'm happy with it.
This weekend, I redid the rear suspension and painted the rear axle. It is now a 3 link. I simply cut the back mount off of the radius arms, and added a 3rd, upper link. This corrected my pinion angle, and allowed the truck to flex MUCH better. It now flexes several inches more than the leaf springs. Its not a bunch of flex, but that's okay, because, as I'm still IFS, the rear does not need to flex a ridiculous amount.
I also built my front bumper, minus my tow hooks, and my buddy Troy built the main beam for my sliders. Bumper is 1/4" thick tube, with 1/4" mount to the frame, and 3/16" bracing. Its a beast, but it should hold up.
I now only have some tube work to finish, and they can go on the truck!!! Then, a belly skid and this sucker is ready to wheel.
On to the pictures.
What the new link started as:
Flexing out, with the new bumper:
Droop:
Stuff (actually can stuff a little farther, but the tire was really hitting the back outter corner of the fender, and the hill was just starting to tip the truck. In other situations, it still has another inch to 2 inches of compression):
Suspension:
Here you can see the cut off radius arm:
Upper link:
All in all, this gives me the flex I wanted with a TON of clearance. Those radius arms REALLY give nice ground clearance. I'm happy with it.
Jul 27, 2009 | 09:43 AM
#22
Thread Starter
Contributing Member
Joined: Apr 2004
Posts: 5,464
Likes: 6
From: Arvada, Colorado
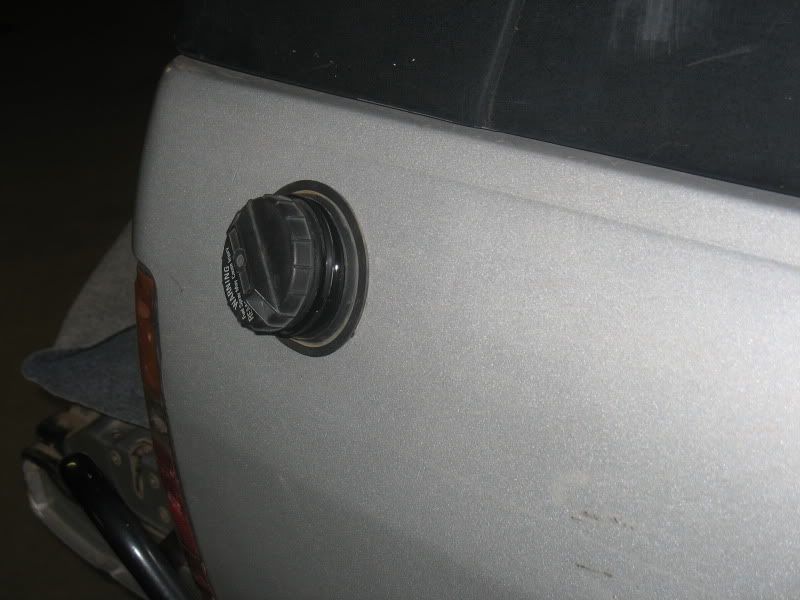
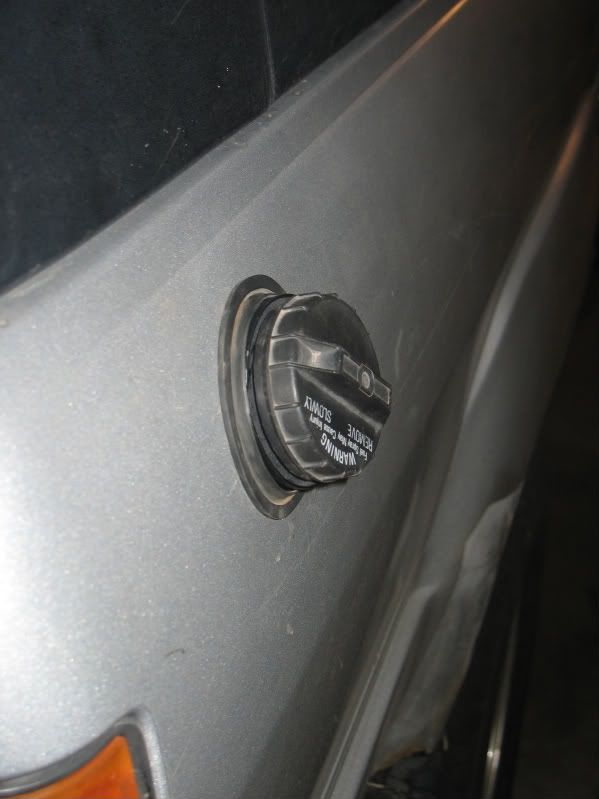
Got the radio in, and the gas filler painted and installed with its grommit.
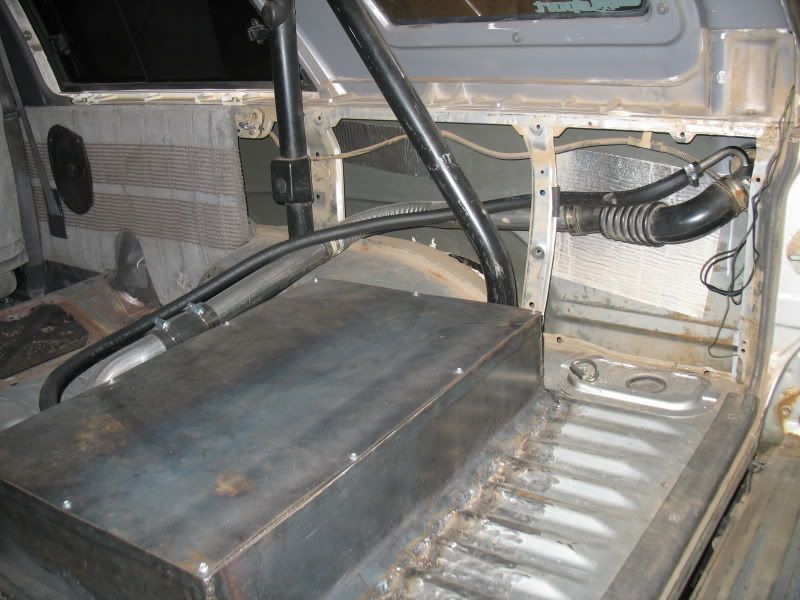
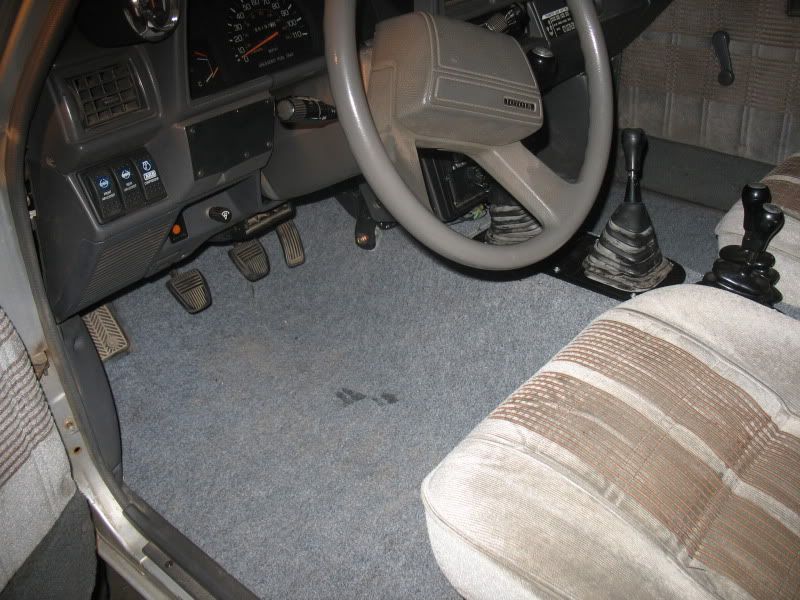
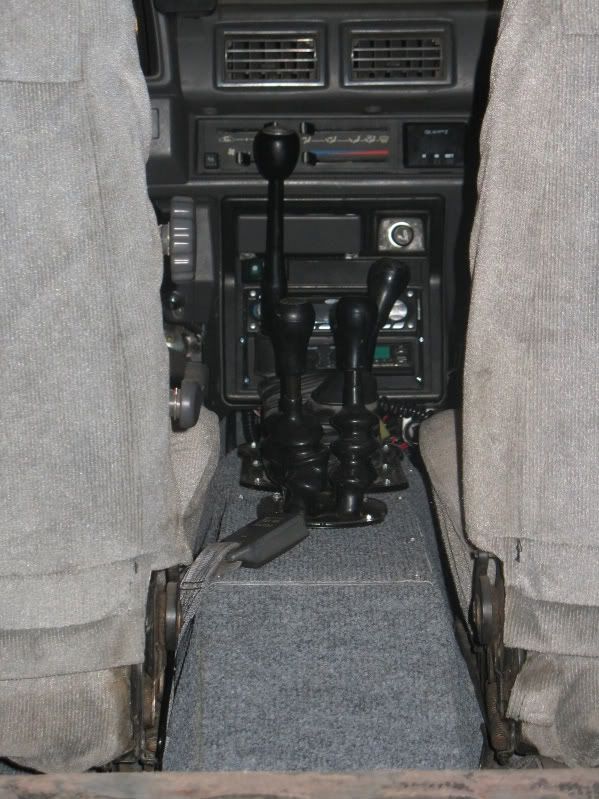
Some interior pics, shots of the gas tank and filler set up, and the painted front bumper, and body "straighting" in the front, so the grill no longer hangs off like a rag doll on the driver side.
Filler neck:
Gas tank
Interior
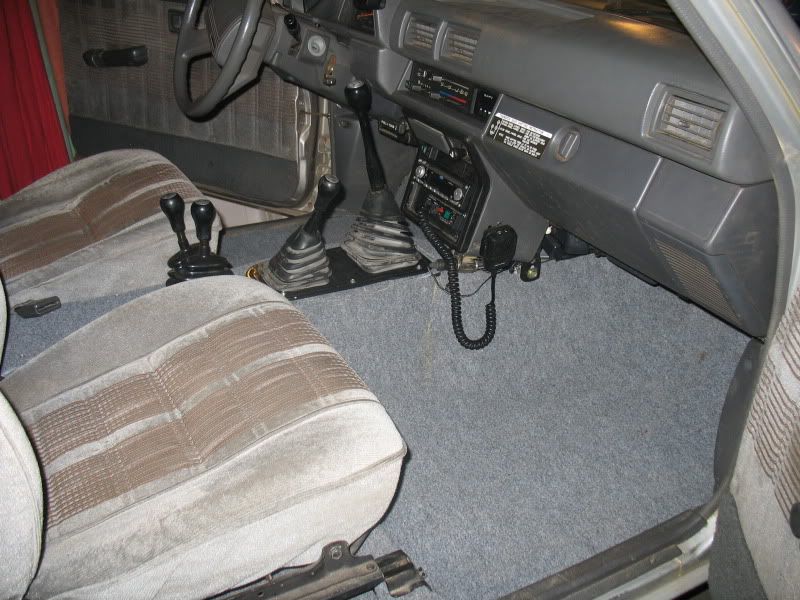
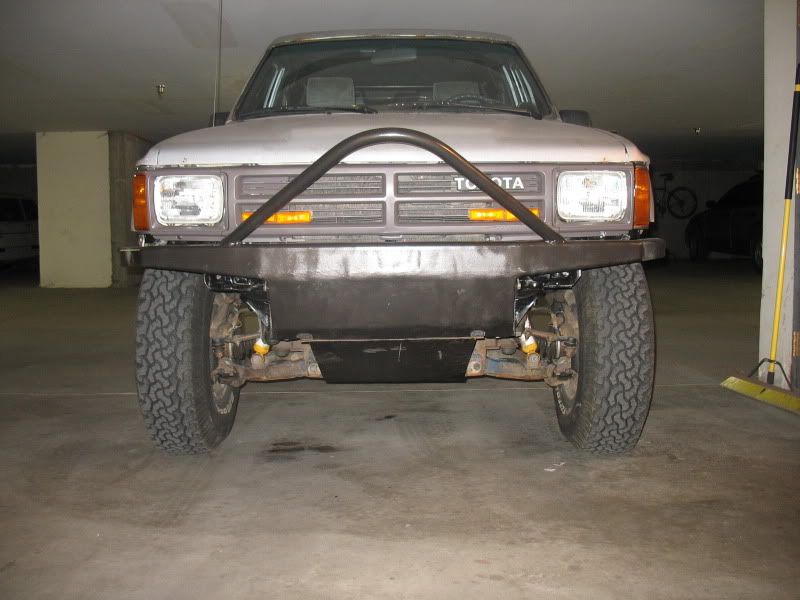
Some interior pics, shots of the gas tank and filler set up, and the painted front bumper, and body "straighting" in the front, so the grill no longer hangs off like a rag doll on the driver side.
Filler neck:
Gas tank
Interior
 :kevin:
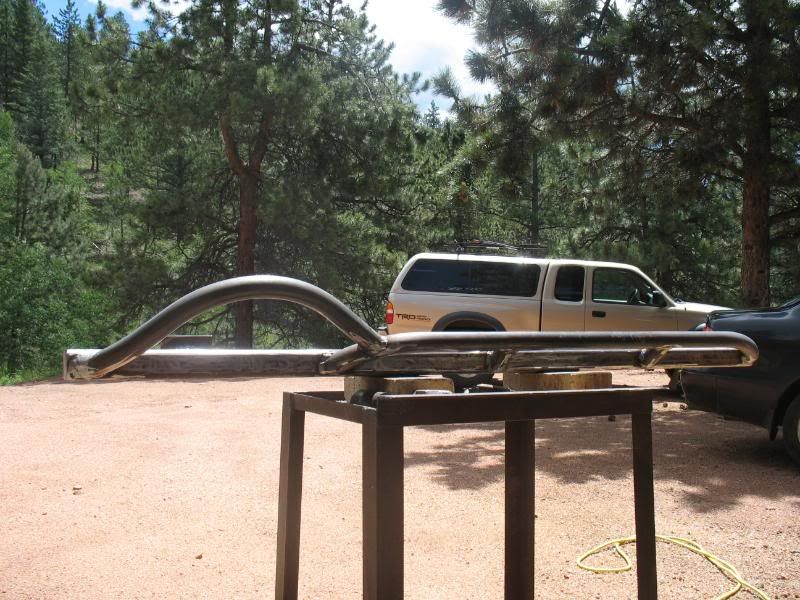

 Jul 27, 2009 | 09:55 AM
#27

Registered User
Joined: Mar 2008
Posts: 3,870
Likes: 4
From: Chico, California
LOL..
Yea i posted that way too earily, i didn't realize there was going to be soo many more posts right off the back.. but shame on you to post those pics where the first one had ifs laying next to a SFA.. lol
Progress looks good though.. How the the rear suspension rid on the street?
Yea i posted that way too earily, i didn't realize there was going to be soo many more posts right off the back.. but shame on you to post those pics where the first one had ifs laying next to a SFA.. lol
Progress looks good though.. How the the rear suspension rid on the street?
Jul 27, 2009 | 10:17 AM
#28
Thread Starter
Contributing Member
Joined: Apr 2004
Posts: 5,464
Likes: 6
From: Arvada, Colorado
Rides great. Antisquat is at 60%, which is a little soft in the rock crawling world, but perfect for street driven rigs.
Solid axle in those pictures is just how I build things: Gather parts for several years, then start a build. Less wallet shock that way. And, I can get good deals on things used, and wait for sales on the expensive stuff.
Solid axle in those pictures is just how I build things: Gather parts for several years, then start a build. Less wallet shock that way. And, I can get good deals on things used, and wait for sales on the expensive stuff.
Jul 27, 2009 | 10:23 AM
#29
Registered User
Joined: Apr 2009
Posts: 157
Likes: 0
From: Gladstone,Or
I Love those rock sliders. Great build, nice and detailed. I know what you mean by collecting parts and the wallet shock. I'm slowly but surely collecting stuff for my lift and sas. I'm sure within 5 years or so I can do it...lol
 Jul 27, 2009 | 11:07 AM
#31
Thread Starter
Contributing Member
Joined: Apr 2004
Posts: 5,464
Likes: 6
From: Arvada, Colorado
Thanks man. I hope so...I've yet to get it out on a trail yet. Gonna have to go crazy in August and September to make up for lost time.
Jul 27, 2009 | 12:16 PM
#33
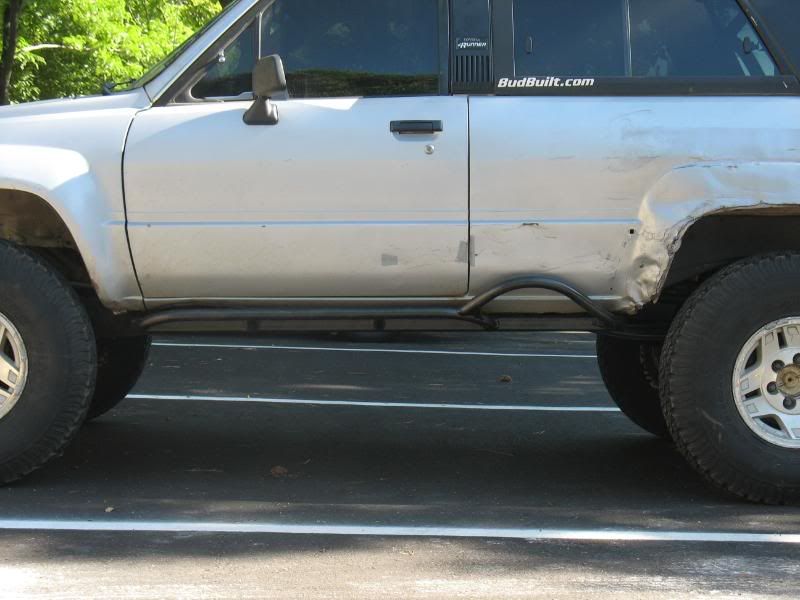
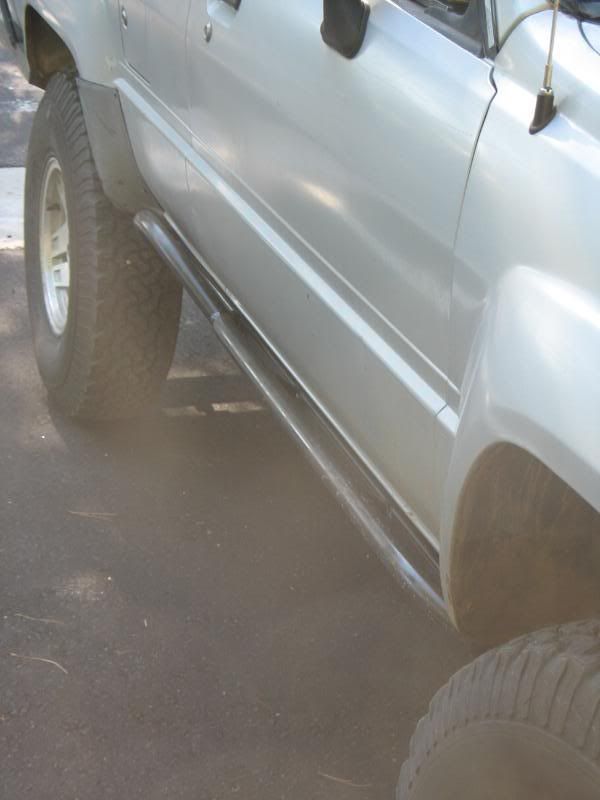
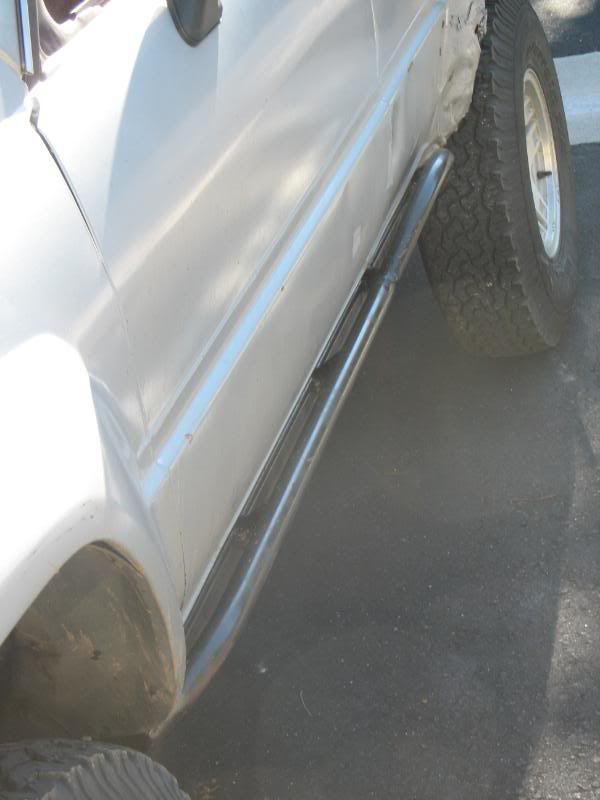
x something on the sliders--very nice.
Seeing builds like this makes me think I need to get a welder and learn to weld again. Awesome work.
On your rear radius arms: are those some modified Cruiser links (Front I think)?
Seeing builds like this makes me think I need to get a welder and learn to weld again. Awesome work.
On your rear radius arms: are those some modified Cruiser links (Front I think)?

 Jul 27, 2009 | 01:13 PM
#35
Thread Starter
Contributing Member
Joined: Apr 2004
Posts: 5,464
Likes: 6
From: Arvada, Colorado
Thanks man!
Thanks! Yup, those are actually Stock front FJ-80 radius arms, with the front mount cut off, and reversed to sit above the axle. They flex pretty well, as my shocks (10" travel) bottom out before the suspension gets fully flexed.
LOL! Just takes practice. You'd be surprised what a good group of friends will get you. The welder is mine, but I borrowed the tube bender, and plasma cutter.
LOL! Just takes practice. You'd be surprised what a good group of friends will get you. The welder is mine, but I borrowed the tube bender, and plasma cutter.
Jul 27, 2009 | 01:20 PM
#36
Contributing Member
Joined: Jul 2003
Posts: 9,076
Likes: 1
From: Orlando, FL
Jul 27, 2009 | 01:43 PM
#37
Contributing Member
Joined: Nov 2005
Posts: 8,875
Likes: 3
From: Longmont, CO
It was really cool when we capped the ends of the tube - it looked like a solid bar (and was heavy enough for you to almost believe it WAS solid!)
Last edited by tc; Jul 27, 2009 at 01:44 PM.
Jul 28, 2009 | 07:35 AM
#39
Thread Starter
Contributing Member
Joined: Apr 2004
Posts: 5,464
Likes: 6
From: Arvada, Colorado
Jul 29, 2009 | 10:31 AM
#40

Registered User
Joined: Dec 2008
Posts: 250
Likes: 0
From: cleveland tn
this is just flat out sexy. great work and you made the interior look sharp! i was worried about how it was going to look early into the thread, but you pulled it off nicely! i feel you on collecting parts slowly, i already have my sfa but won't be able to do the swap till i'm out of college, thats in like 5 years the way its going lol. oh yeah you remember that skid plate i talked about...? its finally made but just not on, the company put the holes in the wrong place so i'll have to re-drill them.
how's the dual cases treating you?
how's the dual cases treating you?


