
Matt1992's 92' 4Runner Rear Quarter Fab with FENDERS!!!
 Nov 3, 2013 | 10:19 PM
#1
Thread Starter
Contributing Member
Joined: Mar 2010
Posts: 34
Likes: 0
From: Winnipeg
Matt1992's 92' 4Runner Rear Quarter Fab with FENDERS!!!
Hey All,
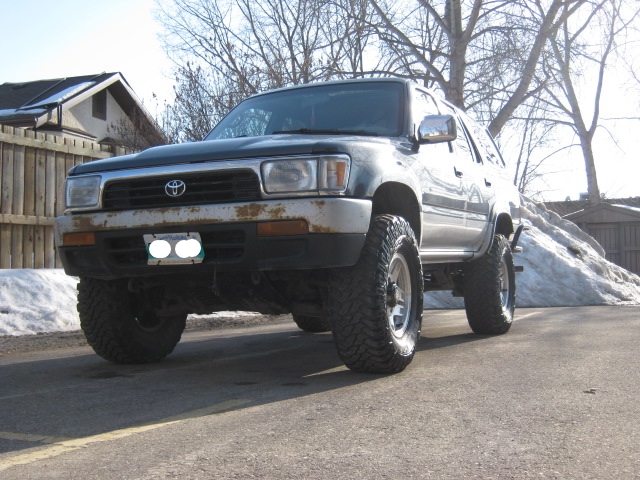
I have started up my quarter panel project finally, I feel like I have been putting off for too long. Now I know my Runner does not look as gruesome nor as rusty as other 4Runners out there but hopefully this gives everyone an idea what front fenders look like on the quarter panels, also how much work went into it. This is rig is originally from �Wild Rose Country� Alberta and spent most of its life there and now she found her way back to �Friendly� Manitoba with me.
Starting with brain storming on what I wanted to use as replacement body parts and where to cut was a little tricky to begin the project especially without blowing your own budget. My 3 options I boiled down to is as follows:
1.) Fiberglass replacement panels. toyotafiberglass.com
2.) "Wolf Steel" steel replacement. alfaparts.net
3.) Front fenders and a little fabing. (Got used and from local supplier)
I started with choosing option #2 and what a mistake that was. The panels they gave you weren�t too bad for what they were, but they still required fabing. Another thing I will point out about these steel replacement panels is that they did NOT cover that area that is hidden by the factory bumper end caps. So at the end of the day it seemed pretty pricey for what you got, luckily I was able to send them back. After having said that, the price of 2 fenders for $160 seemed to be quite right (1 new and 1 used). Now I have to take into account that I had extra metal lying around which also reduced my cost on panels. Some of you may be asking why I didn�t go with option 1? Well I never personally worked with fiberglass myself and I heard good and bad things about it, whether or not the kind of stuff I heard is true or not is another story. I still think it�s a cool idea but I felt much more comfortable working with metal.
Front Fenders one the rear quarter panels? What the HECK?!?!?! Yes, you read that correct. I took the Left Front fender used it on the Right Rear � panel and the Right Front fender and used it on the Left Rear � panel. With how minimal my rust was, I was able to cut before the curve flaring out the wheel well and enable me to weld to the surface without distorting the effect of the factory flare. With cutting approx. 3� of the height of the fender using the radius of the wheel well, I ended up tucking the fender piece up and behind the original body piece that way it eliminates water trickling down in between the panels and also gave me sort of a low spot where I could fill my putty up to. I have to say though it obviously didn�t fit 100% and you should expect that, what issues I ran into was where the arch came down around the dog leg area, I needed to make some pie/ relief cuts and massage down the pointy/ high spots in the metal and this was because the arch was binding.
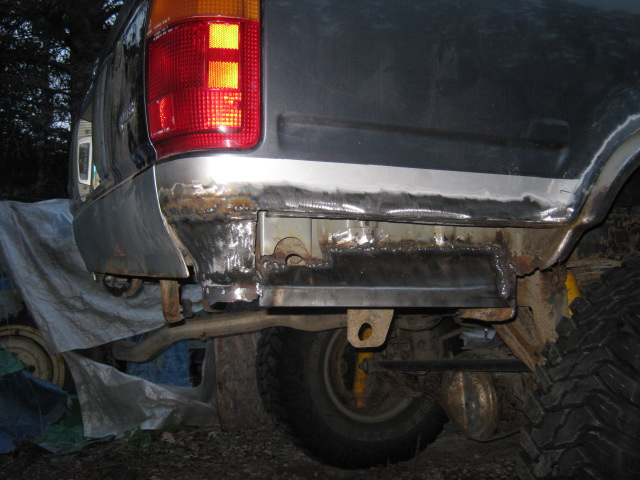
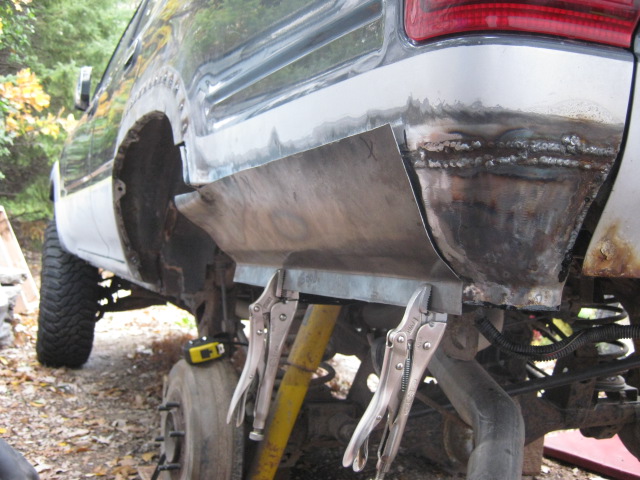
In addition to the fender pieces being on the rear, we started with making up the panels where the bumper sides were. The Right Rear Inner piece needed to be remade, driver side was okay besides a bit of pitting and starting to become a little perforated. Next was cutting up a piece of metal for outer panel which got bent, rolled and slightly formed utilizing a vise, sheet metal vise grips, hammer and a nice round metal tube. The way this piece that I manufactured, eliminated the indent for the factory bumper which means that the radius that is at the bottom also needed to be slightly modified/ pulled out. So the panel where the bumper end piece once was got tacked in place and a little piece of metal in the shape of a diamond was made up to mate that panel to the wheel tub. Final piece that needed to be made up was the �dog leg� which we quickly heated and rolled around the rocker. It got formed into place by hammering then tacking and�. Repeat until it looked decent and was good enough to weld to the fender piece.
During the project I have been using POR15 to minimize any future rusting issues, POR15 Needs to be used with Marine Clean and the Prep & Ready before application, Hands down, There is no if ands or buts. Be cautious when welding panels with the back coated in this stuff, it does have the tendency start a small flame and for some people who are curious, NO POR15 is not weld through. I have used special weld through primer by UPOL which I am hoping will do some good in the long run on this project. I will be putting on a couple of layers of putty and glaze putty to get the body a bit straighter. The metal and putty work did not have to be 100% perfect because the bedliner I used hid most imperfection�s. I used UPOL �Tintable� Raptor Liner A.K.A. Bed Liner, This product was super easy to use and it seemed to stretch quite a bit. I found later on though I could have gone a bit heavier in a couple areas but all in all, The product looked nice plus the color match was pretty good too especially since my truck is a metallic color. (You need to get your own paint mixed using your color code then mix it in with the raptor liner, instructions come with the Raptor liner kit)
To go with my panel repair, I lucked out and was still able to get a minty 4runner tailgate. Good thing to because mine is pretty well shot. I also used POR15 on the top and bottom �prone to rust area�s� and I also made a couple extra drain hole in the bottom of the gate to get rid of any water because we all know it will make it there one way or another. To reduce some shop time I went and got Maaco, They were reasonably priced and where I went actually did a pretty good paint job, Nothing is stuck in the paint. Mind you I did take the guts out and just gave them just the shell already sanded somewhat. I had it only painted gray, I shot the Raptor Liner on the get myself.
So this is how the project went�
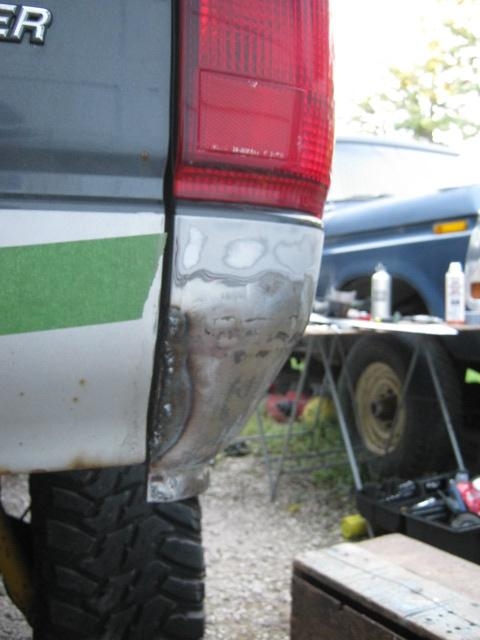
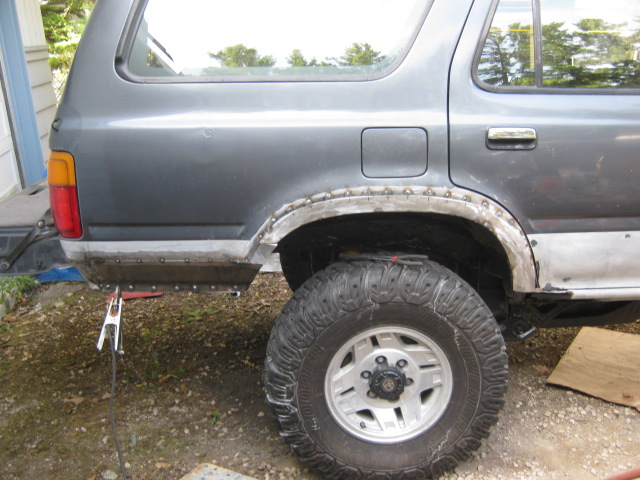
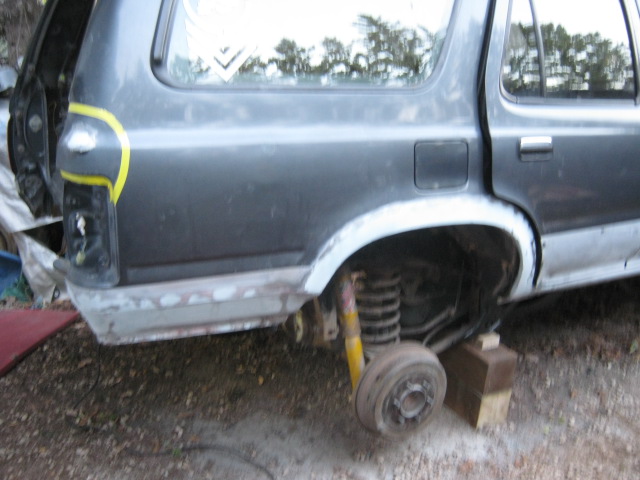
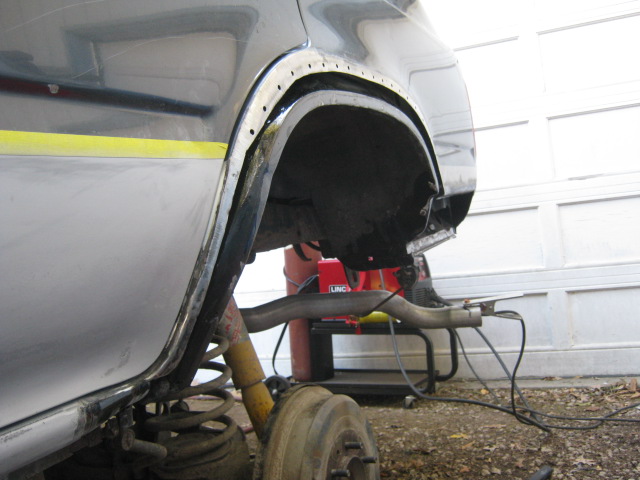
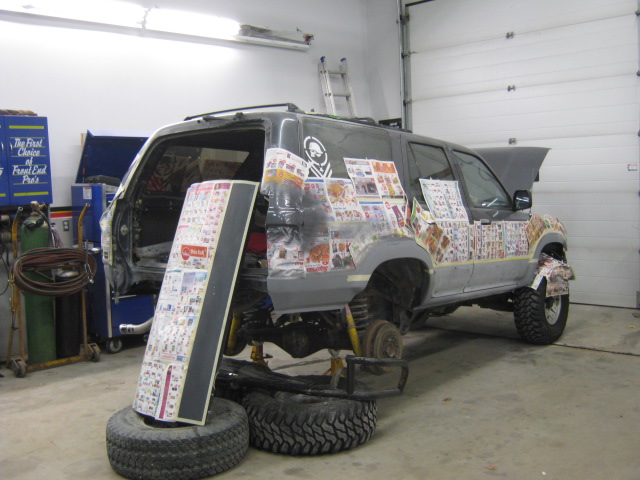
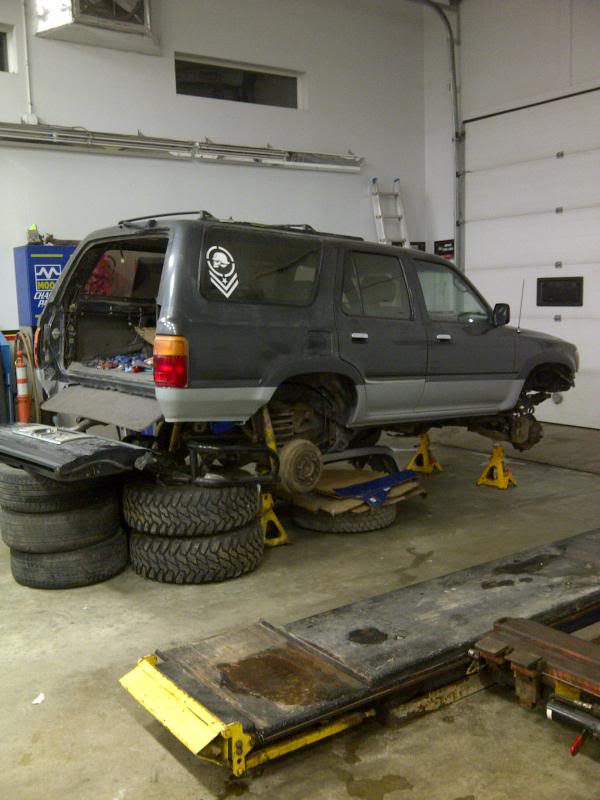
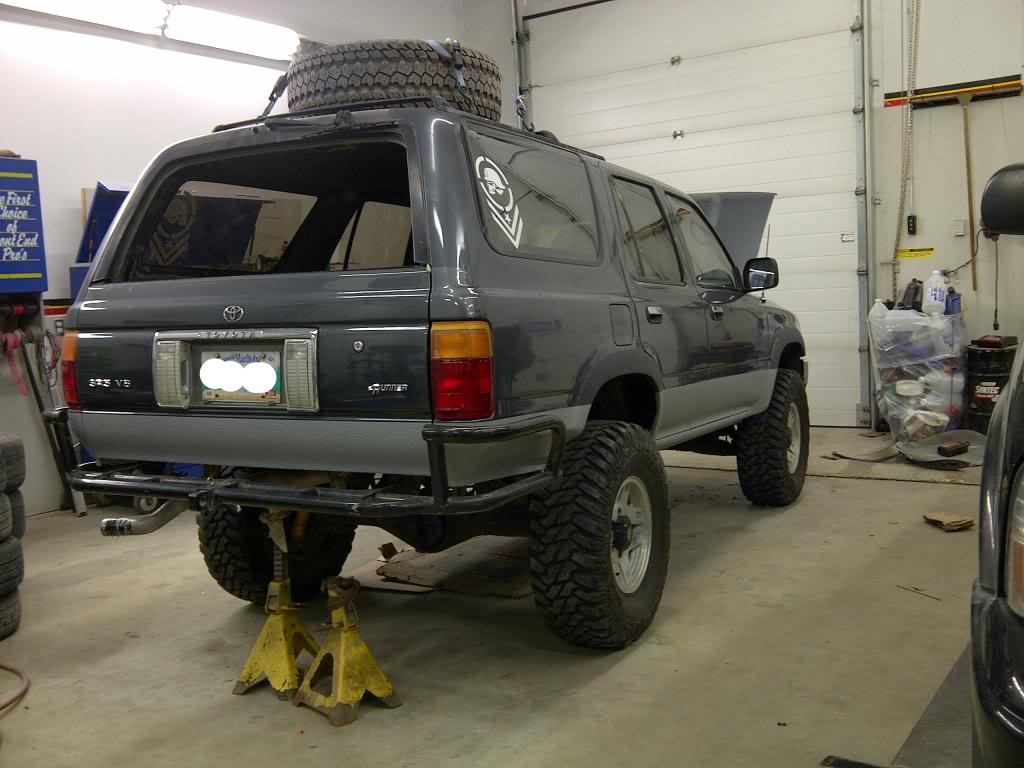
Pre- Project photos
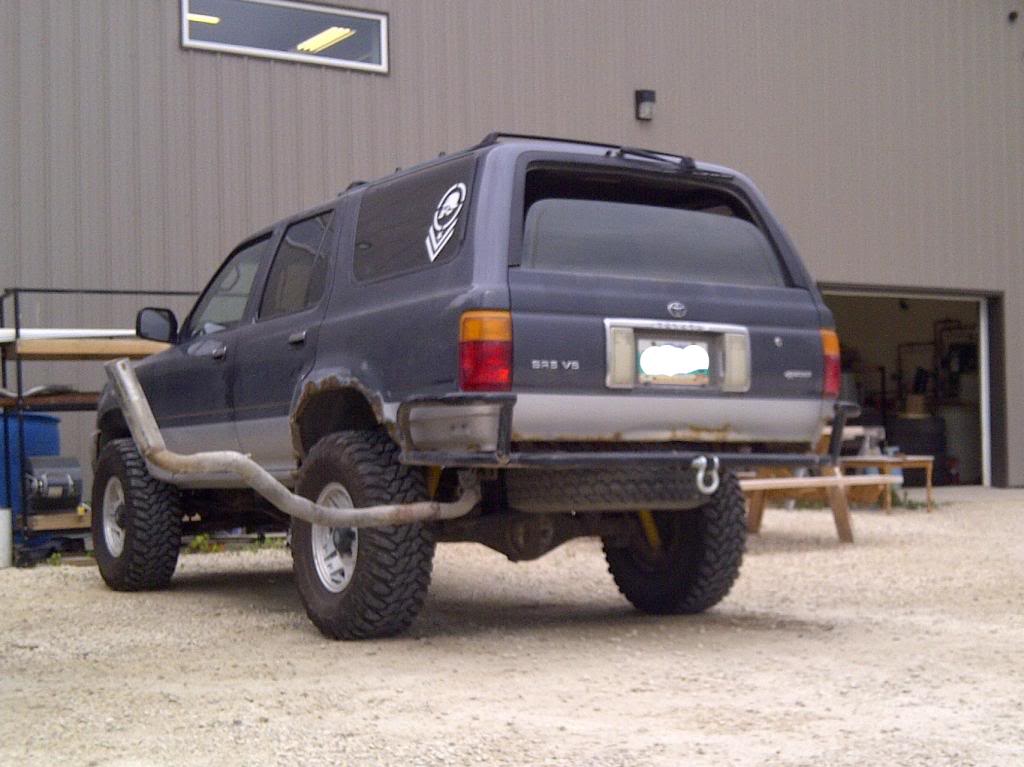
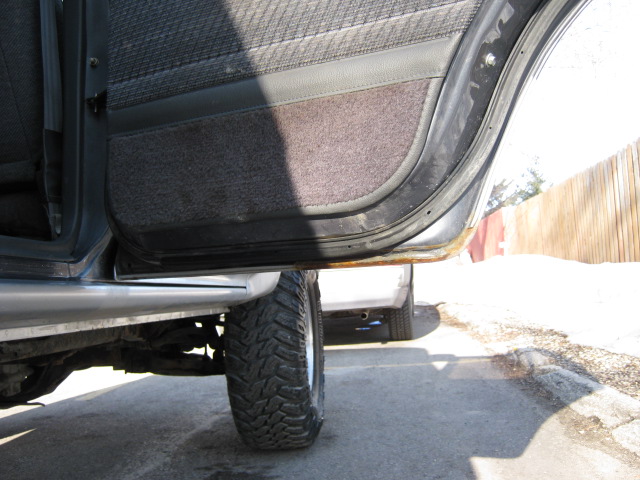
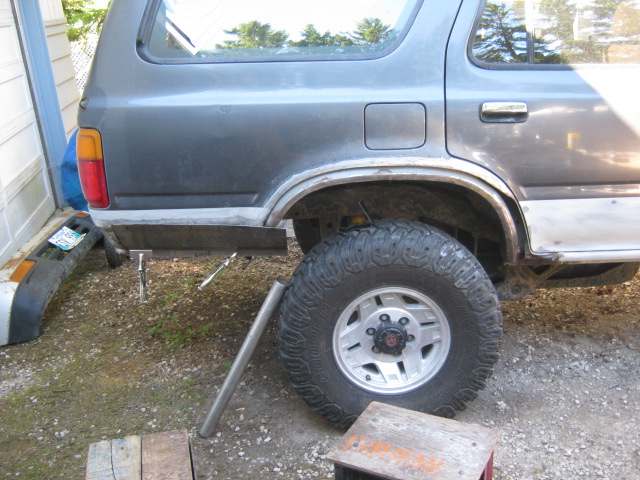
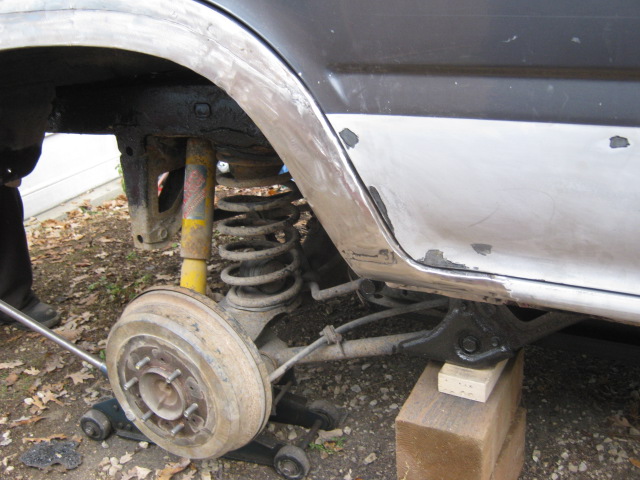
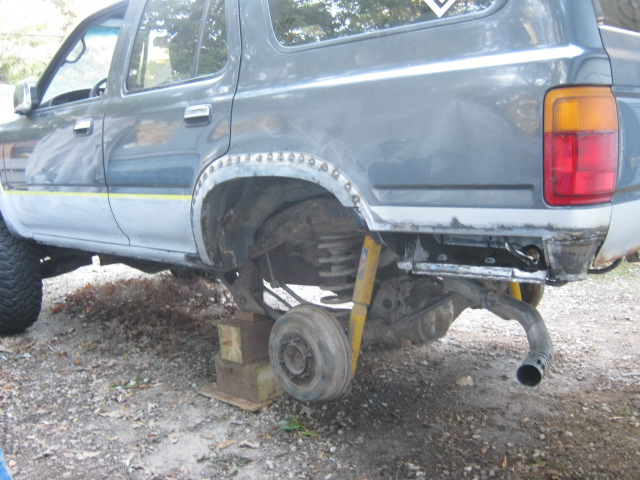
Don't mind my wicked exhaust, I just wanted to show off my wheel arch grinded down...


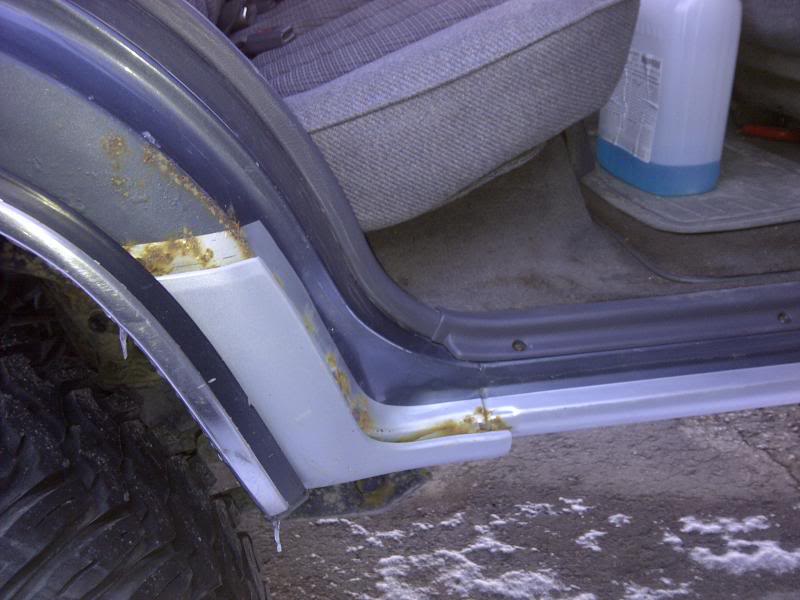
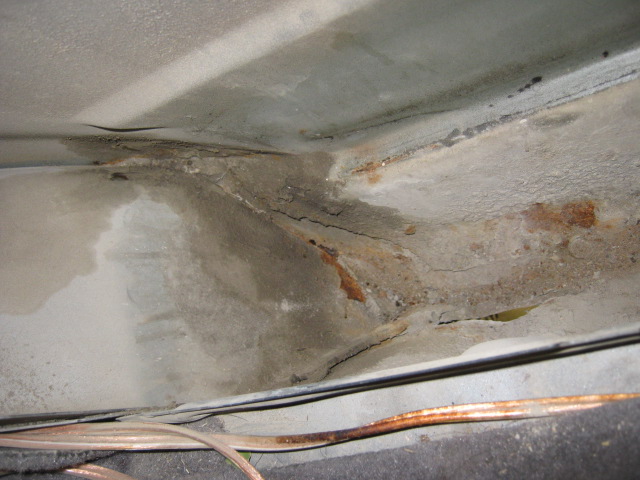
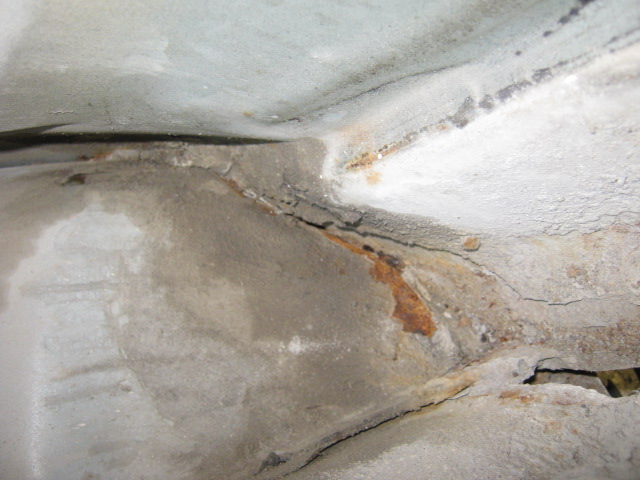
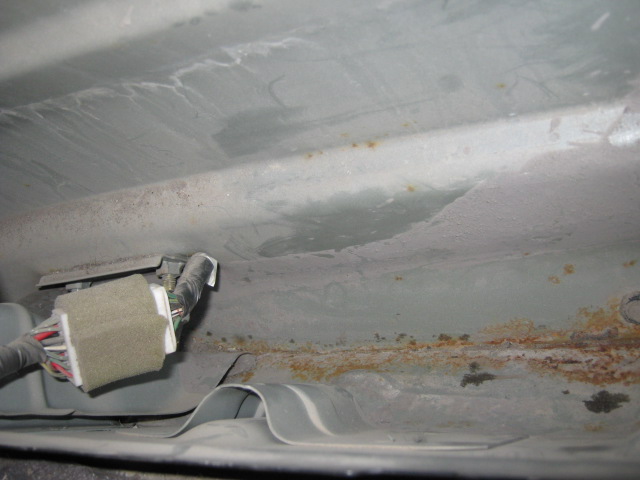
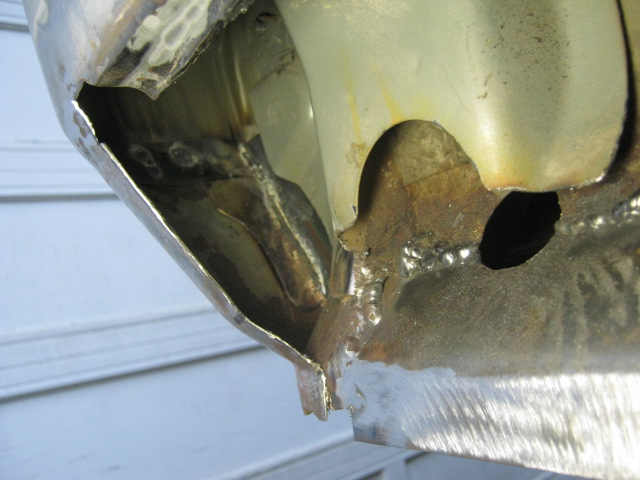
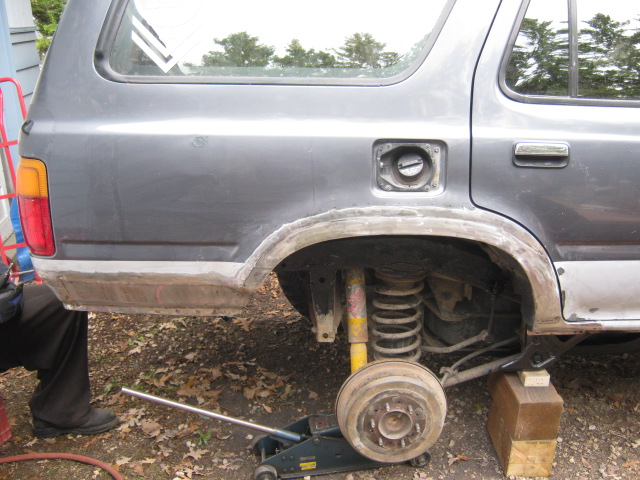
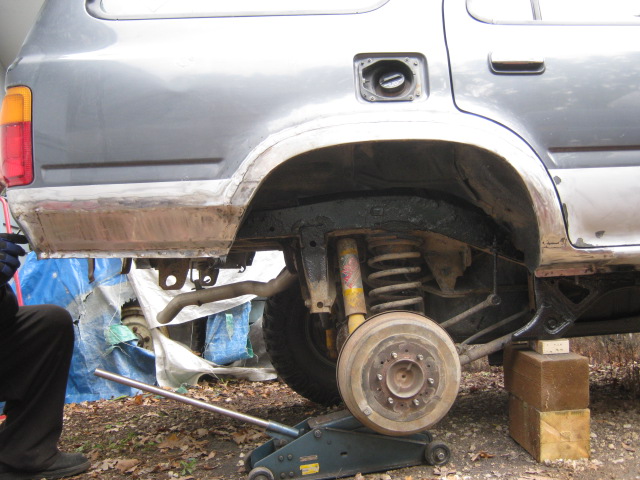
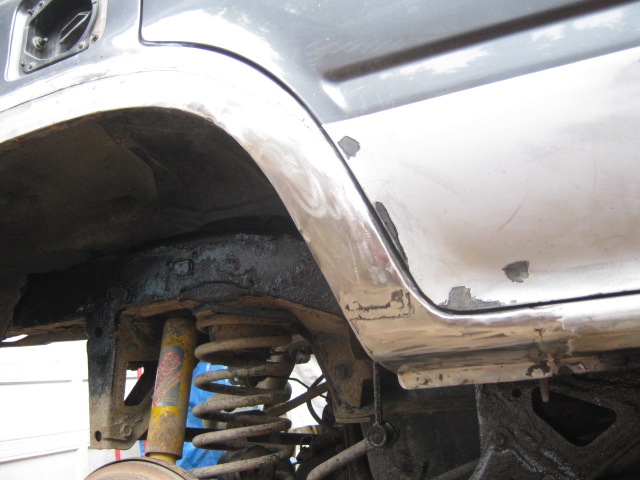
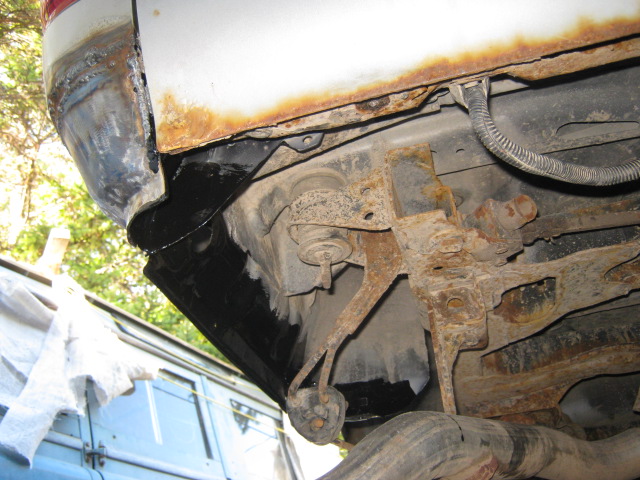
Inside of rear quarters (Sorry about photos, Not the greatest)

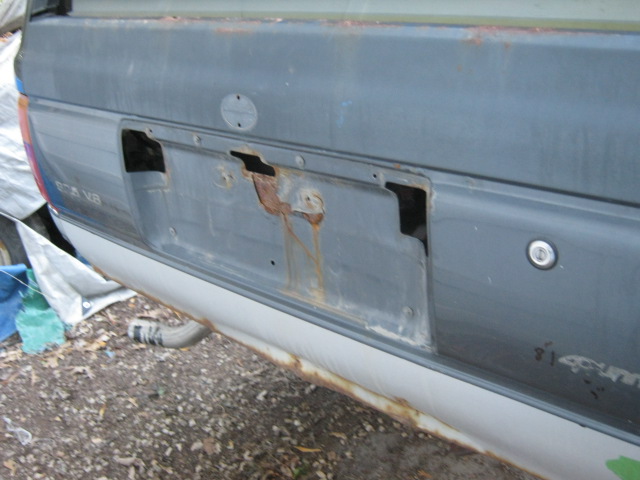
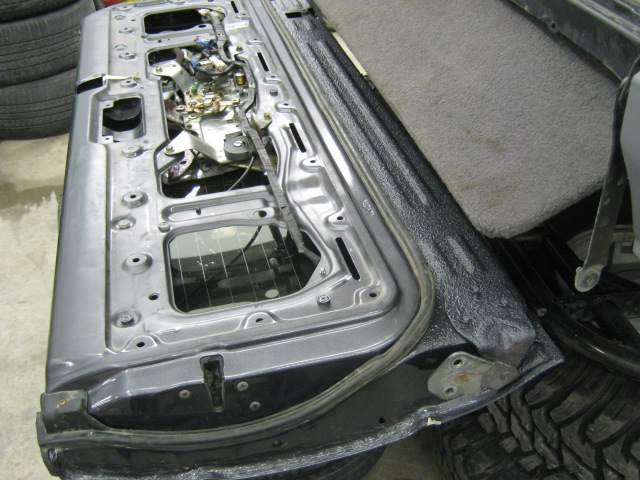
New tailgate.... Stripped, Gutted, POR15'd Painted... V/V
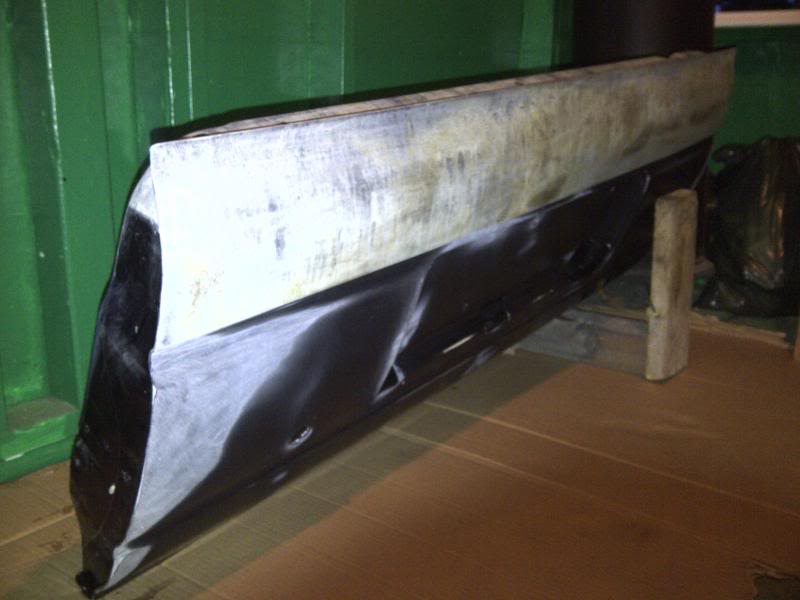
Right down to bare metal. Marine Cleaned (Degreased) Prep&Ready (Metal etcher). You can see how it etches the metal and really dehydrates it.
PORD'd

Skipped a few steps and had it sprayed by Maaco, It looks good! but lets see how long it will stick . Good enough for a truck like this.
NOW! Time for the Cutting, Fabbing, Grinding and you name it! It's all next...
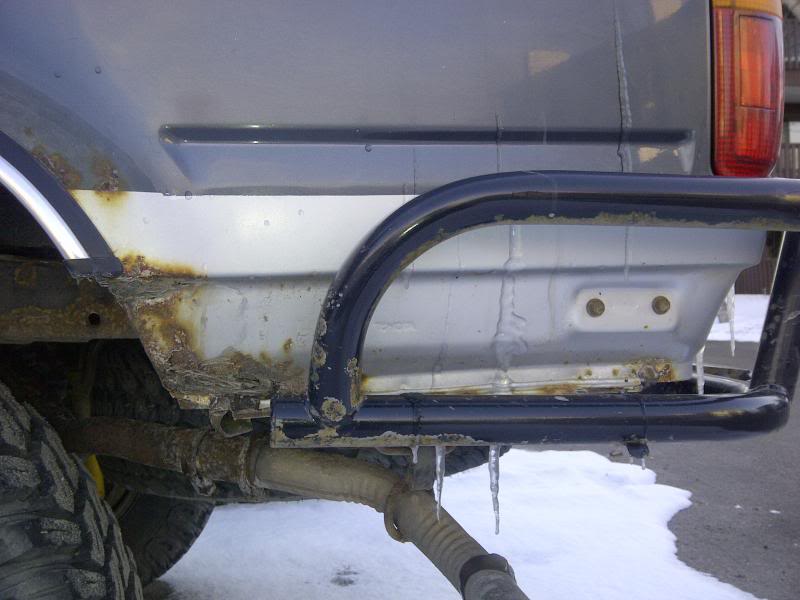
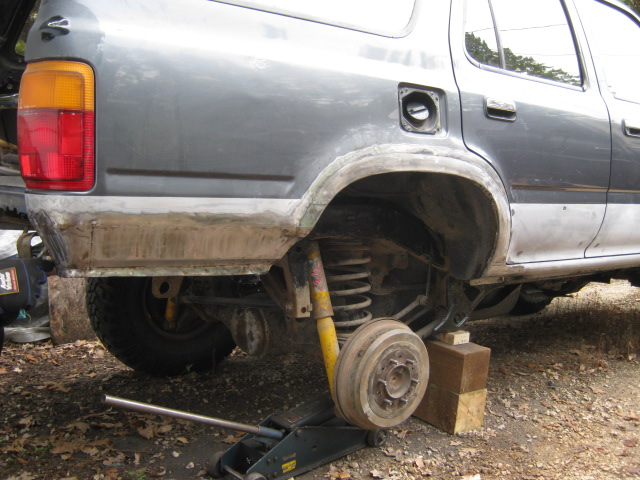
Well... This is where the rust stops and this is where I stop cutting... NOT!
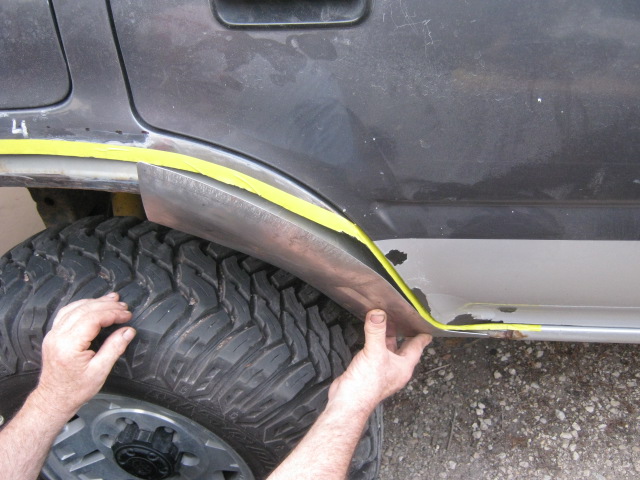
This is what a Wolf Steel Dog Leg looks like, Beautiful ain't it? well I am sorry I forgot to take a photo of their quarter panel piece, If I did well then it would bring a tear to a glass eye. Well you can see how crappy this fits...
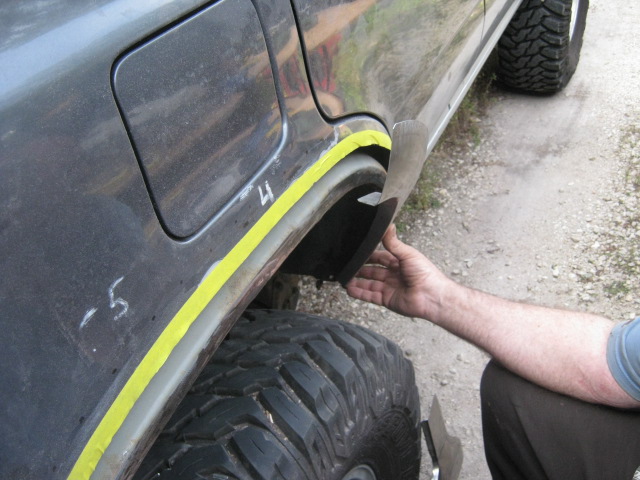
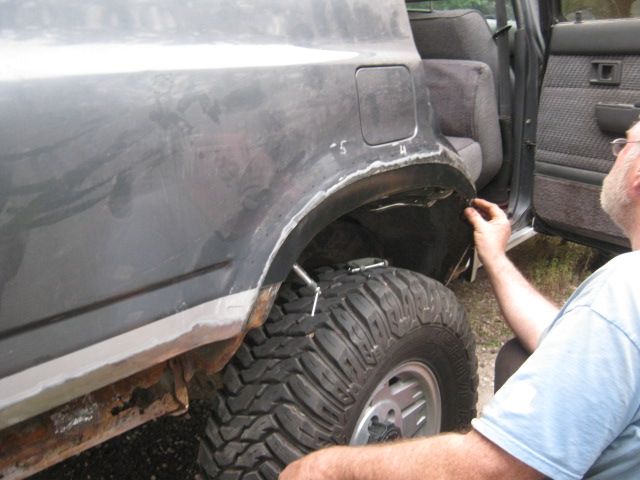
My helper carefully observing the piece I trimmed away from a front fender...
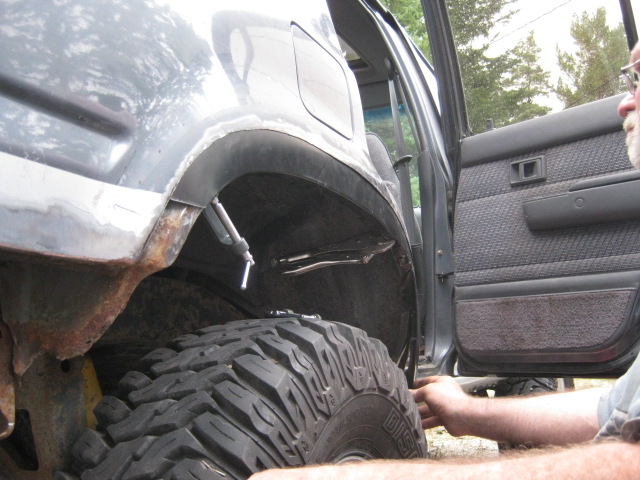
This was a bit of a tricky part, trying to get the two panels to lap while the fender piece was buckling. Had to make some relief cuts and such. We did it a bit different on the drivers side though mind you I am not sure I got a photo.

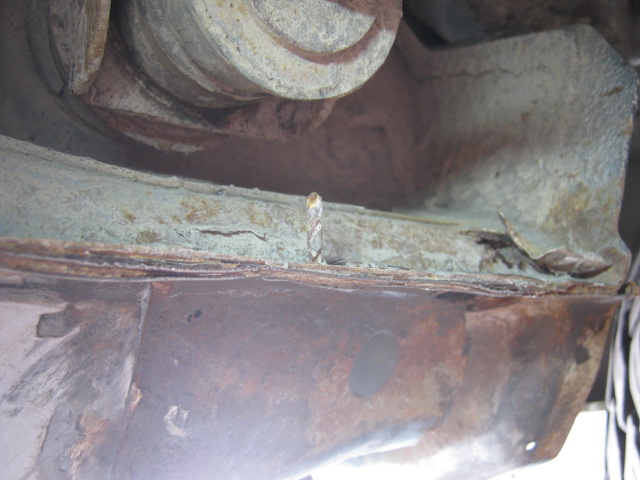
Drill bit left over from previous patch job + beautiful RUST!

This piece was a dog and pony show for us for a reason or two but we managed to make it easier on the other side, Round 2!
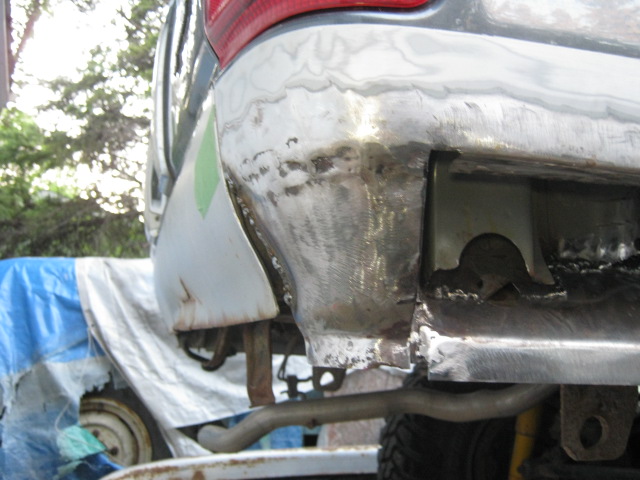
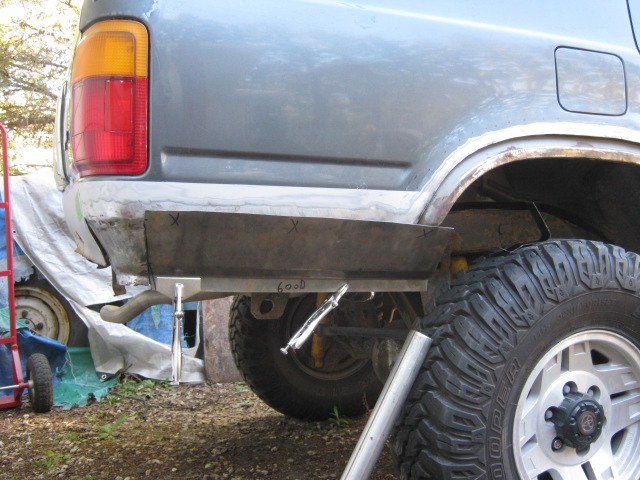
That Diamond shaped piece I was talking about earlier, Well you can see where it goes now.

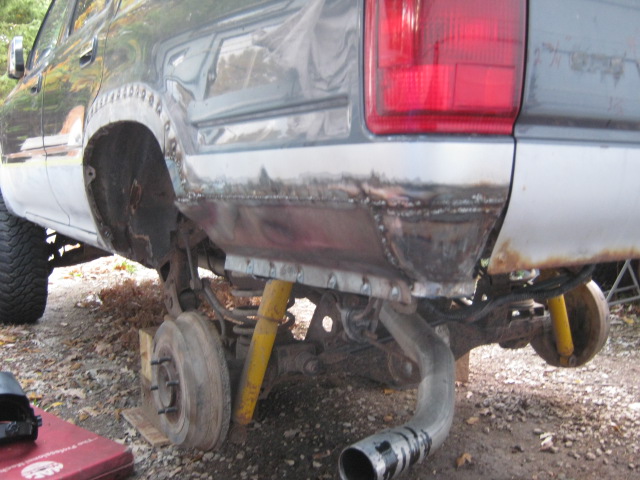
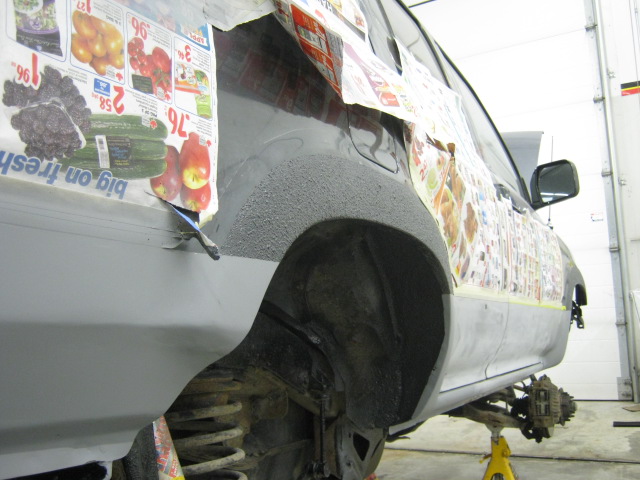
POR'd (Black stuff)

Don't Judge my exhaust, I know its hanging down way too low!
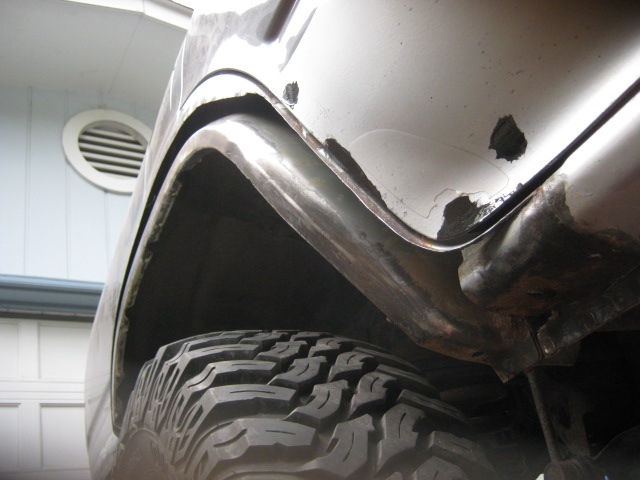
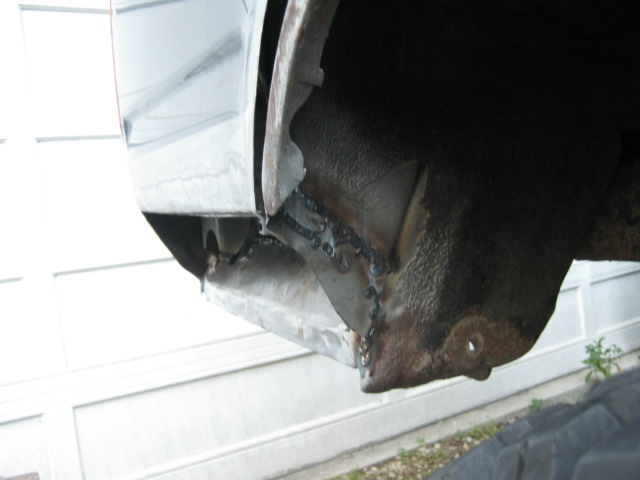
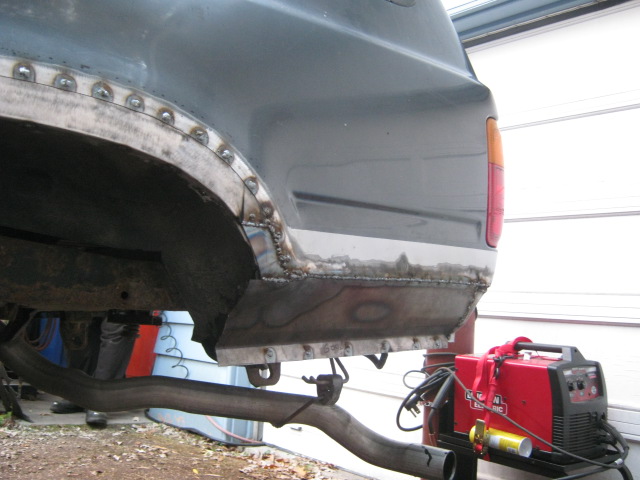
Okay well maybe I did take a photo of this, Looks like we kept some metal on the body side and just left it slipped in behind. That way we can just lap weld her instead of doing is right at a bend.
Nice old tailgate... RIP


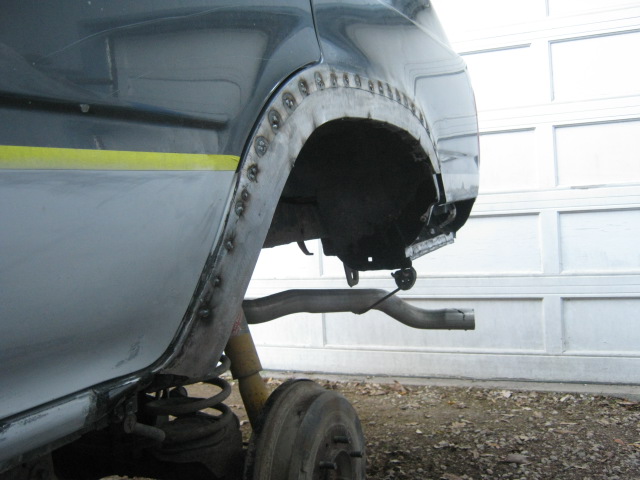
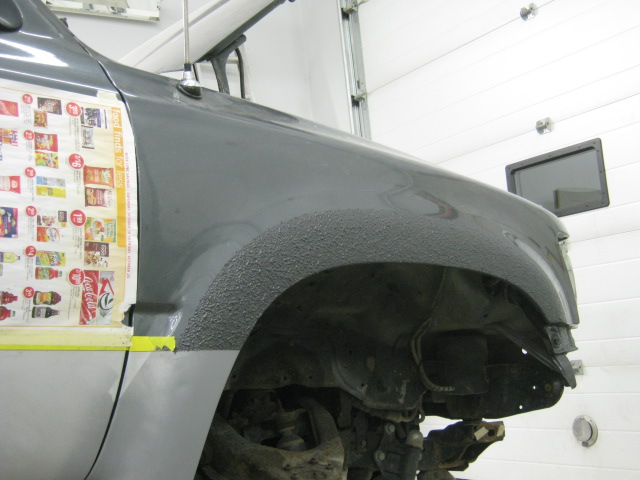
Beautiful countless hours of puttying and sanding...
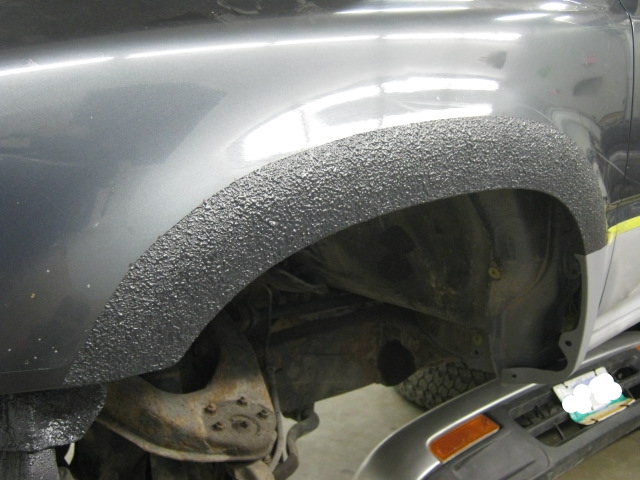
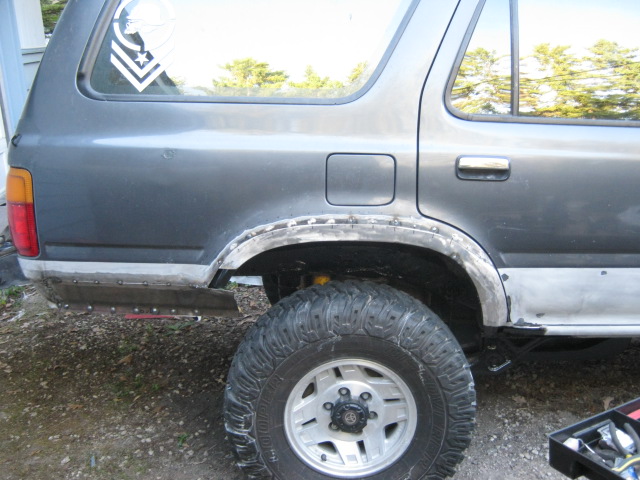
Project Complete! I will need to take more photos soon and post but this is all I got for now folks!
Like I said before, the Raptor Liner sure hid a lot of imperfections but it turned out nice! I only ended up using 3 out of the 4 bottles of Raptor liner on this project. This is what 1 1/2 months (working on the weekend) and $2000 (in Canadian monopoly money) later looks like ball parking it.
Well I hope you enjoyed my first post and hopefully this is the last time we all gotta see this 4Runner get some quarter panel work done!
As for my next project, I will be looking more into bumpers and body armor. I would like to fab something up on the trail gear bumper to support a swing out tire carrier and as for the front... well I got many ideas in my head right now but the goal is to get a receiver slot up front so I swap my winch front to back. If anyone has any ideas feel free to POST!
I have started up my quarter panel project finally, I feel like I have been putting off for too long. Now I know my Runner does not look as gruesome nor as rusty as other 4Runners out there but hopefully this gives everyone an idea what front fenders look like on the quarter panels, also how much work went into it. This is rig is originally from �Wild Rose Country� Alberta and spent most of its life there and now she found her way back to �Friendly� Manitoba with me.
Starting with brain storming on what I wanted to use as replacement body parts and where to cut was a little tricky to begin the project especially without blowing your own budget. My 3 options I boiled down to is as follows:
1.) Fiberglass replacement panels. toyotafiberglass.com
2.) "Wolf Steel" steel replacement. alfaparts.net
3.) Front fenders and a little fabing. (Got used and from local supplier)
I started with choosing option #2 and what a mistake that was. The panels they gave you weren�t too bad for what they were, but they still required fabing. Another thing I will point out about these steel replacement panels is that they did NOT cover that area that is hidden by the factory bumper end caps. So at the end of the day it seemed pretty pricey for what you got, luckily I was able to send them back. After having said that, the price of 2 fenders for $160 seemed to be quite right (1 new and 1 used). Now I have to take into account that I had extra metal lying around which also reduced my cost on panels. Some of you may be asking why I didn�t go with option 1? Well I never personally worked with fiberglass myself and I heard good and bad things about it, whether or not the kind of stuff I heard is true or not is another story. I still think it�s a cool idea but I felt much more comfortable working with metal.
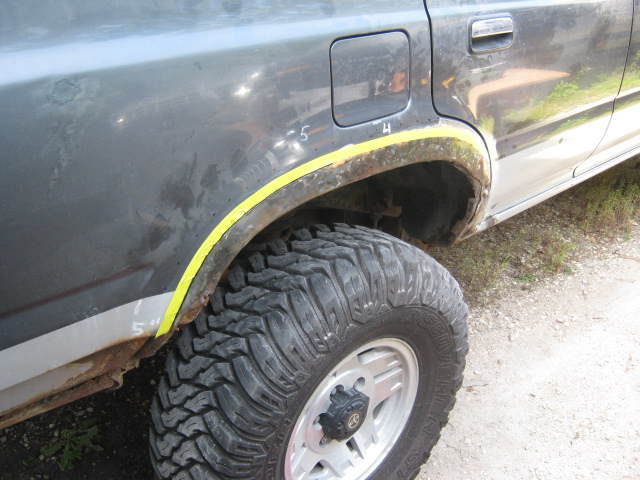
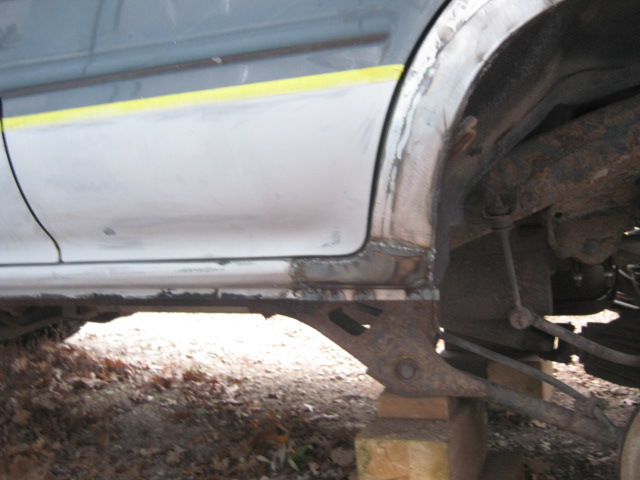
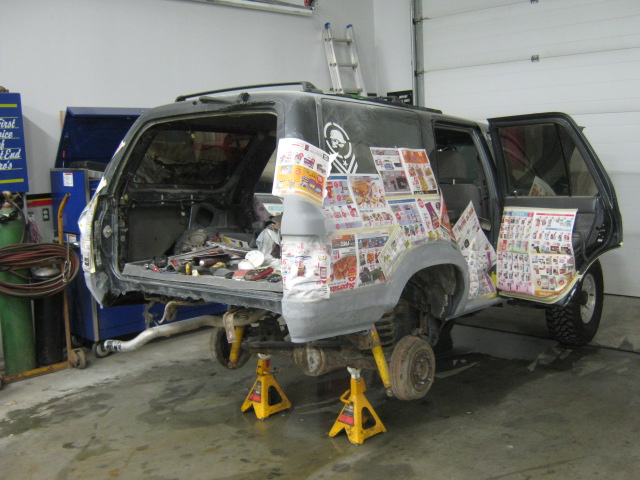
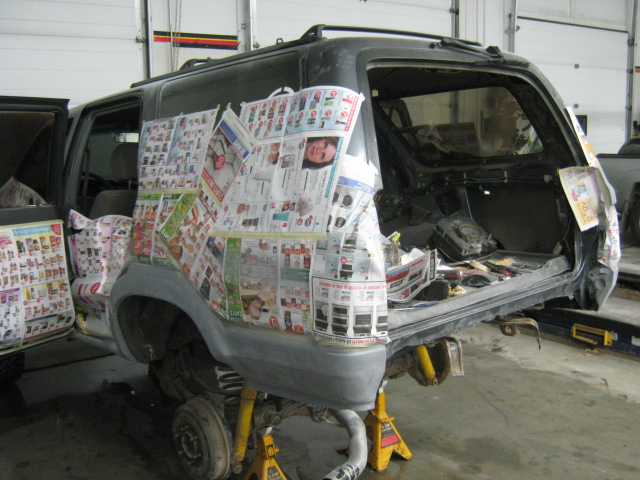
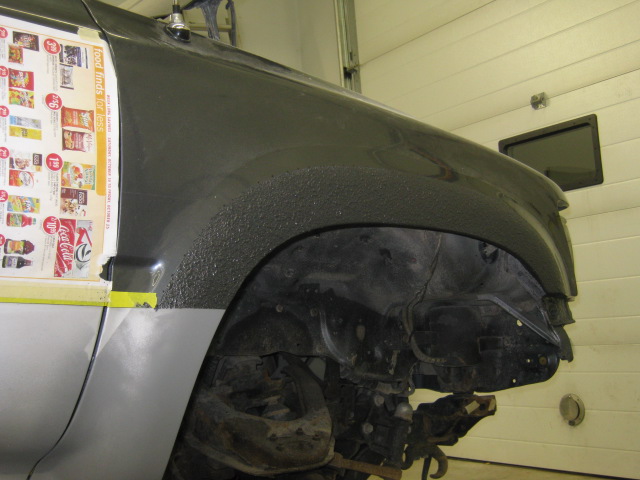
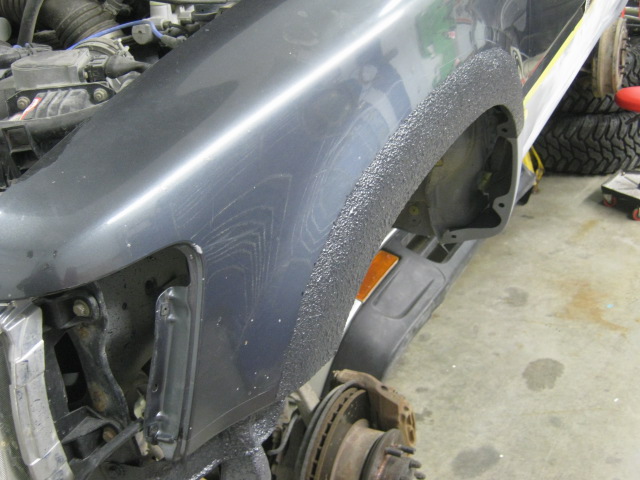
Front Fenders one the rear quarter panels? What the HECK?!?!?! Yes, you read that correct. I took the Left Front fender used it on the Right Rear � panel and the Right Front fender and used it on the Left Rear � panel. With how minimal my rust was, I was able to cut before the curve flaring out the wheel well and enable me to weld to the surface without distorting the effect of the factory flare. With cutting approx. 3� of the height of the fender using the radius of the wheel well, I ended up tucking the fender piece up and behind the original body piece that way it eliminates water trickling down in between the panels and also gave me sort of a low spot where I could fill my putty up to. I have to say though it obviously didn�t fit 100% and you should expect that, what issues I ran into was where the arch came down around the dog leg area, I needed to make some pie/ relief cuts and massage down the pointy/ high spots in the metal and this was because the arch was binding.
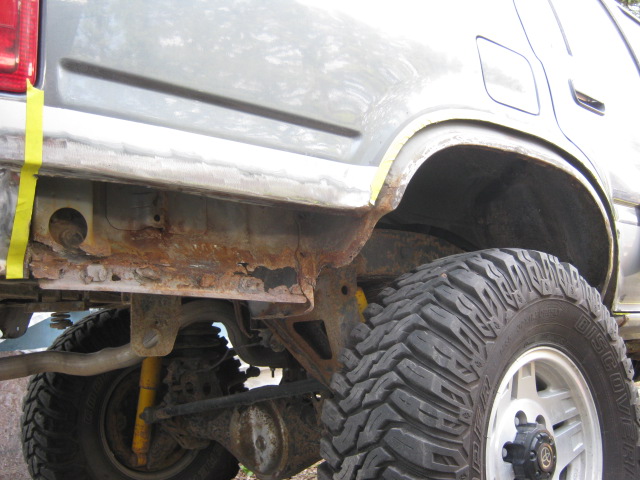
In addition to the fender pieces being on the rear, we started with making up the panels where the bumper sides were. The Right Rear Inner piece needed to be remade, driver side was okay besides a bit of pitting and starting to become a little perforated. Next was cutting up a piece of metal for outer panel which got bent, rolled and slightly formed utilizing a vise, sheet metal vise grips, hammer and a nice round metal tube. The way this piece that I manufactured, eliminated the indent for the factory bumper which means that the radius that is at the bottom also needed to be slightly modified/ pulled out. So the panel where the bumper end piece once was got tacked in place and a little piece of metal in the shape of a diamond was made up to mate that panel to the wheel tub. Final piece that needed to be made up was the �dog leg� which we quickly heated and rolled around the rocker. It got formed into place by hammering then tacking and�. Repeat until it looked decent and was good enough to weld to the fender piece.
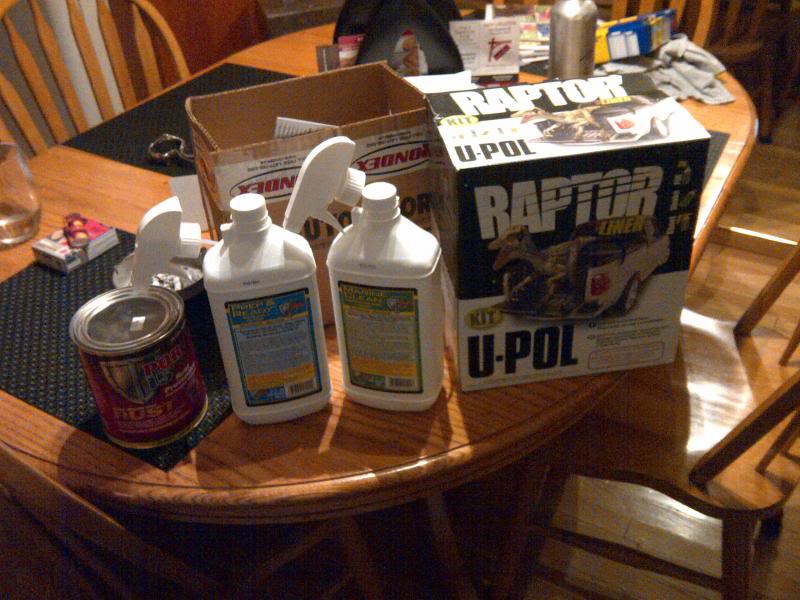
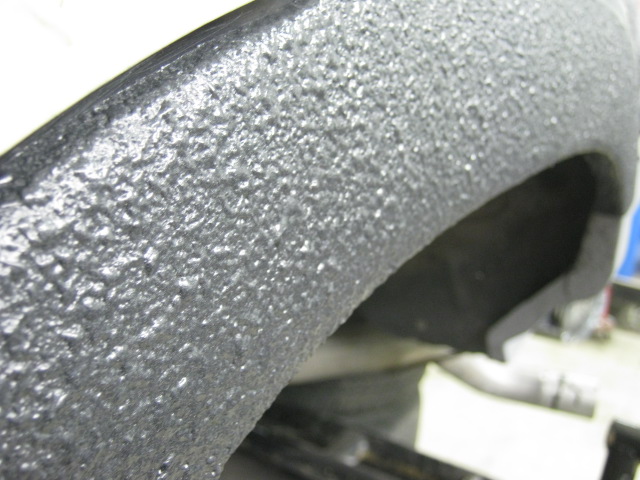
During the project I have been using POR15 to minimize any future rusting issues, POR15 Needs to be used with Marine Clean and the Prep & Ready before application, Hands down, There is no if ands or buts. Be cautious when welding panels with the back coated in this stuff, it does have the tendency start a small flame and for some people who are curious, NO POR15 is not weld through. I have used special weld through primer by UPOL which I am hoping will do some good in the long run on this project. I will be putting on a couple of layers of putty and glaze putty to get the body a bit straighter. The metal and putty work did not have to be 100% perfect because the bedliner I used hid most imperfection�s. I used UPOL �Tintable� Raptor Liner A.K.A. Bed Liner, This product was super easy to use and it seemed to stretch quite a bit. I found later on though I could have gone a bit heavier in a couple areas but all in all, The product looked nice plus the color match was pretty good too especially since my truck is a metallic color. (You need to get your own paint mixed using your color code then mix it in with the raptor liner, instructions come with the Raptor liner kit)
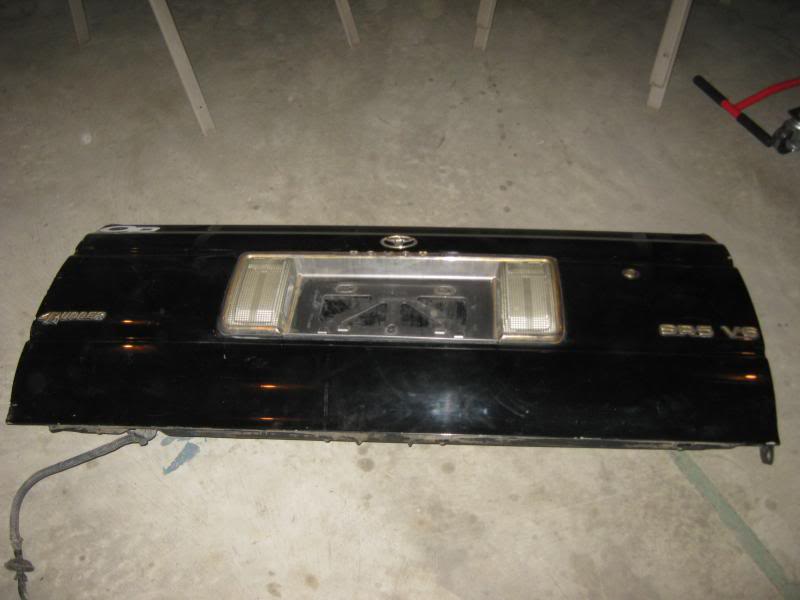
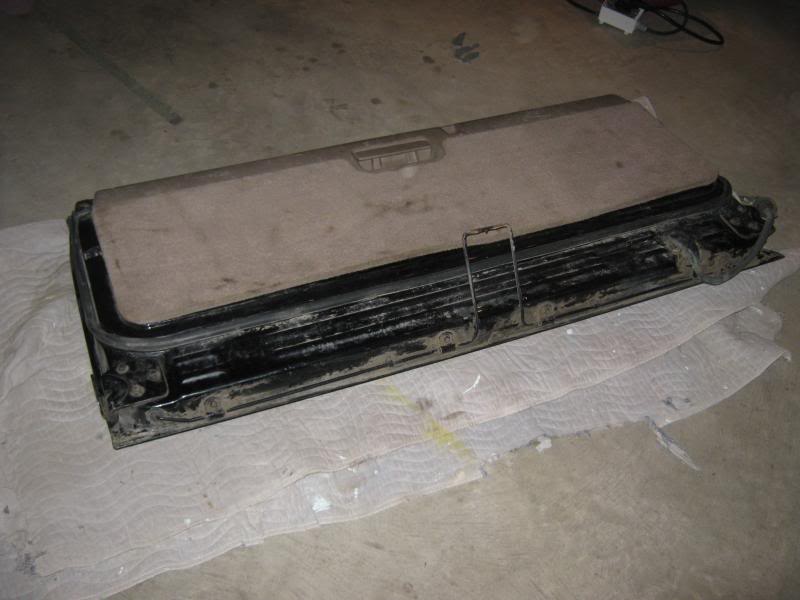
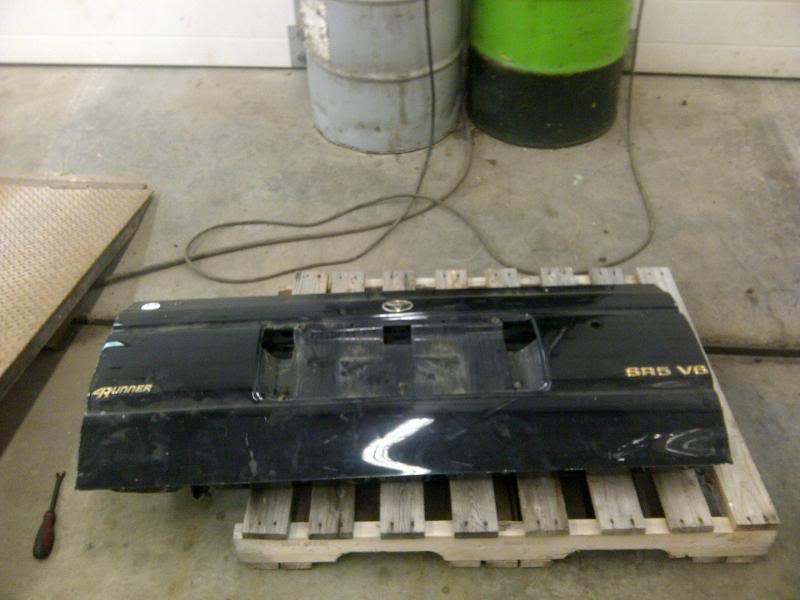
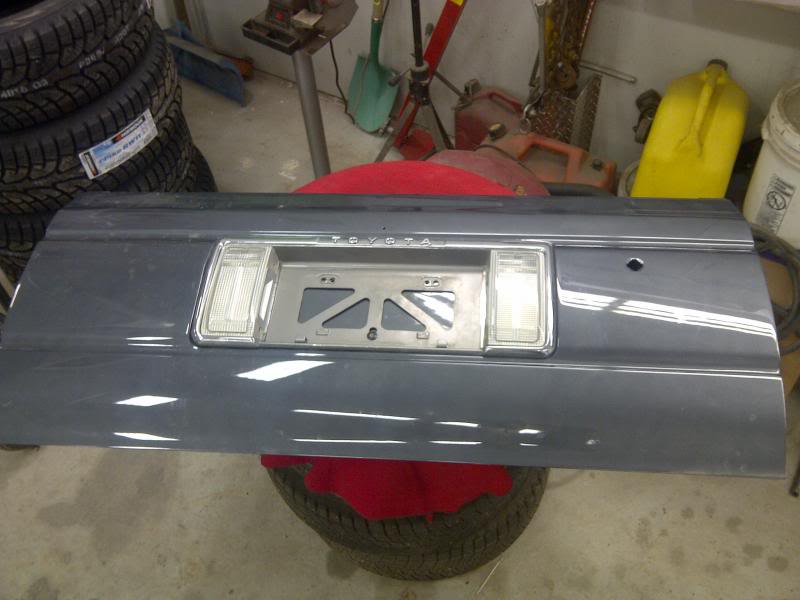
To go with my panel repair, I lucked out and was still able to get a minty 4runner tailgate. Good thing to because mine is pretty well shot. I also used POR15 on the top and bottom �prone to rust area�s� and I also made a couple extra drain hole in the bottom of the gate to get rid of any water because we all know it will make it there one way or another. To reduce some shop time I went and got Maaco, They were reasonably priced and where I went actually did a pretty good paint job, Nothing is stuck in the paint. Mind you I did take the guts out and just gave them just the shell already sanded somewhat. I had it only painted gray, I shot the Raptor Liner on the get myself.
So this is how the project went�
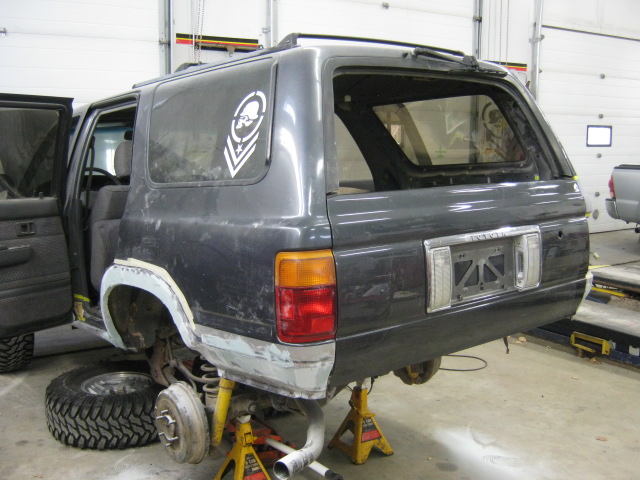
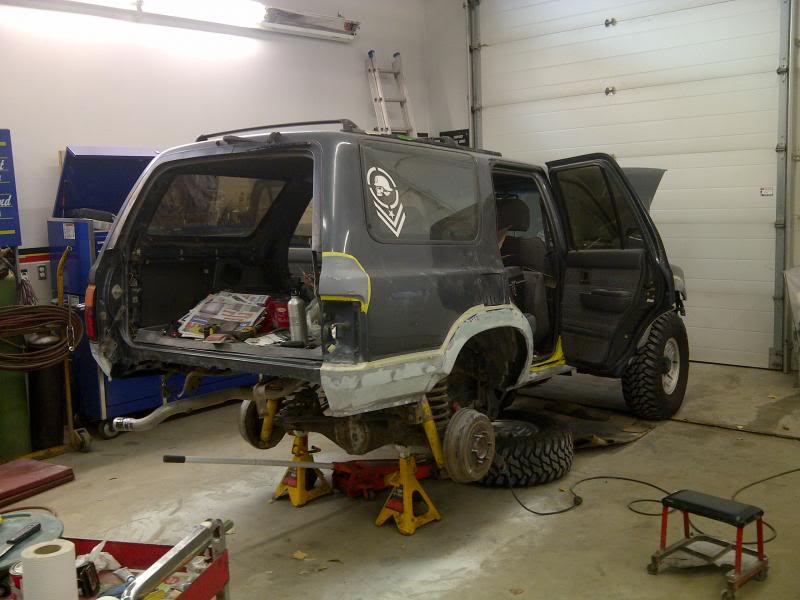
Pre- Project photos
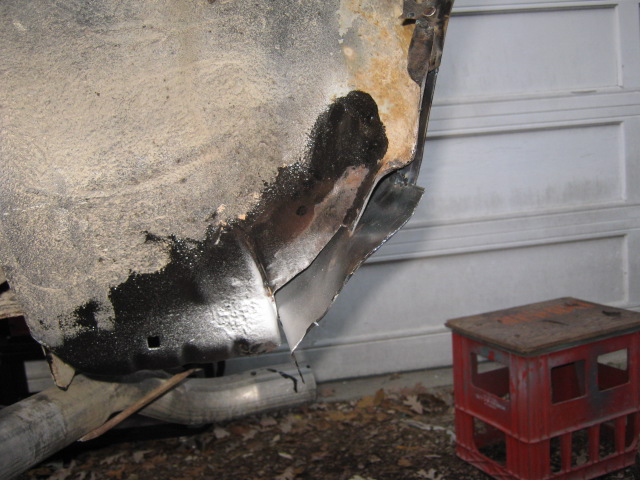
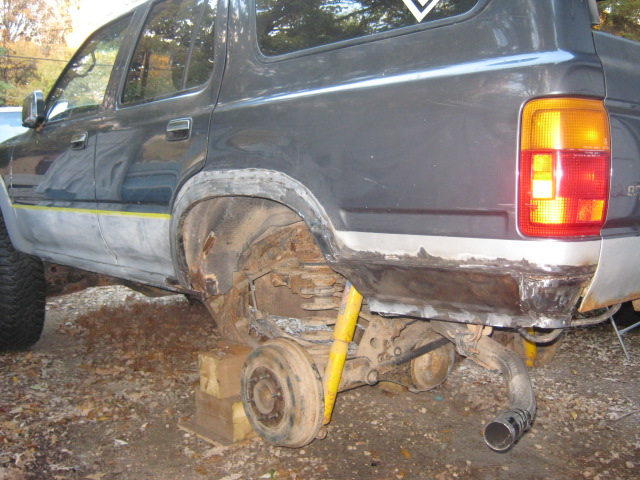
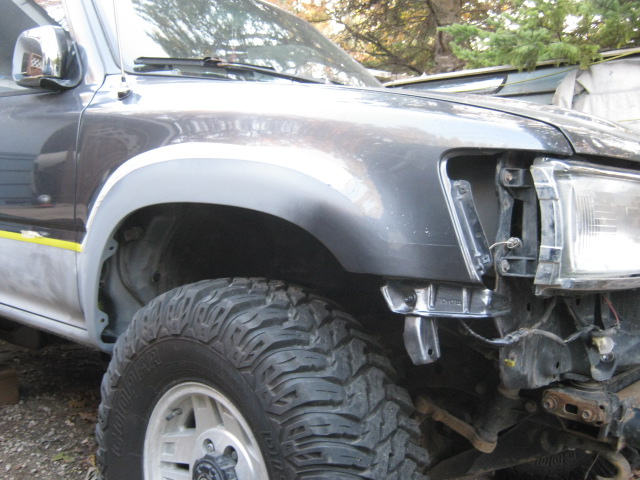
Don't mind my wicked exhaust, I just wanted to show off my wheel arch grinded down...
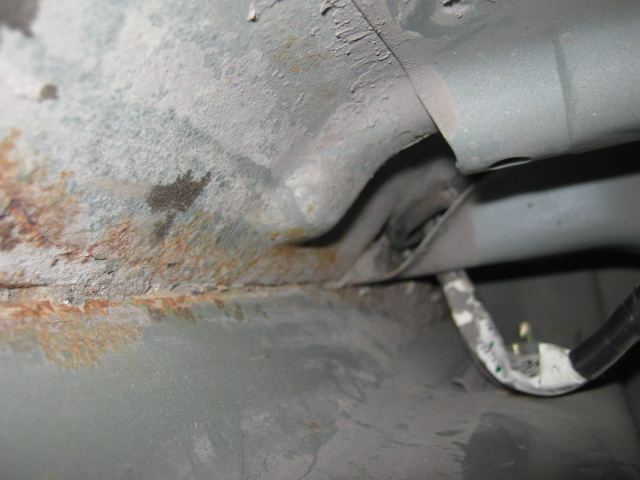
Inside of rear quarters (Sorry about photos, Not the greatest)
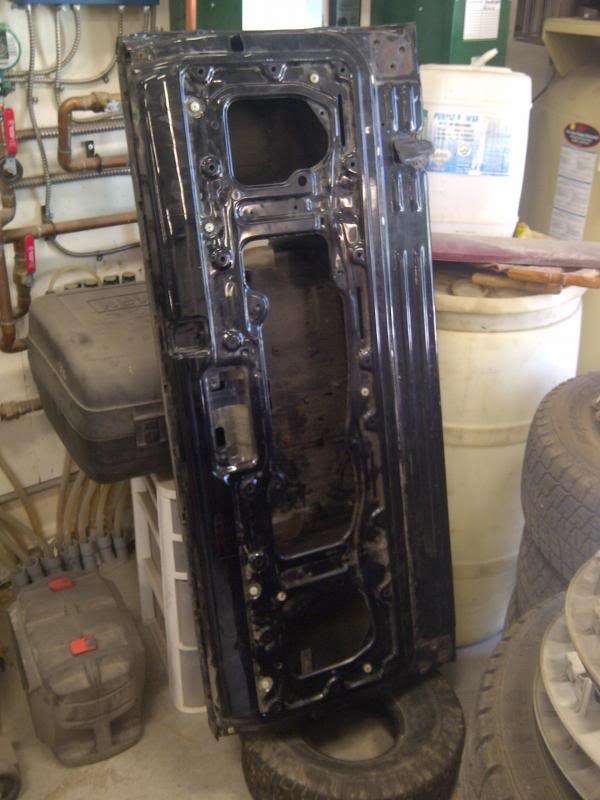
New tailgate.... Stripped, Gutted, POR15'd Painted... V/V
Right down to bare metal. Marine Cleaned (Degreased) Prep&Ready (Metal etcher). You can see how it etches the metal and really dehydrates it.
PORD'd
Skipped a few steps and had it sprayed by Maaco, It looks good! but lets see how long it will stick
. Good enough for a truck like this.NOW! Time for the Cutting, Fabbing, Grinding and you name it! It's all next...
Well... This is where the rust stops and this is where I stop cutting... NOT!
This is what a Wolf Steel Dog Leg looks like, Beautiful ain't it? well I am sorry I forgot to take a photo of their quarter panel piece, If I did well then it would bring a tear to a glass eye. Well you can see how crappy this fits...
My helper carefully observing the piece I trimmed away from a front fender...
This was a bit of a tricky part, trying to get the two panels to lap while the fender piece was buckling. Had to make some relief cuts and such. We did it a bit different on the drivers side though mind you I am not sure I got a photo.
Drill bit left over from previous patch job
+ beautiful RUST!This piece was a dog and pony show for us for a reason or two but we managed to make it easier on the other side, Round 2!
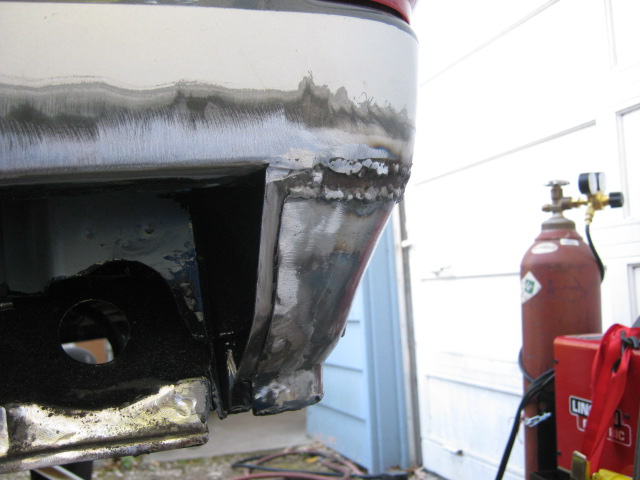
That Diamond shaped piece I was talking about earlier, Well you can see where it goes now.
POR'd (Black stuff)
Don't Judge my exhaust, I know its hanging down way too low!
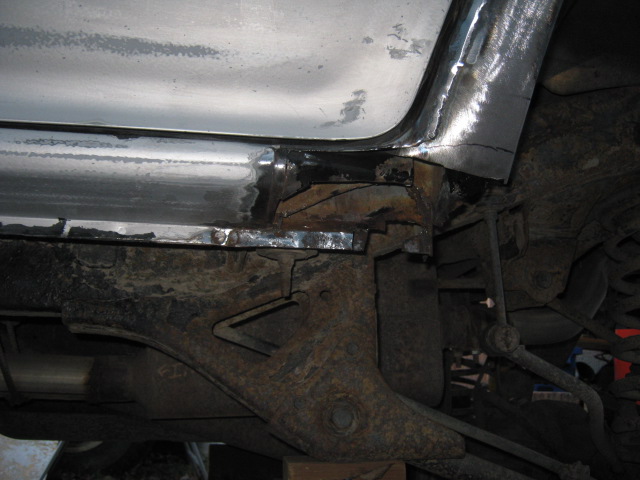
Okay well maybe I did take a photo of this, Looks like we kept some metal on the body side and just left it slipped in behind. That way we can just lap weld her instead of doing is right at a bend.
Nice old tailgate... RIP
Beautiful countless hours of puttying and sanding...
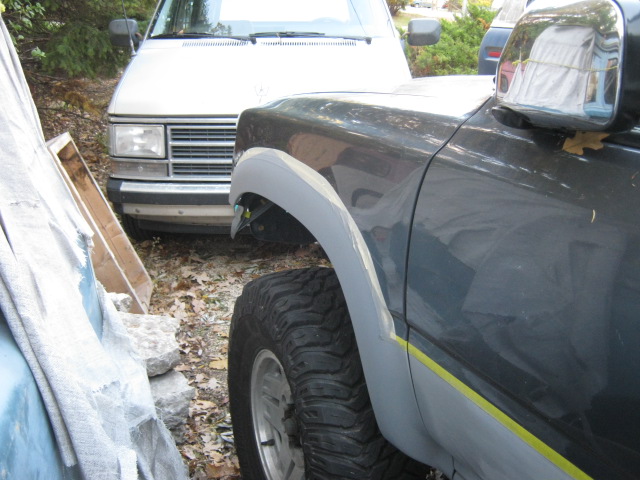
Project Complete! I will need to take more photos soon and post but this is all I got for now folks!
Like I said before, the Raptor Liner sure hid a lot of imperfections but it turned out nice! I only ended up using 3 out of the 4 bottles of Raptor liner on this project. This is what 1 1/2 months (working on the weekend) and $2000 (in Canadian monopoly money) later looks like ball parking it.
Well I hope you enjoyed my first post and hopefully this is the last time we all gotta see this 4Runner get some quarter panel work done!
As for my next project, I will be looking more into bumpers and body armor. I would like to fab something up on the trail gear bumper to support a swing out tire carrier and as for the front... well I got many ideas in my head right now but the goal is to get a receiver slot up front so I swap my winch front to back. If anyone has any ideas feel free to POST!
Nov 14, 2013 | 05:04 PM
#4
Registered User
Joined: Jun 2010
Posts: 1,448
Likes: 100
From: Virginia
Awesome fix. Since you already said it I'll share my experience with Wolf Alpha parts. I ordered rockers for a 1st gen 4Runner. He warned me they were really for a same year pickup so I'd have to trim them. I don't know what they were made for but the profile was completely different from both pickup and 4Runner. And the shipping cost ensured I wasn't going to send them back. 
Nov 14, 2013 | 05:50 PM
#5
Registered User
Joined: Jun 2010
Posts: 1,448
Likes: 100
From: Virginia
I just found a picture of the Wolf rocker panels. This is after I cut about two inches off the top. The profile is all wrong. After looking at your Runner I think he sent me rockers meant for a 3rd gen pickup/2nd gen 4Runner:
[IMG]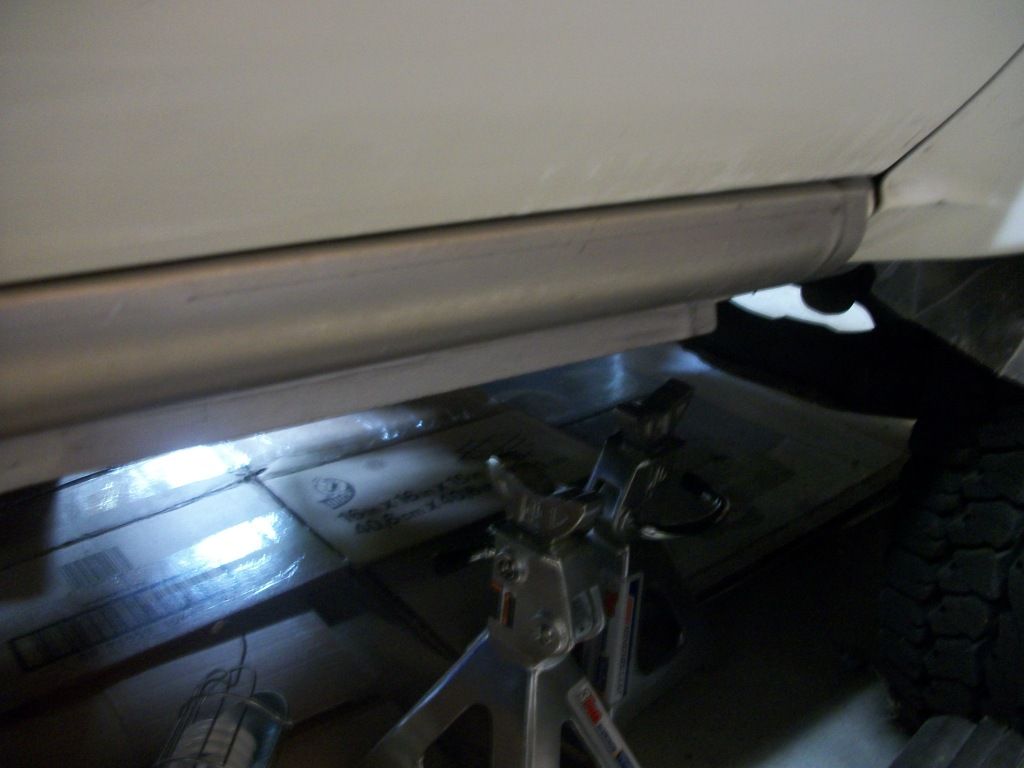 [/IMG]
[IMG]
 [/IMG]
Last edited by Nervo19; Nov 30, 2013 at 06:29 PM.

Trending Topics
Dec 13, 2013 | 01:58 PM
#8
Thread Starter
Contributing Member
Joined: Mar 2010
Posts: 34
Likes: 0
From: Winnipeg
Hahaha, yup! A couple sundays.... About a 100 Hours later.
And Red... I am just a young guy apprenticing as a mechanic, I know how to use a mig welder no problem. We were using a 220V welder which was a little tough, found a couple of tin can areas we just burnt right through which made it a little tricky! And as far as Wolf Steel, they are somewhere in Quebec... Should be able to see it on their site!
Glad I could help with the post. Gives you an idea where to start... Problem is where to finish HAHA!
Dec 13, 2013 | 04:02 PM
#10
Registered User
Joined: Jun 2010
Posts: 1,448
Likes: 100
From: Virginia
I'd GIVE them to you if you were local. On the other hand IF they are meant for your truck they are nice heavy metal.
I can't believe no one makes metal body panels for 1st gen 4Runners other than front fenders.

Thread
Thread Starter
Forum
Replies
Last Post
RedRunner_87
95.5-2004 Tacomas & 96-2002 4Runners (Build-Up Section)
84
Jun 1, 2021 01:51 PM
Jnkml
95.5-2004 Tacomas & 96-2002 4Runners
3
Jul 6, 2015 01:20 PM
Vargntucson
95.5-2004 Tacomas & 96-2002 4Runners
0
Jul 4, 2015 12:15 PM


