When you click on links to various merchants on this site and make a purchase, this can result in this site earning a commission. Affiliate programs and affiliations include, but are not limited to, the eBay Partner Network.
SO! I continue the spending spree... I purchased a new hi lift jack and a smittybuilt x20-10k winch (synthetic line). Also I purchased an old USMC 5 gallon gas can I want to be more self sufficient when out on the trails in-case of a sticky situation.
I will be mounting that soon and share pictures of course
I emailed 4x4labs and waiting for their response about the bumper issues, missing parts and such.
Meanwhile, with the addition of all of this weight and still more to come with skidplate in the near future... I am thinking I may do an engine swap next year. My current engine runs beautifully though, just under powered as the best running 3.0's are. If anyone is interested in buying a strong, newly rebuilt 3.0 contact me
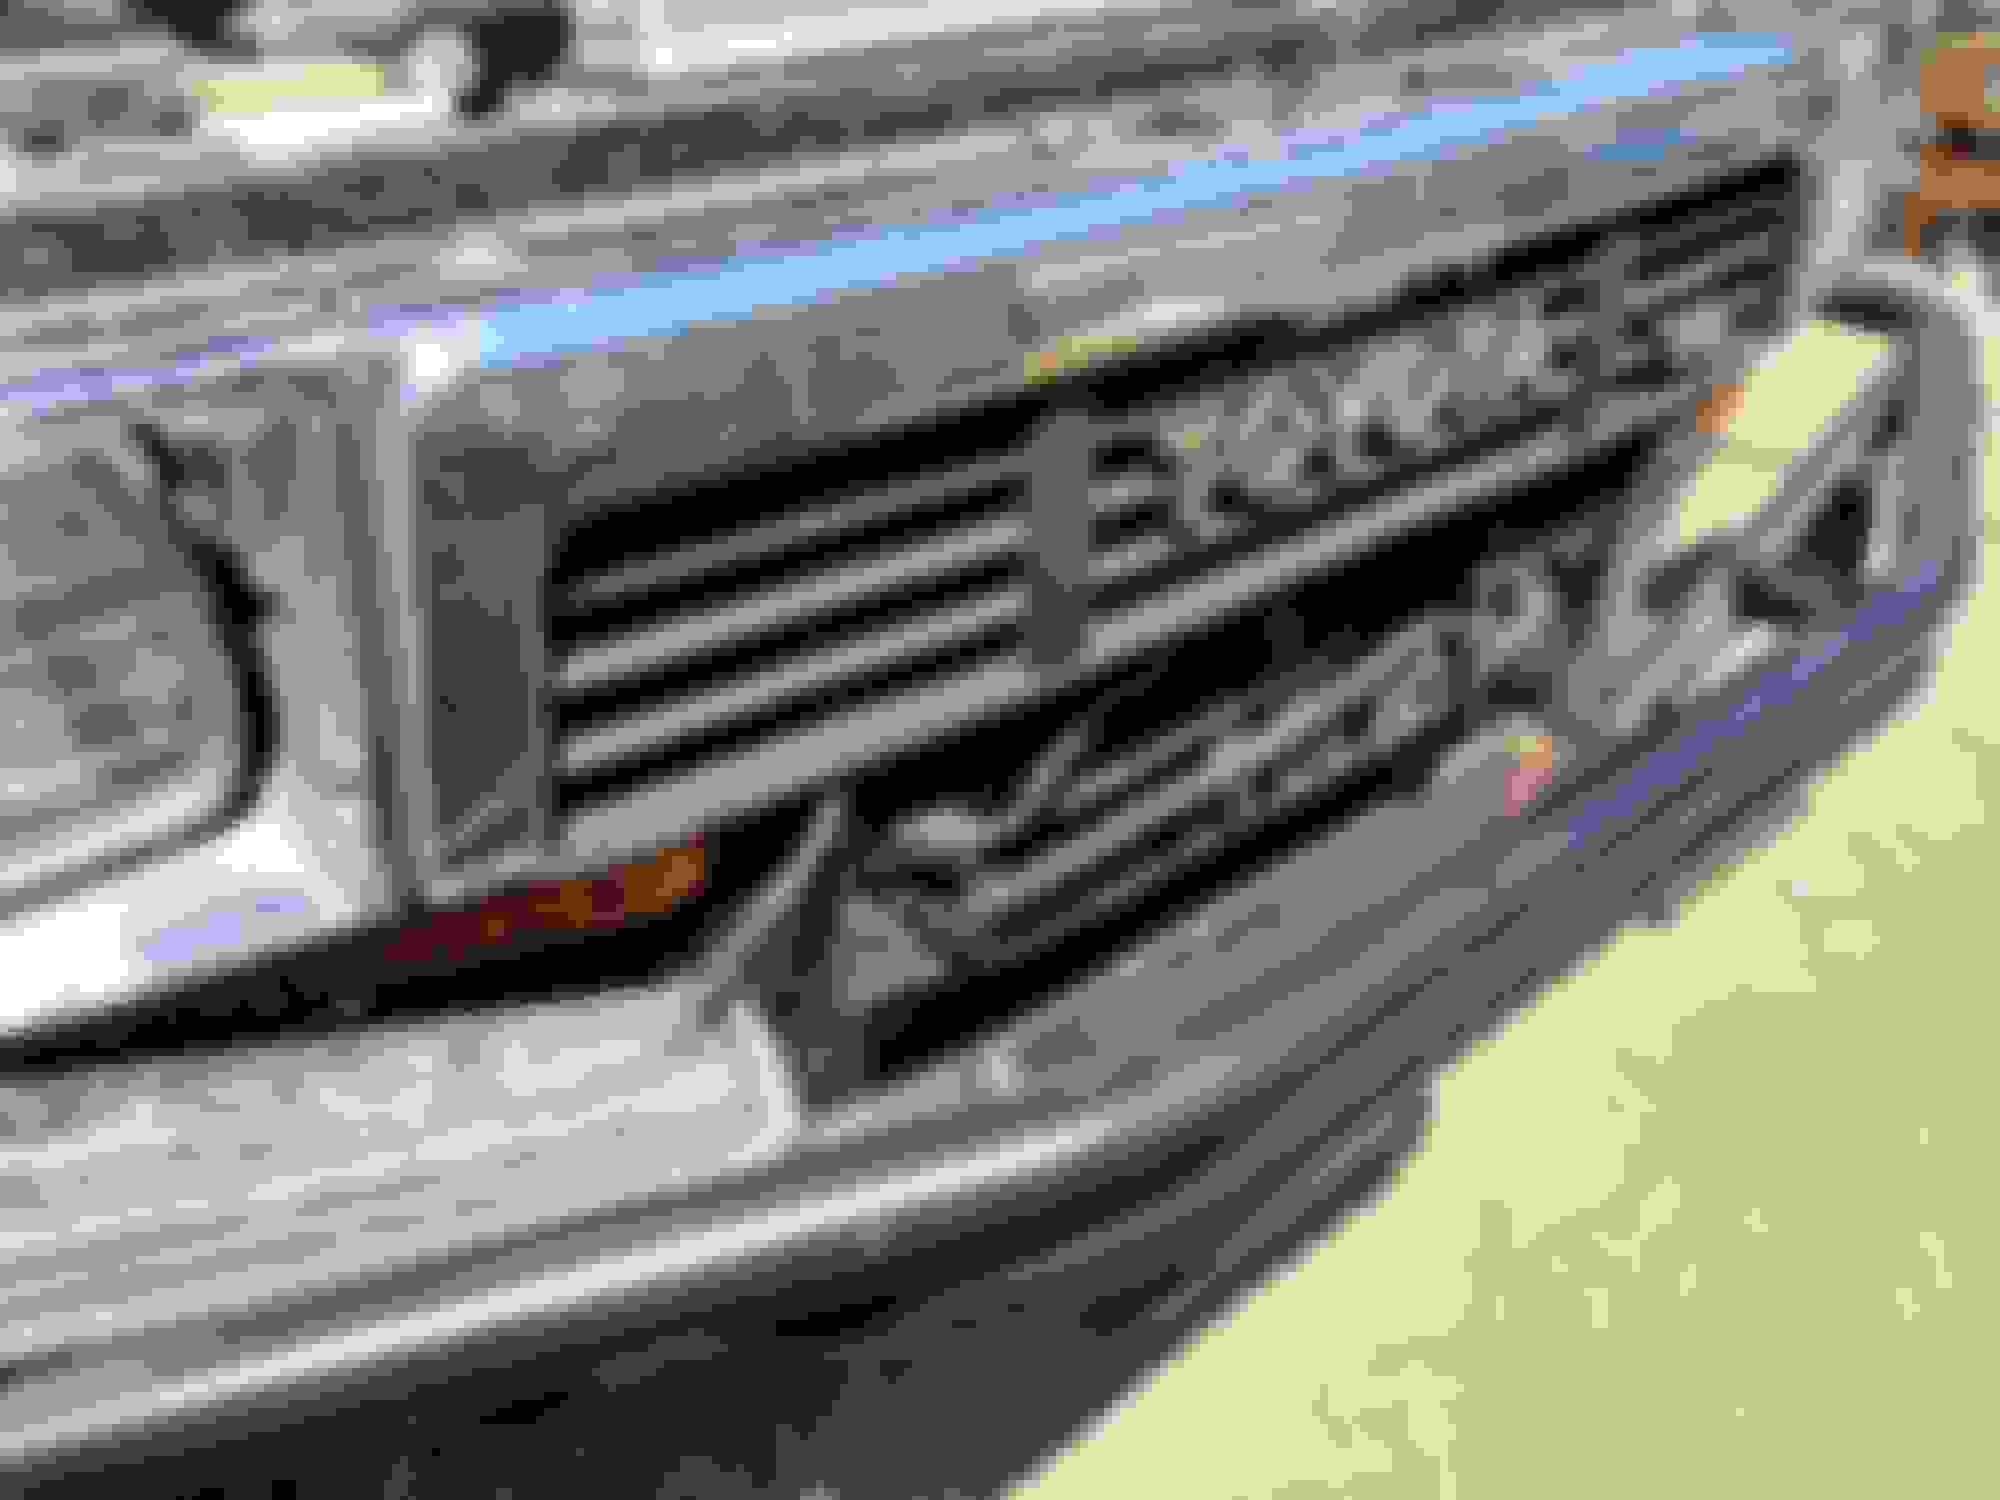
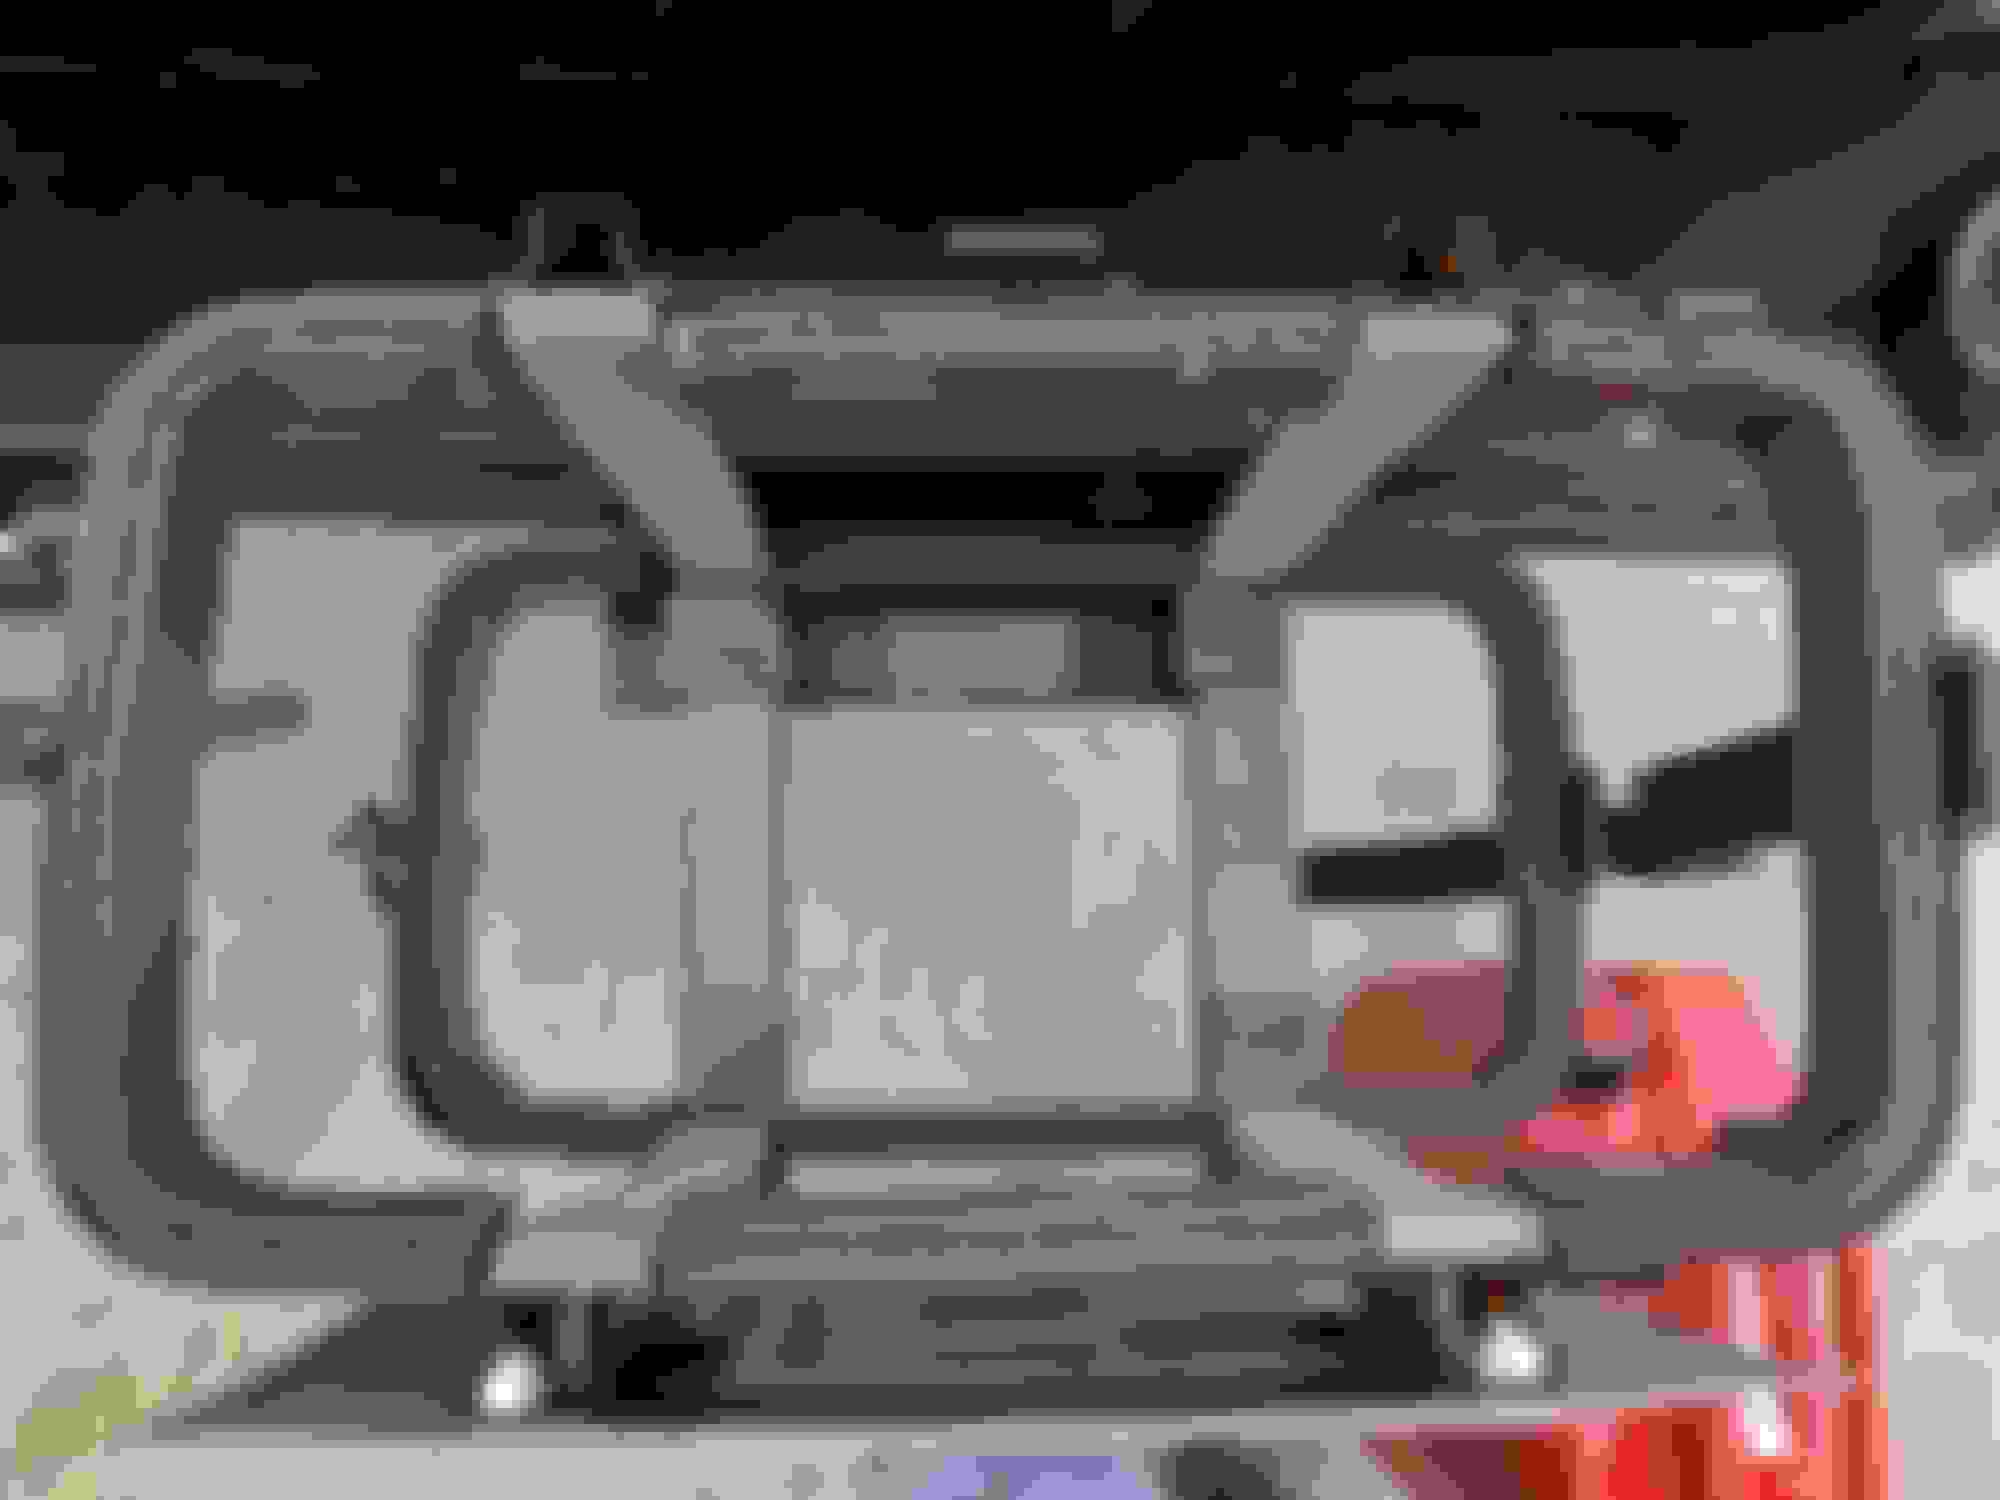
Quick run through of the winch install. Ran into some issues.
This is for installing a smittybuilt X20-10k gen2 winch on a Trail Gear tub front bumper for 2nd gen 4Runner.
Here is a gratuitous shot of the unboxed items.
Ran into fitment issues. THe space is VERY tight. I had to remove the middle section of my custom made expanded metal grill. Then I had to remove the light bar mounts as the light bar had to be mounted differently as well.
The control box would not fit in the middle where I originally wanted to install it. LUCKILY, the winch came with an alternate mounting bracket set for the control box. I mounted it on the left. The very thick and stiff wires made it a battle to get it all in there properly.
Then I had to make new mounts for the light bar. This was my quick solution. I think in the future I will weld a nut onto the tube and get rid of the high brackets. I needed the space underneath to get the nut in there.
Next came another fitment issue. The nuts that were to be used for mounting the fairlead wouldnt fit between the winch and the bumper winch plate.
So... I thought maybe I can cut the nut down the middle.... then I thought I can weld the nut on the outside... then I thought I can drill a hole the size of the nut and weld the nut flush with the front face... then.. I thought, I can thread the winchplate.. I figure that should be enough holding power for a fairlead.
Ok, threaded.
Next, I rant into ... you guessed it.. another fitment problem. The fairlead holes would'nt line up with the winch plate holes. I needed some more clearance on the top.
OK, cute 1/8" off the top. no big deal.
Got all the wiring in and quickly put some paint on the exposed metal.
Put the synthetic line in... I need to do this the right way when I go offroading next. Guess it needs about 1000lbs of force as you are winding it in. super.
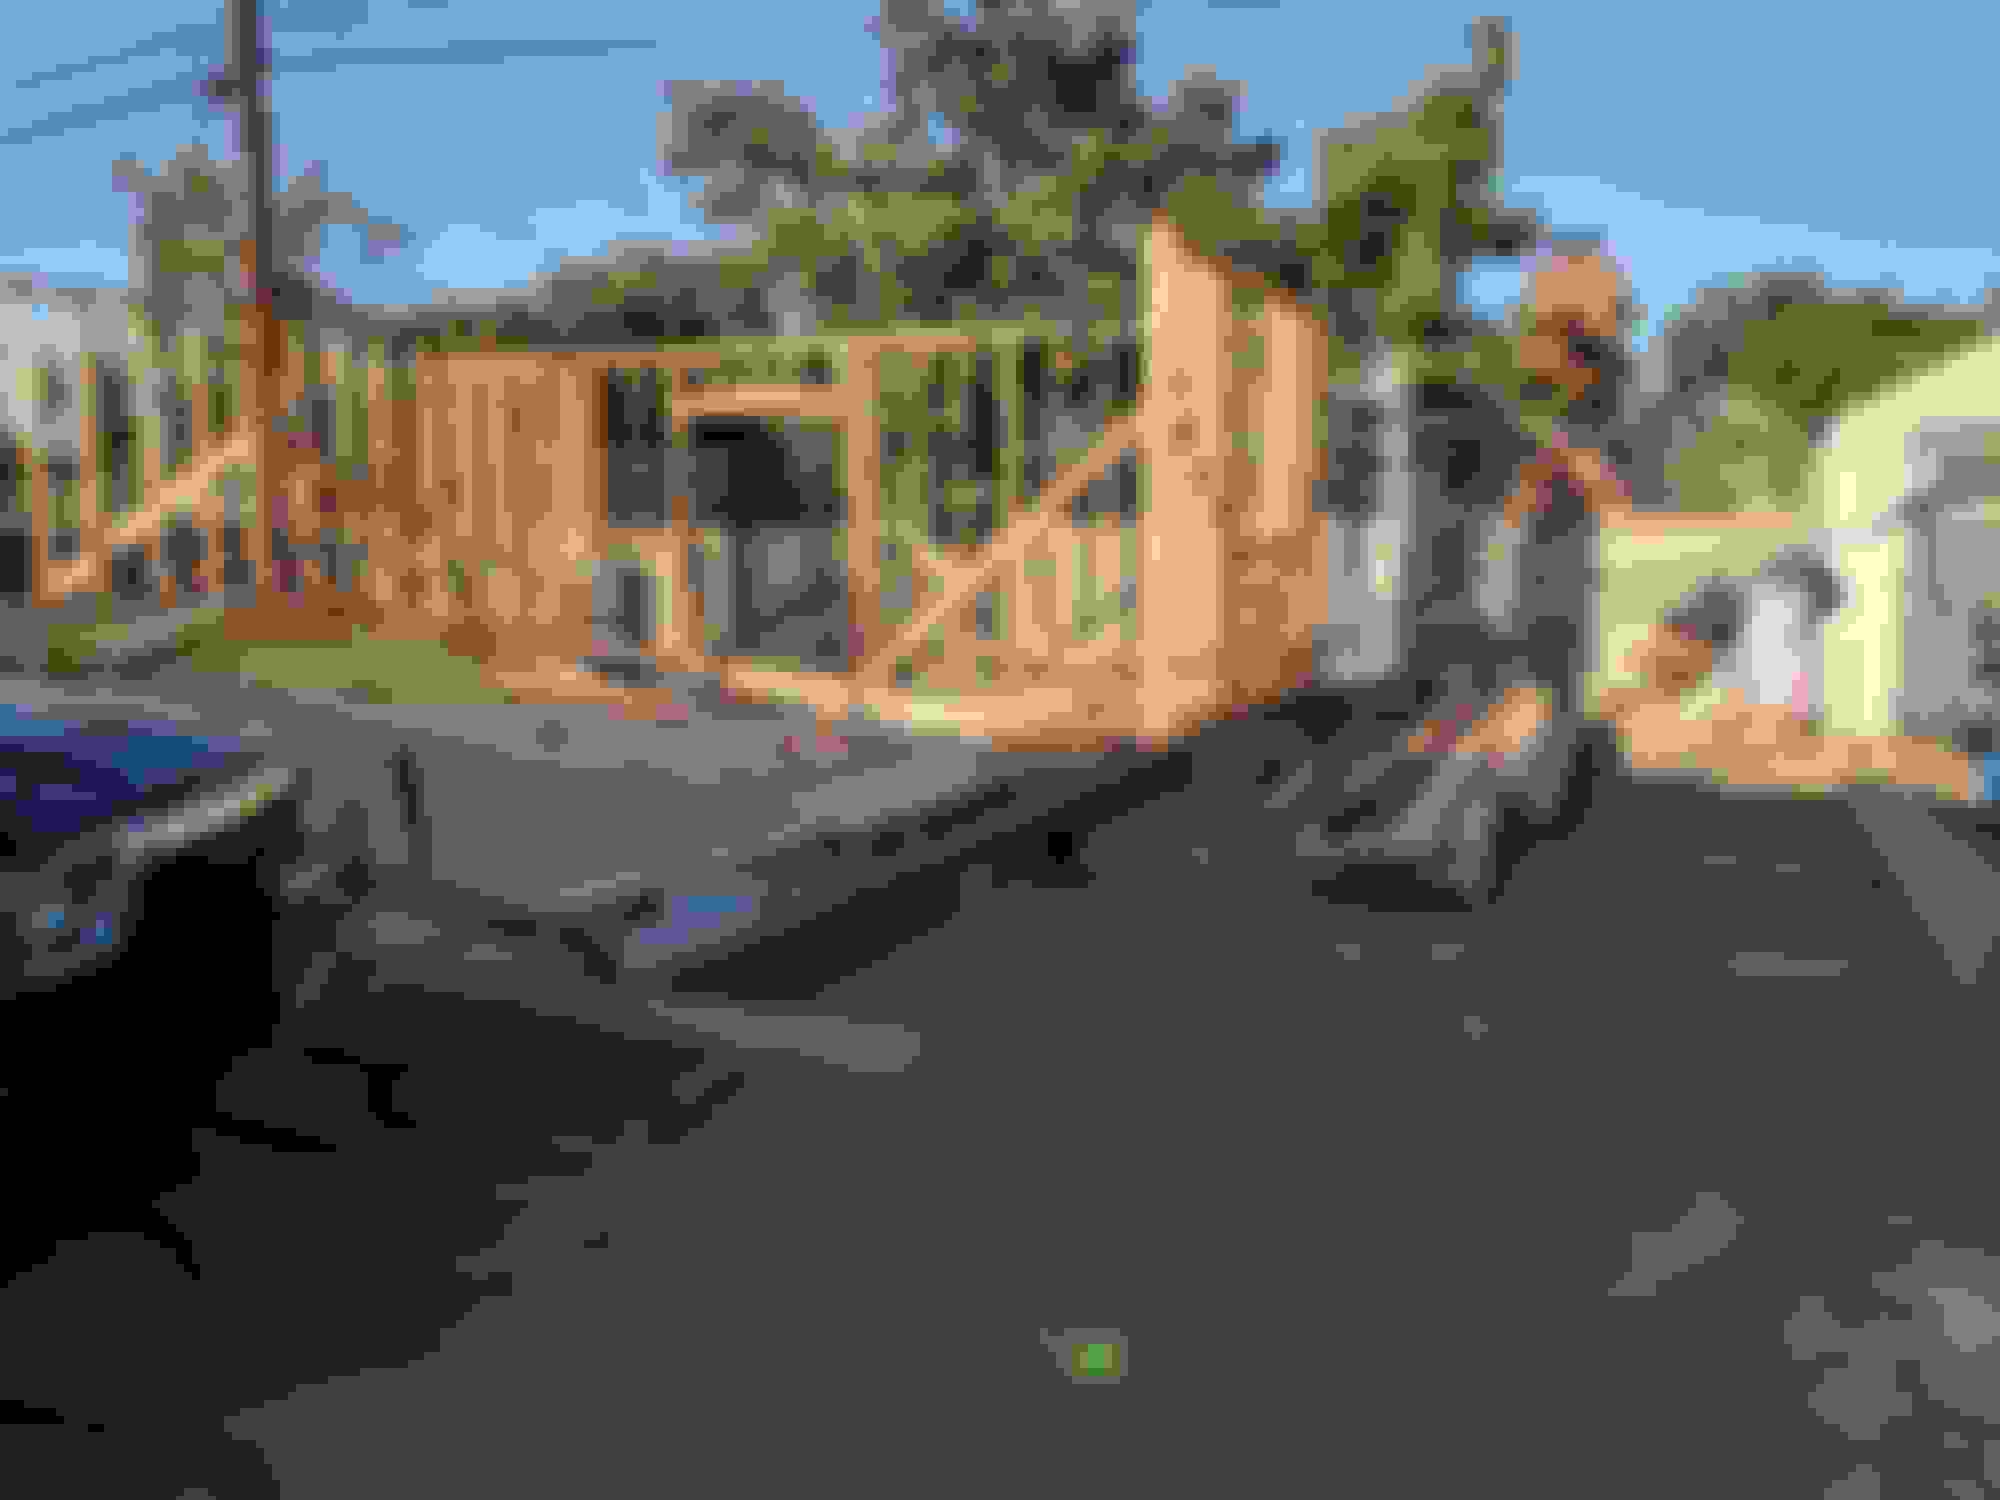
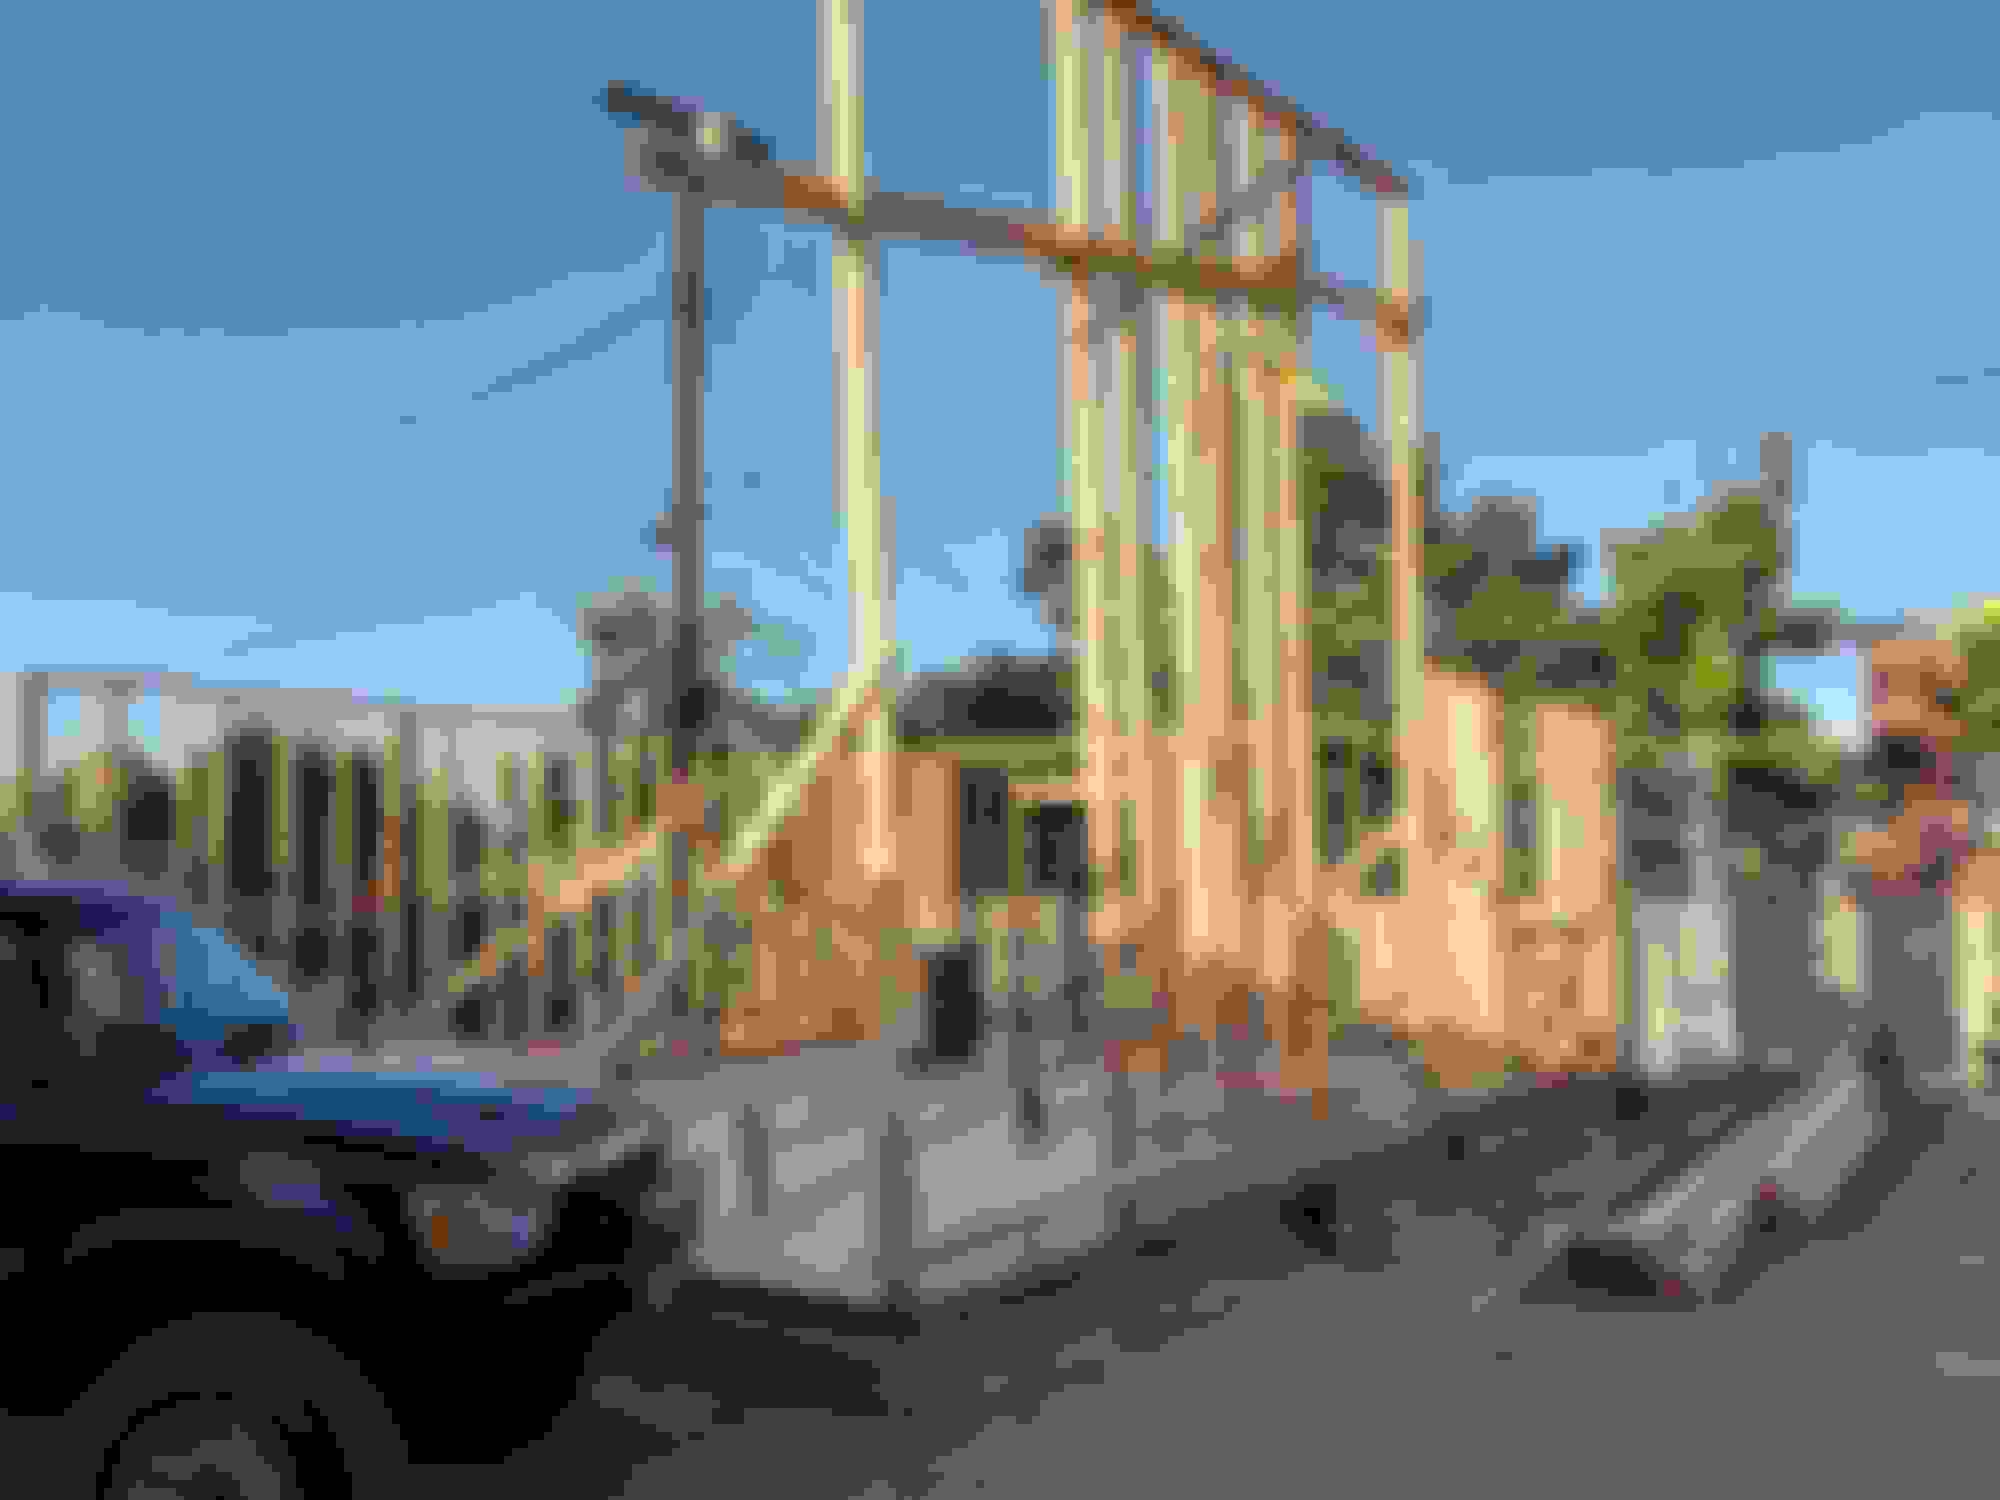
WHy you may ask did I do this in such a haste? Well, I am building a house on my property.. one of the walls is 18ft tall. I built the wall on the floor and couldn't lift it up. TOo much weight. Looked into some construction equipment and I was going to spend like 800 bucks for something rugged enough to drive in the dirt and climb the 1; slab and pick the wall up... A friend joked I can do it with a winch... I took that joke seriously. SO... here it is with the rigging of the lines.
And here it is having done a beautiful job. In hindsight I shoulda had a friend over to help. THere were some oh ˟˟˟˟ moments.. It's soo tall and wobbly..
There it is folks! With a well placed palm tree you can turn your 4Runner into a machine!! Saed couple hundred bucks and ended up with a great winch
Looks good. I have the same winch (looks like they upgraded the wireless switch to a waterproof switch finally, i had to change mine out). Luckily I built my bumper around the winch, but it was still tight lol
Yes, the whole unit and switch is completely waterproof and will work if submersed. I figure, now, I will someday be in that situation. lol
Some pics came to me form the last trip.. friend is slow.
This is a significant obstacle. I was pretty sure I won't make it. But, I did! Dual locked diffs are amazing. I hate off camber situations.. :/ But I challenged myself to go through something like this on that trip and mark on the clinometer how far I can go and not flip I made it. was not fun though. lol Friends jeep. few pages back on my thread this was white and on it's side Let's now all admit that at full droop the front axle width looks silly skinny. lol Maybe I should have a wider stance?
So, I found another good use for my truck. Needed help to get some plywood up 10 ft onto the second story floor. Threw some scrap lumber and nails together to make the lift and the 4Runner did it's thing
It's been nearly a year since I posted to my build thread!? WOW... Well, had a baby and built a house during this time so... fair to say spare time was not available.
I am finally doing some more things to the 4Runner... First of all, thanks to my 3 years old it now has a name. Black Hammer. lol
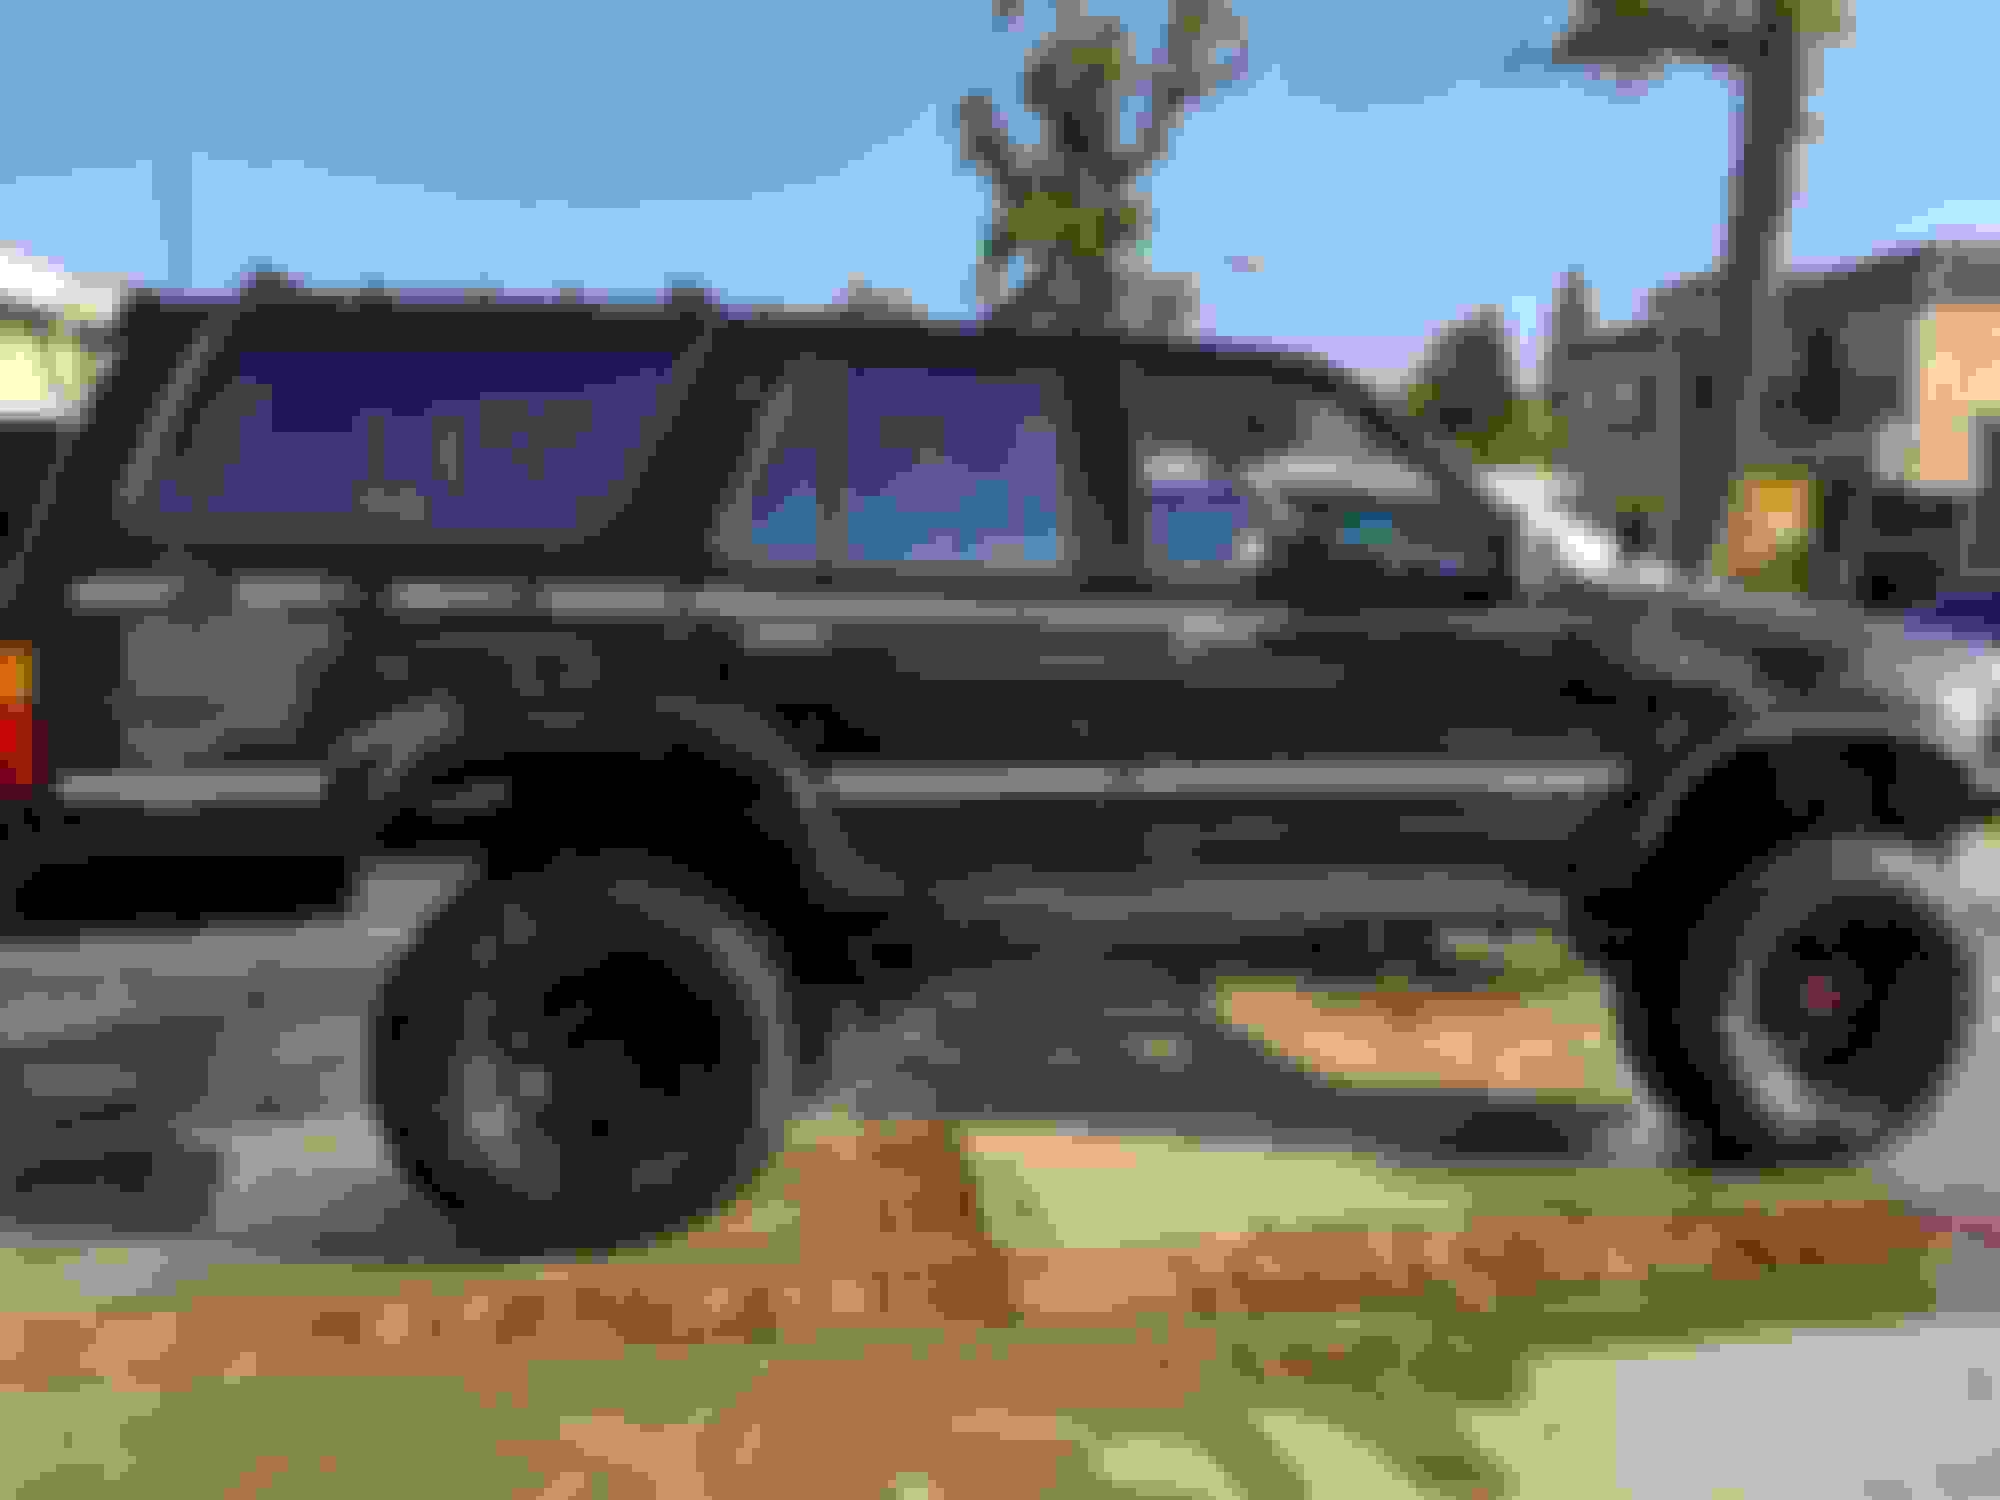
Also, during my brake pad change I noticed a little shiny area on the leading tip of the upper A-arms. Turns out at near full compression the inside of the 11.5 inch wide tire rubs against the A arm. So, perfect timing, I have been meaning to get slightly smaller offset wheels for some time for a little bit more of a wider stance. My options sucked, after much headache later I ended up getting a temporary one. Steelies, 15X8 ofcourse and 3.75" backspacing. NOW, you would think this backspacing on the stock wheels info would be available a hundred times over on this site.. I searched and searched, I found lots of people saying "I think" and sharing a post on how to measure it, but noone was actually correct! I suppose there were different versions of this wheel.... Anyway, I can definitively say that my 1991 V6 4X4 4runner alloy wheels have 4-3/8" backspacing.
It's more like 4-3/16 inch....
Also, my pads were soo far gone! I only went to change them due to the braking deteriorartion. I installed nice Hawk pads. VERY happy with them so far.
Also, I am selling my stock rims. I live in the San Fernando Valley, LA. $75 each. They all look like this one:
Got new wheels. During the brake job I noticed some rubbing at the tip of the upper a-arms near full compression. I had been meaning to get some wheels with less offset. I picked up the truck today and took some pics. I like the simple steelies. Just need to paint the rear hub and drum brake assembly!!
Old rims backspacing is 4-3/8", these are 3.75" So technically i have 5/8 inch wider stance on each side.. I was really hoping for a 3 or 3.25 inch backspace for a slightly wider stance since I plan on my next tires being skinnier. few options :/
Ill get some decent pics later. With cleaner tires
Somehow I've been missing your updates. Nice pics, good going with working on the house using a winch, nice wheels and I'll bet it's nice to have your garage helpers growing up and getting into stuff helping
Thanks habanero.. and, yes, I can't wait for my sons to be old enough so they can help out and go offroading with me!
Ok, so I did some stuff to the car that I had been meaning to do for a long time.. First, I finally fabricated a quick little mount for my gas can holder.
Then I painted some faded plastic bits.. And painted the crappy looking rear drum brake parts that show through the wheels.
Cleaned the tires. Painted the inner parts behind the wheel and the plastic bits around the wheel well. Installed gas can holder. I identified this to be a point of noisyness on the road.. So, I started experimenting.. I ended up with some thick foam weatherstripping. I imagine this won't last too long though. I may need to find some legit rubber bits. It worked well though and snug fit
Hey folks. So had a good day offroading at Rowher flats again this Sunday. I just wanted to share one video for now and will post some more pics and such later. This was fun, around 40 seconds I have some bonus fun. Watch till about 1:10 seconds. Nephew kept recording for no reason
Nice work and the truck is looking good. The people in the video make it look quite a bit steeper than it would otherwise, looks like a challenging spot.
Started to remove old parking brake cable today. Snapped last time out offroading in big bear.
POS job. :/. I dont mind when a job is complicated and difficult but is one you learn from and is interesting.
There is nothing interesting about this job and it has a lot of steps and difficult routing work. Lame.
I read on here some people saying they replaced cable without removing whole assembly, I do NOT see how that can work.
Took me an annoying minute to find what was holding the assembly. Nut from engine bay while the other was bolt from inside car wth? Once it is out, its easy to remove old and install new wire.
Tomorrow I will finish installing new wire. Just got to make extra stiff coffee
I wanted to share a few videos and pictures of my last trip to Big Bear.
This was on Gold Mountain trail. Fun trail, has good challenges. Watch the video of the yellow fj (watch the rear tire) lol.
At the moment I am testing the EGR system. I am going through the FSM. And I am getting the following results as per steps in fsm.
1. When vacuum applied directly to EGR, engine dies. EGR valve is good.
2. Modulator. Cold test: no vacuum at EGR (one would think this means vsv works as intended).
Hot test: no vacuum at EGR at idle, some vacuum at 3500 rpm.
Next test is disconnect ports P, Q and R, plug P amd R, apply pressure in port Q and at idle air should flow freely out of filter. Check. Works.
Next check at 3500 rpm should be lots resistance to above teat. Check.
Buuuut, I noticed that at idle there is also a LOT of resistance, almost as much as at 3500 rpm. The FSM seems to suggest to do first part with engine off and second part at 3500 rpm. Does not mention what it should be at idle. To me this seems nothing to worry about as the function at idle doesnt maTter.. correct?
VSV tested and works. However....
Next test not in the FSM. I figure that the vsv is supposed to close at idle in all conditions. The very first steps makesbit seem this is happening. Once the engine warmed up though, I tested the vsv passage at 3500 rpm and idle and they were both open. Now this is a ecu to vsv signal issue. Since my engine is not dieing at idle that means that even if the vsv is open the modulator is doing its job. And when im at high rpm vsv should be open anyway.
So, now I need to understand the engine temp senser for this circuit, which one is it? Unfortunately we have several sensors... I should test that next. Right? My thinking is if the ecu is using this information for other parameters it may be using bad information and causing other aspects of the combustion to be out of balance. What do you guys think?
I
So to keep this thread complete, the EGR conversation is in a thread I created. Of course EGR was a start and the thread is more about smog issues in general

 Apr 26, 2018 | 09:31 AM

 I want to be more self sufficient when out on the trails in-case of a sticky situation.