DIRTCO's 1986 4Runner Build-Up Thread
 Oct 29, 2008 | 08:58 PM
#201
Registered User


Joined: Mar 2006
Posts: 2,586
Likes: 9
From: Atlanta, GA
its all good man, sorry about that.
Here ya go if yall want to read...https://www.yotatech.com/forums/f116...runner-113250/
DIRTCO sorry to clog the thread with our BS. i swear im done now
Here ya go if yall want to read...https://www.yotatech.com/forums/f116...runner-113250/
DIRTCO sorry to clog the thread with our BS. i swear im done now
Oct 30, 2008 | 03:49 PM
#202
Thread Starter
Registered User
Joined: May 2007
Posts: 1,441
Likes: 0
From: Summit County, Colorado
Oct 30, 2008 | 05:44 PM
#203
Thread Starter
Registered User
Joined: May 2007
Posts: 1,441
Likes: 0
From: Summit County, Colorado
I've been working on the details of the wiring and switches. My last truck was a wiring nightmare (my fault, six years of adding and moving stuff will do that), so this time I want it done right and clean.
I want to use as many factory Toyota switches as possible, I will not be able to use them for everything but it would be nice to have the main stuff on factory switches.
I have always wanted to find a use for the decklight switches that never seem to work. After collecting a few I figured this would be a good time to use them. The factory one will stay and that will control the rocklights, I will leave all the wiring the way it is and tap into the wiring close to the factory decklight.
I also thought it would be cool to mount one in another area to control the back up light. To do this I had to figure how to make the switch work. I spent some time looking at my 86 Electrical FSM book and this is what I came up with. (Note: The book did not have color codes for the switches themselves, so I had to trace each wire through pin location on the plug. I have not tested it yet, but I'm pretty sure it should work. Also the decklight switch is double throw, I wanted to have it work in the normal way, but a couple wires could have to be switched around.)
I also plan on running relays for everything, so that into consideration.
Wire colors on the 86 switch
white w/ black - Ground
Green w/ red - Power to switch light, from light when on - connect to 12 volt wire going to light
Green - 12 volts
Green w/ white - to light
Red - not used, unless switch works backwards, then to light
Last edited by DIRTCO; Oct 30, 2008 at 05:59 PM.
Oct 30, 2008 | 05:53 PM
#204
Thread Starter
Registered User
Joined: May 2007
Posts: 1,441
Likes: 0
From: Summit County, Colorado
This other switch I found in a junkyard inside a mid 80's Toyota van. As sonn as I saw it I knew it would be perfect for off road lights. I didn't have any tools with me so I had to cut the wires with a rusty piece of metal I found (that's why the wires are cut so short), I plan on finding some other terminals to replace these.
I noticed that while the colors on the wires were not the same, they were close to the decklight, so I tested them. Two of the colors were wrong, but after switching them around it worked.
White w/ green - Ground
Green w/ orange - 12 volt power
Red w/ yellow - To light
Green - Power to switch light bulb, connect to Red w/ yellow
Oct 30, 2008 | 06:06 PM
#205
Registered User
Joined: Jun 2007
Posts: 404
Likes: 0
From: Granite Falls
That is gonna be awesome! It might sucks trying to remeber what switch does what for a little while lol.
I'm truly impressed with how good your build looks and how much effort you are putting into it. It's going to be an awesome rig. Tons of good info too. When I start tearing apart the '89 depending on what route we go, I might need some of that wiring information.
I'm truly impressed with how good your build looks and how much effort you are putting into it. It's going to be an awesome rig. Tons of good info too. When I start tearing apart the '89 depending on what route we go, I might need some of that wiring information
.
Nov 2, 2008 | 03:42 PM
#206
Thread Starter
Registered User
Joined: May 2007
Posts: 1,441
Likes: 0
From: Summit County, Colorado
That is gonna be awesome! It might sucks trying to remeber what switch does what for a little while lol.
I'm truly impressed with how good your build looks and how much effort you are putting into it. It's going to be an awesome rig. Tons of good info too. When I start tearing apart the '89 depending on what route we go, I might need some of that wiring information.
I'm truly impressed with how good your build looks and how much effort you are putting into it. It's going to be an awesome rig. Tons of good info too. When I start tearing apart the '89 depending on what route we go, I might need some of that wiring information
.
Nov 2, 2008 | 04:46 PM
#208
Thread Starter
Registered User
Joined: May 2007
Posts: 1,441
Likes: 0
From: Summit County, Colorado
I got the rocklights installed and the rock sliders braced up.
The rocklights are from Wal-mart and were under $20. I replaced the bulbs with some PIAA Super Plasma GTX bulbs. I bought them a while ago for my main off road lights, but I didn't like them. I figured that I should use them for something, so I put them in the rocklights. They have a softer light than the normal bulbs, which is good for rocklights.
The bulbs look pretty cool in the light, normally they are clear with no color.


I also welded up some bracing for the rocksliders

The rocklights are from Wal-mart and were under $20. I replaced the bulbs with some PIAA Super Plasma GTX bulbs. I bought them a while ago for my main off road lights, but I didn't like them. I figured that I should use them for something, so I put them in the rocklights. They have a softer light than the normal bulbs, which is good for rocklights.
The bulbs look pretty cool in the light, normally they are clear with no color.
I also welded up some bracing for the rocksliders
Nov 2, 2008 | 05:09 PM
#209
Thread Starter
Registered User
Joined: May 2007
Posts: 1,441
Likes: 0
From: Summit County, Colorado
I also did some more wheeling! I figured I might as well take advantage of the low snow level. I started to go up one trail that I know of, but a tree had fallen and blocked the entire trail.


Nov 2, 2008 | 05:18 PM
#210
Thread Starter
Registered User
Joined: May 2007
Posts: 1,441
Likes: 0
From: Summit County, Colorado
I decided to head up another trail that I have always wanted to check out but never have. Luckly it gets a lot of sun so there was not that much snow, I was able to get above tree line before having to turn back around.


Nov 2, 2008 | 05:32 PM
#212
Thread Starter
Registered User
Joined: May 2007
Posts: 1,441
Likes: 0
From: Summit County, Colorado
This is as far I ended up making it, the snow started to get too deep and I started to slide off the trail. I'm sure I could have made it further but it was not worth risking it.


Nov 2, 2008 | 05:45 PM
#213
Thread Starter
Registered User
Joined: May 2007
Posts: 1,441
Likes: 0
From: Summit County, Colorado
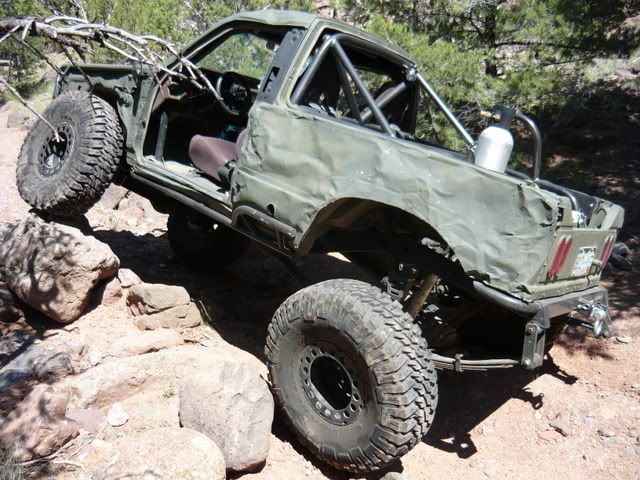
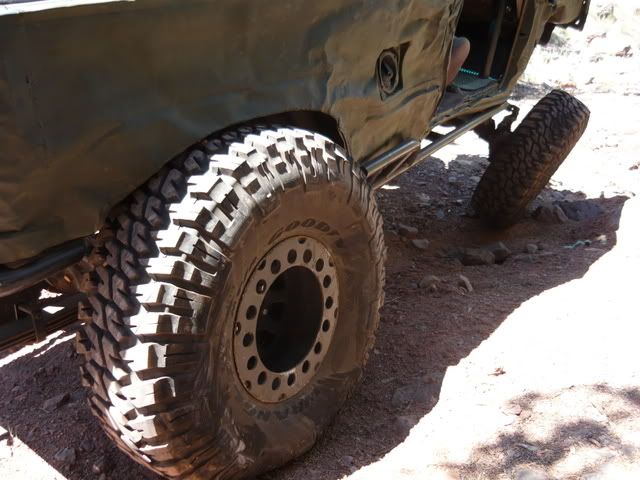
Heading back down the trail I couldn't help but flex the thing out. Since I'm kind of working backwards, I could not belive the lack of flex. It's a good thing I had my studded snow tires to get me through the trail 


Last edited by DIRTCO; Nov 2, 2008 at 05:46 PM.
Nov 2, 2008 | 05:59 PM
#214
Registered User
Joined: May 2007
Posts: 374
Likes: 1
From: North Bay, Ontario
 That is impressive work. I love all the lighting ideas and emergency equipment. Outstanding...but don't dent up that 4Runner like your last one its too nice! That turbo dash cluster is awesome by the way. Some day when I get some excess money I would love to get a Yota built just like that. For now I'm sticking with my DD Truck. Best of luck on the rest of the build.
Nov 2, 2008 | 06:00 PM
That is impressive work. I love all the lighting ideas and emergency equipment. Outstanding...but don't dent up that 4Runner like your last one its too nice! That turbo dash cluster is awesome by the way. Some day when I get some excess money I would love to get a Yota built just like that. For now I'm sticking with my DD Truck. Best of luck on the rest of the build.
Nov 2, 2008 | 06:00 PM
#215
Thread Starter
Registered User
Joined: May 2007
Posts: 1,441
Likes: 0
From: Summit County, Colorado

 Nov 2, 2008 | 06:59 PM
#216
Registered User
Joined: Aug 2004
Posts: 1,209
Likes: 0
From: Pueblo, CO
 Nov 2, 2008 | 07:23 PM
#217
Thread Starter
Registered User
Joined: May 2007
Posts: 1,441
Likes: 0
From: Summit County, Colorado
That is impressive work. I love all the lighting ideas and emergency equipment. Outstanding...but don't dent up that 4Runner like your last one its too nice! That turbo dash cluster is awesome by the way. Some day when I get some excess money I would love to get a Yota built just like that. For now I'm sticking with my DD Truck. Best of luck on the rest of the build. The Turbo cluster is awesome, especially at night!
Nov 2, 2008 | 07:44 PM
#218
beautiful country out up there... your lucky you are able to go places like that... i only get as far as the mud down by the railroad tracks about 1/4th mile from my house...
beautiful truck, beautiful scenery...
if you have a beautiful wife too, im gonna hang myself...
beautiful truck, beautiful scenery...
if you have a beautiful wife too, im gonna hang myself...
Nov 2, 2008 | 08:08 PM
#219
Thread Starter
Registered User
Joined: May 2007
Posts: 1,441
Likes: 0
From: Summit County, Colorado