86-95 Trucks & 4Runners (Build-Up Section) Post your build-ups here

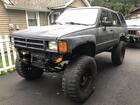
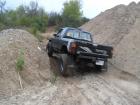
de6w6it's 1988 4Runner Build-Up Thread "Flat Black Lemon"

Thread Tools
 
Search this Thread
 
Old Jun 13, 2020 | 05:16 PM
  #121  
de6w6it's Avatar
Thread Starter
Registered User
 
Joined: Nov 2007
Posts: 462
Likes: 47
From: Lake Hiawatha, NJ
i also pulled the third, welded up the holes in the housing from the inside, ground it down, put on new rtv, and buttoned it back up.


Reply
Old Jun 13, 2020 | 05:20 PM
  #122  
de6w6it's Avatar
Thread Starter
Registered User
 
Joined: Nov 2007
Posts: 462
Likes: 47
From: Lake Hiawatha, NJ
i made some plates to weld the shackle hangars to, and then weld up to the frame. since it is thin there, and needs to be welded overhead, i figured this gave me a better shot at getting the mount solid to the plate, then have more linear welding overhead.


Reply
Old Jun 14, 2020 | 11:15 AM
  #123  
de6w6it's Avatar
Thread Starter
Registered User
 
Joined: Nov 2007
Posts: 462
Likes: 47
From: Lake Hiawatha, NJ
i was hoping to get more done today, but when i was drilling through the ends of the cut leaves i am using to make my rear pack, i broke the only bit i had that was able to drill through the spring steel (apparently). i tried many others, to no avail. 3 holes, 3 to go. i am drilling to add those nylon slider/insulators.
i did get the spring and shackle hangars on the passenger side tacked in. i didn't cut off and grind smooth anything on driver side so i could get good measurements for initial placement on the passenger side. since it will be a different spring pack, it wasn't perfectly level before, and there is now 1/8" plate between the new mounts and the frame, i need to set it down on its weight on the tires to check shackle angle, pinion angle, and level.


Reply
Old Jul 19, 2020 | 12:43 PM
  #124  
de6w6it's Avatar
Thread Starter
Registered User
 
Joined: Nov 2007
Posts: 462
Likes: 47
From: Lake Hiawatha, NJ
i got the driver side frame rail all cleaned up, and it looked much better than the other side. i didn't plate the outside much, it looked pretty solid, but the inside got the full treatment. the only piece left to weld on is the strap under the bottom to make it the same as the passenger side. then tack on the hangars and set it down to check angles.


Reply
Old Aug 2, 2020 | 09:11 AM
  #125  
bone collector's Avatar
Registered User
 
Joined: Nov 2009
Posts: 2,025
Likes: 40
From: Northen Indiana
You are doing amazing work! Keep it up! I'm in the middle of a frame swap due to a rusty frame so I feel your pain. I really like the 35s on the FJ rims. Looking good! Hopefully you can get it on the road soon
Reply
Old Aug 2, 2020 | 11:55 AM
  #126  
5 Fists's Avatar
Registered User
 
Joined: Aug 2008
Posts: 531
Likes: 168
From: British Columbia
Nice shackle mounts! Frame is looking excellent!
Reply
Old Sep 1, 2020 | 11:37 AM
  #127  
de6w6it's Avatar
Thread Starter
Registered User
 
Joined: Nov 2007
Posts: 462
Likes: 47
From: Lake Hiawatha, NJ
Originally Posted by bone collector
You are doing amazing work! Keep it up! I'm in the middle of a frame swap due to a rusty frame so I feel your pain. I really like the 35s on the FJ rims. Looking good! Hopefully you can get it on the road soon
thanks man, much appreciated
i've got a 4 day garage weekend this weekend, so hopefully i'll make some progress
Reply
Old Sep 1, 2020 | 11:38 AM
  #128  
de6w6it's Avatar
Thread Starter
Registered User
 
Joined: Nov 2007
Posts: 462
Likes: 47
From: Lake Hiawatha, NJ
Originally Posted by 5 Fists
Nice shackle mounts! Frame is looking excellent!
thanks, much appreciated
its getting there
Reply
Old Sep 1, 2020 | 11:44 AM
  #129  
de6w6it's Avatar
Thread Starter
Registered User
 
Joined: Nov 2007
Posts: 462
Likes: 47
From: Lake Hiawatha, NJ

i got my axles stripped down and cleaned, and got the new bearing pockets, rotors, disc swap rotor spacers, and longer studs mounted onto them

my new gas tank, front fj rotors, front spring bushings, front axle seals/felts, and front u bolts are on the way

rear spring bushings, rear loaded calipers, and new black lug nuts are here already

ready to get to it this weekend
Reply
Old Sep 8, 2020 | 07:10 AM
  #130  
de6w6it's Avatar
Thread Starter
Registered User
 
Joined: Nov 2007
Posts: 462
Likes: 47
From: Lake Hiawatha, NJ
well, i ordered 8 large and 4 small spring bushings for the rear, and it should have been the other way around. That count from Marlin's site is for after market springs. I have old school Downey springs which require only large bushings in front, and small for both ends of the shackle. This prevented me from setting it down on its own weight to do shock placement, final hangar welding, etc. So that was a bummer for a nice long weekend. I did make some progress though.

I got my axles in and disc brake brackets mounted:


Last edited by de6w6it; Sep 8, 2020 at 07:11 AM.
Reply
Old Sep 8, 2020 | 07:12 AM
  #131  
de6w6it's Avatar
Thread Starter
Registered User
 
Joined: Nov 2007
Posts: 462
Likes: 47
From: Lake Hiawatha, NJ
Driver side hangars:


Reply
Old Sep 8, 2020 | 07:16 AM
  #132  
de6w6it's Avatar
Thread Starter
Registered User
 
Joined: Nov 2007
Posts: 462
Likes: 47
From: Lake Hiawatha, NJ
Chassis saver paint, front spring bushings, rear bushings, and new oem sending unit on the way. The old one was non-functioning:


"Old" fuel pump and bracket assembly are installed into my spanky new shiny spectra premium replacement gas tank.


Reply
Old Sep 8, 2020 | 07:41 AM
  #133  
Gevo's Avatar
Registered User
 
Joined: Sep 2013
Posts: 1,631
Likes: 110
Making steady progress! Looking good.
Reply
Old Sep 20, 2020 | 05:12 PM
  #134  
de6w6it's Avatar
Thread Starter
Registered User
 
Joined: Nov 2007
Posts: 462
Likes: 47
From: Lake Hiawatha, NJ
its on its own weight!


Reply
Old Sep 20, 2020 | 05:16 PM
  #135  
de6w6it's Avatar
Thread Starter
Registered User
 
Joined: Nov 2007
Posts: 462
Likes: 47
From: Lake Hiawatha, NJ
i got the pinion set perfect at 2 degrees down at ride height
the shackle angle is a good compromise
wheelbase on either side is very very close
frame is level front to back within half a degree or so
ride height seems good
less arch in this spring pack, hopefully a better ride


everything is only tacked and nothing is tight, as it all has to come back apart for final welding

Reply
Old Sep 20, 2020 | 05:18 PM
  #136  
de6w6it's Avatar
Thread Starter
Registered User
 
Joined: Nov 2007
Posts: 462
Likes: 47
From: Lake Hiawatha, NJ
got the lower shock munts tacked
the upper shock mount is fabricated, it just needs to be installed


Last edited by de6w6it; Sep 20, 2020 at 05:19 PM.
Reply
Old Sep 21, 2020 | 02:45 PM
  #137  
bone collector's Avatar
Registered User
 
Joined: Nov 2009
Posts: 2,025
Likes: 40
From: Northen Indiana
Originally Posted by de6w6it
its on its own weight!


I know that feeling well. Keep up the good work!
Reply
Old Oct 3, 2020 | 01:11 PM
  #138  
de6w6it's Avatar
Thread Starter
Registered User
 
Joined: Nov 2007
Posts: 462
Likes: 47
From: Lake Hiawatha, NJ
i got the spring and shackle hangers final welded
i also reinforced some rotted body mounts i trimmed


Reply
Old Oct 3, 2020 | 01:14 PM
  #139  
de6w6it's Avatar
Thread Starter
Registered User
 
Joined: Nov 2007
Posts: 462
Likes: 47
From: Lake Hiawatha, NJ
i also final welded the lower shock mounts


Reply
Old Oct 3, 2020 | 01:17 PM
  #140  
de6w6it's Avatar
Thread Starter
Registered User
 
Joined: Nov 2007
Posts: 462
Likes: 47
From: Lake Hiawatha, NJ
i also bent two plates to reinforce the bumpstop mounts


Reply


All times are GMT -8. The time now is 11:25 AM.