When you click on links to various merchants on this site and make a purchase, this can result in this site earning a commission. Affiliate programs and affiliations include, but are not limited to, the eBay Partner Network.
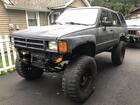
It has been many years since my last post. Nothing huge has changed on the truck except for miles on the ODO and the amount of rust/rot everywhere. The little man in the pictures is 11, and I now have 2.5 year old twin girls as well.
I put on a LCE long tube race header, removed all EGR and other components with some LCE (IIRC) block off plates, and did a nice tune up. Had to redo the exhaust for the millionth time.
I have been itching to get the rust fixed, re-gear, get bigger tires, and get some other smaller things taken care of. I ended up selling the 60's, opting to stay all Toy and save $. I installed a lift and dod a CMC for a friend, so I got his old FJ stealies and tires for $50.
The front end and frame are not bad. The back is. So I disconnected the rear brake line, rear driveshaft, and rear shocks. It is on jack stands ready to be ground and cleaned up. I bought 2x4 to make new front and rear bumpers. I got a stick of 1.5" 0.25" wall DOM to make frame tie ins for the factory roll bar. I got some 0.125"x4" bar to plate the inside and outside of the rear frame rails. I got two pieces of 1.5" square tube to make new rear crossmembers, one of which will be the new rear upper shock mount. I have some 4" channel to make a cap rearmost crossmember. I got some 0.188"x3" to fish plate over seams in my 0.125"x4" plating.
After that, rear axle is due for seals, bearings, rust removal, and new lower shock mounts. I will also be doing new rear spring hangars and shackle hangars. New spring hangars require 18mm bolts and new bushings. Also need to do some fender trimming, body repair, and floor rust repair. Have to drop gas tank, and will reinforce mounting and reinstall the skid when I'm done. When I first bought the truck I had dropped the tank, did new factory pressure and return lines and the fuel pump sending unit bracket. Hopefully it has held up.
I still have the Mustang (always will), but I traded my '09 Taco for a brand new 2017 Taco 4 door Sport V6 Manual 4x4. Added a few little things. Love this truck, plus it has the necessary 5 seats.
cut off the spring hanger and shackle hanger on the passenger side. also cut out the rotted crossmember that used to hold the spare tire and welded a temporary piece of angle to tie the rear part of the frame together to prep for the new crossmembers.
i made some good progress today with the frame repairs.
i started with the outside passenger side, as it was the worst. first plate is 3"x3/16" and goes from the rear most body mount to the bumpstop extension.
the third plate is 4"x1/8" and goes from that third body mount to the next body mount, in front of which the frame is ok. i ran out of welding gas before i finished burning it in.
Its cool to see you come back to the forum and share the life of the Truck. That is a lot of rust, you have the same type of work on the inside of the frames rails?
I am always glad to see these things get repaired and renewed instead of junked!
Its cool to see you come back to the forum and share the life of the Truck. That is a lot of rust, you have the same type of work on the inside of the frames rails?
I am always glad to see these things get repaired and renewed instead of junked!
was pretty cool to come read back through everything myself, to be honest.
the driver side frame rail is no where near as bad, but yes, the inside of the passenger side is just as bad. going to do both sides of both rails.
i told my wife this round will hold for another 10 years, but making a new frame is definitely the next step.
i have a lot of body rot to fix too. i can't afford a newer play truck and can't not have one so fixing it is my only option.
i sold the old oem aluminum rims and bfg's to a great local dude with a fleet of toyotas he has resurrected, so they went to a good home.
i picked up another 80 cuft bottle of gas.
also got the 35's swapped onto my fj rims.
I pulled the springs off the axle. The lowest leaf on one side and second to lowest on the other were cracked and came off in multiple pieces. These were the leaves from the marlin pack. Not sure if it was rust or the way I used them. I have some stock rear packs I will take the leaf and overload (chopped down) off of. Bushings removed from either end. Pro tip on getting the bushing with sleeve out of the main eye when the bolt is seized in and had to be cut off: drill through the rubber, all around, repeatedly, and eventually it'll be chewed up enough for removal. No heating, hammering, pressing, etc.
I also got the axle/backing plate/bearing assemblies pulled. One side leaks bad passed the axle seal, so I'm going to get new bearing pockets in addition to the standard rebuild parts and disc brake brackets. Axle is cleaned up ready for lower shock mounts and brakes. Once everything is done I will prep for paint. Trying the "hammered" paint everyone seems to get goo results with. Thinking of trying "Chassis Saver" for the frame over Por15 as it is supposed to be UV resistant as is.



 Apr 15, 2020 | 11:21 AM


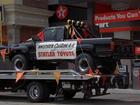


 . Good luck on the rust work.