
ChefYota4x4's 1987 4Runner Build-Up Thread
 .....
.....
 Aug 1, 2013 | 11:45 PM
#7283
Registered User
Joined: Jul 2012
Posts: 2,365
Likes: 4
From: Idaho
nice very quiet did ya pull the seats out to do the tunnel or just pull the carpet back a bit? eventually i have to do this to mine
also the frost king it has to be taped/spray glued into place dont it?
also the frost king it has to be taped/spray glued into place dont it?
Aug 2, 2013 | 12:30 AM
#7284
Thread Starter
Registered User
iTrader: (5)
Joined: Jun 2009
Posts: 19,281
Likes: 20
From: Lake Havasu, AZ
Sweeeet.... I mean, .....is it working out? Hahaha!
I unbolted the seats to give a lil play, but didn't remove the bolts on the outside, just the inside, and then I stick it to the back of my hands and slide my hand in and down to the floor.....until it's even with the hole and slightly overlapping the shifter hole... then u can easily cut it at the edge.
Far as having to add adhesive? Nope,.... it's adhesive backed, closed cell foam & foil topped awesomeness! Lol.
Far as having to add adhesive? Nope,.... it's adhesive backed, closed cell foam & foil topped awesomeness! Lol.
Aug 2, 2013 | 09:34 AM
#7286
Thread Starter
Registered User
iTrader: (5)
Joined: Jun 2009
Posts: 19,281
Likes: 20
From: Lake Havasu, AZ
Ahhh, ok. Lemme know how it works out. I thought about duals with 35's..... But I'll check it out, offroad, and I'll see what I think..... OMEmu has one, I believe.... And I really loved the one I had on my IFS...
Obviously, SFA suspensions, while capable and squishy(crawler setups anyway, lol) in some ways...., they are also proved to driving themselves(wandering on streets) and such a bit more.... AND that is far more obvious without High steer, from what I've felt, having had both styles.
Obviously, SFA suspensions, while capable and squishy(crawler setups anyway, lol) in some ways...., they are also proved to driving themselves(wandering on streets) and such a bit more.... AND that is far more obvious without High steer, from what I've felt, having had both styles.
Last edited by ChefYota4x4; Aug 2, 2013 at 09:55 AM.
Aug 2, 2013 | 12:17 PM
#7287
Thread Starter
Registered User
iTrader: (5)
Joined: Jun 2009
Posts: 19,281
Likes: 20
From: Lake Havasu, AZ
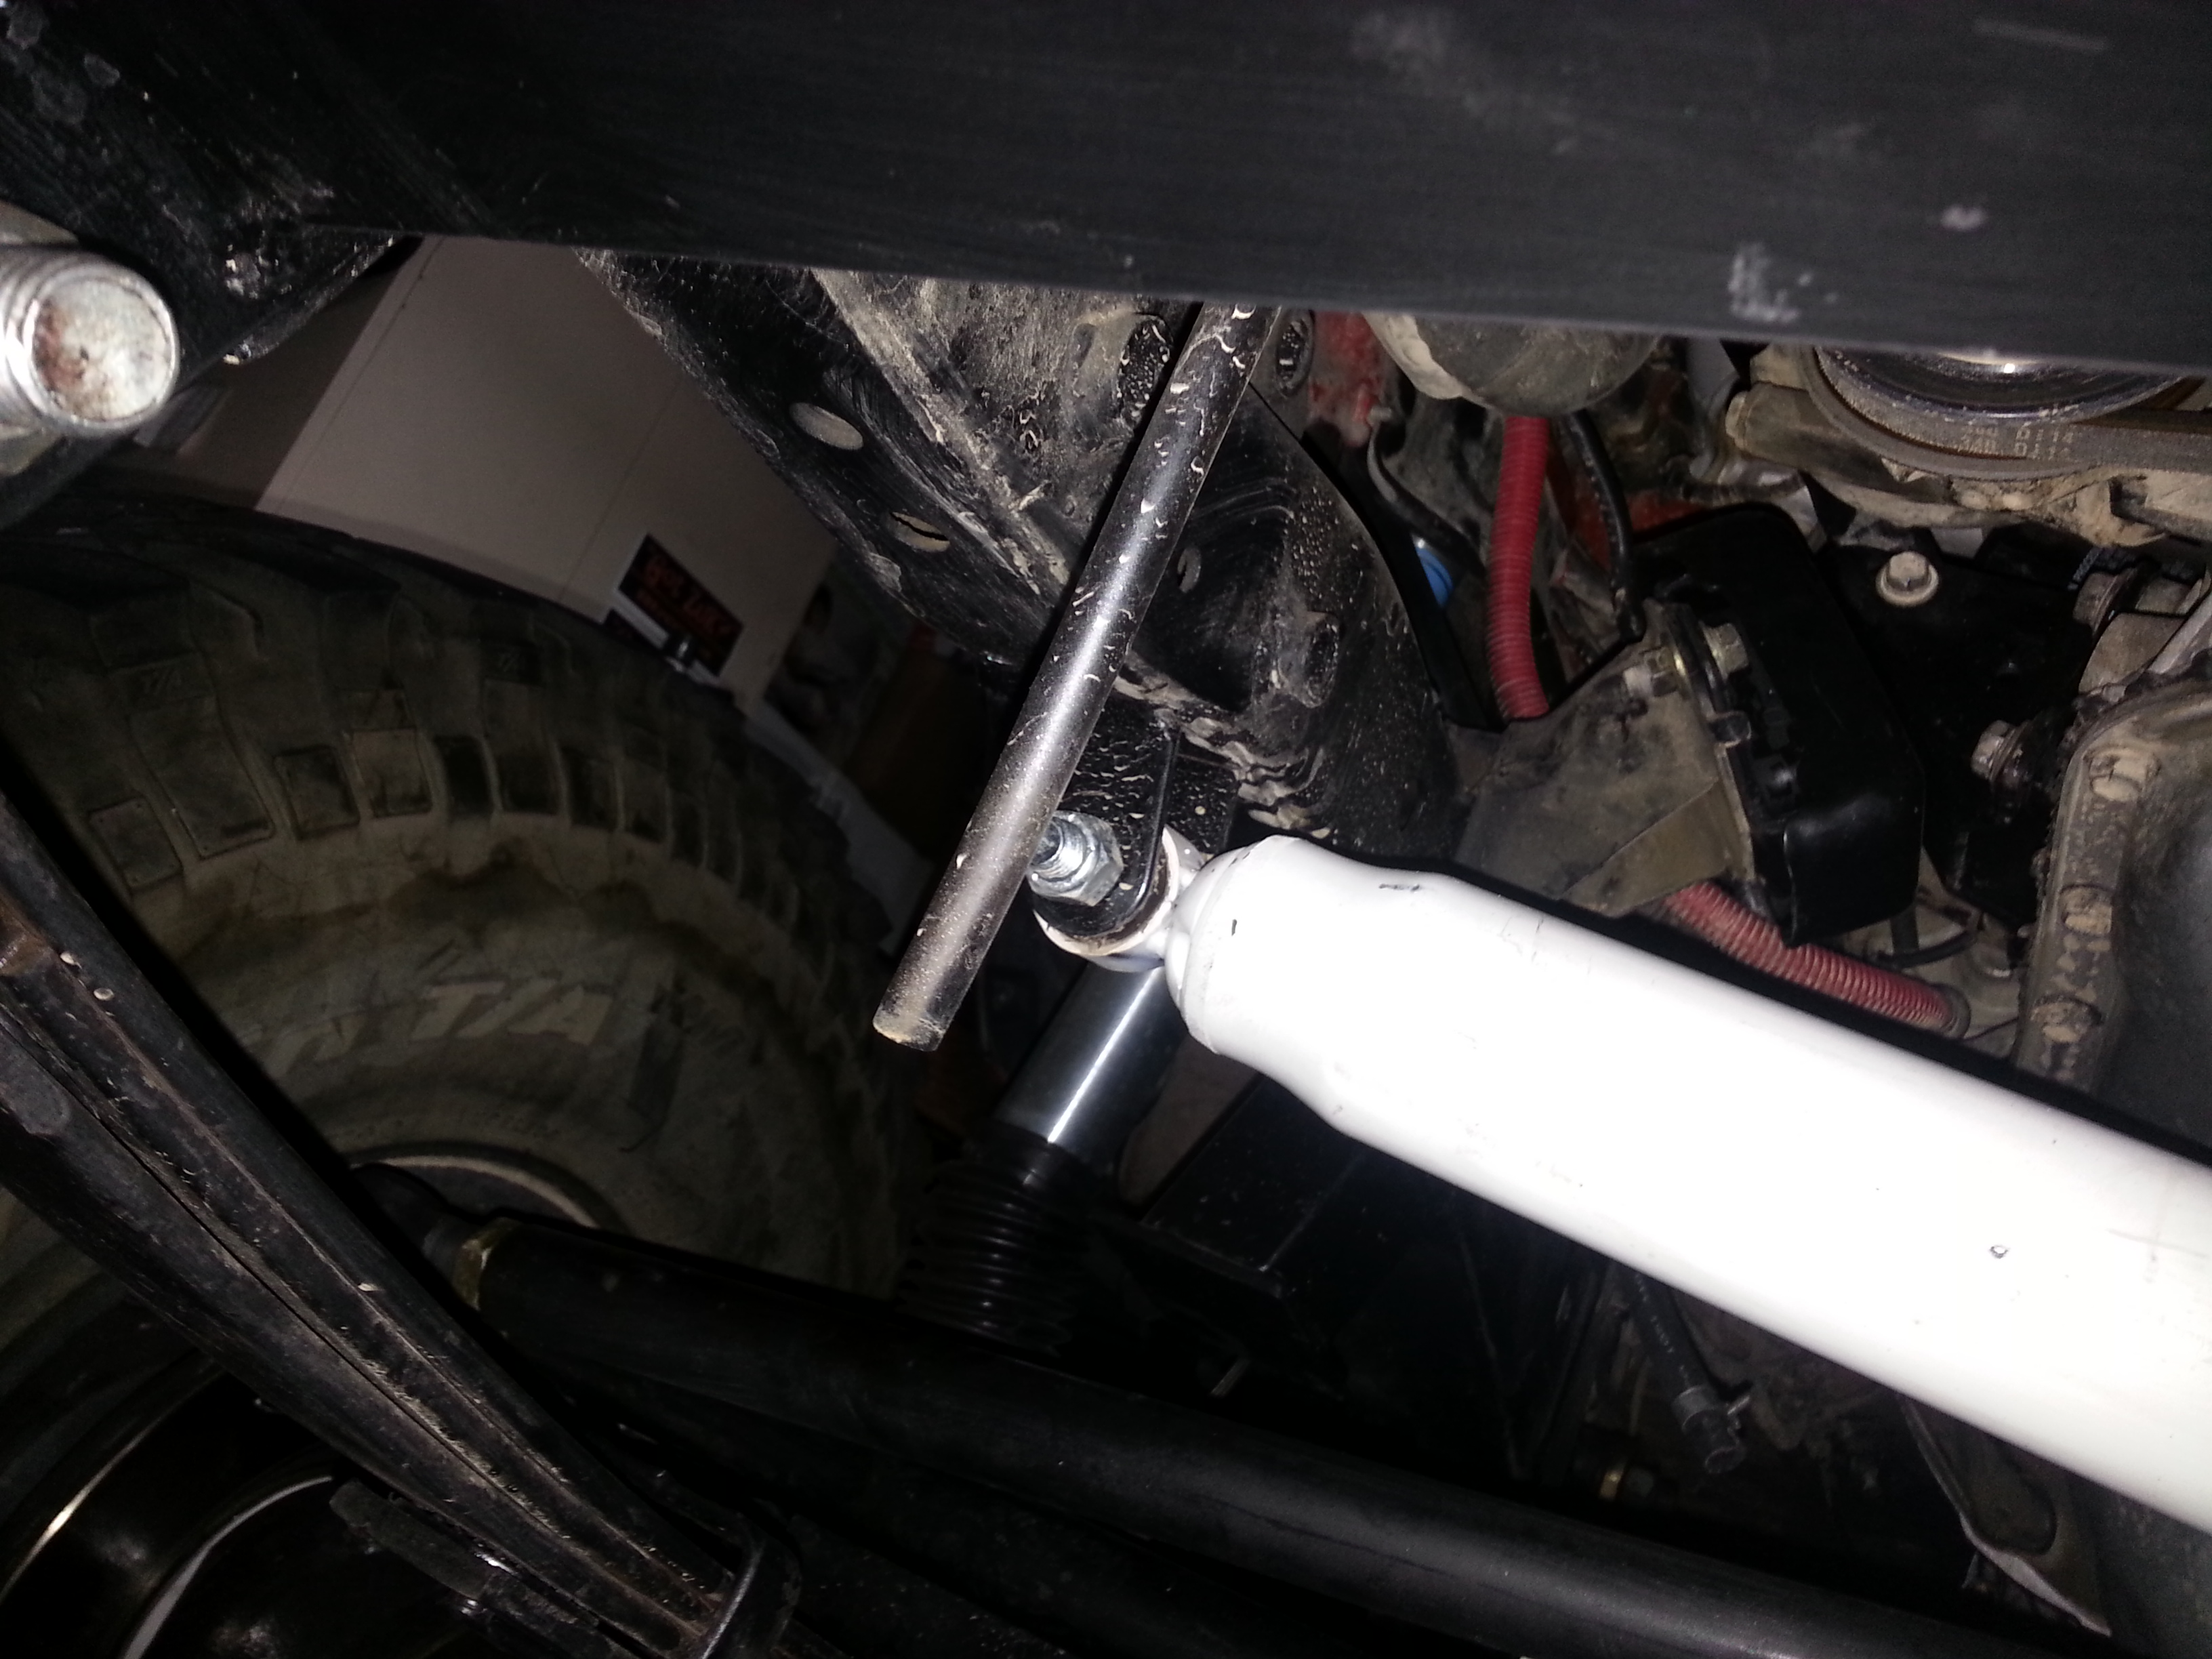
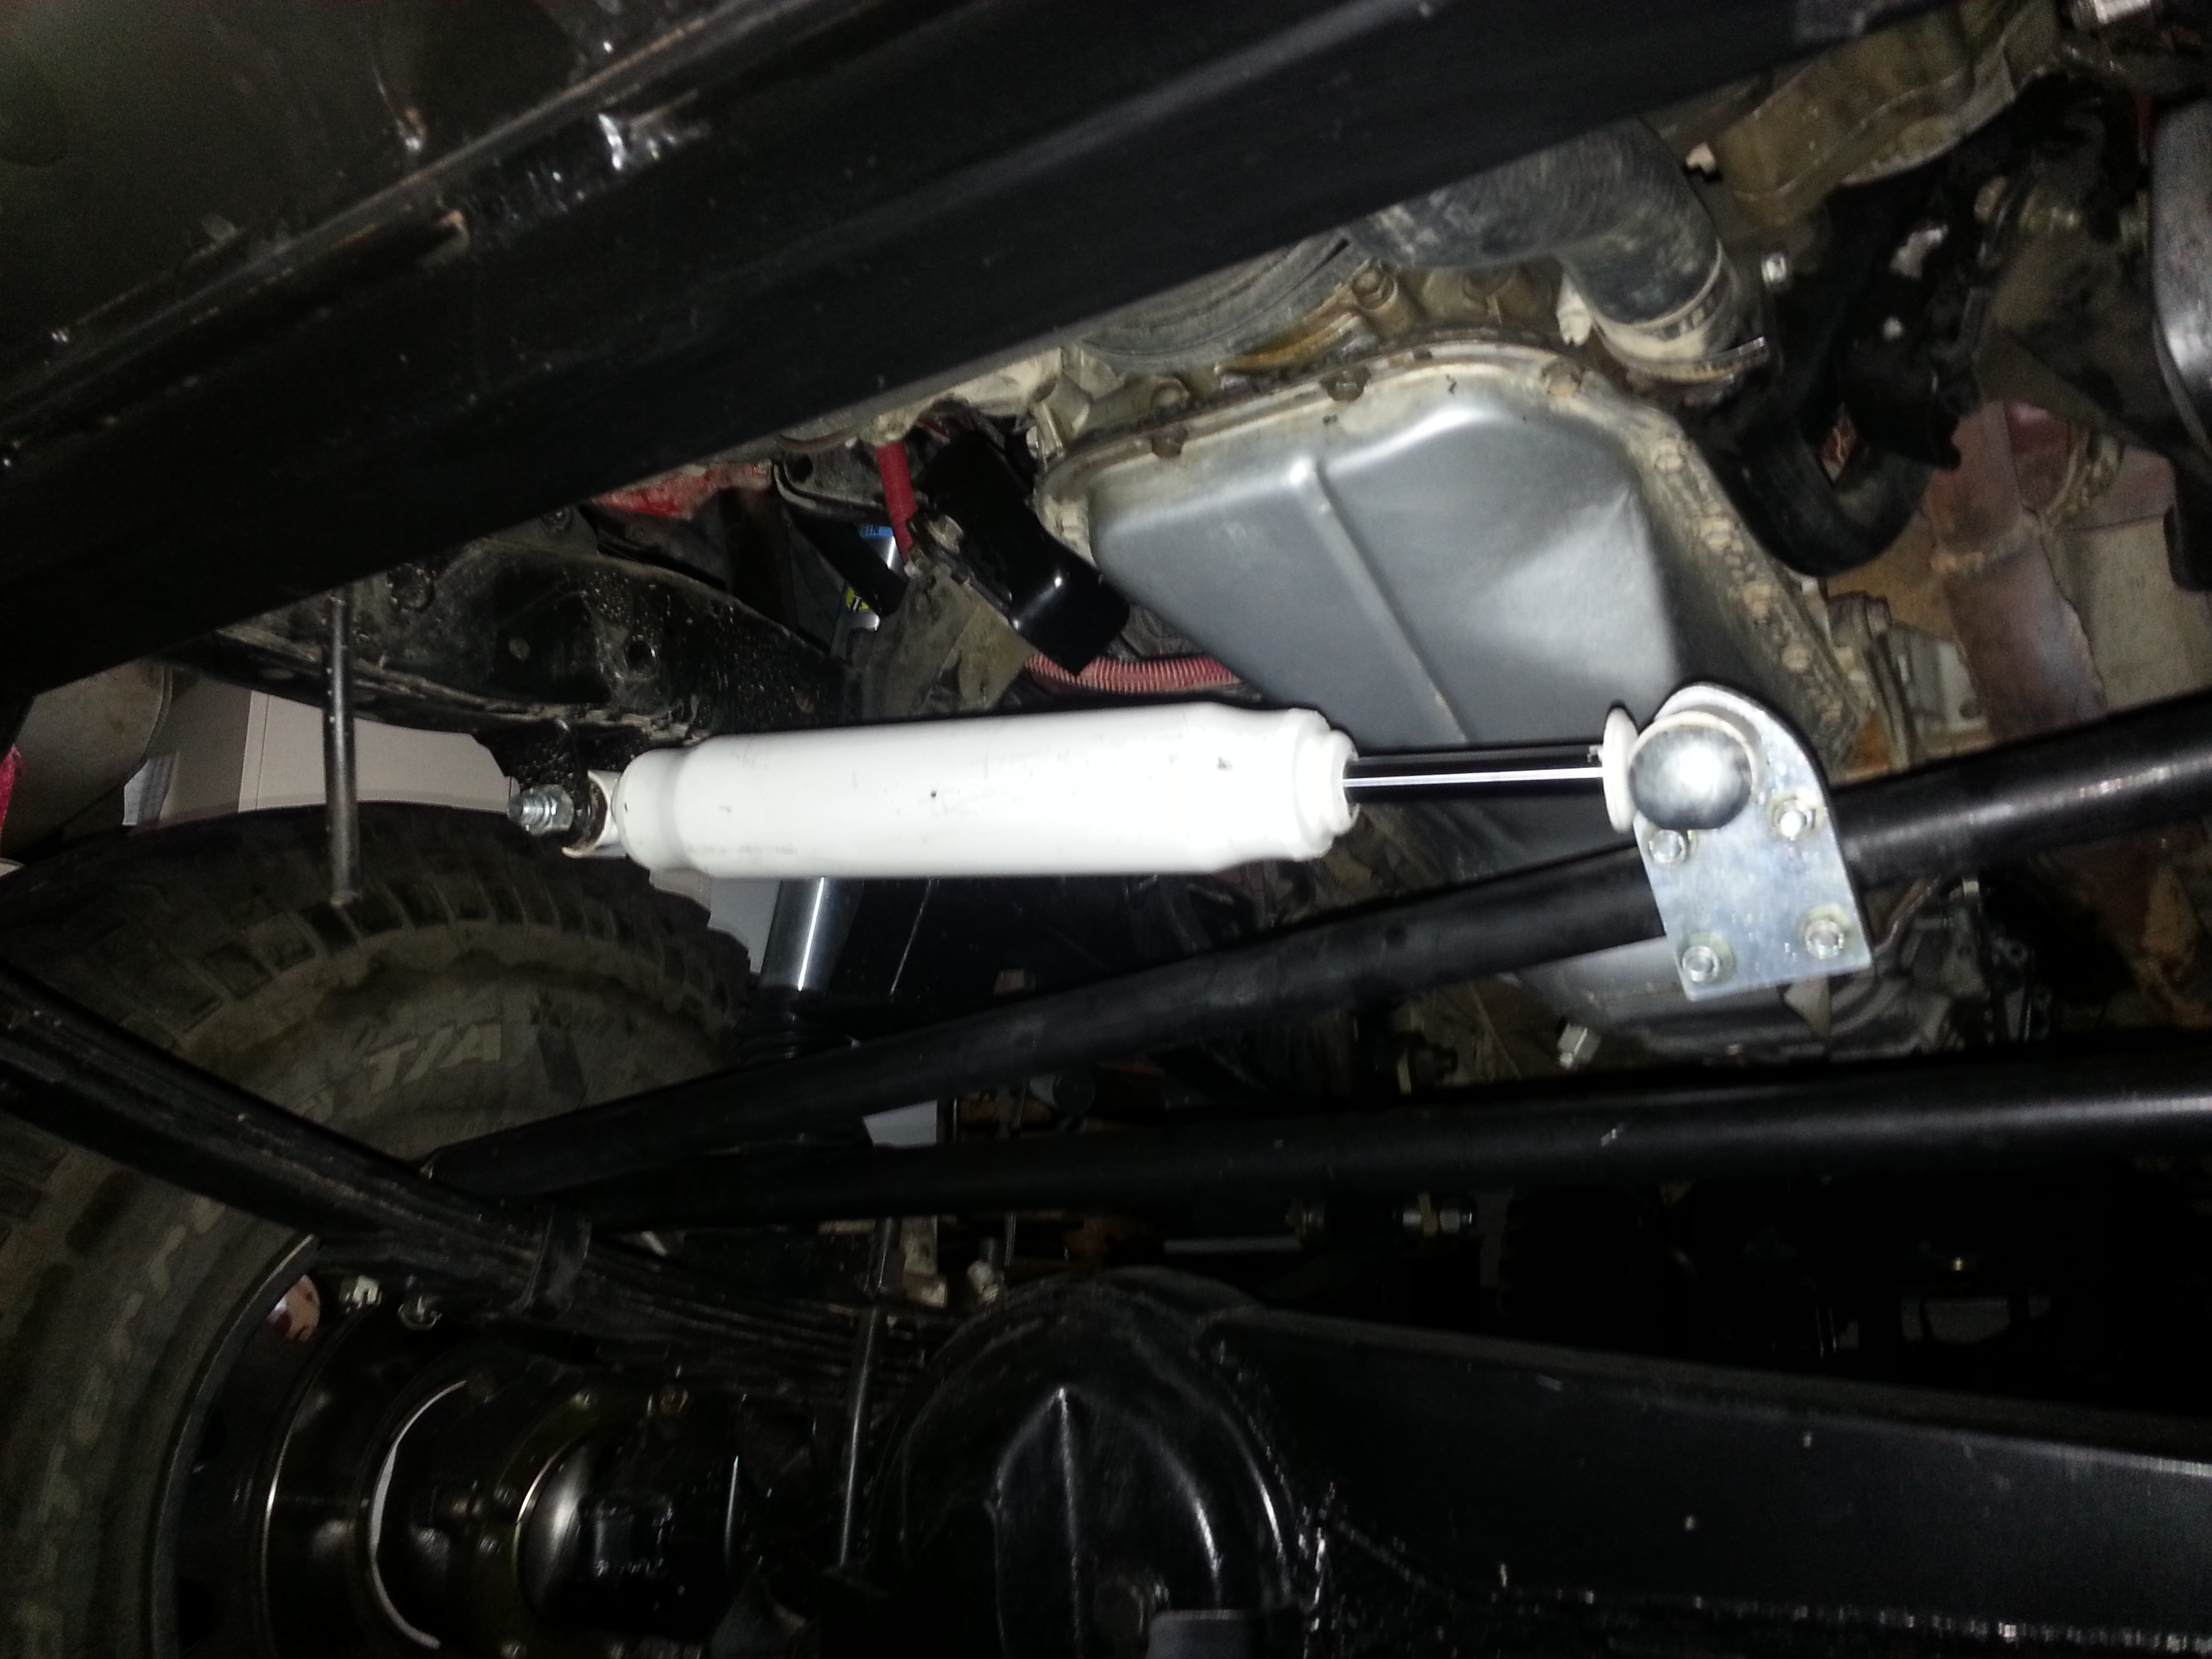
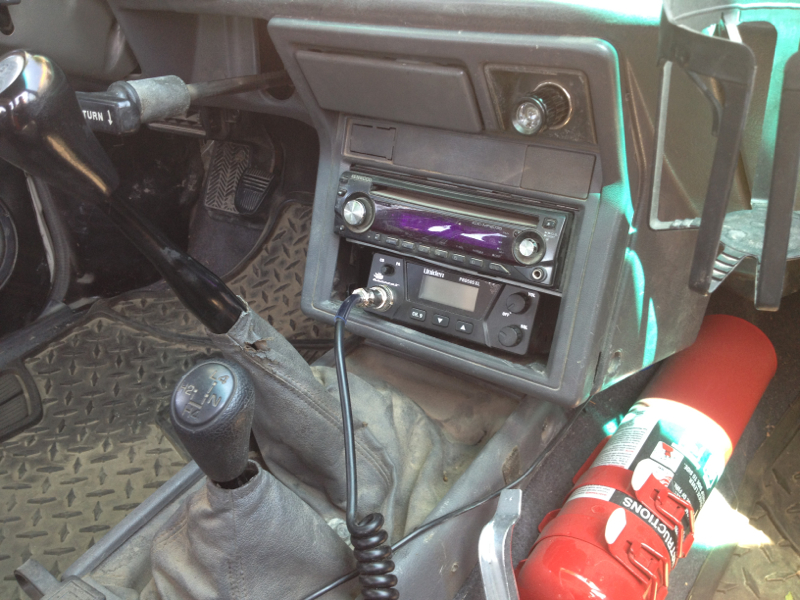
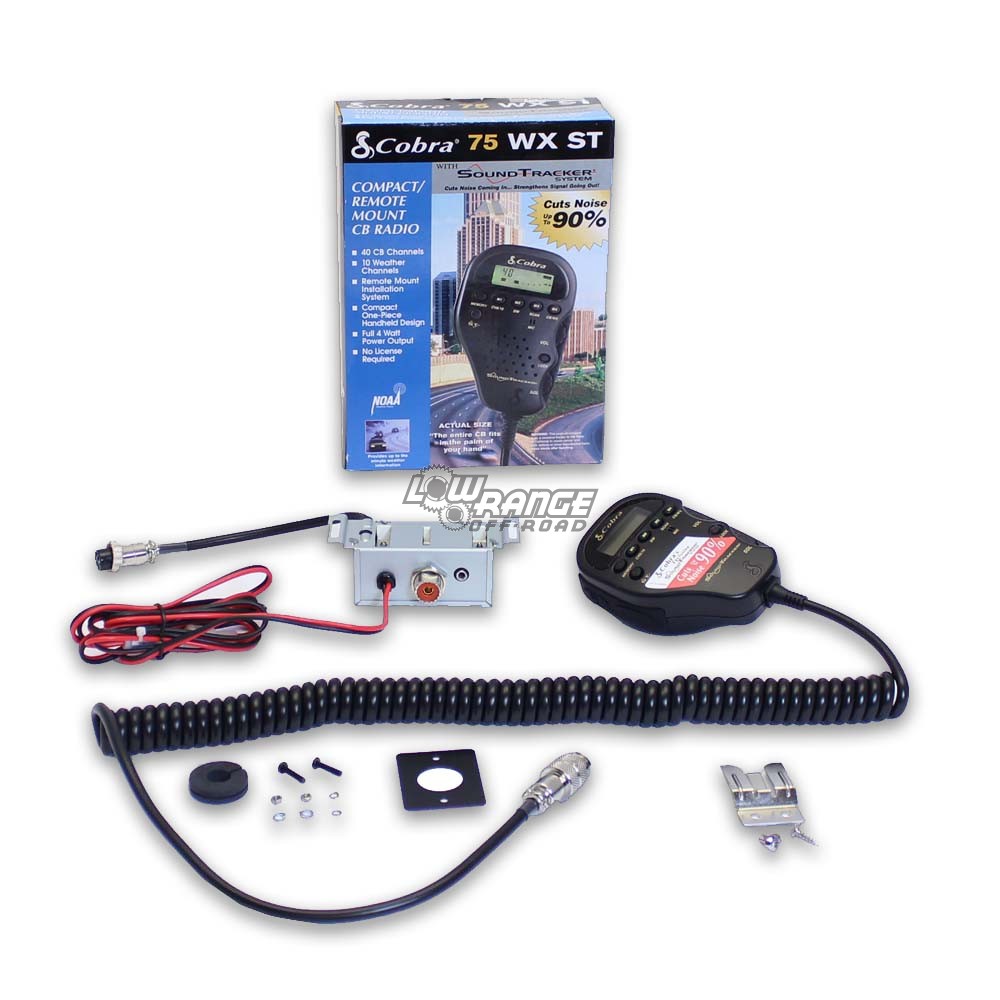
Unfortunately, I haven't had time to get to the CB install, .....but I did get to drive the R3DRUM again, and I'm very pleased with how well insulated from heat and sound that the shifter base turned out! 
Looking up ideas on mounting the CB Remote unit..... Want to mount it up under the dash somewhere.... hmmmmmm
Looking up ideas on mounting the CB Remote unit..... Want to mount it up under the dash somewhere.... hmmmmmm
Aug 2, 2013 | 12:37 PM
#7288
Registered User
Joined: Jul 2012
Posts: 752
Likes: 2
From: Austin, TX
I took out the pocket under my CD player and put the CB in there. It's floating loose right now, but it didn't come close to falling out on my last wheelin trip. I know whatever you do will be cleaner and secure.
 Aug 2, 2013 | 04:30 PM
#7289
Thread Starter
Registered User
iTrader: (5)
Joined: Jun 2009
Posts: 19,281
Likes: 20
From: Lake Havasu, AZ
Hey buddy, thanks for the input... Most do that or the ashtray area..... Only thing is, this is a "hidden" style.... meant to not be seen at all.....
PS: I'm having it terribly difficult time deciding on what type of onboard air I want to do. I really I'm not sure about mountain the compressor underneath... & I could do a compressor inside the terminal and run the air hose through the rear panels and down into and out of the quarter panel... Just like with My differential breather.... then, the air supply would run of the tank which would be noted in my spare tire location.
ORRRRRR, I run the ARB twin and call it a day and just settle for whatever tools it can handle. The Viair 480C is.....
VIAIR 20008 Compressor Kit Specs:
VIAIR 480c Compressor
100psi (100% Duty) /1.67CFM @ 0# & .85CFM @ 200psi (50% Duty)
12 volt Permanent Magnetic MotorMax Working Pressure of 200psi
20 Amp Draw
Min. Ambient Temp.: -40 F.Max. Ambient Temp.: 158 F.
2 Gallon TankDim: 19.07''L x 6.0''W x 13.94''H
This Kit also includes:
*Pressure Switch(165psi ON--200psi OFF)
*1/2''NPT Compression Fitting
*250psi Pressure Safety Valve
*Drain Cock*Drain Cock
*Removable Air Filter
*Just Mount w/4Bolts-Run Power Leads and then PLAYTIME!!
*Complete Instructions
*VIAIR 1 Year Warranty against DefectsThis Unit is perfect for:Air HornsAir Lockers for 4x4Emergency AirRe-Airing tires-No more having to stop for air!!Air for Pneumatic ToolsPickups, Jeeps, Semi-Trucks-Anything.RV's & Tow Campers.Can Mount to plywood platform-use as a portable unit.
*************************************
ARB TWIN TANK:
About the Product:
ARB's new CKMTA12 and CKMTA24 twin on-board compressor kits were designed to fill the market need for a compact sized yet high-volume compressed air source to suit the high volume airflow needs of most air powered tools, and also to suit the actuation and control needs of the ARB Air Locker, and the harsh and demanding environment of the ARB Air Locker user.˟
Applications:
˟Pneumatic supply and electrical control for ARB Air Locker(s). (Air Locker Manifold Kit #171503 required)Rapid inflation of small, medium and large tires.
Air tools rated up to 85LPM [3CFM] @ 6Bar [90PSI] continuous supply. Air tools rated higher than 85LPM [3CFM] @ 6Bar [90PSI] using an˟optional air tank suitable to the run time requirements.˟
Kit Includes:
*Fully assembled and tested air compressor (12V or 24V).
*Complete wiring loom w/ Air Locker solenoid plug-in terminals.
*Automotive OEM quality compressor isolating switch.
*2 x relocatable splash resistant air filters with washable high-flow sintered bronze filter cartridges.
*Mounting bolts and washers.
*Comprehensive photo illustrated installation guide
Last edited by ChefYota4x4; Aug 2, 2013 at 05:52 PM.
Aug 2, 2013 | 06:02 PM
#7291
Thread Starter
Registered User
iTrader: (5)
Joined: Jun 2009
Posts: 19,281
Likes: 20
From: Lake Havasu, AZ
Yeah, it's pretty cool.... More than one of the CB pros I know have told me in PM's that they love it. Only problem I'll have is that I will have to install the Firestick Doorjam mount from Firestik on the passenger side of the tailgate.....cuz I have some Filler showing where it would mount in the driver side body piece above the taillight/inside the tailgate jam. I dont see any filler on the paseenger side. Grrrr! Lol. Shouldn't hurt reception any.....so s'all good. Plus, I could have my passenger get out and tuck it, I'll just say, "it's on your side, Homie/Girl!" Hahaha.
Aug 2, 2013 | 06:22 PM
#7292
Thread Starter
Registered User
iTrader: (5)
Joined: Jun 2009
Posts: 19,281
Likes: 20
From: Lake Havasu, AZ
http://m.lowes.com/product?langId=-1...&nValue=SEARCH
My Kobalt 350# 1/2" drive air wrench....
Specifications
Impact Wrench Size (Inches)0.5
Ft.-lbs. torque (Foot/lbs.)350.0__ CFM @ __ PSI
6 CFM @ 90 PSI
So, I would likely need the 2.5 gal portable Viair/etc tank to run this one that I have? ^^^^^^^
***********************************
http://m.lowes.com/product?langId=-1...&nValue=SEARCH
Here's the smaller one I have.....
Specifications
Impact Wrench Size (Inches) 3/8"
Ft.-lbs. torque (Foot/lbs.)60.0__ CFM @ __ PSI...... 4.5 CFM @ 90 PSI
ANSI Safety Listing
Drive Size3/8"
Aug 3, 2013 | 12:26 PM
#7293
Thread Starter
Registered User
iTrader: (5)
Joined: Jun 2009
Posts: 19,281
Likes: 20
From: Lake Havasu, AZ
Dragon, I wondered if u could help out on which compressor would be needed to operate both or at least one of my air tools? I'm not freash on the CFM info/appplication. I'm look it up and post more though.
Aug 3, 2013 | 12:35 PM
#7294
Registered User
Joined: Jul 2012
Posts: 2,365
Likes: 4
From: Idaho
ripped this from a website it explains it better than i could me bein a shadetree dragon :-D
The amount of air a compressor delivers is measured in cubic feet per minute (CFM). Note that the CFM a compressor delivers changes at varying psi. Most air tools have specific requirements for volume and pressure. These requirements must be met for the tool to function properly. When choosing a compressor, consider the tools you want it to operate. Select the tool that requires the highest CFM at the highest psi, and add 50% to the required CFM for a margin of safety. For example, if a tool requires 3 CFM at 90 psi, select a compressor that delivers at least 4.5 CFM at 90 psi. Use this formula to ensure that the tool receives enough air to function properly.

The amount of air a compressor delivers is measured in cubic feet per minute (CFM). Note that the CFM a compressor delivers changes at varying psi. Most air tools have specific requirements for volume and pressure. These requirements must be met for the tool to function properly. When choosing a compressor, consider the tools you want it to operate. Select the tool that requires the highest CFM at the highest psi, and add 50% to the required CFM for a margin of safety. For example, if a tool requires 3 CFM at 90 psi, select a compressor that delivers at least 4.5 CFM at 90 psi. Use this formula to ensure that the tool receives enough air to function properly.
Aug 3, 2013 | 12:39 PM
#7295
Registered User
Joined: Jul 2012
Posts: 2,365
Likes: 4
From: Idaho
in more laymen speek
the compressor has to feed a percent more CFM than the tool needs at the right pressure
the storage tank size is only for how long the tool can operate before the compressor has to catch up an recharge the tank
the compressor has to feed a percent more CFM than the tool needs at the right pressure
the storage tank size is only for how long the tool can operate before the compressor has to catch up an recharge the tank
Aug 3, 2013 | 01:01 PM
#7296
Thread Starter
Registered User
iTrader: (5)
Joined: Jun 2009
Posts: 19,281
Likes: 20
From: Lake Havasu, AZ
Yeah, I figured neitger of these would be adequate for my 1/2 drive(to change out tires quickly, make a repair that is much quicker with air tools, either in yhe blazing heat or freezin cold..... It SEEMS REDUNDANT......but it's happened to me before more than once)......
With the 200psi capable 2.5 gal tank..... I would be able to break the lugs free with short bursts......, but with the ARB alone....... not likely to cut it without a spare tank. it looks as though, according to the requirements math..... The ARB would probably do just fine with my smaller tool and be able to keep up. Maybe I would be better off investing in a half inch drive 18 volt quality cordless with a couple extra batteries... Then just get one that can fill my tires fast and handle my 3/8ths?
I'm not asking everyone to the side for me I'm just curious what people think. I've pretty much narrowed it down to those two compressors because they seem to have the best reviews and great customer service.
Aug 3, 2013 | 01:28 PM
#7297
Registered User
Joined: Jul 2012
Posts: 2,365
Likes: 4
From: Idaho
to be devils advocate here
the reason your doing the compressor is to reduce the tools youd carry adding electrical tools adds more to think about when going to play
did i charge the tools batteries? ahh crud....
id go with the neitgear
the reason your doing the compressor is to reduce the tools youd carry adding electrical tools adds more to think about when going to play
did i charge the tools batteries? ahh crud....
id go with the neitgear
 Aug 3, 2013 | 02:51 PM
#7299
Registered User
Joined: Jul 2012
Posts: 752
Likes: 2
From: Austin, TX
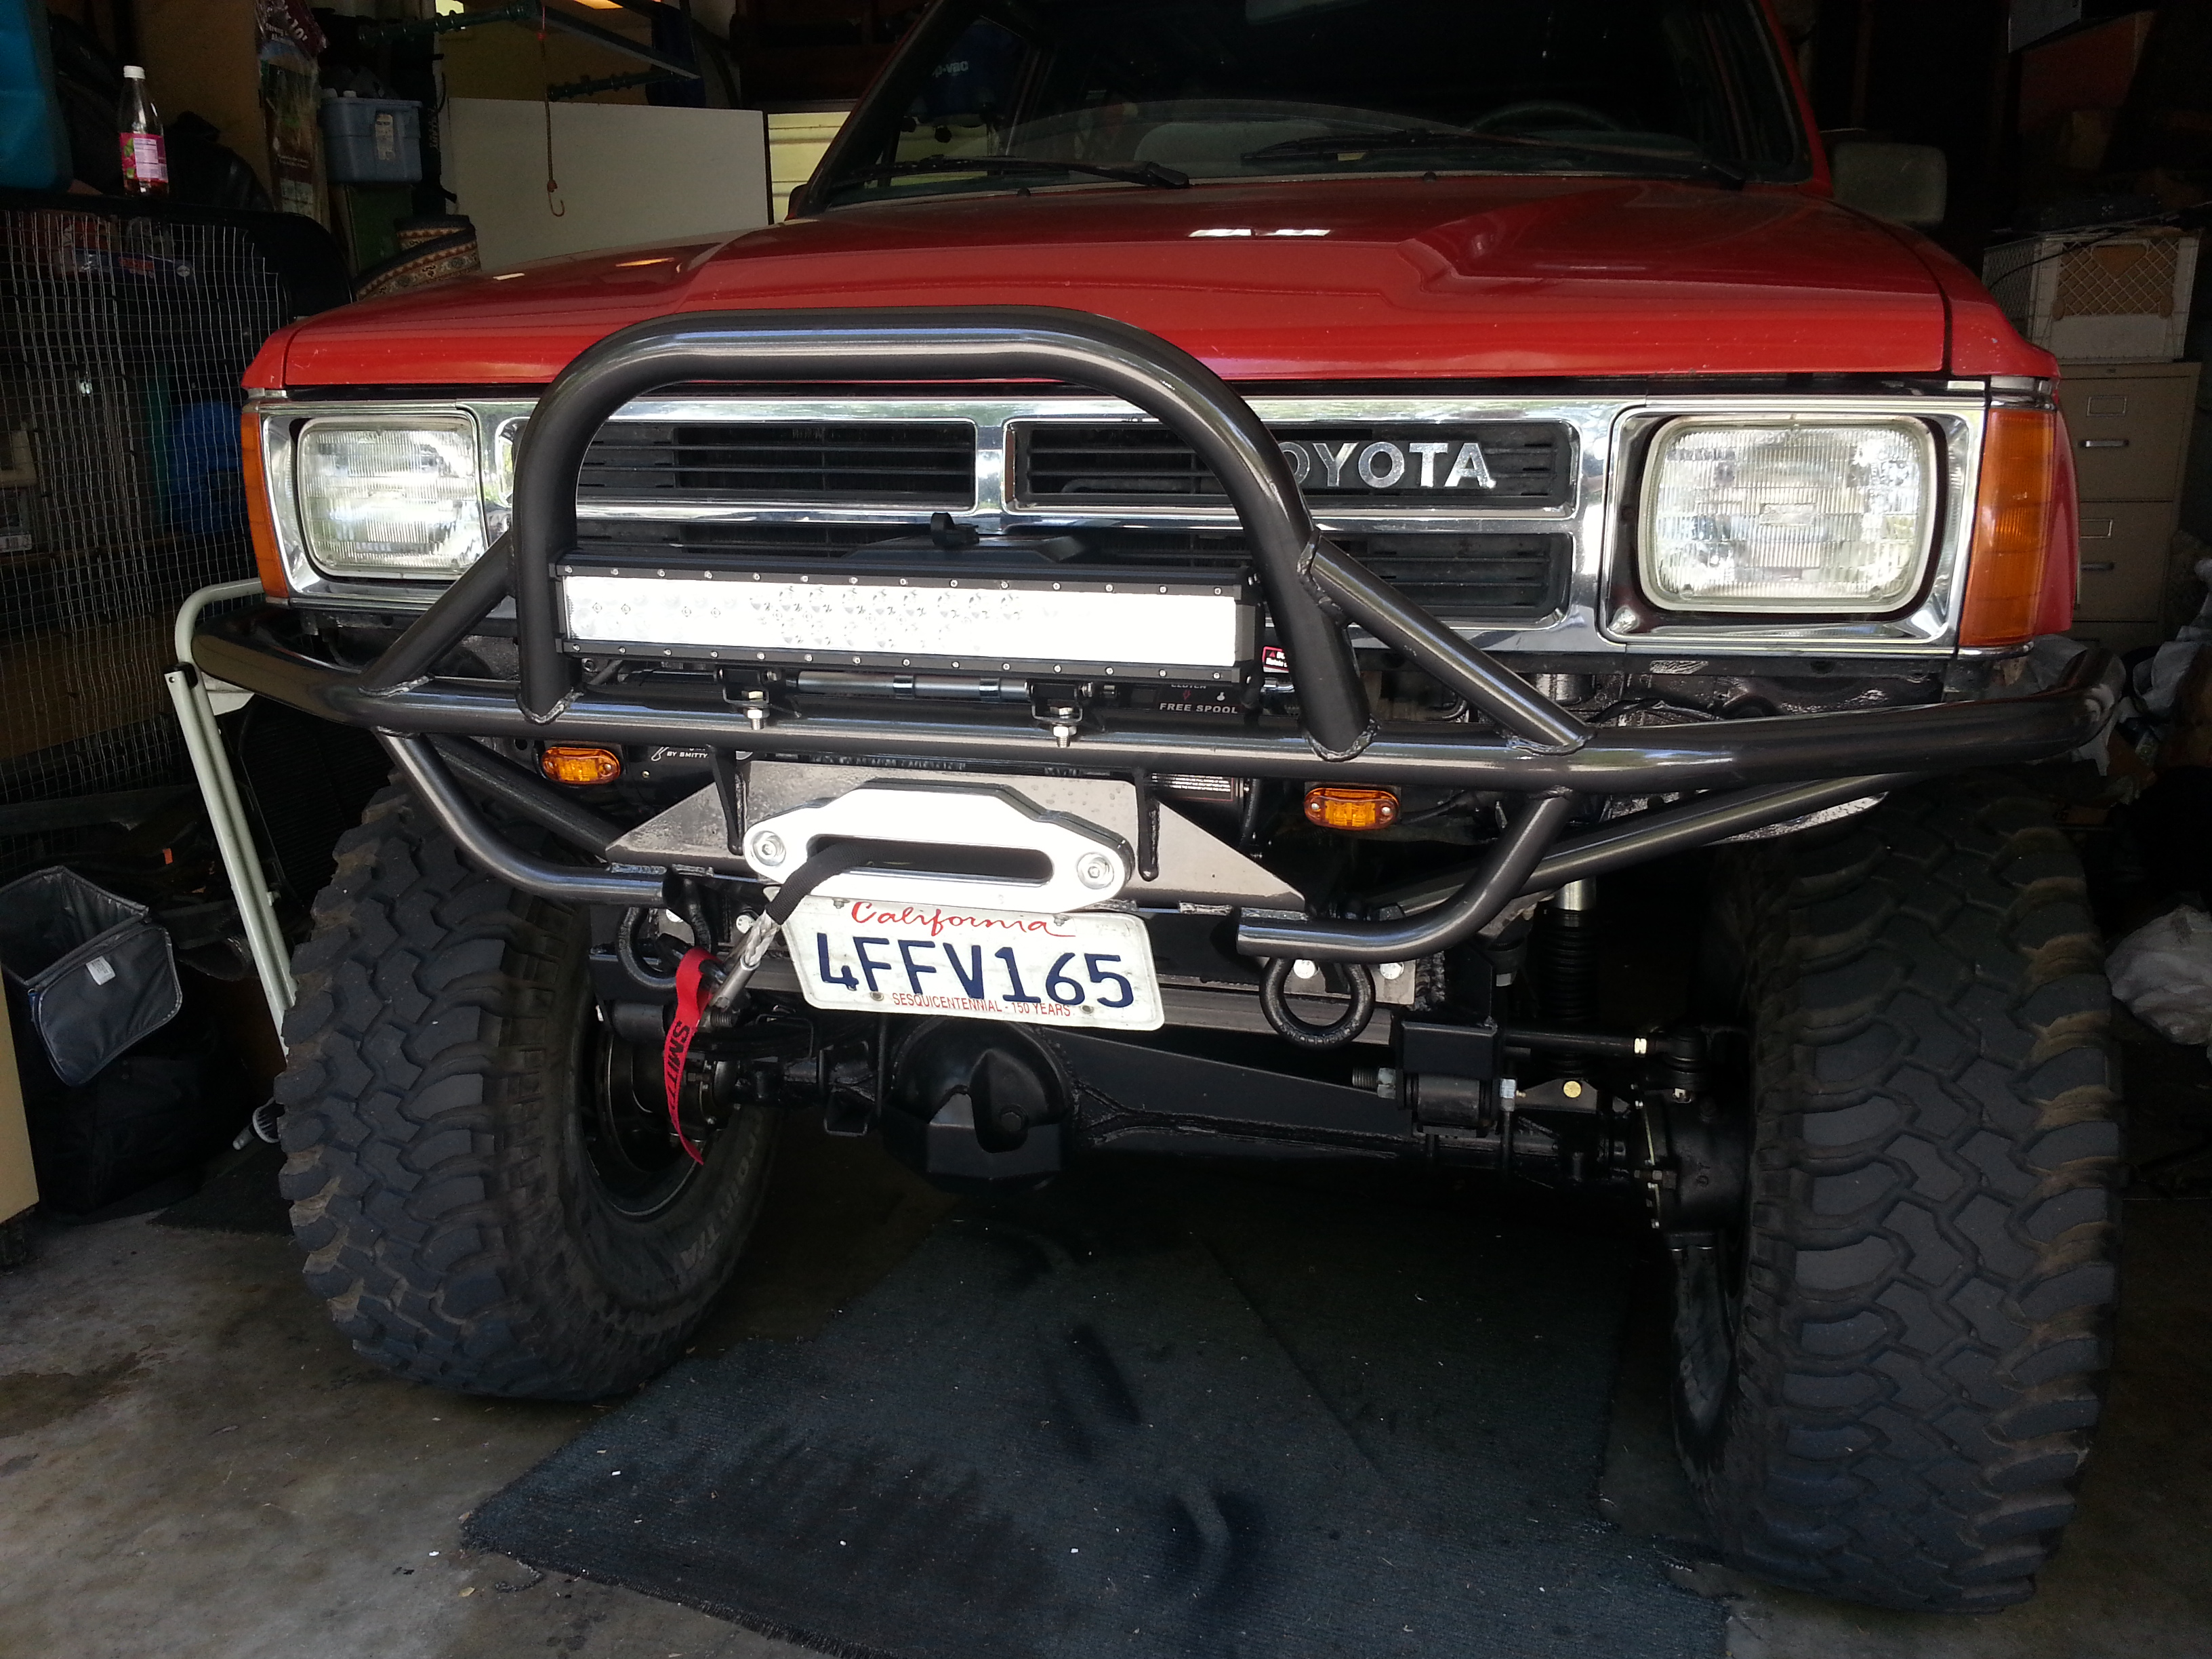
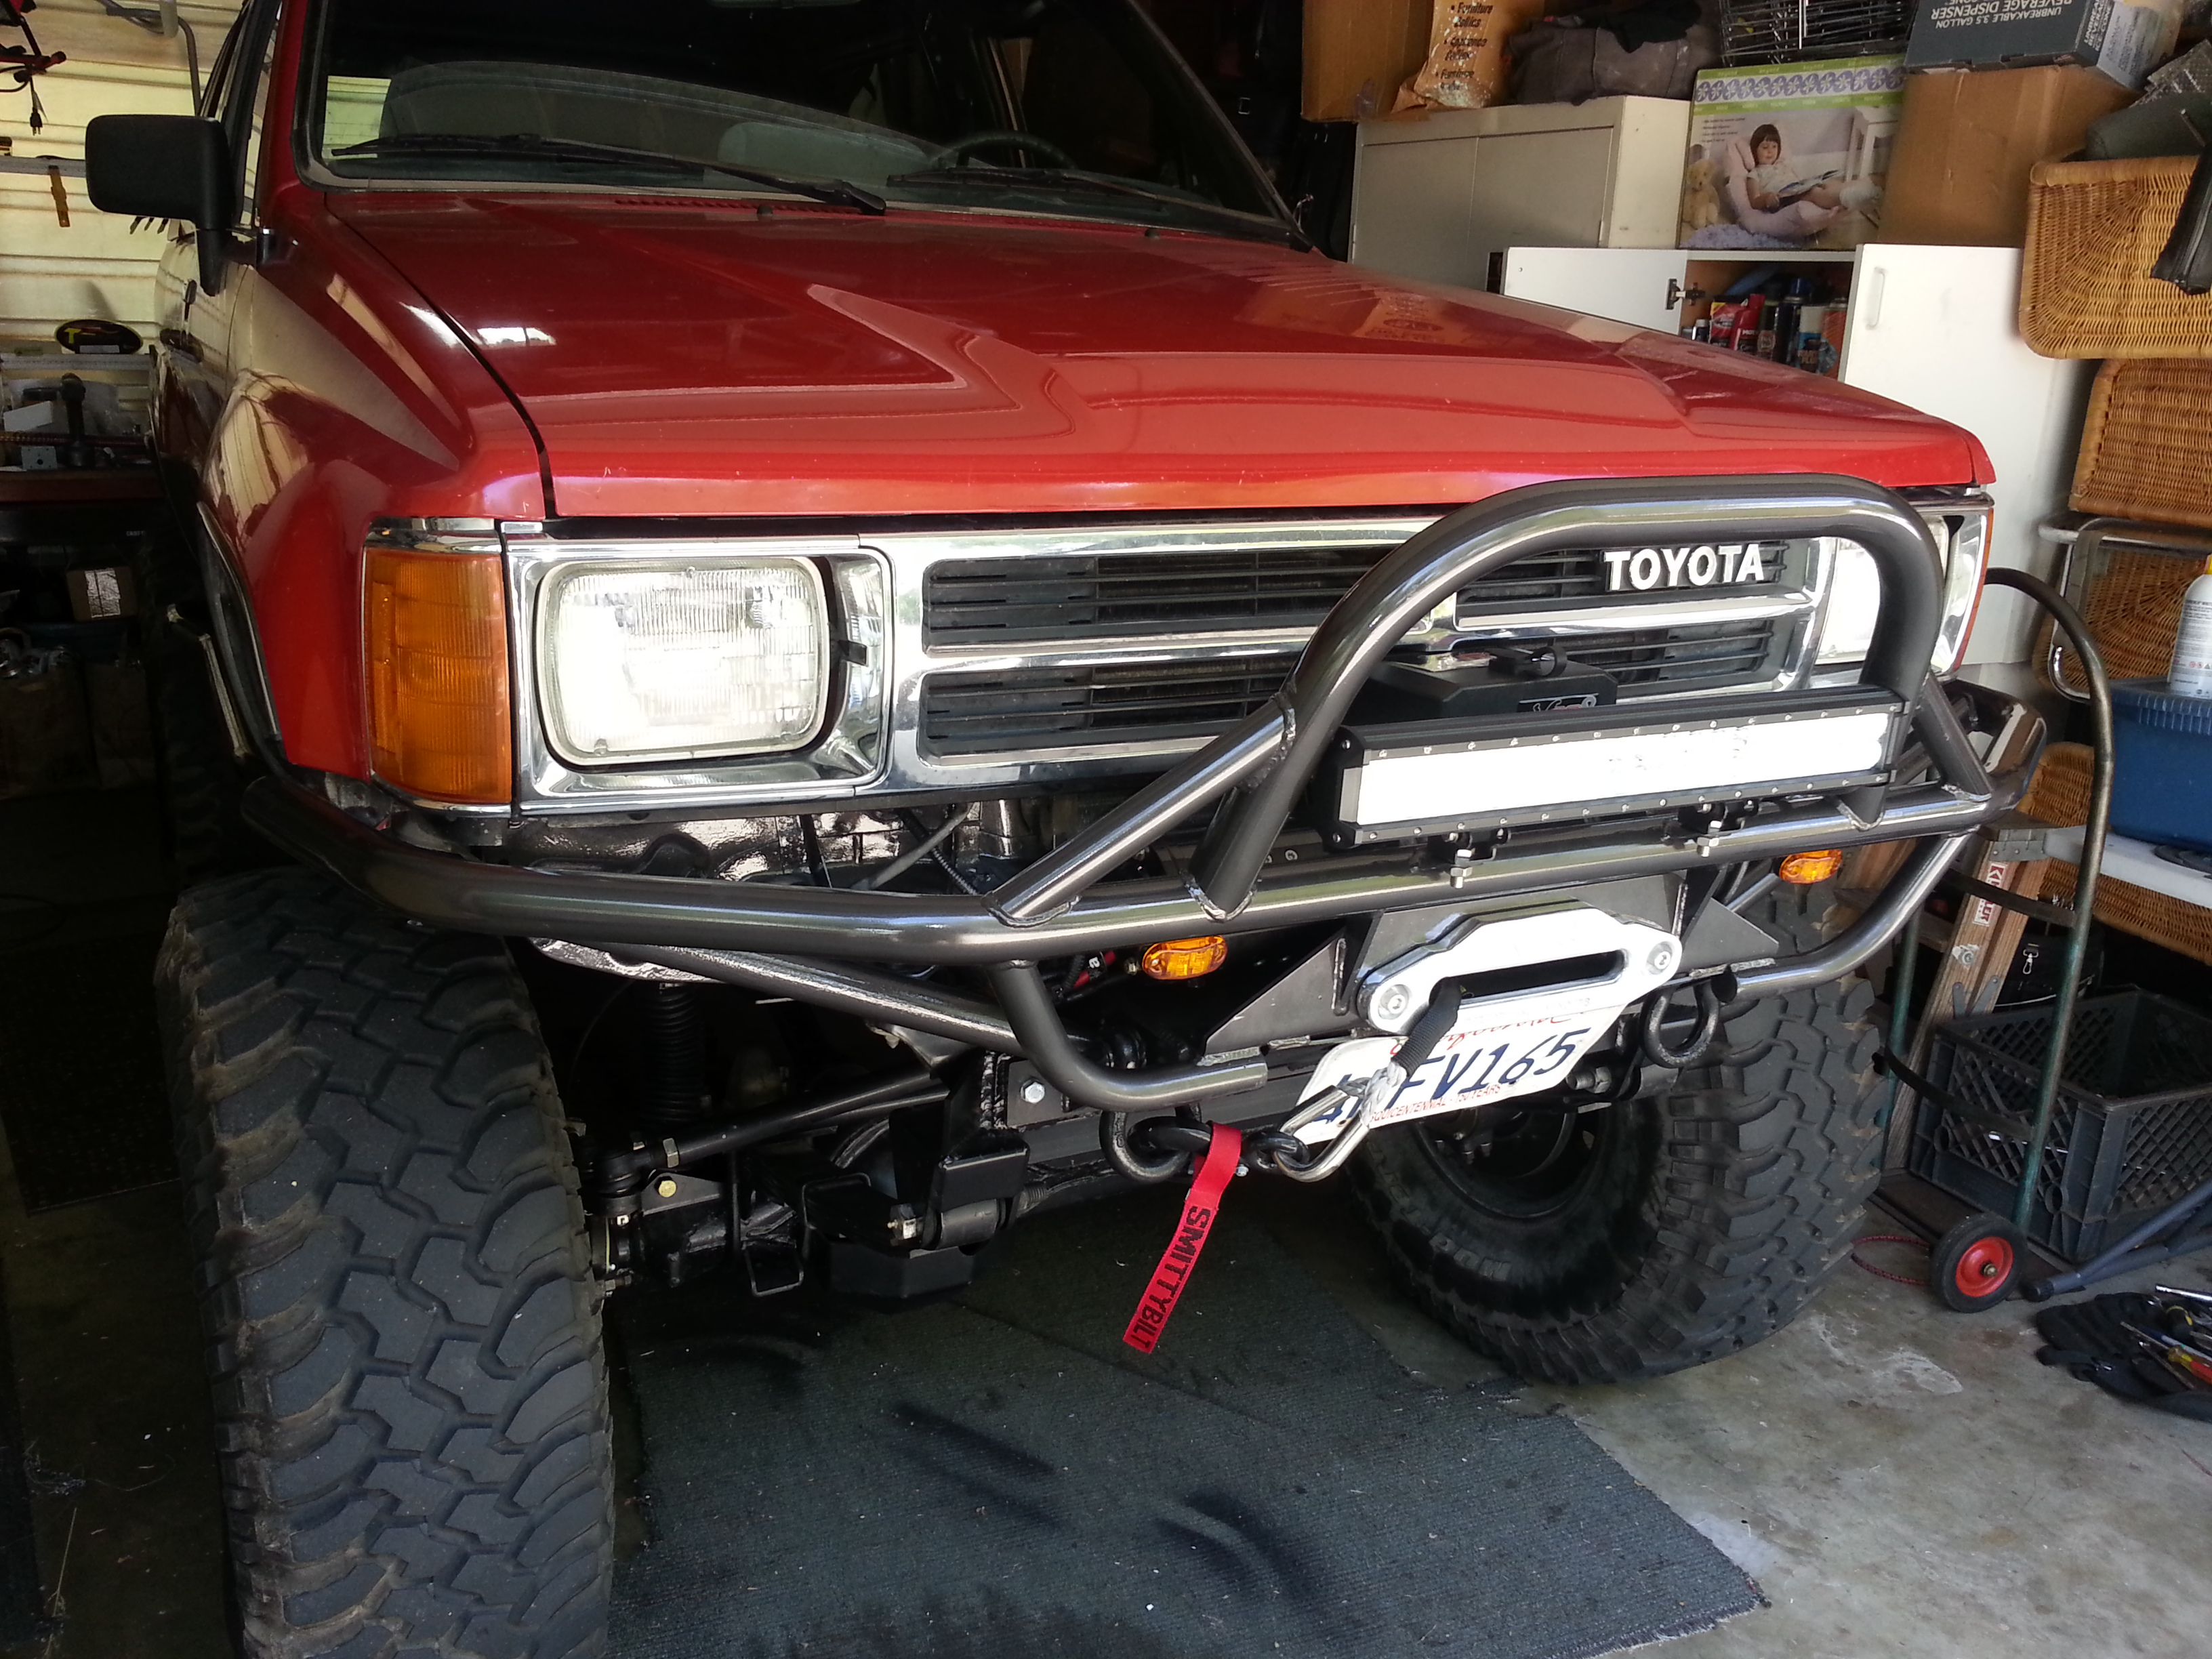
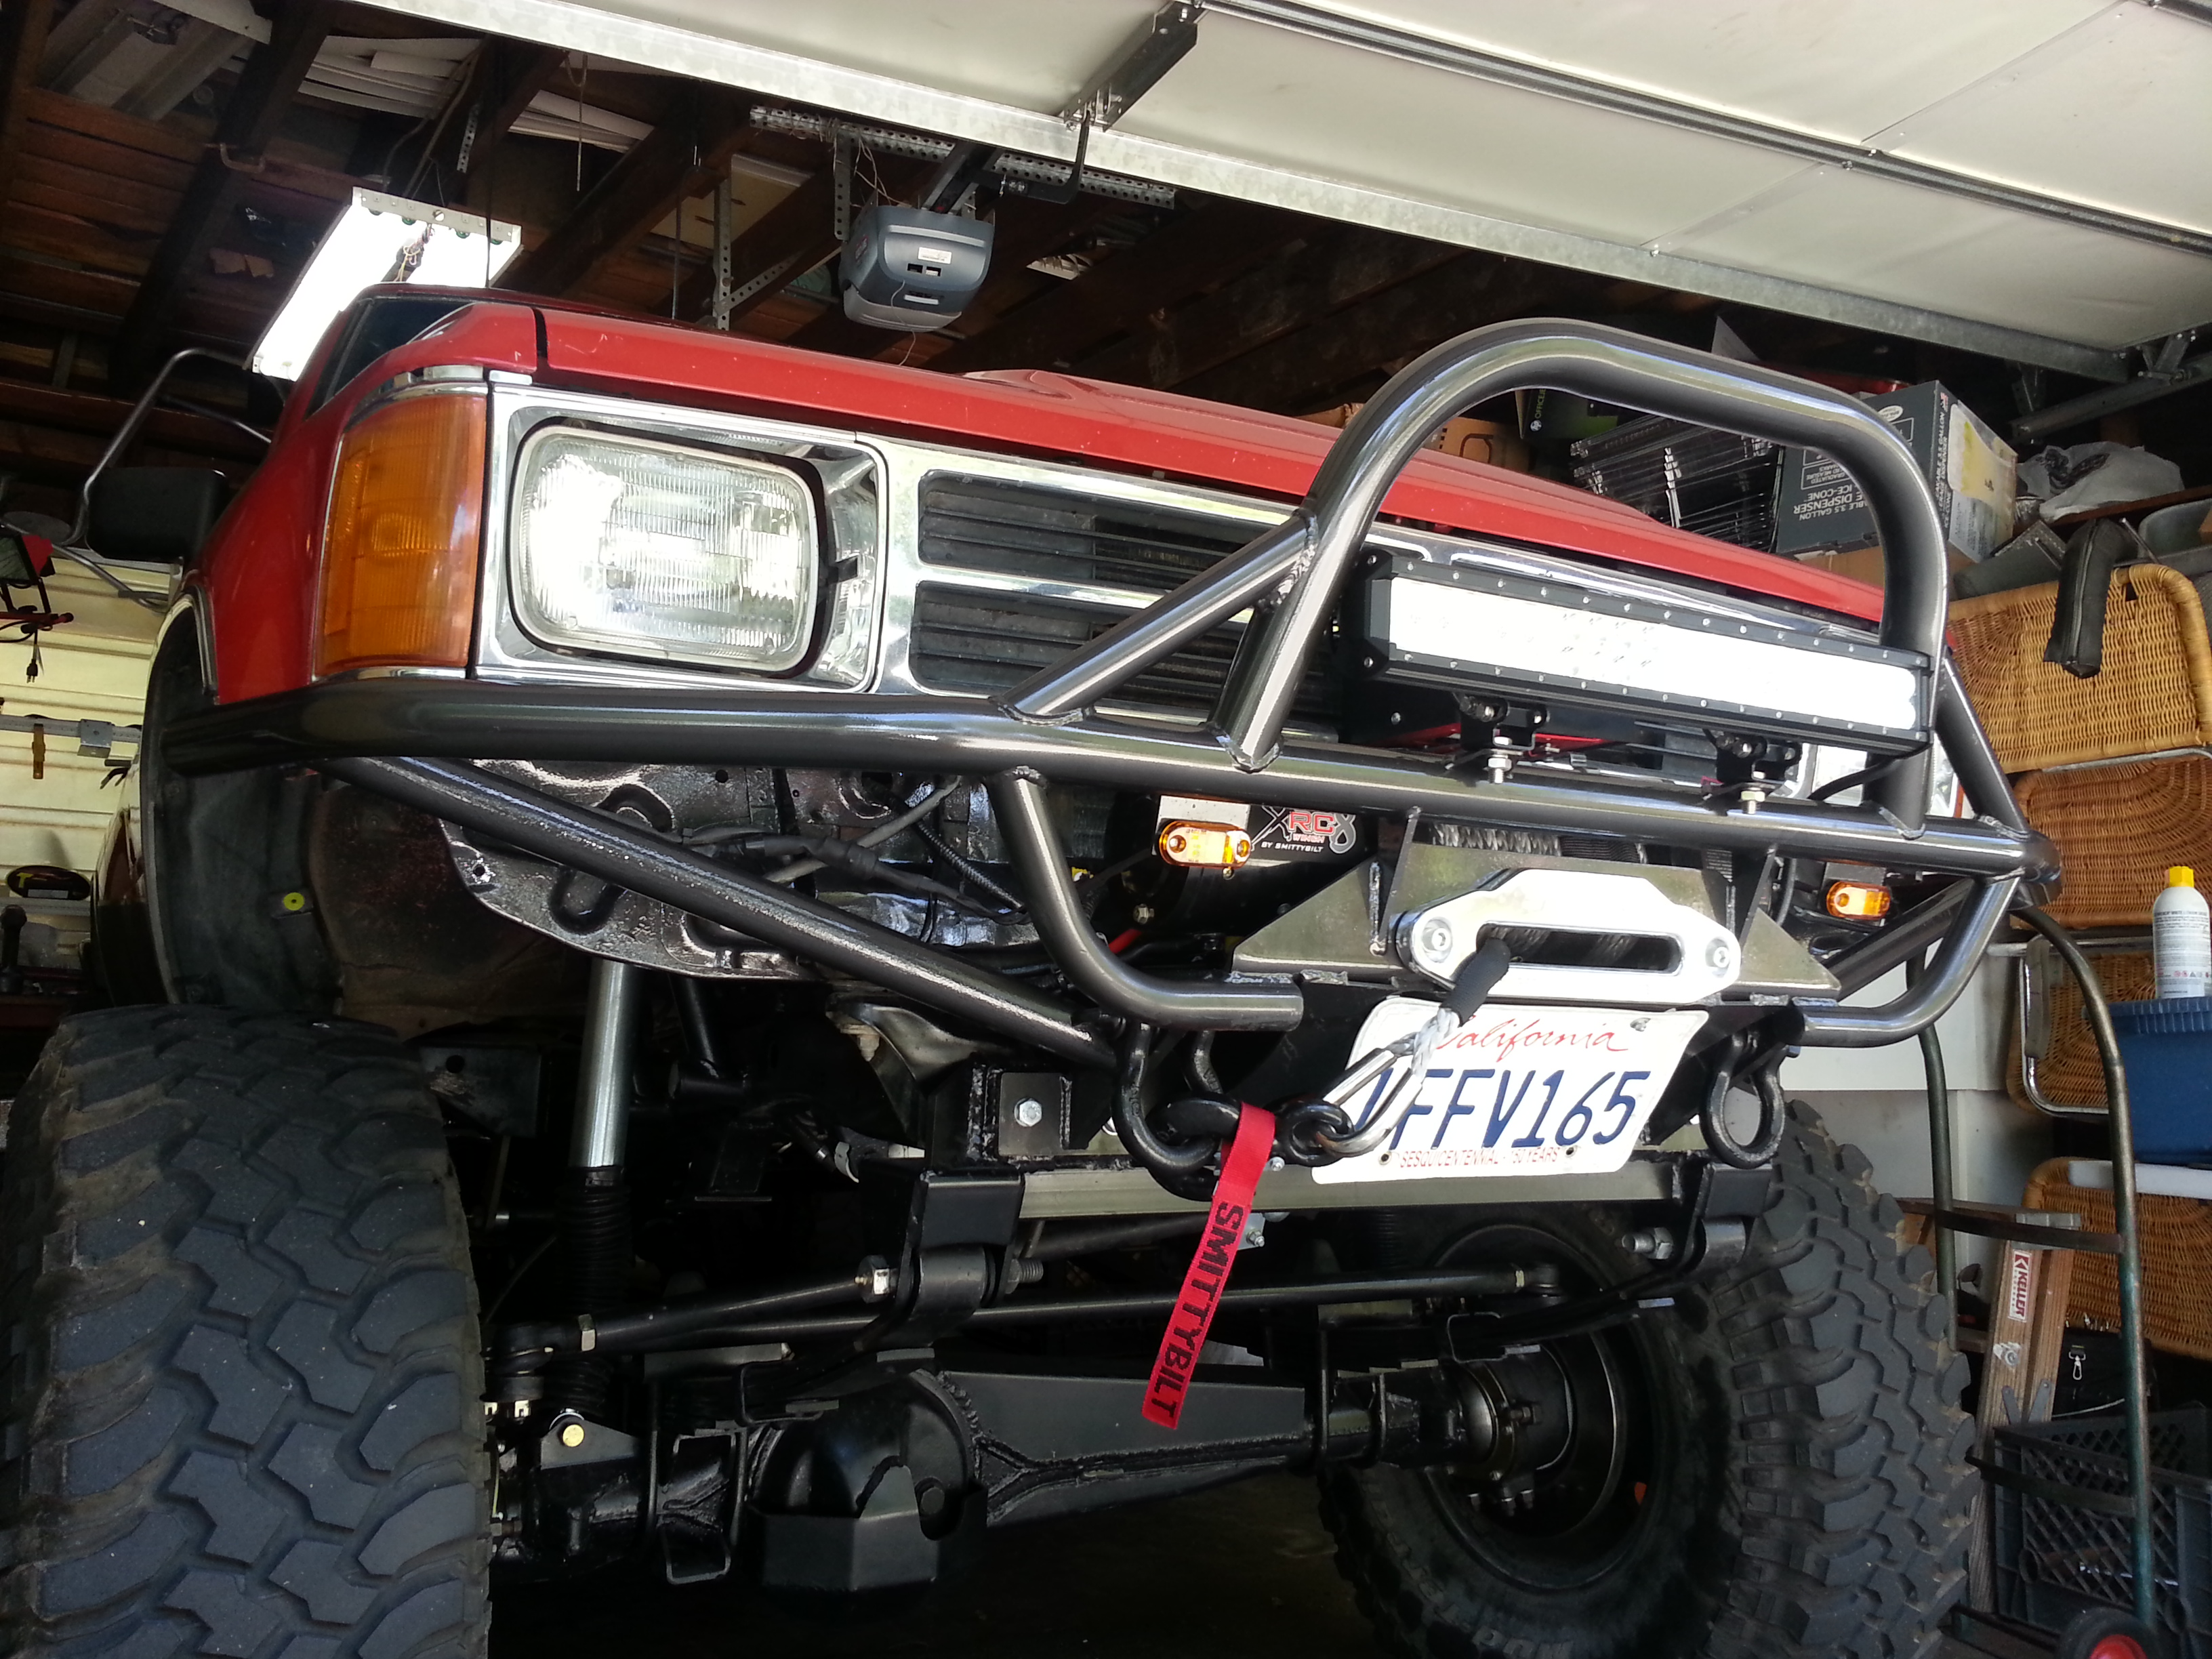
That really cleans it up.
I would recommend doing it with bed liner or matte black, though. It makes all that sheet metal fall away against the contrast of the bumper. It IS harder to keep clean, though. It won't wipe clean like the glossy stuff.
I would recommend doing it with bed liner or matte black, though. It makes all that sheet metal fall away against the contrast of the bumper. It IS harder to keep clean, though. It won't wipe clean like the glossy stuff.


