
AssYriaNrocKer's 1995 4Runner Build-up Thread

 Jul 4, 2015 | 05:36 AM
#562
Thread Starter
Registered User
Joined: Aug 2010
Posts: 636
Likes: 1
From: Southern WI
-RONI-
 Jul 6, 2015 | 02:10 AM
#564
Thread Starter
Registered User
Joined: Aug 2010
Posts: 636
Likes: 1
From: Southern WI
-RONI-
Jul 6, 2015 | 02:12 AM
#565
Thread Starter
Registered User
Joined: Aug 2010
Posts: 636
Likes: 1
From: Southern WI
Oct 8, 2015 | 03:29 PM
#566
Thread Starter
Registered User
Joined: Aug 2010
Posts: 636
Likes: 1
From: Southern WI
Ladies and gentlemen I am still alive and it is indeed time for an update...


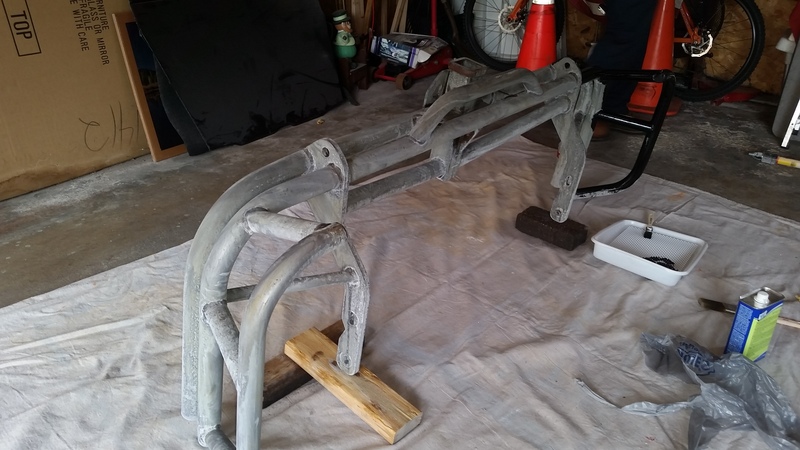
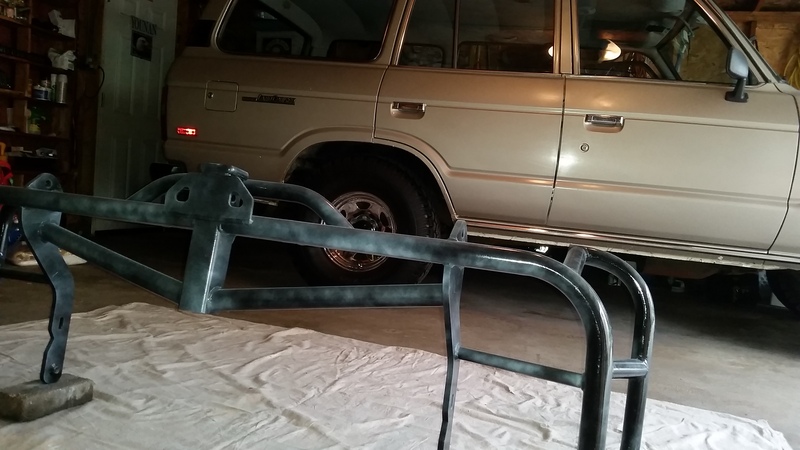
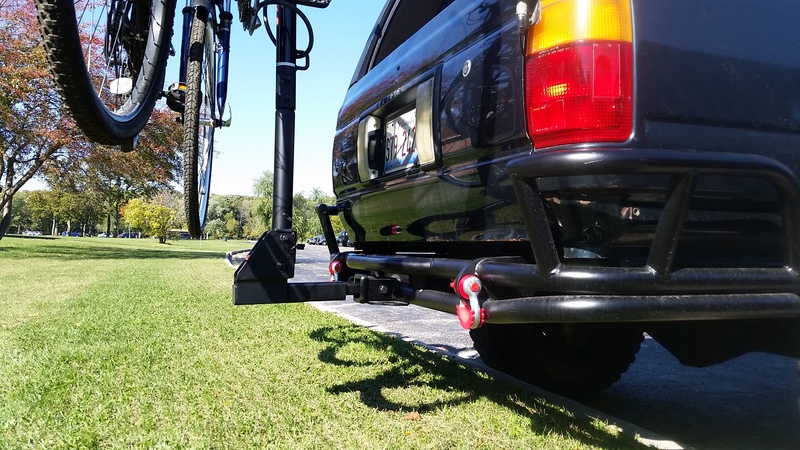
Yes that's right...I actually got some $#it done. First, although not most important, was the 4xinnovations rear bumper that has been waiting nearly a year now! Well guess what, I got it on! I coated it with a product called, POR15. I followed the directions PERFECTLY, and the end result was a beautiful rust proof coating. Basically the process starts with a thorough cleaning with POR15 degreaser provided in the starter pack. After a number of degreaser baths I used the provided metal etcher spray. What the spray does is give the POR15 a surface it can adhere to. Given that I was working with raw metal the surface alone would not work well with the POR15. In fact according to the instructions (and numerous online reviews) the product works best on lightly rusted surfaces. Call me crazy but I actually did leave my bumper on my balcony for this very purpose. With the slight rust (and I mean very slight in my case) and the degreasing plus the etching, the bumper felt rough and ready for the rust proof coating.
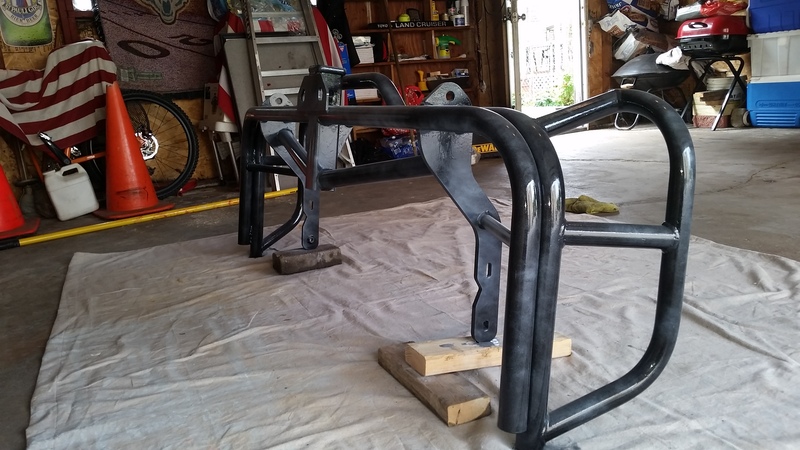
Here you can see what the bumper looked like after the etching was done and you can also see where I started brushing on the por15. You can't tell after the etching but there was surface rust I swear! I cant believe I did not snap a pic. of the bumper before hand. I used to take way more pics....I am def. slacking in the picture/posting department lately.
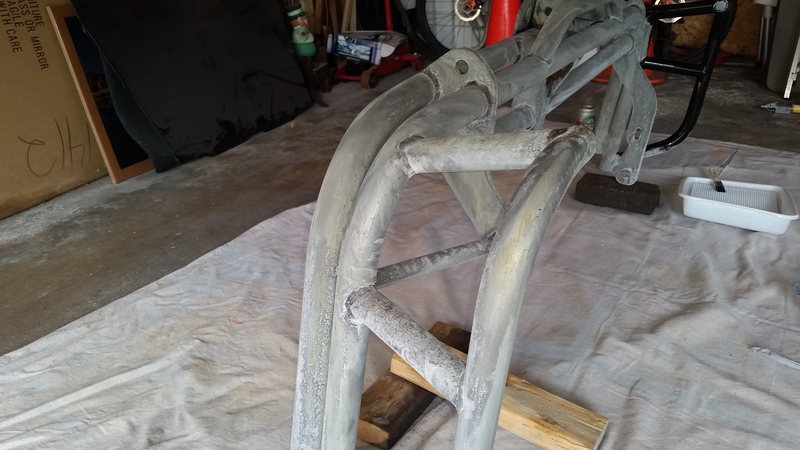
This stuff is intense....USE GLOVES.
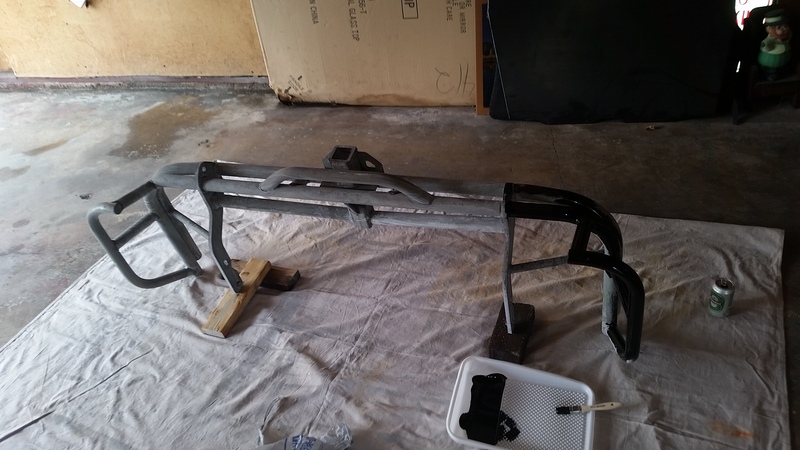
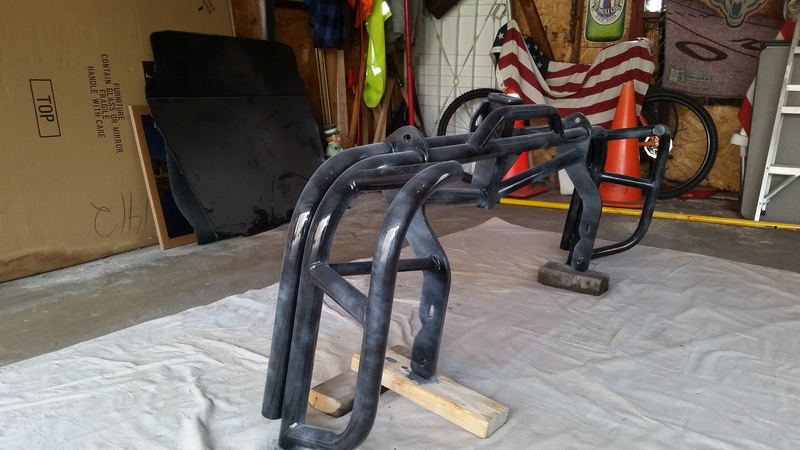
One reason I loved this product was the smooth finish. Even though I brushed it on it smoothed itself out quit nicely. Here is the bumper with the POR15 coating on.
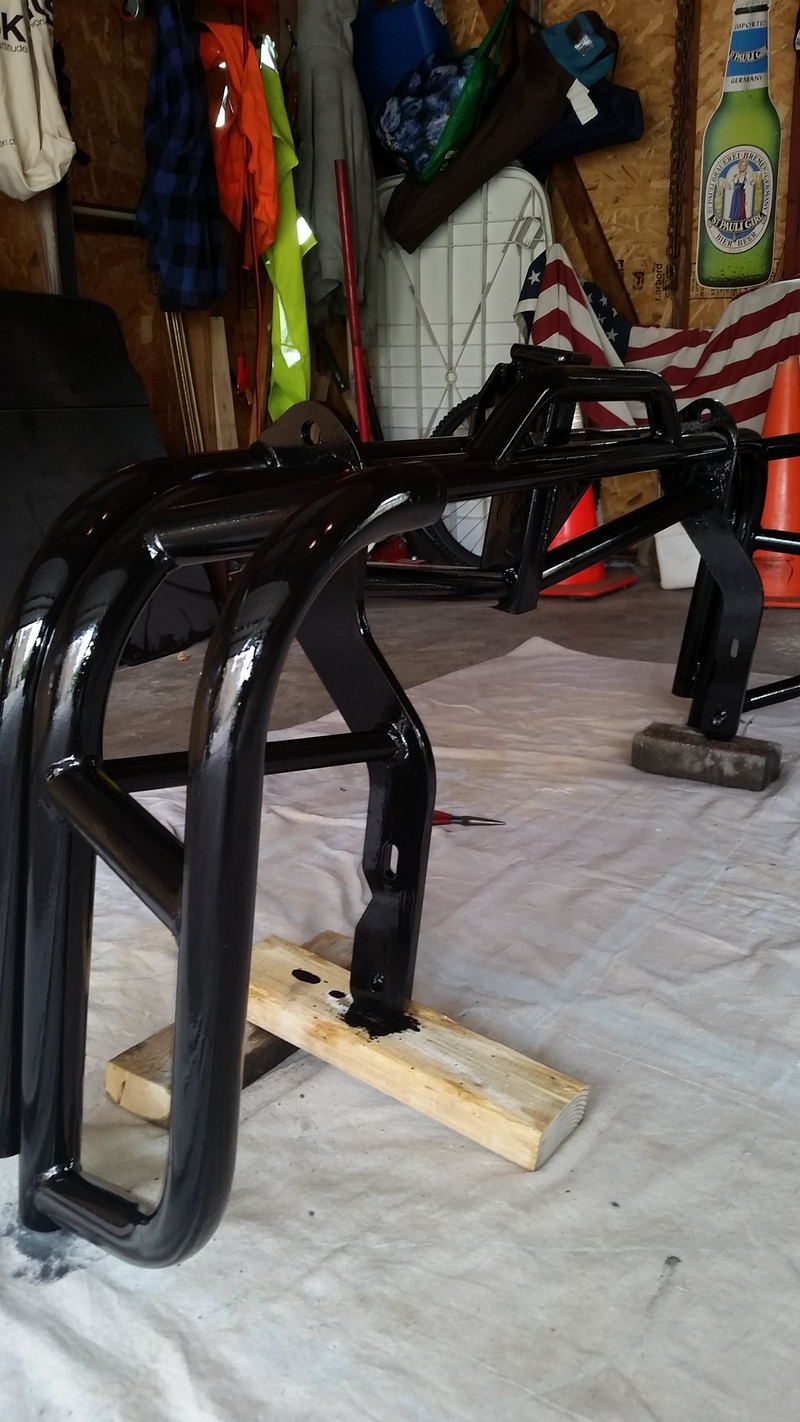
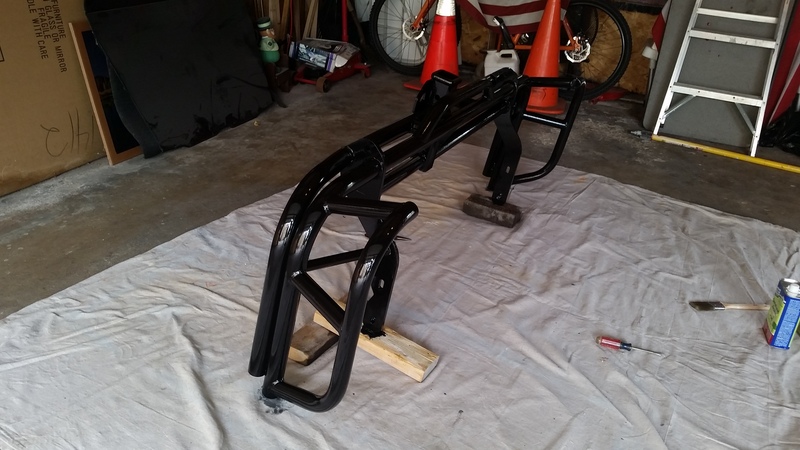
Per the instructions provided I sprayed a light layer of primer while the POR15 was still tacky. Because the POR15 is not UV protected it needs to be top coated. I went with the POR15 brand top coat Semi-Gloss black.
I should have more/better pictures of the finished product but I don't....
This is the only pic for now.
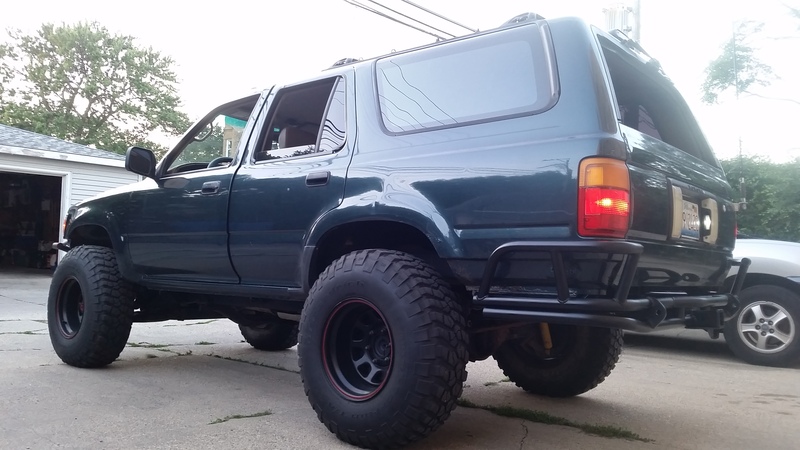
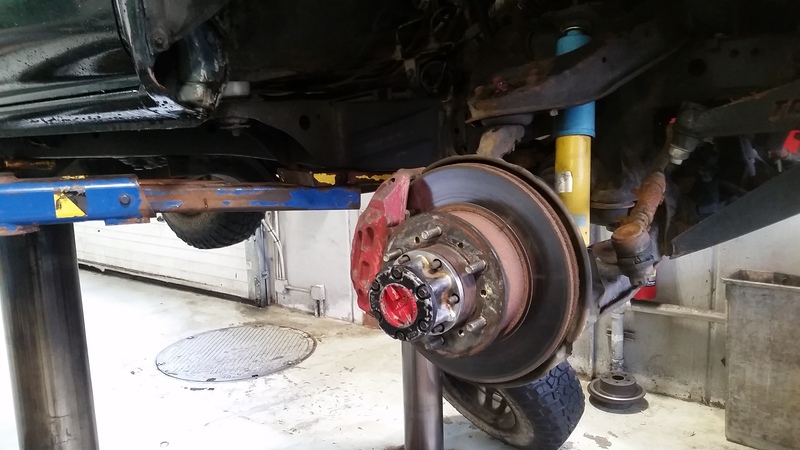
With the bumper on I can now, not only protect my rear end but I also have some proper tow points! Of course this also includes a class 2 2" hitch witch I plan on using to bring our bikes along on our trips.....and anything else I feel like towing I guess. However having this b@d@$$ bumper is not gonna do me any good if I can't get the damn thing to stop! My front brakes where in need of service reeeeaaallll bad. I had a seized caliper that I could not free up no matter how hard I tried. Add that to the warped rotors and well....

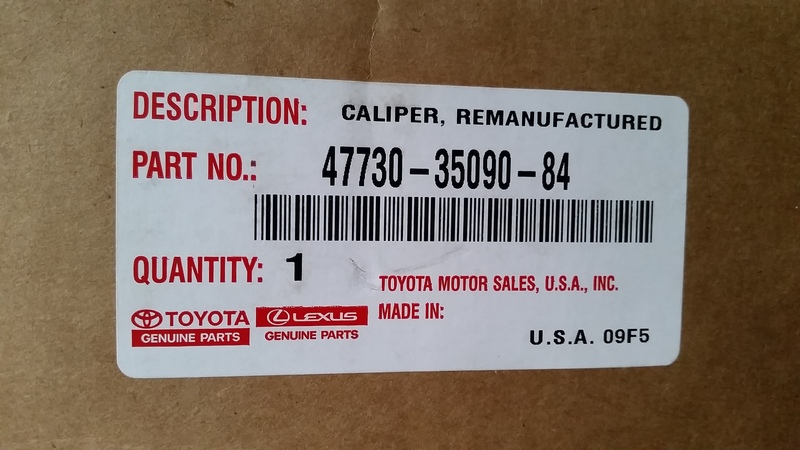
I bought OEM Calipers, pads and shims from work and ordered the rotors online. I went with OEM replacement Brembo rotors because they seem to being doing just fine on the Subaru.
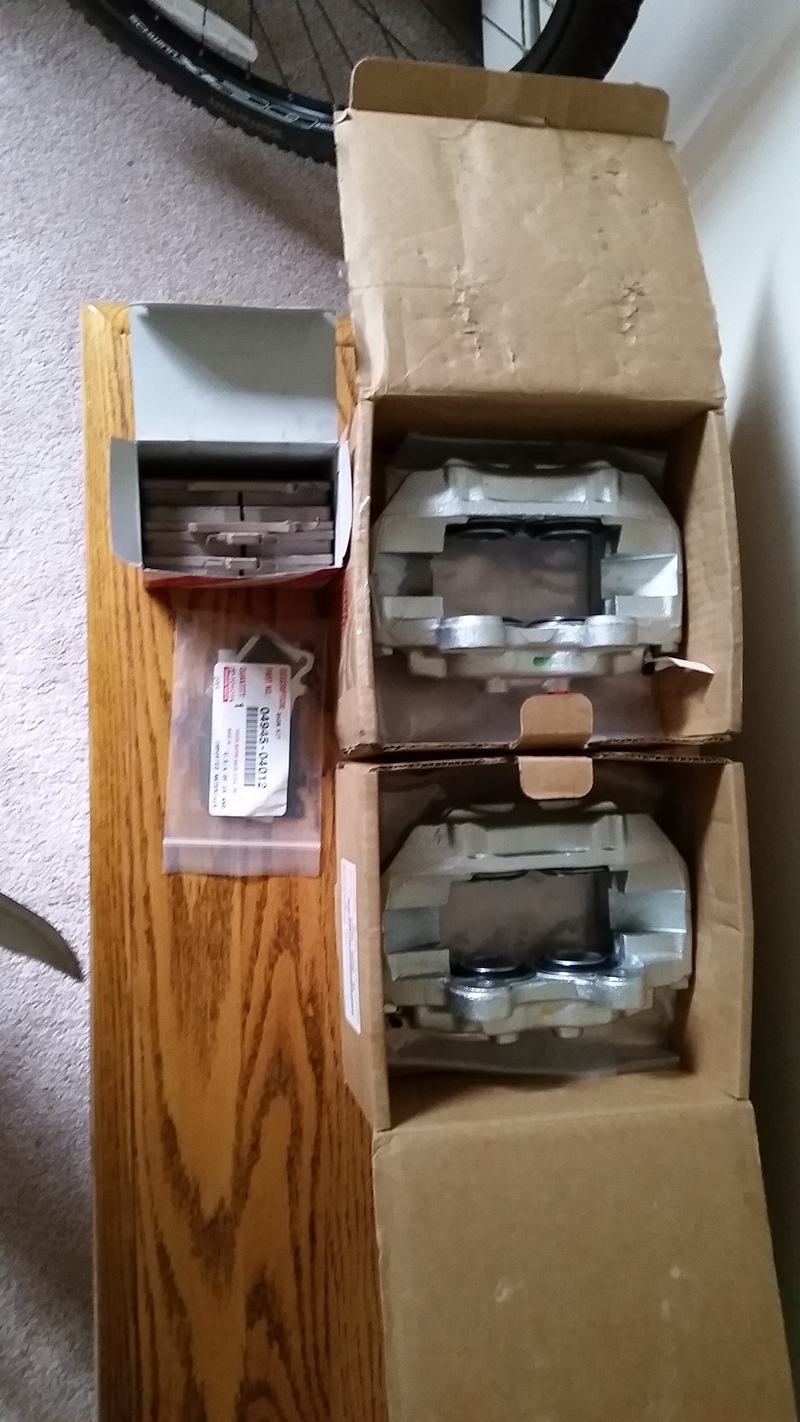
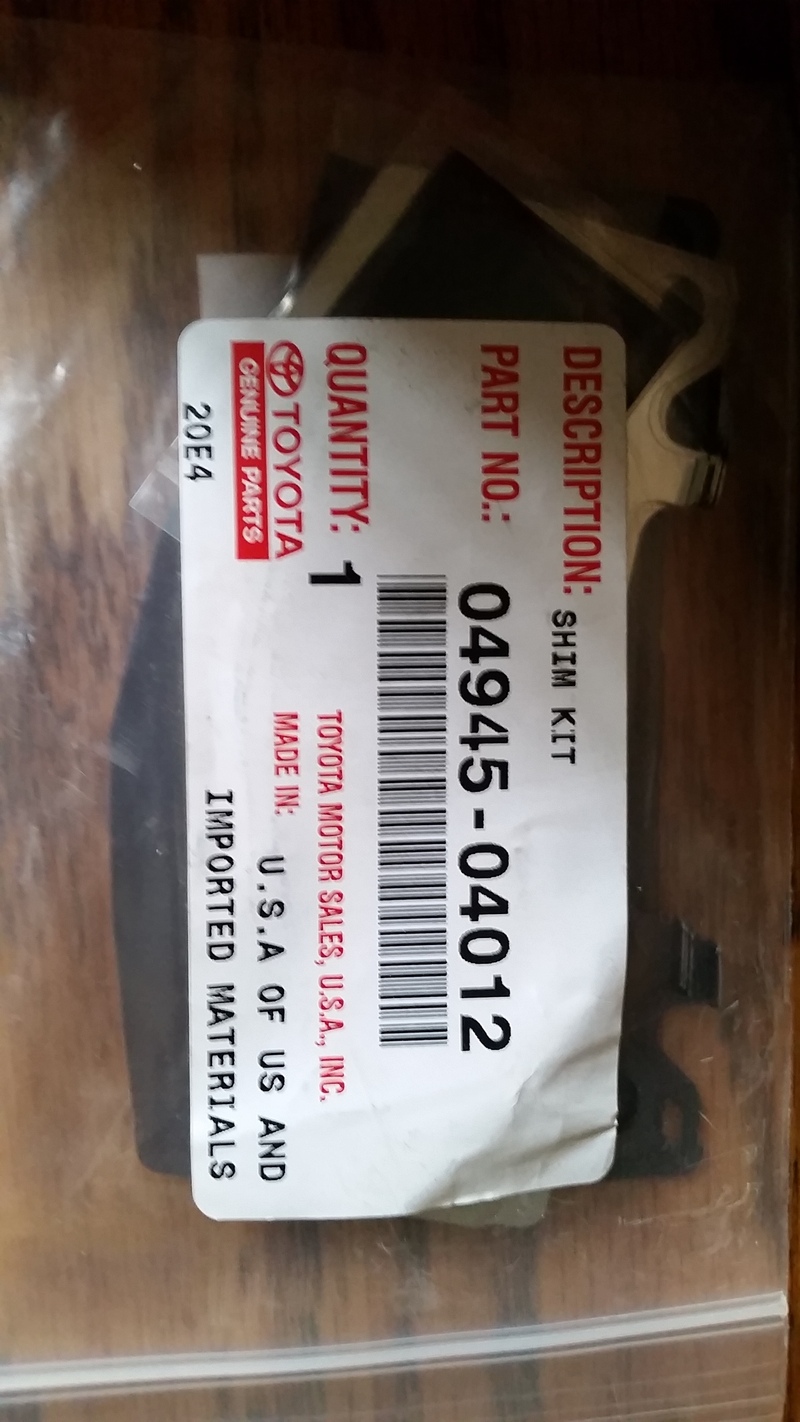
Shim kit part #
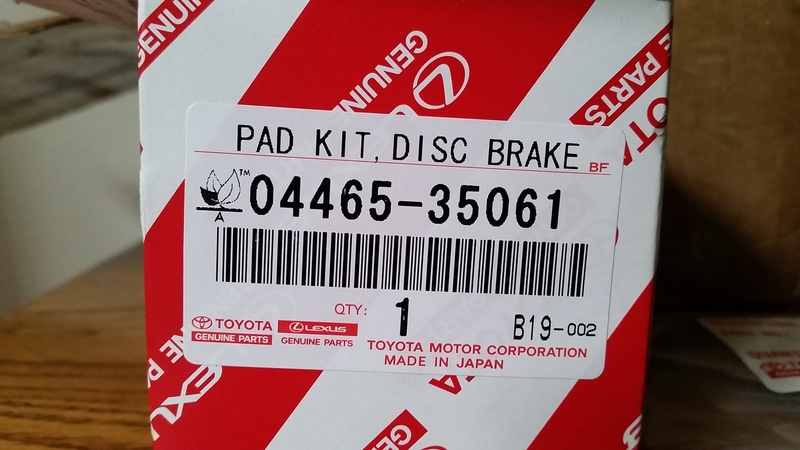
Pads part #
Caliper part #
Anyone who has replaced their rotors before knows how fun and messy it can be. Bearings have to come out and if they are out you would be a dork to not re-pack and check the bearings/races. I replaced bearings about 10k miles ago so they where good all I did was repack them. To remove the rear bearing I took out the front bearing and put the axle nut back on. You forcefully and carefully slide the hub forward and the nut will hold the bearing and axle seal on the spindle. That way you can re-use the seal....that's what I did anyway. You can always just buy new seals I suppose.
Old stuff... (one day I need to refurbish those Aisin locking hubs.)
I used a 54mm socket (trail Gear) to remove the axle nuts. When installing the nuts I was sure not to have it too tight as I have seen in the past. Get it snug and then just back it off a little. Don't mind the rubber bands...my socket doubles as a rubber band holder when its off duty...

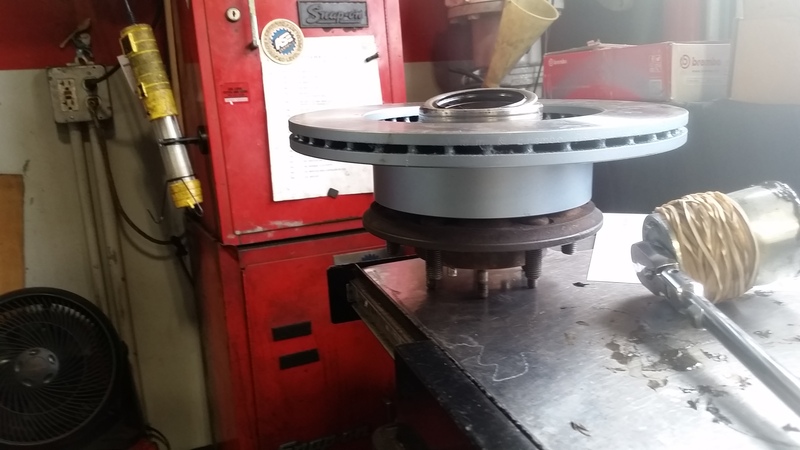
The old rotor separates form the hub by removing the 6 or 8 14mm bolts and pressing it out. If you have no press available pounding it with a hammer should do just fine. Here is the new rotor just before I installed the seal.
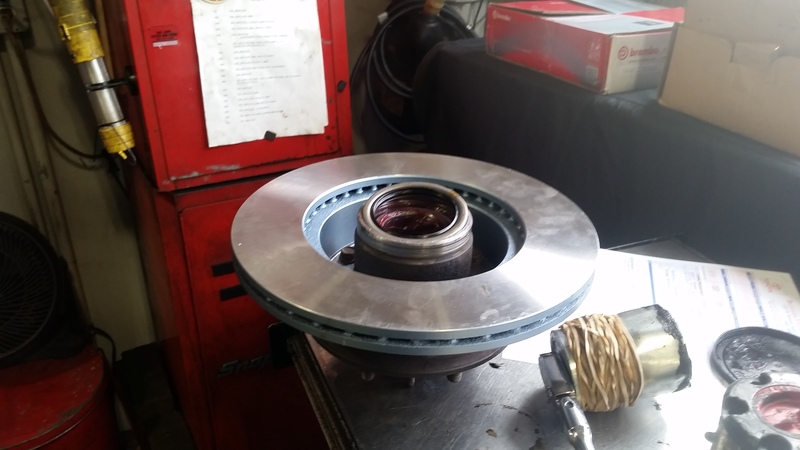
Cleaned off the spindle and added a light coating of bearing grease.
Hub and rotor installed
All together

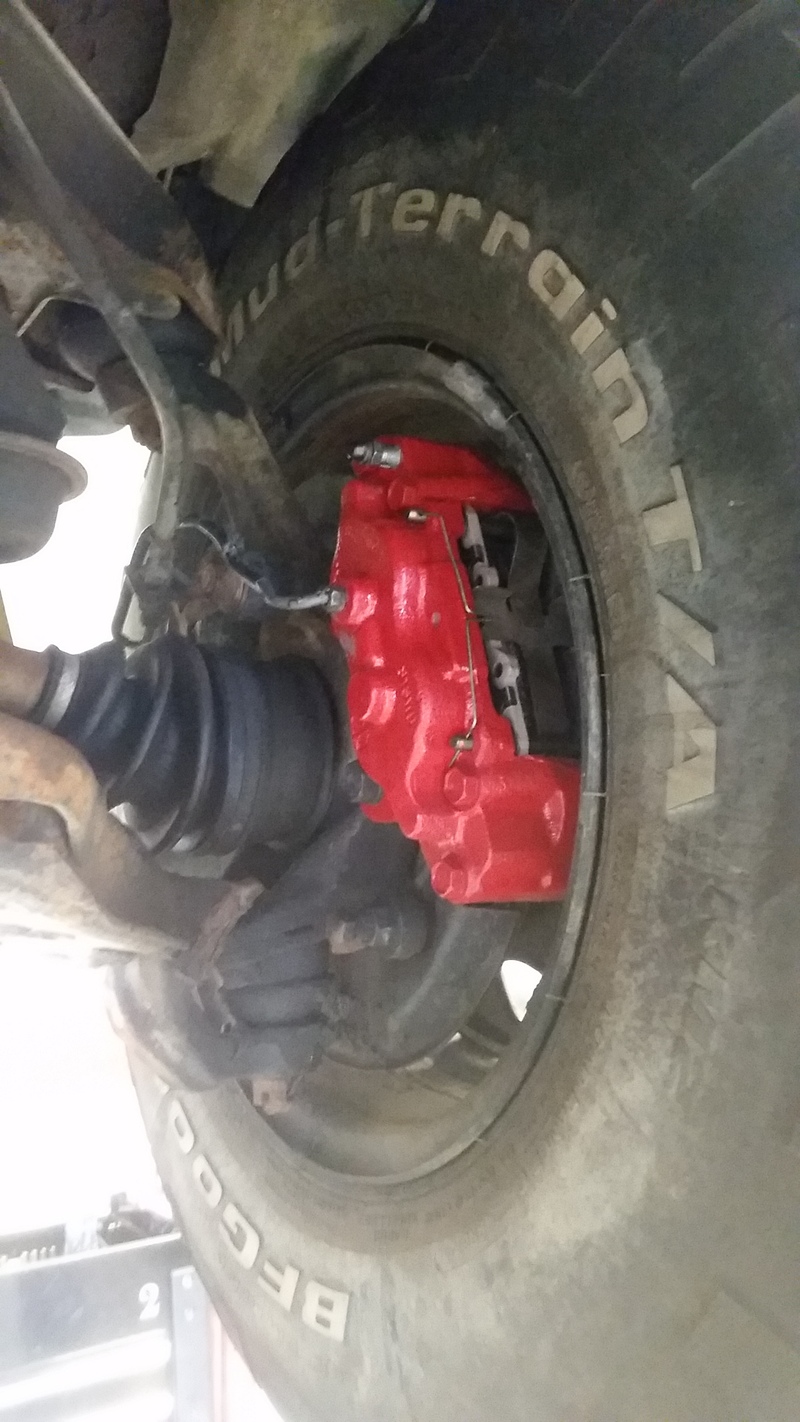
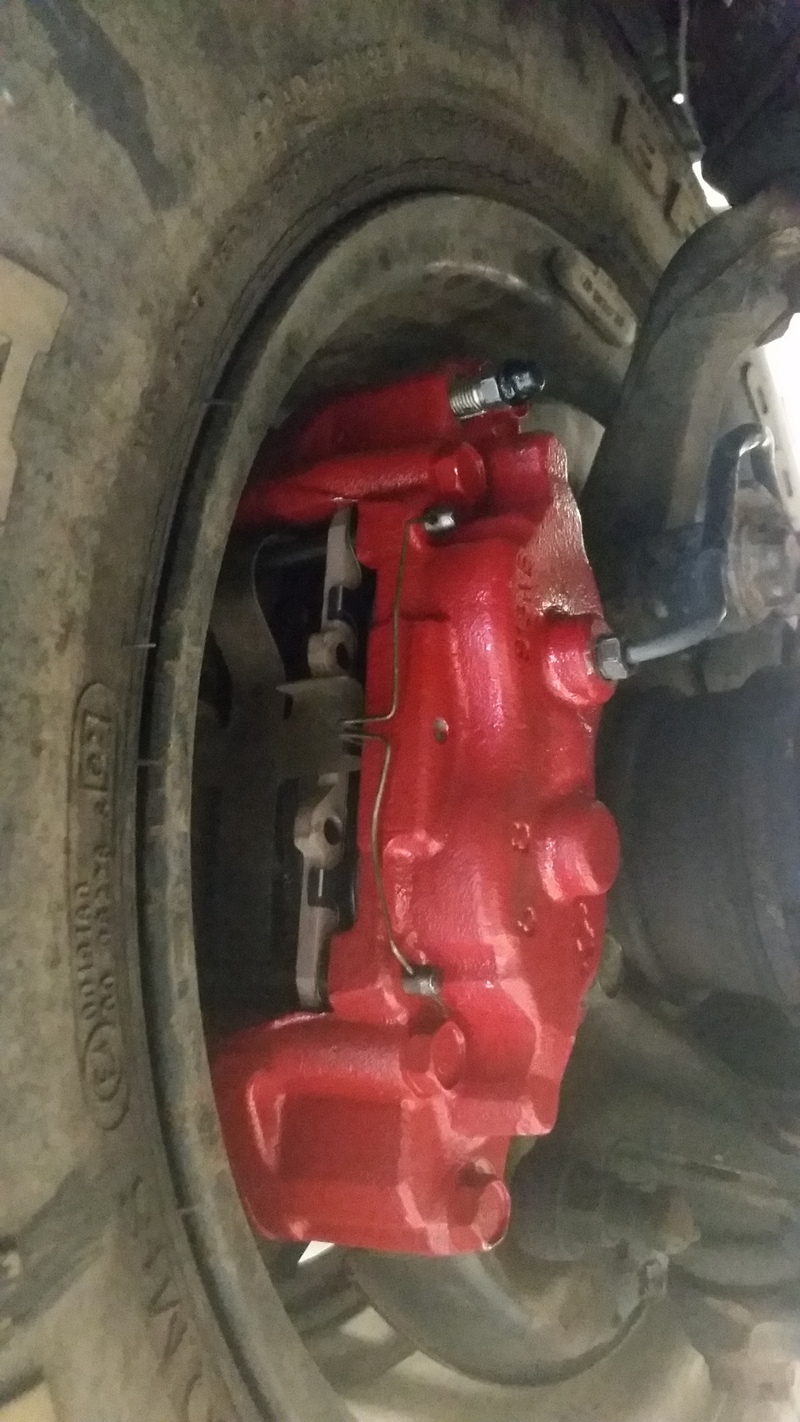
Yeah that's right I painted my calipers red...sue me.........Beats rusty brown any day.
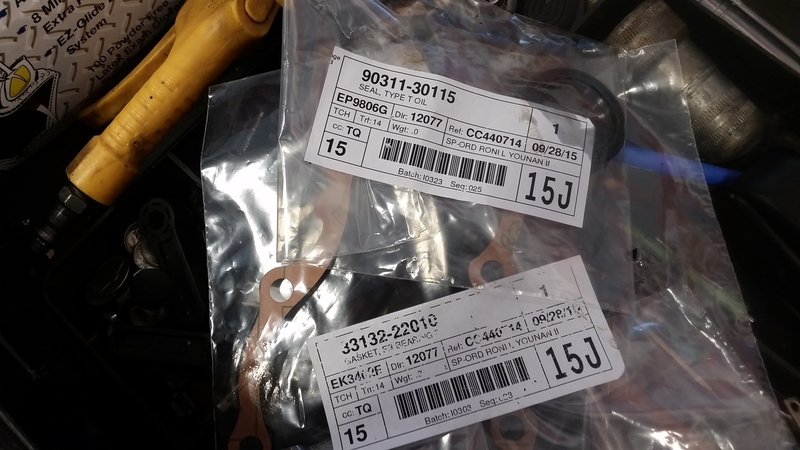
Next on the list was a leaking transmission. I had previously miss diagnosed this leak as a leaking front diff. pinion seal. I thought the gear oil was coming out and spinning all over the trans and clutch fork boot. When I replaced the pinion seal I said "wow that looks pretty dry"  I replaced it anyways. No surprise everything was still getting covered in gear oil. I waited a while...maybe 2 months... and the I removed the clutch fork boot only to get a face full of gear oil! Ok well not a face full but about 1/4 of a cup of gear oil spilled out. It was the front seal on the w56 leaking like a mofo! I was worried about it getting all over my clutch so I ordered the seal right away along with the gasket for the front plate.
W56 front seal and front plate gasket part #s
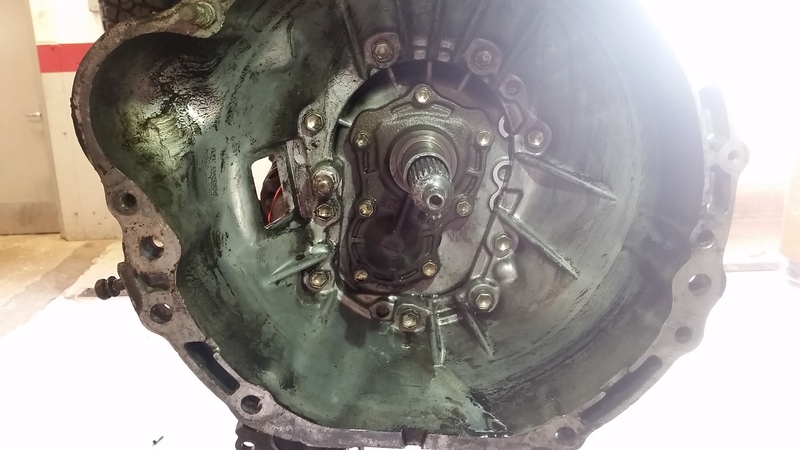
Here is where most of the leakage was coming from. I think it was spinning off of the shaft.
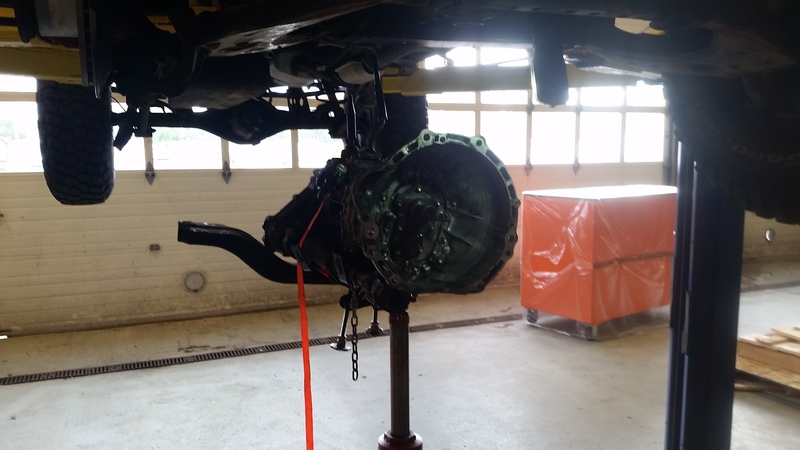
So I started by removing the starter, drive shafts, bell housing bolts, and clutch slave. From there the only thing holding it is the cross member. BTW I did not remove the front drive shaft completely. Just the end that attaches to the front differential.

Lowered it using the trans jack. If you don't have a shop you can do this in your garage using a rented floor trans. jack. as I did during the trans. swap.
You can see how the gear oil was spinning all over the place.
I should mention at this point that you should have drained the transmission before removing it. I totally forgot that step so when I removed the front plate gear oil was spewing. I just did it slowly and allowed it to drain.

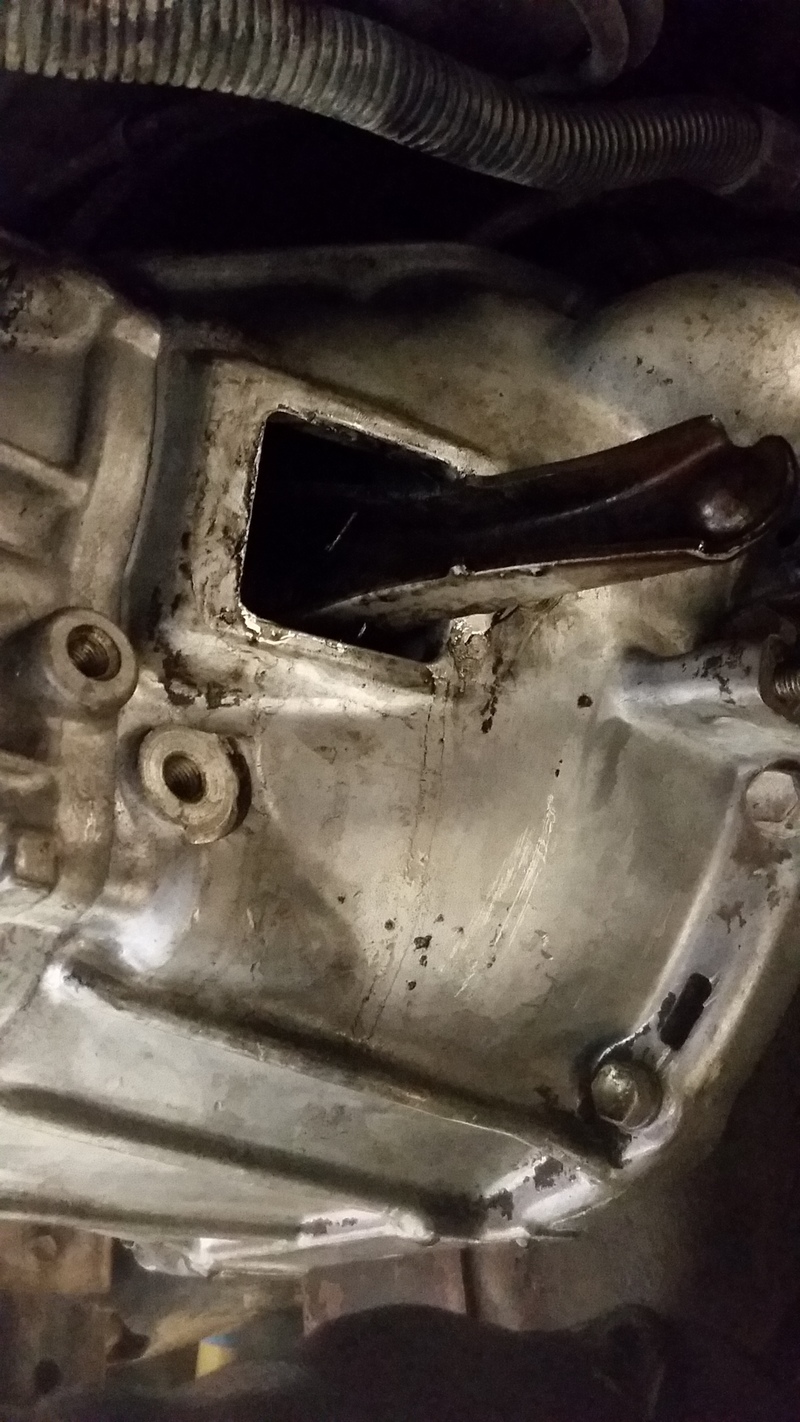
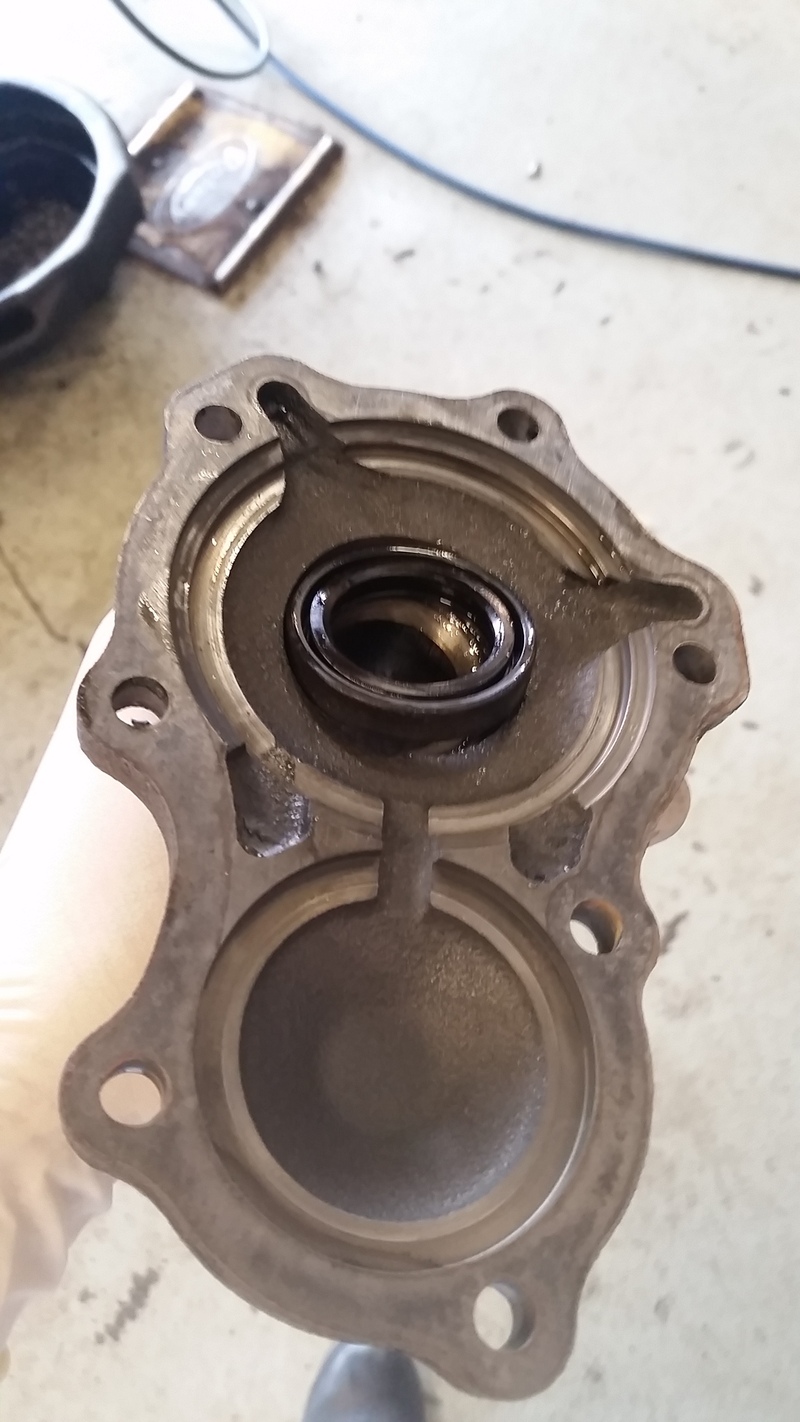
Here is the inside part of the "front plate" that I keep mentioning. Surely that is not the correct name for it but there it is with the old seal. I used a 32mm socket to press in the new seal.
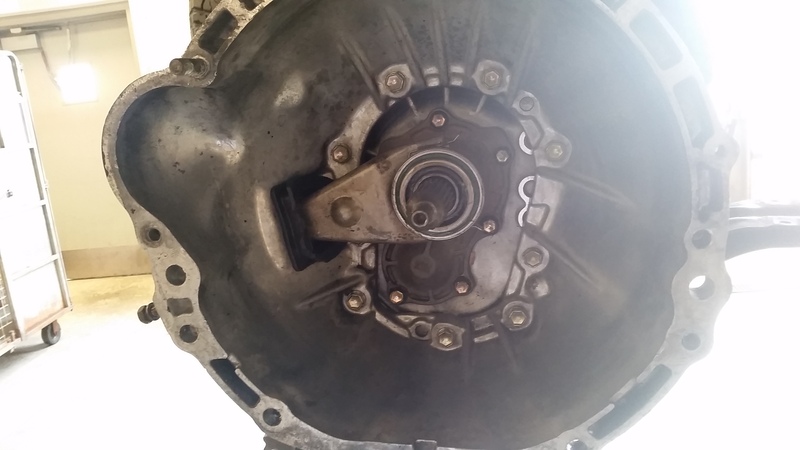
All cleaned up and back together with new seal and gasket. I used a little bit of FIPG on each bolt just as extra insurance. After this I just threw her back in the truck and called it a day. No leaks since and it's been about 100 miles.
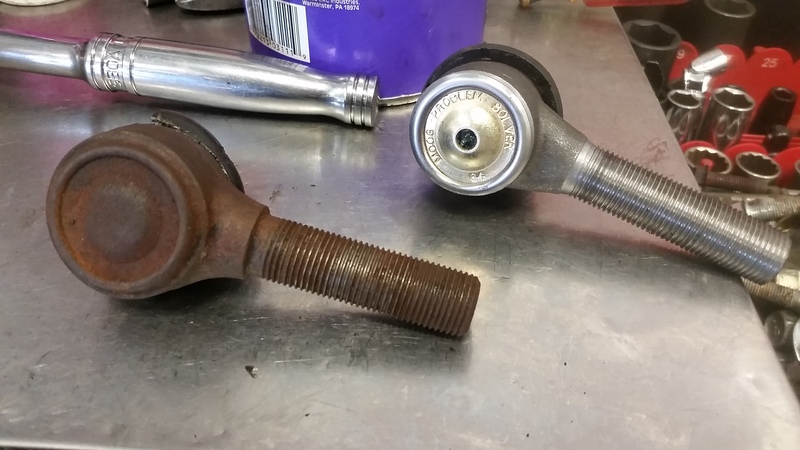
While doing all of this in the shop I had co-workers checking my car over (as they naturally do when someone brings in their own car) and every single one of them gave me crap about my tie rods. I kept telling them "ehhh I drive an IFS Toyota I've had worse tie rods then that!" By the end of the day I said okay screw it I'll change them. I figured I'm going on a trip soon and even though they are not all loose and wobbly I'd rather be safe then sorry. I purchased Moog "problem solvers". I have gone through many IFS joints over the years and I am really not a big fan of Moog. In my opinion nothing beats factory parts for a factory setup.....but dang they expensive!
Old vs. New
The boot is torn and has been torn for a long time....but like I said there was no loose play or anything.


So not so recently I also did a couple other maintenance Items. (I thought I posted them but I guess not) I lost some pics...nothing really to be posting about it but I'll throw it in here anyway.
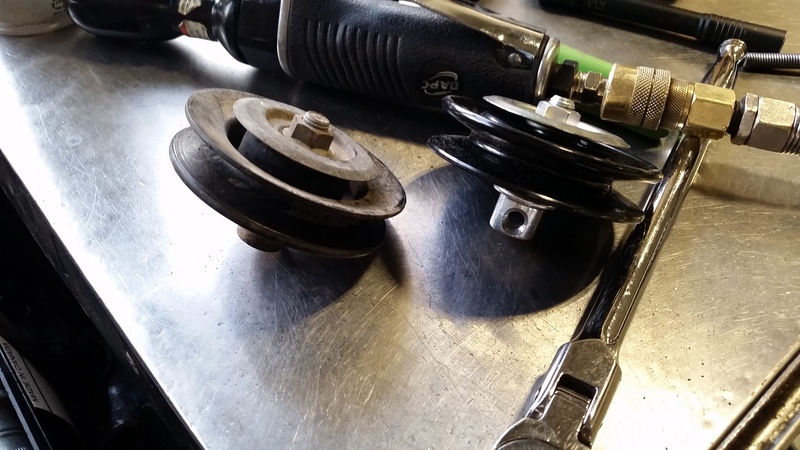
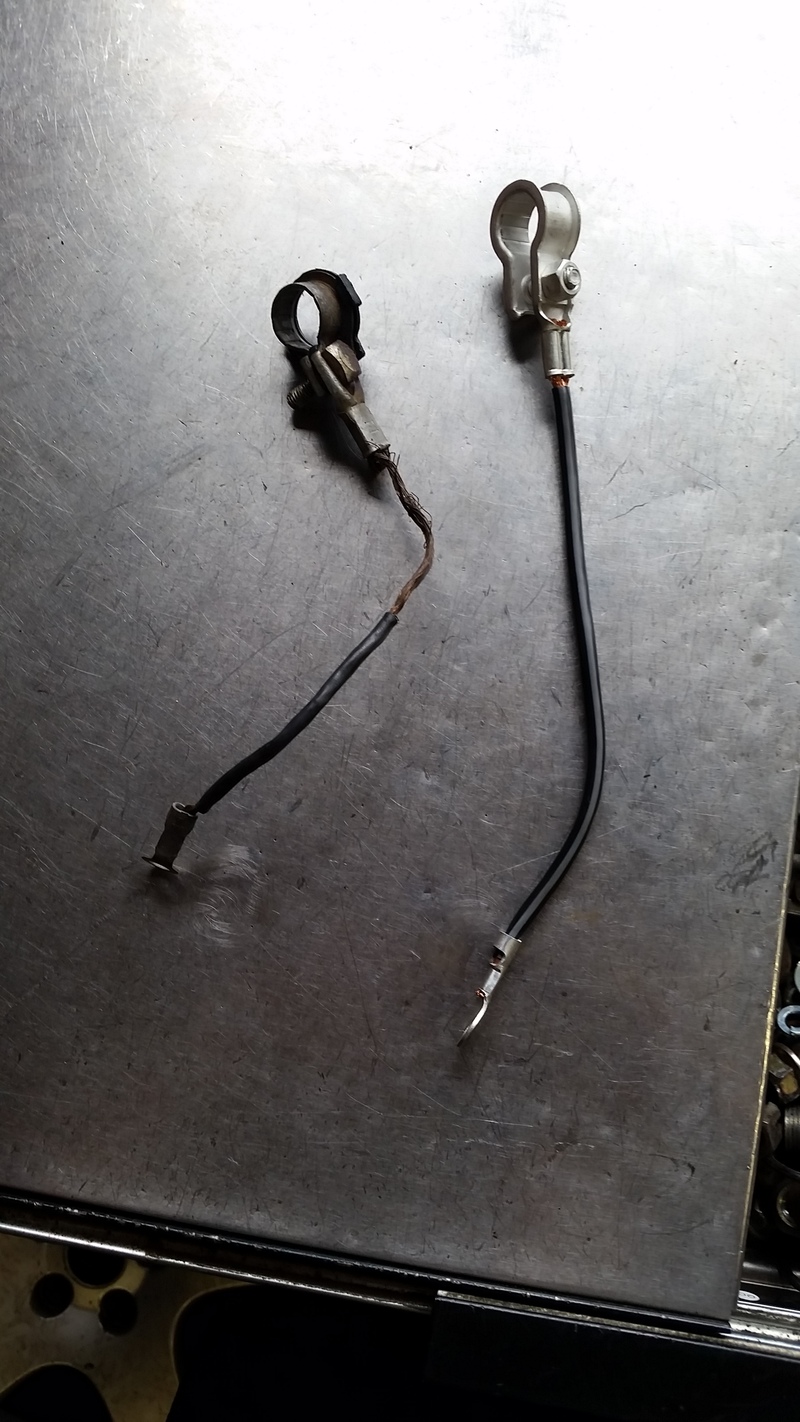
Nothing serious.... I had a belt idler pulley go bad and replaced that along with all the drive belts. and then I noticed my battery ground wire was deteriorating and replaced that as well.
Old pulley vs. new pulley
Old ground vs. new ground
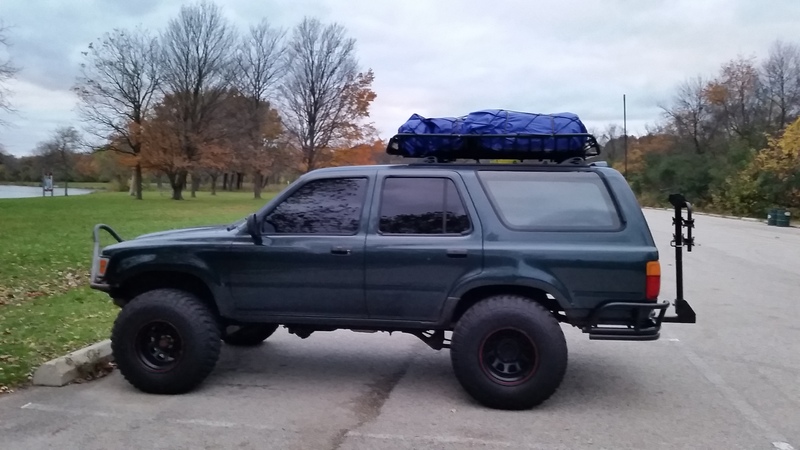
Rig now has good brakes, good tie rods, rear bumper, and it's also aligned. :waytogo: She is ready for a camping trip. We are heading to Apple river canyon for Halloween. It will be freezing so we will be bundling up and sleeping in the runner. Should be a great time and I will be sure to post some pics.

-RONI-
Yes that's right...I actually got some $#it done. First, although not most important, was the 4xinnovations rear bumper that has been waiting nearly a year now! Well guess what, I got it on! I coated it with a product called, POR15. I followed the directions PERFECTLY, and the end result was a beautiful rust proof coating. Basically the process starts with a thorough cleaning with POR15 degreaser provided in the starter pack. After a number of degreaser baths I used the provided metal etcher spray. What the spray does is give the POR15 a surface it can adhere to. Given that I was working with raw metal the surface alone would not work well with the POR15. In fact according to the instructions (and numerous online reviews) the product works best on lightly rusted surfaces. Call me crazy but I actually did leave my bumper on my balcony for this very purpose. With the slight rust (and I mean very slight in my case) and the degreasing plus the etching, the bumper felt rough and ready for the rust proof coating.
Here you can see what the bumper looked like after the etching was done and you can also see where I started brushing on the por15. You can't tell after the etching but there was surface rust I swear! I cant believe I did not snap a pic. of the bumper before hand. I used to take way more pics....I am def. slacking in the picture/posting department lately.


This stuff is intense....USE GLOVES.

One reason I loved this product was the smooth finish. Even though I brushed it on it smoothed itself out quit nicely. Here is the bumper with the POR15 coating on.


Per the instructions provided I sprayed a light layer of primer while the POR15 was still tacky. Because the POR15 is not UV protected it needs to be top coated. I went with the POR15 brand top coat Semi-Gloss black.


I should have more/better pictures of the finished product but I don't....
This is the only pic for now.

With the bumper on I can now, not only protect my rear end but I also have some proper tow points! Of course this also includes a class 2 2" hitch witch I plan on using to bring our bikes along on our trips.....and anything else I feel like towing I guess. However having this b@d@$$ bumper is not gonna do me any good if I can't get the damn thing to stop! My front brakes where in need of service reeeeaaallll bad. I had a seized caliper that I could not free up no matter how hard I tried. Add that to the warped rotors and well....
I bought OEM Calipers, pads and shims from work and ordered the rotors online. I went with OEM replacement Brembo rotors because they seem to being doing just fine on the Subaru.

Shim kit part #

Pads part #

Caliper part #

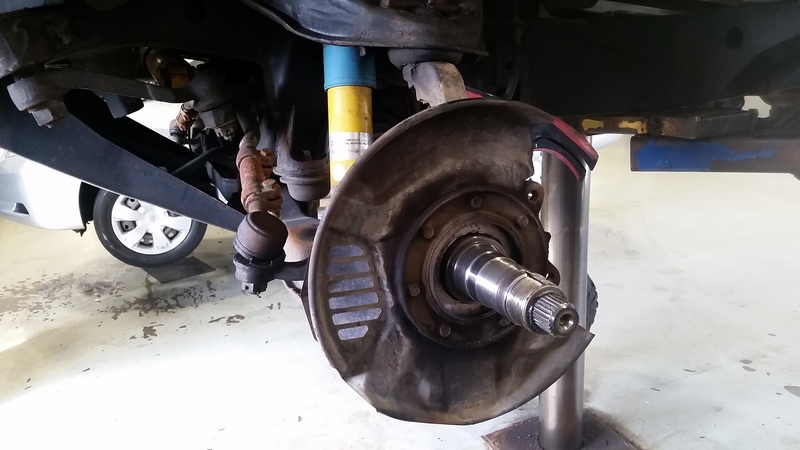
Anyone who has replaced their rotors before knows how fun and messy it can be. Bearings have to come out and if they are out you would be a dork to not re-pack and check the bearings/races. I replaced bearings about 10k miles ago so they where good all I did was repack them. To remove the rear bearing I took out the front bearing and put the axle nut back on. You forcefully and carefully slide the hub forward and the nut will hold the bearing and axle seal on the spindle. That way you can re-use the seal....that's what I did anyway. You can always just buy new seals I suppose.
Old stuff... (one day I need to refurbish those Aisin locking hubs.)

I used a 54mm socket (trail Gear) to remove the axle nuts. When installing the nuts I was sure not to have it too tight as I have seen in the past. Get it snug and then just back it off a little. Don't mind the rubber bands...my socket doubles as a rubber band holder when its off duty...

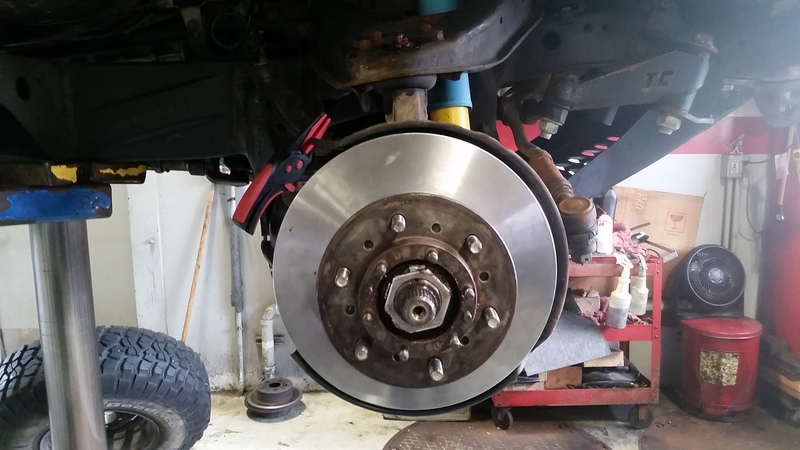
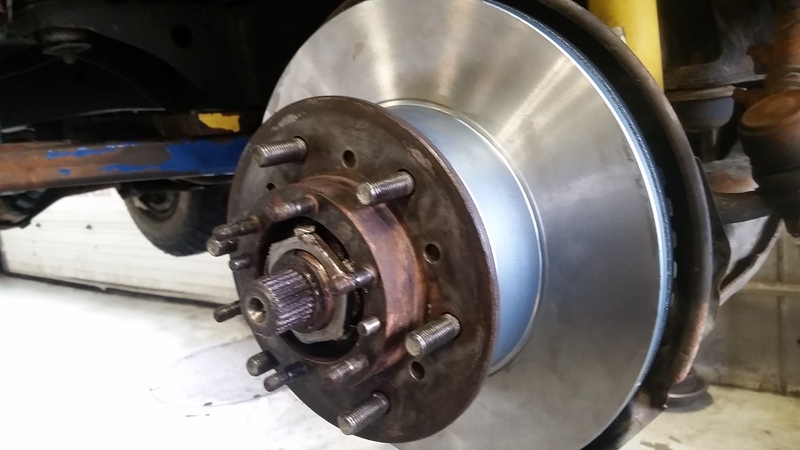
The old rotor separates form the hub by removing the 6 or 8 14mm bolts and pressing it out. If you have no press available pounding it with a hammer should do just fine. Here is the new rotor just before I installed the seal.


Cleaned off the spindle and added a light coating of bearing grease.

Hub and rotor installed


All together


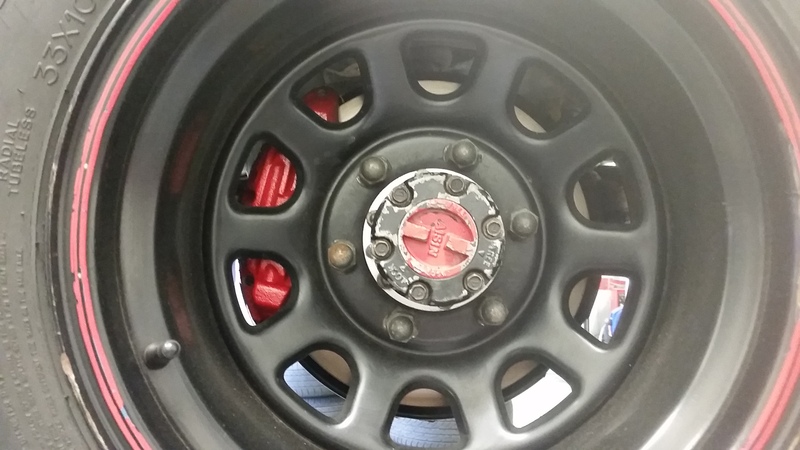
Yeah that's right I painted my calipers red...sue me.........Beats rusty brown any day.
Next on the list was a leaking transmission.
I had previously miss diagnosed this leak as a leaking front diff. pinion seal. I thought the gear oil was coming out and spinning all over the trans and clutch fork boot. When I replaced the pinion seal I said "wow that looks pretty dry" I replaced it anyways. No surprise everything was still getting covered in gear oil. I waited a while...maybe 2 months... and the I removed the clutch fork boot only to get a face full of gear oil! Ok well not a face full but about 1/4 of a cup of gear oil spilled out. It was the front seal on the w56 leaking like a mofo! I was worried about it getting all over my clutch so I ordered the seal right away along with the gasket for the front plate. W56 front seal and front plate gasket part #s

Here is where most of the leakage was coming from. I think it was spinning off of the shaft.

So I started by removing the starter, drive shafts, bell housing bolts, and clutch slave. From there the only thing holding it is the cross member. BTW I did not remove the front drive shaft completely. Just the end that attaches to the front differential.

Lowered it using the trans jack. If you don't have a shop you can do this in your garage using a rented floor trans. jack. as I did during the trans. swap.

You can see how the gear oil was spinning all over the place.

I should mention at this point that you should have drained the transmission before removing it. I totally forgot that step so when I removed the front plate gear oil was spewing. I just did it slowly and allowed it to drain.

Here is the inside part of the "front plate" that I keep mentioning. Surely that is not the correct name for it but there it is with the old seal. I used a 32mm socket to press in the new seal.

All cleaned up and back together with new seal and gasket. I used a little bit of FIPG on each bolt just as extra insurance. After this I just threw her back in the truck and called it a day. No leaks since and it's been about 100 miles.

While doing all of this in the shop I had co-workers checking my car over (as they naturally do when someone brings in their own car) and every single one of them gave me crap about my tie rods. I kept telling them "ehhh I drive an IFS Toyota I've had worse tie rods then that!" By the end of the day I said okay screw it I'll change them. I figured I'm going on a trip soon and even though they are not all loose and wobbly I'd rather be safe then sorry. I purchased Moog "problem solvers". I have gone through many IFS joints over the years and I am really not a big fan of Moog. In my opinion nothing beats factory parts for a factory setup.....but dang they expensive!
Old vs. New
The boot is torn and has been torn for a long time....but like I said there was no loose play or anything.


So not so recently I also did a couple other maintenance Items. (I thought I posted them but I guess not) I lost some pics...nothing really to be posting about it but I'll throw it in here anyway.
Nothing serious.... I had a belt idler pulley go bad and replaced that along with all the drive belts. and then I noticed my battery ground wire was deteriorating and replaced that as well.
Old pulley vs. new pulley

Old ground vs. new ground

Rig now has good brakes, good tie rods, rear bumper, and it's also aligned. :waytogo:
She is ready for a camping trip. We are heading to Apple river canyon for Halloween. It will be freezing so we will be bundling up and sleeping in the runner. Should be a great time and I will be sure to post some pics.-RONI-
Last edited by AssYriaNrocKer; Oct 8, 2015 at 03:43 PM.
Oct 11, 2015 | 08:28 AM
#569
Registered User
Joined: Dec 2010
Posts: 44
Likes: 0
From: Surprise, AZ
Damn that is a lot of work you've done lately. It's looking real nice. I'm really liking that rear bumper. You have more patience than me to brush the paint on. Turned out real nice though. Looking good!! 
Oct 12, 2015 | 10:41 AM
#570
Thread Starter
Registered User
Joined: Aug 2010
Posts: 636
Likes: 1
From: Southern WI
Thanks man It does take some patience. The final coat was sprayed though not brushed.
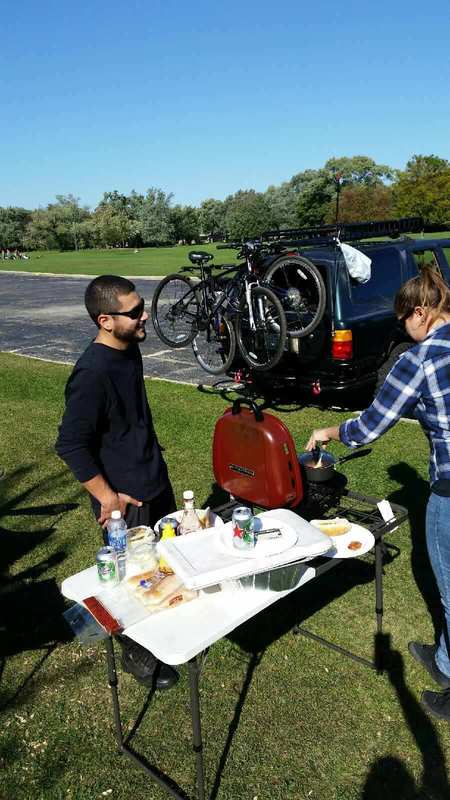
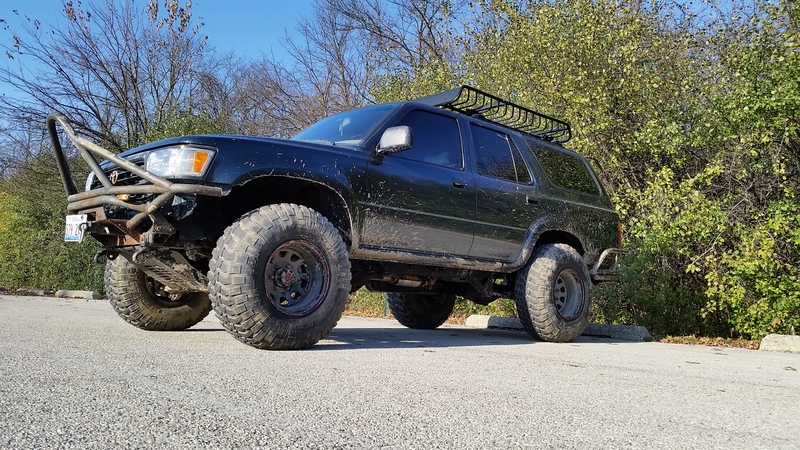
Yesterday I met up with my Pops and had a little bbq. Snapped a few pics. She needs a wash.....
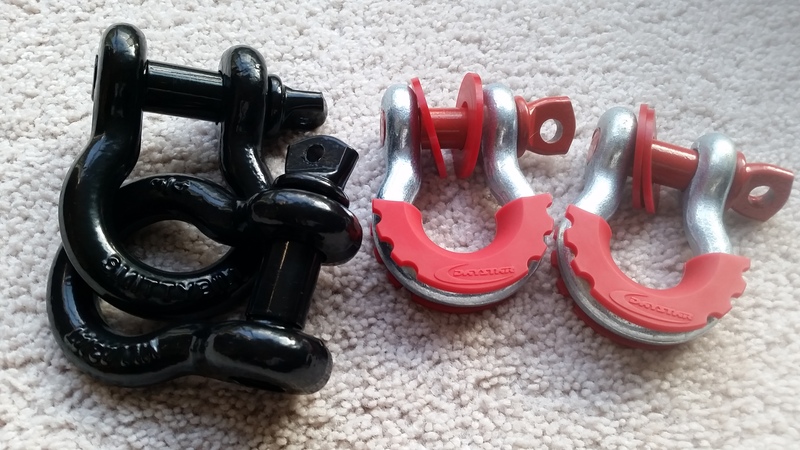
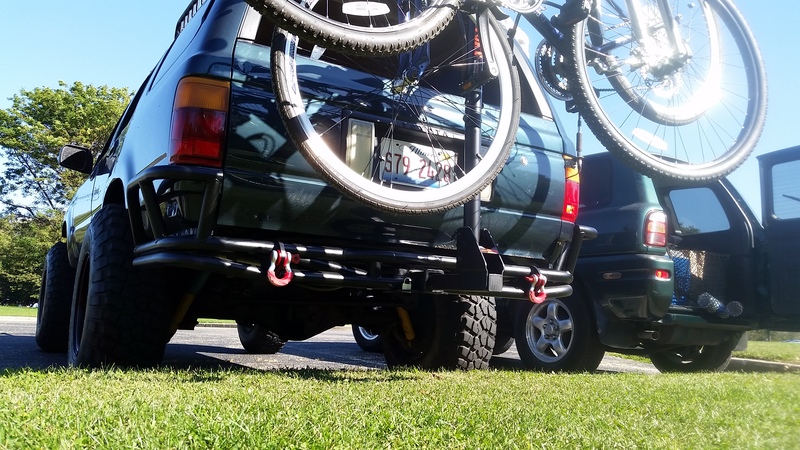
Here is some shackles I bought. I bought the wrong size at first because the sizing goes by the shackle part not the pin.....I didn't know this. I also used some Daystar isolators to avoid any noise.

I need to give it a wash and take a few pics without the rack on there.
-RONI-
Yesterday I met up with my Pops and had a little bbq. Snapped a few pics. She needs a wash.....
Here is some shackles I bought. I bought the wrong size at first because the sizing goes by the shackle part not the pin.....I didn't know this. I also used some Daystar isolators to avoid any noise.


I need to give it a wash and take a few pics without the rack on there.
-RONI-


 Nov 19, 2015 | 03:33 PM
#572
Thread Starter
Registered User
Joined: Aug 2010
Posts: 636
Likes: 1
From: Southern WI
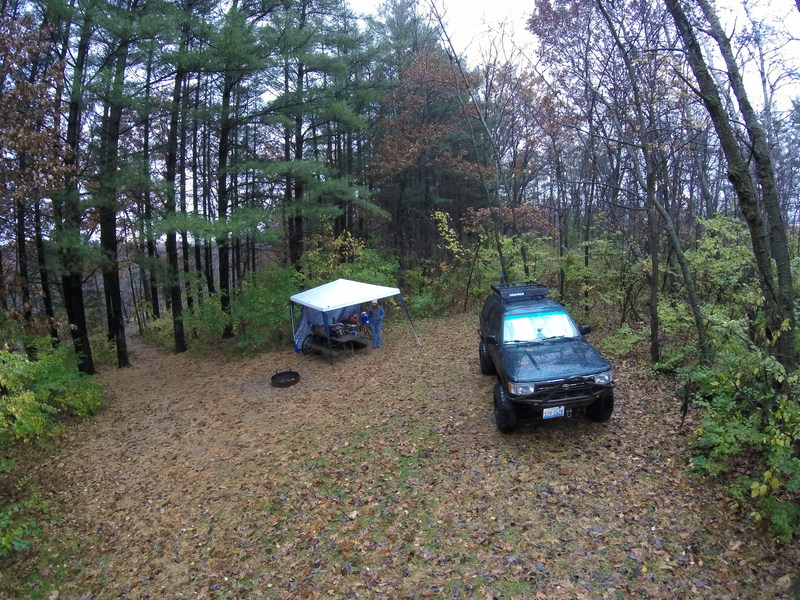
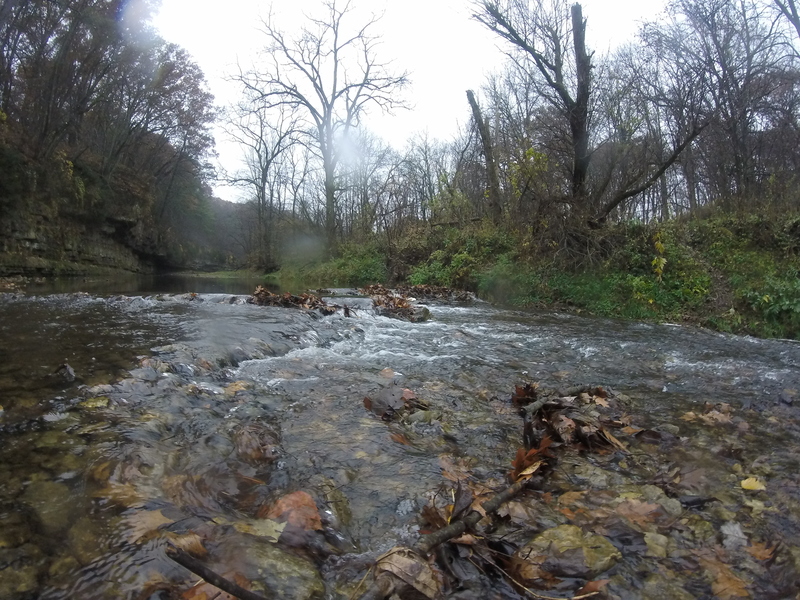
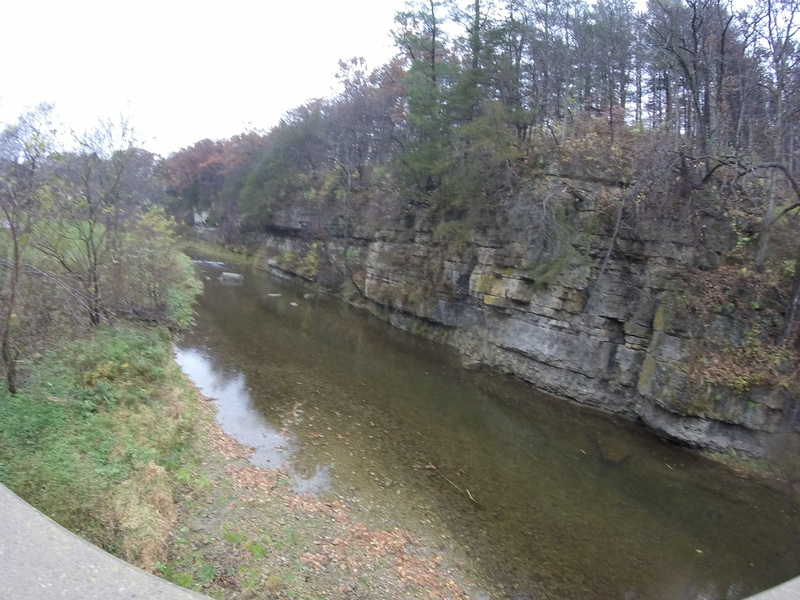
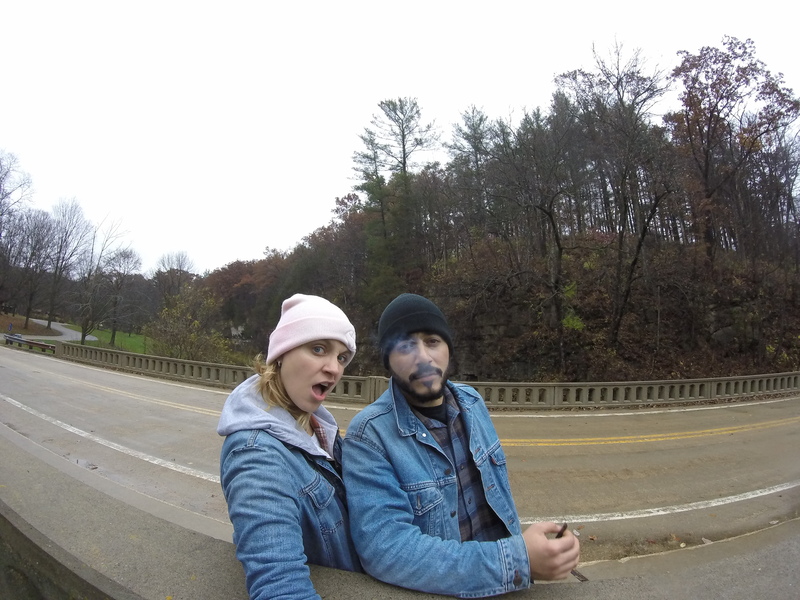
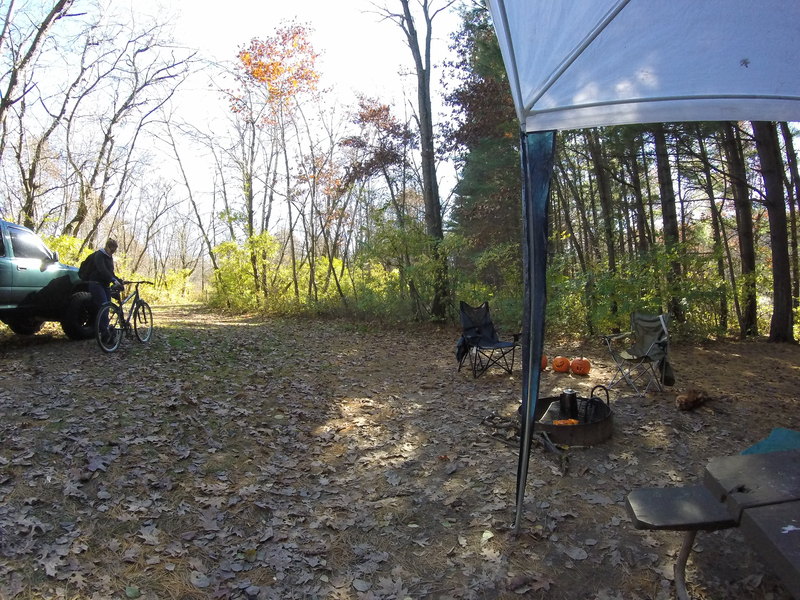
Halloween camping 2015 was a major success. 
My page, I can clog it with all the pics I want, so here it goes.
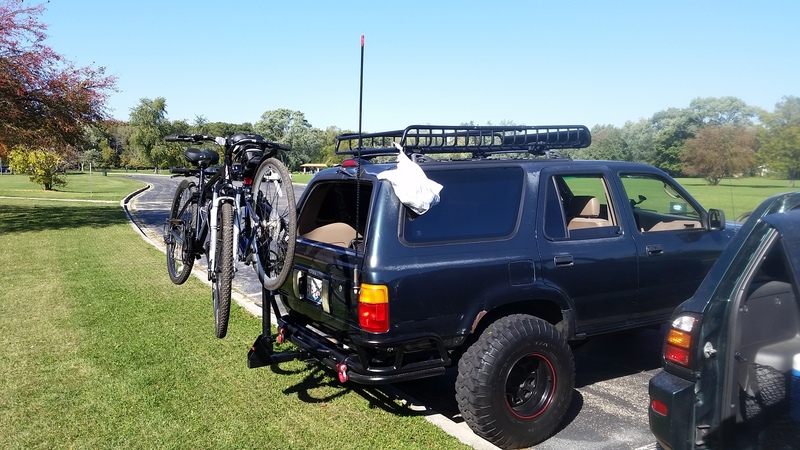
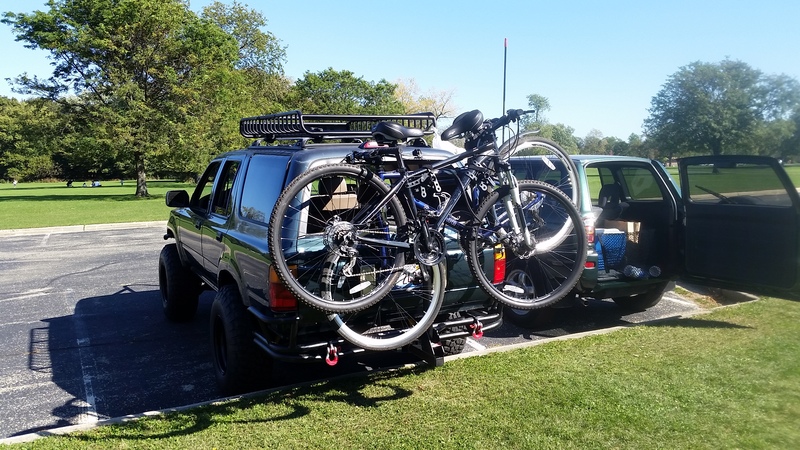
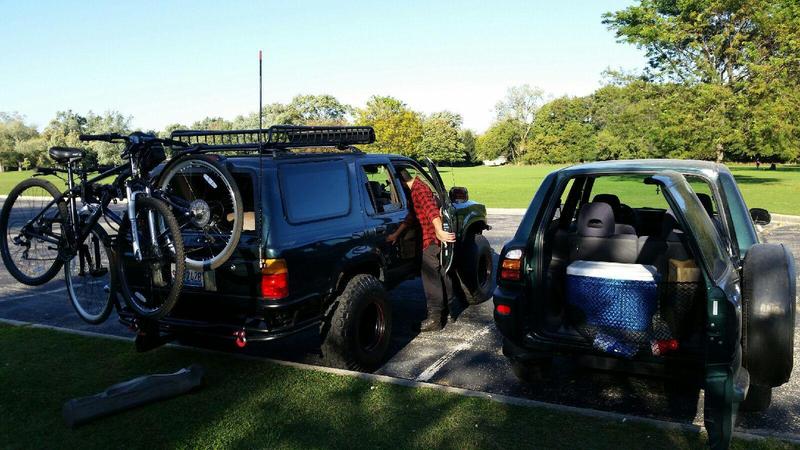
Loaded up...sagging and just about ready for the trip. This is before I threw the bikes on.
Home for the weekend.
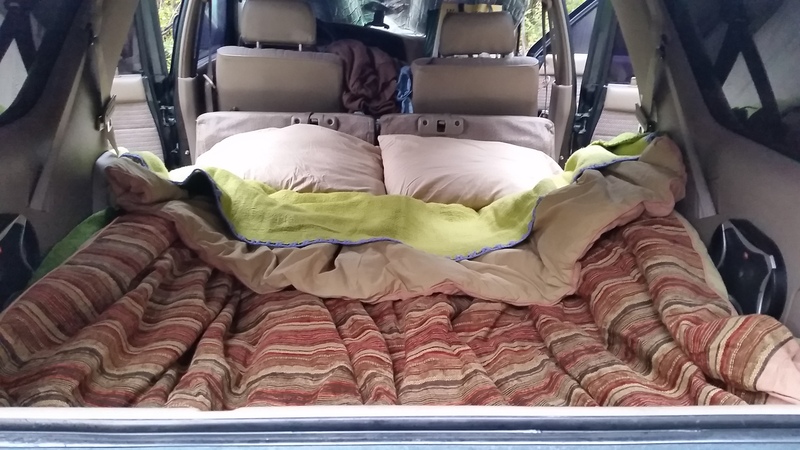
Bed was great the foam I laid out worked good.

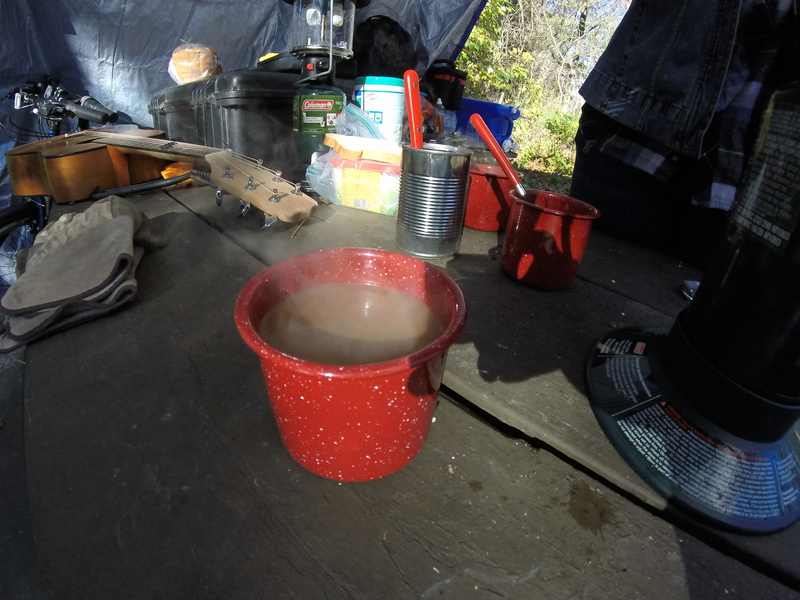
Camping coffee is the best coffee.

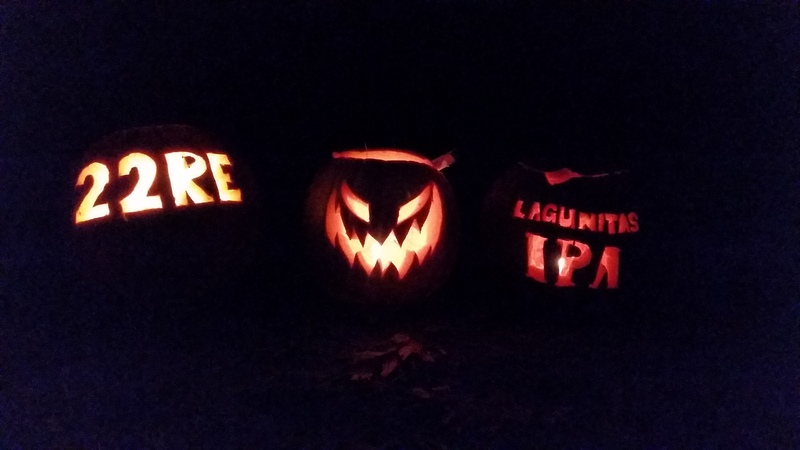
Best easy pumpkin ever...
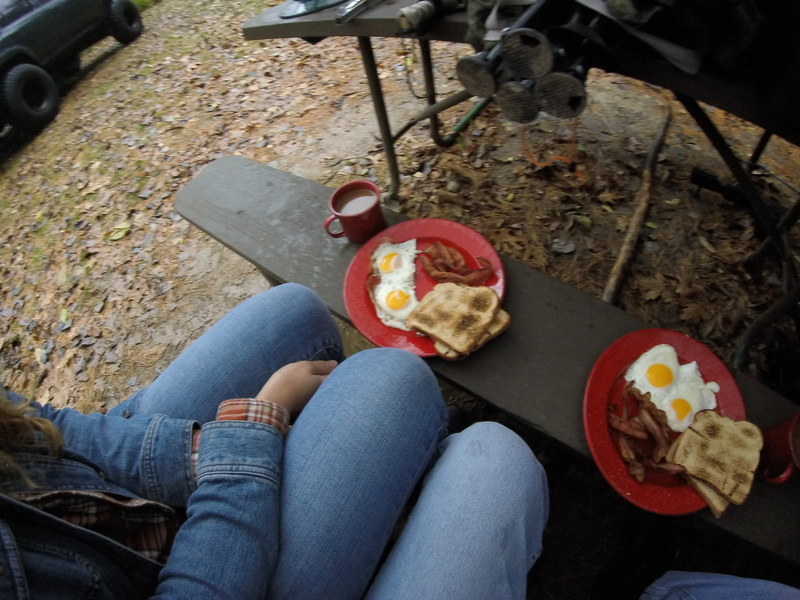
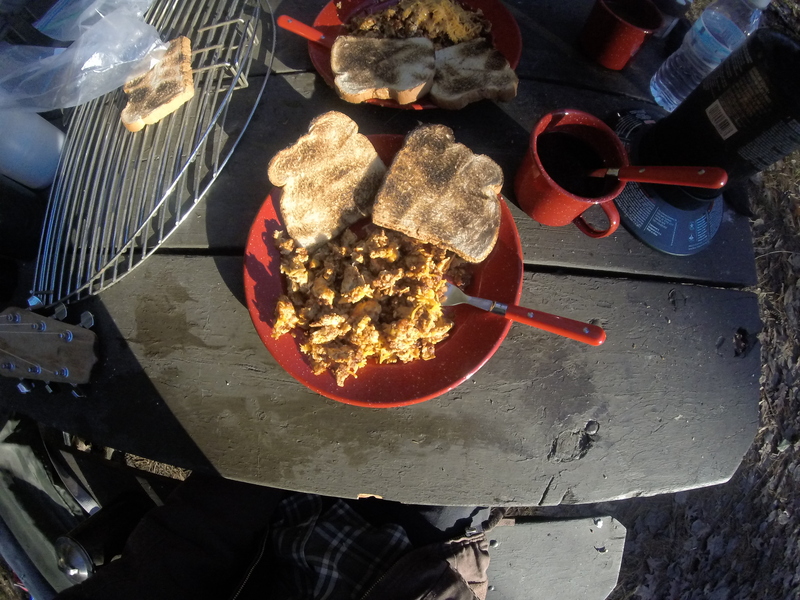
Breakfast day1: Eggs-n-bacy.
Breakfast day 3: Chorizo-N-eggs. Day 2 was oatmeal
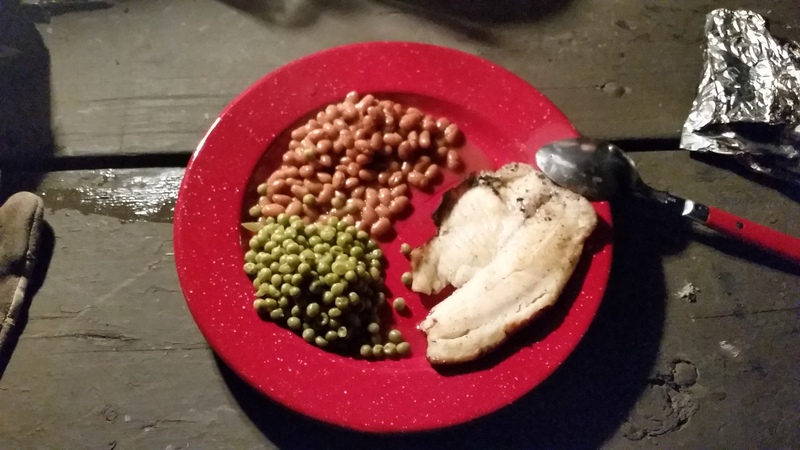
Night 1: Tilapia, beans and peas.
Night 2: Chicken, potato, tomato, onion and seasoning wrapped in foil and tossed on the embers. With Hawaiian bread!

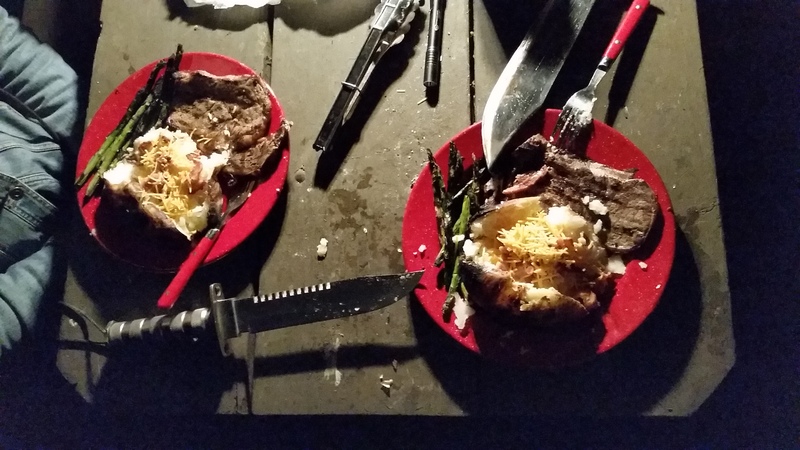
Night 3: Steak, loaded potato and asparagus.
It's not Halloween without pumpkins.
It was a great trip. I'll prob. put together some cheesy video soon.

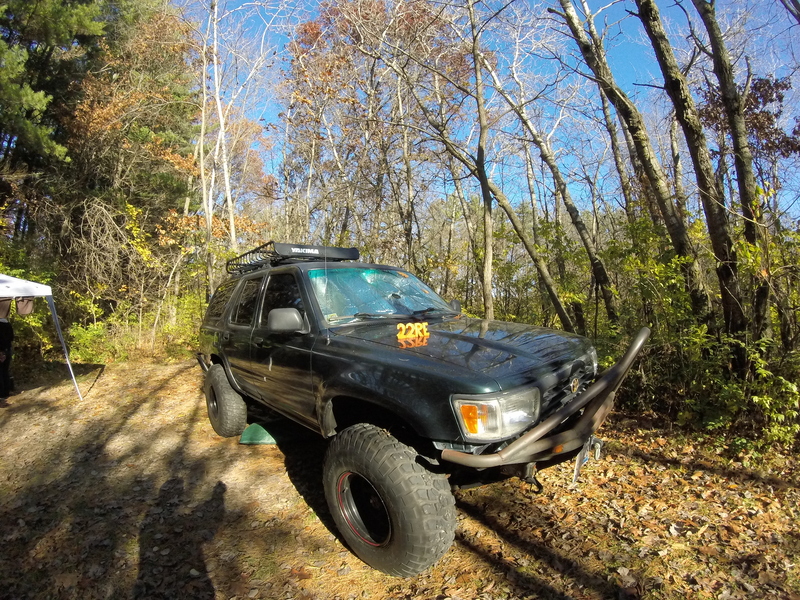
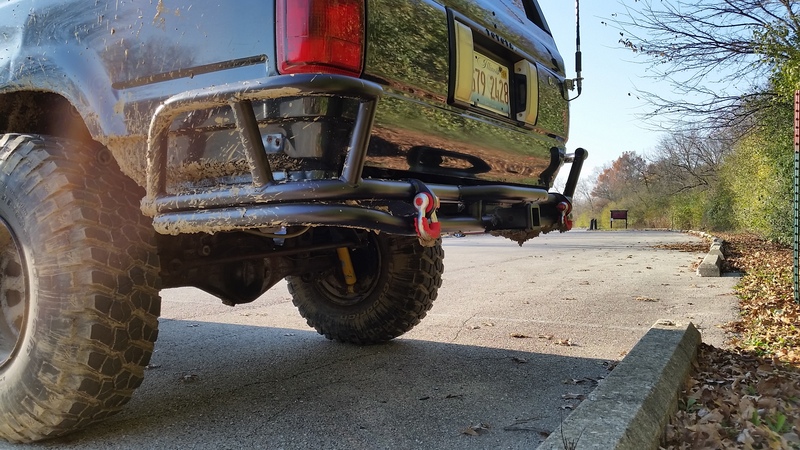
After returning home I got a chance to do some of my first real Illinois off roading! Sure it was a "park"....sure I had to pay to get it in.....sure I was the only Toyota there....but wheeling is wheeling! Let me tell ya there is a huge difference in wheeling out here than AZ. The main attraction here is mud and....MUD. Deep deep mud. I was not about to abuse the hell out of my rig dumping it in 6ft deep mud holes, I went around those....but it sure was fun and worth the 15 bucks. I went with a friend of mine from work.(jeep) I was very pleased with the way the truck handled it all. I guess I can say "pleased but not surprised".lol There was domestic vehicles struggling all over the place.....Why would you bring your 2015 Silverado on over inflated highway terrains to a place like this? Anyway way needless to say I took only one picture...My phone was dying and I needed the GPS to get home. It was about 1.5 hours away from where I live, again totally worth it. I plan on hitting this place up more next season. Unfortunately the time has come....this Saturday we are expecting first snow fall so the rig is washed, greased and ready for hibernation.
I took this picture while waiting for the jeep guys in street tires and 20' rims to get out of the way.....that took about 45min.
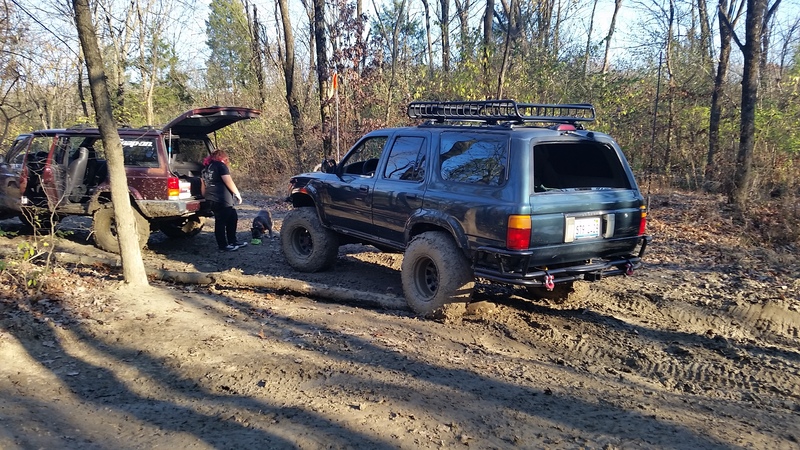
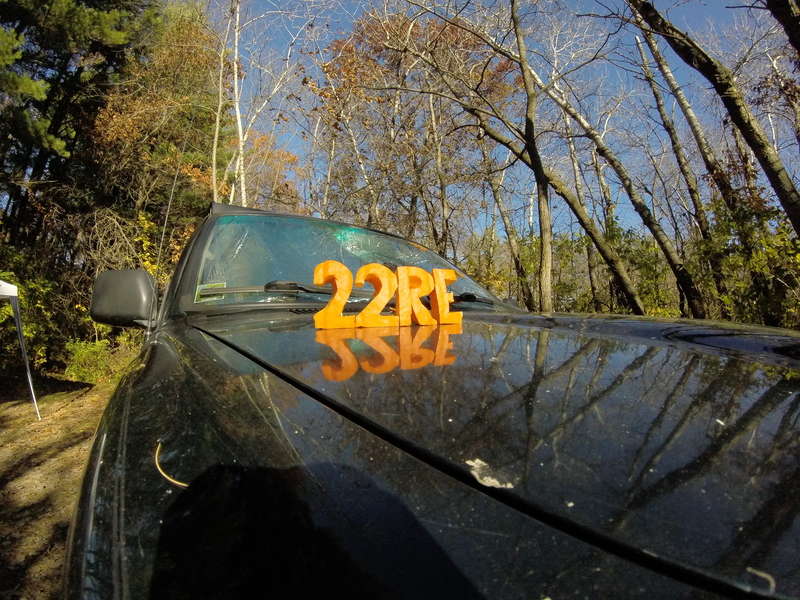
Here is more proof....
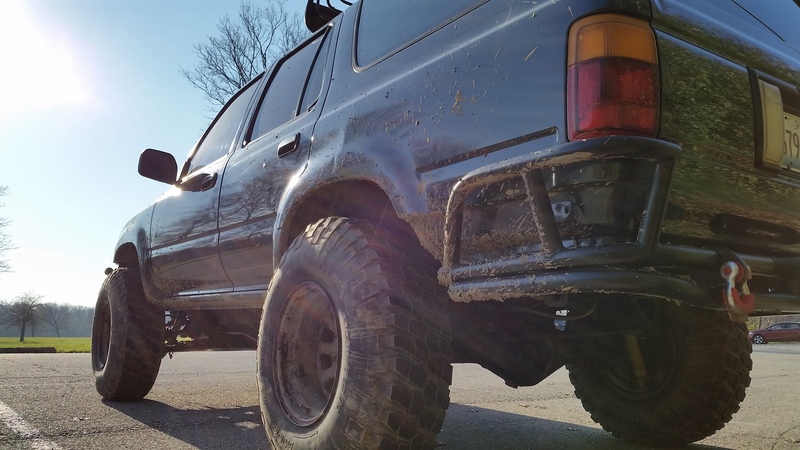
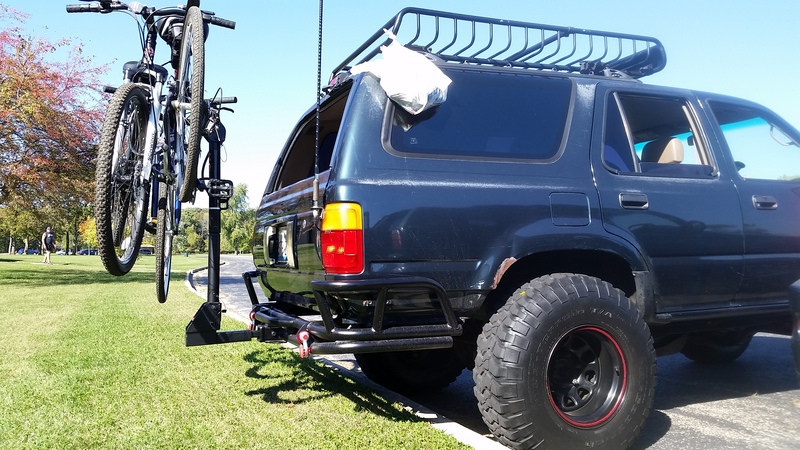
Loving the 4xInnovations rear bumper! Landed on it pretty hard at least once. Luckily I removed my bike rack just before. I should have removed it before going to the park but I was kinda hung over not gonna lie.
-RONI-
My page, I can clog it with all the pics I want, so here it goes.
Loaded up...sagging and just about ready for the trip. This is before I threw the bikes on.

Home for the weekend.

Bed was great the foam I laid out worked good.


Camping coffee is the best coffee.


Best easy pumpkin ever...


Breakfast day1: Eggs-n-bacy.

Breakfast day 3: Chorizo-N-eggs. Day 2 was oatmeal

Night 1: Tilapia, beans and peas.

Night 2: Chicken, potato, tomato, onion and seasoning wrapped in foil and tossed on the embers. With Hawaiian bread!

Night 3: Steak, loaded potato and asparagus.

It's not Halloween without pumpkins.

It was a great trip. I'll prob. put together some cheesy video soon.


After returning home I got a chance to do some of my first real Illinois off roading! Sure it was a "park"....sure I had to pay to get it in.....sure I was the only Toyota there....but wheeling is wheeling! Let me tell ya there is a huge difference in wheeling out here than AZ. The main attraction here is mud and....MUD. Deep deep mud. I was not about to abuse the hell out of my rig dumping it in 6ft deep mud holes, I went around those....but it sure was fun and worth the 15 bucks. I went with a friend of mine from work.(jeep) I was very pleased with the way the truck handled it all. I guess I can say "pleased but not surprised".lol There was domestic vehicles struggling all over the place.....Why would you bring your 2015 Silverado on over inflated highway terrains to a place like this?
Anyway way needless to say I took only one picture...My phone was dying and I needed the GPS to get home. It was about 1.5 hours away from where I live, again totally worth it. I plan on hitting this place up more next season. Unfortunately the time has come....this Saturday we are expecting first snow fall so the rig is washed, greased and ready for hibernation.I took this picture while waiting for the jeep guys in street tires and 20' rims to get out of the way.....that took about 45min.

Here is more proof....


Loving the 4xInnovations rear bumper! Landed on it pretty hard at least once. Luckily I removed my bike rack just before. I should have removed it before going to the park but I was kinda hung over not gonna lie.

-RONI-
Last edited by AssYriaNrocKer; Nov 19, 2015 at 03:41 PM.

 Nov 19, 2015 | 04:46 PM
#574
Thread Starter
Registered User
Joined: Aug 2010
Posts: 636
Likes: 1
From: Southern WI
rattlewagon: Thanks man. I have 100's more but I posted the very condensed version. Yeah I guess names of locations would have been good to mention huh?
Camping: Apple River Canyon State Park Illinois
Off Road Park: The Cliffs Insane Terrain (near seneca IL.)
-RONI-
Camping: Apple River Canyon State Park Illinois
Off Road Park: The Cliffs Insane Terrain (near seneca IL.)
-RONI-
May 4, 2016 | 04:49 PM
#575
Thread Starter
Registered User
Joined: Aug 2010
Posts: 636
Likes: 1
From: Southern WI
 :
:Got in a couple more camping trips since last post. They were short weekend trips nothing too exciting so not many pics.
Trip 1 was to White Pines State Park in Illinois. It was OK i guess...
 Camp sites were far too close together and the rangers (and 1 sheriff) drove by during all hours of the night like patrolmen securing a prison. They also have some kind of cabin rental/hotel as if there was not enough people in the park already. Needless to say this is not a secluded/primitive type of camping and we will not be going back.


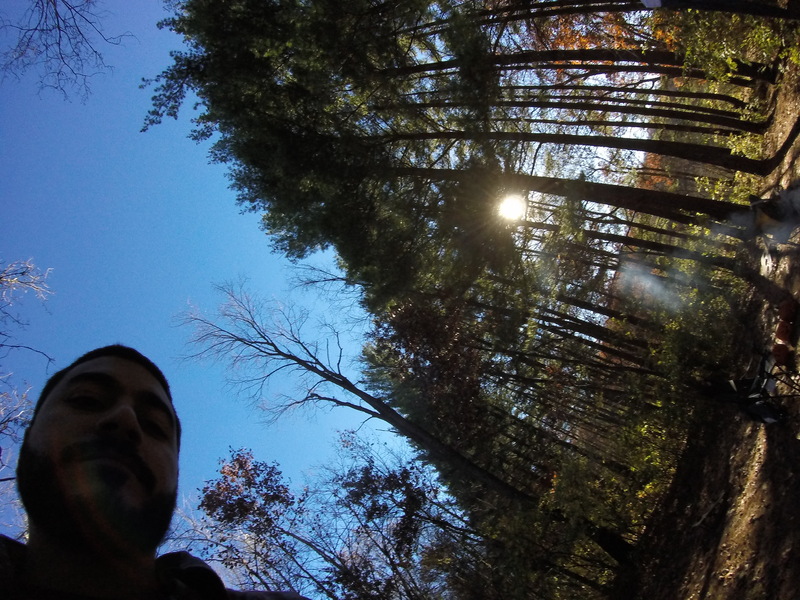
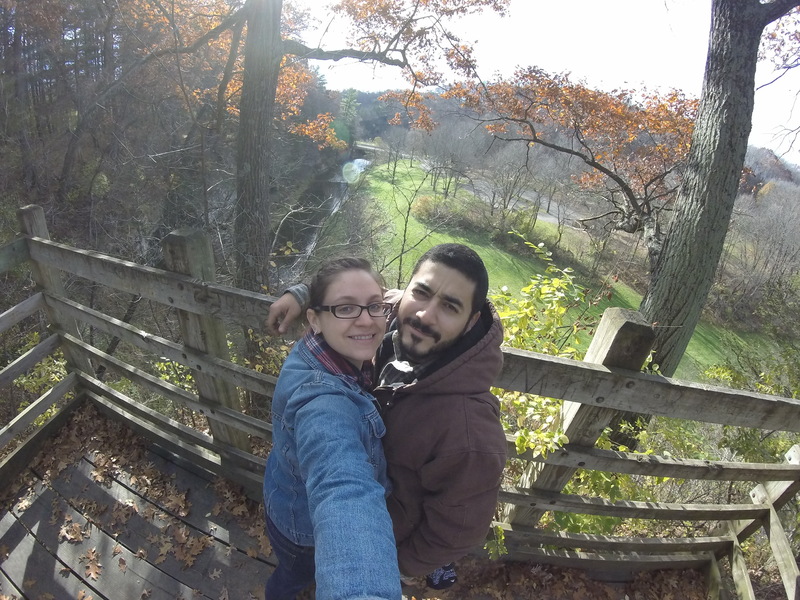
Trip 2 was to Pike Lake in the Kettle Moraine State Forrest of Wisconsin. Although we enjoyed this location a bit more it was still over crowded for our taste. The sites were a little further apart but your neighbor is still very visible and can be heard clearly. The volunteer host couple was very nice and even gave us a huge log as a "welcoming gift". As nice as the hosts may have been we were still being watched closely by rangers (and a sheriff....again). One perk of this location in the observation tower located on the top of the 2nd highest point in southern Wisconsin. With that being said I took 0 pictures...

-------------------------------------------------------------------------
I had some time to finally replace the speedometer cable that has been dead for about a year now. I replaced it before but it was a junkyard part that I used and that's why it didn't last. This time I went with a fresh part from the dealer. This turned out to be a hassle. Installation is easy...remove cluster..feed cable...connect to transfer case and done. It was finding the right part that was a pain! The parts department used my vin number and somehow came up with the wrong part. The length was the same, the mounts where the same, but the plug in part behind the cluster was different. On the second try the plug was the same but the mounts were slightly different. I got frustrated and decided to use it anyway...and it worked. So I will show some part numbers but keep in mind I am not sure these are the correct numbers but I can say that the second one is working just fine.


-------------------------------------------------------------------------
SO....after the drive back from trip number 2 I parked the 4runner and what do you know... motor oil dripping all over the place!


I look under the truck to see everything has been coated in oil. It was obviuos that the leak was coming from the front of the motor, and with the help of 70mph wind, was working its way back all the way to the transfer case. I guess you can say I was a bit worried. Dip stick was reading 1/4 of a qt low and this motor has never been low on oil when I check it. Took it into the surgery room to perform diagnosis which was actually a little difficult given everything was wet. I cleaned it all off very well, started the truck and watched for the oil to leak and.....nothing. Did not see one drop of oil come from anywhere in 20 min. of running.
I thought to myself "well it was leaking while highway driving". 22re + 4:88 gears + 33" tires = 70mph @ 3k rpms. So I had a friend get in and hold it at 3k and it started leaking within seconds, leaking a lot to. Seemed to me like the oil was coming from behind the crank pulley so I decided to do the crank seal and oil pump gasket. By the way I decided it was the crank seal because it was slinging off of the pulley and flying all over the place. 
As it turned out after I was done it was leaking AGAIN! This time I paid closer attention and saw that it was somehow coming from the water pump. I have never seen this before...oil leaking out of the water pump. Then after I watched it for a while I see the oil is actually contaminated with coolant!
 So what I believe is happening here is that the oil is obviously going past the timing cover gasket/FIPG through a bolt and that bolt goes through the water pump. Now for there to be coolant mixed with the oil that must mean that the water pump gasket is also leaking.

Here is what I believe my options are;
1. Remove the water pump...throw a bunch of FIPG on the leaking bolt and replace the water pump gasket. This would be the least amount of time and work but I'm not sure it will work and it sure as hell is not a proper fix.
2. Remove front cover and reseal everything. This involves a bit more work and is a bit more risky. Removing the timing cover without removing the head and oil pan could result in a blown head-gasket if not done carefully. All the old guys in the shop claim this is the way they did it in the 90's even though step one in the FSM says remove head and oil pan. If I go this route I will be replacing timing chain and guides as well as radiator. (radiator has more miles then my truck and has def. seen better days.)
3. Remove head...remove oil pan...remove timing cover. This is the correct way to go about things according to the FSM. However this is quite a bit more work, time, and money.
So far I am really leaning towards option number 2. I have already ordered gaskets.
!!!!!!!!!!!!!!!!!!!!!!!!!!!!!!!!!!!!!!!!!!!!!!!!!! !!!!!!!!!!!!!!!!!!!!!!!!!!!!!!!!!!!!!!!!!!!!!!!!
What do you guys think? Is my theory correct? Has anyone else seen a leak like this? Aside from the radiator, gaskets, chain and guides is there anything else I should be replacing for preventative maintenance? I was thinking about replacing the water pump but the "old dudes" at work keep saying it is very unlikely the 22re water pump will go bad anytime soon. Along with the radiator I will be doing hoses and thermostat as preventative maint. What is the best replacement radiator? aluminum? 3 core? brand? will the stock shroud still work?
I wanna hear from you Yotatech! Let's hear some comments questions and answers!
Thanks in advance for any replies I may get. Party on Garth...
:w rench::wre nch:-RONI-
May 16, 2016 | 10:47 PM
#578

Registered User
Joined: May 2016
Posts: 41
Likes: 0
So this is my first post, but on a new account, so not really my first....either way...I just read through your entire build, and I have to say...Awesome!
I am pretty much the opposite of you, although I think it comes down to the same thing fundamentally...I grew up wheeling in the Deserts of California...and then I moved to the East Coast, and hated every minute I lived there, and then I moved to Washington State...while better than NC, I still hate it...I hate the rain and the cold...I want my dry hot deserts back so much...but I think it is all about how we grew up...so like I said...fundamentally the same.
I have recently finished rebuilding my 92 4Runner and will be starting my build thread here soon...so I have been reading through all the threads I can find to get ideas...
As far as the oil leak goes...I have done option #2 on my 22RE about 9 years ago...and this is when I was 17 and not a real mechanic...It turned out perfectly fine for me. Now, as an ASE certified master tech and mechanic for almost a decade...I would do the same thing...lmao
Either way, I wanted to let you know I really enjoyed your build and I will be looking back for more updates...even if they are slow going. Maybe you can come by and check out mine, which I should have started in the next day or two...just trying to collect the photos to start!
May 24, 2016 | 02:09 PM
#579
Thread Starter
Registered User
Joined: Aug 2010
Posts: 636
Likes: 1
From: Southern WI
So this is my first post, but on a new account, so not really my first....either way...I just read through your entire build, and I have to say...Awesome!
I am pretty much the opposite of you, although I think it comes down to the same thing fundamentally...I grew up wheeling in the Deserts of California...and then I moved to the East Coast, and hated every minute I lived there, and then I moved to Washington State...while better than NC, I still hate it...I hate the rain and the cold...I want my dry hot deserts back so much...but I think it is all about how we grew up...so like I said...fundamentally the same.
I have recently finished rebuilding my 92 4Runner and will be starting my build thread here soon...so I have been reading through all the threads I can find to get ideas...
As far as the oil leak goes...I have done option #2 on my 22RE about 9 years ago...and this is when I was 17 and not a real mechanic...It turned out perfectly fine for me. Now, as an ASE certified master tech and mechanic for almost a decade...I would do the same thing...lmao
Either way, I wanted to let you know I really enjoyed your build and I will be looking back for more updates...even if they are slow going. Maybe you can come by and check out mine, which I should have started in the next day or two...just trying to collect the photos to start!
I am pretty much the opposite of you, although I think it comes down to the same thing fundamentally...I grew up wheeling in the Deserts of California...and then I moved to the East Coast, and hated every minute I lived there, and then I moved to Washington State...while better than NC, I still hate it...I hate the rain and the cold...I want my dry hot deserts back so much...but I think it is all about how we grew up...so like I said...fundamentally the same.
I have recently finished rebuilding my 92 4Runner and will be starting my build thread here soon...so I have been reading through all the threads I can find to get ideas...
As far as the oil leak goes...I have done option #2 on my 22RE about 9 years ago...and this is when I was 17 and not a real mechanic...It turned out perfectly fine for me. Now, as an ASE certified master tech and mechanic for almost a decade...I would do the same thing...lmao
Either way, I wanted to let you know I really enjoyed your build and I will be looking back for more updates...even if they are slow going. Maybe you can come by and check out mine, which I should have started in the next day or two...just trying to collect the photos to start!
#2 Looks like the goal right now as long as I don't come across any other issues. So far I have ordered the gaskets and hoses from the dealer, CSF radiator, and timing chain kit. The radiator is CSF #2055. According to a few CSF distributors that is the correct part number. It was a little difficult to get the correct part number because some sites where conflicting. Hopefully I got the right one. The timing chain kit comes with chain, sprockets, and steal guides. Kit was purchased from 22RE Performance. All of the gaskets, radiator hoses, clamps, and thermostat where purchased from the dealer. Maybe I will post some part numbers later.
Anyone else that has any tips feel free to chime in now before I start digging in!

-RONI-
May 31, 2016 | 08:26 AM
#580
Registered User
Joined: May 2016
Posts: 41
Likes: 0
I always say good luck for anyone doing engine work...lmao, even after having done it as much as I have, I always have that nagging feeling like, Am I gonna screw this up....but I am always fine...so yeah, Good Luck.


