
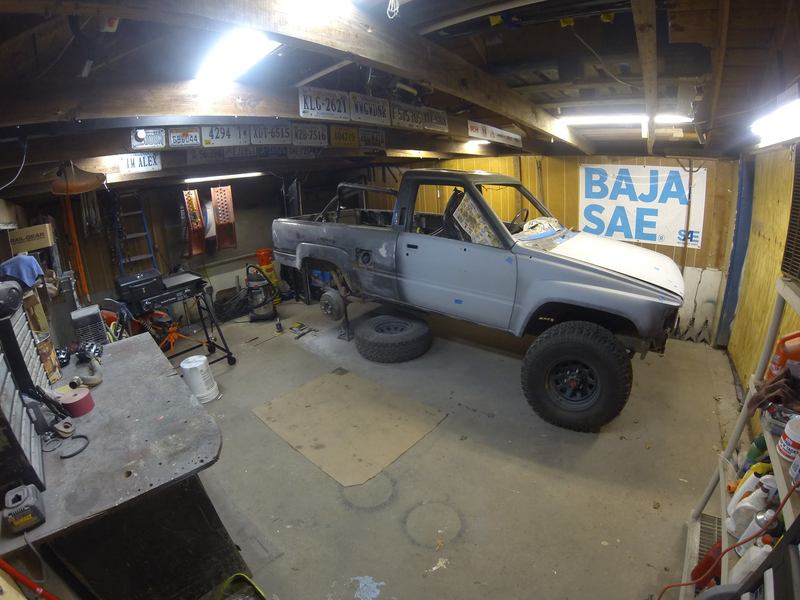
arlindsay1992's 1987 4Runner Build Up Thread
 Apr 20, 2016 | 04:51 AM
#82
Thread Starter
Registered User
iTrader: (8)
Joined: May 2011
Posts: 1,517
Likes: 354
From: Southeast Virginia
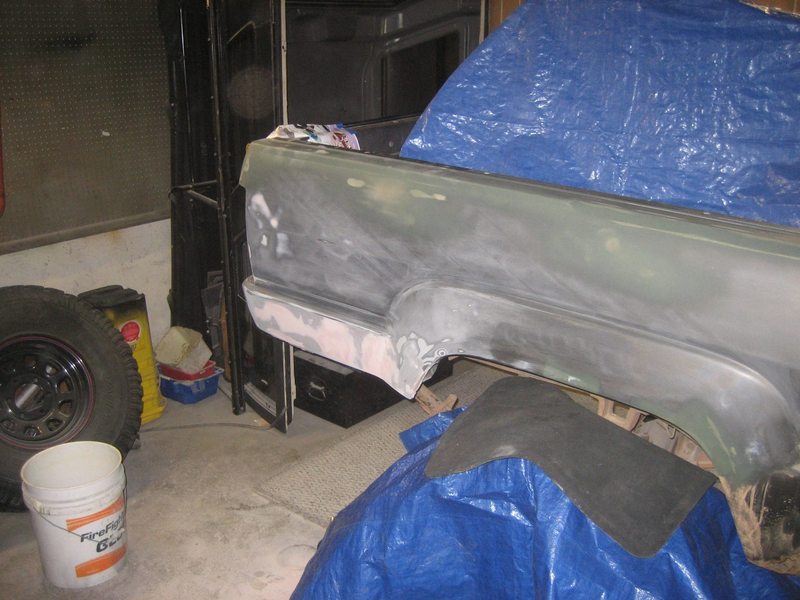
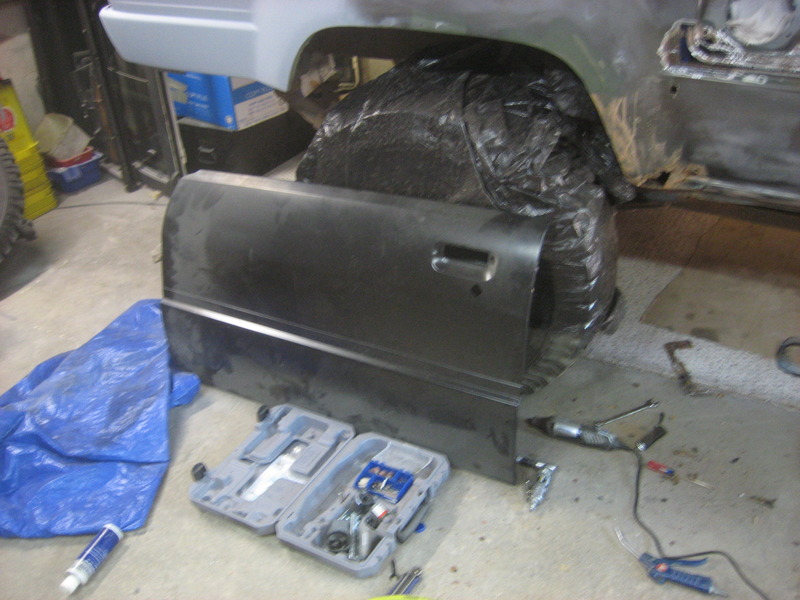
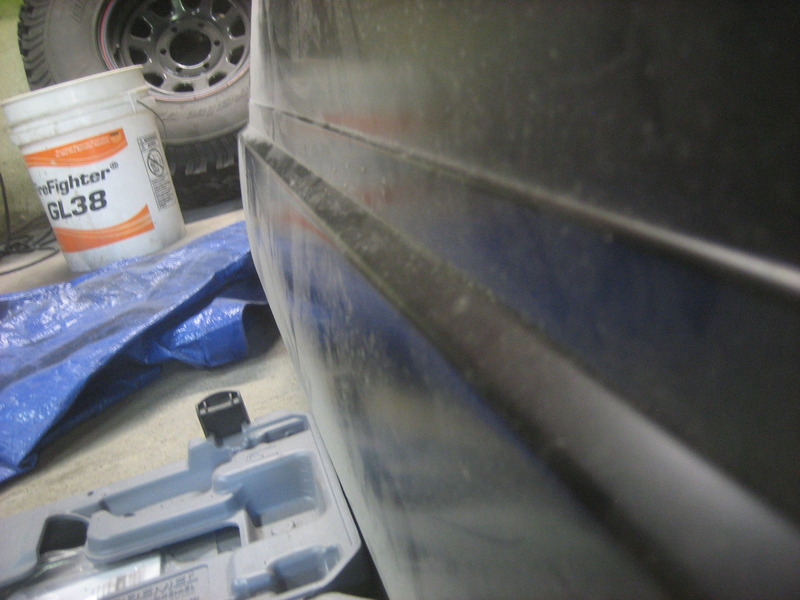
Progress! Passenger side door and front fender are on and aligned.
Moved on to the back. Started with this. Tape marks where I'm about to cut.

Chop chop, weld weld.
Still need to cut a few more patch pieces.
A bit of filler.
And primed!
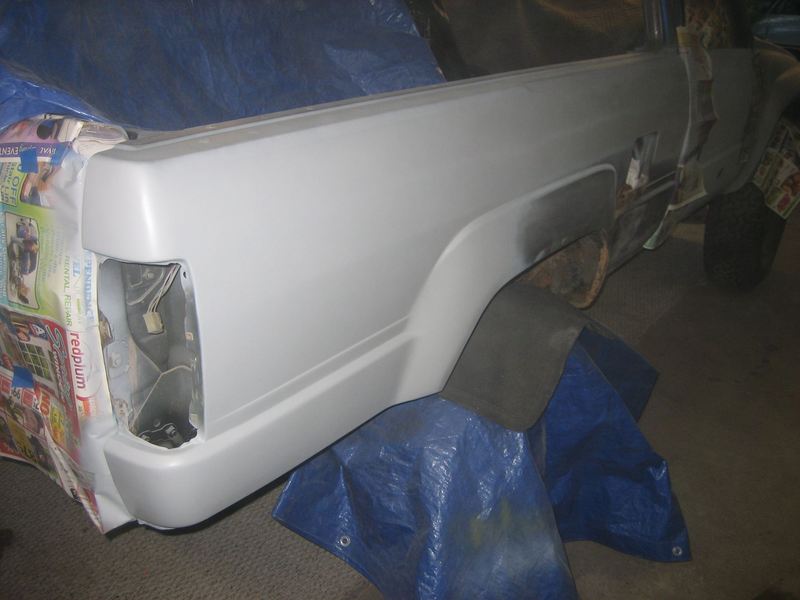
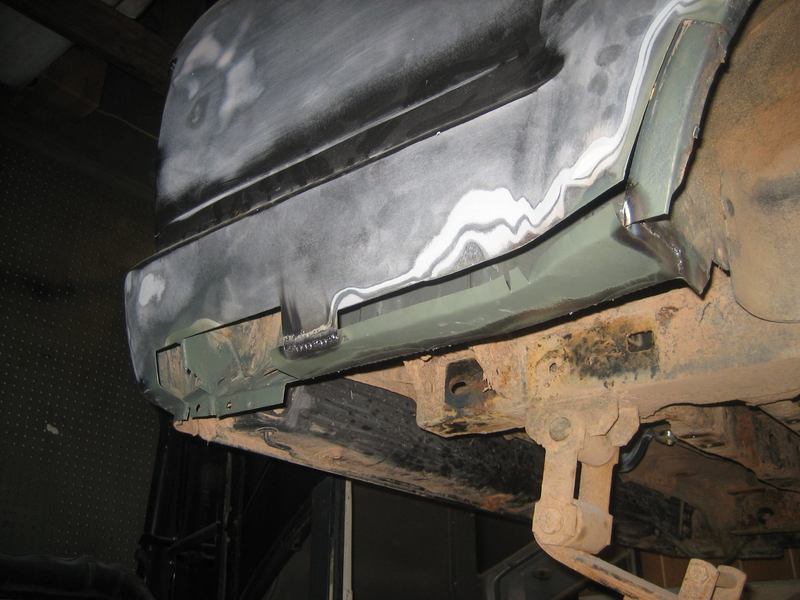
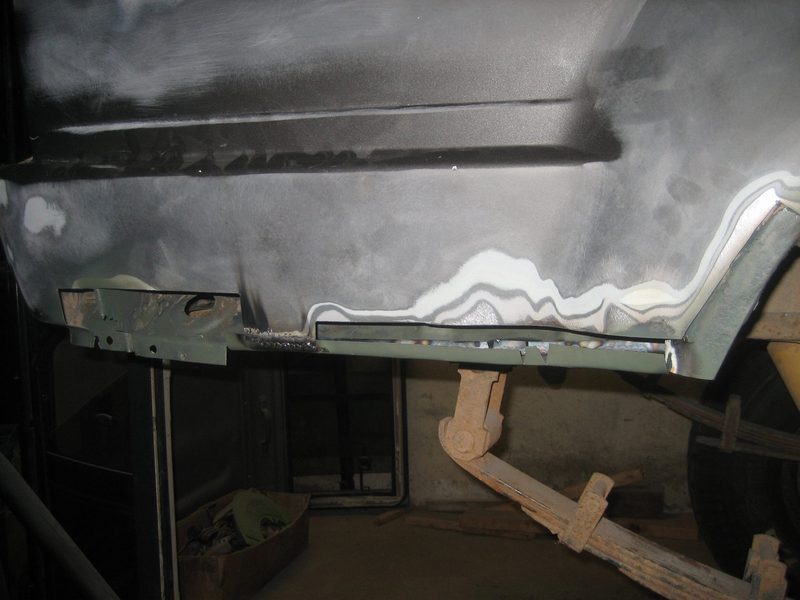
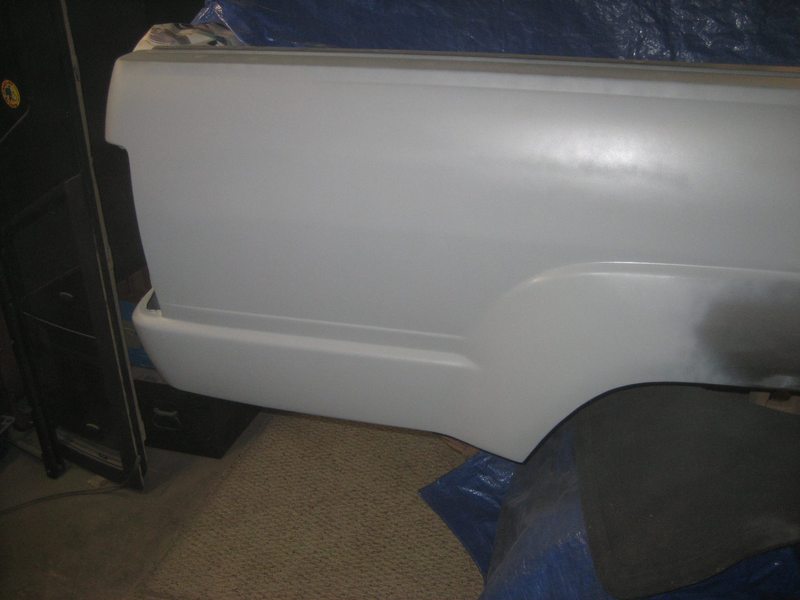
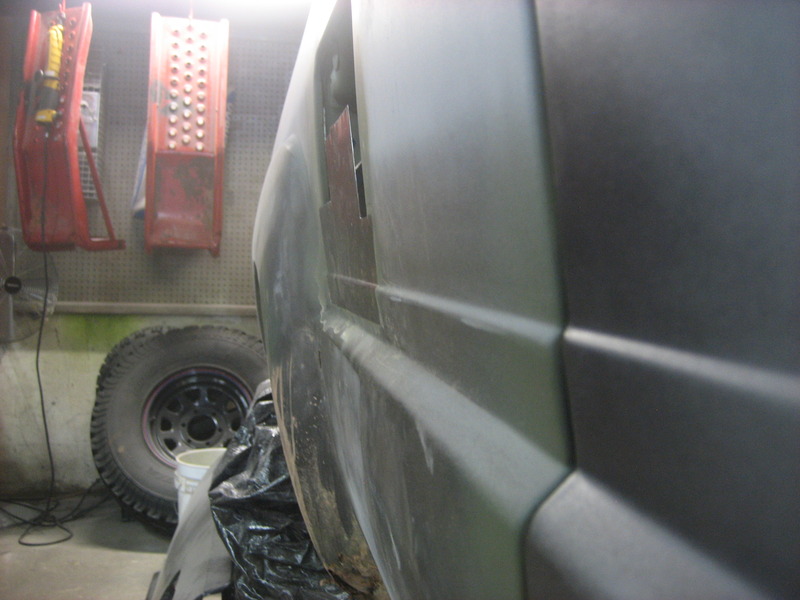
It's a complicated shape down there so I just chopped it all out and closed it off. The bottom of the fender is now at the same height as the frame rails.
Moved on to the back. Started with this. Tape marks where I'm about to cut.
Chop chop, weld weld.
Still need to cut a few more patch pieces.
A bit of filler.
And primed!
It's a complicated shape down there so I just chopped it all out and closed it off. The bottom of the fender is now at the same height as the frame rails.


 Apr 21, 2016 | 06:41 AM
#85
Thread Starter
Registered User
iTrader: (8)
Joined: May 2011
Posts: 1,517
Likes: 354
From: Southeast Virginia
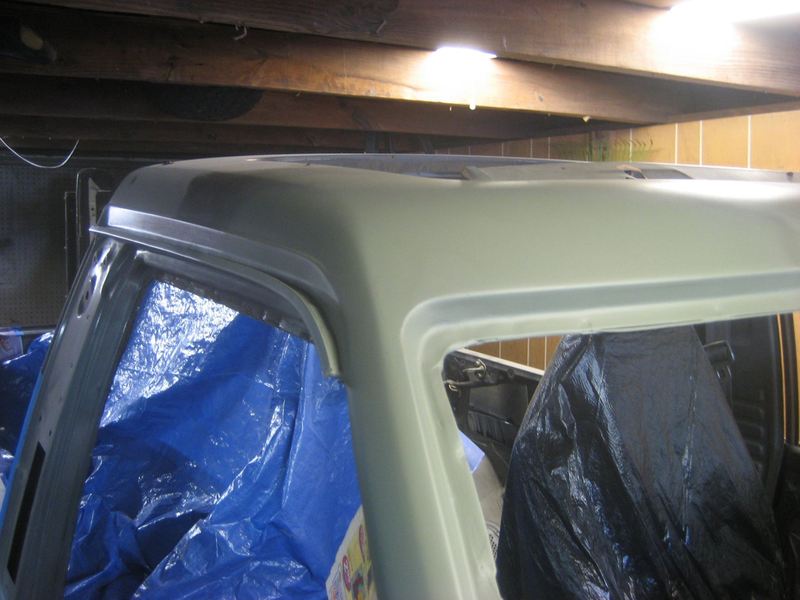
Started with this.
Cut out the Swiss cheese.
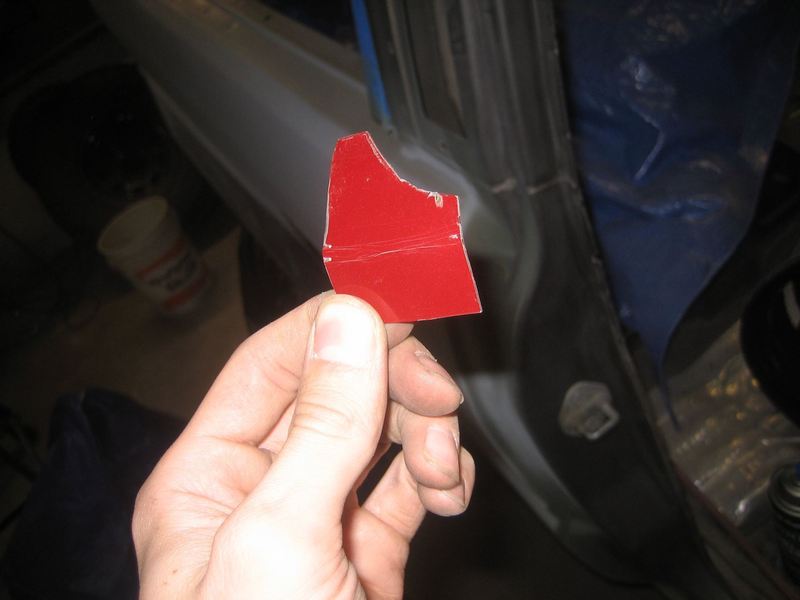
Made this. Cut out of a piece of a red Ford Focus roof.
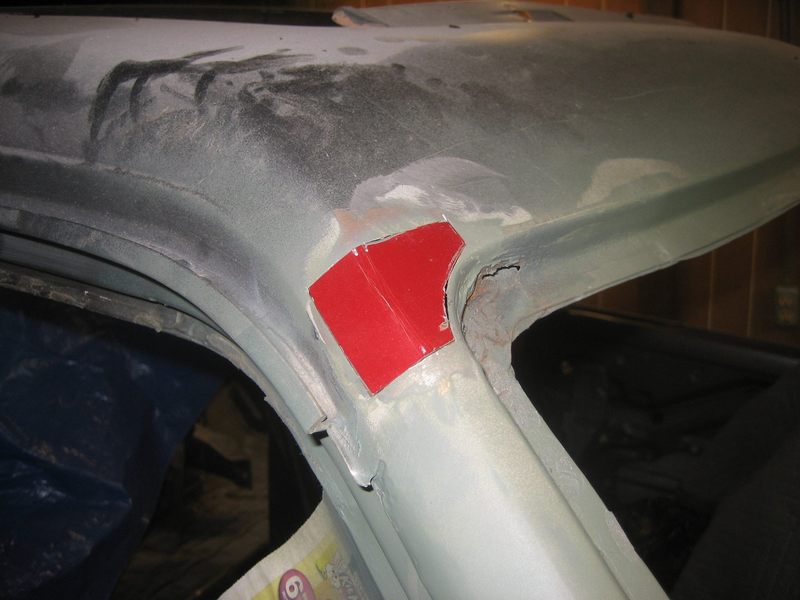
Fits decent enough.
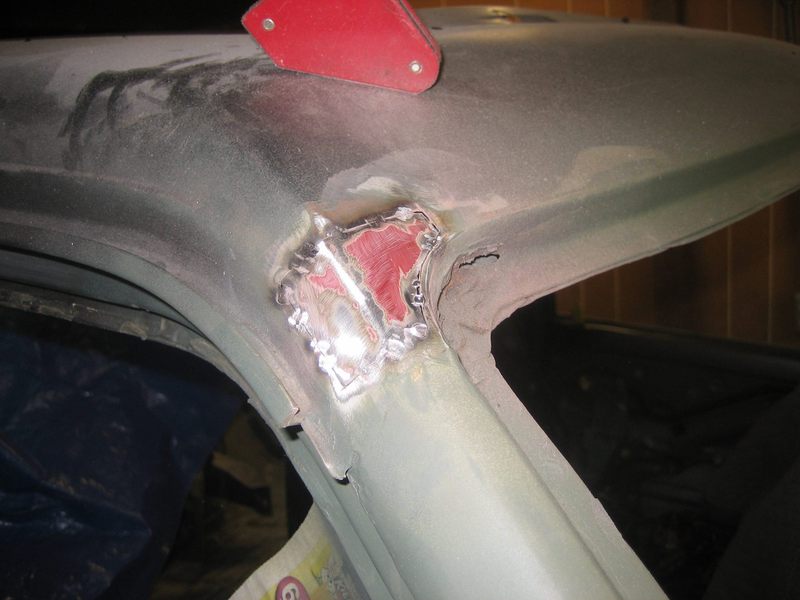
Burned it in.
Glass reinforced filler.

And glazing putty to finish it off.
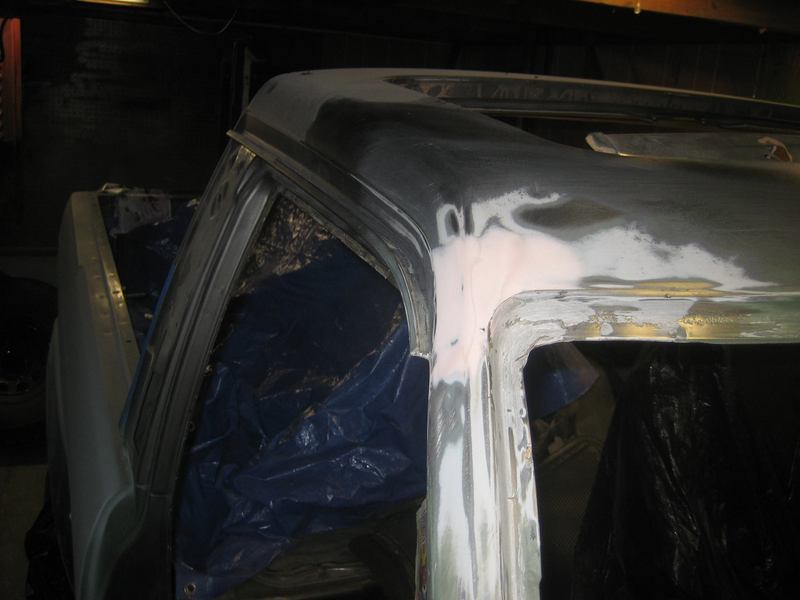
And primer!
Cut out the Swiss cheese.
Made this. Cut out of a piece of a red Ford Focus roof.
Fits decent enough.
Burned it in.
Glass reinforced filler.
And glazing putty to finish it off.
And primer!

 Apr 22, 2016 | 02:40 AM
#89
Thread Starter
Registered User
iTrader: (8)
Joined: May 2011
Posts: 1,517
Likes: 354
From: Southeast Virginia
Thanks, takes a lot longer than pictures make it seem. I'm better than when I started but I'm nowhere close to a pro.
I scraped out as much rust as I could with various tools, then sprayed it with self etching primer from every direction accessible. One thing on my list before paint is to re-apply seam sealer over all the cracked original seam sealer around the sunroof and in the rain gutter. My hope is that this, the primer, and the combination of this truck being garage kept and a nice weather/wheeling vehicle from now on prevent it from eating back through.
I'm using Dupli-Color rattle can primer. I'm using both etching and filling depending on where it's going. I use the etching anywhere I'm painting on bare metal or on body filler. Over original paint I just give it a good sand with some 220. I use the filler primer on the large panels like hood, fenders, doors, and bedsides. Don't feel the need to use filler primer in areas like door jambs. In my pictures, the green is self etching and the white/gray is filler primer.
Like I said, they are rattle can. The paint guy said that these are fine. The self etching primer works really good and really adheres. The filler primer gets sanded away except in the scratches it's filling in so I guess we'll see. It hasn't worried me but I have no advise for choosing sprayable paint or setting up a spray gun.
Apr 22, 2016 | 02:48 AM
#90
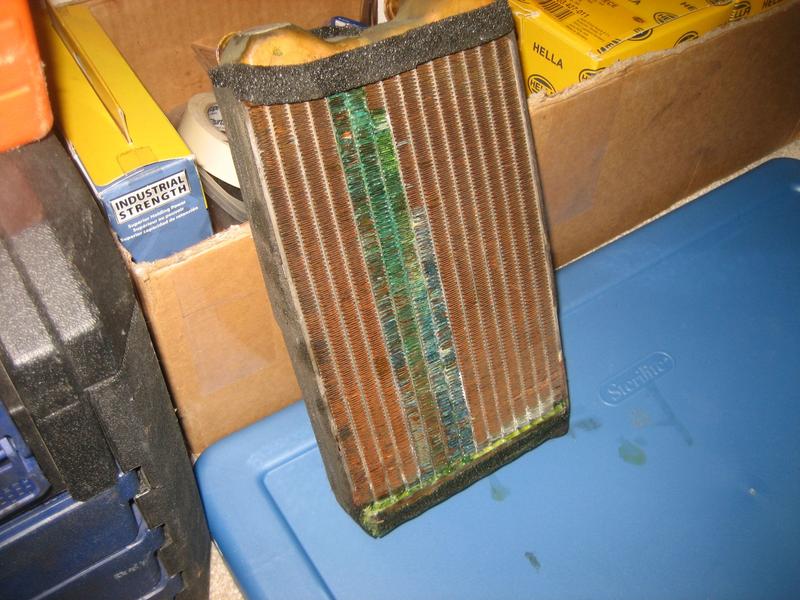
which heater core did you get from rockauto? the one I got from them didn't have the little flat "lips" for the C clips to connect the pipes to. they were just kind of flared at an angle. I think I got the cheapest one they had. spectra or something. its a shame they cant just make one woth the pipes attached.
 Apr 22, 2016 | 03:01 AM
#91
Thread Starter
Registered User
iTrader: (8)
Joined: May 2011
Posts: 1,517
Likes: 354
From: Southeast Virginia
Here's a link to another heater core thread I replied to:
https://www.yotatech.com/forums/f116.../#post52310954
https://www.yotatech.com/forums/f116.../#post52310954
Apr 27, 2016 | 06:48 AM
#94
Thread Starter
Registered User
iTrader: (8)
Joined: May 2011
Posts: 1,517
Likes: 354
From: Southeast Virginia
Getting really close to time for paint. I'm shooting to get it there by the end of next week. I just have a spot on the passenger rocker and a hole behind that chip guard by the rear wheel on the passenger side. That one doesn't need to look good so it should be easy. I also have a couple dents on the tailgate then another once over the whole truck to fix little pinholes and chips which showed up after primer. Anyway, onto the latest progress.
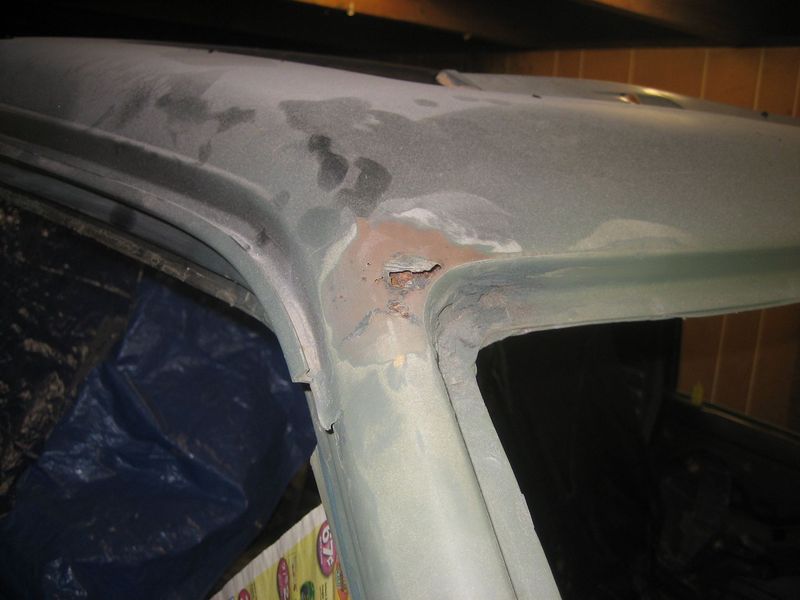
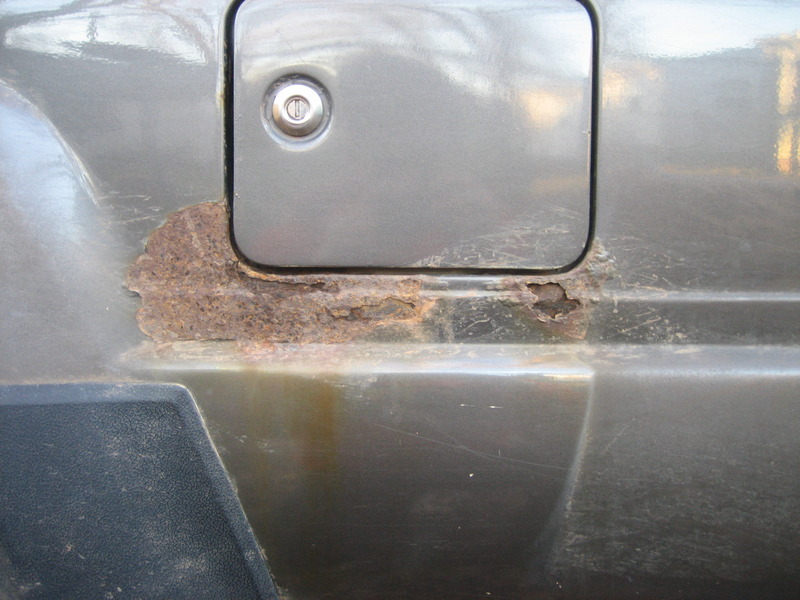
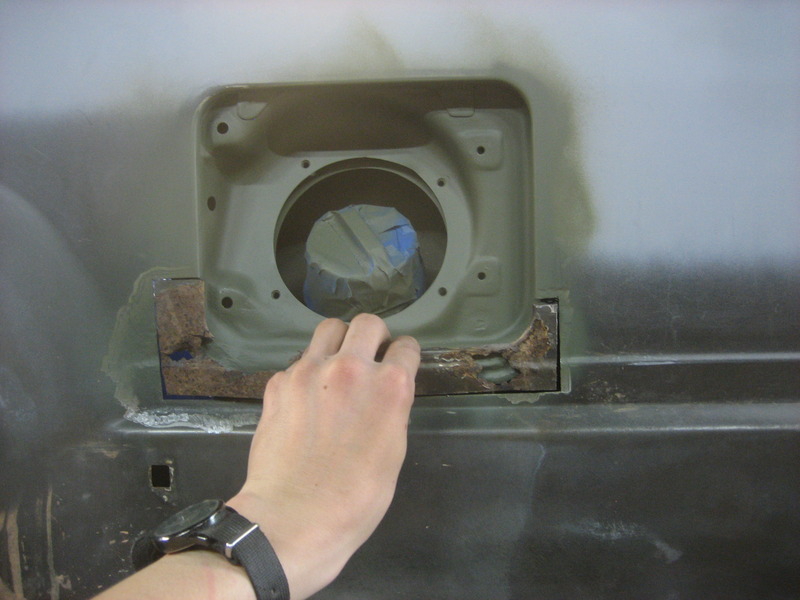
Here's the rust when I first bought the truck back in 2012.
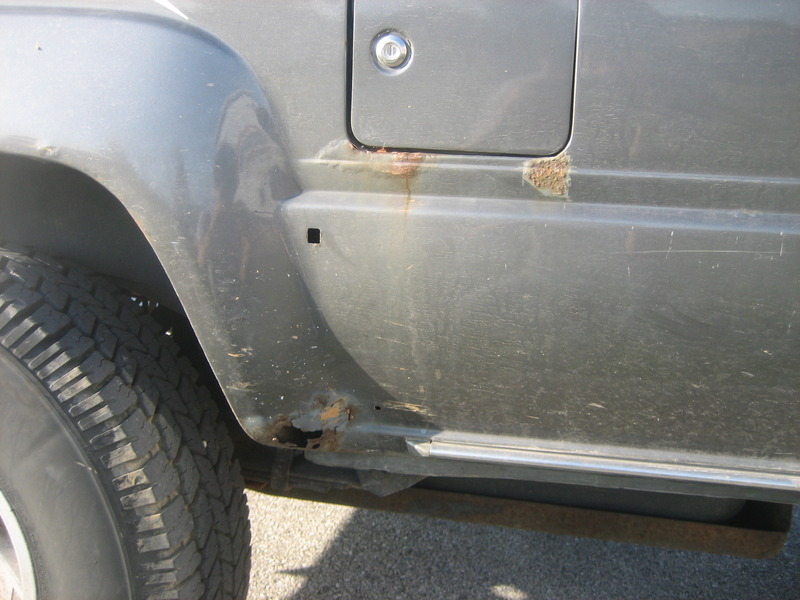
And here it is back in December before I started all this work.
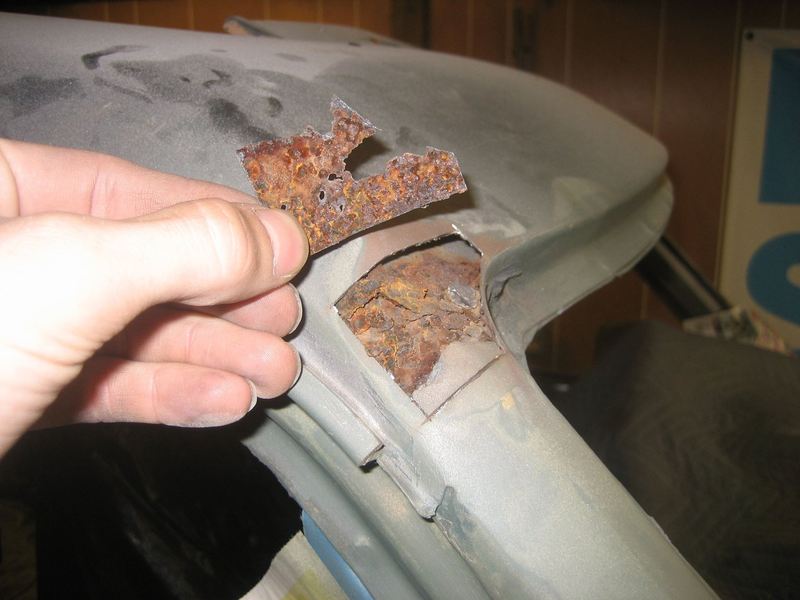
First step is to cut out all the bad stuff and grind away the rust.
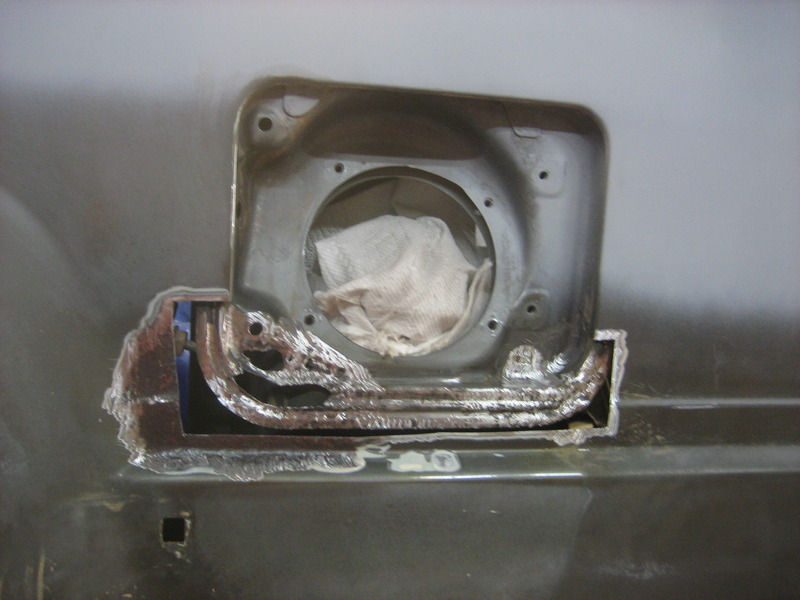
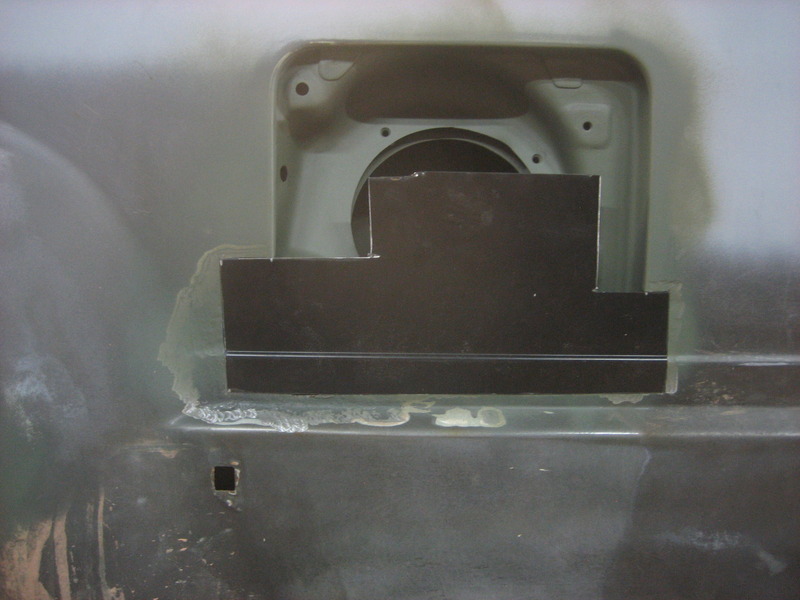
Filled in the holes in the filler insert with fiberglass mat and resin then smeared some glass reinforced filler to smooth it out just a bid. Doesn't need to be super pretty behind the filler door.
This contour is going to suck to duplicate.
I've been trying to sell this driver's side door skin ever since I got it in a package deal 5 years ago. Nobody wanted it so today I'll put it to use.
That'll do nicely.
A little bit later.
Looking good so far.
Saved this piece of the original metal.
Used it to trace the curve for the door to fit into.
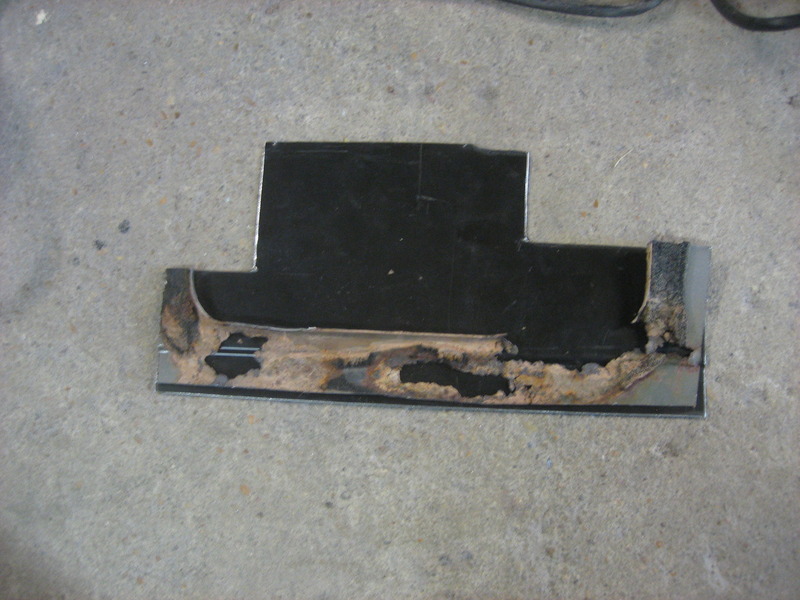
Then copy the curve about 3/16 smaller to leave material for the lip that gets bent over into the hole.
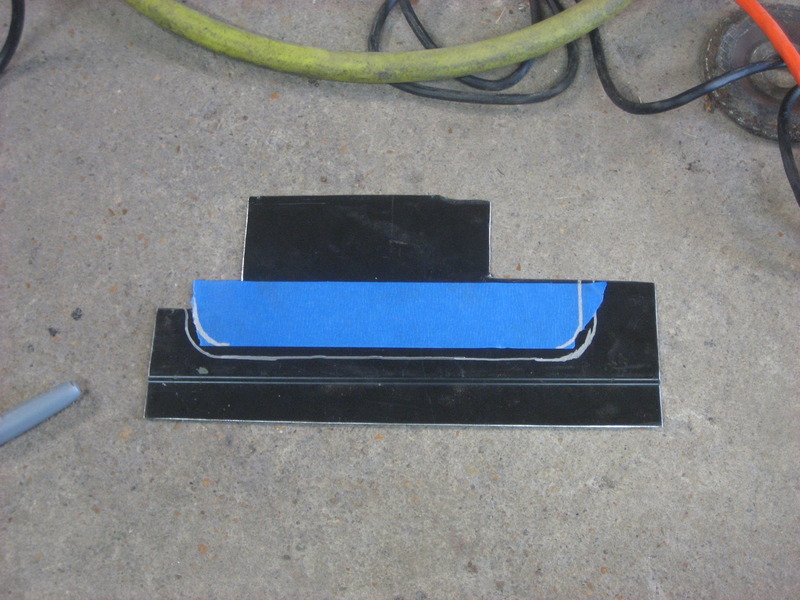
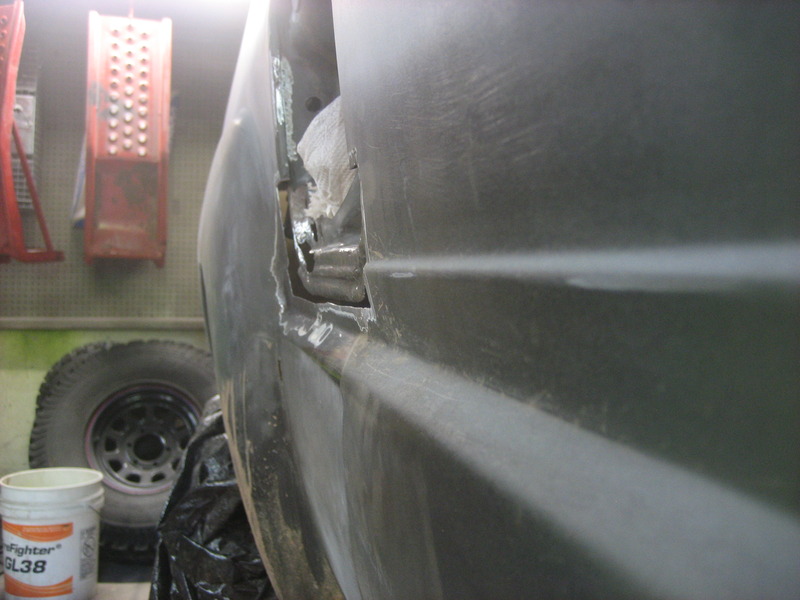
Started burning it in. Was a bit nervous welding within inches of the fuel filler. Fortunately nothing happened.
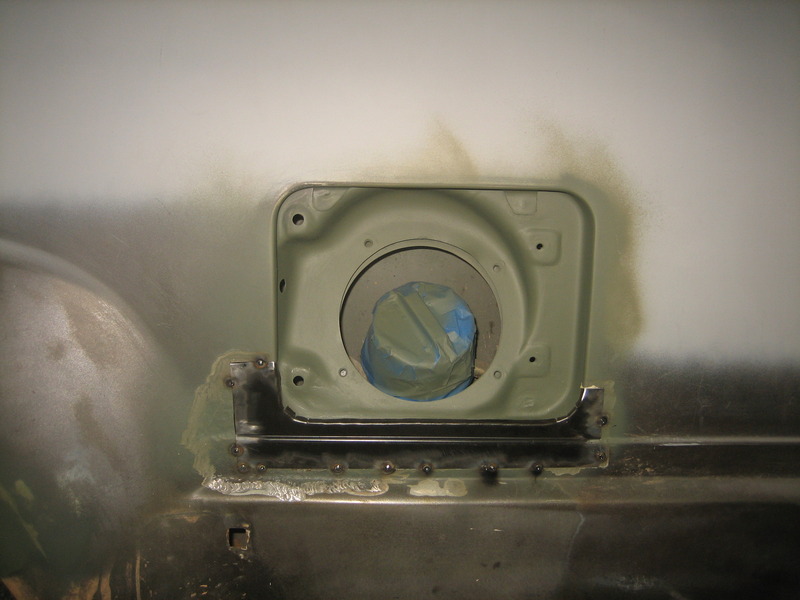
Fully welded and ground down. Seam sealed the two pieces together before welding, then seam sealed the inside and outside after welding. Hopefully it works.
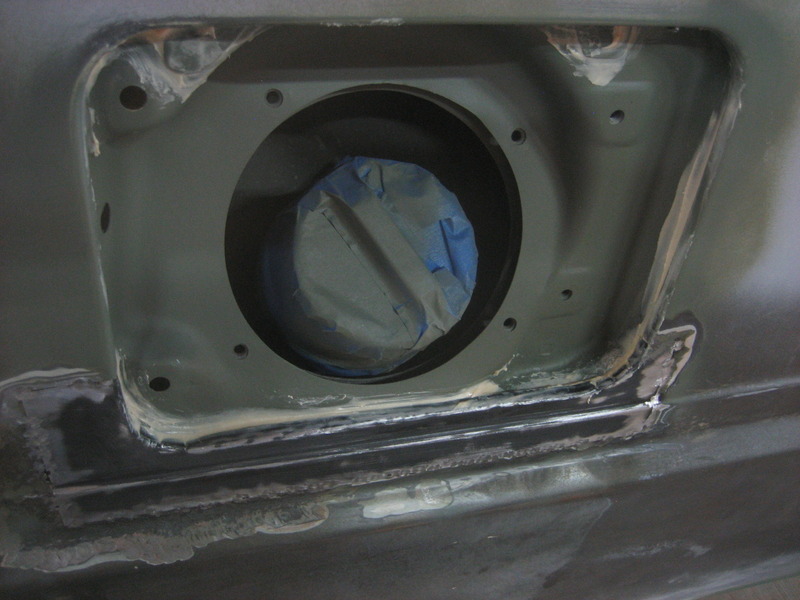
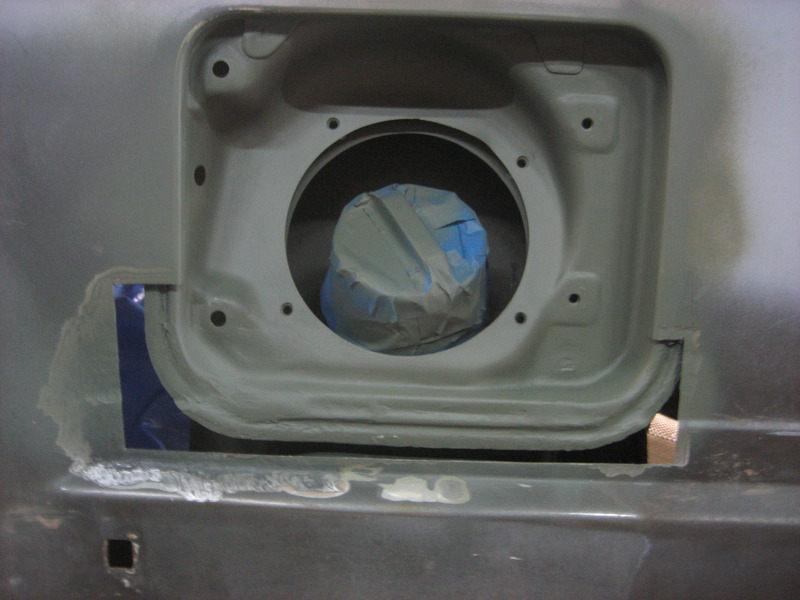
Body filler and primer. I'm no pro but it looks decent. The picture makes the crease look a bit wonky but I don't remember it looking like that in person. I'll have to look at it again.
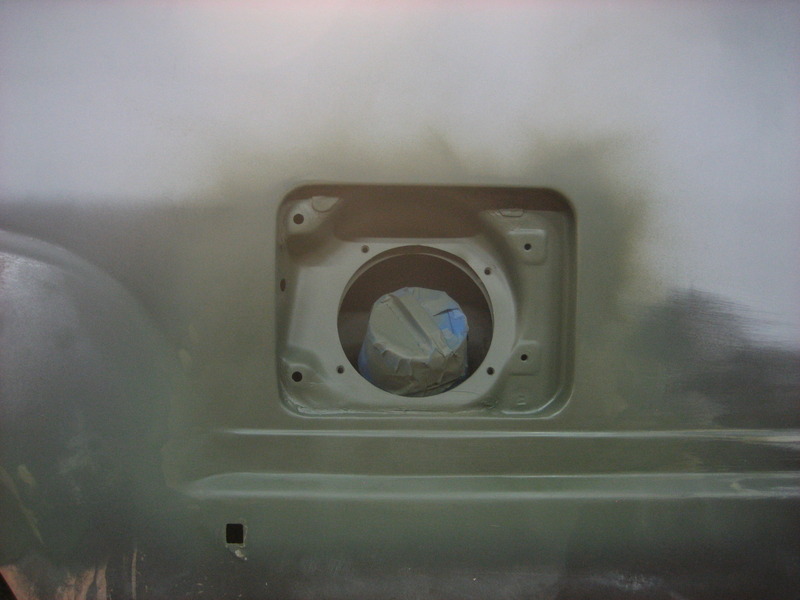
Didn't want to get high build primer on the inside so I cut this out of some cardboard.
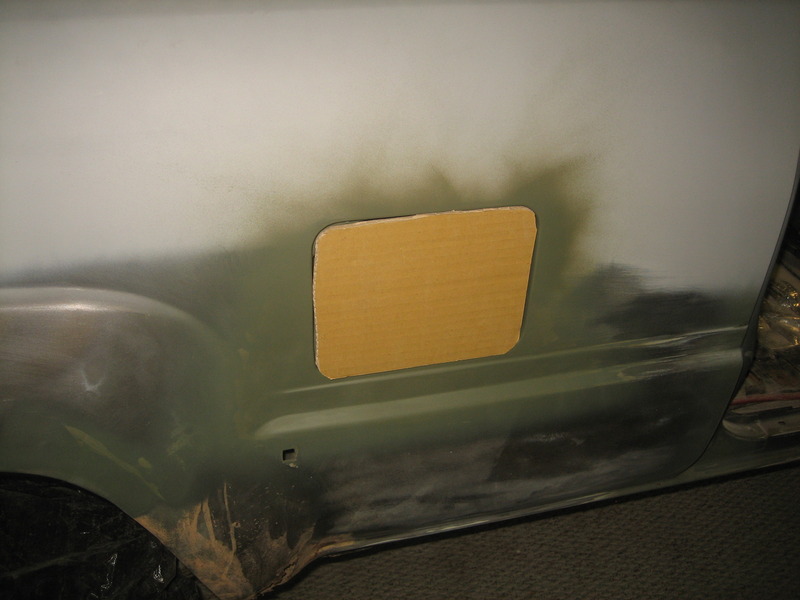
And here it is all finished up.

Today I'm hoping to paint the inside of the filler area back to body color with the color matched paint from AutomotiveTouchup.com. I used it to cut in the fenders and I'll use it on the door jambs too. If all goes well I'll prime and mount the filler door today too.
Here's the rust when I first bought the truck back in 2012.
And here it is back in December before I started all this work.
First step is to cut out all the bad stuff and grind away the rust.
Filled in the holes in the filler insert with fiberglass mat and resin then smeared some glass reinforced filler to smooth it out just a bid. Doesn't need to be super pretty behind the filler door.
This contour is going to suck to duplicate.
I've been trying to sell this driver's side door skin ever since I got it in a package deal 5 years ago. Nobody wanted it so today I'll put it to use.
That'll do nicely.
A little bit later.
Looking good so far.
Saved this piece of the original metal.
Used it to trace the curve for the door to fit into.
Then copy the curve about 3/16 smaller to leave material for the lip that gets bent over into the hole.
Started burning it in. Was a bit nervous welding within inches of the fuel filler. Fortunately nothing happened.
Fully welded and ground down. Seam sealed the two pieces together before welding, then seam sealed the inside and outside after welding. Hopefully it works.
Body filler and primer. I'm no pro but it looks decent. The picture makes the crease look a bit wonky but I don't remember it looking like that in person. I'll have to look at it again.
Didn't want to get high build primer on the inside so I cut this out of some cardboard.
And here it is all finished up.
Today I'm hoping to paint the inside of the filler area back to body color with the color matched paint from AutomotiveTouchup.com. I used it to cut in the fenders and I'll use it on the door jambs too. If all goes well I'll prime and mount the filler door today too.
May 2, 2016 | 09:31 AM
#99
Thread Starter
Registered User
iTrader: (8)
Joined: May 2011
Posts: 1,517
Likes: 354
From: Southeast Virginia
I haven't decided yet if I want to put the factory stripes back on it. Sometimes I think I like the old retro styling but other times I think it looks better without them. Then I factor in cost and I'm leaning towards leaving them off.
Yes, it's a basecoat and clearcoat. I told the owner what I've been using for primer so far and he said it would be fine but I'll mention it again when I drop it off.
May 2, 2016 | 10:22 AM
#100
Registered User
Joined: Jun 2010
Posts: 1,448
Likes: 100
From: Virginia
I haven't decided yet if I want to put the factory stripes back on it. Sometimes I think I like the old retro styling but other times I think it looks better without them. Then I factor in cost and I'm leaning towards leaving them off.
Yes, it's a basecoat and clearcoat. I told the owner what I've been using for primer so far and he said it would be fine but I'll mention it again when I drop it off.
Yes, it's a basecoat and clearcoat. I told the owner what I've been using for primer so far and he said it would be fine but I'll mention it again when I drop it off.
Did they use a sealer on it before painting? I would imagine many old cars that go to Maaco have spray primer on them. Mine is half white primer at this point.


