
arlindsay1992's 1987 4Runner Build Up Thread
 Jan 25, 2016 | 02:16 PM
#41
Nice job on the body work, I'll be following this closely as I will be starting on mine once the weather gets warmer. I'm also curious about reusing the old fenders as patch panels for the rear quarter wheel wells. I've heard of people doing this as well, and might give it a shot. What size wire are you using for welding in the patches?
Jan 26, 2016 | 02:16 AM
#42
Thread Starter
Registered User
iTrader: (8)
Joined: May 2011
Posts: 1,517
Likes: 354
From: Southeast Virginia
I was using 0.025" wire with CO2 gas on either the lowest or second voltage setting on my Lincoln Weldpak 100 HD. It's a little 110V welder. I can also run flux core 0.035" wire and it'll work up to 1/4". Plan to use it when I SAS this truck.
Jan 26, 2016 | 02:46 AM
#43
Thread Starter
Registered User
iTrader: (8)
Joined: May 2011
Posts: 1,517
Likes: 354
From: Southeast Virginia
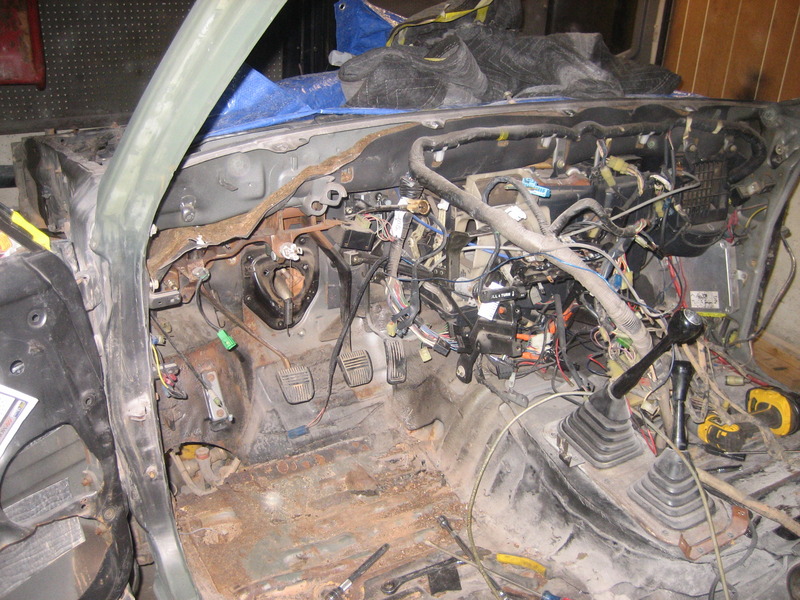
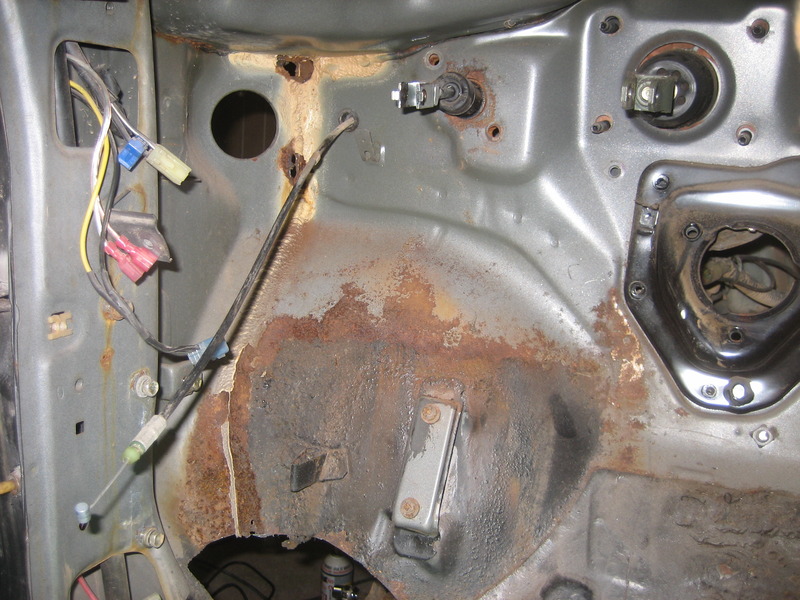
I kind of jump around a lot. I make progress on one area but get a bit tired of working the same thing so I move to another area. So my latest area of concern is the rust at the top of the firewall/footwell area. It seems pretty common based upon other threads. Fortunately it doesn't show so I just need to get it watertight to keep water from rusting the pinchweld and driver's floor.
Pulled the dash and half the harness. May not be totally necessary but it makes it way easier to access the holes from both sides.
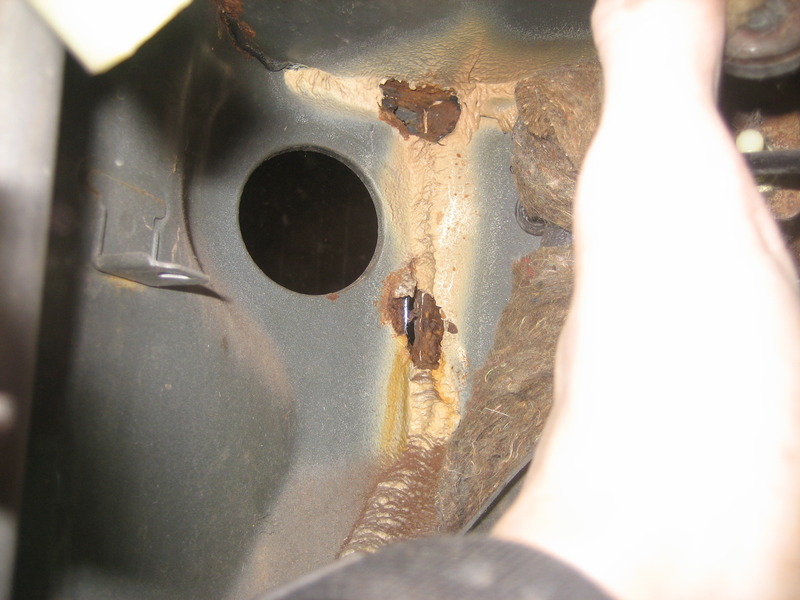
Here's the hole from the inside. Might still have to pull the pedal assembly to get the firewall insulation out of the way.
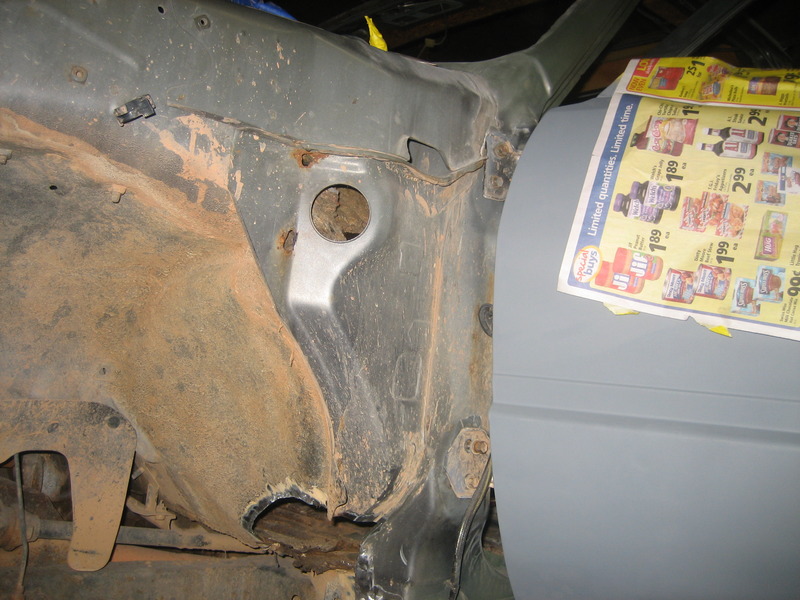
And the same hole from the outside.
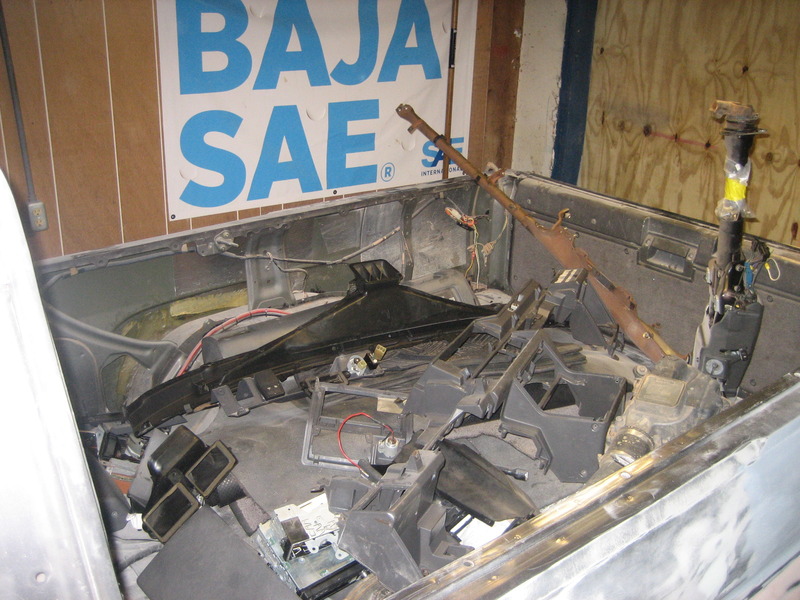
Then I need to put all this crap back in. I was debating whether to pull the dash or just fight to fix that hole. My main reason to pull the dash was so I could get the fuseblock and that real thick section of the harness out of the way. I figure since I like this truck I might as well do it right, and make sure I have good access so I can make a sound repair. I'll also use all this accessibility to clean up some wiring I put in for accessories over the years.
Pulled the dash and half the harness. May not be totally necessary but it makes it way easier to access the holes from both sides.
Here's the hole from the inside. Might still have to pull the pedal assembly to get the firewall insulation out of the way.
And the same hole from the outside.
Then I need to put all this crap back in. I was debating whether to pull the dash or just fight to fix that hole. My main reason to pull the dash was so I could get the fuseblock and that real thick section of the harness out of the way. I figure since I like this truck I might as well do it right, and make sure I have good access so I can make a sound repair. I'll also use all this accessibility to clean up some wiring I put in for accessories over the years.
Feb 4, 2016 | 03:35 AM
#44
Thread Starter
Registered User
iTrader: (8)
Joined: May 2011
Posts: 1,517
Likes: 354
From: Southeast Virginia
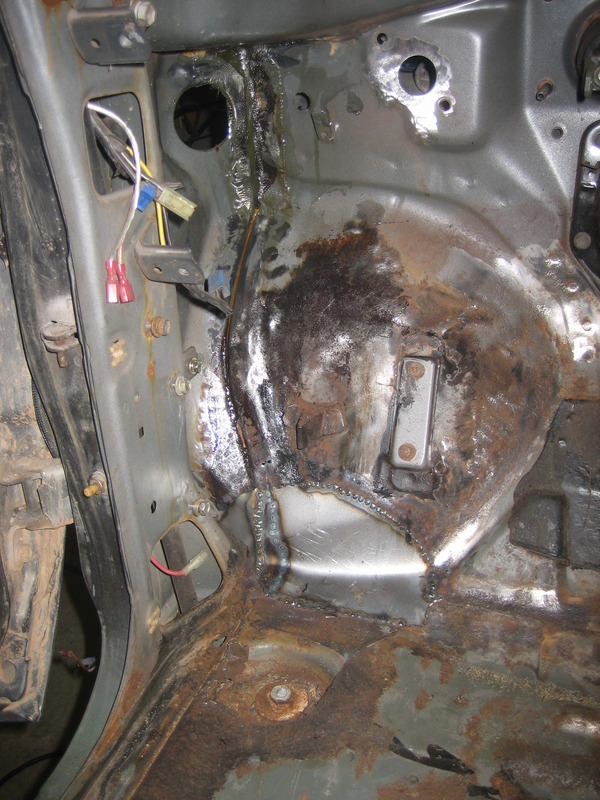
Dash, pedals, and harness all pulled so I can easily access the rust. Cut out a section of the floor that was rusted out.
New metal welded on the floor. Layered some fiberglass mat to patch the holes at the top near the cowl. The fiberglass was layed in two layers both inside and outside to seal up the holes after cutting out the rust.
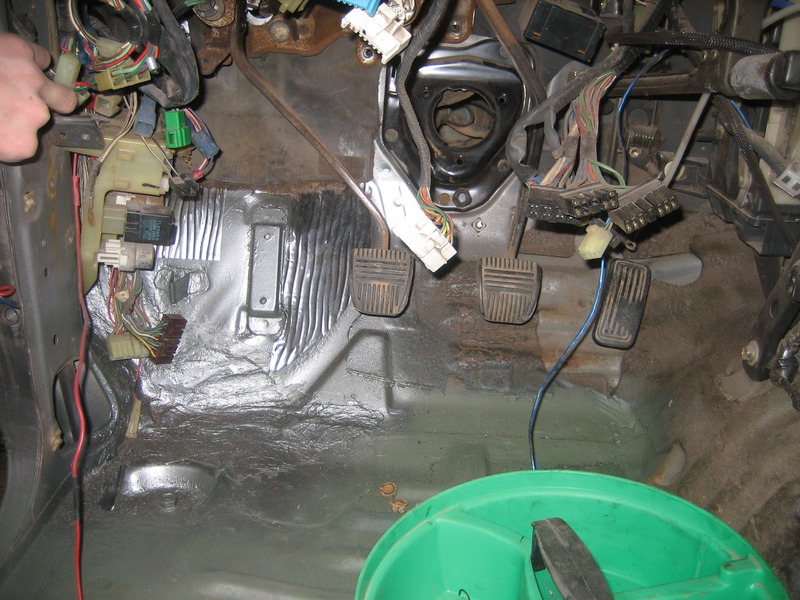
Pedals, column, and wiring is all back in. Smothered some glass reinforced filler on the floor to seal up the metal patch then painted it with some rattle can stuff that is similar to the truck's color. Doesn't need to look pretty under the carpet.
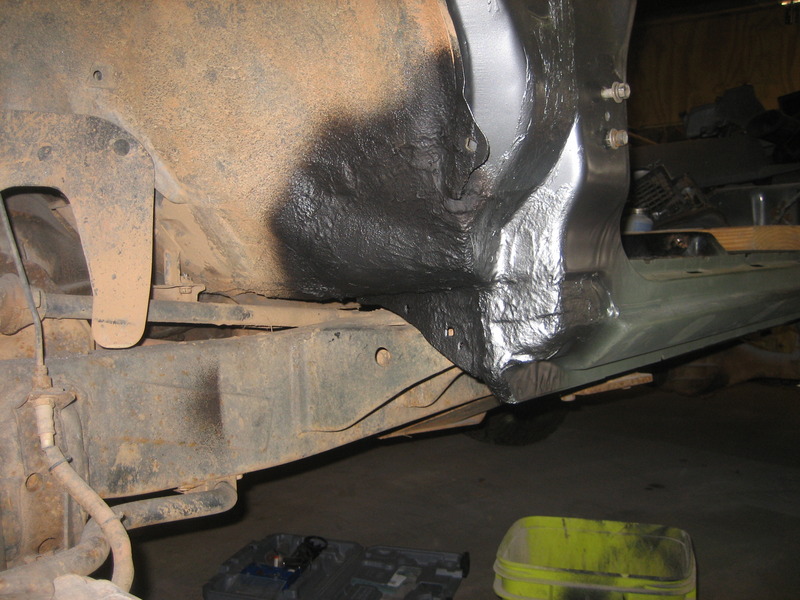
And how it looks from outside. Hammered the pinch weld in prep for the future SAS. Smeared some glass reinforced filler here too to smooth everything out. Then sprayed some 3M rubberized undercoat to match the factory finish. Sprayed some more rattle can in the area where it might show once assembled.
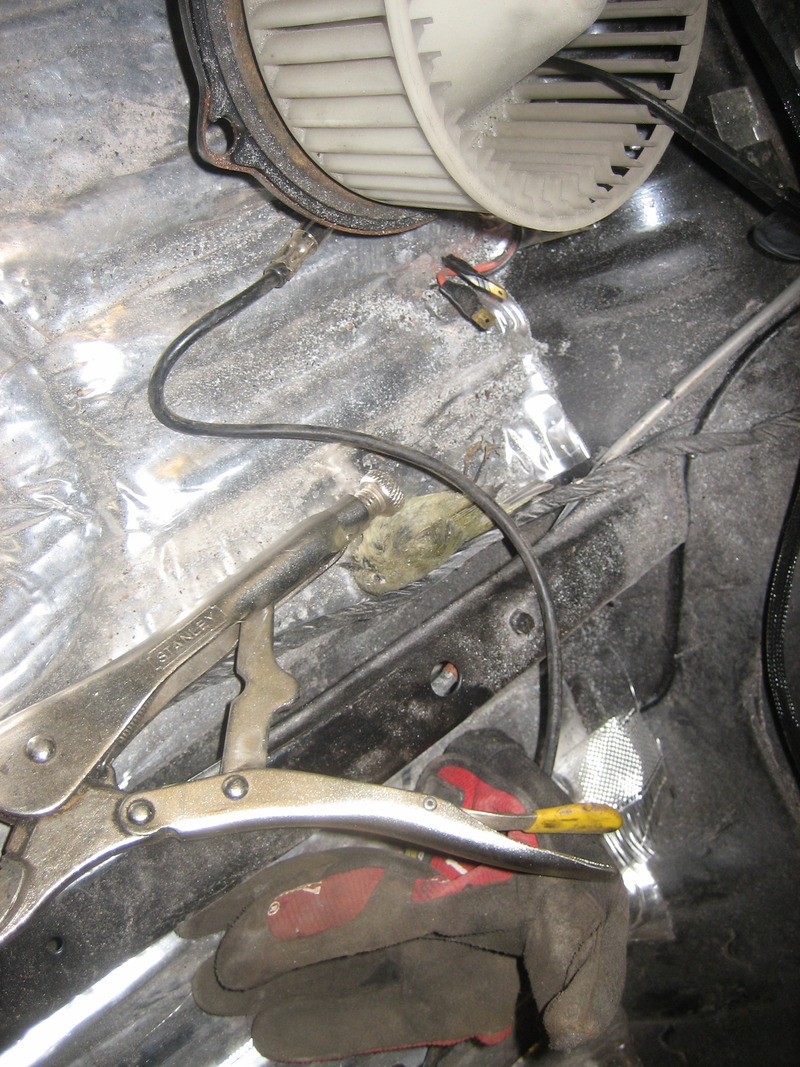
The passenger side floor is perfect but it had the same rust at the top of the firewall right by where the harnesses go through. No pictures but I fixed it the same way. Had to pull the blower box out to get to it. about 30 minutes after pulling the heater box and the air ducts I found this little dead bird laying on the floor. I'm not sure if he flew in the garage and died or if he was in the HVAC and fell out when I was working on everything. Either way, gross.
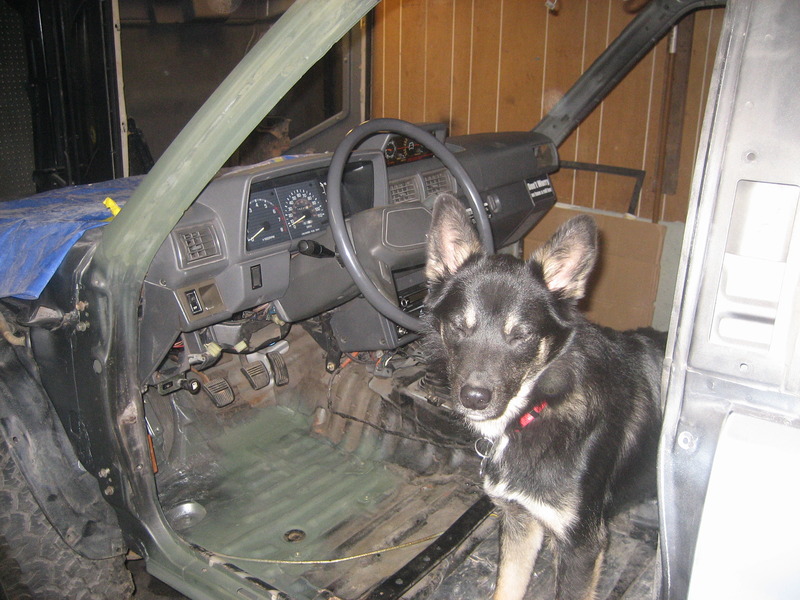
Dash is 95% back in. While it was all apart I cleaned up a bunch of wiring I added over the years. Dog doesn't like the flash.
New metal welded on the floor. Layered some fiberglass mat to patch the holes at the top near the cowl. The fiberglass was layed in two layers both inside and outside to seal up the holes after cutting out the rust.
Pedals, column, and wiring is all back in. Smothered some glass reinforced filler on the floor to seal up the metal patch then painted it with some rattle can stuff that is similar to the truck's color. Doesn't need to look pretty under the carpet.
And how it looks from outside. Hammered the pinch weld in prep for the future SAS. Smeared some glass reinforced filler here too to smooth everything out. Then sprayed some 3M rubberized undercoat to match the factory finish. Sprayed some more rattle can in the area where it might show once assembled.
The passenger side floor is perfect but it had the same rust at the top of the firewall right by where the harnesses go through. No pictures but I fixed it the same way. Had to pull the blower box out to get to it. about 30 minutes after pulling the heater box and the air ducts I found this little dead bird laying on the floor. I'm not sure if he flew in the garage and died or if he was in the HVAC and fell out when I was working on everything. Either way, gross.
Dash is 95% back in. While it was all apart I cleaned up a bunch of wiring I added over the years. Dog doesn't like the flash.
Feb 4, 2016 | 07:30 AM
#45
Registered User
Joined: Aug 2011
Posts: 51
Likes: 1
From: NH
Rear quarter panel repair
I used an opposite front fender to repair my own rear quarter and that worked OK, but I'd never done anything like it before and it ended up at a slight slant, which looks a bit silly on mine.
Afterwards I was doing some searching and I found this place
http://www.rustrepair.com/PANELS/79-...CH-3778452.HTM
It says it's for a pickup, but I would think it's the same for a 4runner. plus it's only $50
Afterwards I was doing some searching and I found this place
http://www.rustrepair.com/PANELS/79-...CH-3778452.HTM
It says it's for a pickup, but I would think it's the same for a 4runner. plus it's only $50
Feb 4, 2016 | 08:05 AM
#46
Thread Starter
Registered User
iTrader: (8)
Joined: May 2011
Posts: 1,517
Likes: 354
From: Southeast Virginia
Good information for anyone who stumbles upon this in the future. I sure would have preferred to use that instead. Saves a lot of time and uses way less body filler.
Feb 9, 2016 | 03:20 AM
#47
Thread Starter
Registered User
iTrader: (8)
Joined: May 2011
Posts: 1,517
Likes: 354
From: Southeast Virginia
So I got sidetracked from the bodywork for a couple weeks. Just got tired of sanding all day so I decided to switch gears for a bit. Once the bodywork is complete I'm going to SAS the truck so I've been prepping for that but I've pretty much come to a stopping point on the SAS. I need to buy more parts before I can go any farther so I'll be back to the body work. Bodywork is time consuming but cheap. It's good for my wallet.
I've been sitting on this 85 axle for a couple years. Bought it for $550 from Bank's Toyota in Fredericksburg, Virginia. I looked for a few months but never found one so I went with them. They are a Toyota junkyard and have a lot of trucks and 4Runners but they are pricey. I definitely overpaid but it was what I needed and it was hub to hub.
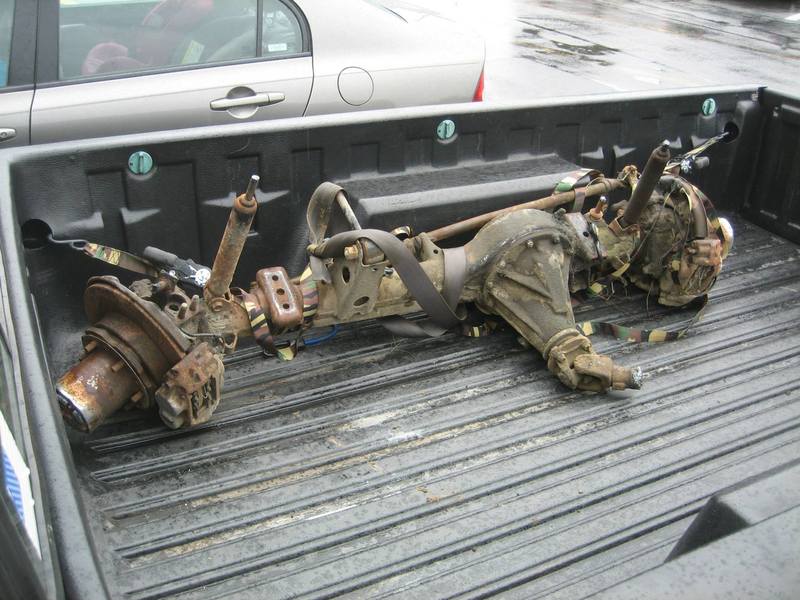
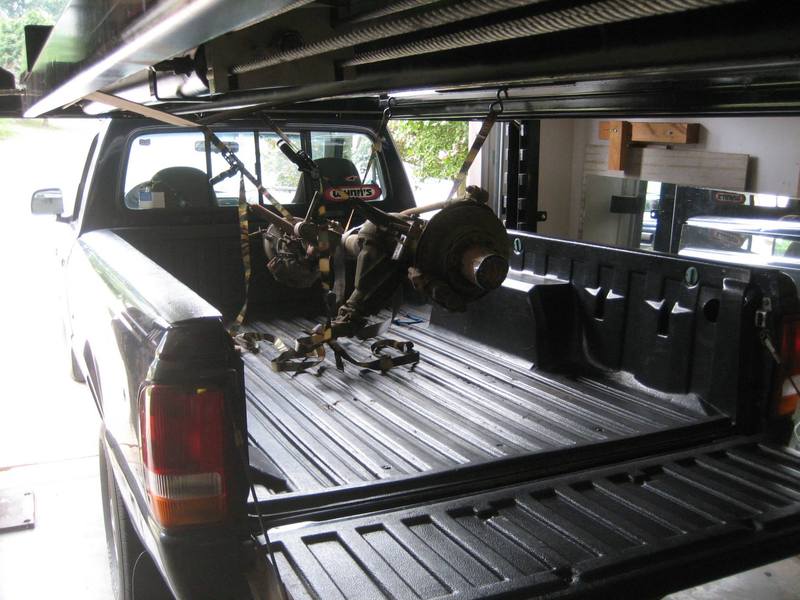
To unload it I backed my boss's Ranger under my Dad's lift, strapped it to the lift and raised it up. Makes unloading it a one man job.
On the floor.
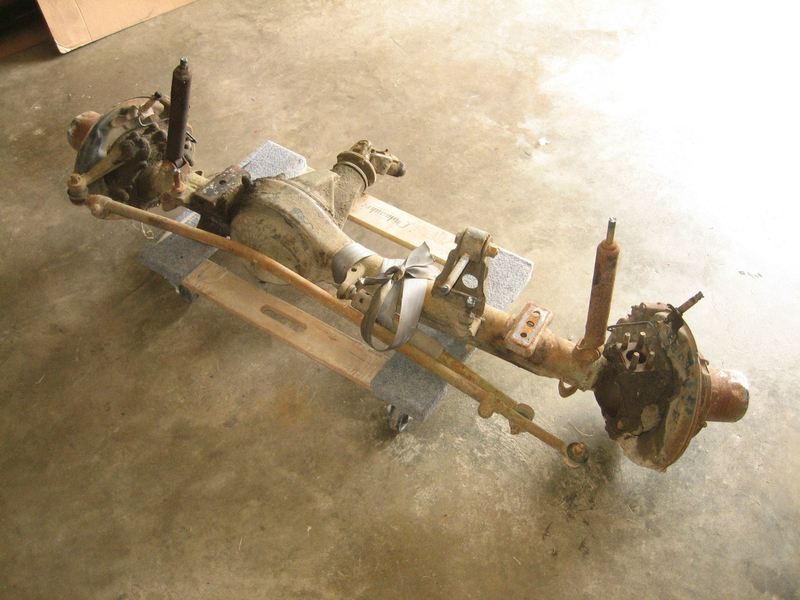
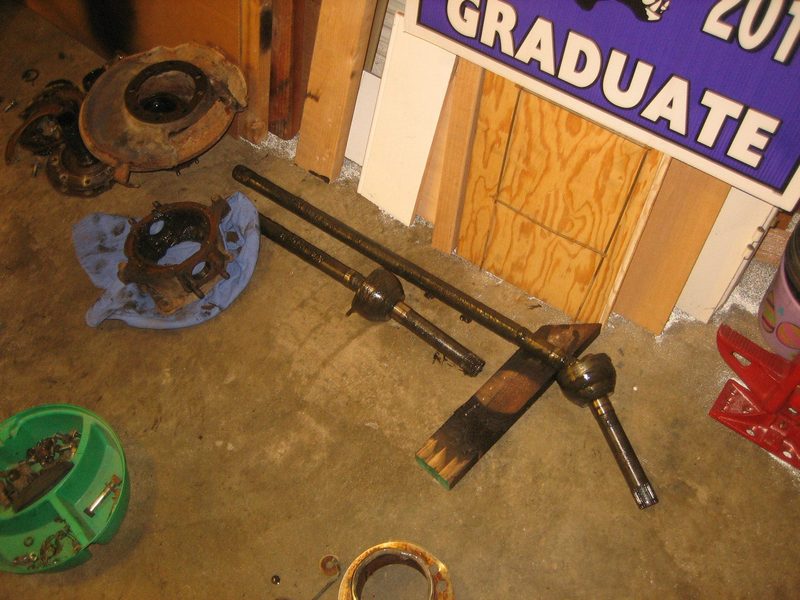
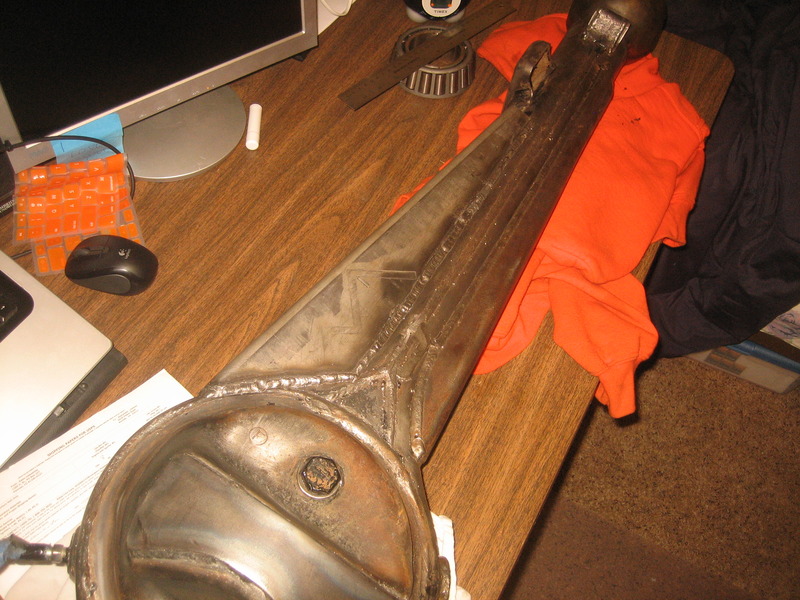
Stripped it all down. Nothing looked damaged. Cleaned everything up and it will go back together with the Marlin Crawler full axle rebuild kit except for the knuckle wipers. I'll use the Trail Gear Trail Safe knuckle seals with their Rock Rings since they appear to be way beefier than the factory replacements. Stock axle shafts and birfs look good. I'm cheap so I'll run these and replace them if/when they blow.
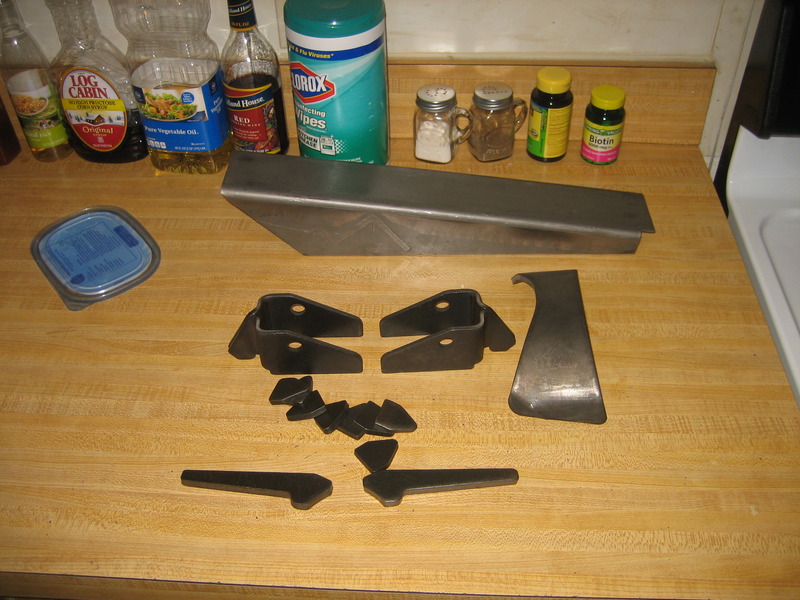
Ordered the Trail Gear truss, small diff armor, and knuckle gussets from Jegs. Free shipping on orders over $75 and they are always cheaper than from Trail Gear directly. It's a bit hard to navigate their site so find the part on Trail Gear's site then copy the part number into the search bar on Jegs.
Don't tell my girlfriend I put car parts in the kitchen.
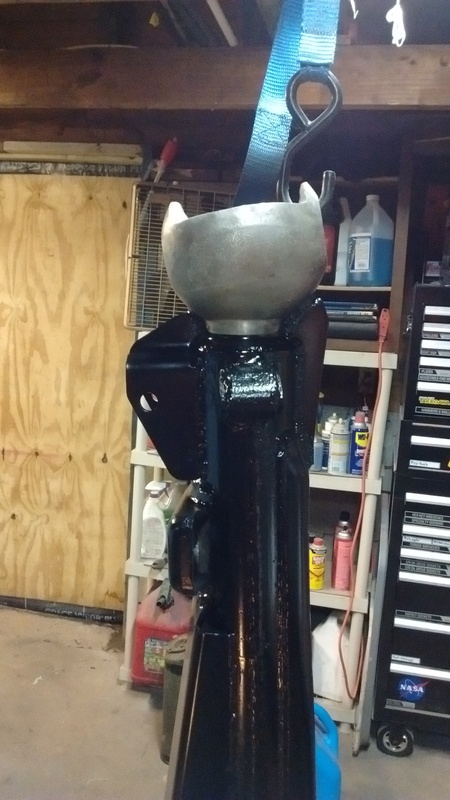
Ring gear armor welded on.
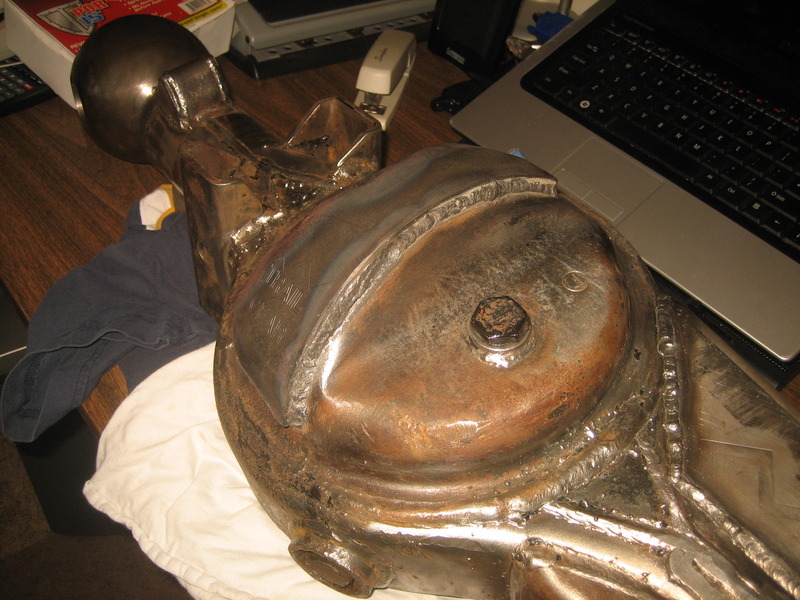
And the truss welded on. I welded an inch in four separate spots then let it cool before continuing all four welds for another inch. After welding I mocked everything up and it went together smoothly so hopefully I'm good. All welding was done with a Lincoln 110V flux core welder with 0.035" wire.
Slid the Trail Safe knuckle seals over the knuckle balls. These things are tough.
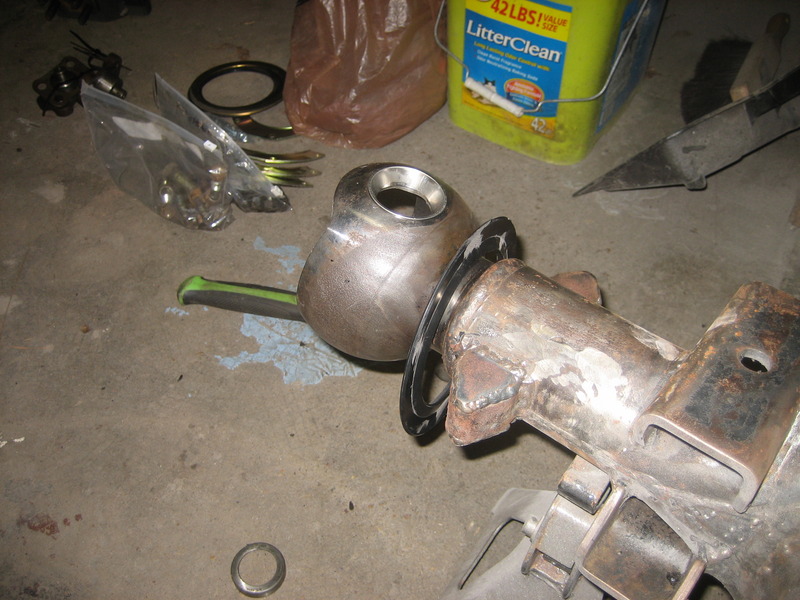
I've heard the knuckle ball gussets can interfere with the knuckle seals, especially with the thicker Rock Rings from Trail Gear. So I mocked up the knuckle with two bottom caps. I don't have the high steer arms yet and I scrapped the stock steering arms, but for this purpose it works fine. I did have to clearance the top gusset/shock mount. The bottom gusset wasn't even close so it can be welded on without modification. Here they both are tacked in place.
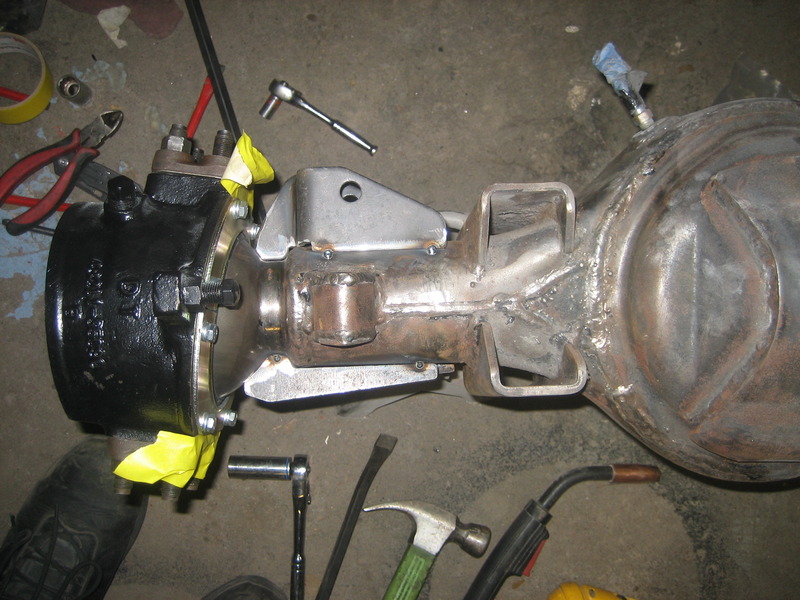
And here they are burned in. You can also see the balls smeared with JB weld to smooth out the pitting. Nobody wants rusty balls.
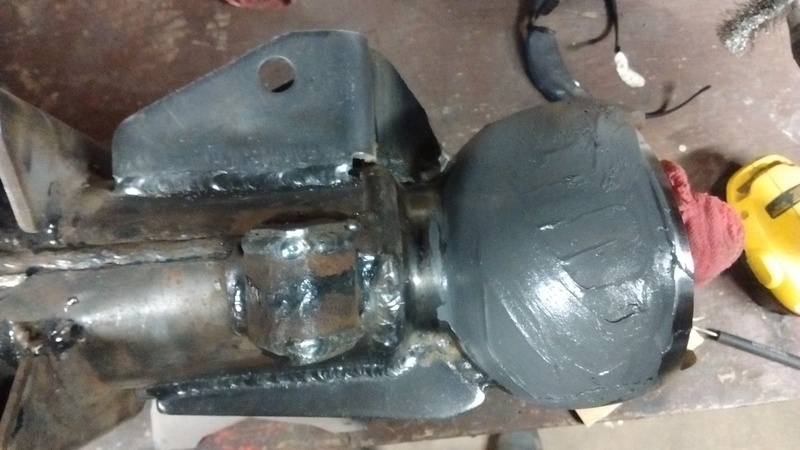
All painted up and drying. I used VHT Roll Bar and Chassis paint. I've used it before and it holds up decent. I know it's going to get banged up no matter what so I didn't use anything too fancy.
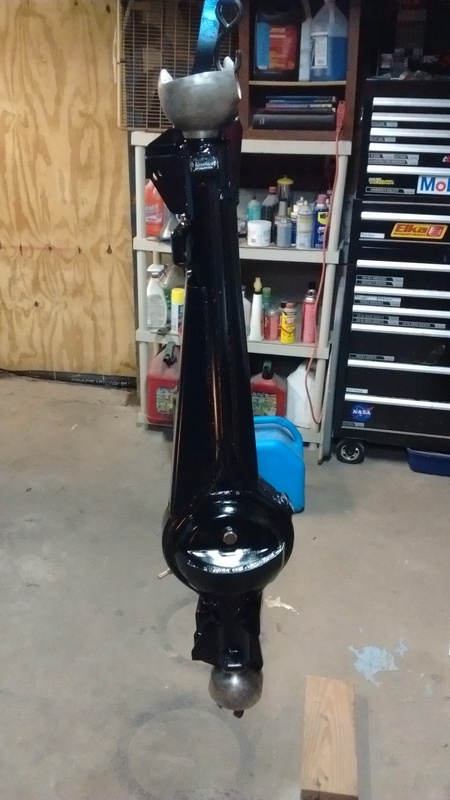
Polished my balls. Once again, didn't go too crazy here. Just got them smooth.
So that's where I am now. Should be back to body filler and sanding later today. Warm weather is approaching and I want to have my truck back.
I've been sitting on this 85 axle for a couple years. Bought it for $550 from Bank's Toyota in Fredericksburg, Virginia. I looked for a few months but never found one so I went with them. They are a Toyota junkyard and have a lot of trucks and 4Runners but they are pricey. I definitely overpaid but it was what I needed and it was hub to hub.
To unload it I backed my boss's Ranger under my Dad's lift, strapped it to the lift and raised it up. Makes unloading it a one man job.
On the floor.
Stripped it all down. Nothing looked damaged. Cleaned everything up and it will go back together with the Marlin Crawler full axle rebuild kit except for the knuckle wipers. I'll use the Trail Gear Trail Safe knuckle seals with their Rock Rings since they appear to be way beefier than the factory replacements. Stock axle shafts and birfs look good. I'm cheap so I'll run these and replace them if/when they blow.
Ordered the Trail Gear truss, small diff armor, and knuckle gussets from Jegs. Free shipping on orders over $75 and they are always cheaper than from Trail Gear directly. It's a bit hard to navigate their site so find the part on Trail Gear's site then copy the part number into the search bar on Jegs.
Don't tell my girlfriend I put car parts in the kitchen.
Ring gear armor welded on.
And the truss welded on. I welded an inch in four separate spots then let it cool before continuing all four welds for another inch. After welding I mocked everything up and it went together smoothly so hopefully I'm good. All welding was done with a Lincoln 110V flux core welder with 0.035" wire.
Slid the Trail Safe knuckle seals over the knuckle balls. These things are tough.
I've heard the knuckle ball gussets can interfere with the knuckle seals, especially with the thicker Rock Rings from Trail Gear. So I mocked up the knuckle with two bottom caps. I don't have the high steer arms yet and I scrapped the stock steering arms, but for this purpose it works fine. I did have to clearance the top gusset/shock mount. The bottom gusset wasn't even close so it can be welded on without modification. Here they both are tacked in place.
And here they are burned in. You can also see the balls smeared with JB weld to smooth out the pitting. Nobody wants rusty balls.
All painted up and drying. I used VHT Roll Bar and Chassis paint. I've used it before and it holds up decent. I know it's going to get banged up no matter what so I didn't use anything too fancy.
Polished my balls. Once again, didn't go too crazy here. Just got them smooth.
So that's where I am now. Should be back to body filler and sanding later today. Warm weather is approaching and I want to have my truck back.


 Feb 9, 2016 | 05:34 AM
#49
Thread Starter
Registered User
iTrader: (8)
Joined: May 2011
Posts: 1,517
Likes: 354
From: Southeast Virginia
Thanks. The next thing to buy is the high steer kit so I can install the steering arms and set up the knuckles. That's a pretty expensive piece so I'll be holding off a bit.
Feb 9, 2016 | 06:05 AM
#50
Looks good. You'll like the TG trail safe knuckle ball wipers, I ran them on my last build, way beefier than the stock felts! Looking at your pics makes me want to SAS my current 4Runner, I had planned to keep the ifs on this one, but keep finding my self looking at SAS parts and build thread, lol. Nice work!
Feb 9, 2016 | 06:17 AM
#51
Thread Starter
Registered User
iTrader: (8)
Joined: May 2011
Posts: 1,517
Likes: 354
From: Southeast Virginia
I've been wanting to SAS it for years. IFS is only reliable in stock form. As soon as you lift it it gets worse and worse. BJ spacers cause weird tire wear, lower ball joint wear, and makes the idler arm way more likely to bend. After dealing with that all I went back to stock front end but my 33's barely clear and it sits higher in the rear with just the medium duty OME springs.
My goals for the SAS are to be better able to keep 4 wheels on the ground, level the front and rear (about 2 inch lift), and increase reliability and piece of mind off road. Whenever I wheel with the IFS I always have slight worry about the front end. I've come home many times with a new clunk in the front end. I've gone through lower ball joints and bent two idler arms.
My goals for the SAS are to be better able to keep 4 wheels on the ground, level the front and rear (about 2 inch lift), and increase reliability and piece of mind off road. Whenever I wheel with the IFS I always have slight worry about the front end. I've come home many times with a new clunk in the front end. I've gone through lower ball joints and bent two idler arms.
Feb 9, 2016 | 06:38 AM
#52
Registered User
Joined: Jun 2009
Posts: 572
Likes: 0
From: Virginia Beach, VA
Looks good. You'll like the TG trail safe knuckle ball wipers, I ran them on my last build, way beefier than the stock felts! Looking at your pics makes me want to SAS my current 4Runner, I had planned to keep the ifs on this one, but keep finding my self looking at SAS parts and build thread, lol. Nice work!
I've been wanting to SAS it for years. IFS is only reliable in stock form. As soon as you lift it it gets worse and worse. BJ spacers cause weird tire wear, lower ball joint wear, and makes the idler arm way more likely to bend. After dealing with that all I went back to stock front end but my 33's barely clear and it sits higher in the rear with just the medium duty OME springs.
My goals for the SAS are to be better able to keep 4 wheels on the ground, level the front and rear (about 2 inch lift), and increase reliability and piece of mind off road. Whenever I wheel with the IFS I always have slight worry about the front end. I've come home many times with a new clunk in the front end. I've gone through lower ball joints and bent two idler arms.
My goals for the SAS are to be better able to keep 4 wheels on the ground, level the front and rear (about 2 inch lift), and increase reliability and piece of mind off road. Whenever I wheel with the IFS I always have slight worry about the front end. I've come home many times with a new clunk in the front end. I've gone through lower ball joints and bent two idler arms.
 but I really wanna
  Feb 9, 2016 | 07:14 AM
#53
Thread Starter
Registered User
iTrader: (8)
Joined: May 2011
Posts: 1,517
Likes: 354
From: Southeast Virginia
Lots of variables affect whether you rub or not. I was rubbing at full lock on the street with stock backspacing, 15x8, 33x10.5R15. I trimmed the fender liner ever so slightly to fix it on the street but it still rubbed when stuffed. This was all a while back. Since the truck has been apart I've hammered the pinch weld and refinished all the cracked paint from the process.
I never had issues with static alignment. With stock parts and a straight frame you should have no issues. Might have a tweaked frame. You can run any T-bars and keep the same ride height. Ride height is adjusted by the torsion bar adjusting bolt on the frame right under the front seats. The other torsion bars will only change the stiffness.
The most affected part from lifting IFS is the idler arm. This is because the tie rods are no longer in line with the center link and apply a vertical load on it. This vertical load must be supported by the steering box and the idler arm. The steering box is fine in this situation but the idler arm is not meant to take this much of a vertical load so it bends.
I'd say the next most affected part is the lower ball joint but this is dependent on bumpstop placement. Check on Nate AKA BlazeN8's thread talking about all the issues with the common IFS lifts.
Feb 9, 2016 | 07:25 AM
#54
Registered User
Joined: Jun 2009
Posts: 572
Likes: 0
From: Virginia Beach, VA
Lots of variables affect whether you rub or not. I was rubbing at full lock on the street with stock backspacing, 15x8, 33x10.5R15. I trimmed the fender liner ever so slightly to fix it on the street but it still rubbed when stuffed. This was all a while back. Since the truck has been apart I've hammered the pinch weld and refinished all the cracked paint from the process.
I never had issues with static alignment. With stock parts and a straight frame you should have no issues. Might have a tweaked frame. You can run any T-bars and keep the same ride height. Ride height is adjusted by the torsion bar adjusting bolt on the frame right under the front seats. The other torsion bars will only change the stiffness.
The most affected part from lifting IFS is the idler arm. This is because the tie rods are no longer in line with the center link and apply a vertical load on it. This vertical load must be supported by the steering box and the idler arm. The steering box is fine in this situation but the idler arm is not meant to take this much of a vertical load so it bends.
I'd say the next most affected part is the lower ball joint but this is dependent on bumpstop placement. Check on Nate AKA BlazeN8's thread talking about all the issues with the common IFS lifts.
I never had issues with static alignment. With stock parts and a straight frame you should have no issues. Might have a tweaked frame. You can run any T-bars and keep the same ride height. Ride height is adjusted by the torsion bar adjusting bolt on the frame right under the front seats. The other torsion bars will only change the stiffness.
The most affected part from lifting IFS is the idler arm. This is because the tie rods are no longer in line with the center link and apply a vertical load on it. This vertical load must be supported by the steering box and the idler arm. The steering box is fine in this situation but the idler arm is not meant to take this much of a vertical load so it bends.
I'd say the next most affected part is the lower ball joint but this is dependent on bumpstop placement. Check on Nate AKA BlazeN8's thread talking about all the issues with the common IFS lifts.
Feb 9, 2016 | 08:13 AM
#56
Thread Starter
Registered User
iTrader: (8)
Joined: May 2011
Posts: 1,517
Likes: 354
From: Southeast Virginia
At this point I'm planning to keep the 33's and 4.10's. Where I live is pretty flat and I drive a decent amount of highway miles. When I do drive through hilly areas there's always a lower gear. Even with the bigger tires I've been getting decent mileage since it lowers the engine RPM for a given speed. I replaced the speedometer driven gear to correct the speedometer and odometer. It's definitely slower off the line but I'm hoping to buy an engine from 22RE performance in the next couple years which will help offset the larger tires. Going to be putting a Spartan locker in the front and a selectable in the rear. I don't really care if it's a Zip, ARB, or E-locker. It'll be whatever I find a deal on. I'm not sure who's idea the JB weld was originally. I've seen it in multiple threads.
Feb 9, 2016 | 08:18 AM
#57
Thread Starter
Registered User
iTrader: (8)
Joined: May 2011
Posts: 1,517
Likes: 354
From: Southeast Virginia
Also, the transfer case will be getting a set of 4.71 gears to help slow it down off road. I've made it this far with the 2.28 but there have been a handful of situations where it was pretty hairy and I had to ride the clutch pretty hard. I like the cool factor of duals but there is really no need for what I do. Plus the cost is really prohibitive. Besides the duals themselves, I need a new rear driveshaft and I need to cut up the interior too. I want to keep a factory looking interior.
Feb 9, 2016 | 04:48 PM
#58
Thread Starter
Registered User
iTrader: (8)
Joined: May 2011
Posts: 1,517
Likes: 354
From: Southeast Virginia
Worked on the body some more today. The left side of the truck is about 95% complete. Should be finishing it up soon then I can back the truck into the garage and do the other side. No pictures, just filling and sanding.
I did work on this today too. I picked up the holy grail of center consoles from forum member mtb_taco. It was a bit banged up but it was serviceable and it was what I've been searching for in junkyards since I bought my 4Runner. I like having an armrest to prop my elbow on while driving.
The front right mounting tab is broken off but I do have it so it could be glued back on, there's also a couple holes drilled in the little cubby behind the switches.
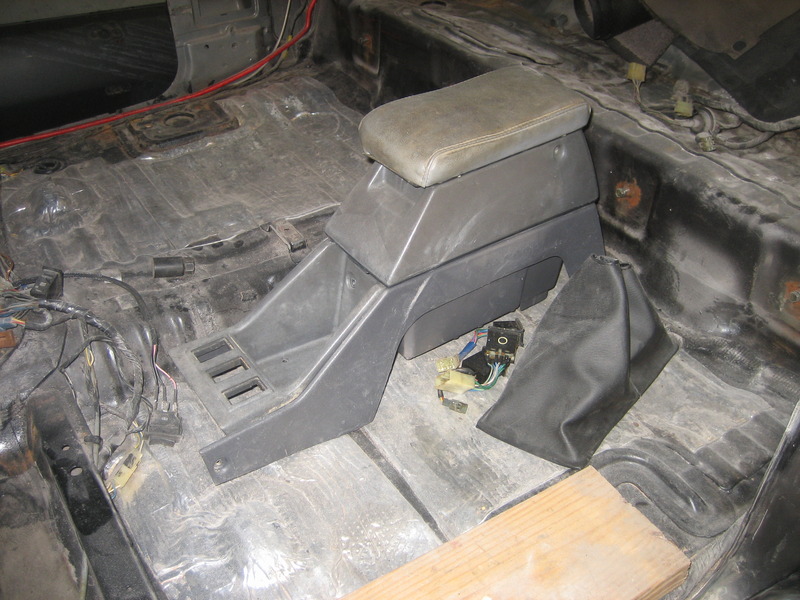
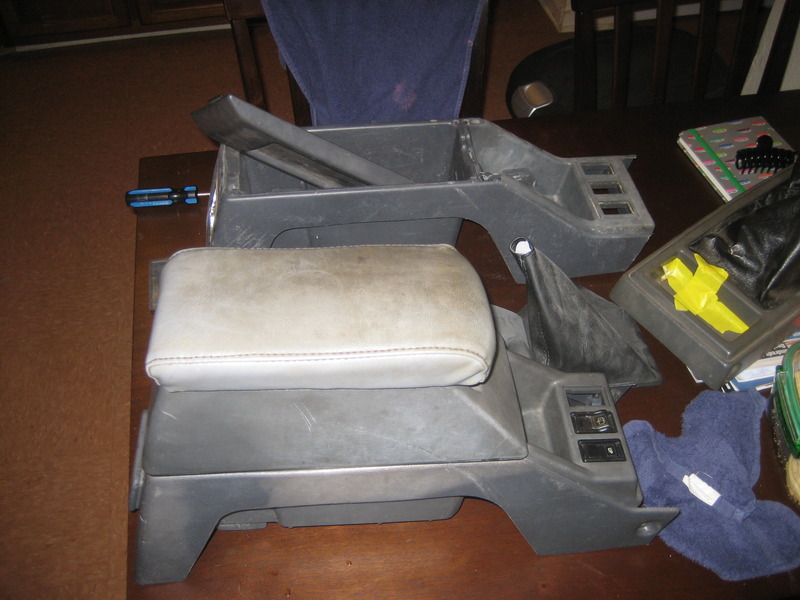
Here it is next to my original center console. I gain extra storage and an armrest.
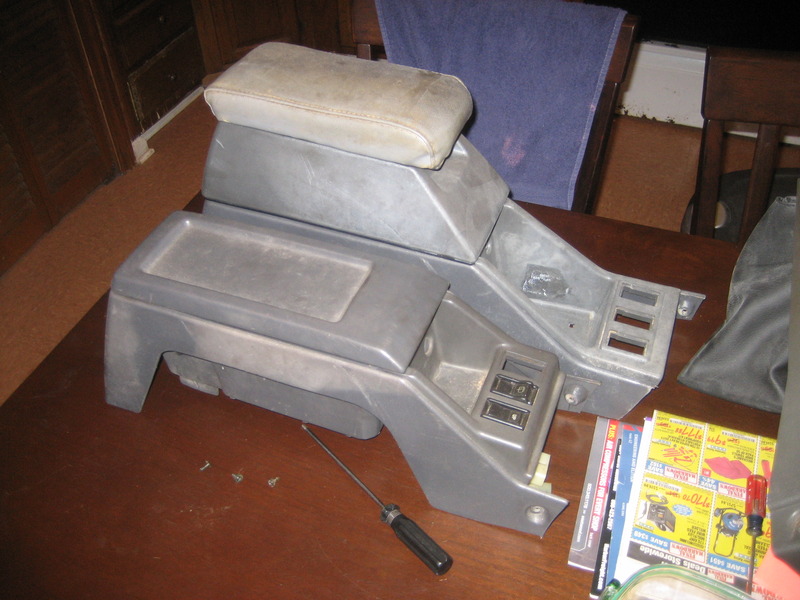
I then discovered that the replacement console was longer. I don't know what year, engine, trans, or trim level determines which console you have. Just keep an eye out if you're looking to buy.
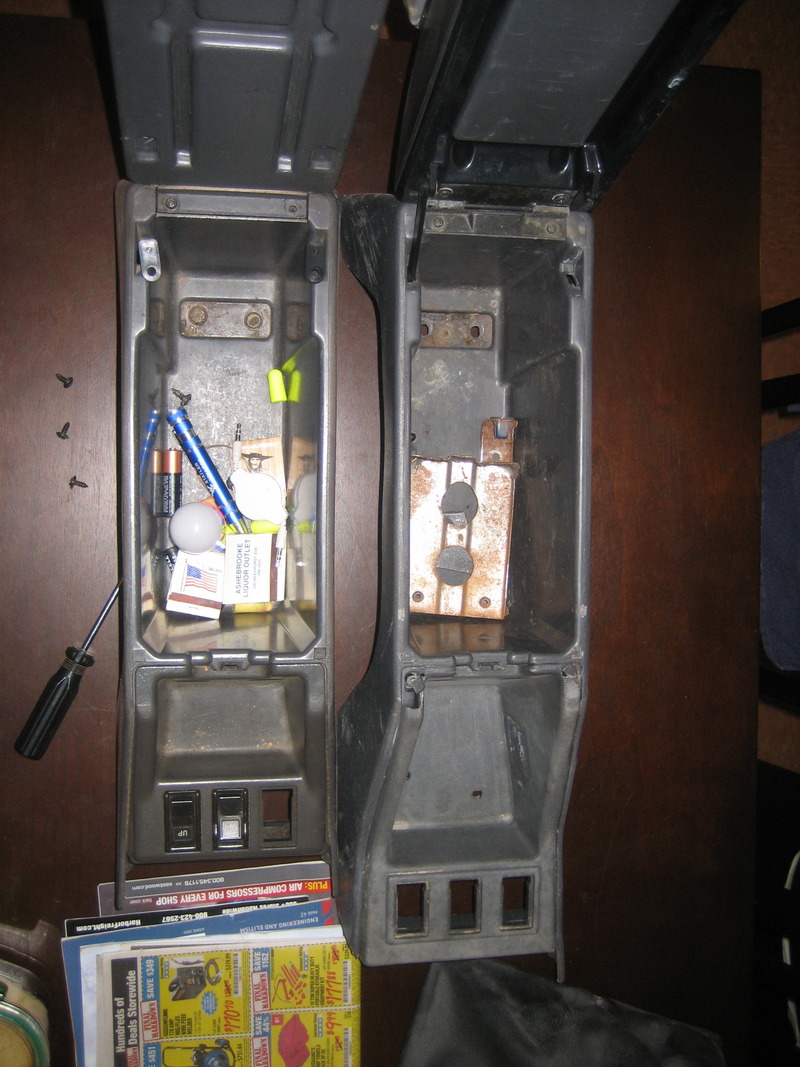
Fortunately, the upper section which I so desire can be swapped between the two lower sections. So that's what I did. I bolted the dual storage upper section to the shorter single storage lower section.
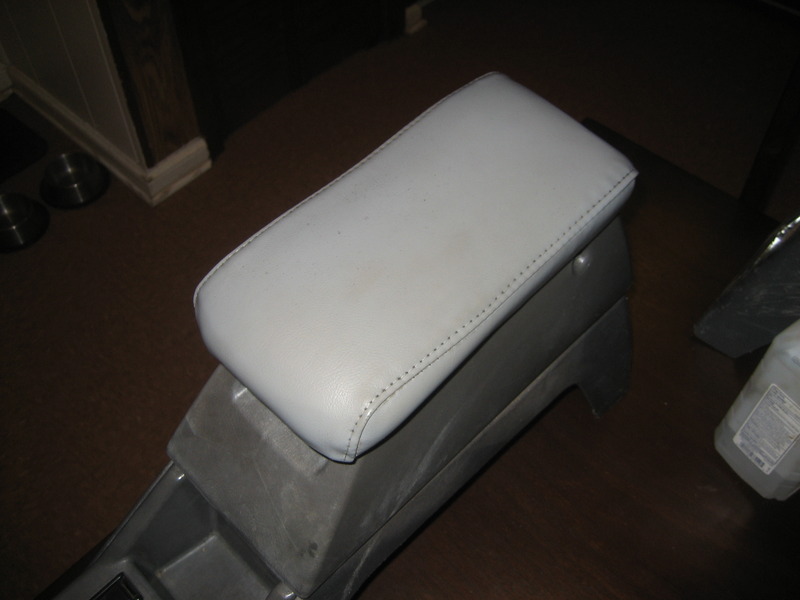
The pad on top looked pretty beat so I started looking for replacements on eBay. I decided to try to clean it first. Soap and water didn't cut it. Rubbing alcohol barely made a difference. Then I tried Purple Power. This worked great. I quickly followed it up with a wipe of rubbing alcohol for fear the Purple Power might start to eat the material. Here's my final product!
I did work on this today too. I picked up the holy grail of center consoles from forum member mtb_taco. It was a bit banged up but it was serviceable and it was what I've been searching for in junkyards since I bought my 4Runner. I like having an armrest to prop my elbow on while driving.
The front right mounting tab is broken off but I do have it so it could be glued back on, there's also a couple holes drilled in the little cubby behind the switches.
Here it is next to my original center console. I gain extra storage and an armrest.
I then discovered that the replacement console was longer. I don't know what year, engine, trans, or trim level determines which console you have. Just keep an eye out if you're looking to buy.
Fortunately, the upper section which I so desire can be swapped between the two lower sections. So that's what I did. I bolted the dual storage upper section to the shorter single storage lower section.
The pad on top looked pretty beat so I started looking for replacements on eBay. I decided to try to clean it first. Soap and water didn't cut it. Rubbing alcohol barely made a difference. Then I tried Purple Power. This worked great. I quickly followed it up with a wipe of rubbing alcohol for fear the Purple Power might start to eat the material. Here's my final product!
Feb 9, 2016 | 05:00 PM
#59
Awesome score on the console, those definitely are a holy grail find, I've never even seen one in person, just pictures of them on the forums, lol. Nice work cleaning it up!
Last edited by rustED; Feb 9, 2016 at 05:02 PM.
Feb 10, 2016 | 02:22 AM
#60
Thread Starter
Registered User
iTrader: (8)
Joined: May 2011
Posts: 1,517
Likes: 354
From: Southeast Virginia
In the 4 years I've owned the truck and been looking for a center console, I've seen two at the junkyards. One was red and one was gray but they were both trashed. Smashed to bits and broken to gain access to whatever else someone was trying to get to. Been searching the classifieds here to no avail. They pop up on eBay once in a while but they are usually very pricey.


