When you click on links to various merchants on this site and make a purchase, this can result in this site earning a commission. Affiliate programs and affiliations include, but are not limited to, the eBay Partner Network.
Hey guys, figured it was time to start my own thread, I've only been a member here for about a decade..
My toyota background: bought my first '88 4runner about 12 years ago, 22RE, 300,00ish KM on it, manual trans, engine was scabbed together from a few, had a 3" body lift using hockey pucks. Loved that thing, but I knew very little about vehicles and maintenance back then, so didn't care for it like I should have. While I was driving it, bought a cheap stock '88 4runner that needed trans work, old lady that owned it only drove in 3rd gear... Eventually the timing chain guides went on my lifted '88, so dropped the W56 out of it and bolted it into the stock 4runner, 2 days after that I was on my way camping and got T boned in it, insurance company would not let me keep it, or take my transmission back out of it. I was pissed.
Used my insurance money to get the transmission from the stock '88 rebuilt and bought a '91 4runner with a 3.0 in it. Drove the '91 for about a year while slowly putting the lifted '88 back together then sold the '91 to a buddy of mine who drove it to well past 500,000km. Never quite got the '88 back together, as I got married, had kids, and got busy with life. Sold it to a buddy that actually had time to work on it/maintain it properly. I hated that it was sitting in my yard rotting. I've been driving lame non-toyotas since then.
Fast forward to 3 years ago and I was looking for an 80's pickup/4runner as a project, and my buddy that I sold the '91 to had an '87 SR5 Auto, 22RE, power package, sitting on his property. He had blown the HG, so he did that and timing chain guides at the same time, but after he had it back together he couldn't stop it from over heating so he gave up. He gave me the truck for nothing if I promised to get her back on the road.
This is how she looked when I got it. Front end smashed in from him hitting something, different hood on it, front drivers fender is a replacement by some shop he took it to, missing a head light. That pic is the day before I drove it to work the first time, it tried to overheat on me on my drive home from work that day, so parked it and started researching while slowly straightening out the front end. Discovered he was running no thermostat to try and stop it from overheating, did not help. Put a thermostat in, checked fan clutch etc. Everything pointed to the Rad, but my buddy claimed it was brand new. Pulled it out, and sure enough a big dark brown spot in one of the bottom corners that I couldn't see with it installed. New rad in, overheating issue fixed.
Got the front end straightened out, new headlight in, built new bumper ends, and this is still about how she looks now.
Things I've done:
-Adjusted TPS back into spec. (wasn't idling right, and jumping the diagnostic port wouldn't work, fixed it.)
-Redone 4 main grounds
-Valve adjustment
-Remade copper contacts inside starter
-RAD4Runners starter relay install (fixed my no start issue)
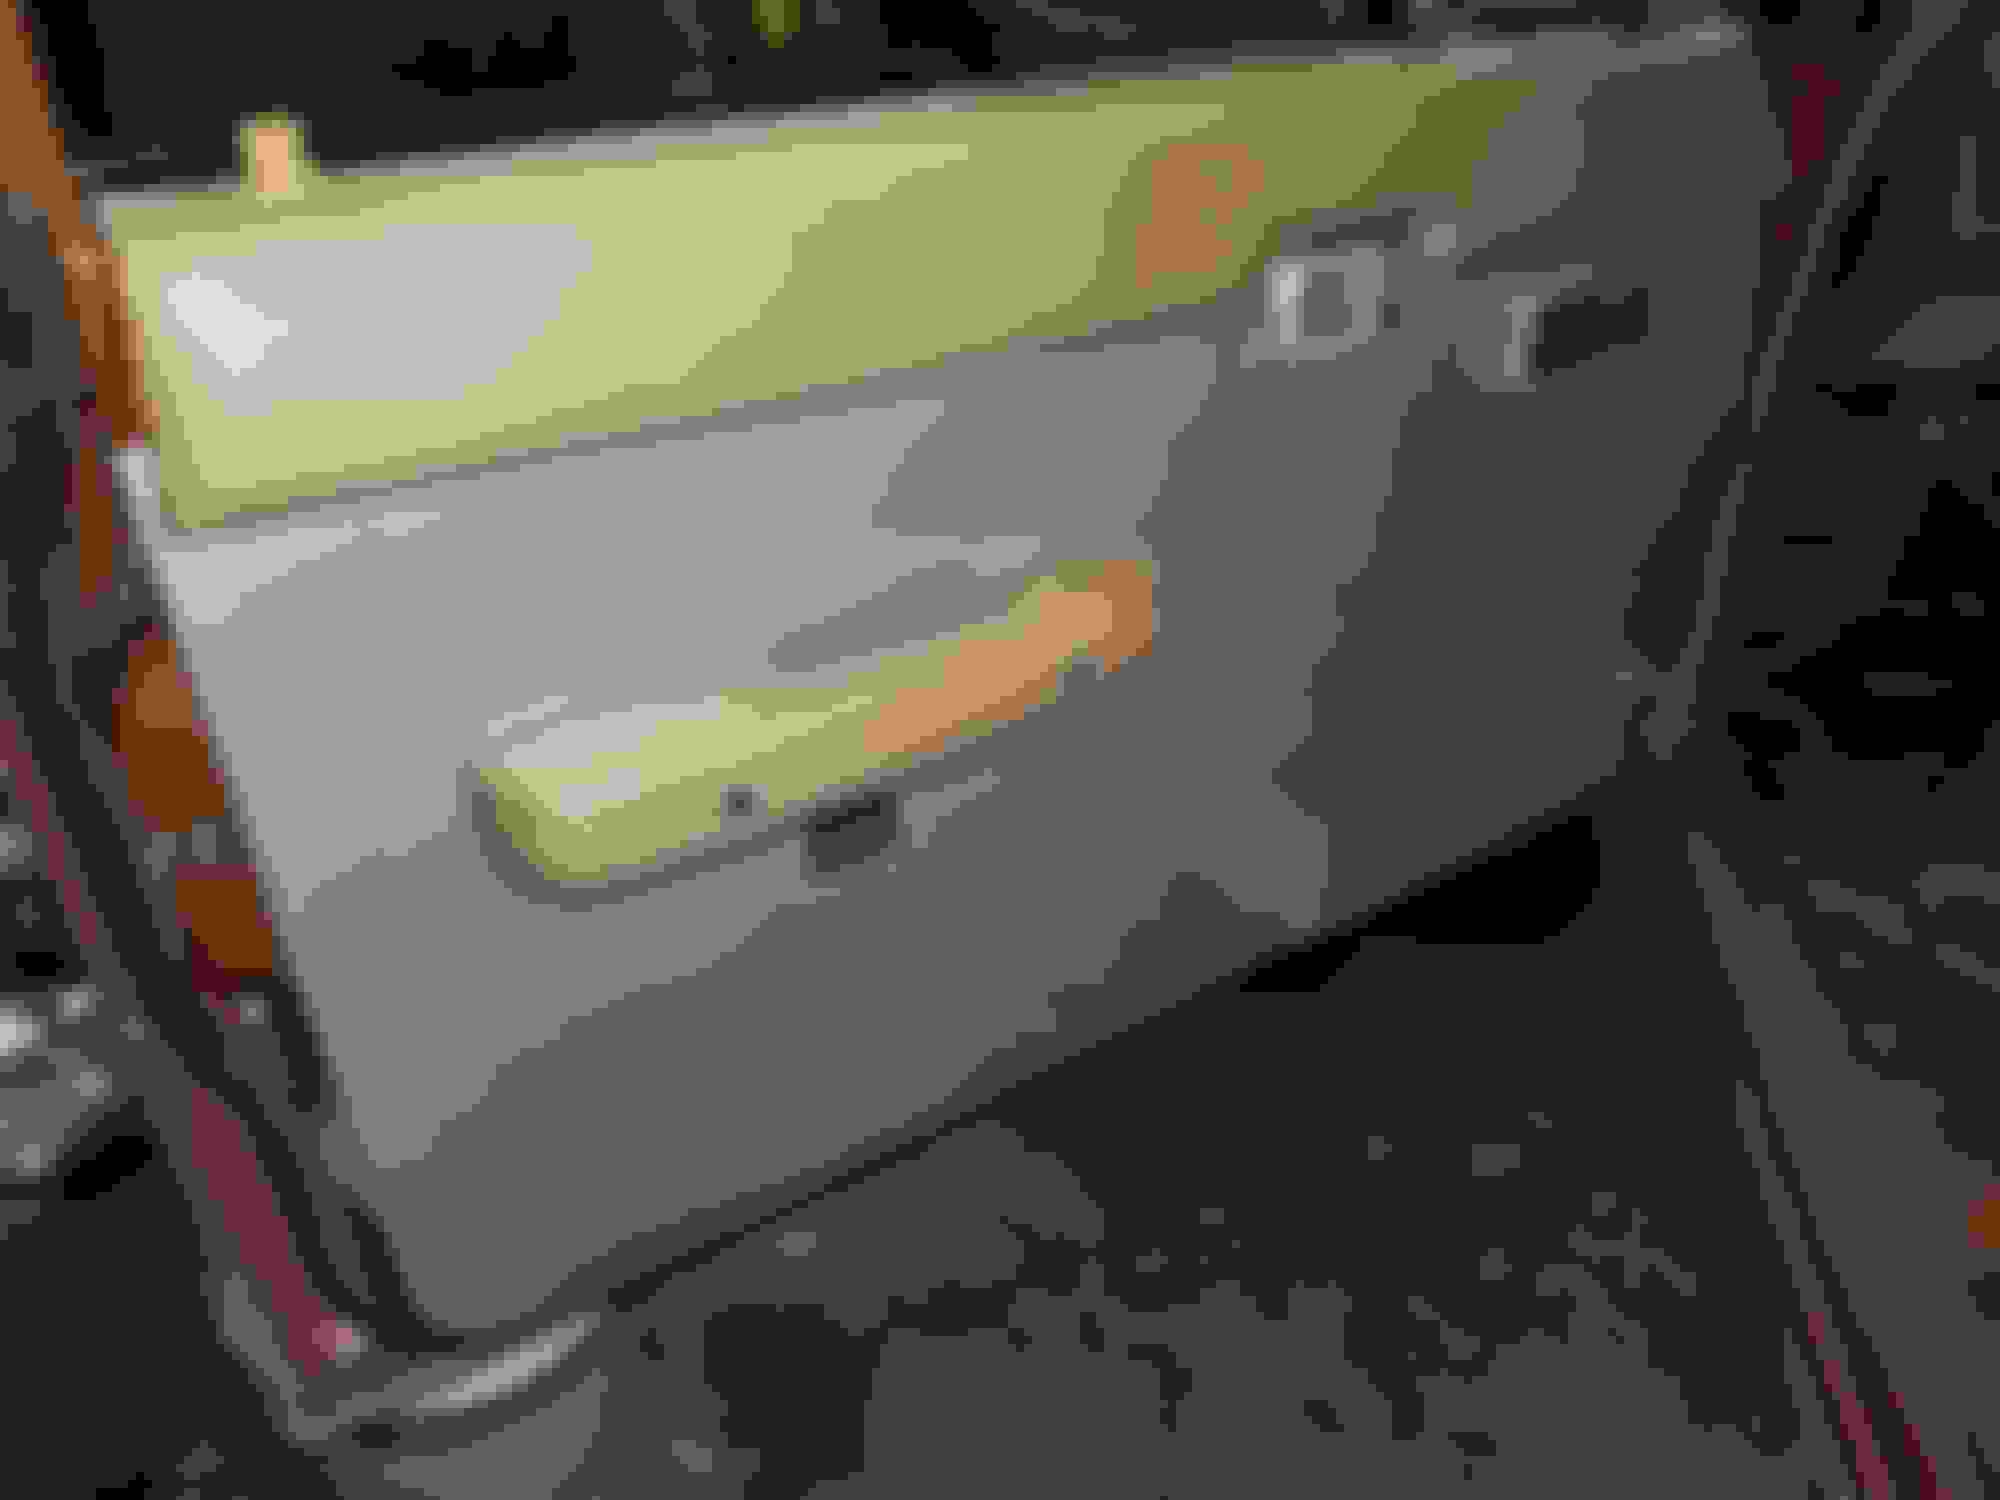
-Made new door panels
-Made new bumper ends
-Removed rear heater and bypassed lines
-Made custom center console (with cupholder!)
-Replaced fuel pump and filter
-Started Delete of rear roll up window, to replace with canopy style flip up, and use tail gate as storage (Ongoing!)
(There's more.. come on brain, work with me!)
Things I plan to do:
-ZUK mod
-EGR delete
-A/C delete
-Colour match and paint hood
-Fix rusty fenders (still researching)
-Install shoulder belts for rear seats
-Add sound deadening
-Assess my heater controls before the cold comes
More pics and info soon, just wanted to get things started.
Initial sketch I came up with First prototype, didn't quite fit properly Second prototype. You can see I had to step the back side of it down to fit under the fender better, as well as angle the corner above where it bolts, to match the profile of the bumper Both sides completed Installed
Initial layout sketch for various holes. The only one that changed between driver and passenger was the window controls. Holes cut on a CNC plasma table, but could be done with a grinder and hole saws easily enough. First fit up Spray balm with Red Oxide Primer, as it's pretty close to my exterior Metallic brown/red. Installed.
I plan to make another set, I'd like to put some sort of detail in the center to break up the flat panel feel of it. Some beads running across is horizontally or a border or something. Still thinking.
Truck wouldn't start when I went to leave work one day. Confirmed spark and air, so disconnected supply side to fuel filter then jumpered to bypass COR and AFM circuit, only a sad little dribble of fuel came out. Picked up a new pump and filter, already had one side of filter unhooked, so might as well replace. This is how the old filter looked. Wasn't leaking though.
She's a little cockeyed..
Install new pump, go to install new filter.. and lose one of the Banjo bolts in the gravel parking lot at work. had to order one from the dealership, took 2 days, so had to leave her parked at work and take a company truck home for a couple days. Got the new bolt, new filter in, and fired right up. My pump must have been failing for a while, a new one solved a starting issue I was having.
Well, friday on my way home I blew a rear brake line and almost totalled the 4runner. The guy in front of me in some big lifted domestic slammed on his brakes to yell at some lady for not using her turn signal, felt my line give out through the pedal. Limped it to the nearest gas station. Sprung a leak right between the gas tank and the frame, which sounds like a common spot. Couldn't pinch it off, had dinner getting cold in the truck for the family, had to admit defeat and call a tow truck. Will be driving a work truck this week while I get parts together to redo next weekend.
I've been researching since friday night, I will either buy pre-flared sections to bend myself and install, or buy a 25' roll of 3/16 brake line, flaring kit, the M10X1 connectors, and redo from scratch. Anyone have thoughts on this? It sounds like getting the hang of the double flare can be tricky, but it's something I'd like to add to my skill set for sure.
The quality of the flare tool makes all the difference. Those cheap ones with the two metal bars and what looks like a small tie rod end puller with a pointed tip are a pain. I have about a 75% success rate with those. The quality tools cost over $200 but look like such a breeze to use. If you can find pre-flared line in the right length it's definitely easier. I've never seen lengths much more than 6' or so. I'd buy the 25' roll. That's what I used for my truck. You can re-use your old flare nuts if they aren't too corroded. Just have to cut the line to get them off. On my Ford Ranger I used to have, I lost the line to the rear brakes. It also went between the gas tank and frame. I just cut it at both ends, abandoned it in place, and ran a new line around the gas tank (not between the tank and frame). It was ugly, but it worked. I didn't care much about that truck, but it worked fine.
Hmm that's what I was afraid of. $200 for a good flaring kit might not be in the budget right now. Buying some pre-flared lengths to bend might be my best option. From what I've read cutting and flaring an old line is not ideal and rarely works though, so I would need to go from the connection into the splitter at the front passenger wheel, to the LSPV at the rear wheel I think? So using two pre-flared lengths and joining in the middle somewhere with a union. I will crawl under there when I get home and try to get a better feel of where all the unions and connections are.
I was able to buy a preformed 97 Corolla rear brake line from the Toyota dealer after mine blew a few years ago. Long shot, but are you sure you can't get one for the 4runner?
I have not talked to the dealership yet, no, but that's a good point, thanks Melrose.
I should at least get a price from them if it's available.
I tend to ignore them as the local one on my island is so over priced it's ridiculous. The last thing I got a price on was a Dual Stage Thermostat, they quoted it as $88.50..
That definitely looks a lot nicer than the cheap ones out there, unfortunately not in the budget right now. It will be something I add to my tool kit eventually though.
Bought various lengths of pre-flared 3/16 metric threaded brake line from the local parts store, plus a handful of extra M10X1 connectors and unions, and a 12" long female/female M10X1 flex line just in case I need it.
I've been generously soaking the connections I plan to break free for the last few nights, and tried one at the LSPV last night, wouldn't budge. I will bypass it and add a manual proportioning valve at the Master if I have to. I know it's not ideal, and it won't function as well as the LSPV(if it is even functioning), but I need my truck back on the road. I do like the idea of only having a single line running to the rear. This is my Plan B if I can't break those connections, I always like to have at least one back up plan in place, as things can quickly go sideways on repairing/replacing 32 year old parts and connections.
Anyone have any info on removing the factory cruise control? I've searched but not really found anything on it. I will never use it, and plan to remove it along with my A/C components sometime soon. A/C should be easy enough, but cruise control I can't find much info on.

 Jul 17, 2019 | 11:04 AM