
775Toy's 84 X-cab build Thread
 Feb 20, 2014 | 07:00 PM
#201
Thread Starter
Registered User
Joined: Dec 2011
Posts: 415
Likes: 1
From: 775 Reno Nevada
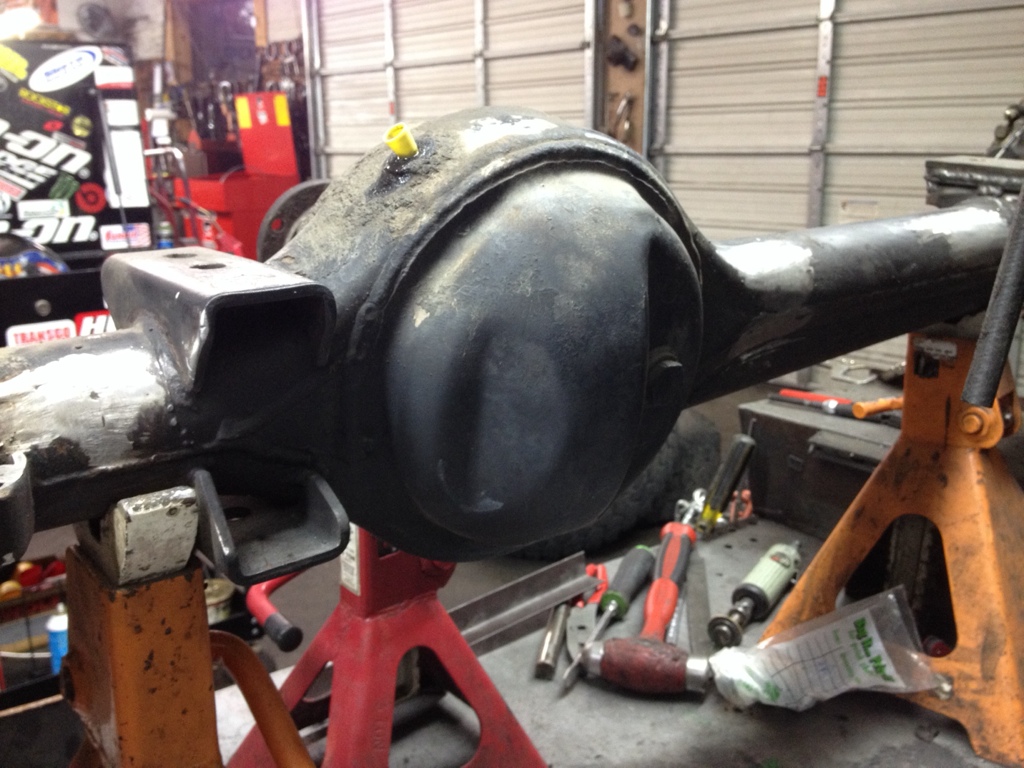
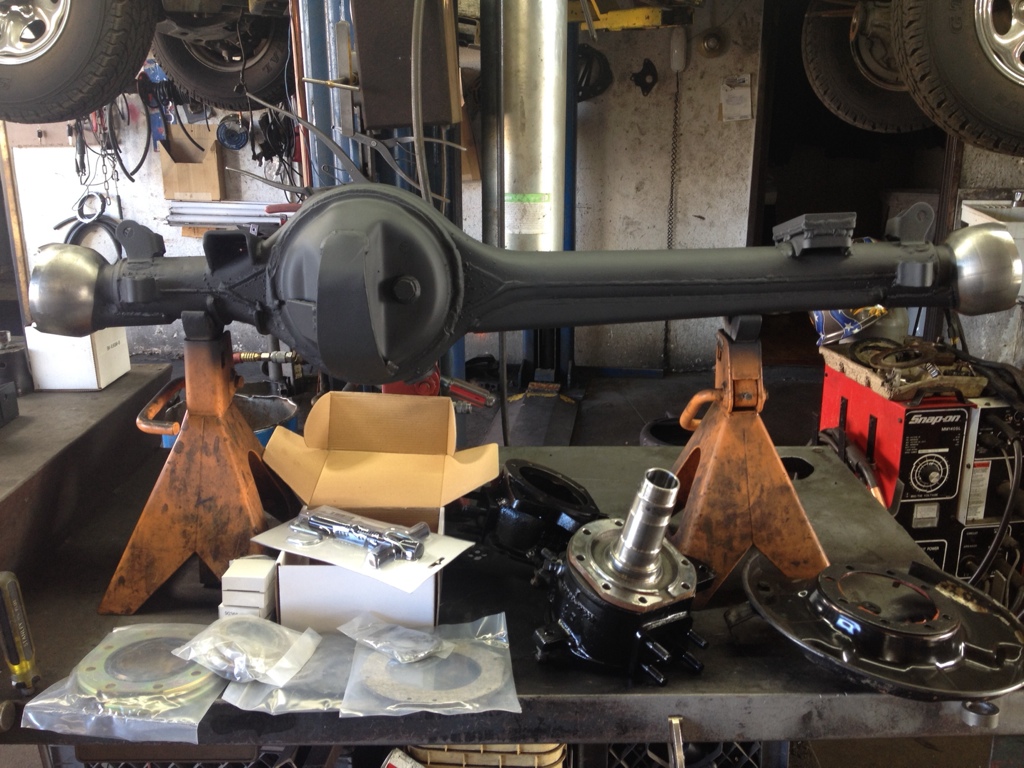
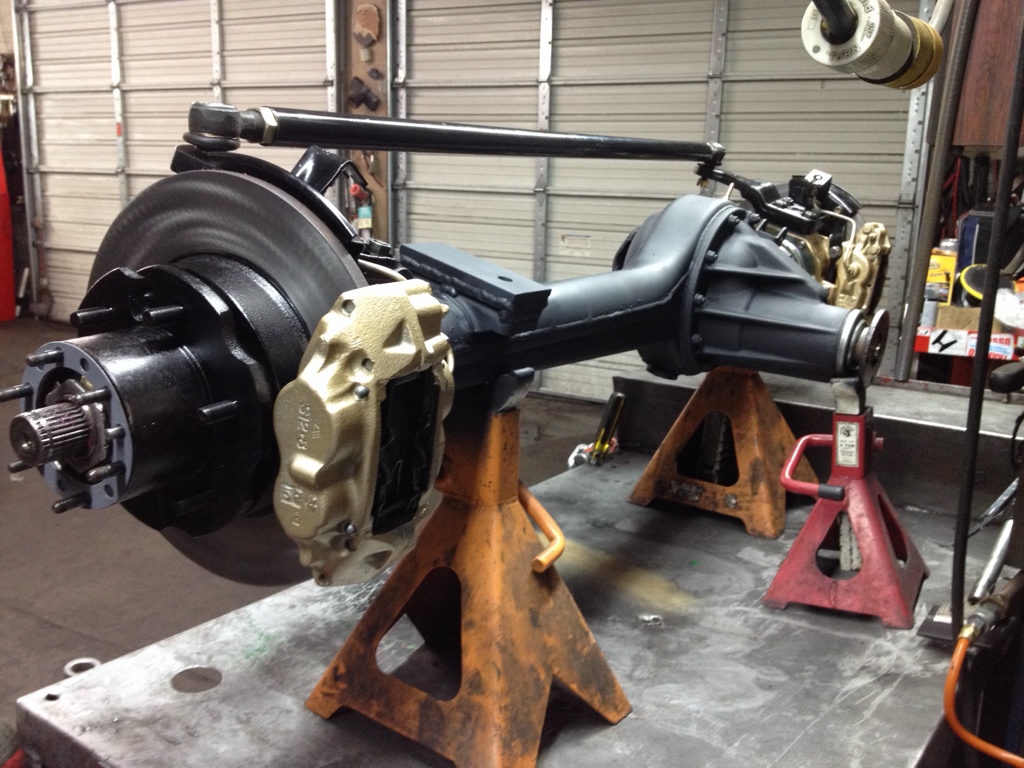
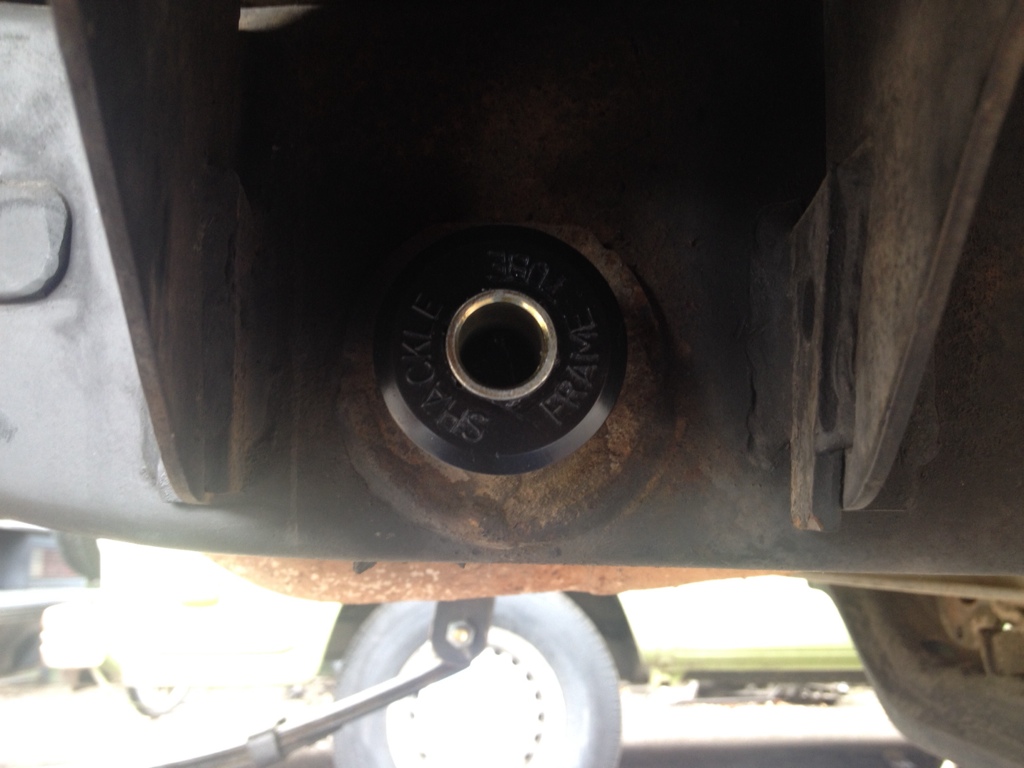
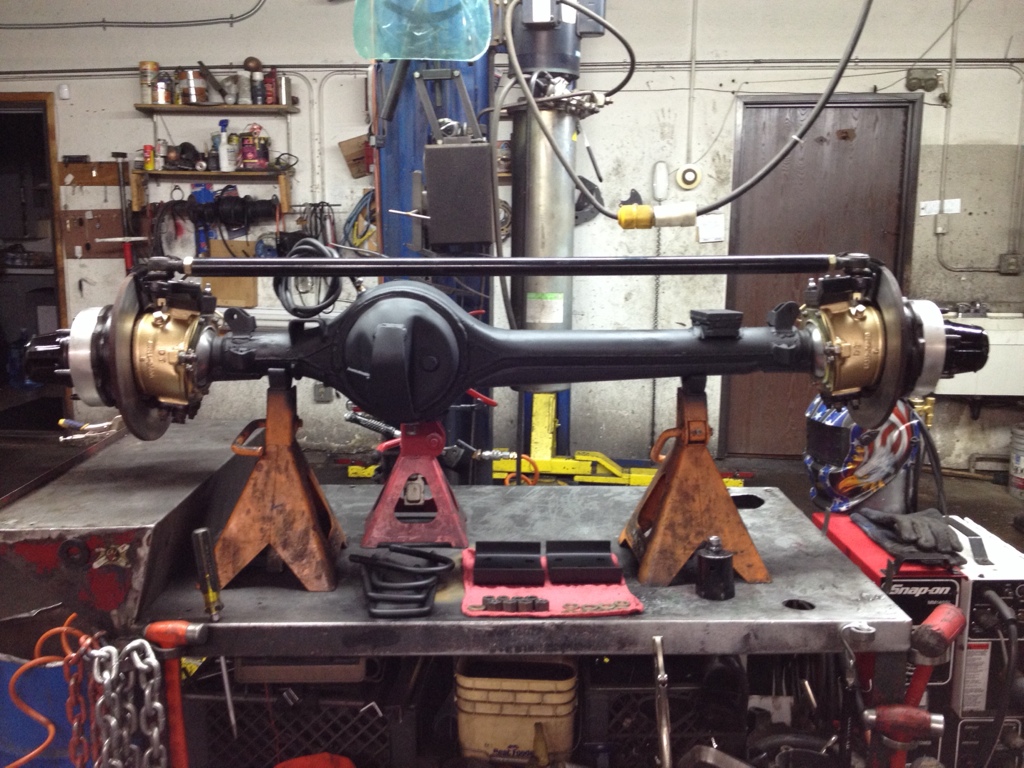
Well after another lapse in motivation I got back into it this week. Time to push the axle forward a little and do some service work and armor while the diff is out.
Pulled out & on stands.

Drilled passenger side perch 1 3/8" back
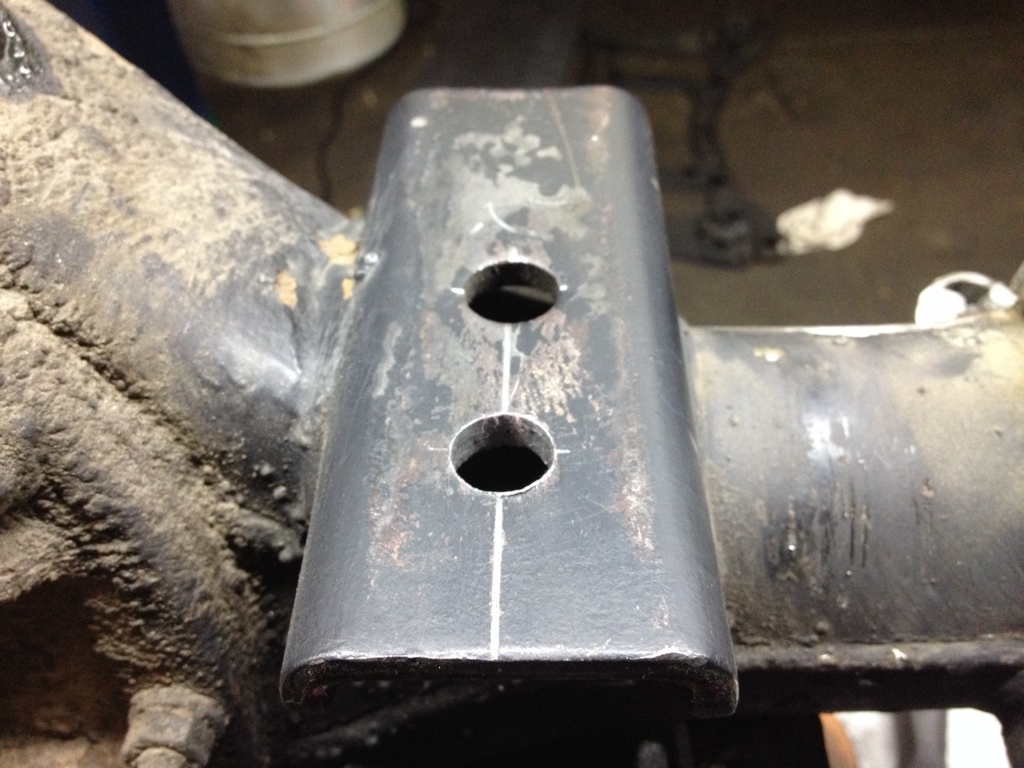
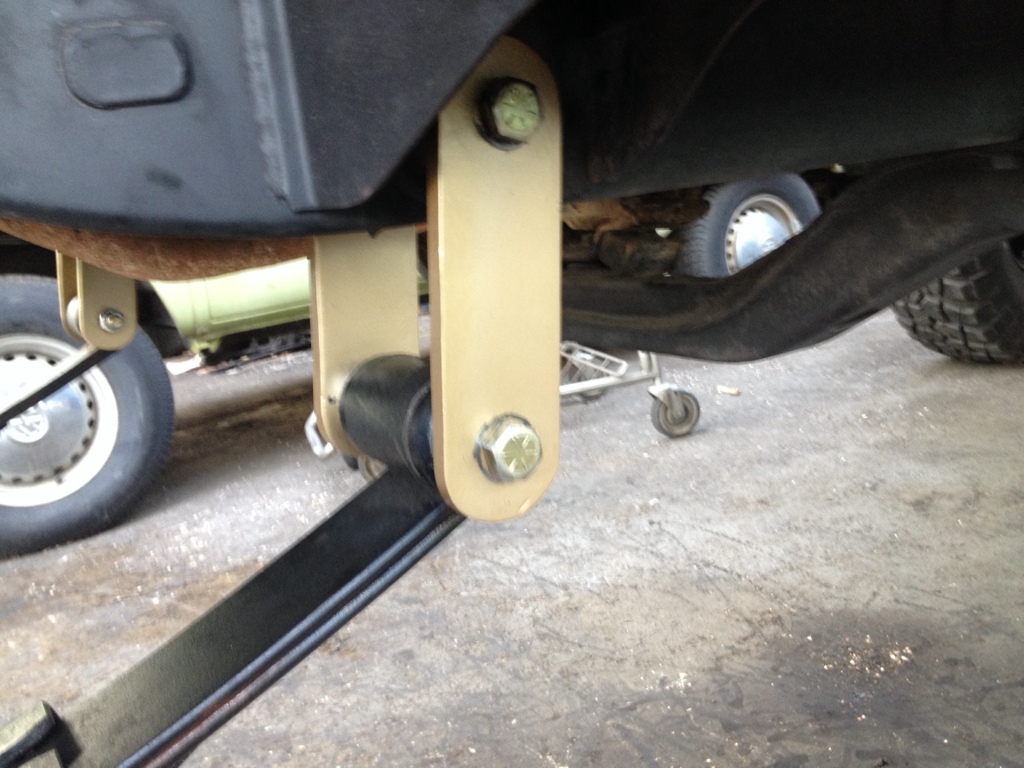
Since I went with wagoneer rancho 44044 leafs up front and not toyota specific springs the truck sat about 3/4" lower on the driver side. So I built a 3/4" spacer and drilled it to match the pass perch.
Burned it onto the perch . Welded up the front & back and stitched the sides. Shouldn't go anywhere haha.
Drilled plates to match
Cut off the sway bar & steering stabilizer mounts.
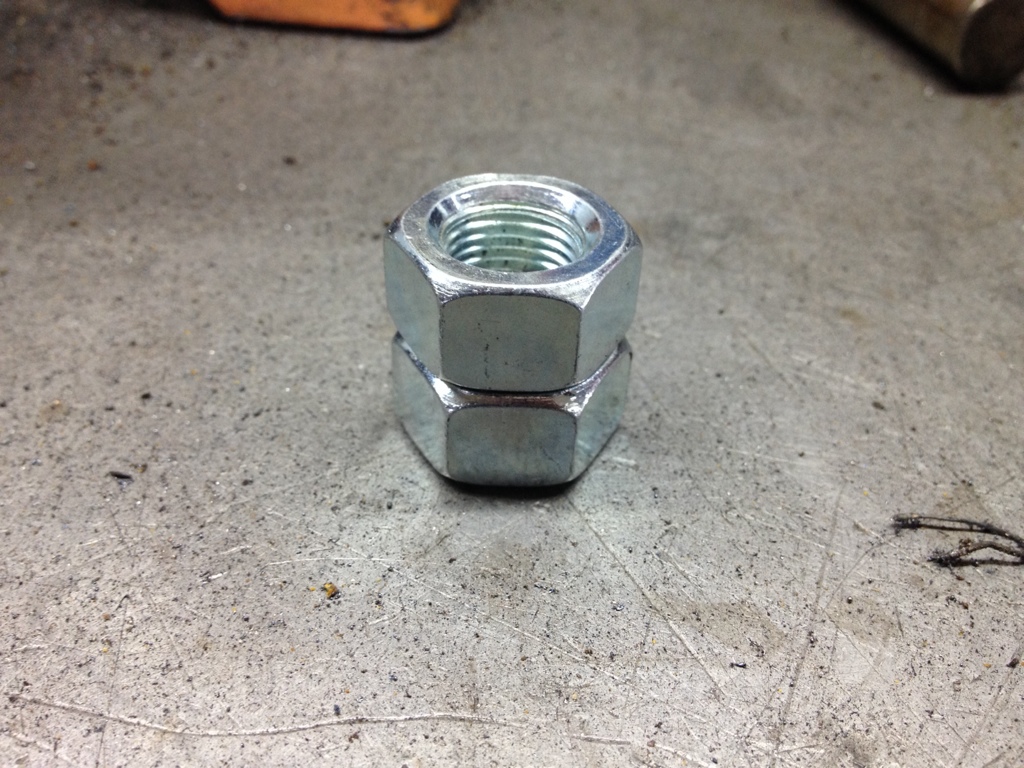
Cheap way to beef up steerin stops. Stack 2 nuts up inside and burn them in.
Started tearing down knuckles today , as well as cleaning up the housing. Still undecided on if I'm going to buy diff armor & knuckle gussets or build them ?
Hopefully more progress next week.
Pulled out & on stands.
Drilled passenger side perch 1 3/8" back
Since I went with wagoneer rancho 44044 leafs up front and not toyota specific springs the truck sat about 3/4" lower on the driver side. So I built a 3/4" spacer and drilled it to match the pass perch.
Burned it onto the perch . Welded up the front & back and stitched the sides. Shouldn't go anywhere haha.
Drilled plates to match
Cut off the sway bar & steering stabilizer mounts.
Cheap way to beef up steerin stops. Stack 2 nuts up inside and burn them in.
Started tearing down knuckles today , as well as cleaning up the housing. Still undecided on if I'm going to buy diff armor & knuckle gussets or build them ?
Hopefully more progress next week.
Feb 21, 2014 | 09:02 AM
#203
Thread Starter
Registered User
Joined: Dec 2011
Posts: 415
Likes: 1
From: 775 Reno Nevada
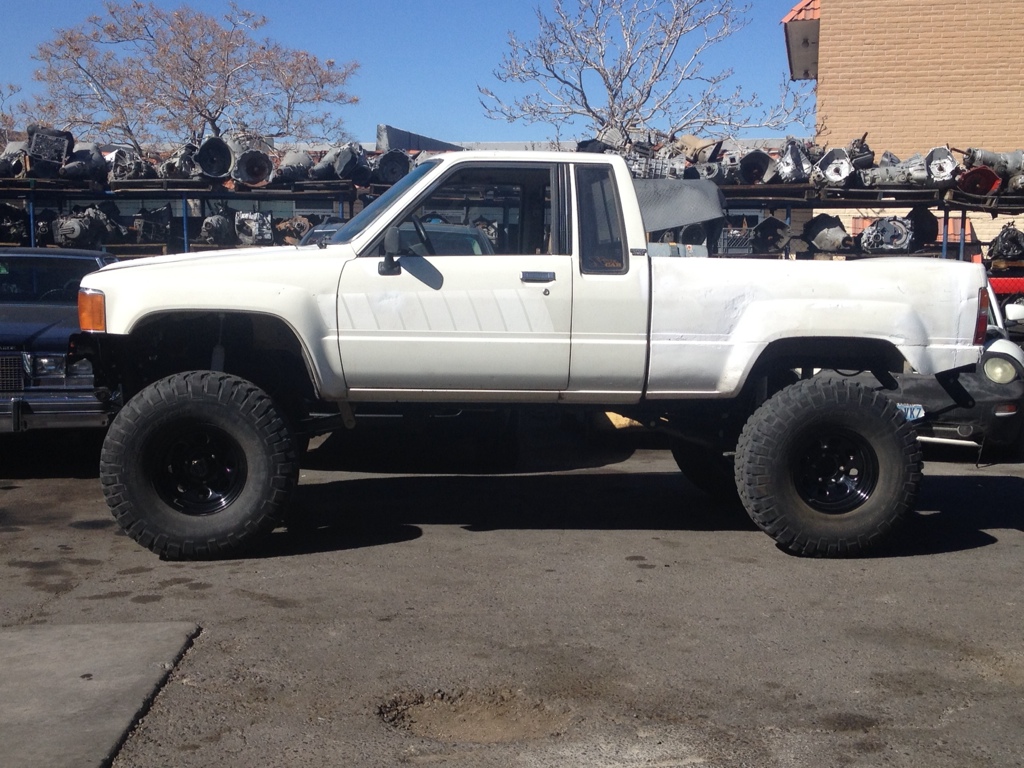
Thanks , and I do plan on lightly scuffing it and re spraying white one day. I don't plan on doing much body work. Might chisel out some old bondo on the bed sides and scrape off old disco graphics.
Feb 21, 2014 | 04:35 PM
#204
Thread Starter
Registered User
Joined: Dec 2011
Posts: 415
Likes: 1
From: 775 Reno Nevada
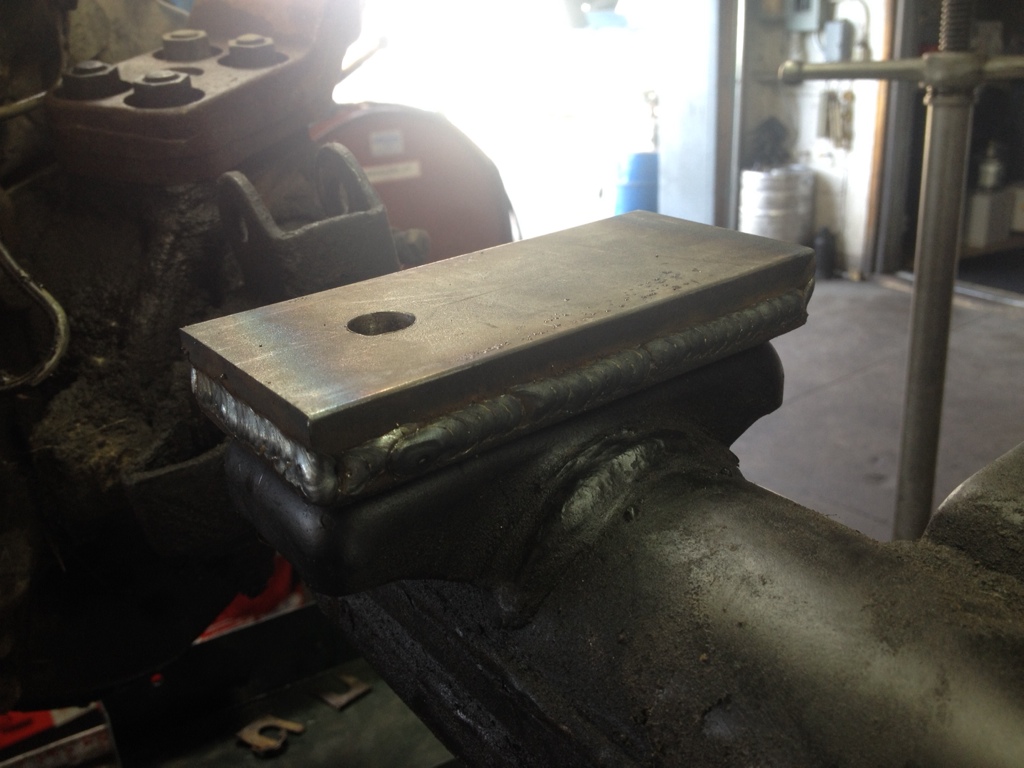
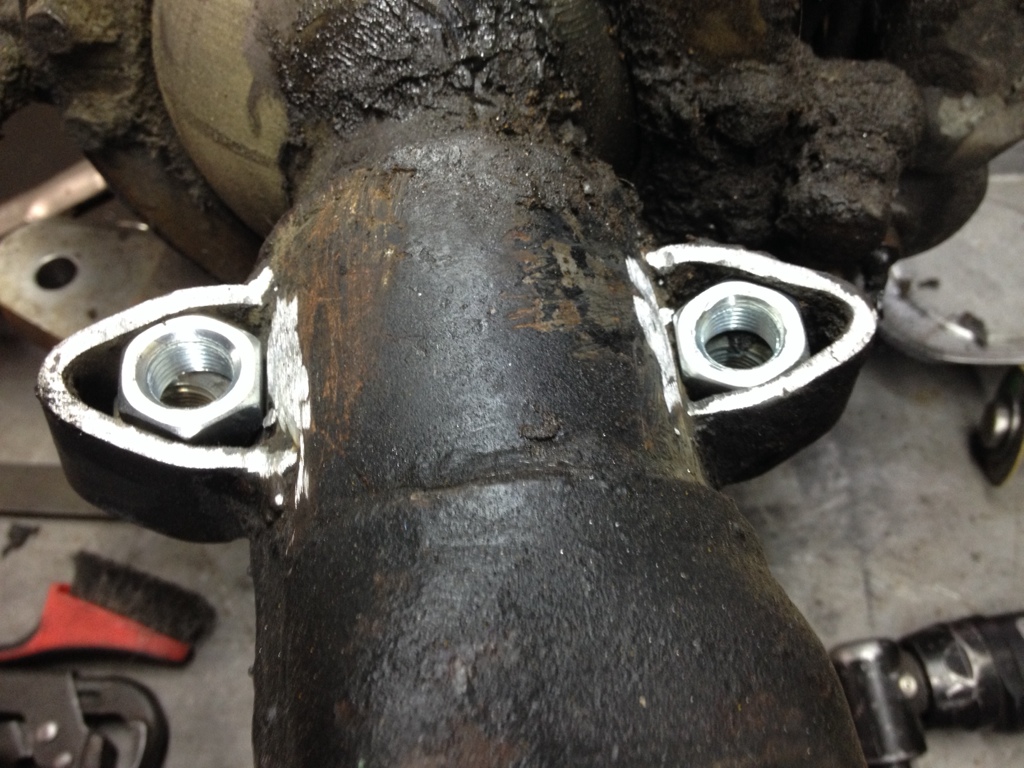
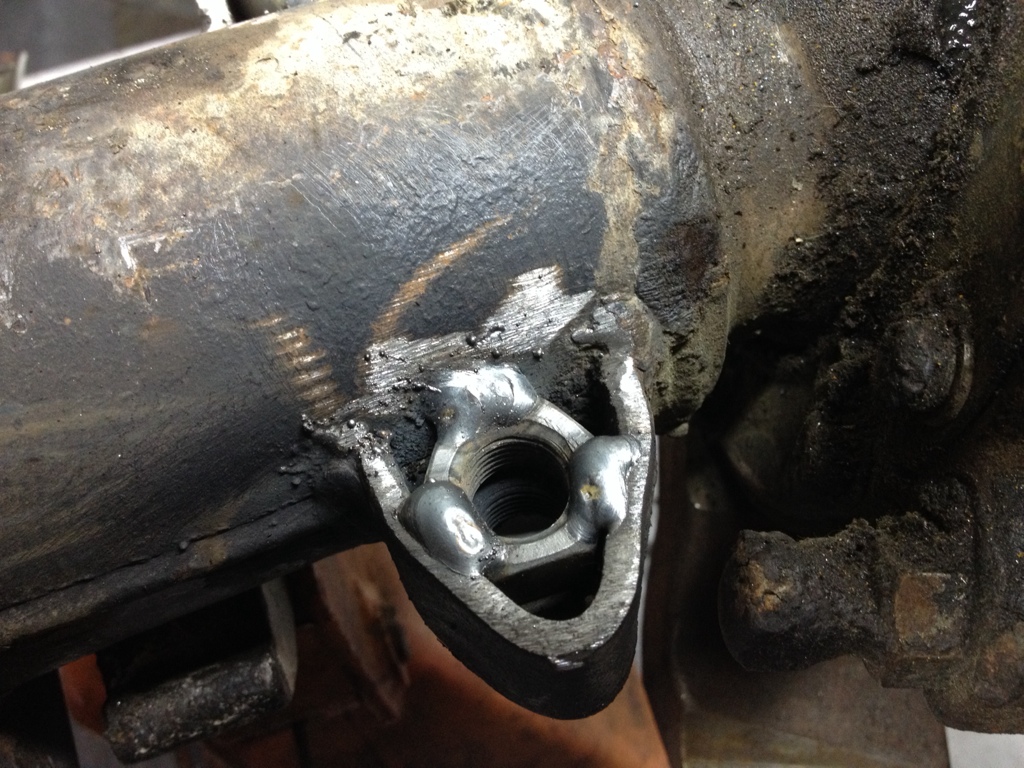
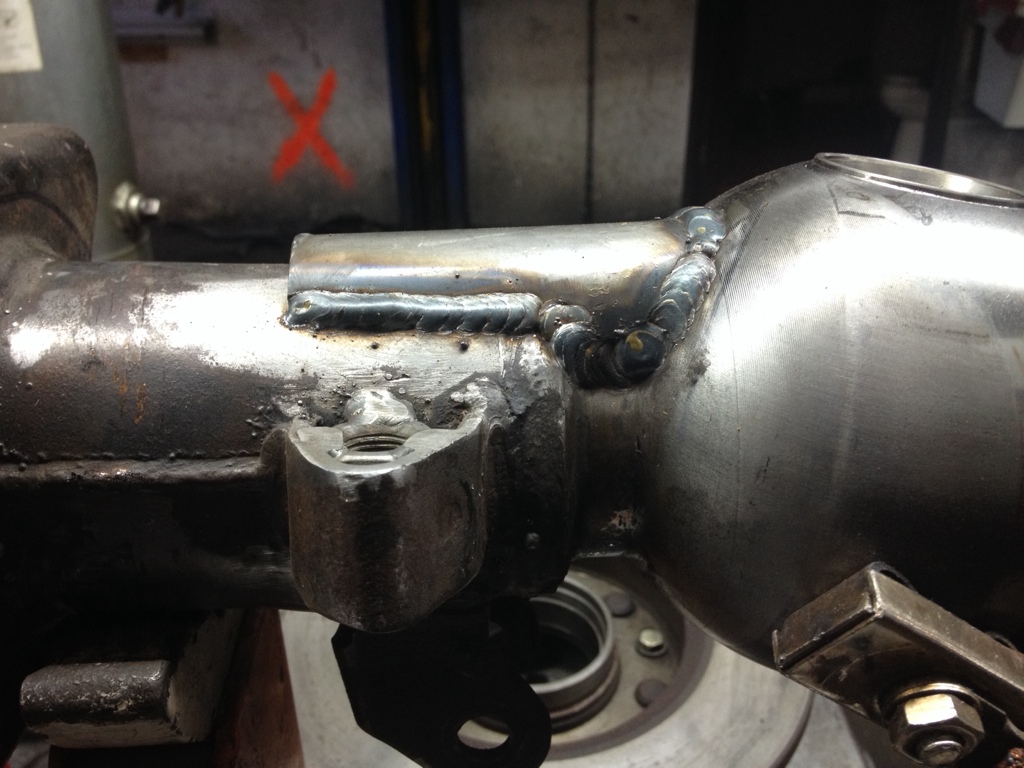
Built some lower knuckle ball gussets out of some extra tubing I had laying around.
Driver side

Pass side

I prepped the area to weld them in and It never fails welder ran out of gas ; (
Hopefully get them burned in Monday. Still undecided if I'm gonna attempt to make a diff guard or just buy one ? Knuckle rebuild kit as well as a few other parts should be here next week.
Driver side
Pass side
I prepped the area to weld them in and It never fails welder ran out of gas ; (
Hopefully get them burned in Monday. Still undecided if I'm gonna attempt to make a diff guard or just buy one ? Knuckle rebuild kit as well as a few other parts should be here next week.
Last edited by 775Toy; Feb 21, 2014 at 04:37 PM.
Feb 24, 2014 | 06:23 PM
#205
Thread Starter
Registered User
Joined: Dec 2011
Posts: 415
Likes: 1
From: 775 Reno Nevada
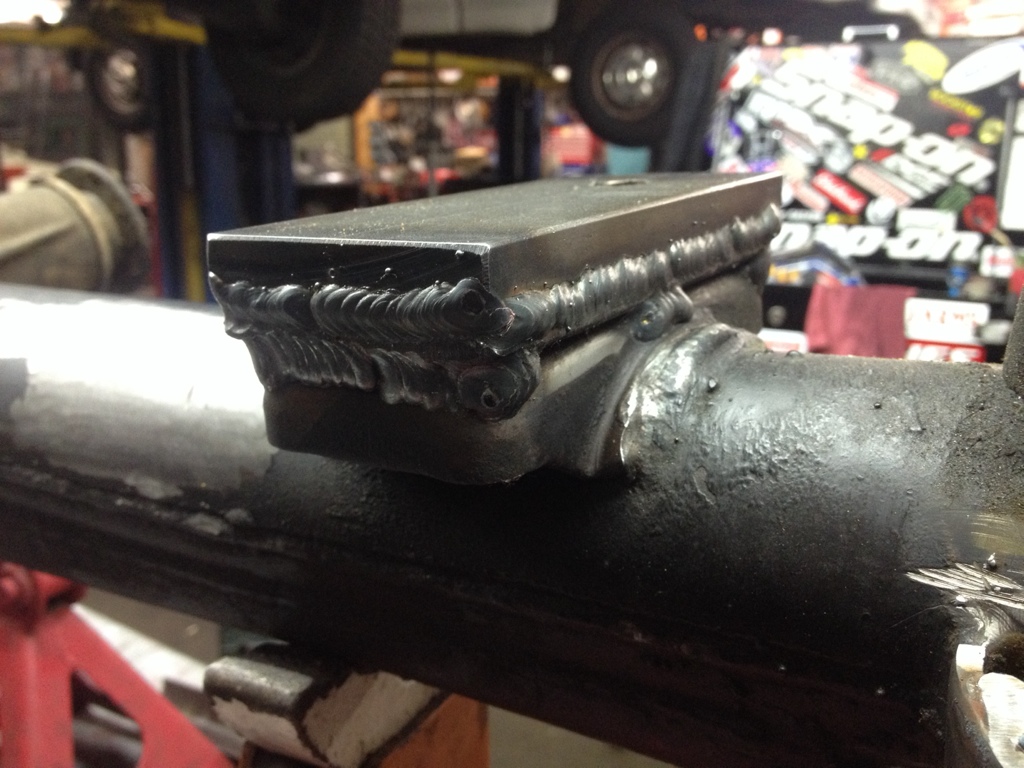
Burnt in lower ball gussets
Decided to save a few $$$ and build a diff guard out of some scrap 1/4" plate. Still need to form It a little more and finish welding it up tomorrow.
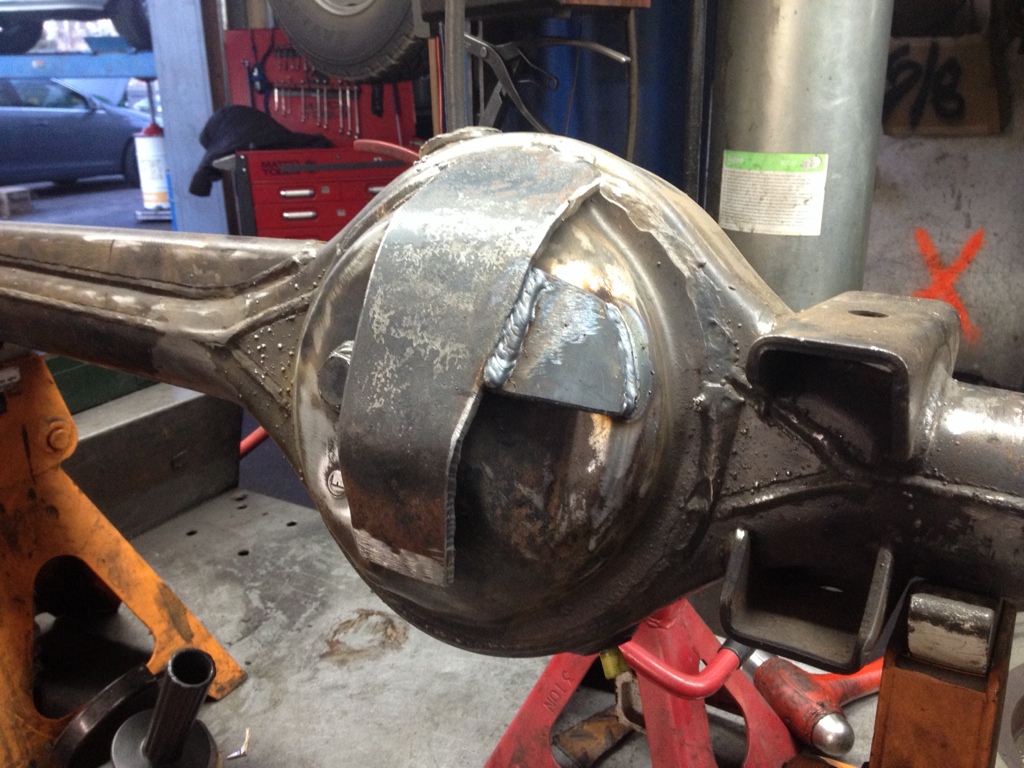
Decided to save a few $$$ and build a diff guard out of some scrap 1/4" plate. Still need to form It a little more and finish welding it up tomorrow.
Feb 25, 2014 | 06:52 PM
#206
Thread Starter
Registered User
Joined: Dec 2011
Posts: 415
Likes: 1
From: 775 Reno Nevada
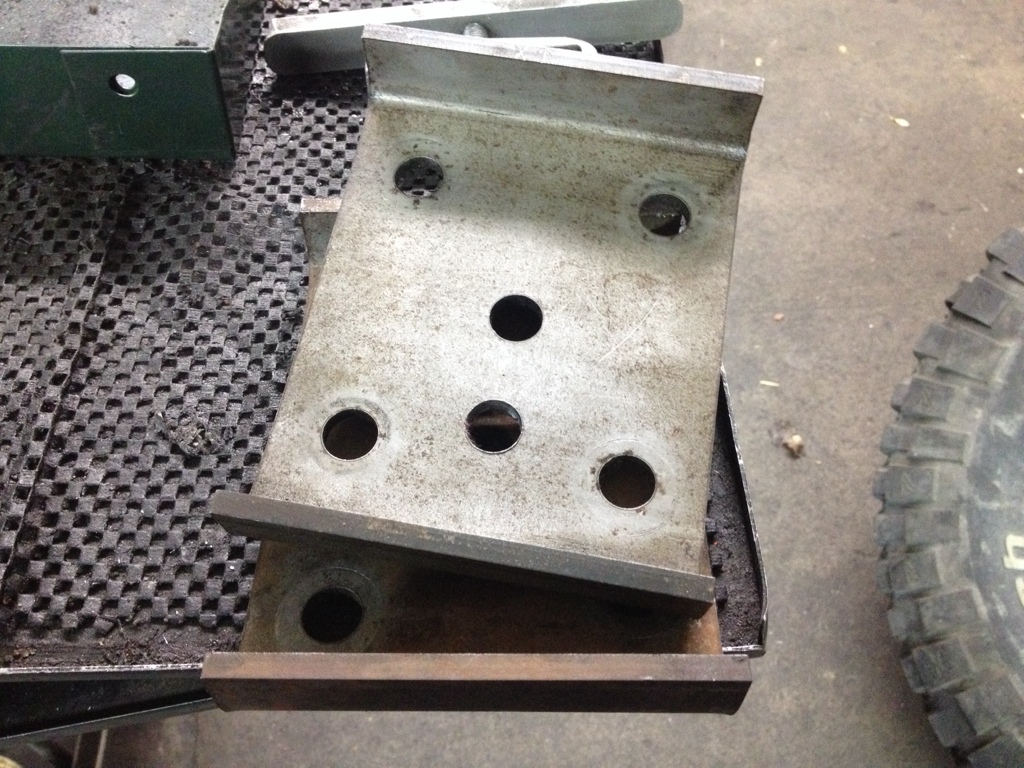
Got a little more done on my lunch break today. Welded the knuckle gussets shut and finished forming the diff guard and seeing it in. Also trimmed the lower perch , left enough to help keep the ubolts from walking.
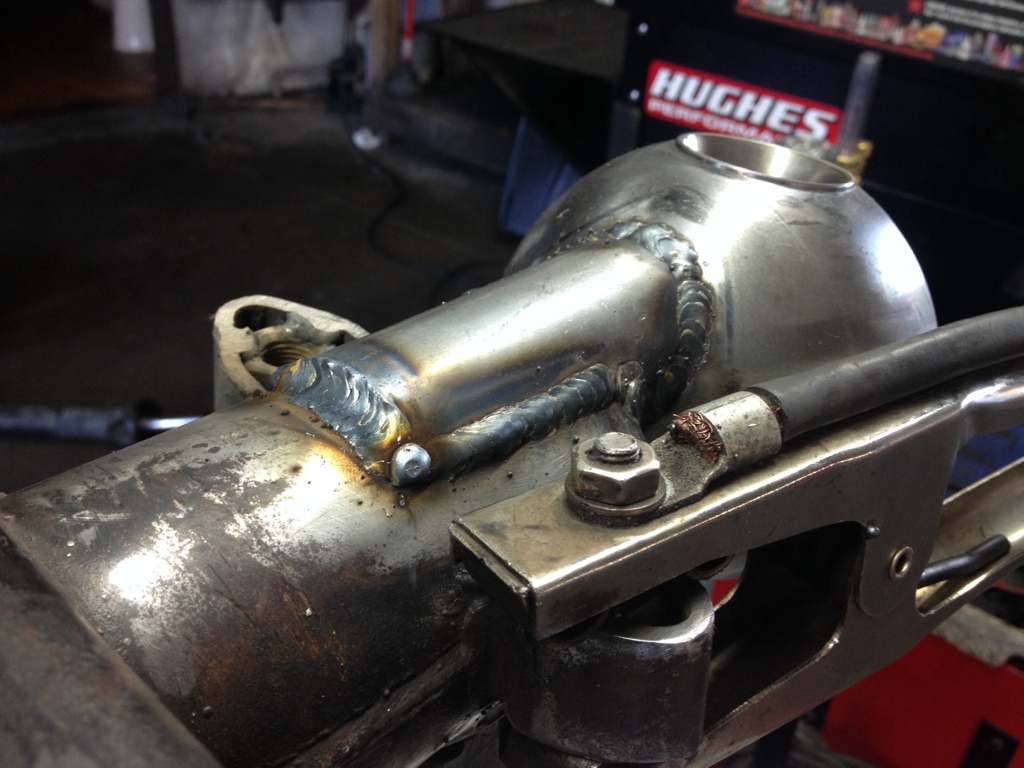
Gonna try and get the rest of te housing all cleaned up and ready for paint. Parts should arrive soon to put back together.
Gonna try and get the rest of te housing all cleaned up and ready for paint. Parts should arrive soon to put back together.
Feb 27, 2014 | 06:09 PM
#207
Thread Starter
Registered User
Joined: Dec 2011
Posts: 415
Likes: 1
From: 775 Reno Nevada
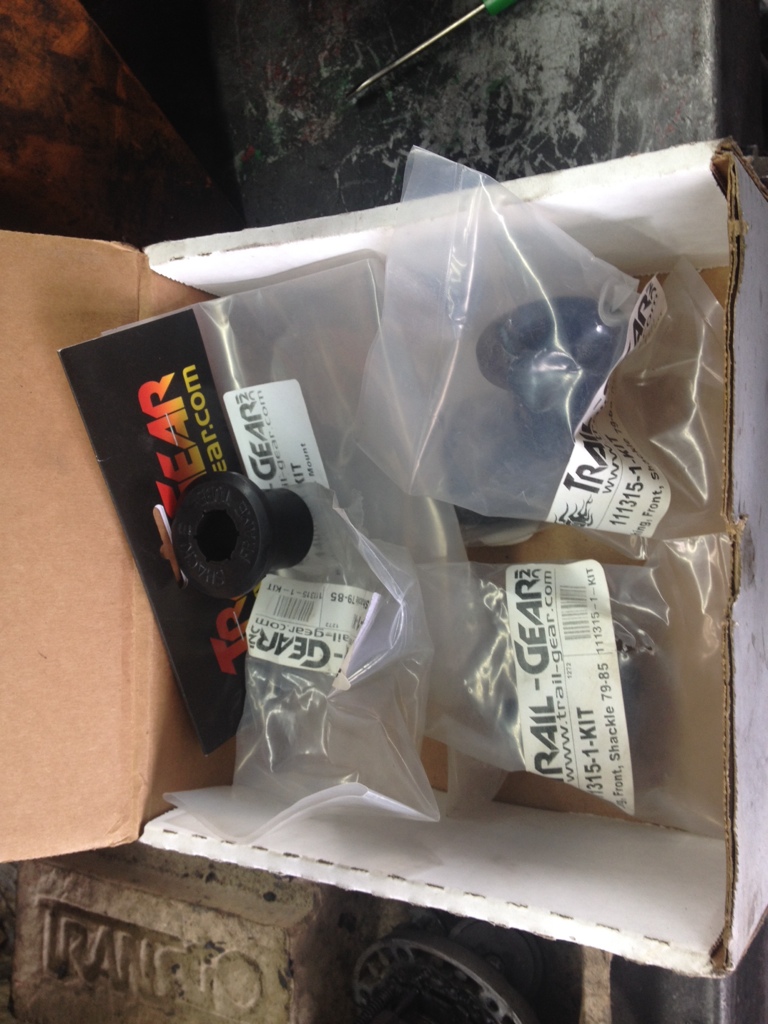
Got my knuckle rebuild today. Also started cleaning up and painting a few peices.
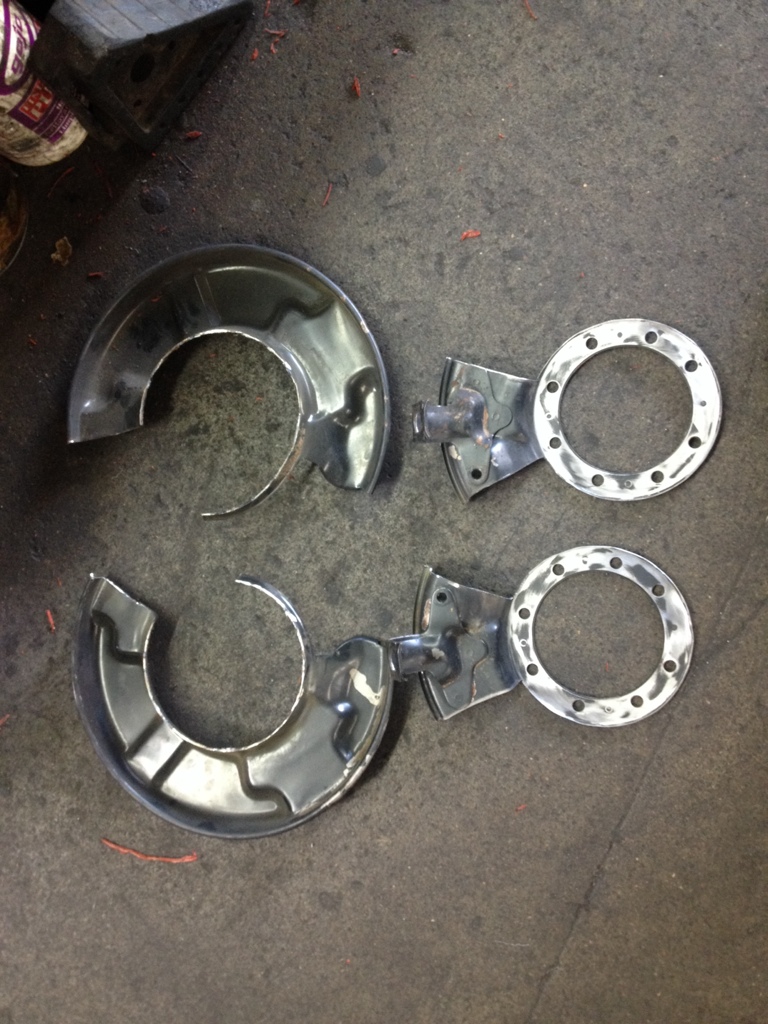
Made my own backing plate eliminators with stock shields. Just saved the top part for the brake line bracket.
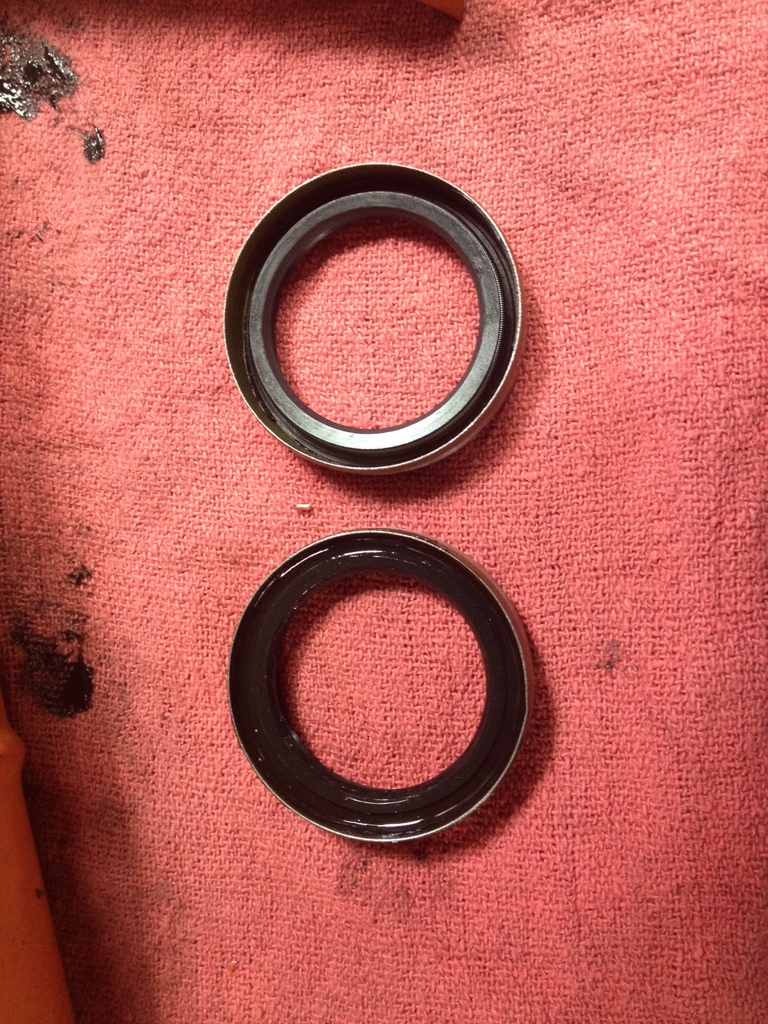
Picked this tip up from a old school Yota wheeler. Back before tg and marlin offered hd inner axle seals you would fill in the backside of a stock seal with black rtv silicone and let it dry. Poor mans hd seal. Pics shows one with , and one without for referance.
Should have rotors back tomorrow and new pads and hopefully start assembly.
Made my own backing plate eliminators with stock shields. Just saved the top part for the brake line bracket.
Picked this tip up from a old school Yota wheeler. Back before tg and marlin offered hd inner axle seals you would fill in the backside of a stock seal with black rtv silicone and let it dry. Poor mans hd seal. Pics shows one with , and one without for referance.
Should have rotors back tomorrow and new pads and hopefully start assembly.
Feb 28, 2014 | 09:42 PM
#208
Thread Starter
Registered User
Joined: Dec 2011
Posts: 415
Likes: 1
From: 775 Reno Nevada
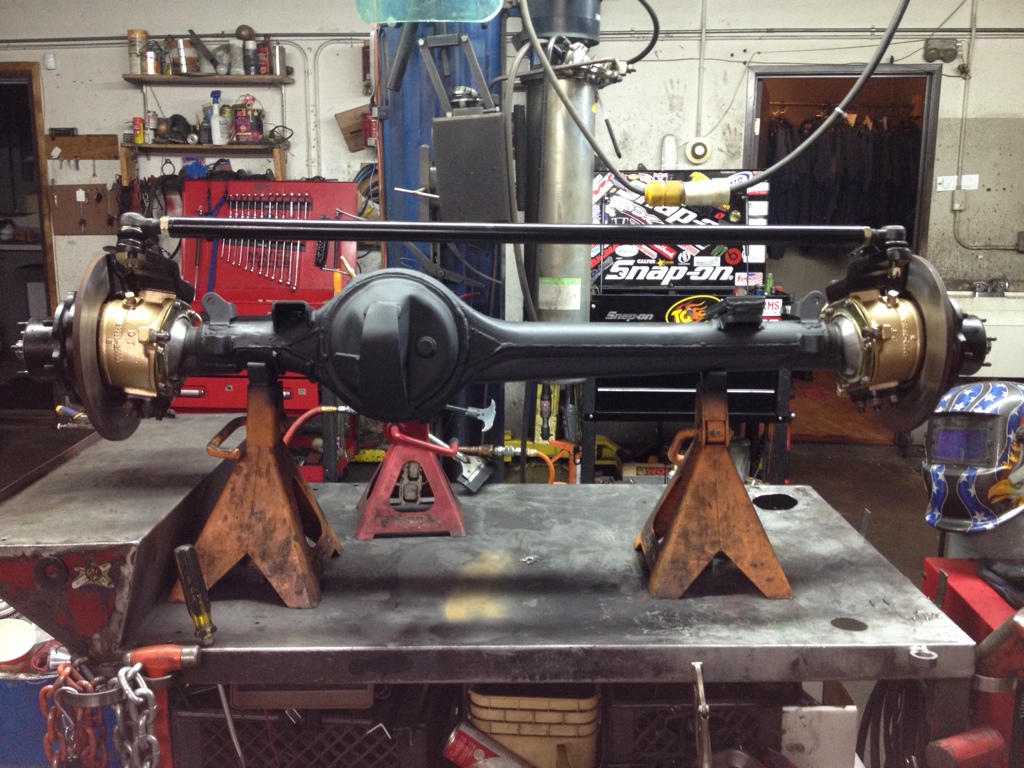
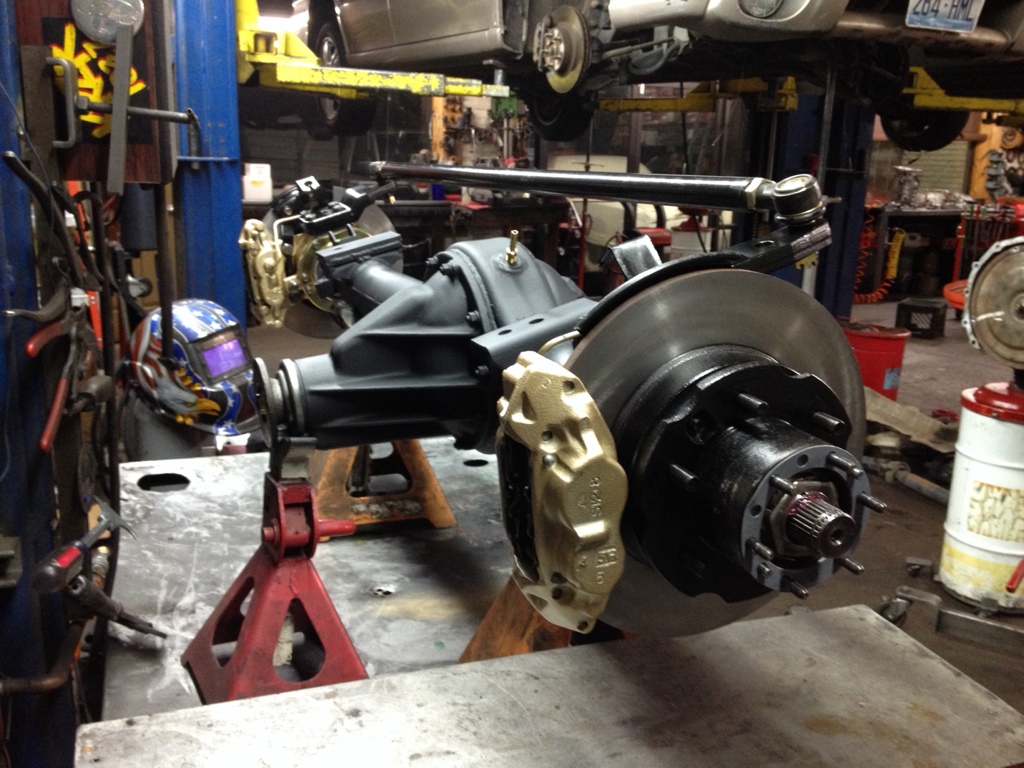
Got the rotors back today and a set of new pads. Got the axle pretty much ready to go back under. Still waiting on my knuckle studs. Also got to get my hubs and wheel spacers back on.
Mar 1, 2014 | 09:24 PM
#209
Registered User
Joined: Jun 2013
Posts: 363
Likes: 0
From: kelowna BC
well,... thats a nice lookin axle. so many new ideas. so little sleep... youre too fast! ill keep you posted on my slow poke build up, as my truck is a town over and i have very little free time. so hah. ...
Mar 2, 2014 | 04:33 PM
#210
Thread Starter
Registered User
Joined: Dec 2011
Posts: 415
Likes: 1
From: 775 Reno Nevada
Thanks. Well I've been at this for about 2 years now. I work in short motivated sessions. Then won't touch it for months. Keep plugging away...
Mar 4, 2014 | 05:34 PM
#213
Thread Starter
Registered User
Joined: Dec 2011
Posts: 415
Likes: 1
From: 775 Reno Nevada
While I'm STILL waiting on my tg knuckle studs ! Figured I have a few things to do before axle goes under anyway.
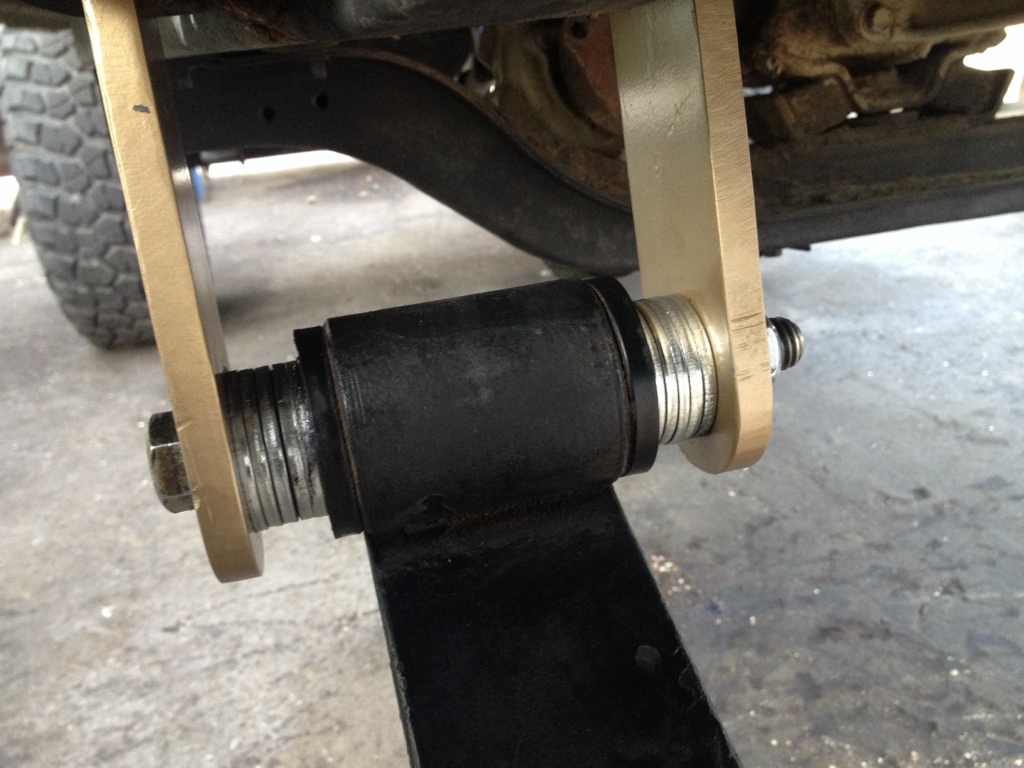
New frame bushings up front.
Since toyota uses 18mm hardware without sleeves , and I'm using 9/16 grade 8 hardware with a dom sleeve I have to drill out the 18mm bushing to 3/4 to fit the dom sleeve outside diameter.

After quick work with a drill & 3/4" bit sleeve fits nice.
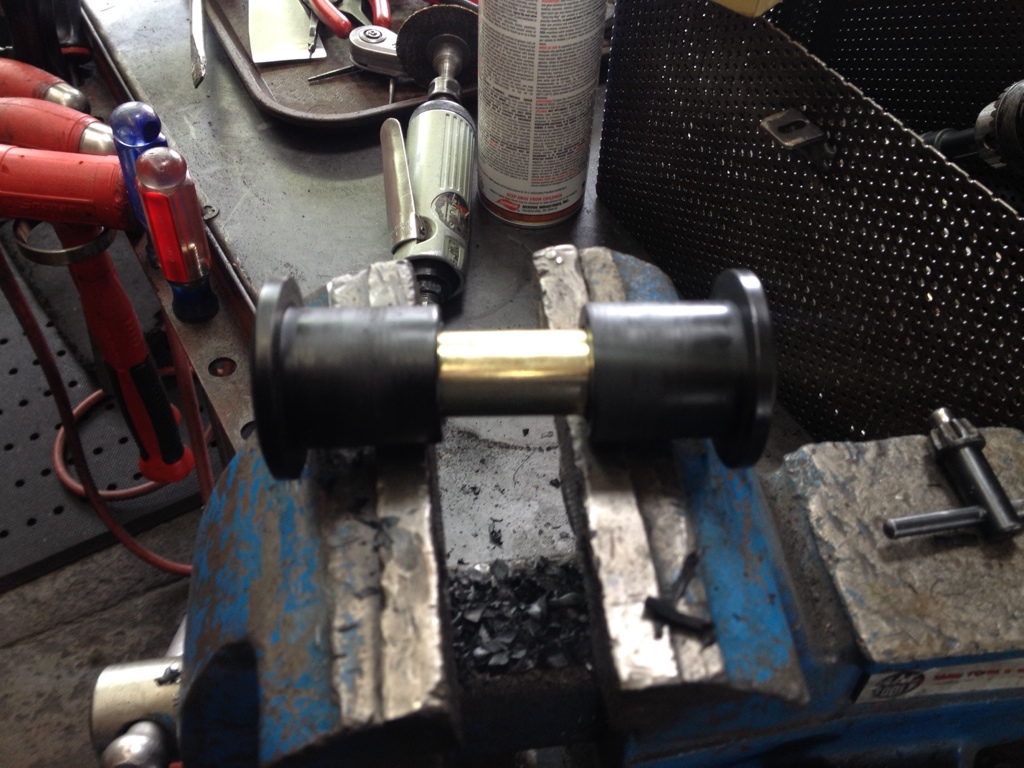
Since the sleeve is the width of a leaf spring I ended up pushing it through till it just poked out one side of frame bushing , then put another sleeve in after and marked it and cut I to length. So I end up needing 3 sleeves in total to do both sides. This way the shackles don't tighten up against the bushing, they bottom out on the dom sleeve.
Leaf springs & shackles hung
Decided to save a few bucks and make my own 3/4" spacers. Just good ol 9/16 washers.
Pretty much ready for axle to go back under.
New frame bushings up front.
Since toyota uses 18mm hardware without sleeves , and I'm using 9/16 grade 8 hardware with a dom sleeve I have to drill out the 18mm bushing to 3/4 to fit the dom sleeve outside diameter.
After quick work with a drill & 3/4" bit sleeve fits nice.
Since the sleeve is the width of a leaf spring I ended up pushing it through till it just poked out one side of frame bushing , then put another sleeve in after and marked it and cut I to length. So I end up needing 3 sleeves in total to do both sides. This way the shackles don't tighten up against the bushing, they bottom out on the dom sleeve.
Leaf springs & shackles hung
Decided to save a few bucks and make my own 3/4" spacers. Just good ol 9/16 washers.
Pretty much ready for axle to go back under.
Last edited by 775Toy; Mar 4, 2014 at 05:37 PM.
Mar 6, 2014 | 07:34 PM
#214
Thread Starter
Registered User
Joined: Dec 2011
Posts: 415
Likes: 1
From: 775 Reno Nevada
Got the trail gear super metal studs in and torqued down.

Got the hubs all cleaned , greased and painted and back on the axle. Wheel spacers too.
On a side note - Been fighting a steering box leak. Thought for sure it was the seal where the steering shaft goes in. Took it apart and put in a new seal... Still leaks. Cleaned it off real good and let it sit , looks as if it's leaking from the part the seal goes into. It threads into the box and is leaking from the bottom. Must be a seal or o-ring behind that part. Hopefully can do it in the truck. Don't want to pull that box back apart. Guess I'll have to take the shaft back off and inspect behind that threaded in part that holds the seal.
Last edited by 775Toy; Mar 6, 2014 at 07:36 PM.
Mar 9, 2014 | 08:39 PM
#215
Thread Starter
Registered User
Joined: Dec 2011
Posts: 415
Likes: 1
From: 775 Reno Nevada
Got a good days work in today.
-Took steering box off and fixed leak ( as of now ) flushed out old fluid as well , filled with new ATF
-Stabbed the axle under the truck
-bled the brakes
-installed front vent and ran the breather up the firewall
-Cut off old bump stop pads on frame ( ford towers need to go there )
-chopped up more inner fender for the ford shock towers
-measured , measured and measured for the shock towers
-welded the towers in ( for the most part , still going to brace them )
-mounted one shock just for kicks
Will post pics tomorrow.
Mar 13, 2014 | 07:58 PM
#217
Thread Starter
Registered User
Joined: Dec 2011
Posts: 415
Likes: 1
From: 775 Reno Nevada
^ thanks Rustedyota .
Got some progress pics.
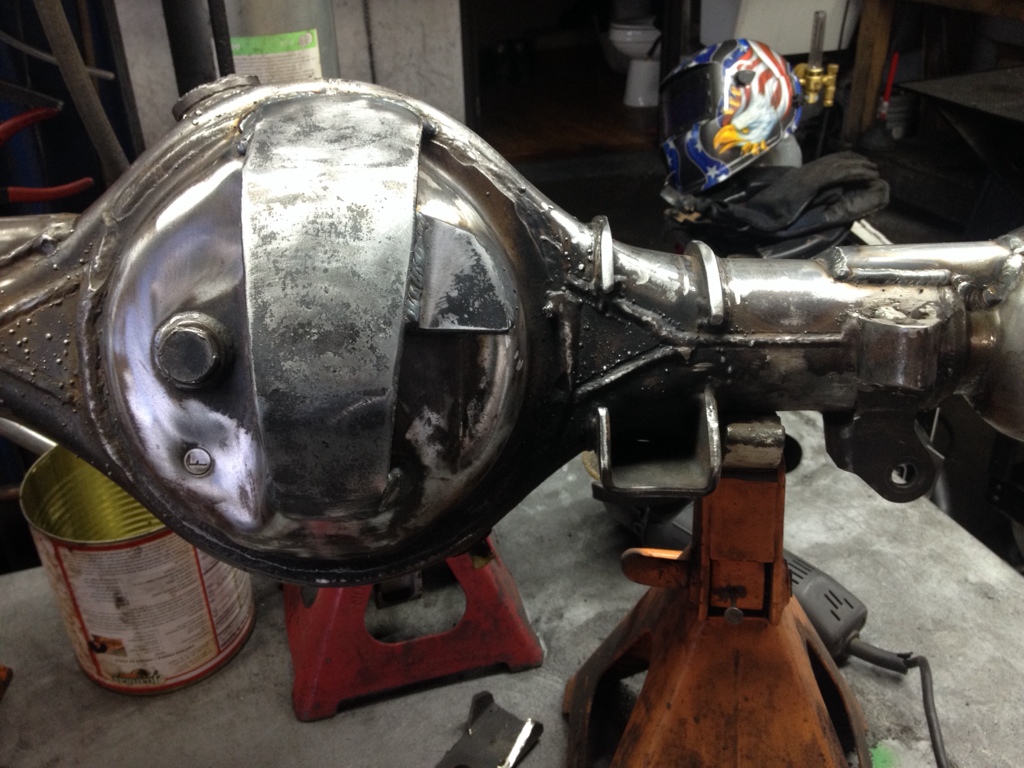
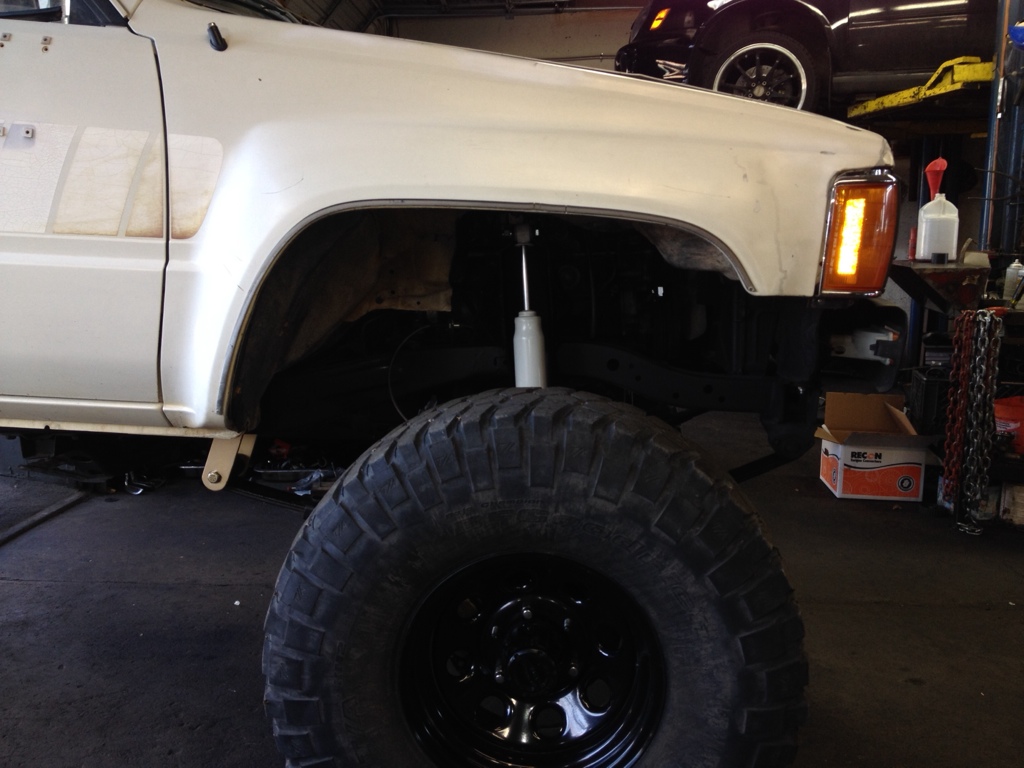
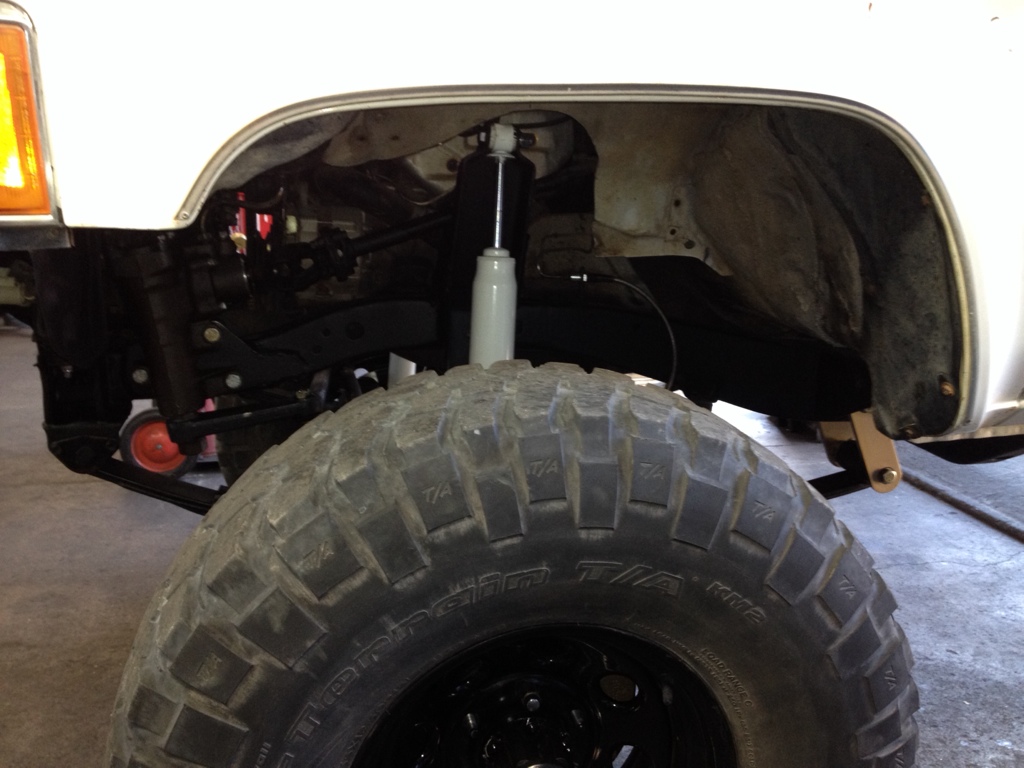
Axle back under. Drilling the perches and pushing axle forward worked out nice.
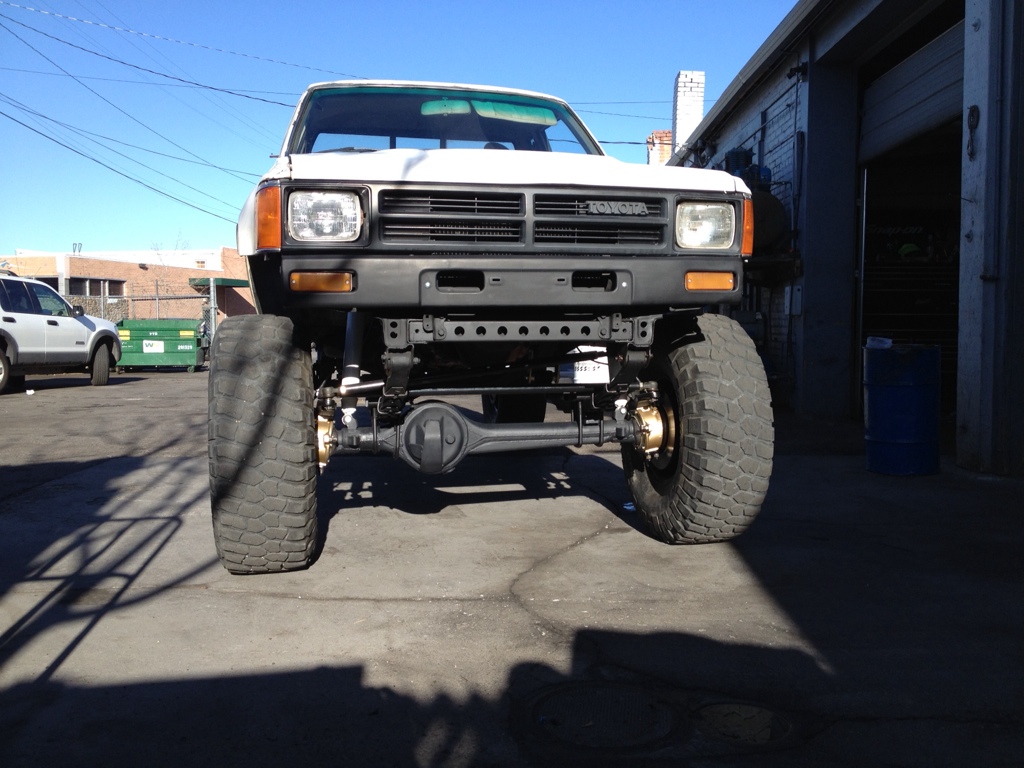

Welded in ford shock towers
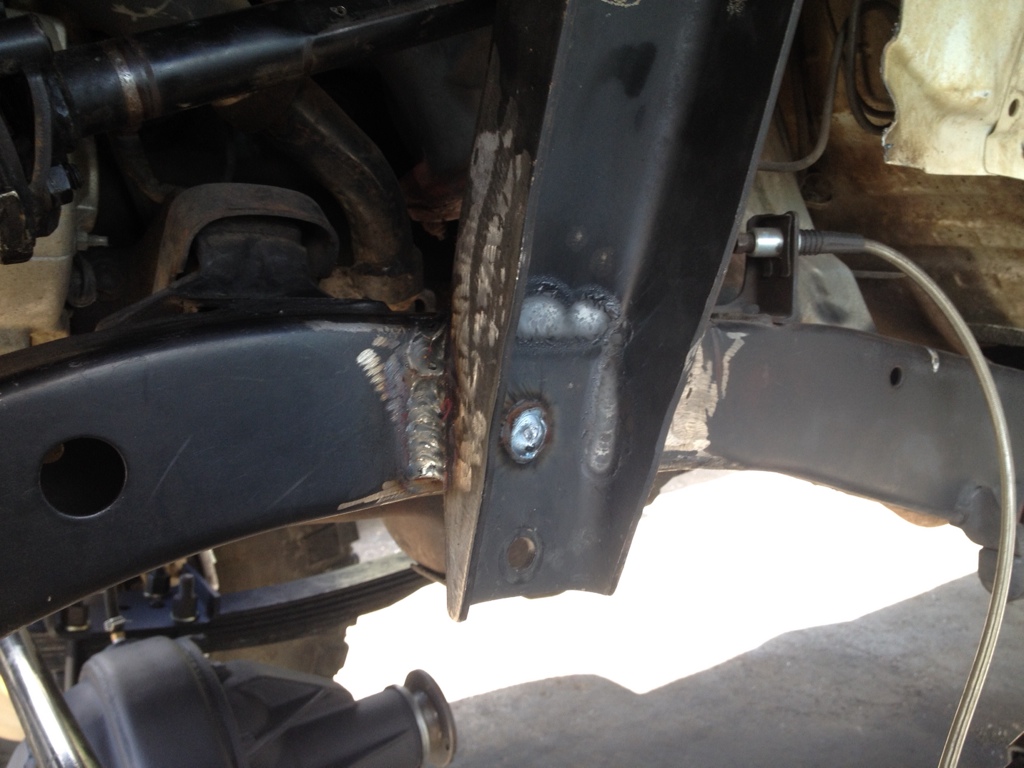
Backside if towers to frame
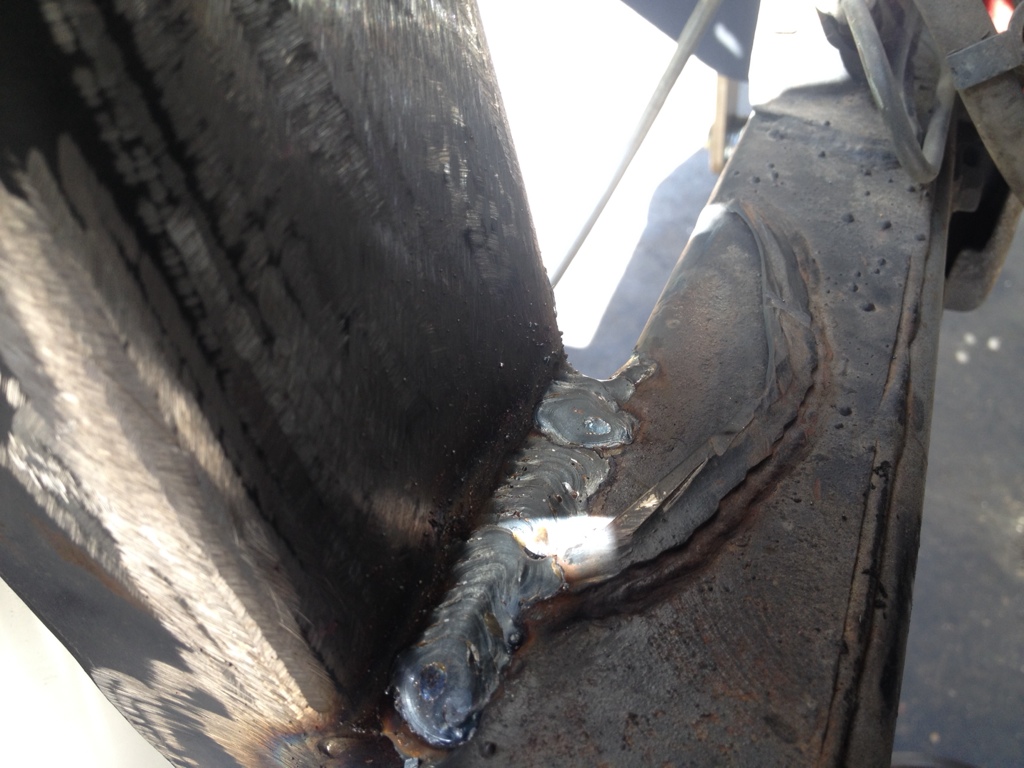
Built some 1/4" side plates & welded In to brace towers to top of frame.
All painted up along with all new hardware.
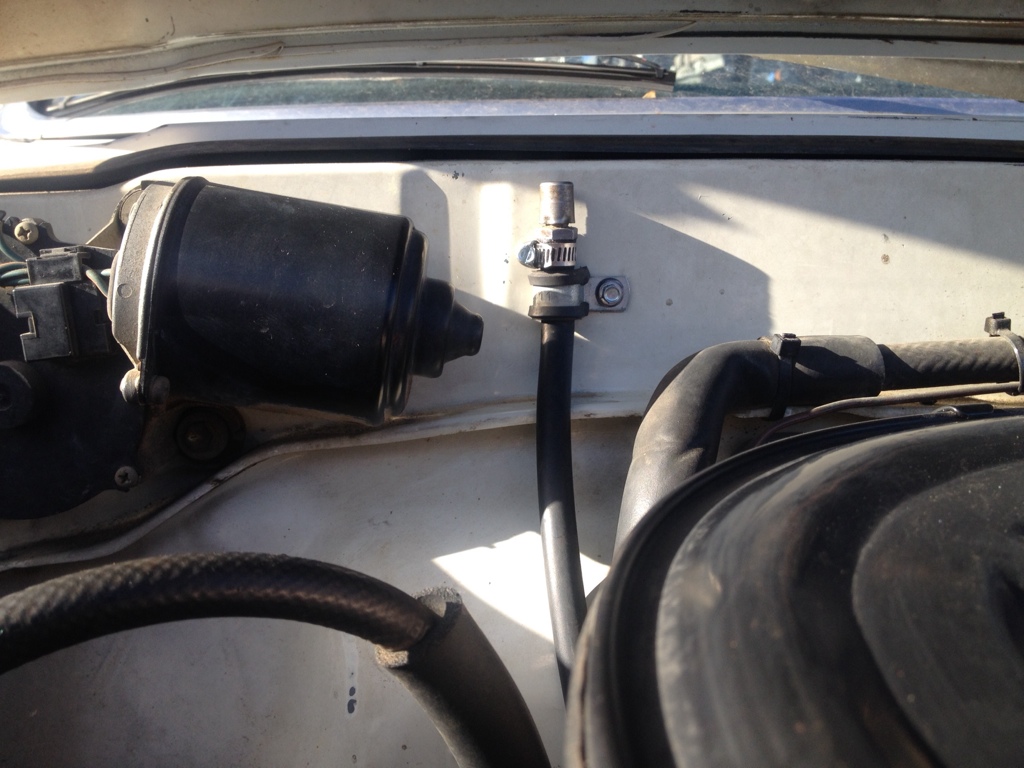
Ran the vent for front diff up the firewall
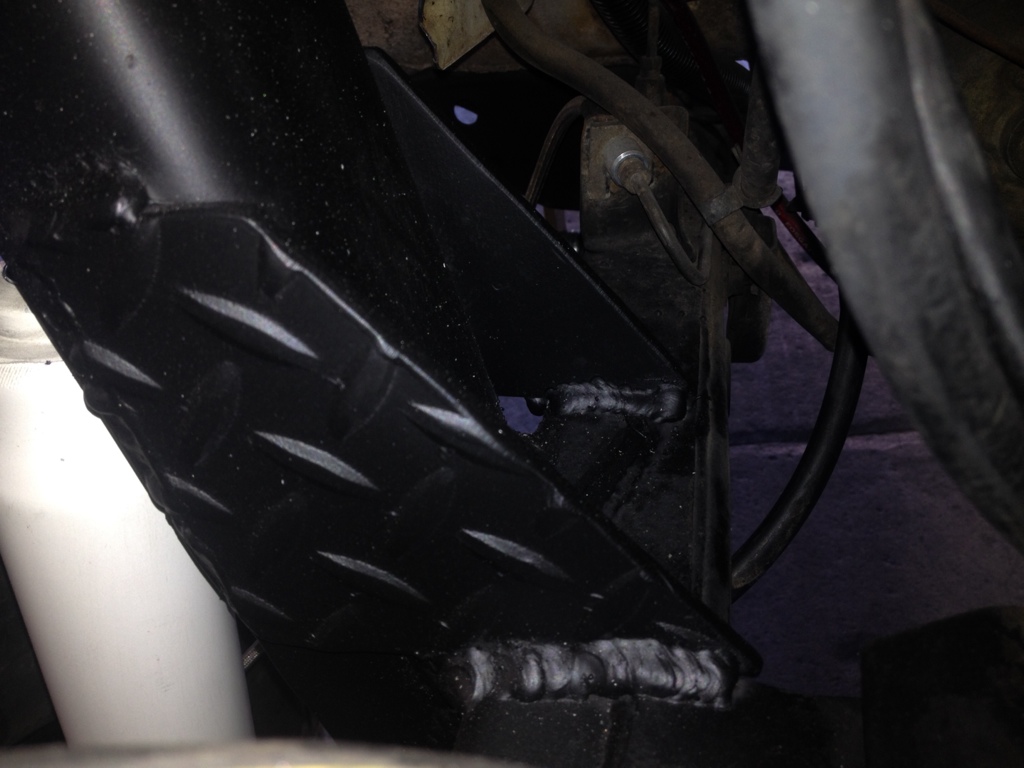
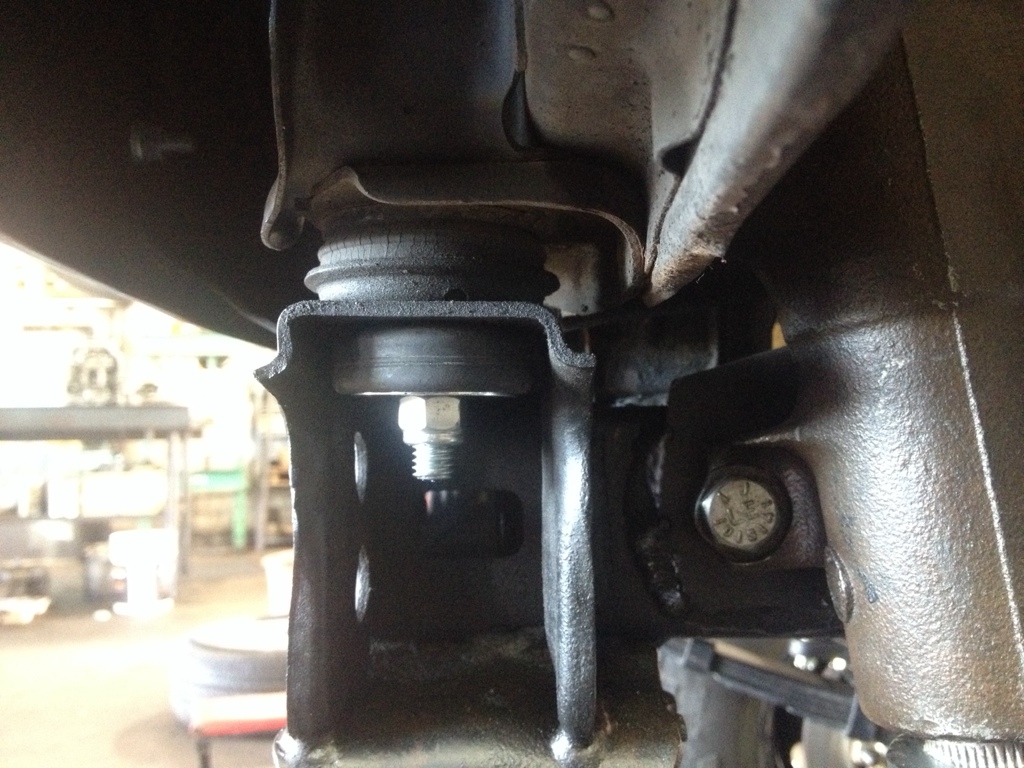
Added some new rubber & hardware to the front body mount.
Steering box leak fix seems to be holding , no leaks yet ( fingers crossed )
Got some progress pics.
Axle back under. Drilling the perches and pushing axle forward worked out nice.
Welded in ford shock towers
Backside if towers to frame
Built some 1/4" side plates & welded In to brace towers to top of frame.
All painted up along with all new hardware.
Ran the vent for front diff up the firewall
Added some new rubber & hardware to the front body mount.
Steering box leak fix seems to be holding , no leaks yet ( fingers crossed )
Last edited by 775Toy; Mar 13, 2014 at 08:02 PM.
Mar 14, 2014 | 07:37 AM
#220


Just finished reading through your thread. Love the build. Came a very long way from the first few pics of it in the field.
Im also curious on the ford shock towers. They look awfully close in resemblance to the stock towers on the 84-84 trucks. What year ford are they from?
Im also curious on the ford shock towers. They look awfully close in resemblance to the stock towers on the 84-84 trucks. What year ford are they from?


