
1985 4runner Build


 Mar 11, 2014 | 07:34 PM
#103
Thread Starter
Registered User
Joined: Apr 2013
Posts: 72
Likes: 0
From: St joe missouri
Another update
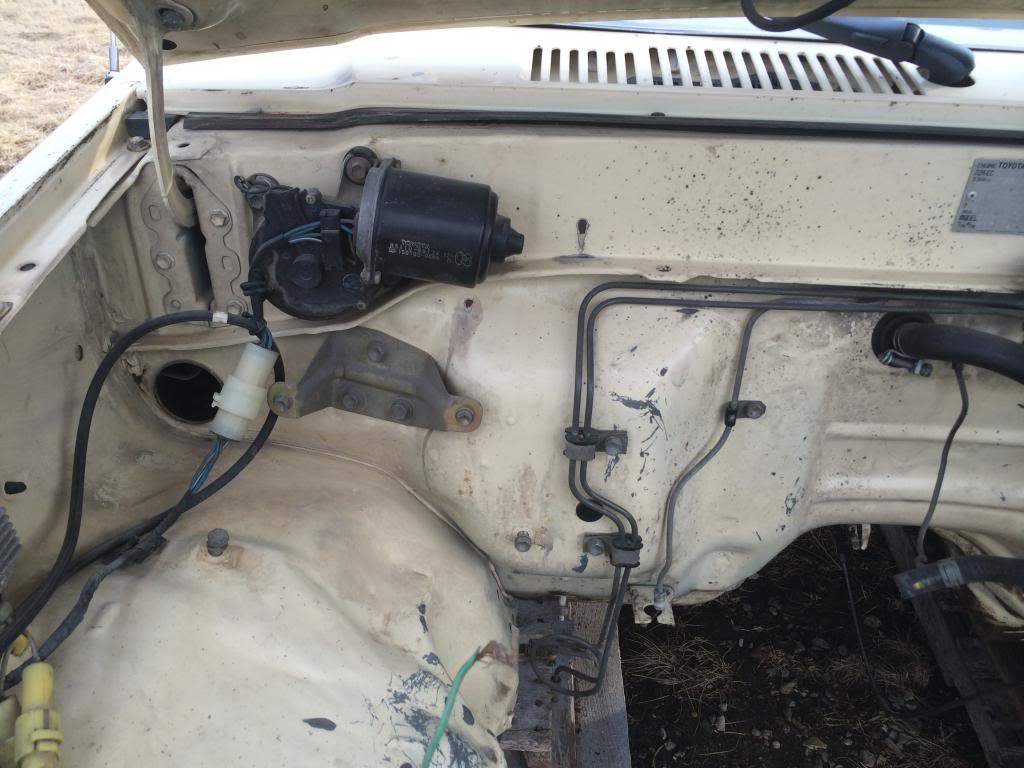
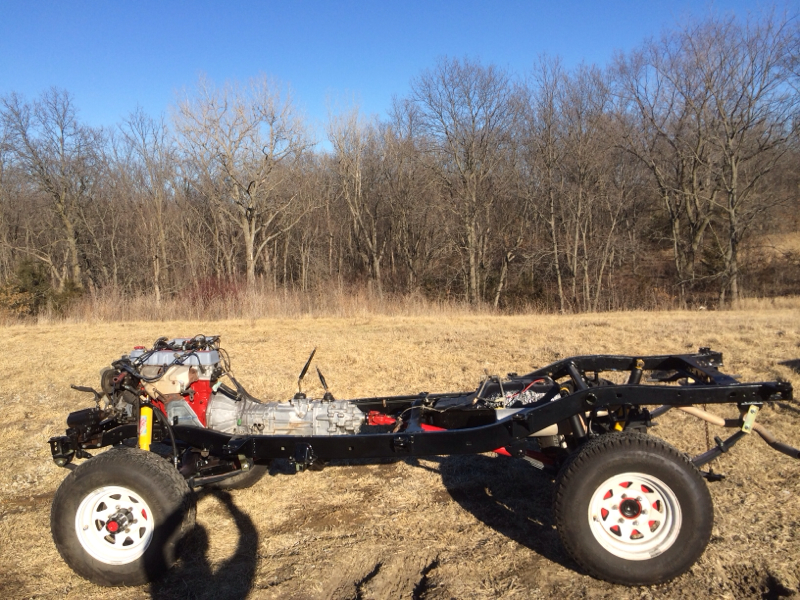
Sorry guys for not having a update in a while it has been to cold here to do anything outside. First we got everything on the frame and it is now ready to go back under the body. Then we started to work on the firewall. First thing we did was take everything off.

This is before we started to clean and take it apart.
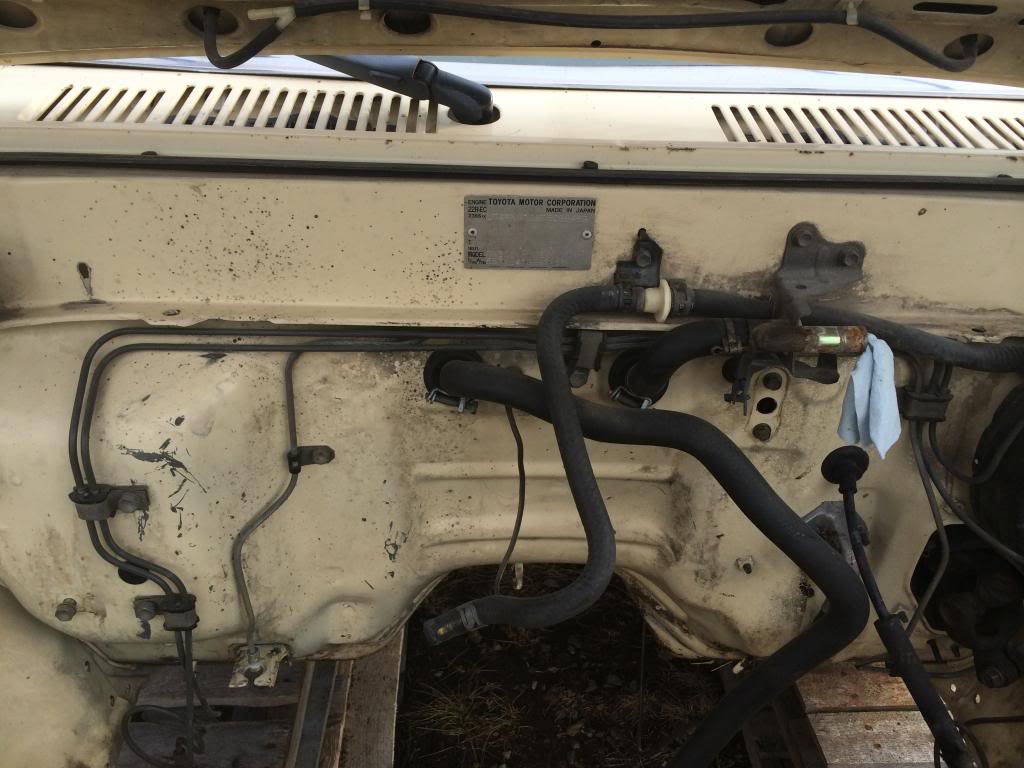


This was after it was wire wheeled and scrubbed.

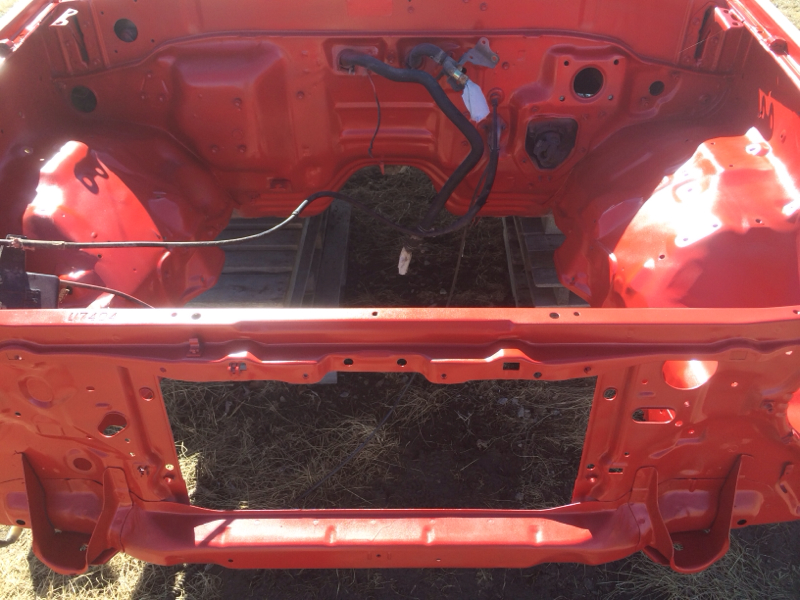
And this is after the primer was put on. I let that dry for a day then put the red paint on.
I will upload some pictures of it finished sometime soon. Next time I do an update i am hoping it will be the body being put on the frame. And that is all for now I have will have another update soon. Hopefully.
This is before we started to clean and take it apart.
This was after it was wire wheeled and scrubbed.
And this is after the primer was put on. I let that dry for a day then put the red paint on.
I will upload some pictures of it finished sometime soon. Next time I do an update i am hoping it will be the body being put on the frame. And that is all for now I have will have another update soon. Hopefully.
Mar 11, 2014 | 09:29 PM
#104
Registered User
Joined: Dec 2012
Posts: 47
Likes: 0
From: colorado
Sorry guys for not having a update in a while it has been to cold here to do anything outside. First we got everything on the frame and it is now ready to go back under the body. Then we started to work on the firewall. First thing we did was take everything off.

This is before we started to clean and take it apart.


This was after it was wire wheeled and scrubbed.

And this is after the primer was put on. I let that dry for a day then put the red paint on.
I will upload some pictures of it finished sometime soon. Next time I do an update i am hoping it will be the body being put on the frame. And that is all for now I have will have another update soon. Hopefully.
This is before we started to clean and take it apart.
This was after it was wire wheeled and scrubbed.
And this is after the primer was put on. I let that dry for a day then put the red paint on.
I will upload some pictures of it finished sometime soon. Next time I do an update i am hoping it will be the body being put on the frame. And that is all for now I have will have another update soon. Hopefully.
Mar 12, 2014 | 04:30 AM
#105
Thread Starter
Registered User
Joined: Apr 2013
Posts: 72
Likes: 0
From: St joe missouri

 Mar 12, 2014 | 12:31 PM
#107
Thread Starter
Registered User
Joined: Apr 2013
Posts: 72
Likes: 0
From: St joe missouri
Thanks. It took a little bit of work to get it their but it better now that it has some fresh paint in their.
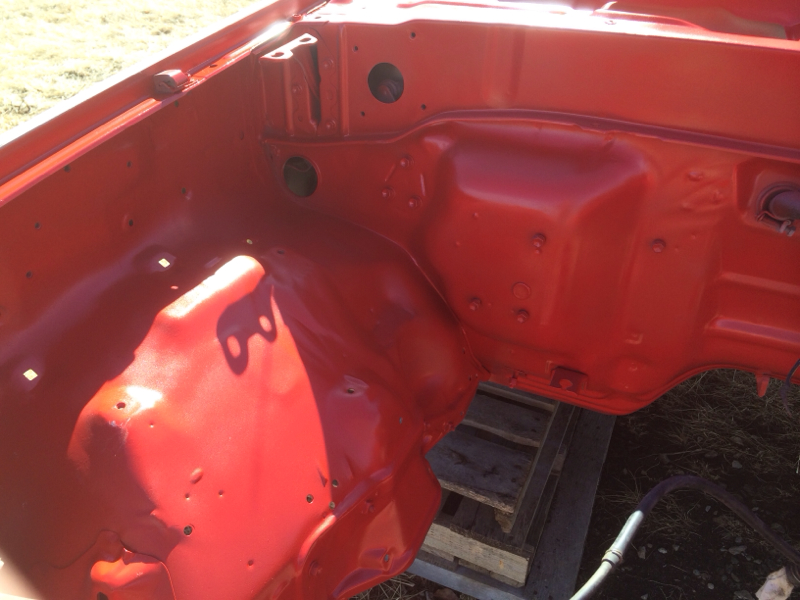
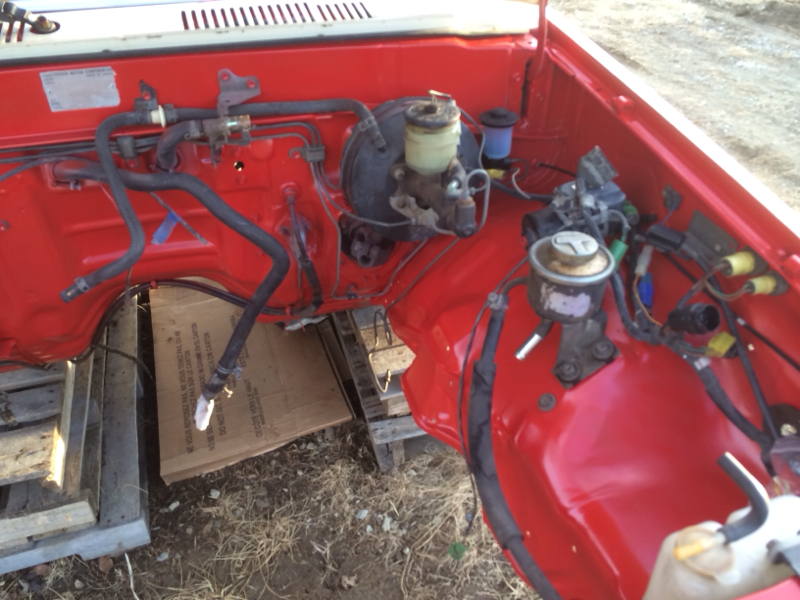
Here are some pictures of it finished and painted.
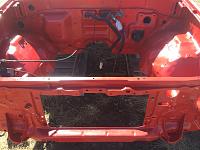


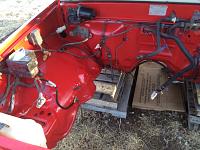
We also got some of the brake and fuel lines attached so it is all ready for the body to go on the frame.
Here are some pictures of it finished and painted.


We also got some of the brake and fuel lines attached so it is all ready for the body to go on the frame.
Mar 12, 2014 | 08:14 PM
#108
Thread Starter
Registered User
Joined: Apr 2013
Posts: 72
Likes: 0
From: St joe missouri
Didn't do much today but we did change the fluids in both the diffs, transmission, and the transfer case.
I have a question for you guys. Do you guys know where I can get an adapter for brake lines? I am doin the lspv delete and I am usin the summit manual brake proportioning valve and I can't find an adapter for it. Also I need a plug for my brake lines
I have a question for you guys. Do you guys know where I can get an adapter for brake lines? I am doin the lspv delete and I am usin the summit manual brake proportioning valve and I can't find an adapter for it. Also I need a plug for my brake lines
Mar 13, 2014 | 07:12 PM
#109
Thread Starter
Registered User
Joined: Apr 2013
Posts: 72
Likes: 0
From: St joe missouri
Ok finally got some work done today here are some pictures to explain.
The frame before.
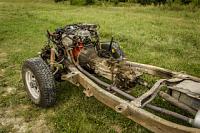
And after
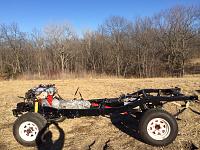
And here is the body goin on

It took about 5 hours of work just to get the body on. The reason it took so long is that we don't have the right stuff to lift it up so it took a while it also looks a lot hire with the old man emu 2 in suspension lift but I think it will settle a little.
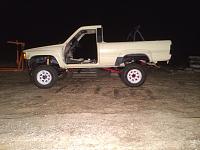
This is before the lift.
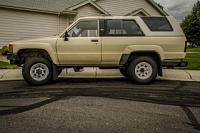
And this is after we had it done not very good picture but just had to get some quick pictures with my phone because we had worked into the dark.
I am goin to try to get it running this weekend as long as nothing goes wrong. That is all for now guys.
The frame before.

And after
And here is the body goin on

It took about 5 hours of work just to get the body on. The reason it took so long is that we don't have the right stuff to lift it up so it took a while it also looks a lot hire with the old man emu 2 in suspension lift but I think it will settle a little.
This is before the lift.

And this is after we had it done not very good picture but just had to get some quick pictures with my phone because we had worked into the dark.

I am goin to try to get it running this weekend as long as nothing goes wrong. That is all for now guys.
Mar 14, 2014 | 03:37 AM
#110

Registered User
Joined: Jan 2014
Posts: 283
Likes: 2
From: N. Shore MA
She'll settle a bit, plus you don't have the top on or interior in which will add some weight.
Amazing work!
Remind me - did y'all do work to the motor while you had the opportunity of it being out of the engine bay?
Amazing work!
Remind me - did y'all do work to the motor while you had the opportunity of it being out of the engine bay?
Mar 14, 2014 | 04:08 AM
#111
Thread Starter
Registered User
Joined: Apr 2013
Posts: 72
Likes: 0
From: St joe missouri
 Mar 14, 2014 | 05:01 AM
#112
Nice work buddy. I really like the final color of the engine bay! Amazing work and patience you have with this build.
I should come down and check it out. You are only about 70 miles from me!
I should come down and check it out. You are only about 70 miles from me!
Mar 15, 2014 | 08:51 PM
#114
Thread Starter
Registered User
Joined: Apr 2013
Posts: 72
Likes: 0
From: St joe missouri
Okay now time for an update. I am proud to announce that we have now got the engine to run. I will post a video of it soon. Now the only problem is the accelerator cable has broke so we can't drive it. But we rigged up something temporarily so we could test it out. It runs pretty good. Everything seems to be working fine right now. All of the fluids have been changed and nothing is leaking right now.
Mar 19, 2014 | 05:47 AM
#118
[QUOTE=Jacob13;52177283]Thanks and I also like the color. And you can come down whenever I would also like to see your 4runner.
I will have to make sure I take a trip down now that the warmer weather is coming.
I will have to make sure I take a trip down now that the warmer weather is coming.
Mar 19, 2014 | 07:18 AM
#119
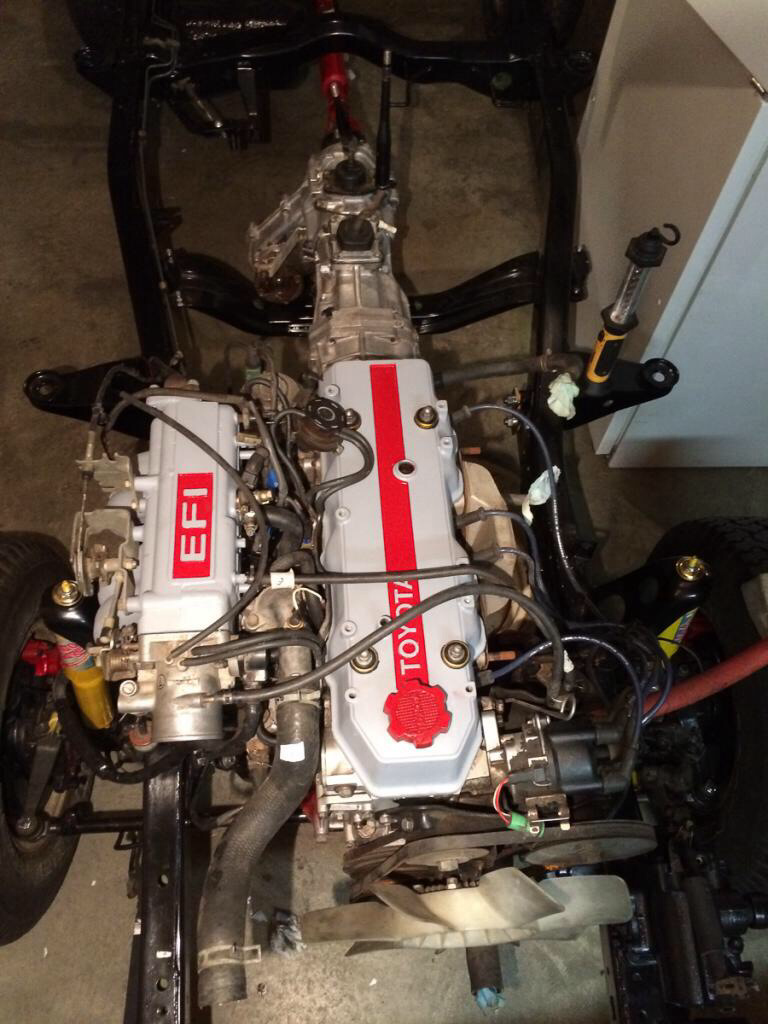
Man I love that red highlighting on the plenum and valve cover. I've gotta do something similar to mine and soon! Glad to see she started right up. Seems a little ticky though. Need to adjust your lifters maybe? Could be just how its coming through on the video though.
Mar 20, 2014 | 05:01 AM
#120
Thread Starter
Registered User
Joined: Apr 2013
Posts: 72
Likes: 0
From: St joe missouri
Thanks man.
Thanks and I am glad I could inspire someone. Yea grizler it is starting to get nice outside now all it needs to do is stay nice.
Thanks. I thought it turned out pretty good. And could you explain a little bit more on the lifters. I don't know that much about motors but I am learning.
Man I love that red highlighting on the plenum and valve cover. I've gotta do something similar to mine and soon! Glad to see she started right up. Seems a little ticky though. Need to adjust your lifters maybe? Could be just how its coming through on the video though.


