
JustDSM's '83 SR5 Build up Thread
 Feb 15, 2011 | 09:07 PM
#21
Registered User
Joined: Aug 2009
Posts: 176
Likes: 1
From: San Diego
Great work man! reminds me of restoring my '83, also terra cotta over beige/brown! If you need spray paint for any of the interior let me know, (head liner, door panels ect I've matched them all. good luck tony
Feb 16, 2011 | 04:00 PM
#24
Registered User
Joined: Jul 2010
Posts: 81
Likes: 0
From: Delmarva
I saw that truck on ebay and was tempted to bid. I like what you're doing with it and it's looking good!
Please post pics when you get the carpet installed. I'm looking to do the same thing once it gets warmer


 Feb 17, 2011 | 05:51 AM
#26
Thread Starter
Registered User
Joined: Dec 2006
Posts: 383
Likes: 0
From: Las Cruces, NM
Thanks for your offer on the paint Tony. If the need arises I'll certainly keep you in mind.
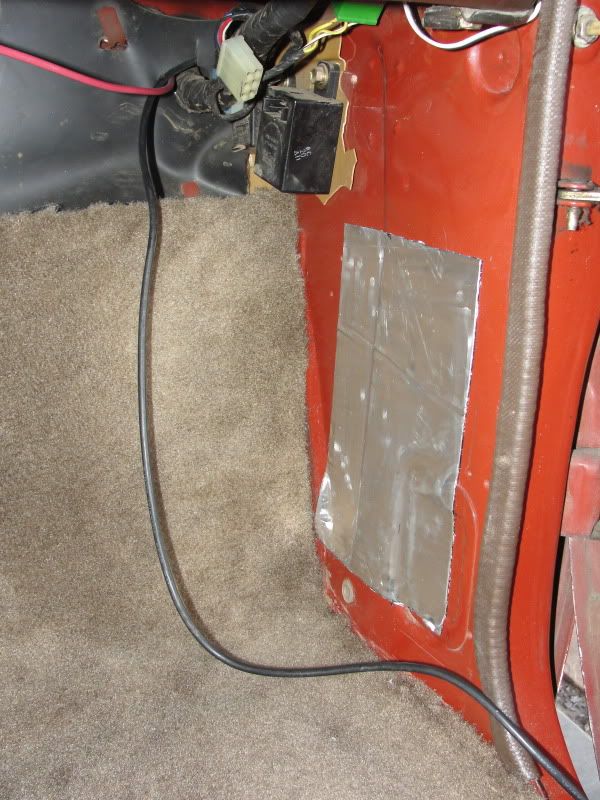
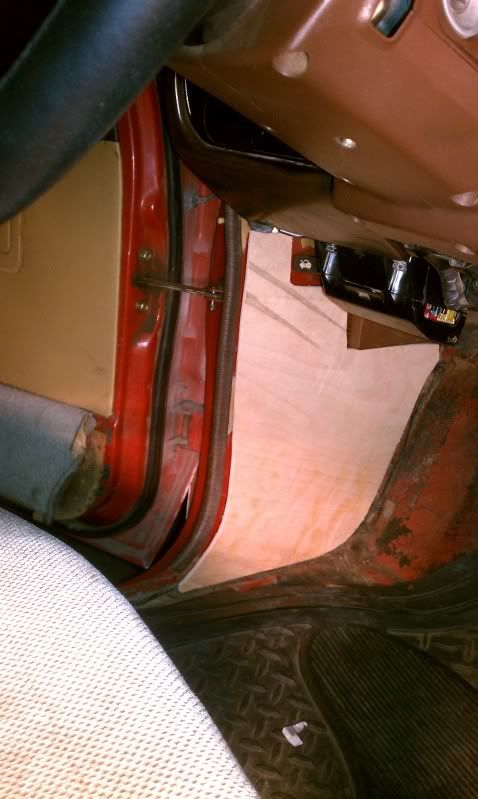
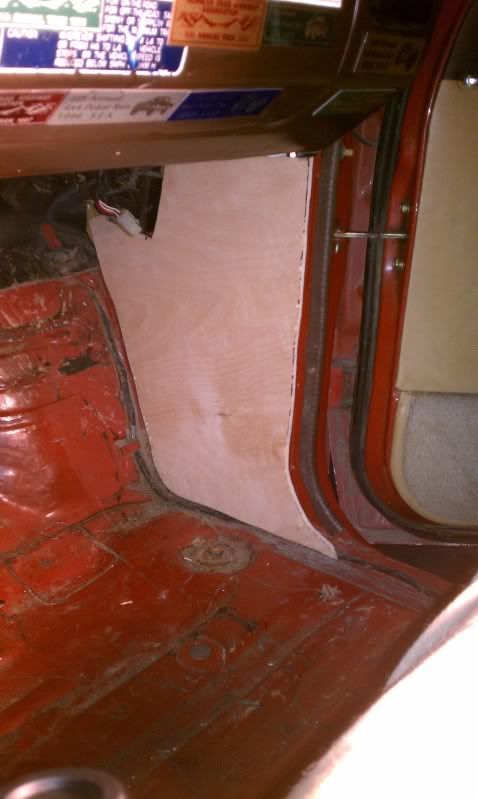
Regarding the sound-proofing material I'm using.. You guys will probably laugh.. But it's actually a Lowe's product called "Peel & Seel". It's a asphault based mat with an aluminum backing almost identical to the "Dynamat" product. While not EXACTLY that of Dynamat or similar products, it's functionality is 90% or better for probably less than 50% of the cost. This stuff works extremely well and you can find quite a bit of video on YouTube on this stuff (mostly stereo related). This combined with the mass-backed carpet kit I ordered should really keep noise out of the cabin. I can say that it's done wonders for thus far.
So far I've used up just about 3 rolls of the Peel & Seel. I've covered the rear cab, the transmission tunnel, floorboards (under the seats), the passenger-side footwell as well as both doors. Still have the drivers footwell to do do..
My local Lowe's has the 6"x25' roll for $17 and change. Much cheaper than the $65 for 12sq/ft of Dynamat.
On another note.. Got my LC Engineering header installed yesterday. Zero fitment problems! Also got a quicky exhaust mocked up that'll allow me to drive around until I can get something more perm. installed/fabricated. I was quite pleased with this USA built product, especially since it carries a CARB E.O. #!
More work needs to be done.. Keep you guys posted! Thanks for the comments. I hope you all enjoy the work.
Feb 17, 2011 | 06:34 AM
#27
Registered User
Joined: Jul 2010
Posts: 81
Likes: 0
From: Delmarva
Thanks for the tip on the "peel & seel"! I've been looking at various sound deadening materials like Dynamat and Eastwood's Thermo-Coustic material, but both cost a we bit more coin than I would like to spend. If it's comparable to Dynamat like you said, I'll have to give it a shot. 
I'd also be interested in hearing how you like the quality and fitment of that carpet from Stock Interiors with the mass backing. Seems like the way to go. I'll have to get some samples and see if I can find something that will go with the beige/tan interior of the banana
I'd also be interested in hearing how you like the quality and fitment of that carpet from Stock Interiors with the mass backing. Seems like the way to go. I'll have to get some samples and see if I can find something that will go with the beige/tan interior of the banana
Feb 17, 2011 | 06:47 AM
#28
Thread Starter
Registered User
Joined: Dec 2006
Posts: 383
Likes: 0
From: Las Cruces, NM
Thanks for the tip on the "peel & seel"! I've been looking at various sound deadening materials like Dynamat and Eastwood's Thermo-Coustic material, but both cost a we bit more coin than I would like to spend. If it's comparable to Dynamat like you said, I'll have to give it a shot.
I'd also be interested in hearing how you like the quality and fitment of that carpet from Stock Interiors with the mass backing. Seems like the way to go. I'll have to get some samples and see if I can find something that will go with the beige/tan interior of the banana
I'd also be interested in hearing how you like the quality and fitment of that carpet from Stock Interiors with the mass backing. Seems like the way to go. I'll have to get some samples and see if I can find something that will go with the beige/tan interior of the banana
With the Peel & Seal you'll get the functionality of the Dynamat material without the pricetag. If it's something you're interested in, I would strongly recommend you browse YouTube and watch some of the videos with other using this product. I am confident that it would meet just about anyones needs without tacking on the heavy price tag.
I'll report back with the carpet. It looks like UPS is saying it should be here today. I'll document the ordeal with lots of pictures. I'm actually very excited to get carpet in this thing as the bare metal floor and now the shiney aluminum floor just aren't my idea of comfort..
 Feb 17, 2011 | 05:13 PM
#29
Thread Starter
Registered User
Joined: Dec 2006
Posts: 383
Likes: 0
From: Las Cruces, NM
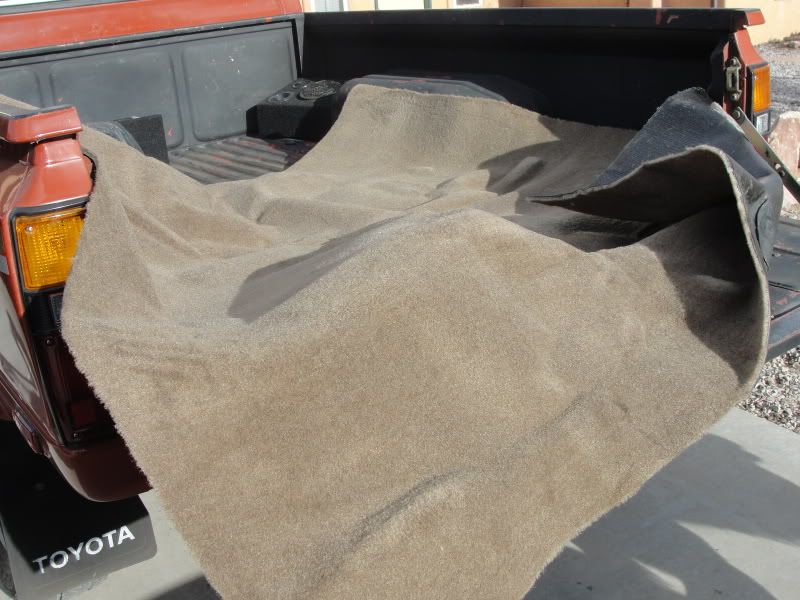
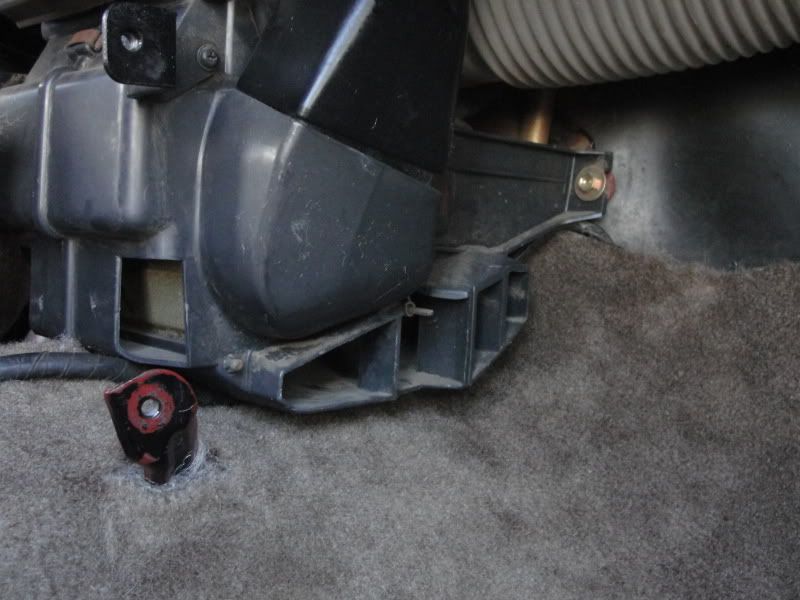
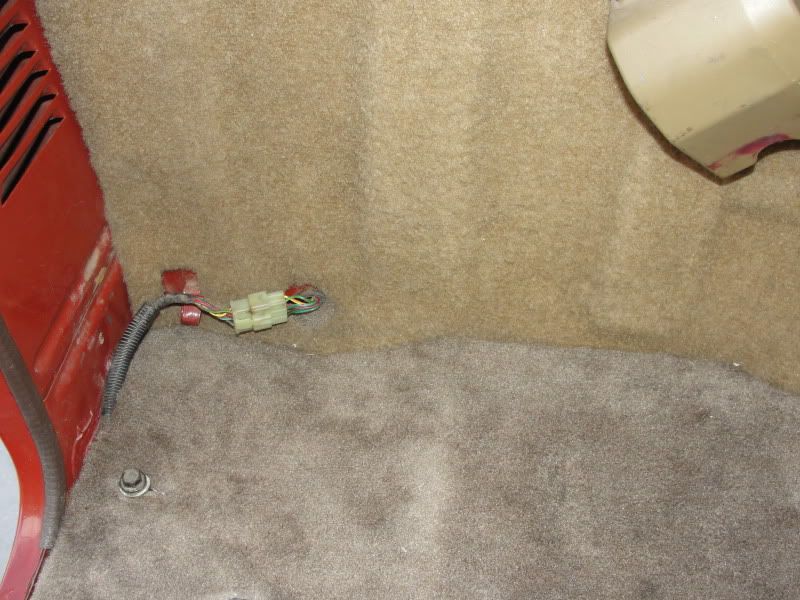
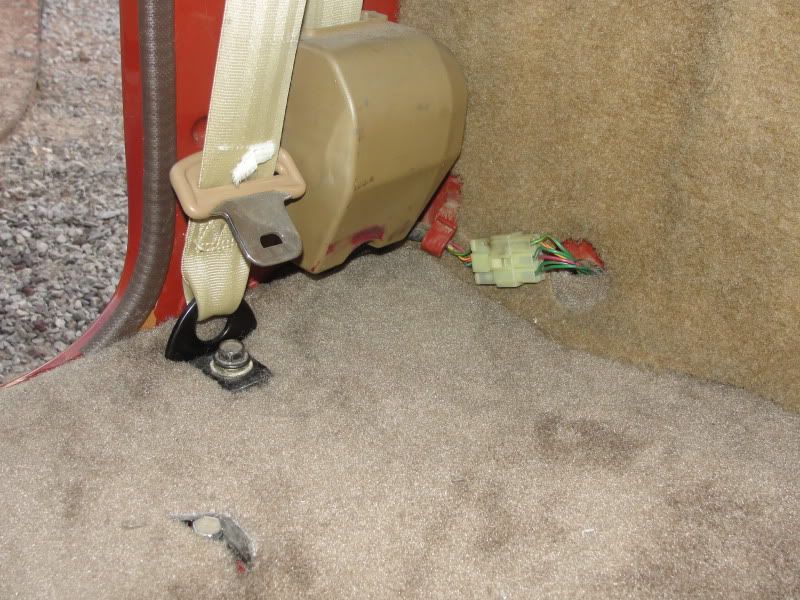
Carpet arived today! Put in a little work getting it trimmed up and fitted.
I would give the Stock Interiors Mass-Backed carpet a solid 8.5 out of 10.
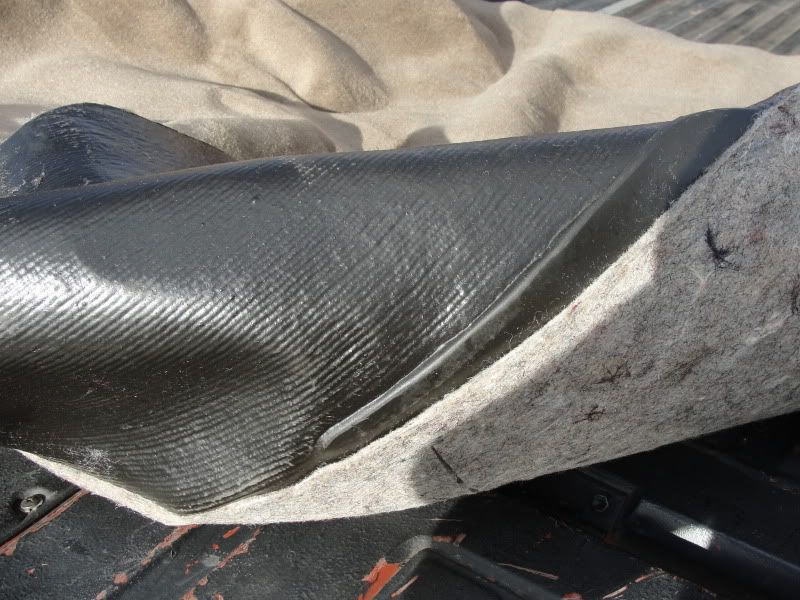
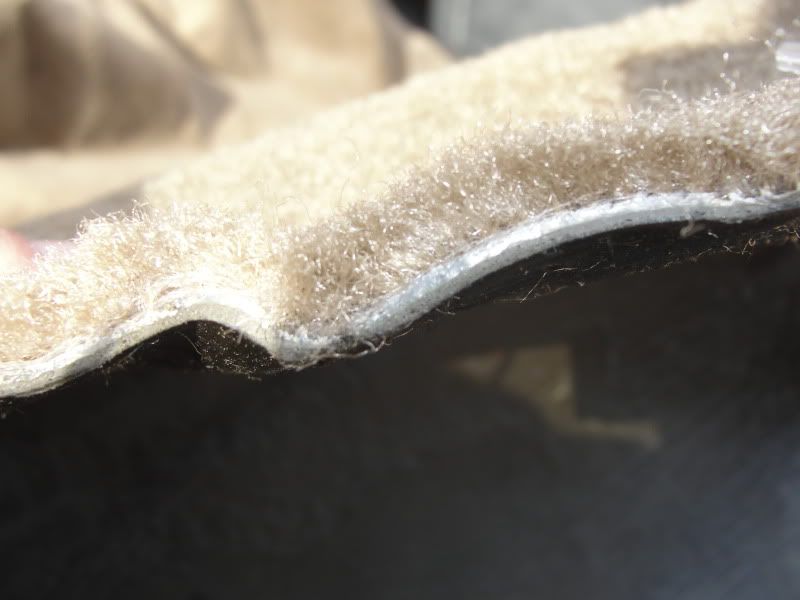
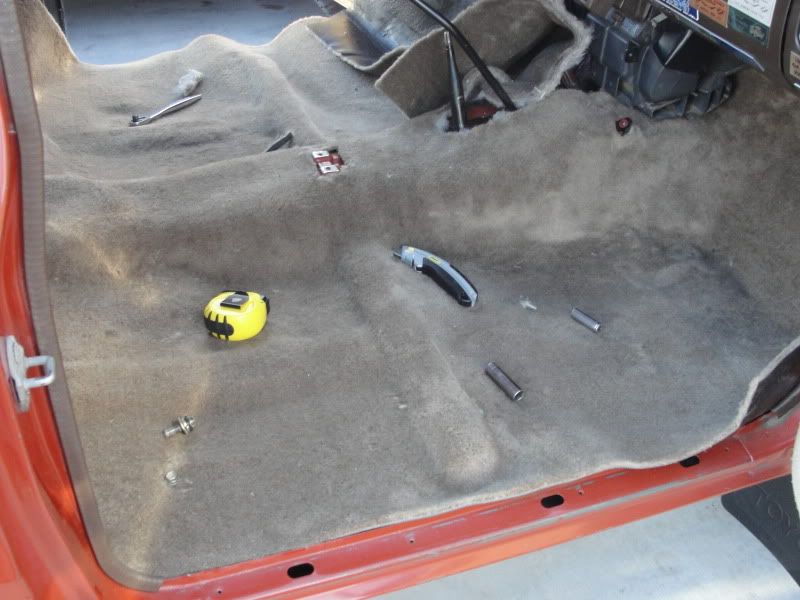
The install was a chore to say the least.. Stock Interiors suggests you take the new carpet and lay it over the original to mark the cuts and locations to cut.. Well, I didn't have a stock carpet, so I had to try to immediately stuff it in the truck, and let me tell you... They sure give you some extra carpet to work with cause I could barely get it to fit.. I started with the rear end of the cab as there was little obstruction and I was able to get it trimmed down so I could better manage the rest of the carpet.. The biggest trouble area was the transmission tunnel. The shifters really made things difficult and caused me to make a bad cut.. Well I can't blame the shifters.. But rather I should have measured twice, measured again, and then cut.. But I just measured and cut.. And I made a costly mistake.. I'm not too bent out of shape about it though, as I'll be making a custom center console which will cover this area. But it still was a bit upsetting. Overall I think the job came out rather well.. The passenger side I think came out flawless.. I'm quite impressed with how this carpet feels and how well it quiets things down. I think it's a great upgrade! But dont just start cutting away.. Be patient with your install and I think anyone would be happy.
Areas of improvement for the carpet:
- Better mold of the floorpan. More defined creases would be helpful in position the carpet properly to start the trimming process.
- Maybe trim the edges a little closer to the final cuts
- Pre-cut a basic hole for the shifters! This would aid GREATLY in positioning the carpet properly. And as they say the carpet is based off the actual floorboard, they'd know where those are.. Just a simple slit would suffice.
Well here's some pics of the process:

I would give the Stock Interiors Mass-Backed carpet a solid 8.5 out of 10.
The install was a chore to say the least.. Stock Interiors suggests you take the new carpet and lay it over the original to mark the cuts and locations to cut.. Well, I didn't have a stock carpet, so I had to try to immediately stuff it in the truck, and let me tell you... They sure give you some extra carpet to work with cause I could barely get it to fit.. I started with the rear end of the cab as there was little obstruction and I was able to get it trimmed down so I could better manage the rest of the carpet.. The biggest trouble area was the transmission tunnel. The shifters really made things difficult and caused me to make a bad cut.. Well I can't blame the shifters.. But rather I should have measured twice, measured again, and then cut.. But I just measured and cut.. And I made a costly mistake.. I'm not too bent out of shape about it though, as I'll be making a custom center console which will cover this area. But it still was a bit upsetting. Overall I think the job came out rather well.. The passenger side I think came out flawless.. I'm quite impressed with how this carpet feels and how well it quiets things down. I think it's a great upgrade! But dont just start cutting away.. Be patient with your install and I think anyone would be happy.
Areas of improvement for the carpet:
- Better mold of the floorpan. More defined creases would be helpful in position the carpet properly to start the trimming process.
- Maybe trim the edges a little closer to the final cuts
- Pre-cut a basic hole for the shifters! This would aid GREATLY in positioning the carpet properly. And as they say the carpet is based off the actual floorboard, they'd know where those are.. Just a simple slit would suffice.
Well here's some pics of the process:
Feb 17, 2011 | 05:50 PM
#30
Regarding the sound-proofing material I'm using.. You guys will probably laugh.. But it's actually a Lowe's product called "Peel & Seel". It's a asphault based mat with an aluminum backing almost identical to the "Dynamat" product. While not EXACTLY that of Dynamat or similar products, it's functionality is 90% or better for probably less than 50% of the cost. This stuff works extremely well and you can find quite a bit of video on YouTube on this stuff (mostly stereo related). This combined with the mass-backed carpet kit I ordered should really keep noise out of the cabin. I can say that it's done wonders for thus far.
So far I've used up just about 3 rolls of the Peel & Seel. I've covered the rear cab, the transmission tunnel, floorboards (under the seats), the passenger-side footwell as well as both doors. Still have the drivers footwell to do do..
My local Lowe's has the 6"x25' roll for $17 and change. Much cheaper than the $65 for 12sq/ft of Dynamat.
.
Thanks for the tip on the "peel & seel"! I've been looking at various sound deadening materials like Dynamat and Eastwood's Thermo-Coustic material, but both cost a we bit more coin than I would like to spend. If it's comparable to Dynamat like you said, I'll have to give it a shot.
Feb 17, 2011 | 06:23 PM
#31
Thread Starter
Registered User
Joined: Dec 2006
Posts: 383
Likes: 0
From: Las Cruces, NM
You're welcome you guys!
I am really pleased with how it's worked in my '83 thus far. The key is to the surface prep. Clean everything really good, and then wipe it all down with alcohol or similar. Heat the surface with a hair dryer or heat gun, and also keep the Peel & Seal warm, and when you lay it down, work it into the nooks and crannies as you lay it down.. Use something to roll it down and fit it up against every sq/cm of material.
Post up some pics of your applicatoin of it!
Feb 19, 2011 | 05:33 AM
#33
good pointers, I wonder if throwing the roll in the oven on low heat would work for heating the roll...
Feb 19, 2011 | 07:53 AM
#34
Thread Starter
Registered User
Joined: Dec 2006
Posts: 383
Likes: 0
From: Las Cruces, NM
Thats actually what I did! I also used the handle end of a screwdriver (with rounded end) to really work it in the tight areas.. That's worth mentioning as well.
I also used the handle end of a screwdriver (with rounded end) to really work it in the tight areas.. That's worth mentioning as well.
Last edited by JustDSM; Feb 19, 2011 at 07:54 AM.
Mar 1, 2011 | 09:07 AM
#36
Registered User

Joined: Oct 2009
Posts: 270
Likes: 0
From: West Texas
Cool looking truck! Hope you keep it stock. There aren't too many like ours around anymore (at least not in this condition). I'm just down the road from you in west EP. Nice to see you restoring your 83. Check out my truck...Any questions or help just ask
https://www.yotatech.com/forums/f114...s-pics-198746/
https://www.yotatech.com/forums/f114...t-nice-197014/
https://www.yotatech.com/forums/f114...s-pics-198746/
https://www.yotatech.com/forums/f114...t-nice-197014/
Mar 6, 2011 | 12:56 PM
#38
Registered User
Joined: Jul 2010
Posts: 538
Likes: 6
From: Carson City
So, I flew out to Sacramento, CA early Saturday morning and picked up the truck.. Had lunch and dinner with a old friend who lives out that way. About 9PM Sat. evening I took and headed home.. Made it home Sunday around 6PM. Truck ran great! It's a bit noisey inside with no carpet and with the cracked exhaust manifold. Beyond that the drive was pretty fun, especially crusing around in a old truck.
So I've looked it over a little and I found that the rear brakes were dragging quite a bit. Eating up what little HP that truck makes, not to mention eating up gas or the wear on the brakes. The little jingle/rattle I heard was just the differential dust shield seperating from the flange.
So I ordered up a header, and some other goods from LC Engineering, Marlin Crawler to get things fixed up just right. Picked up some items to rebuild the rear end (bearings and seals). Figured while I was in there I'd give the brakes a once over and see if any damage occured from the rear pads being dragged for god knows how long.
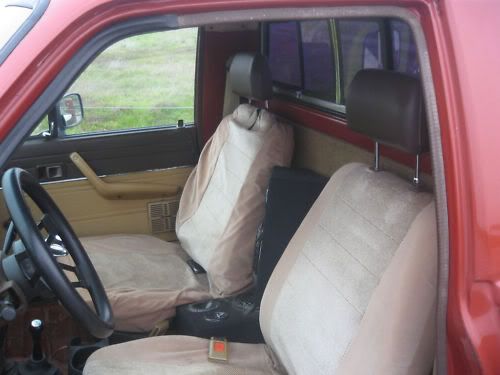
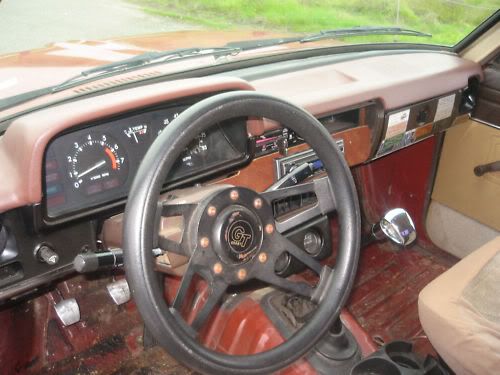
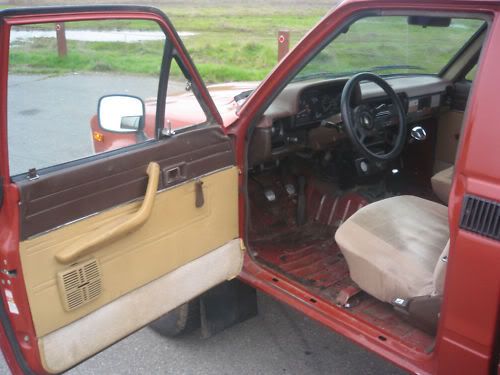
Well, now I've been itching to get the interior up to par. The dash is full of rattles and some of the back lighting isn't working. Their is no carpet or center console. The seats are in poor shape, but are good enough for now. The Speedometer isn't working. I know that sounds like a boat-load of problems, but the interior really isn't too shabby, compared to other vehicles of this vintage.
So tonight I started the interior project by making some templets for some kick pannels I'll be making. I'll be making a pod to house some 5.25" speakers fiberglassed into the pannel. I spent an hour this evening getting the rough backing plate made. This weekend I'll see if I can't find some decent speakers to use for these and I can start molding the glass and get these things underway.
If not I'll get the cracked exhaust manifold replaced with the header, and get a exhaust fab'd up along with installing the other goodies I ordered. Not many pics yet, as I've mostly just been poking and prodding at the truck to determine what I want to do with it.. But this is the first "project" for the truck so here's a pic or two of the begining of my kick pannels. Not much to see yet..
And some of the interior as is:

So I've looked it over a little and I found that the rear brakes were dragging quite a bit. Eating up what little HP that truck makes, not to mention eating up gas or the wear on the brakes. The little jingle/rattle I heard was just the differential dust shield seperating from the flange.
So I ordered up a header, and some other goods from LC Engineering, Marlin Crawler to get things fixed up just right. Picked up some items to rebuild the rear end (bearings and seals). Figured while I was in there I'd give the brakes a once over and see if any damage occured from the rear pads being dragged for god knows how long.
Well, now I've been itching to get the interior up to par. The dash is full of rattles and some of the back lighting isn't working. Their is no carpet or center console. The seats are in poor shape, but are good enough for now. The Speedometer isn't working. I know that sounds like a boat-load of problems, but the interior really isn't too shabby, compared to other vehicles of this vintage.
So tonight I started the interior project by making some templets for some kick pannels I'll be making. I'll be making a pod to house some 5.25" speakers fiberglassed into the pannel. I spent an hour this evening getting the rough backing plate made. This weekend I'll see if I can't find some decent speakers to use for these and I can start molding the glass and get these things underway.
If not I'll get the cracked exhaust manifold replaced with the header, and get a exhaust fab'd up along with installing the other goodies I ordered. Not many pics yet, as I've mostly just been poking and prodding at the truck to determine what I want to do with it.. But this is the first "project" for the truck so here's a pic or two of the begining of my kick pannels. Not much to see yet..
And some of the interior as is:
Your interior looks like it's a good candidate for some Herculiner! I did the whole interior of my 4runner. It's durable and kills highway noise better than carpet and the tar mats. Here's my thread. Lots of other guys have done it.https://www.yotatech.com/forums/f116...emodel-218213/
Mar 6, 2011 | 03:08 PM
#39
Thread Starter
Registered User
Joined: Dec 2006
Posts: 383
Likes: 0
From: Las Cruces, NM
Thanks for the suggestion! However the interior is coming around and actually functioning as a cosy interior.. I need to get some pictures posted, but the '92 Honda Accord seats I've installed with the help of a friend (he's got the welder!) we fabricated some bracketry to use the factory sliding rails. Which was nice since I didn't have to cut/drill/tap any holes since they bolt into the factory locations.


