Diesel Swaps Diesel engines

Another OM617 Swap: 1998 Tacoma

Thread Tools
 
Search this Thread
 
Old 01-21-2013, 08:39 PM
  #1  
Registered User
Thread Starter
 
flatspeed's Avatar
 
Join Date: Jan 2013
Location: Pemberton, BC
Posts: 48
Likes: 0
Received 0 Likes on 0 Posts
Smile Another OM617 Swap: 1998 Tacoma

Hi all.

I managed to do this swap for under $2000 CDN including the truck, but it also took 8 months and i'm estimating over 150 hours to complete. For those that are trying to do this from scratch, you will need some serious discipline.

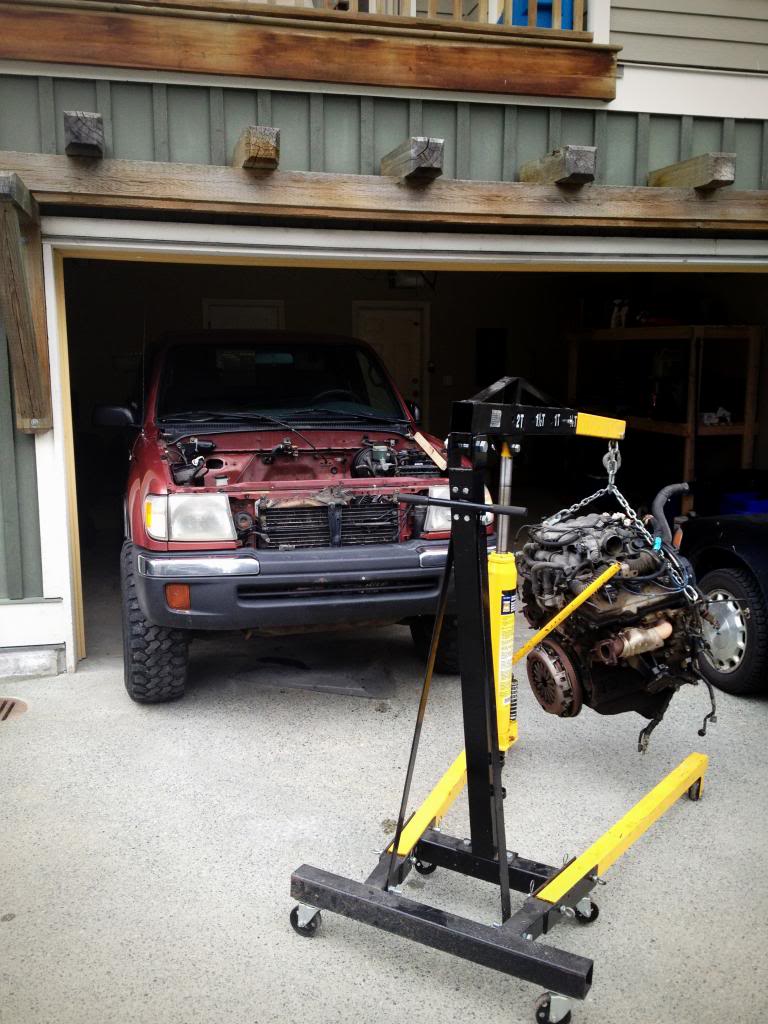
1998 Tacoma 4x4, the day I picked it up. Seller said it overheated and leaked its coolant everywhere, he wanted nothing to do with it and was asking $1000. I had cash in his hand within a few hours of him posting the ad, can't let deals like this get away right?

Name:  IMG_1458_zpsc3982378.jpg
Views: 3205
Size:  114.4 KB


EDIT: Nov , 2018 - How it sits now. The frame ended up rusting out, the engine still runs great!
(I'll leave this thread up for reference.)


Last edited by flatspeed; 11-07-2018 at 09:26 AM. Reason: clarity
Old 01-21-2013, 08:45 PM
  #2  
Registered User
Thread Starter
 
flatspeed's Avatar
 
Join Date: Jan 2013
Location: Pemberton, BC
Posts: 48
Likes: 0
Received 0 Likes on 0 Posts
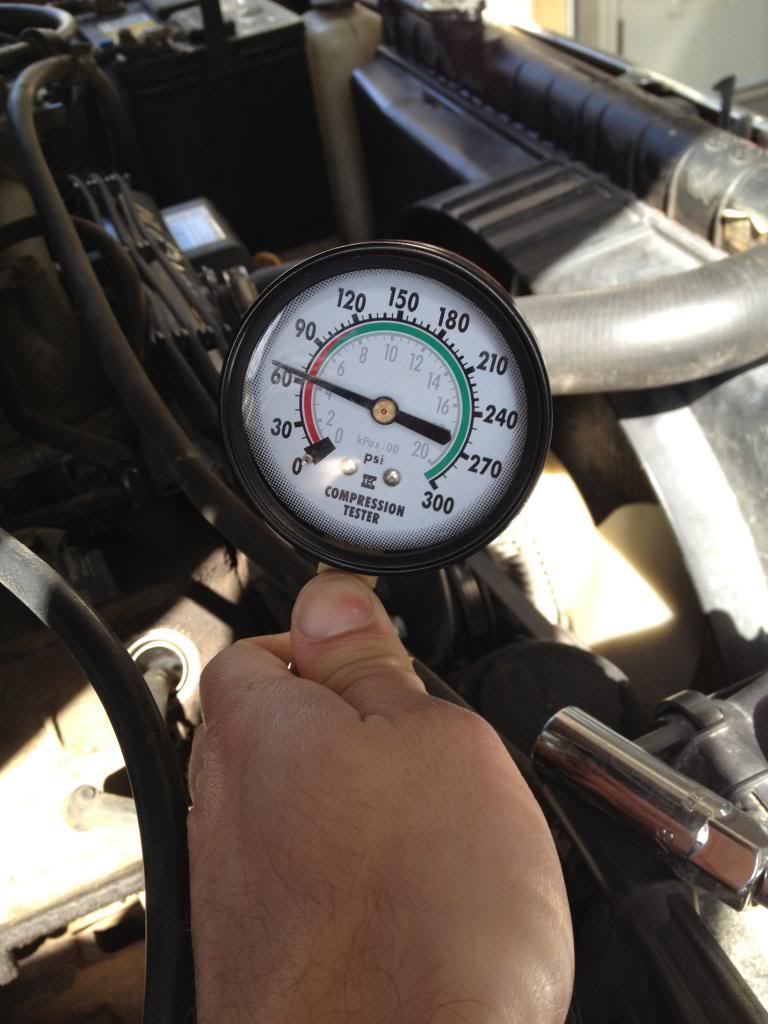
Towed it less than a km to my house, tried starting it for kicks, and it actually ran. Poor 5vzfe, good motors but this one was done. 4 out of 6 cylinders had poor compression. probably blew its hg between cylinders.

Name:  IMG_1471_zpse052072f.jpg
Views: 2635
Size:  76.7 KB

Pulled it out.

Name:  IMG_1569_zps24f8808f.jpg
Views: 2692
Size:  119.5 KB


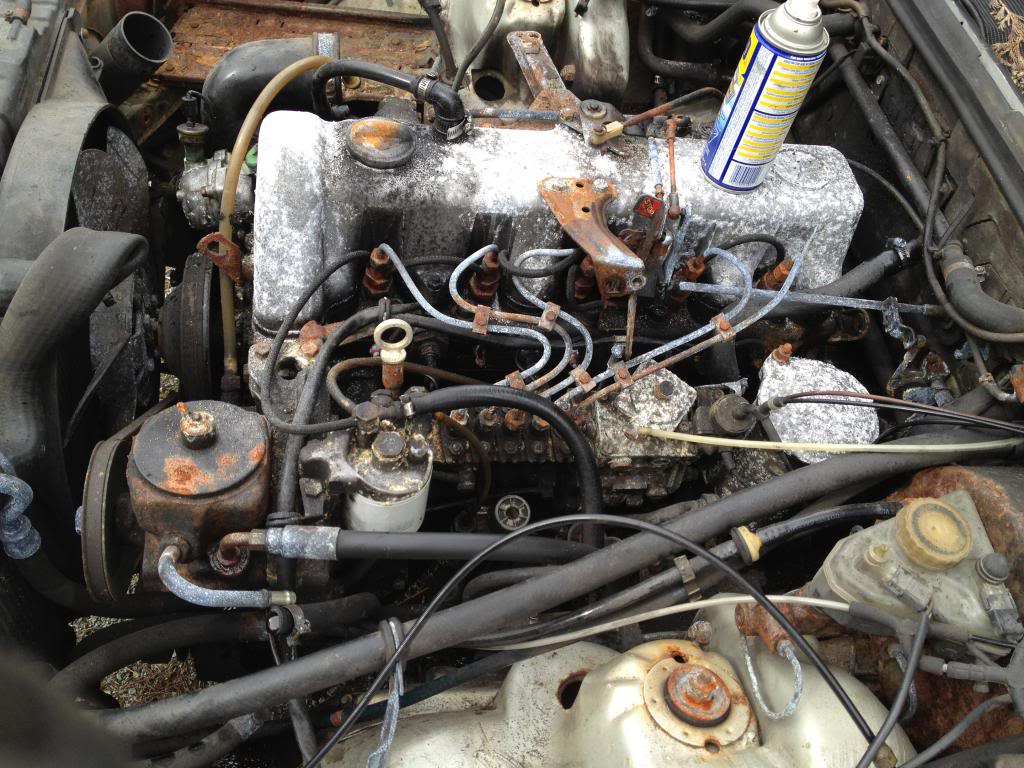
A friend of mine gave me the om617 out of his 300sd parts car, this saved me the cost of the motor. It was rough. Wasnt sure if it ran at this point but he drove it to his house, so apparently it did at one point.

Name:  IMG_1573_zps2019f830.jpg
Views: 3191
Size:  151.6 KB

Last edited by flatspeed; 11-07-2018 at 08:52 AM. Reason: clarity
Old 01-21-2013, 08:49 PM
  #3  
Registered User
Thread Starter
 
flatspeed's Avatar
 
Join Date: Jan 2013
Location: Pemberton, BC
Posts: 48
Likes: 0
Received 0 Likes on 0 Posts
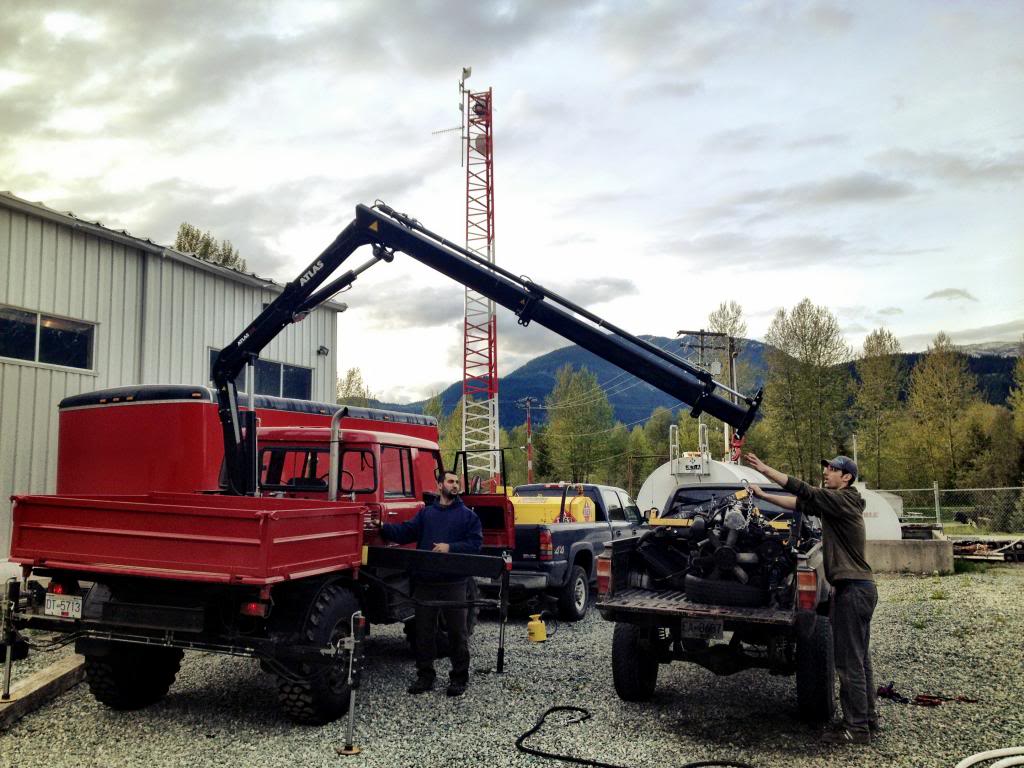
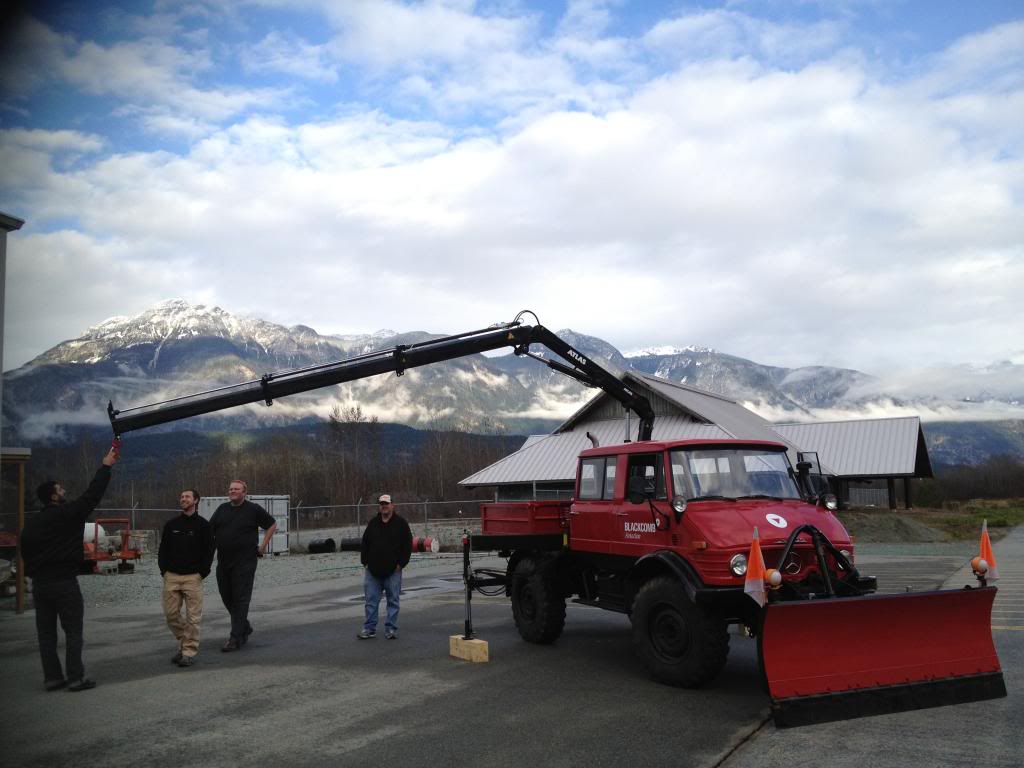
Big mercedes yanks the little mercedes engine out of my other truck. It's a 1980's unimog doka(4 door) diesel with a hiab crane, pretty cool work truck!

Name:  IMG_1585_zpsfd0131c4.jpg
Views: 2697
Size:  125.8 KB

And i'm too tired to post any more, so stay tuned
Old 01-21-2013, 09:18 PM
  #4  
Registered User
 
Discombobulated's Avatar
 
Join Date: Oct 2011
Location: Denver CO
Posts: 2,242
Received 215 Likes on 157 Posts
Holy Moses the unimog is freaking incredible!!!!! What a neat looking beast!!!
Old 01-22-2013, 07:08 PM
  #5  
Registered User
Thread Starter
 
flatspeed's Avatar
 
Join Date: Jan 2013
Location: Pemberton, BC
Posts: 48
Likes: 0
Received 0 Likes on 0 Posts
Originally Posted by Discombobulated
Holy Moses the unimog is freaking incredible!!!!! What a neat looking beast!!!
Yup its sweet,

Front view

Name:  IMG_1117_zps85320de1.jpg
Views: 2569
Size:  78.8 KB

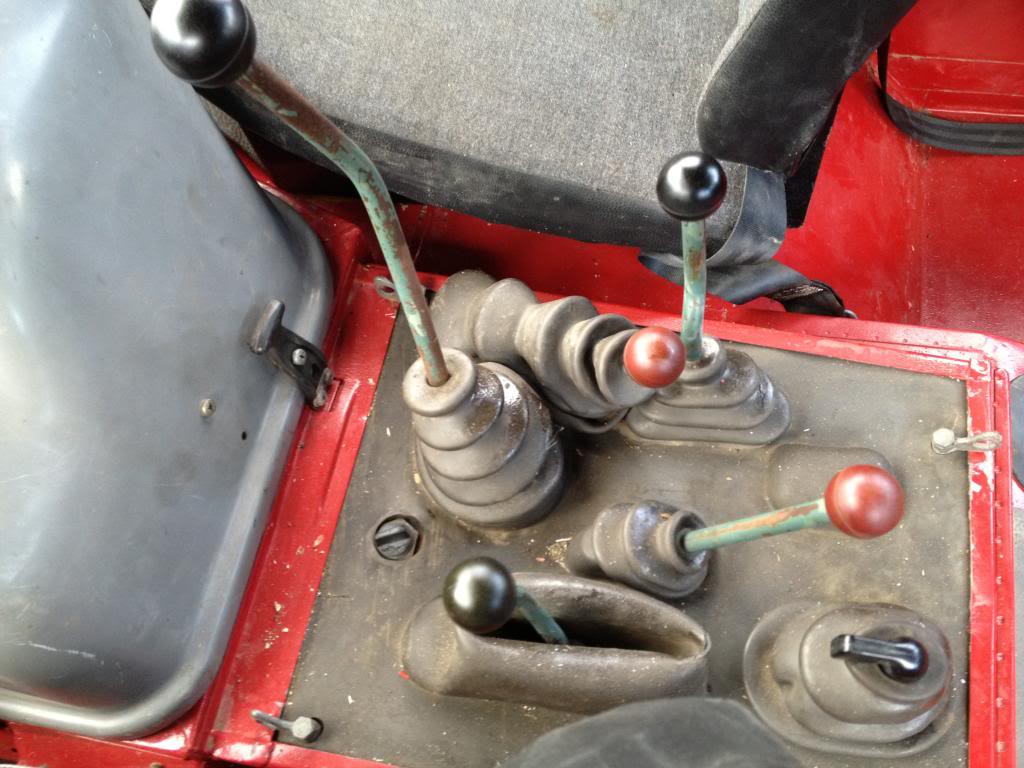
and check out the shifter setup,

Name:  IMG_1121_zpse74b7a91.jpg
Views: 2620
Size:  100.0 KB

The knobs are for front/rear PTO, gears 1-6, transfer case, high low and super low range, fwd/reverse select, and air locker. gears 1-2 are for crawling, 3-6 are for highway speeds, it tops out at 80kmh(50 mph), and will crawl so slow that you can barely notice its moving. no joke. also has a hand throttle thats out of view. I hope to incorporate something similar into the Tacoma.
Old 01-22-2013, 07:13 PM
  #6  
Registered User
Thread Starter
 
flatspeed's Avatar
 
Join Date: Jan 2013
Location: Pemberton, BC
Posts: 48
Likes: 0
Received 0 Likes on 0 Posts
So back to the Tacoma..

I welded plugs into the toyota flywheel, and redrilled to the mercedes crank pattern.

Name:  IMG_1908_zps5406bb88.jpg
Views: 2684
Size:  94.2 KB
Name:  IMG_1910_zps49fb91cc.jpg
Views: 2705
Size:  93.0 KB
Name:  IMG_1913_zps96a83fb6.jpg
Views: 2635
Size:  96.6 KB
Old 01-22-2013, 07:18 PM
  #7  
Registered User
Thread Starter
 
flatspeed's Avatar
 
Join Date: Jan 2013
Location: Pemberton, BC
Posts: 48
Likes: 0
Received 0 Likes on 0 Posts
Also turned my pilot bearing bushing on the mini lathe.

Name:  IMG_1915_zps0e6760a8.jpg
Views: 2605
Size:  84.1 KB

Name:  IMG_2198_zps4f8822bb.jpg
Views: 2575
Size:  99.3 KB

Last edited by flatspeed; 11-07-2018 at 08:53 AM. Reason: clarity
Old 01-23-2013, 09:02 AM
  #8  
Registered User
 
Transplanter's Avatar
 
Join Date: Mar 2012
Posts: 91
Likes: 0
Received 0 Likes on 0 Posts
Did you cut the pan,cross member or do a body lift for pan clearance? That mog is so sweet!
Old 01-24-2013, 08:21 PM
  #9  
Registered User
Thread Starter
 
flatspeed's Avatar
 
Join Date: Jan 2013
Location: Pemberton, BC
Posts: 48
Likes: 0
Received 0 Likes on 0 Posts
Originally Posted by Transplanter
Did you cut the pan,cross member or do a body lift for pan clearance? That mog is so sweet!
I ended up cutting the cross member, i'll have pics up soon
Old 01-24-2013, 08:25 PM
  #10  
Registered User
Thread Starter
 
flatspeed's Avatar
 
Join Date: Jan 2013
Location: Pemberton, BC
Posts: 48
Likes: 0
Received 0 Likes on 0 Posts
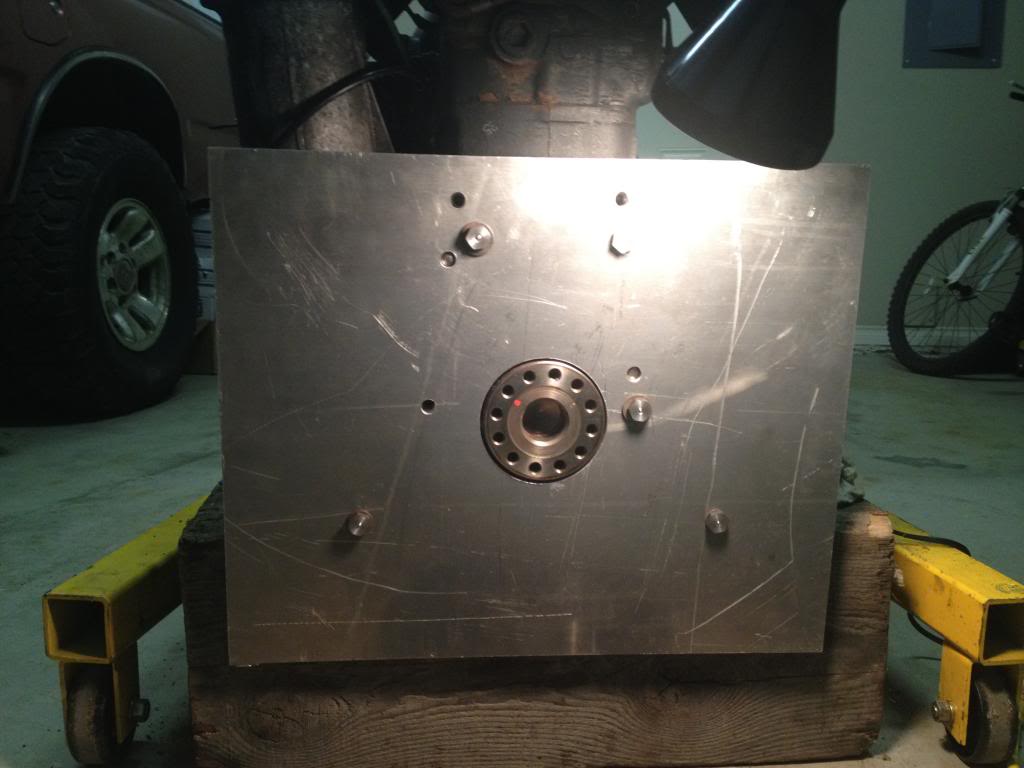
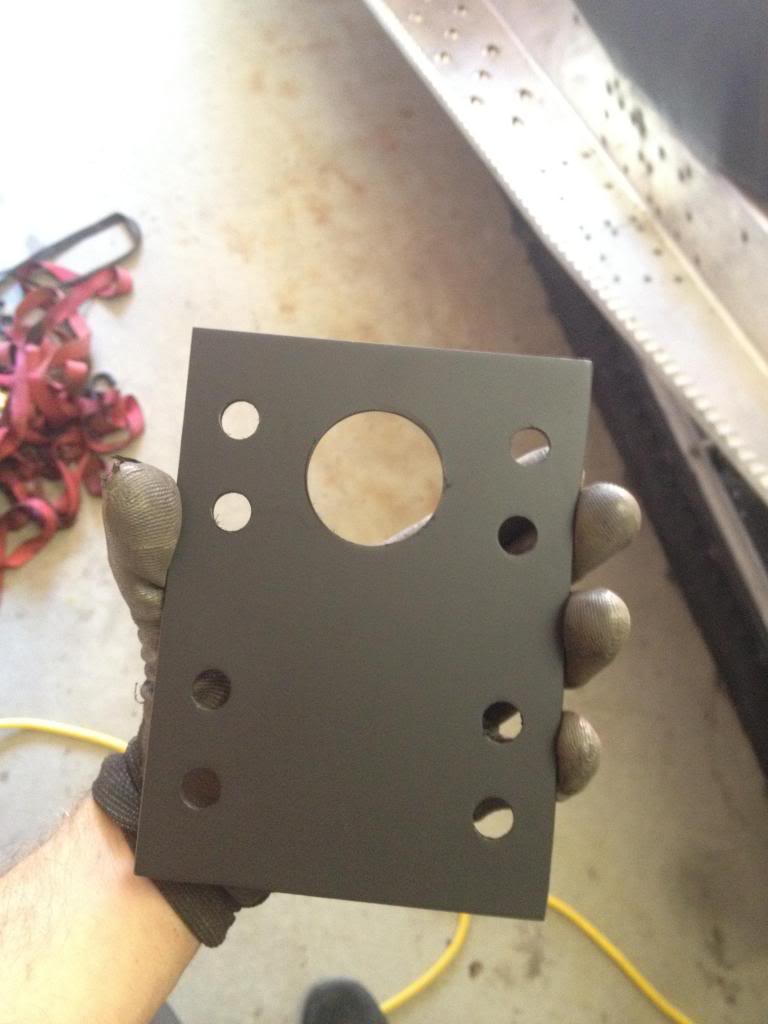
Le adapter plate, the metal shop had this chunk of aluminum in the bin and gave it to me for cheap, the dimensions were perfect! Used a hole saw for the crank hole.

Name:  IMG_2328_zpsa1291b35.jpg
Views: 2674
Size:  62.1 KB

and here it is mocked up

Name:  IMG_2336_zpsb7560900.jpg
Views: 2700
Size:  101.7 KB
Old 01-24-2013, 08:29 PM
  #11  
Registered User
Thread Starter
 
flatspeed's Avatar
 
Join Date: Jan 2013
Location: Pemberton, BC
Posts: 48
Likes: 0
Received 0 Likes on 0 Posts
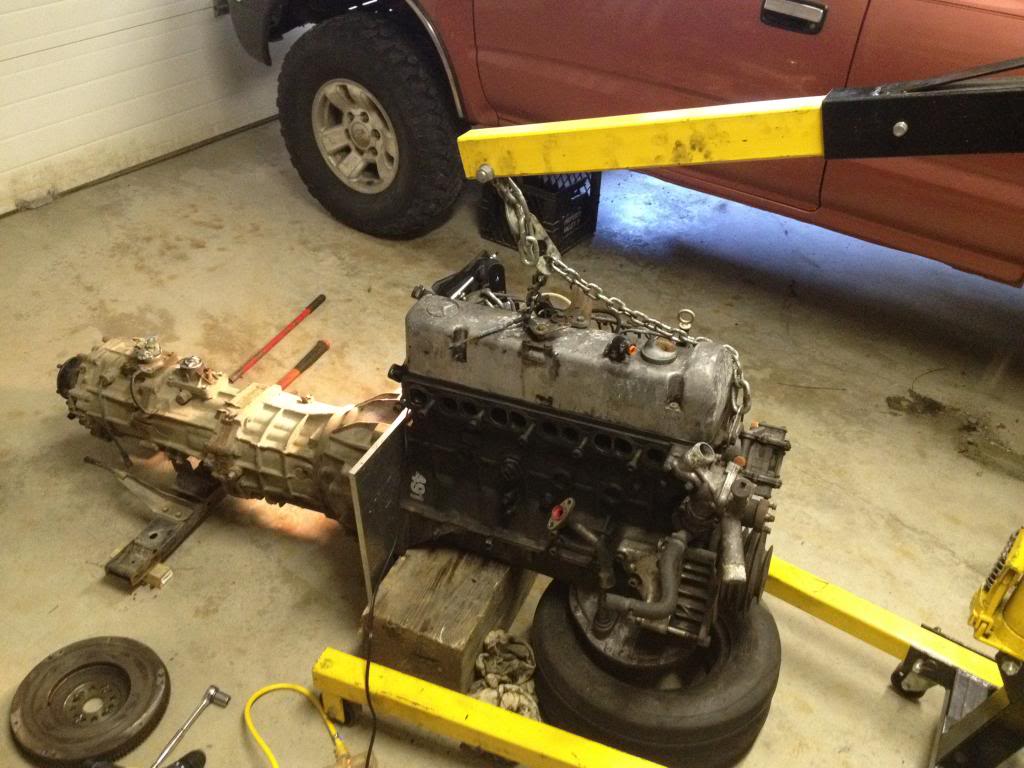
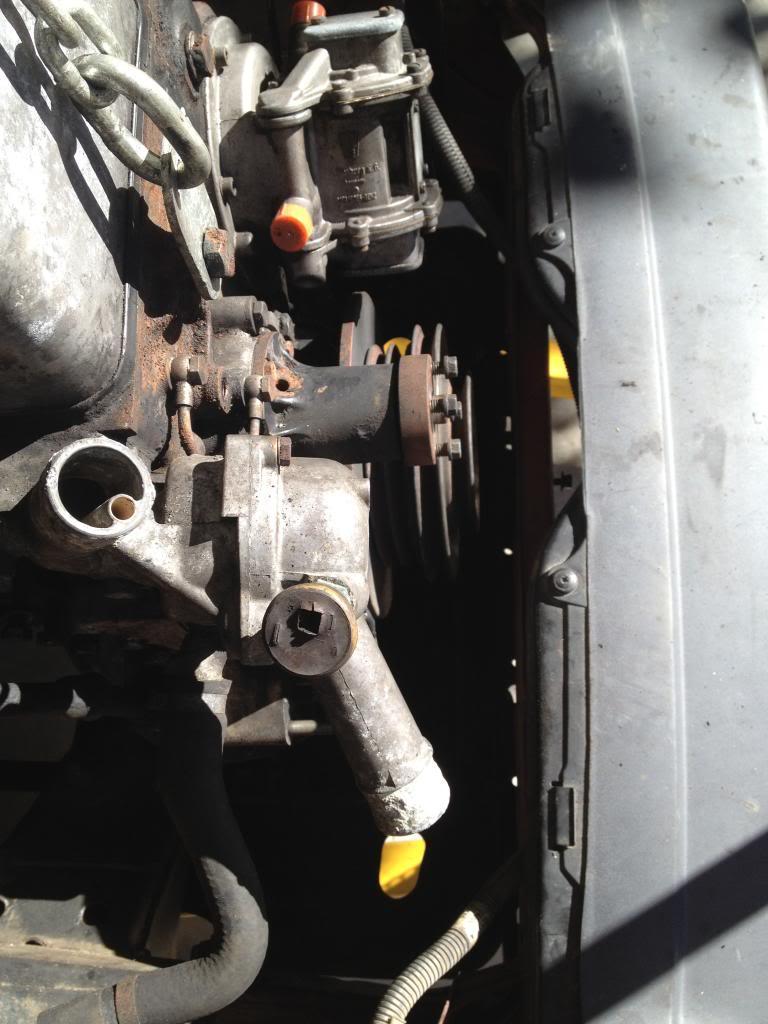
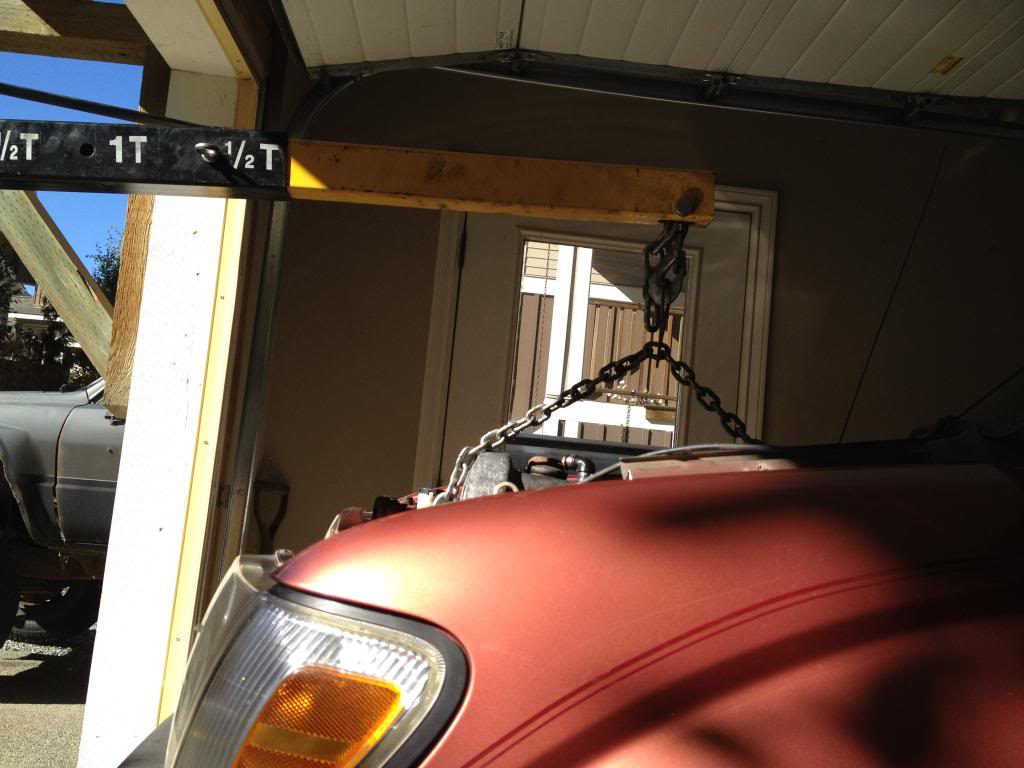
Got the engine in for the first time to see how it sits (sans motor mounts), it had to go back quite a bit, the front pulley is sitting where the rad should be.
The v6 is such a short motor compared to this one.

Name:  IMG_2575_zpsddd32040.jpg
Views: 2560
Size:  90.6 KB

Name:  IMG_2574_zpseeebad94.jpg
Views: 2578
Size:  73.1 KB
Old 01-24-2013, 08:32 PM
  #12  
Registered User
Thread Starter
 
flatspeed's Avatar
 
Join Date: Jan 2013
Location: Pemberton, BC
Posts: 48
Likes: 0
Received 0 Likes on 0 Posts
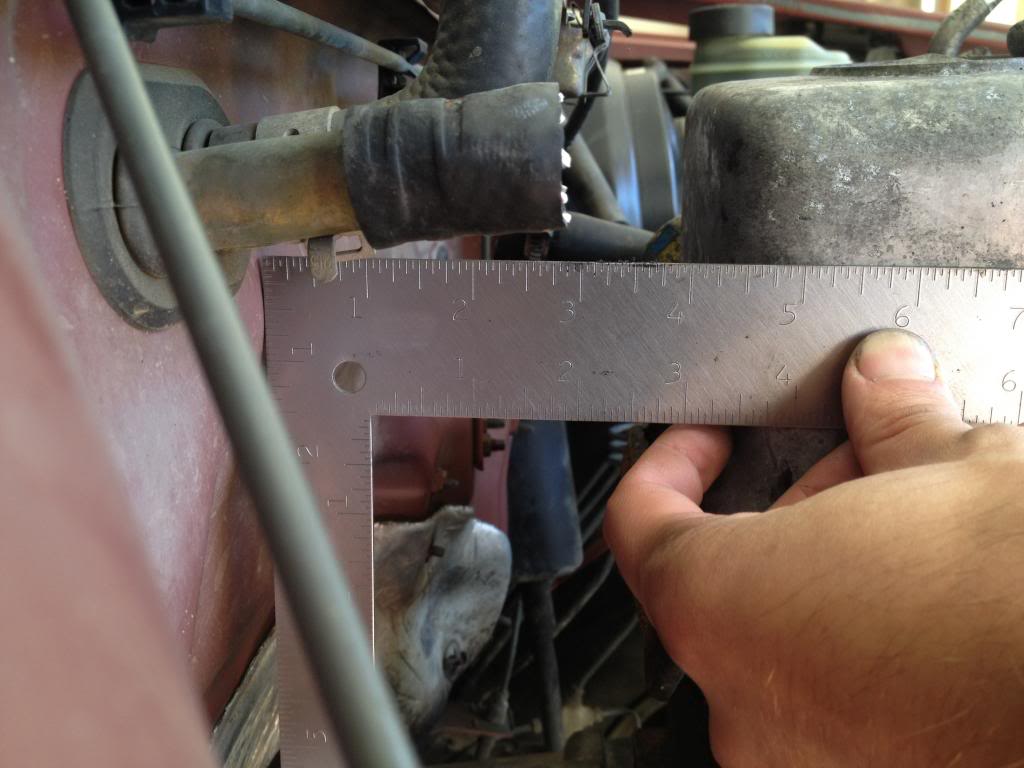
It could also be a bit lower, the crossmember is sitting right where the oil pan is. The good news is the diff and steering rack are so far back in the tacomas that they don't interfere.

Name:  IMG_2585_zps4c7f0cd9.jpg
Views: 2538
Size:  77.0 KB
Old 01-25-2013, 06:04 PM
  #13  
Registered User
 
B-yodaful's Avatar
 
Join Date: Mar 2010
Location: Sc Pa
Posts: 365
Likes: 0
Received 0 Likes on 0 Posts
Great work... Can't wait so this swap in a Tacoma
Old 01-27-2013, 07:13 PM
  #14  
Registered User
Thread Starter
 
flatspeed's Avatar
 
Join Date: Jan 2013
Location: Pemberton, BC
Posts: 48
Likes: 0
Received 0 Likes on 0 Posts
Originally Posted by B-yodaful
Great work... Can't wait so this swap in a Tacoma
Thanks man.
Old 01-27-2013, 07:23 PM
  #15  
Registered User
Thread Starter
 
flatspeed's Avatar
 
Join Date: Jan 2013
Location: Pemberton, BC
Posts: 48
Likes: 0
Received 0 Likes on 0 Posts
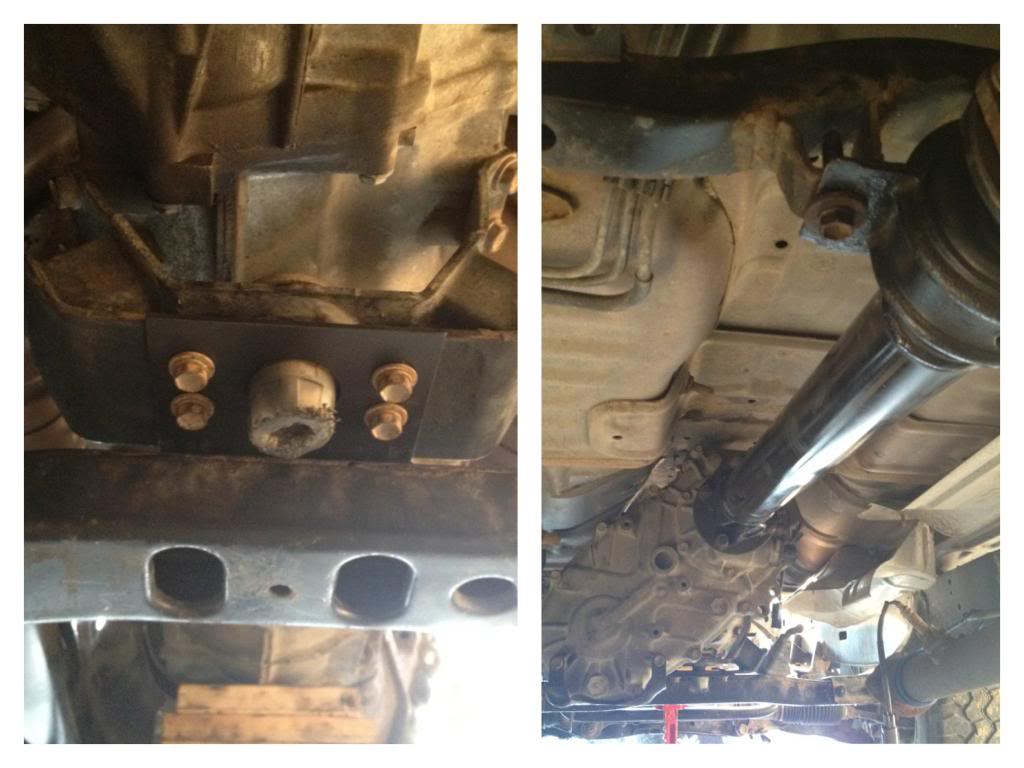
So I decided to move the drivetrain back 3".
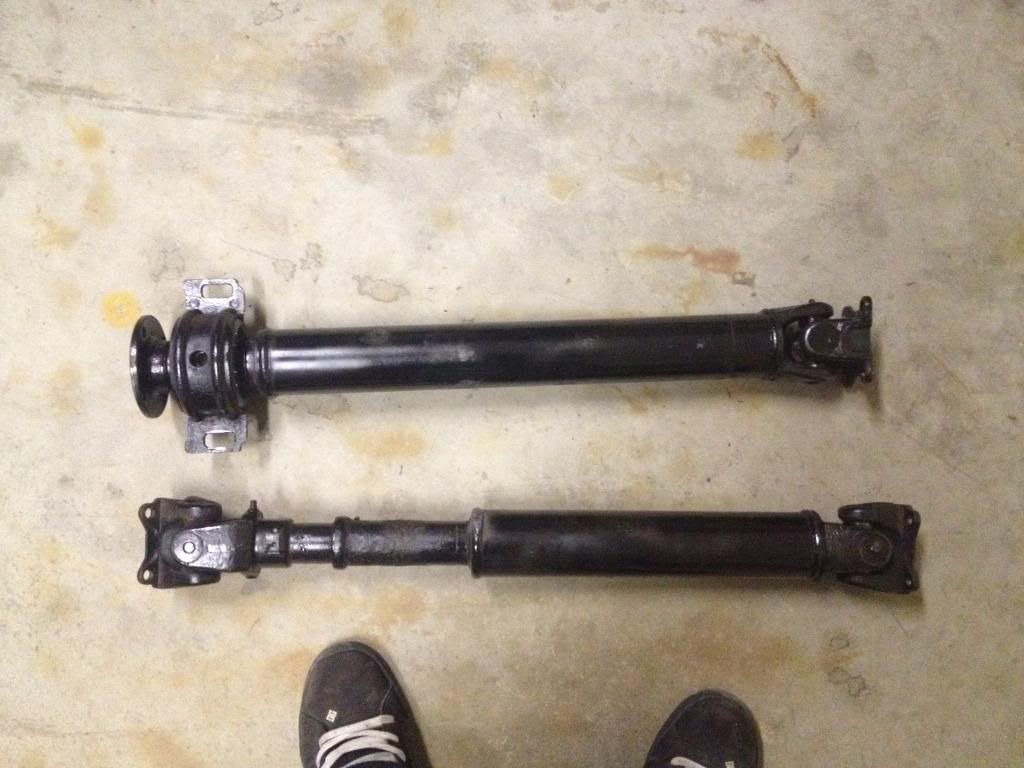
Moving the drivetrain back meant moving the transmission mount back, as well as lengthening the front and shortening the rear driveshafts. I did not have the capability/cajones/time to do this myself, so I took the driveshafts to a driveline shop ( http://www.patsdriveline.com/ ) which is somewhat local to me, and they did a good job. turned it around in <1 day. Cost was about $350 for both, balanced.

I told them to shorten both by 3", and built the motor and transmission mounts AFTER the rear shaft was installed. The front shaft, being a slip-yoke, would have plenty of spline engagement to take up whatever little bit of difference there was in length (due to sitting at different angles).

Name:  IMG_2612_zpsa4505b68.jpg
Views: 2605
Size:  84.8 KB
Old 01-27-2013, 07:26 PM
  #16  
Registered User
Thread Starter
 
flatspeed's Avatar
 
Join Date: Jan 2013
Location: Pemberton, BC
Posts: 48
Likes: 0
Received 0 Likes on 0 Posts
Transmission mount I made up.

Name:  IMG_2614_zps90d18ca8.jpg
Views: 2519
Size:  56.4 KB

Mount and driveshaft installed!
I should also mention that when they re-tubed the driveshafts, they used thicker wall tubing. Bonus!

Name:  IMG_2641_zpsd8a510f6.jpg
Views: 2562
Size:  76.4 KB
Old 01-27-2013, 07:31 PM
  #17  
Registered User
Thread Starter
 
flatspeed's Avatar
 
Join Date: Jan 2013
Location: Pemberton, BC
Posts: 48
Likes: 0
Received 0 Likes on 0 Posts
Got tired of doing driveline stuff so worked on a funner project in the meantime..

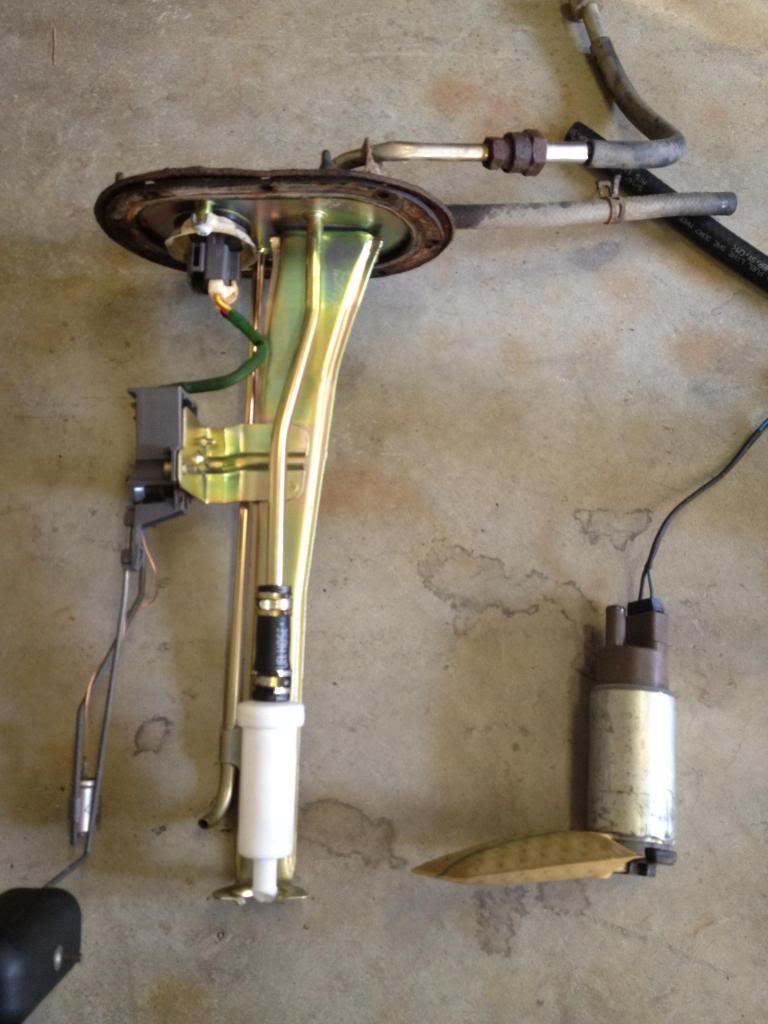
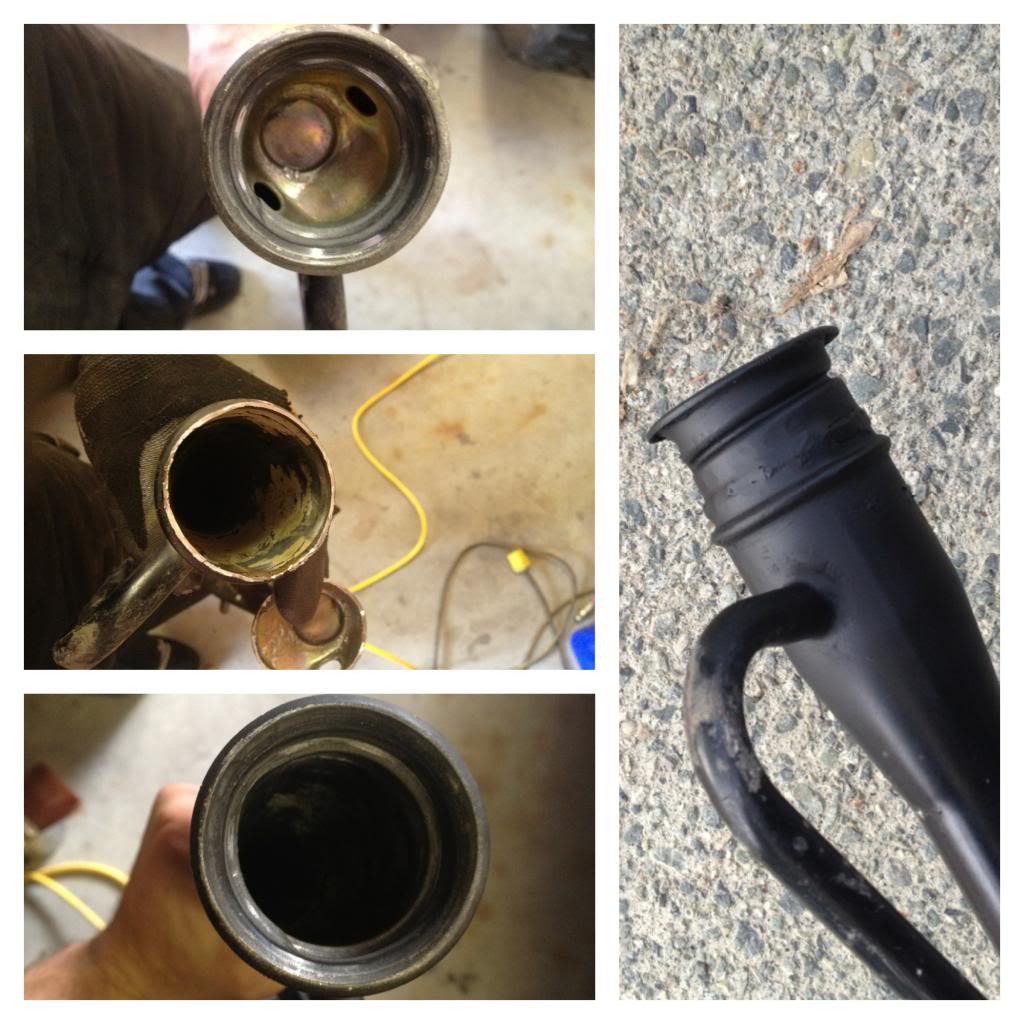
The om617 no longer needed the electric in-tank fuel pump, so I took that out and replaced it with an inline filter. If you look close you can see a little slash cut I put in the bottom of the filter..obviously you wouldnt want a flat bottomed tube against the bottom of a flat tank.

Name:  IMG_2632_zps440f06b6.jpg
Views: 2570
Size:  75.1 KB
Old 01-27-2013, 07:35 PM
  #18  
Registered User
Thread Starter
 
flatspeed's Avatar
 
Join Date: Jan 2013
Location: Pemberton, BC
Posts: 48
Likes: 0
Received 0 Likes on 0 Posts
The gas cap restrictor had to go too. F that gas nonsense, no turning back now..

Name:  IMG_2640_zpsf1629a4a.jpg
Views: 2643
Size:  127.3 KB
Old 01-28-2013, 08:36 AM
  #19  
Registered User
iTrader: (1)
 
2003mikem's Avatar
 
Join Date: Aug 2005
Location: appleton wisconsin
Posts: 392
Likes: 0
Received 0 Likes on 0 Posts
looking good
Old 01-28-2013, 09:13 PM
  #20  
Registered User
Thread Starter
 
flatspeed's Avatar
 
Join Date: Jan 2013
Location: Pemberton, BC
Posts: 48
Likes: 0
Received 0 Likes on 0 Posts
^ Thanks mike, your runner looks sweet btw, always liked the 80s graphics on those things.

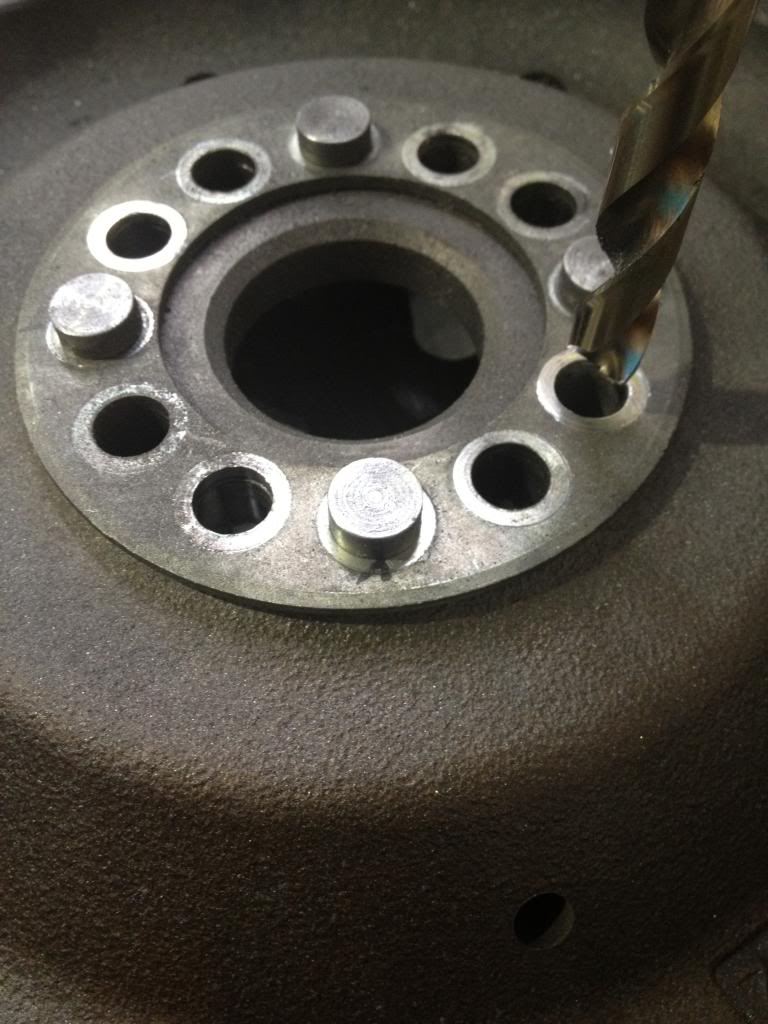
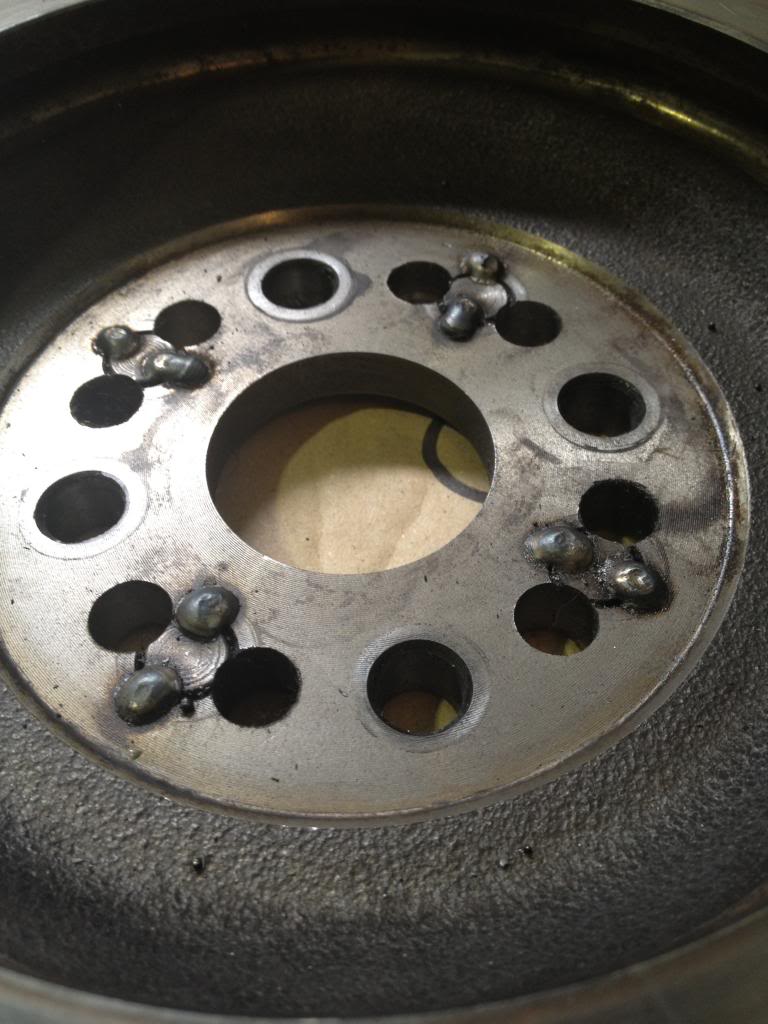
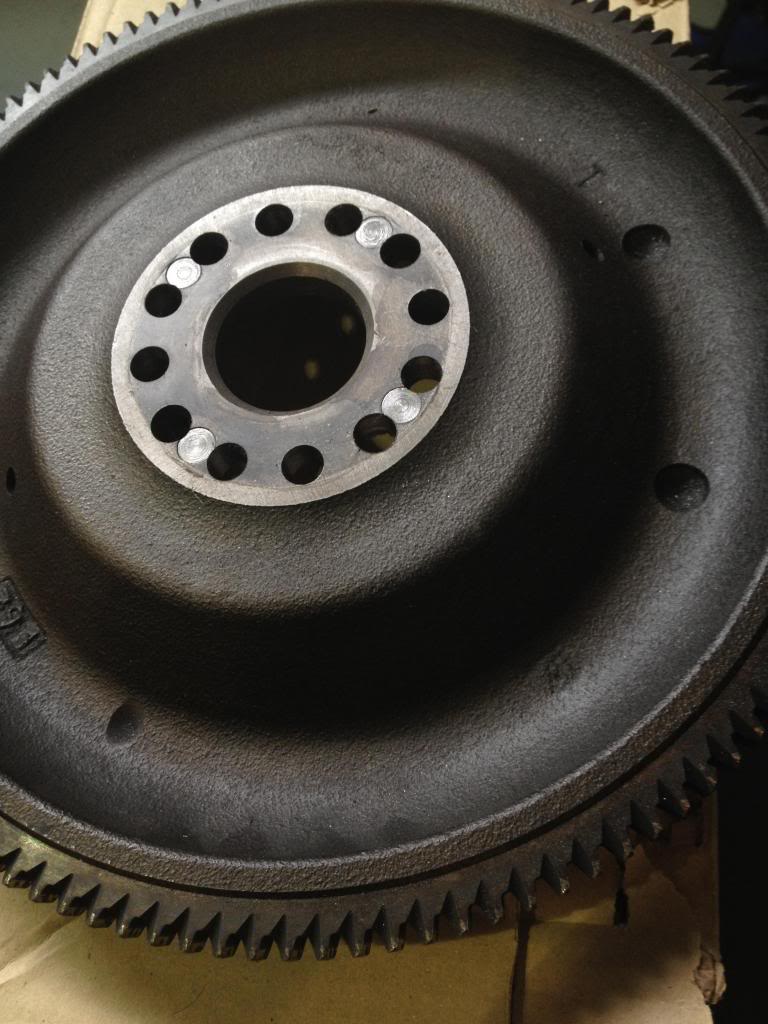
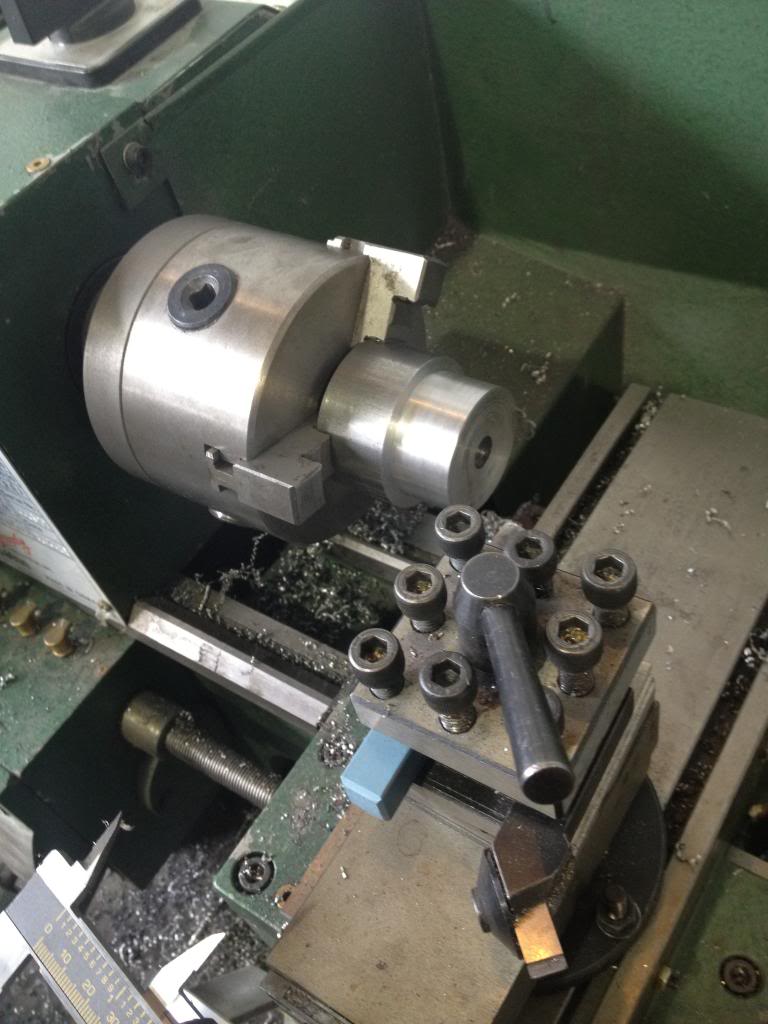
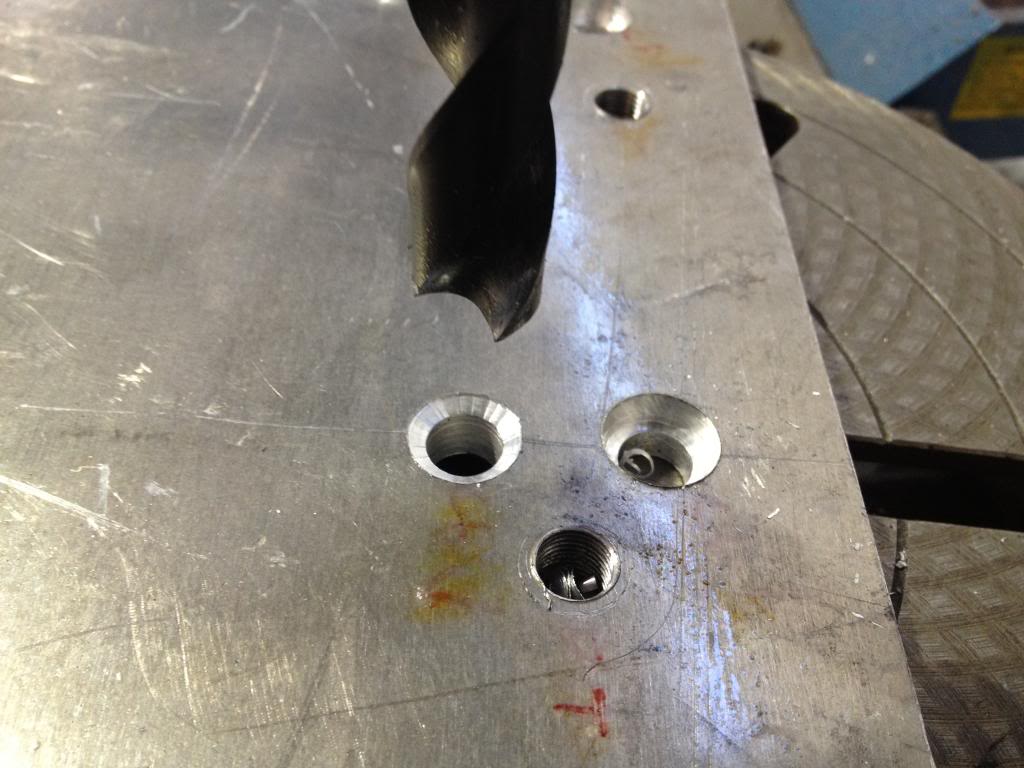
Back to the adapter plate, I finally got the metric hardware I needed. Flywheel bolts are m10x1 22.5mm long, the adapter to engine bolts are m10x1.5, 25mm length. I used hex head bolts so I could counterbore them flush. Unfortunately I didn't have an end mill to do this, so I made my own bottoming drill. It's crude but it works. Drilled all the holes deep enough with a standard bit so the flat bit would remain centered, then followed with the bottoming drill. If you are going to make this bit, grind the point down flat, then grind a slight relief angle back into it, so it doesn't chatter.

Name:  IMG_2674_zps2fe1e364.jpg
Views: 2538
Size:  88.7 KB


Quick Reply: Another OM617 Swap: 1998 Tacoma


All times are GMT -8. The time now is 10:25 PM.