
Live4soccer7's 84runner 1UZ Swap
 Jun 30, 2014 | 06:44 PM
#143

Thread Starter
Registered User
Joined: Nov 2008
Posts: 1,319
Likes: 2
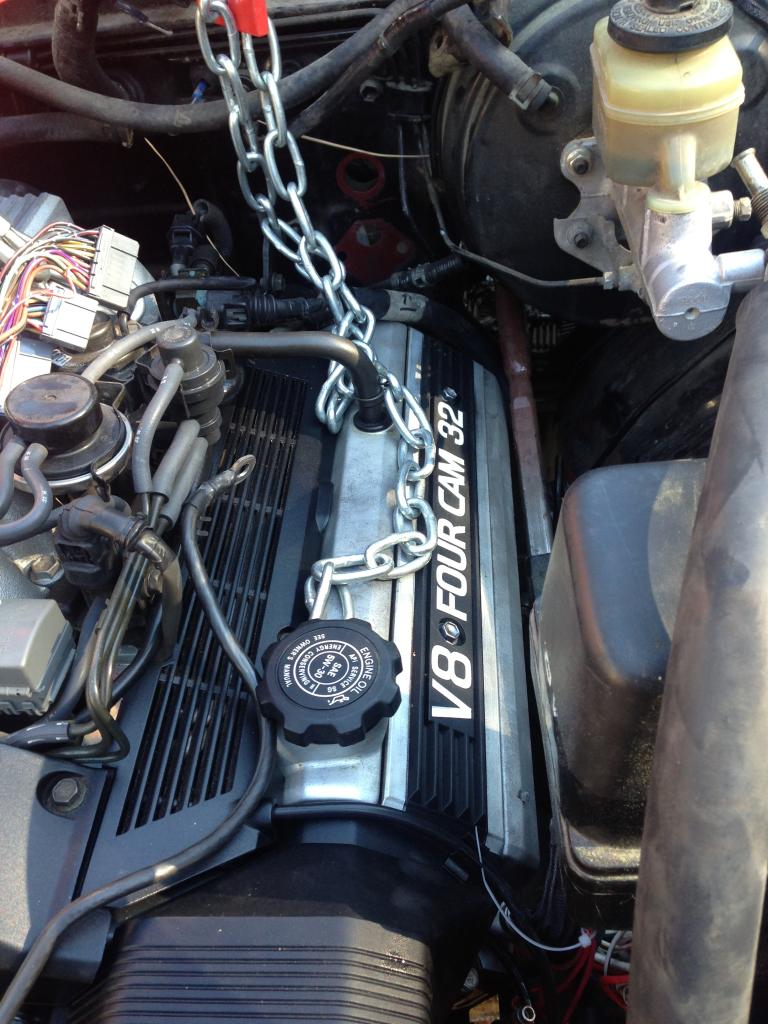
So I have the correct PP now. Thankfully that is done and over with. I have begun doing some measurements for getting this thing setup properly.
My brother has a T100 with the 3.4L in it, so I thought since the slave cylinder is exactly the same I would measure the throw of the
While the clutch pedal was in the normal driving state (not pushed in) there was about 1.25" from the end of the rubber boot to the other side of the fork. When the pedal was pressed in, there was (same reference points) 1.75".
So the throw of the slave cylinder in action and in a stock application is approximately .50".
My next rough measurement is how much the flywheel, clutch/pp stick in to the bell housing. I say rough because the clutch components aren't all bolted together and this may change a little with the pressure once it is bolted on to the flywheel. This is roughly 2.904" in to the bell housing. This is from the bottom of the flywheel to the top of the fingers on the PP. There is also about another 2mm from where the flywheel bolts on to the crank where it sits above the mating surface.
When putting the fork and throwout on the tranny I started off with ONE washing (.125" thick). I used the 3.0 bearing because the 3.4 was actually clearly too long for the flywheel and PP I'm using (i'm guessing this is where the discrepancy could be coming from on other setups). So, with the 3.0 and the one washer and have the bearing pressed in toward the tranny so that I could have the same compression on the slave cylinder that the stock 3.4 setup that I observed has, I measured 3.25". This told me that the bearing needed to come out more (toward the engine) in it's resting place. I added another .125" washer behind the pivot ball for a total of TWO washers and .25". I measured the distance from the edge of the bell housing again to the throw out bearing when it was in same position as earlier and I measured 3.03" at this point.
With the PP/flywheel sticking in to the bellhousing approximately 2.904" and now the throwout bearing is recessed in the housing at just 3.03", I think this is a good base for getting it right. I'll bolt up the flywheel/clutch to the engine and make another measurement and see if it needs adjusted any more and I will go from there.
If you were able to follow what I'm getting at here, does this seem like sound reasoning for the application?
I have read in some places that the TB does not always contact the PP, this is obviously not true because the slave cylinder naturally wants to push the TB toward the PP, even in resting state.
Let me know your guys' thoughts on this.
Jul 3, 2014 | 09:54 PM
#144
Thread Starter
Registered User
Joined: Nov 2008
Posts: 1,319
Likes: 2
More drama with SBC results in me having to send the clutch disc back to them for an exchange, not to mention it is also the wrong piece too (I even asked them to make sure it was correct). Regardless, I'm probably out a couple weeks on the clutch disc. I have decided to assemble the transmission and engine without the clutch in there so I can go ahead and get the engine and tranny mounted in the truck. Once I do that it will open up a lot more things that I can work on, in the event that I'm still waiting on SBC to fix their mistakes.
Well.... There she sits!
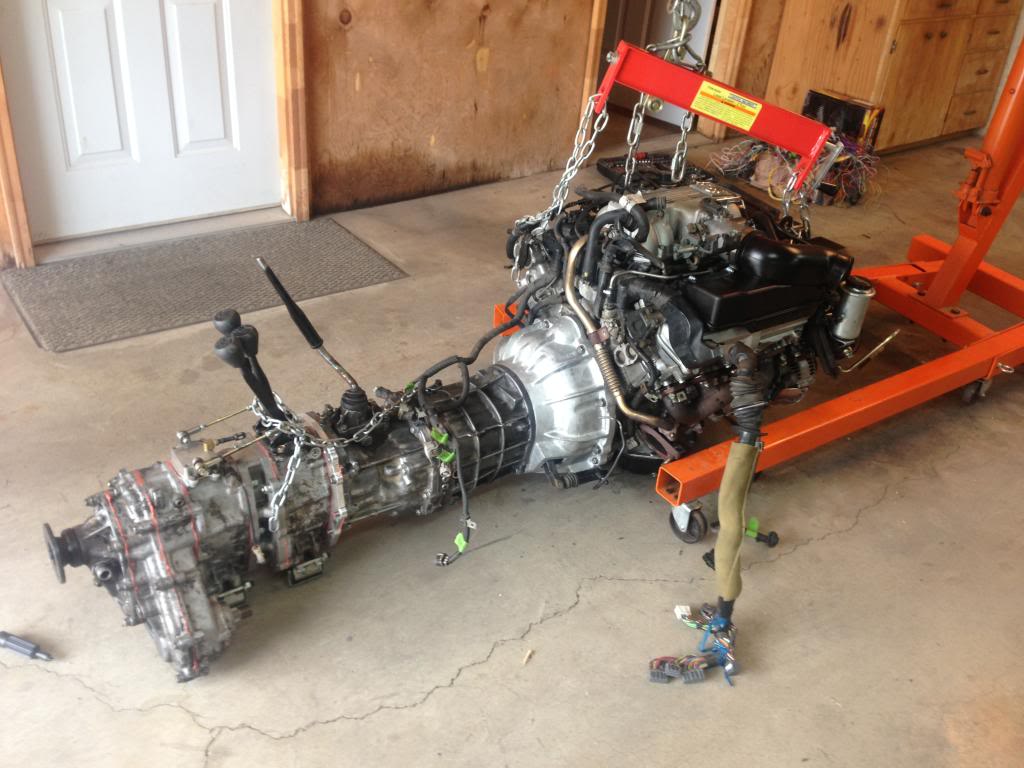
Just need to get it transported now. My friend's trailer is being used by someone else, so I must find another. I think on the 5th, I may be able to borrow a family members trailer to get this thing moved.
It sure is tail end heavy with the tcases back there. Not sure how well it will be able to hoist in to the truck in one shot considering it hardly wants to pick that end up at all right now. I'll likely need to try and make a couple adjustments on the hoist leveler and remove the wheels/tires on the truck and block the axle housings to get it to sit as low as possible.
Jul 6, 2014 | 08:12 AM
#145
Thread Starter
Registered User
Joined: Nov 2008
Posts: 1,319
Likes: 2
I'll be putting it in this week. Any last minute input on positioning the engine that you would have done slightly different or would highly recommend? I understand that as far back as it can go is a necessity.
A picture of the engine at the truck now. That is someone helping with the move in the background.
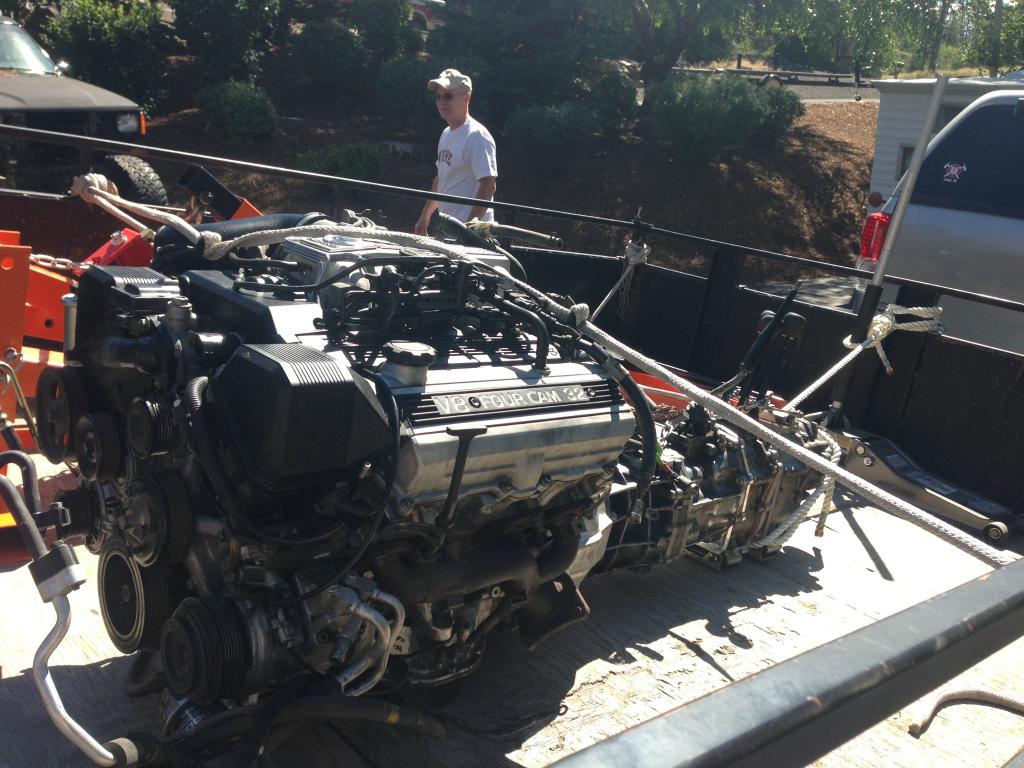
A picture of the engine at the truck now. That is someone helping with the move in the background.
 Jul 6, 2014 | 09:24 PM
#147
Thread Starter
Registered User
Joined: Nov 2008
Posts: 1,319
Likes: 2
That's a great idea. I want to retain the original grill etc..., so I can extend the front like that as much as the stock grill will allow. I'll have to take a look.
Since you created more room up front, did you keep the original transmission mounts on the frame then? That sure would save a little work.
Since you created more room up front, did you keep the original transmission mounts on the frame then? That sure would save a little work.
Jul 7, 2014 | 12:09 PM
#148

Registered User
Joined: Oct 2013
Posts: 133
Likes: 1
I am retaining the grill.
It will have a stock grill. Just no a/c! But you can mount the condenser in the same area. I will finish the grill area up this week so you can get an idea. Will be using hood pins. What is nice is the 5" between the front pulley and the radiator.
Jul 9, 2014 | 04:05 AM
#150
Thread Starter
Registered User
Joined: Nov 2008
Posts: 1,319
Likes: 2
Got the motor in today. Here are some pics:
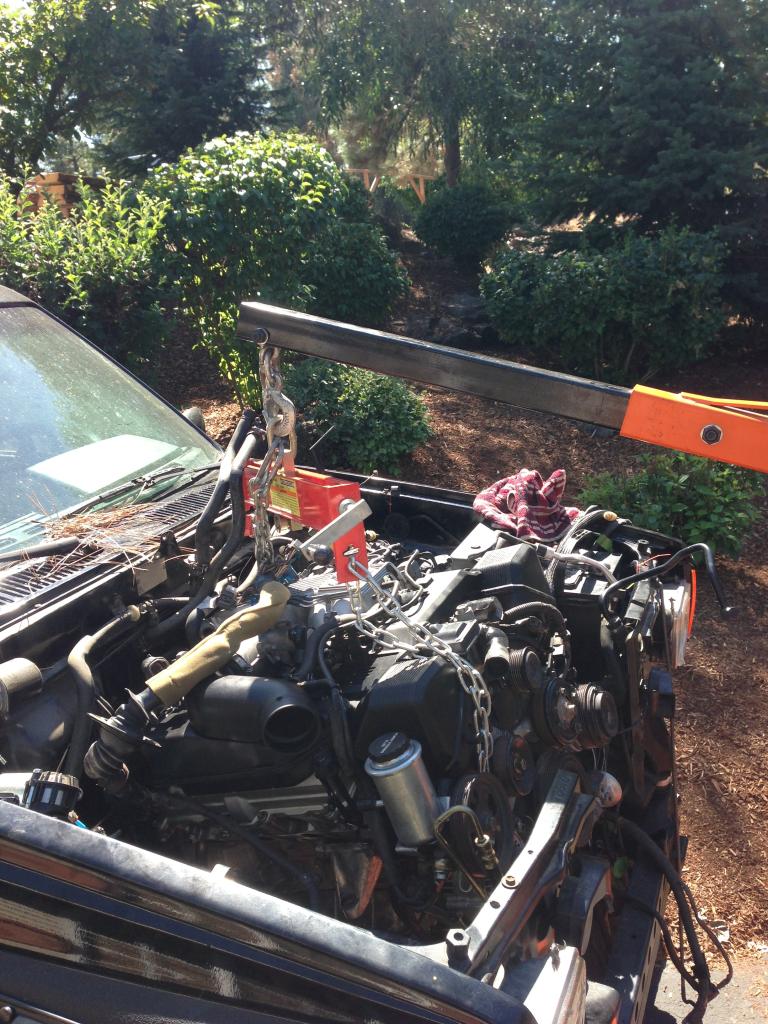
It was a bit tricky to shoehorn in there:
Mostly the final position:
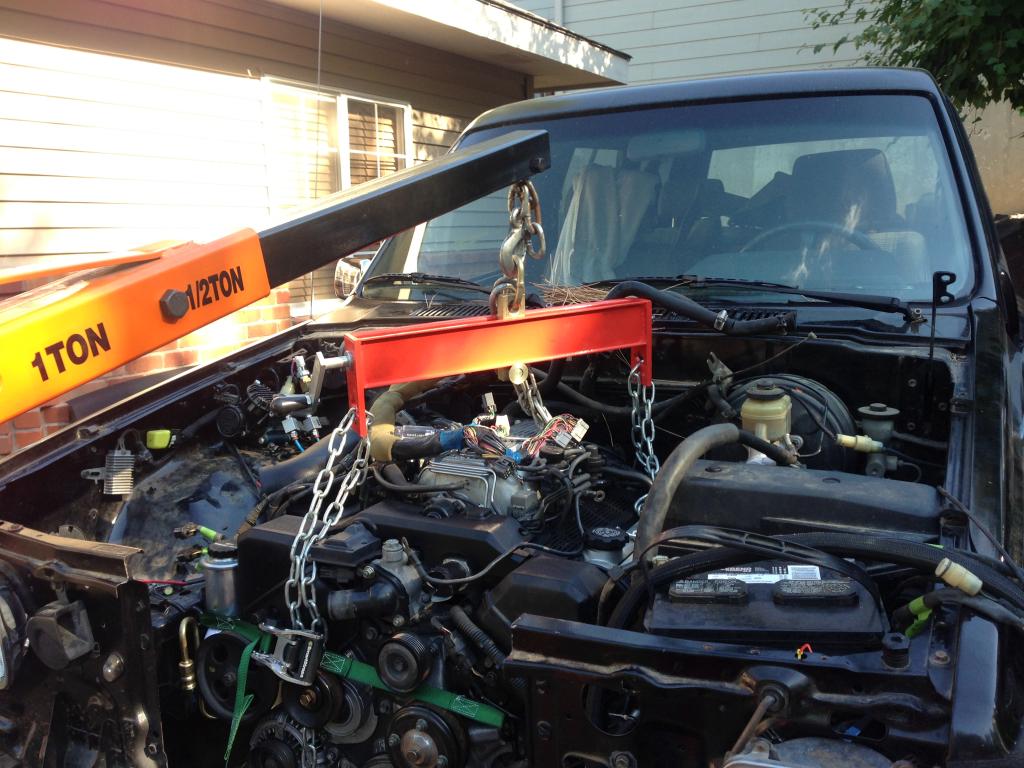
Basically how it look as it sits now too:
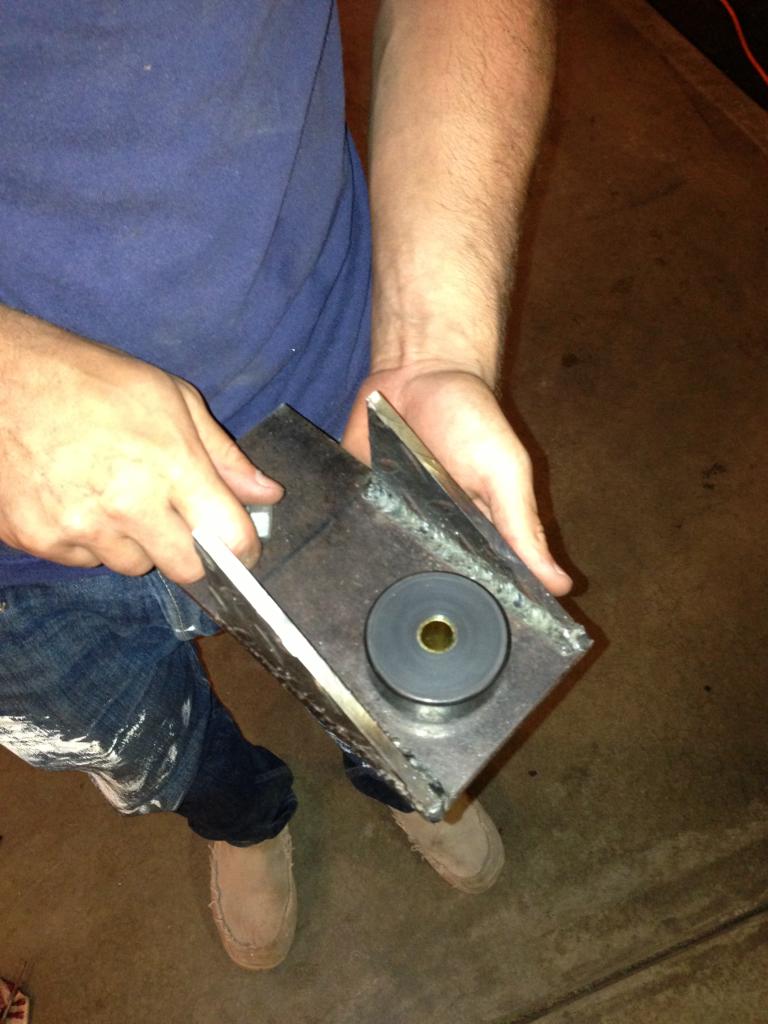
One of the motor mounts. The motor was offset almost an inch toward the passenger side to help clear the steering shaft:
Mounts all welded in:
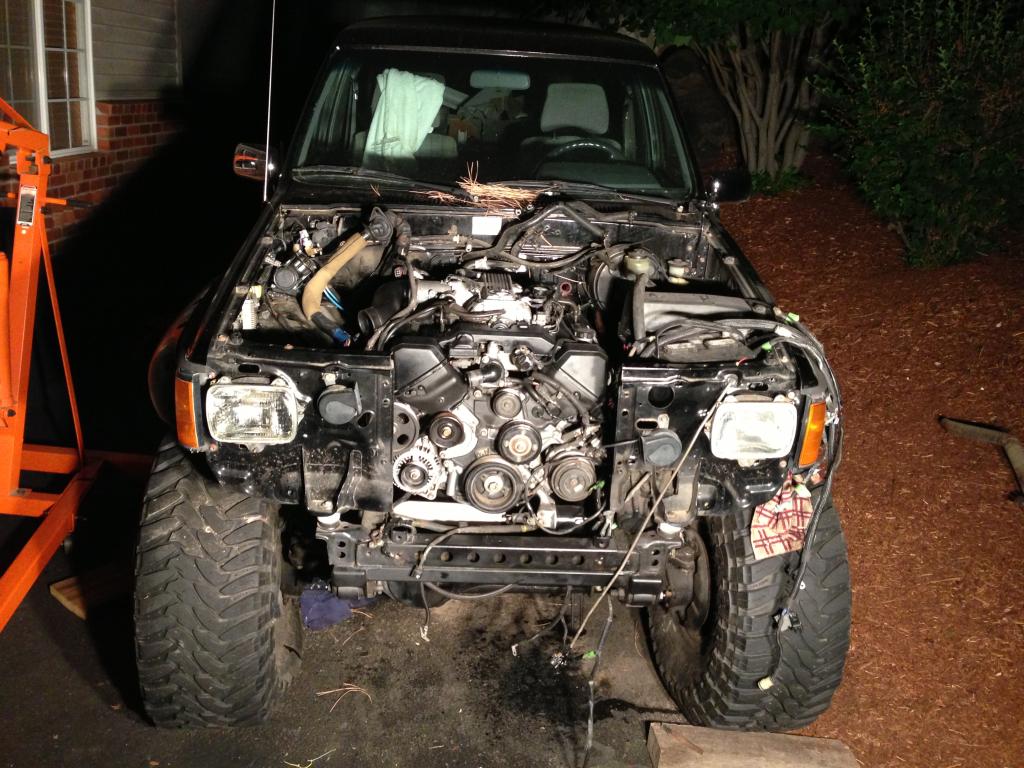
I had my brother helping me out, so that was a big bonus. We were able to get the motor in, mounts made, and welded them in while the motor was in there. It was a bit tricky, but it did work out and they are rock solid now. Due to some of the tight spots some of the welds don't look 'showroom', but they are plenty functional and the more important ones were double/triple passed due to this.
Now for cooling, headers, and fuel. It'll be ready to start after that. And SBC needs to get me the correct clutch disc as well.
It was a bit tricky to shoehorn in there:

Mostly the final position:

Basically how it look as it sits now too:

One of the motor mounts. The motor was offset almost an inch toward the passenger side to help clear the steering shaft:

Mounts all welded in:

I had my brother helping me out, so that was a big bonus. We were able to get the motor in, mounts made, and welded them in while the motor was in there. It was a bit tricky, but it did work out and they are rock solid now. Due to some of the tight spots some of the welds don't look 'showroom', but they are plenty functional and the more important ones were double/triple passed due to this.
Now for cooling, headers, and fuel. It'll be ready to start after that. And SBC needs to get me the correct clutch disc as well.
Jul 21, 2014 | 07:56 PM
#151

Registered User
Joined: Oct 2009
Posts: 60
Likes: 4
From: MI
clutch setup
hello, I see a while back you were asking what the spacer was for, the one that came with the KS bell housing kit. it is a spacer to put behind the pilot bearing, there is enough space in the crank to put this spacer and the pilot bearing, this way when you are mounting the trans you don't push the pilot bearing into the crank.
I also read your post about the clutch engagement and the differences between the 3.0 and 3.4 throw bearing. If you search my name I am also doing this swap with the R150 with the ks bell housing. with .25" behind the pivot that came with the bell housing and the 3.0 throw bearing. this setup did not work for me, the fork would hit the bellhousing before disengaging the clutch. i have ordered a 3.4 throw to see if that will work. you could put more spacers behind the pivot point, but there are not many threads left when you do that, so i opted to try the 3.4 throw.
sweet thread so far! I will be watching as I finish mine up. right now I have all the wiring ran, now i am just trying to figure out the vacuum lines and the VSV's and I am having a hard time with that. when i got my engine the top end was not together.
Jul 21, 2014 | 10:17 PM
#152
Thread Starter
Registered User
Joined: Nov 2008
Posts: 1,319
Likes: 2
That's a bummer about all the vacuum stuff. I didn't really bother with it all because I know it can be easy to mix up and i knew it ran well when I pulled it. I wanted to take as many things out of the equation as possible for trouble shooting reasons when I got it running again.
I have the 3.4 in there now with I think a washer or two. I will have to pull my tranny to put the clutch disc in because SBC kinda screwed the pooch on my setup and have kinda been a PIA to work with.
I think I may have to add ONE more washer. basically from what I have seen, if you add .25" at the ball then it makes a .5" difference at the throwout, roughly. I have some measurements from a functional R150 in my brothers T100 for what the slave cylinder should be at when the clutch is engaged/disengaged. This is what I have been shooting for. If I can get close then it should be good enough.
If you have any questions, let me know.
Jul 22, 2014 | 09:18 AM
#154
Thread Starter
Registered User
Joined: Nov 2008
Posts: 1,319
Likes: 2
These are the only photos I have of it at the moment that come close to what you are looking for:
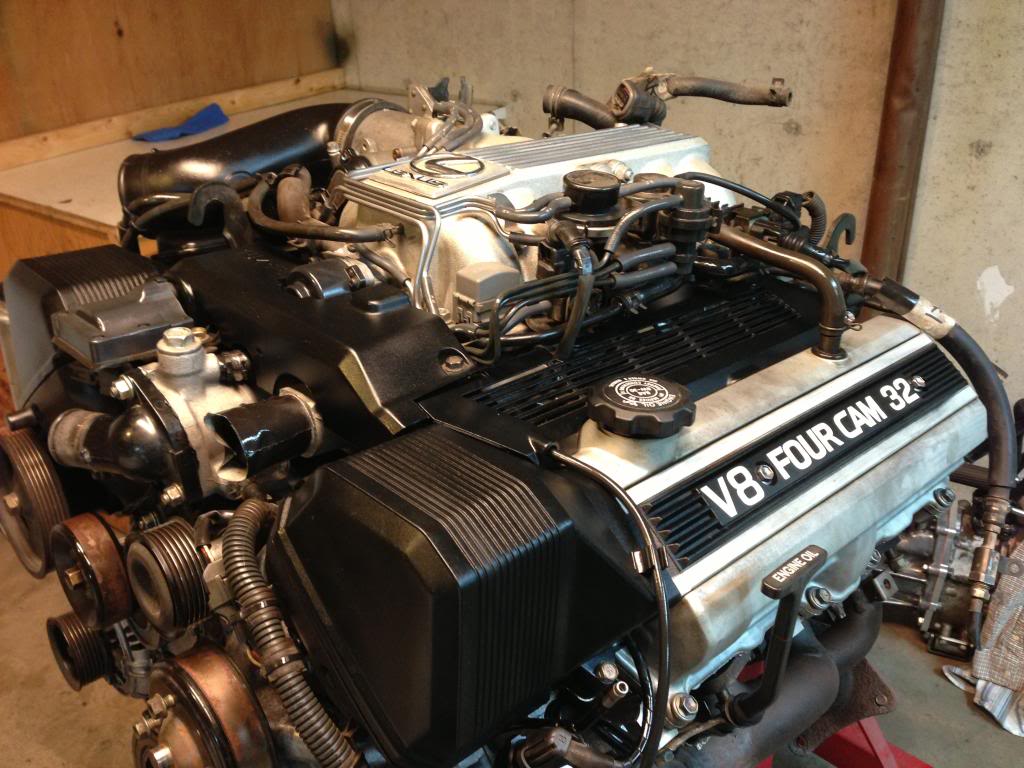
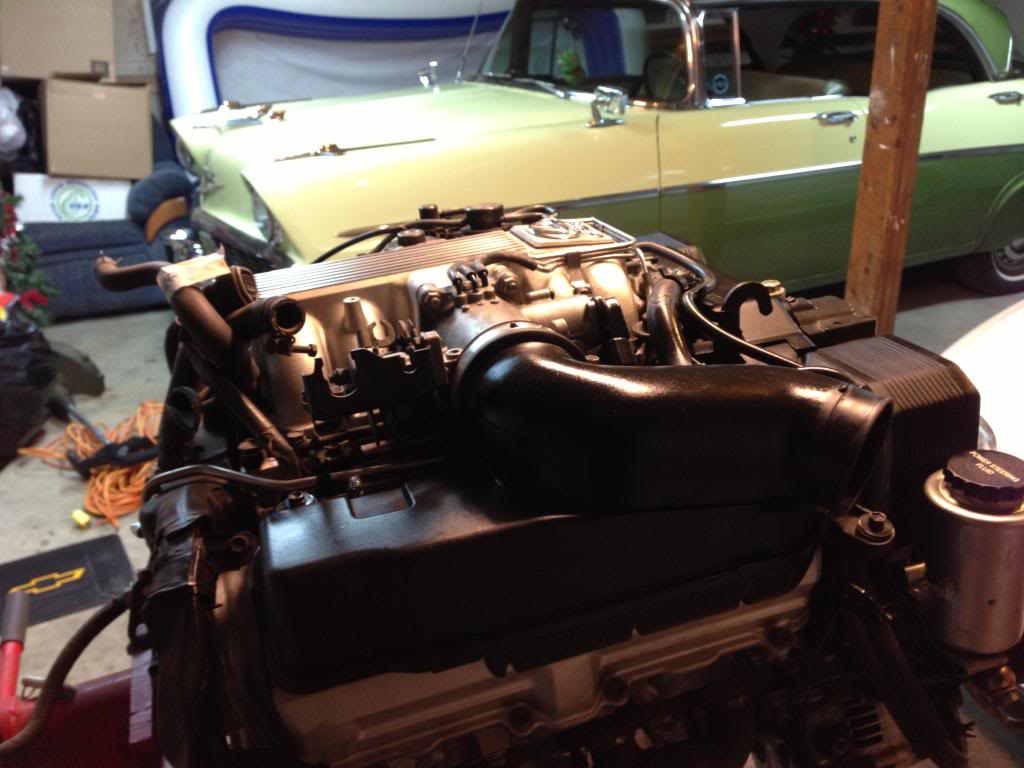
Let me know if you need better shots and I'll shoot them next time I'm at the motor. Unfortunately, I started this project at a different location than my home, so I must travel to work on it. Not far, but I'm not there every day.


Let me know if you need better shots and I'll shoot them next time I'm at the motor. Unfortunately, I started this project at a different location than my home, so I must travel to work on it. Not far, but I'm not there every day.


