
1uz swap in the works.
 Jul 14, 2010 | 02:21 PM
#63
Thread Starter
Registered User
Joined: Sep 2009
Posts: 263
Likes: 0
From: St George,Ut
pm me your email.
yeah it fits realy good, i would not recomend plazma cutting it though..
deff go with a water jet.
now i can finish my exhaust, i might just fab it up with the engine on the ground? hmm
yeah it fits realy good, i would not recomend plazma cutting it though..
deff go with a water jet.
now i can finish my exhaust, i might just fab it up with the engine on the ground? hmm
Jul 14, 2010 | 02:25 PM
#64
Thread Starter
Registered User
Joined: Sep 2009
Posts: 263
Likes: 0
From: St George,Ut
hey RMA i was just thinking, you should put a high stall in your runner, it would help emensly with the low end sluggishnesessss.... i put a 2500 stall in my truck (chevy) and it would light up the 33's i had on there at the time when i mashed on it from a stop..
Jul 14, 2010 | 03:07 PM
#65
Contributing Member
Joined: Dec 2008
Posts: 2,505
Likes: 16
From: San Jose ,Ca
yea ill look into that , dont really know much about them ..but if it will help im all for it ..
thanks !!
Jul 14, 2010 | 05:08 PM
#66
Thread Starter
Registered User
Joined: Sep 2009
Posts: 263
Likes: 0
From: St George,Ut
high stall torque converter: basically the fins inside of the converter are at a shallower angle allowing the fluid to shear more before causing enough drag to start transfer of power.. so for an example: put the runner in drive. hold the brake and then press the gas at the same time, the RPM's will prolly be close to 1200rpm's (guessing) with a high stall you do the same thing and your RPM's will be around 2-2500rpm's, thus allowing the engine
to create more power before the power is transfered to the wheel's... and vuala smoky burnout..
to create more power before the power is transfered to the wheel's... and vuala smoky burnout..
Jul 15, 2010 | 01:52 PM
#70
Thread Starter
Registered User
Joined: Sep 2009
Posts: 263
Likes: 0
From: St George,Ut
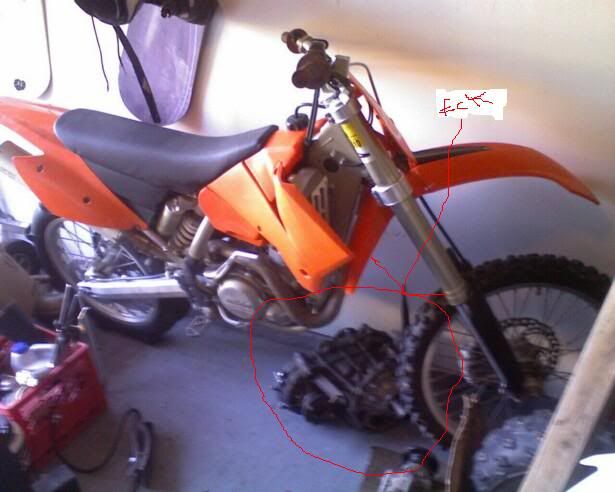
so works slow, and i had my tcase sittin on the ground next to my toolbox and i was like
that thing is F-in dirty like been leakin from day one 30 years ago dirty.. so.. i cleaned it, took it apart and cleaned each part of the case and cleaned them.. i know i am crazy but o boy it looks so much better..
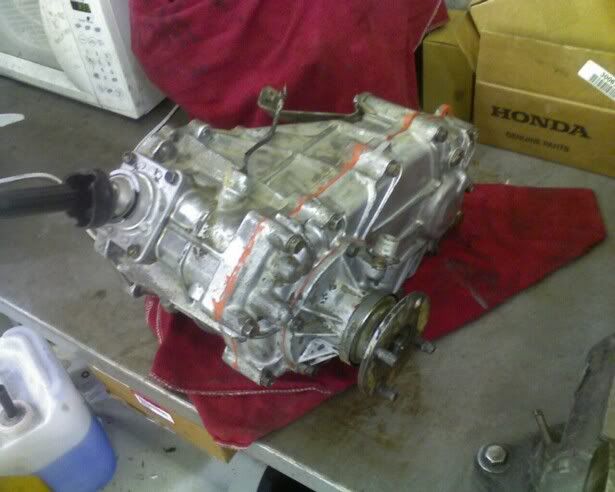
that thing is F-in dirty like been leakin from day one 30 years ago dirty.. so.. i cleaned it, took it apart and cleaned each part of the case and cleaned them.. i know i am crazy but o boy it looks so much better..
Last edited by birdduck; Jul 15, 2010 at 01:54 PM.
 Jul 15, 2010 | 07:58 PM
#72
Thread Starter
Registered User
Joined: Sep 2009
Posts: 263
Likes: 0
From: St George,Ut
well it has three pedals now.. yay!
i did notice before i bolted up the assembly that the bracket was cracked where the master
bolts on, so i welded it up and now were good to go. next step is the slave and clutch fork.
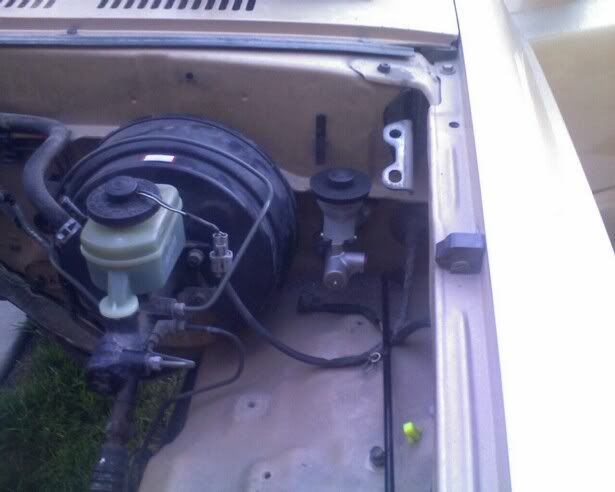
i did notice before i bolted up the assembly that the bracket was cracked where the master
bolts on, so i welded it up and now were good to go. next step is the slave and clutch fork.
Jul 18, 2010 | 01:25 PM
#74
Thread Starter
Registered User
Joined: Sep 2009
Posts: 263
Likes: 0
From: St George,Ut
Okay so hit a speed bumb on the release bearing...
Should have occured to me becore but it didn't untill just
now, well since i added a spacer between the bell i needed
to modify the fork perch. Well the housing for the input
shaft that the throwout bearing rides on, with how it is now
the throwout bearing will run out of shaft after the clutch
is depresed. Well the solution is to have the bell machined
on the engine side the same amount i hade the flywheel
machined. Dam.
I will drop ot off at the machine shop tomorrow and see
what they want to get it done. Hopefully this is it on the
trans and i cAn move on to the next area.
Jul 22, 2010 | 06:14 AM
#76
Thread Starter
Registered User
Joined: Sep 2009
Posts: 263
Likes: 0
From: St George,Ut
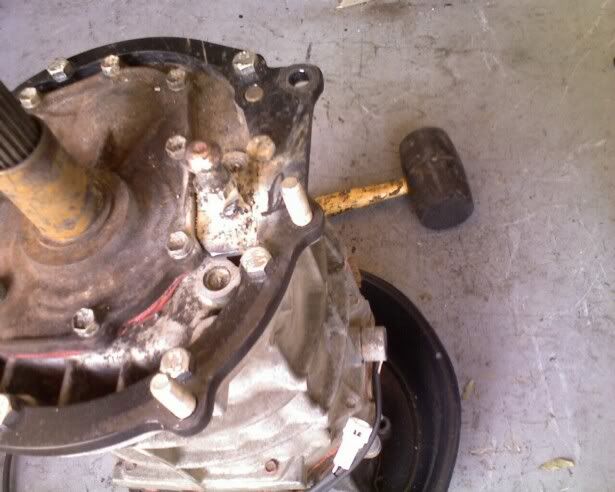
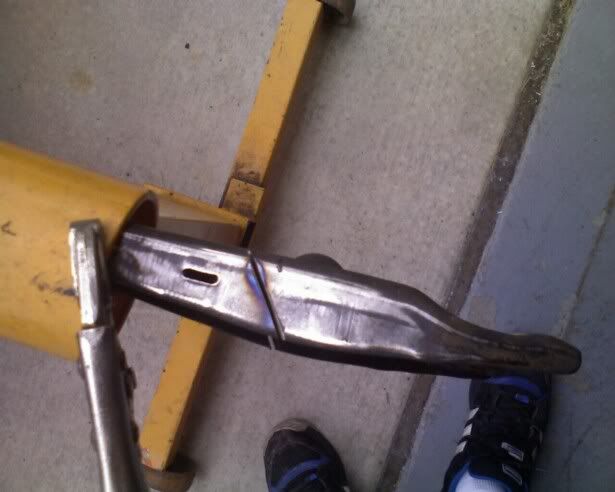
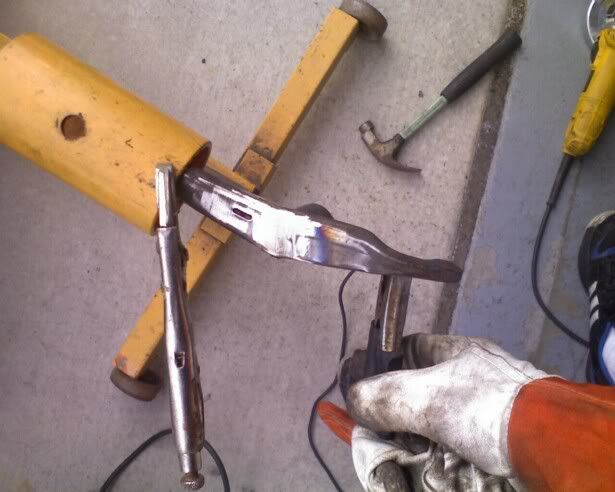
well over my speed bump, and have some pics.
starting on the clutch fork pivot.
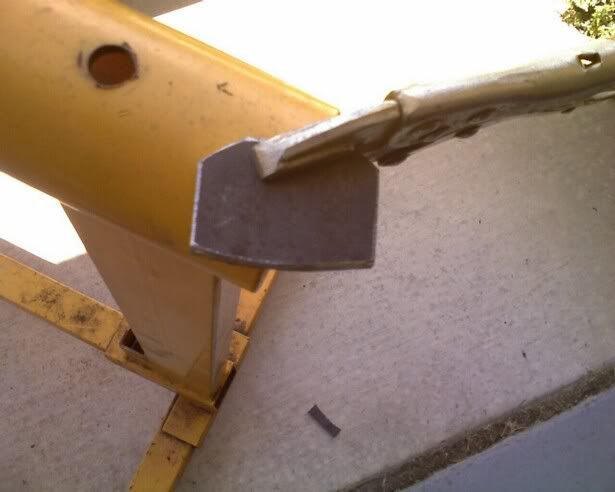
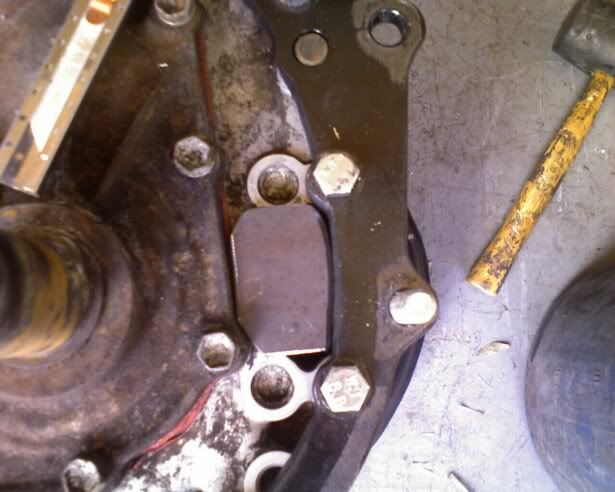
i took this one before i cleaned all the slag off.. gota love flux core..
here is what i did to the fork to get the extra reach..
and there she is!, used a pry bar to check operation, and to make shure it didn't pop or shift.. all is good..
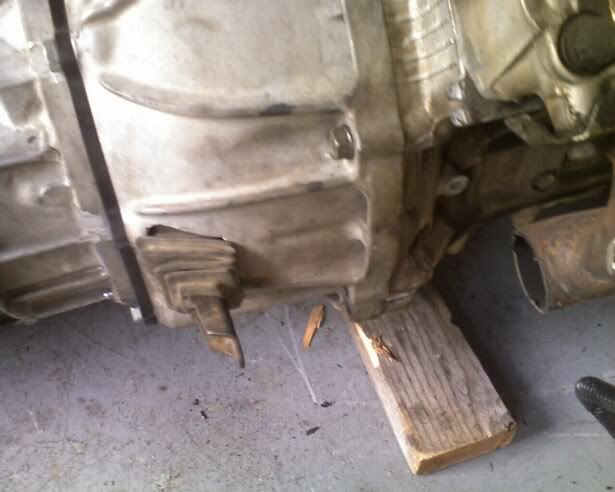
next task is the slave, and the exhaust..
starting on the clutch fork pivot.
i took this one before i cleaned all the slag off.. gota love flux core..
here is what i did to the fork to get the extra reach..
and there she is!, used a pry bar to check operation, and to make shure it didn't pop or shift.. all is good..
next task is the slave, and the exhaust..
Jul 22, 2010 | 05:05 PM
#77
Thread Starter
Registered User
Joined: Sep 2009
Posts: 263
Likes: 0
From: St George,Ut
so i picked up a set of fj springs a wile ago. decided i want to feel like i finished a job
so i threw them on this afternoon. not to bad of a task, as long as you have access to a
high lift jack, floor jack and one of those lame scissor jacks..
just unbolt the shock at the bottom, lift the rear till you can slide the shocks off, then jack it up till both wheels are just off the ground.. i did one side at a time, but take the wheel off support the the truck with the floor jack(or jack stand) and then take your scissor jack
and use it to push the axle down from the frame until you can pull your old spring out..
next, get your new springs(if you have a spring compressor use it) i used some ratchet
straps for my spring compressors.. squish em down till you can squeeze it into the old springs spot, and undo your straps.. a lot easer then i was counting on..
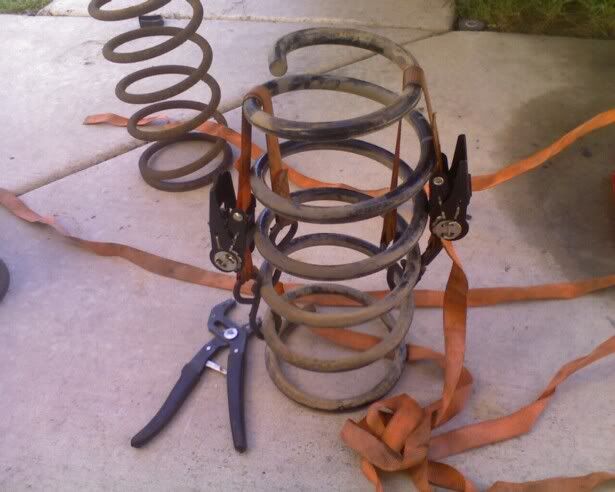
Last edited by birdduck; Jul 22, 2010 at 05:06 PM.
Jul 30, 2010 | 11:42 PM
#80
Thread Starter
Registered User
Joined: Sep 2009
Posts: 263
Likes: 0
From: St George,Ut
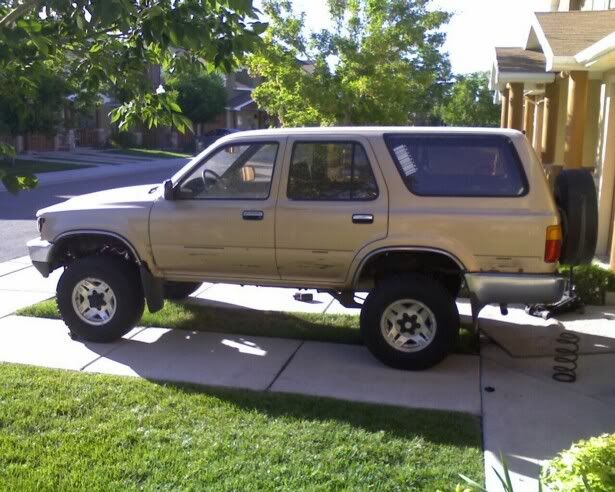
Well small update, i got my rear driveshaft bolted on. The auto
drive shaft flange is differrant then the 5spd so i had to drill
ney holes, but its all bolted on and no need to shorten driveshaft
like you do with the inchworm addapters.
For now i am only doing the bare min so i can get this thing on the
road, after that i will tie up all the small details as i go...


