
1988 4runner 1uz swap

 Mar 23, 2011 | 04:34 PM
#63
Thread Starter
Contributing Member
Joined: Dec 2008
Posts: 2,505
Likes: 16
From: San Jose ,Ca
cool thanks !
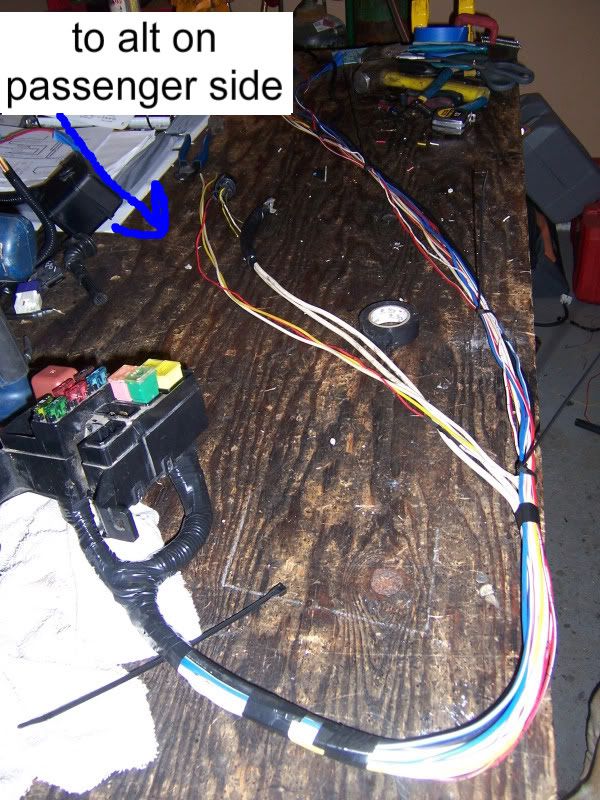
the plugs are exactly the same and the pin locations are also the same .. you really just need to lengthen the wires to the passanger side.. im just doing it this way to make it more plug and play ..the sc plug will plug into the alternator .. then to the battery and then to the old 3.0 alt plug .
but its definetly easier to just extend the original 3.0 wires .
good luck man .. dont forget pics 
the plugs are exactly the same and the pin locations are also the same .. you really just need to lengthen the wires to the passanger side.. im just doing it this way to make it more plug and play ..the sc plug will plug into the alternator .. then to the battery and then to the old 3.0 alt plug .
but its definetly easier to just extend the original 3.0 wires .
Last edited by RMA; Mar 23, 2011 at 04:36 PM.
Mar 26, 2011 | 11:22 PM
#65
Thread Starter
Contributing Member
Joined: Dec 2008
Posts: 2,505
Likes: 16
From: San Jose ,Ca
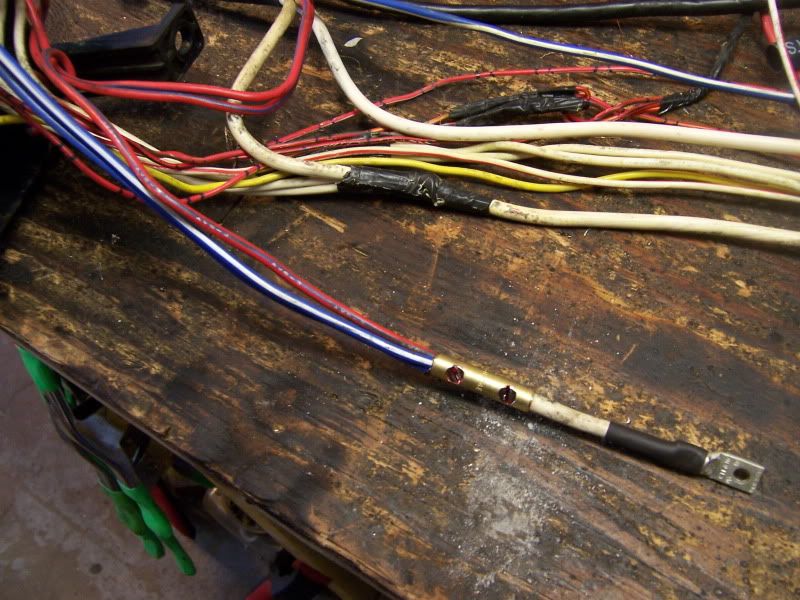
ok so i chaged my mind again .. will use the original 3.0 alternator wires except for the large main one .. will replace that one with one bigger.
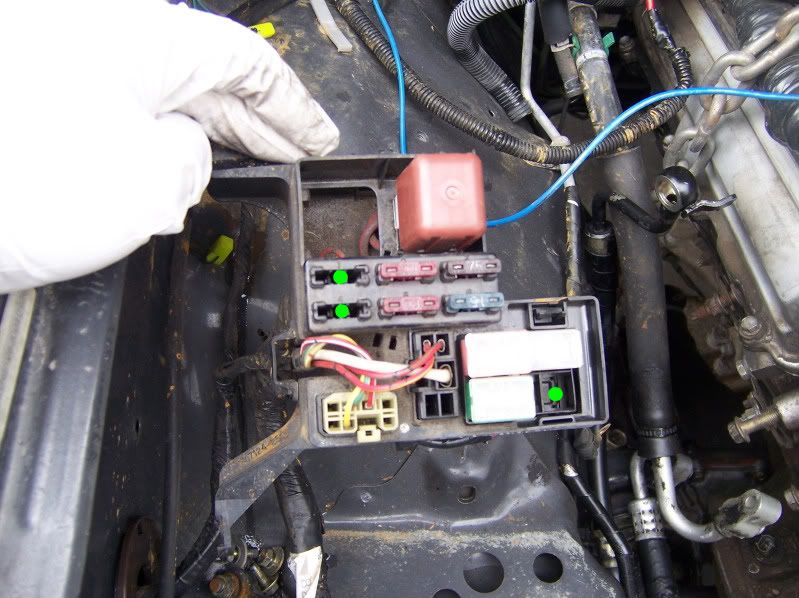
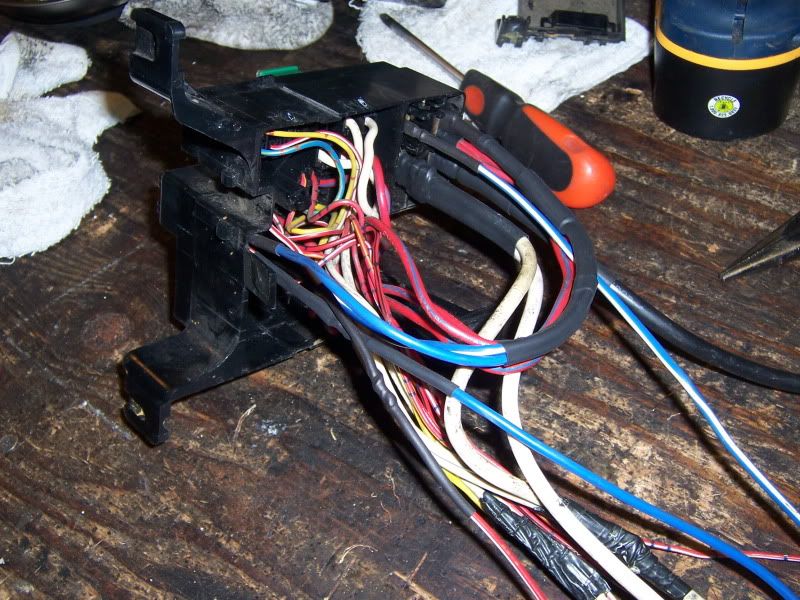
will also use the 3 empty fuse spaces in the original 3.0 fuse box to fuse the starter,efi,ignition main relays.. will still use the junkyard fuse box for the e-fans or something.
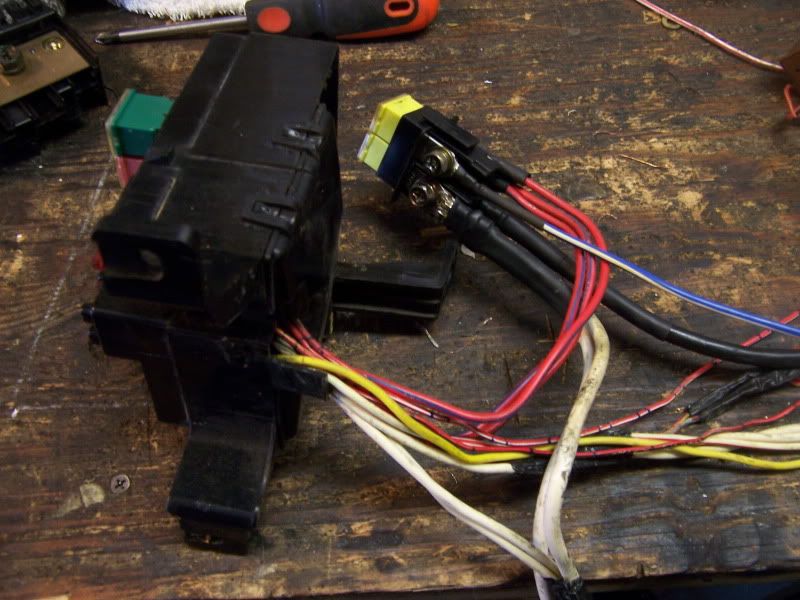
3 empty spaces
removed the 3.0 fuse box
change out the main power wire for the fuse box to larger wire

original 3.0 wire on top (white)and the newer larger installed
power wires for the efi,ignition main fuses .. found these connectors at home depot used red locktight on the screws.
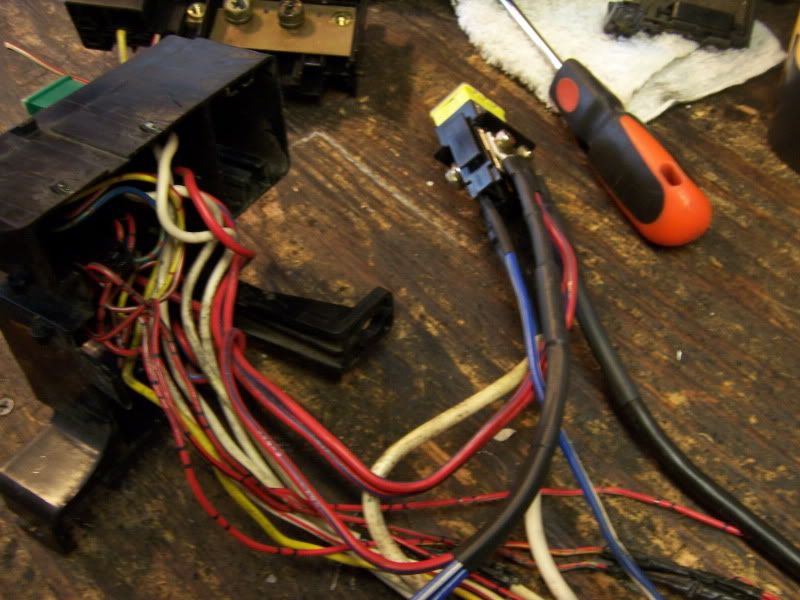
3 spaces filled now
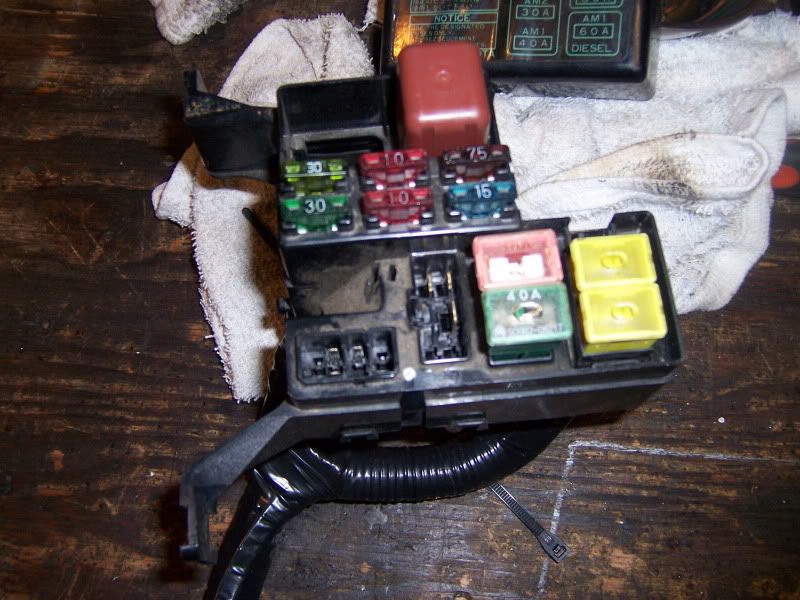
did find the 80 amp fuse along with the 15 amp fuse blown .. need to look into this .

will also use the 3 empty fuse spaces in the original 3.0 fuse box to fuse the starter,efi,ignition main relays.. will still use the junkyard fuse box for the e-fans or something.
3 empty spaces
removed the 3.0 fuse box
change out the main power wire for the fuse box to larger wire
original 3.0 wire on top (white)and the newer larger installed
power wires for the efi,ignition main fuses .. found these connectors at home depot used red locktight on the screws.
3 spaces filled now
did find the 80 amp fuse along with the 15 amp fuse blown .. need to look into this .


 Mar 27, 2011 | 08:27 PM
#69
Thread Starter
Contributing Member
Joined: Dec 2008
Posts: 2,505
Likes: 16
From: San Jose ,Ca
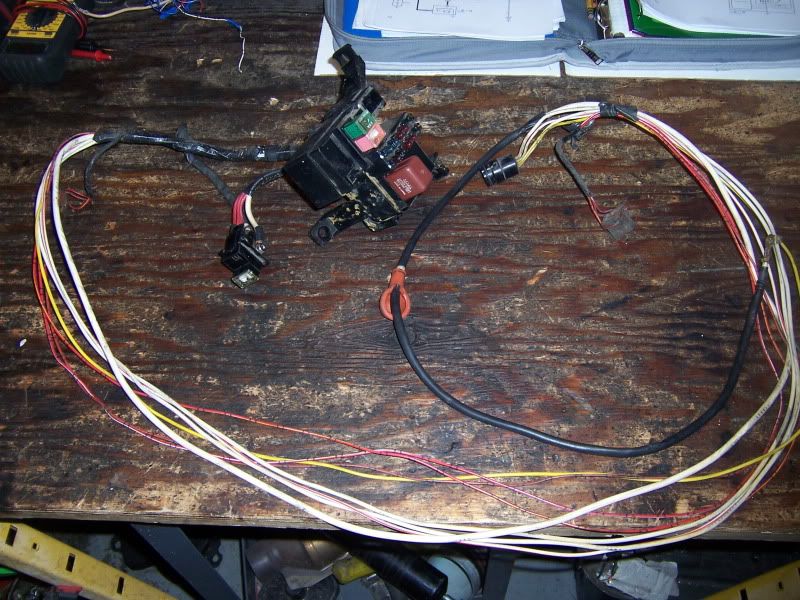
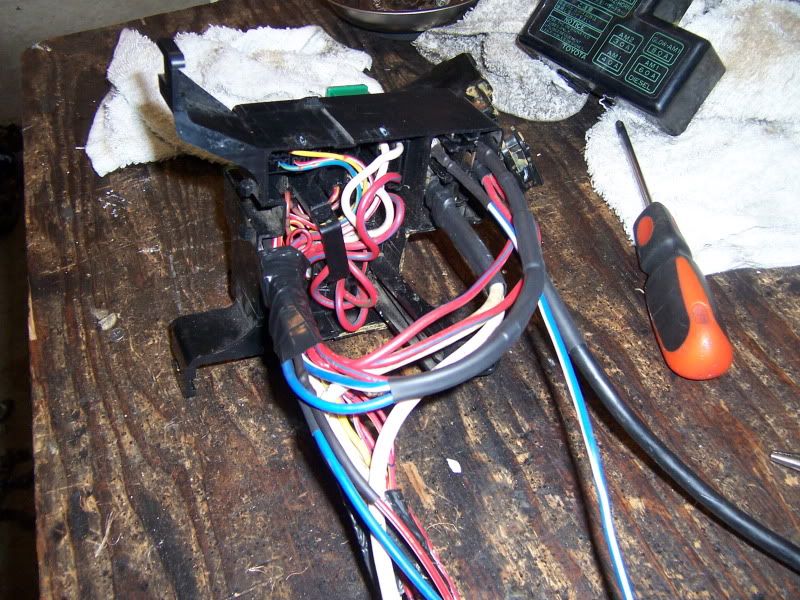
really didnt do anywork on the wiring today .. just picked up the fuse box and 1 more connector i liked .
this is off a 90's tercel for any one interested.
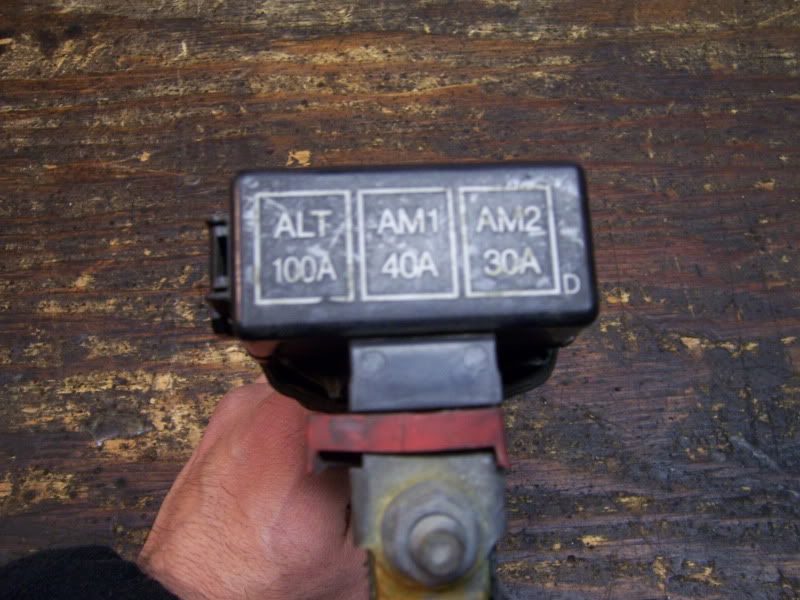
The maroon 4runner has the one off the corrola with the alt fuse at 80 , but this tercel has the 100 amp ..
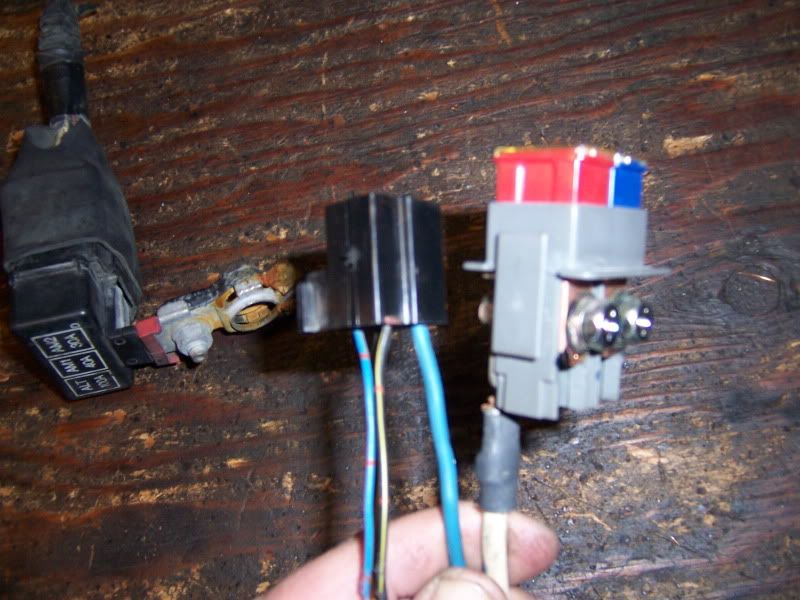
this grey plug on the right is off a tercel ,also it fits and is exactly like the one in the first gens fuse box (mines all messed up this ones in great shape)
the black relay plug on the left is off a 1983 4x4 pick up and fits in the empty spot(snaps into place ,was made for the spot.) for the relay in the 88 4runners fuse box.
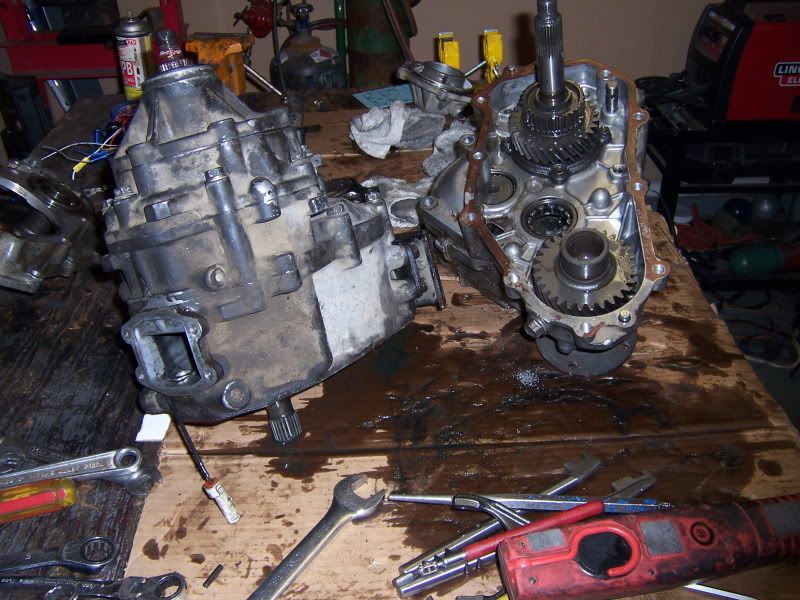
i also converted a forward shift transfer case to top shift ..
Last edited by RMA; Mar 27, 2011 at 08:32 PM.
 Mar 30, 2011 | 08:49 PM
#71
Thread Starter
Contributing Member
Joined: Dec 2008
Posts: 2,505
Likes: 16
From: San Jose ,Ca
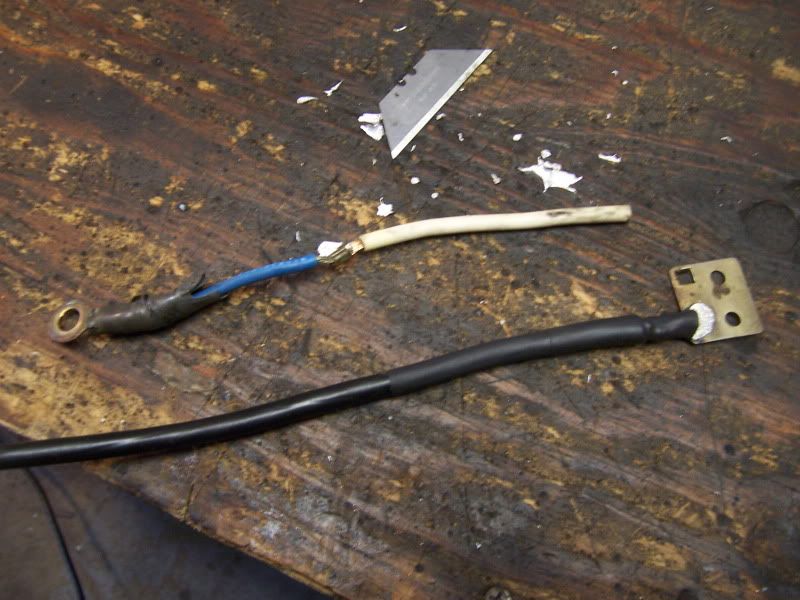
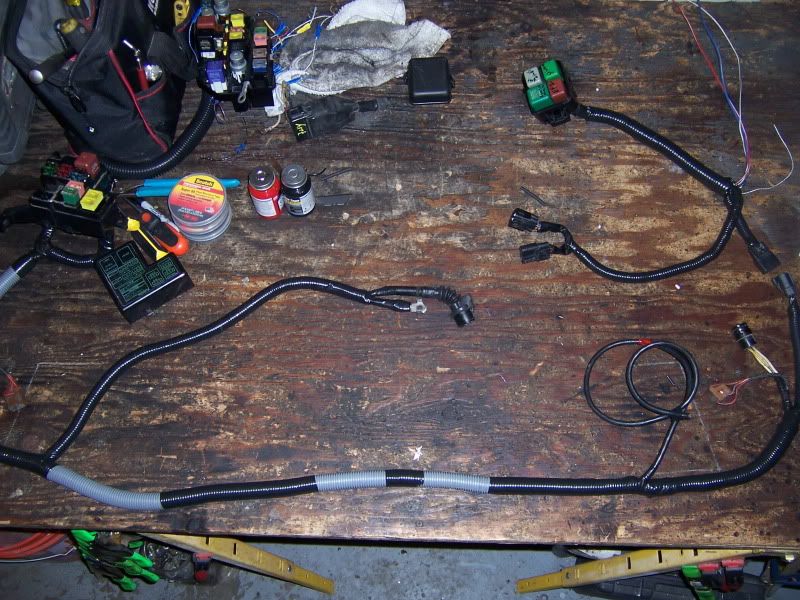
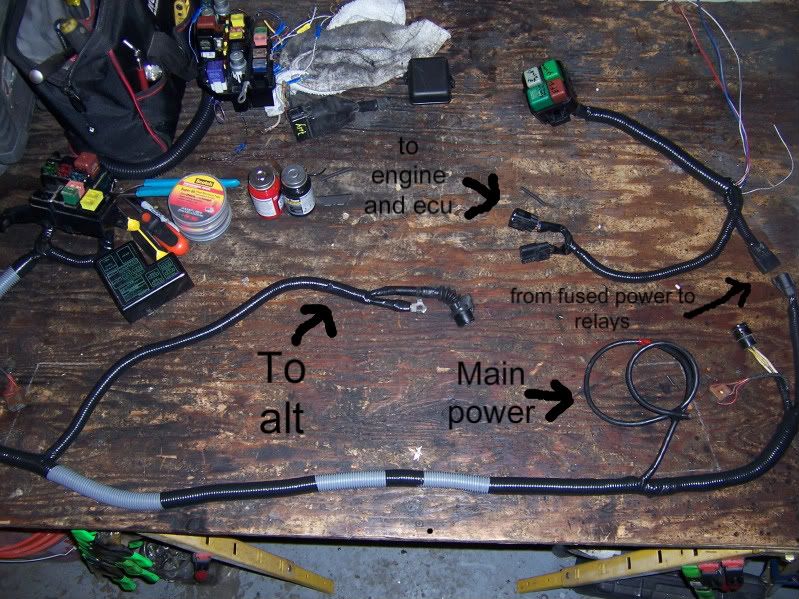
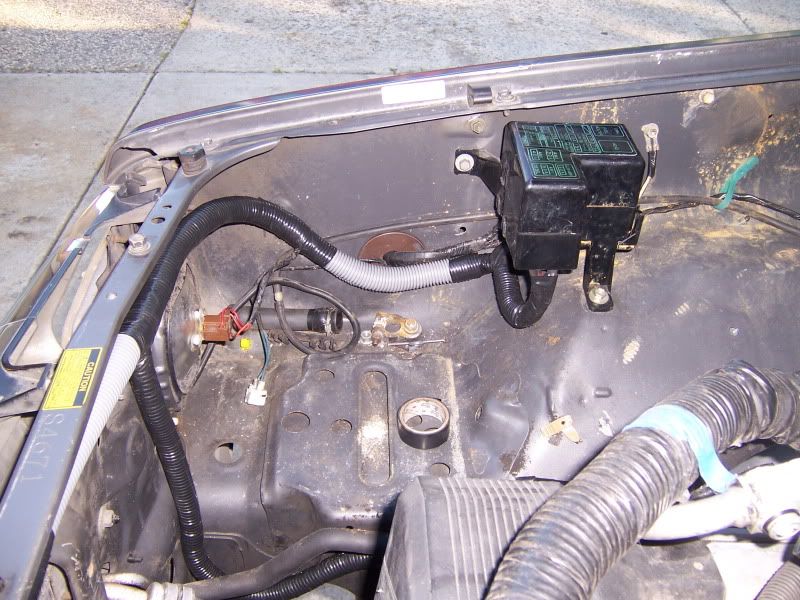
so almost finished with this harness
been messing with some temp switches to see which one i want to use on this truck .
i know im gonna use the 4 row copper radiator (5 row cools to much the maroon 4runner's temp at cruising on the highway is around 169*, according to the scanner ,thats without the fans coming on) but wanted to try a fixed temp switch instead of the adjustable ive been using.
pictured from left to right is the camry,vigor,ls 400 .
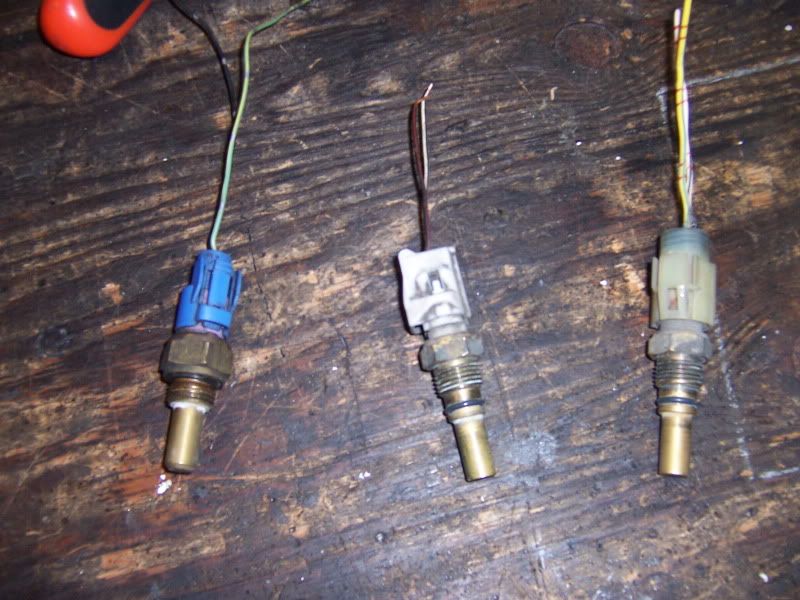
I originally wanted to use the ls 400 switch but after looking thru the diagrams , no way ,to complicated for me ..4 relays for 2 fans. the switch has continuity until 195* then no continuity till 185*. so its backwards .. i need simple
right now looks like ill try the camry switch 195*-175*
if anybody knows of a 195-185 toyota switch please let me know .
for now i have the radiator shop put in a 3/8th bung.
been messing with some temp switches to see which one i want to use on this truck .
i know im gonna use the 4 row copper radiator (5 row cools to much the maroon 4runner's temp at cruising on the highway is around 169*, according to the scanner ,thats without the fans coming on) but wanted to try a fixed temp switch instead of the adjustable ive been using.
pictured from left to right is the camry,vigor,ls 400 .
I originally wanted to use the ls 400 switch but after looking thru the diagrams , no way ,to complicated for me ..4 relays for 2 fans. the switch has continuity until 195* then no continuity till 185*. so its backwards .. i need simple
right now looks like ill try the camry switch 195*-175*
if anybody knows of a 195-185 toyota switch please let me know .
for now i have the radiator shop put in a 3/8th bung.
Last edited by RMA; Mar 30, 2011 at 08:59 PM.
Apr 4, 2011 | 08:15 PM
#72
Thread Starter
Contributing Member
Joined: Dec 2008
Posts: 2,505
Likes: 16
From: San Jose ,Ca
so havent really worked to much on this thing .. took the kids and wife camping this weekend , it was a lot colder at night than i thought it was gonna be , but it was fun anyway ..
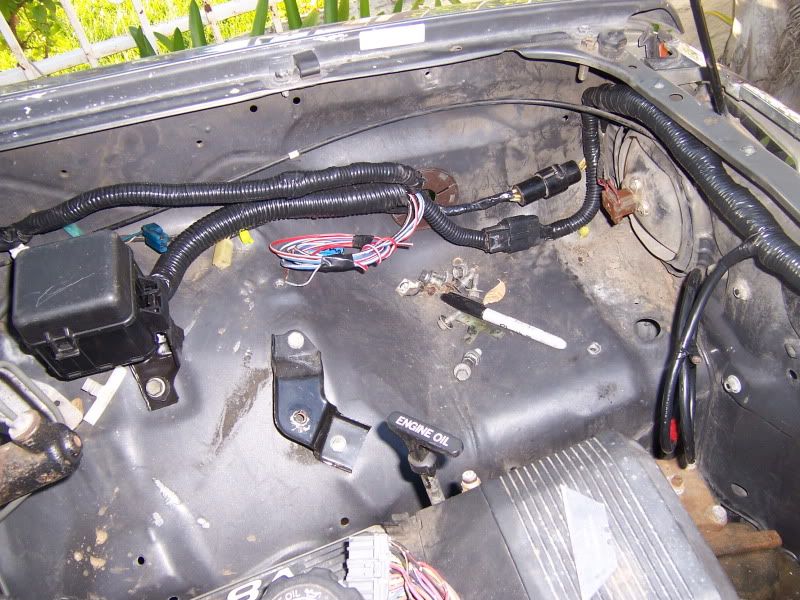
i did install the harness ive been working on , and started to take the dash apart .
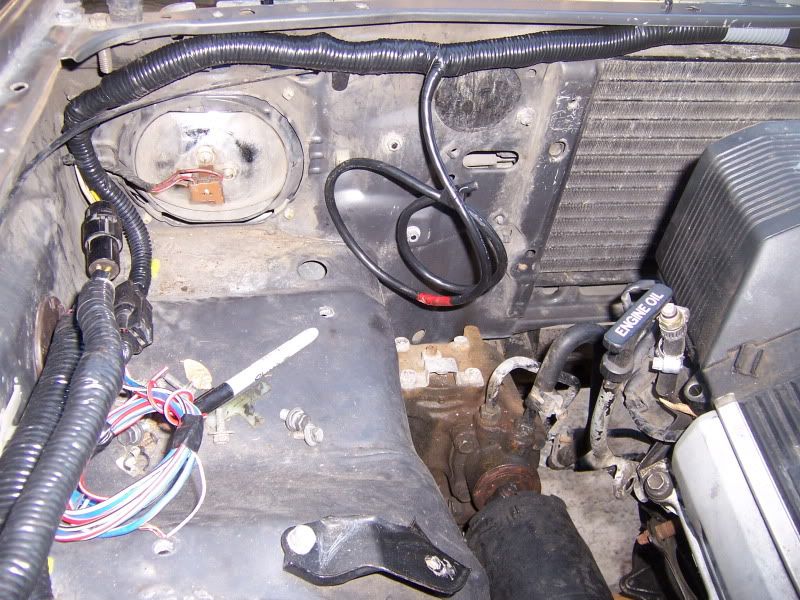
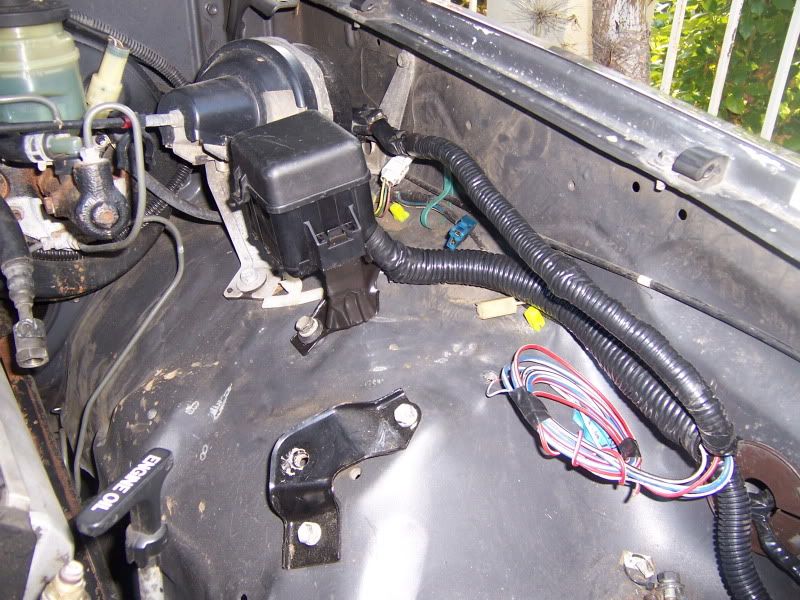
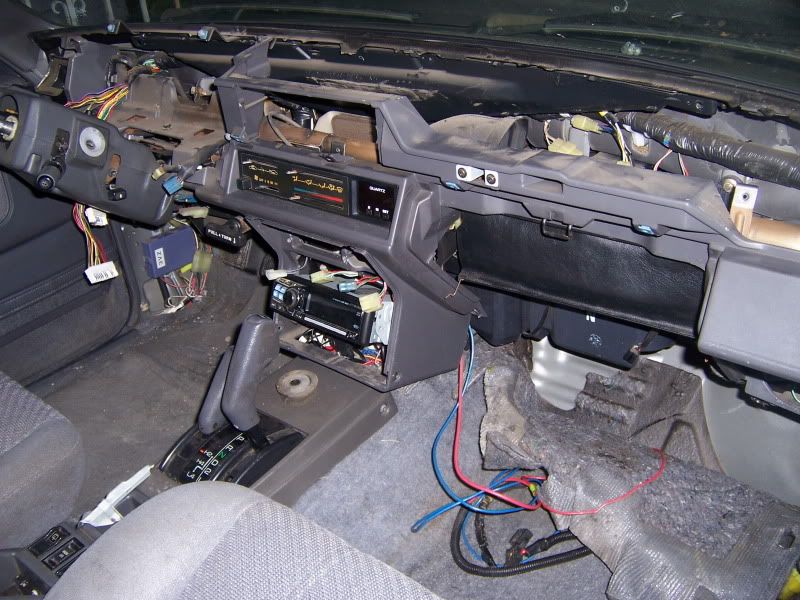
i did install the harness ive been working on , and started to take the dash apart .
Apr 5, 2011 | 09:58 AM
#74
Thread Starter
Contributing Member
Joined: Dec 2008
Posts: 2,505
Likes: 16
From: San Jose ,Ca
but i could start it right now pretty easy if i wanted to .. the easy part is starting the engine , the rest is where the works at ..mainly making it look good and not having it all hacked together ..after the other two swaps im taking my time on the wiring and making sure alls good and just how i want it before doing anything else.
good luck on yours man !!
Apr 10, 2011 | 05:36 PM
#77
Thread Starter
Contributing Member
Joined: Dec 2008
Posts: 2,505
Likes: 16
From: San Jose ,Ca
Apr 10, 2011 | 05:49 PM
#78
Thread Starter
Contributing Member
Joined: Dec 2008
Posts: 2,505
Likes: 16
From: San Jose ,Ca
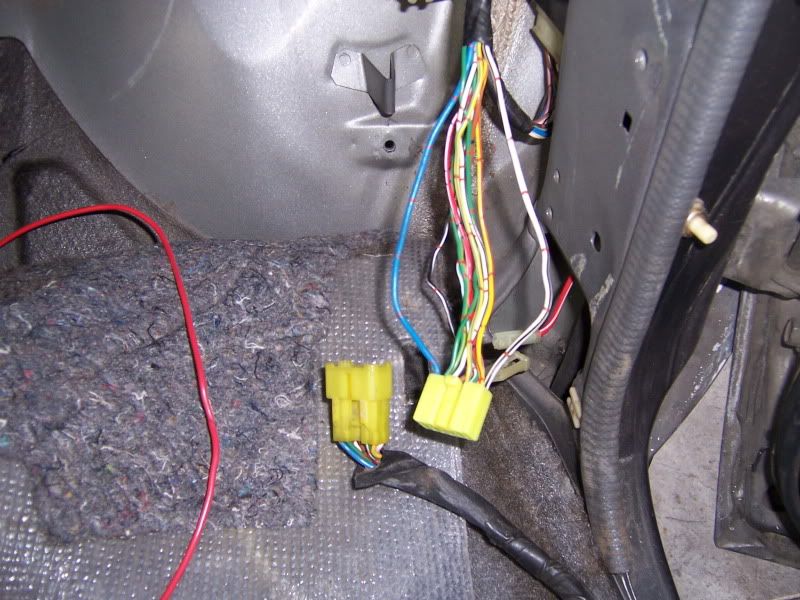
well not much done to this 4runner.. labeled the wires at the cluster to the 4runner .. did some side work ,changed a clutch and did a timing belt on the neighbors cars .. corrolla and civic..
i aslo picked up another sc harness to extend the ecu under the seat, picked up some hood shocks for my 4runner and a bunch of smaller stuff ill need , cluster cover from a early pick up with out the trip reset stem deal...
also got a new camera a kodak play sport .. so heres a couple small video
http://www.youtube.com/watch?v=0YoFN...ature=youtu.be
http://www.youtube.com/watch?v=QObQf7v-_24
Last edited by RMA; Apr 10, 2011 at 05:54 PM.
Apr 18, 2011 | 07:56 PM
#80
Thread Starter
Contributing Member
Joined: Dec 2008
Posts: 2,505
Likes: 16
From: San Jose ,Ca
so im getting tired really want to work on my truck ..
so this 4runner has plugs n1,n4,n5 which is kind of strange i think .. the others had n1,n2,n5.. so the diagrams were not showing the right plug for certain Circuits.

fuel pump wires positive blue ground white black.. was gonna cut the core relay off and put the sc fule pump control in its place , but im getting lazy dont want to take the complete dash off i cant reach it comfortably with out doing so.
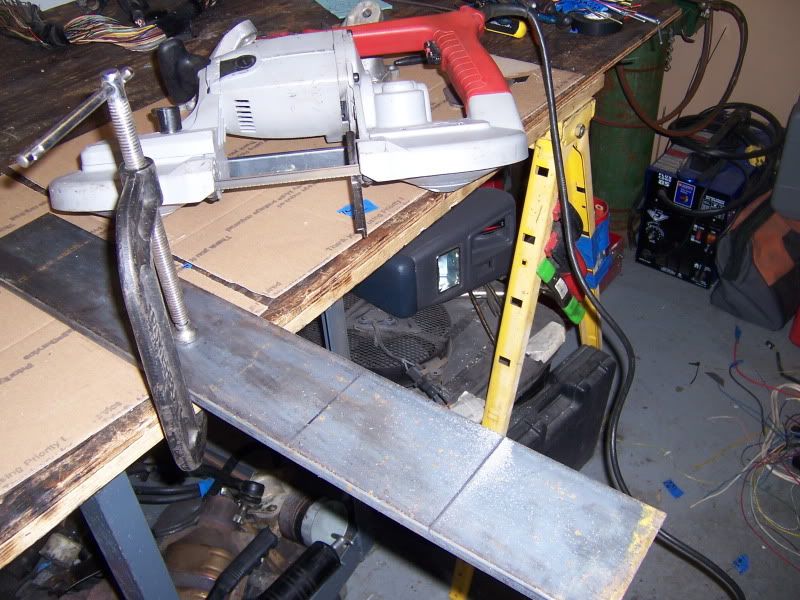
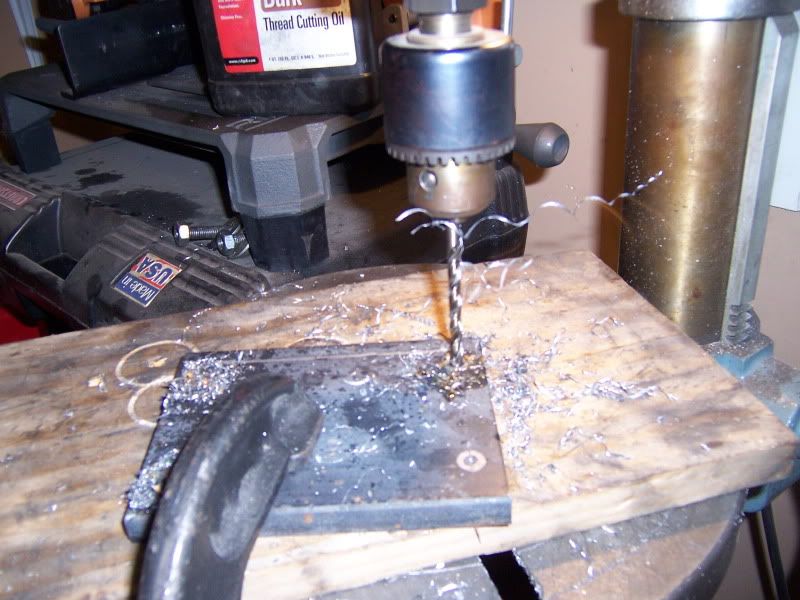
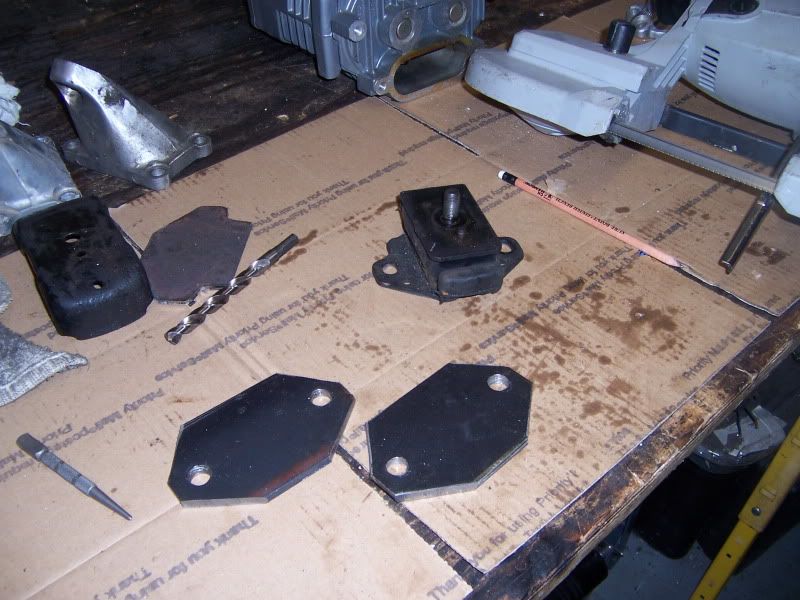
decided to take a little break from the wiring .. started on the mounts , there gonna be solid, ill make a jig so i can make some others with rubbers and change them out if i have to .
really want to work on my truck ..so this 4runner has plugs n1,n4,n5 which is kind of strange i think .. the others had n1,n2,n5.. so the diagrams were not showing the right plug for certain Circuits.
fuel pump wires positive blue ground white black.. was gonna cut the core relay off and put the sc fule pump control in its place , but im getting lazy dont want to take the complete dash off i cant reach it comfortably with out doing so.
decided to take a little break from the wiring .. started on the mounts , there gonna be solid, ill make a jig so i can make some others with rubbers and change them out if i have to .
Last edited by RMA; Apr 24, 2011 at 07:38 AM.


