
1988 4runner 1uz swap
 Apr 21, 2011 | 02:37 PM
#82
Thread Starter
Contributing Member
Joined: Dec 2008
Posts: 2,505
Likes: 16
From: San Jose ,Ca
bending the 3.0 fuel line


cut the end off the 3.0 fuel line and drilled to 5/16 and used that piece to connect some fuel line via brazed.

hopefully i didnt make a mistake doing this .


so i was able to get the engine in a little lower and further back ..

heres the black one


gonna try solid mounts ..what can really happen , this engine is really smooth to start with . and yes its flux core

for those that havent seen.
http://www.youtube.com/watch?v=0zA9a...6FEBE12944FCFE
cut the end off the 3.0 fuel line and drilled to 5/16 and used that piece to connect some fuel line via brazed.
hopefully i didnt make a mistake doing this .
so i was able to get the engine in a little lower and further back ..
heres the black one
gonna try solid mounts ..what can really happen , this engine is really smooth to start with . and yes its flux core
for those that havent seen.
http://www.youtube.com/watch?v=0zA9a...6FEBE12944FCFE
Last edited by RMA; Apr 23, 2011 at 09:42 PM.
Apr 23, 2011 | 09:46 PM
#84
Thread Starter
Contributing Member
Joined: Dec 2008
Posts: 2,505
Likes: 16
From: San Jose ,Ca
RbX .. i wish it was getting easier .. its always different
its only the third one ...on the others i was using compression fittings to combine some fuel lines to make long enough , well i tried brazing this one , hopefully it will be ok.
heres the fuel lines .. now im gonna pull this engine and swap some parts over so i can install the sc engine and hopefully leave it there.
Last edited by RMA; Apr 24, 2011 at 07:38 AM.


 Apr 28, 2011 | 08:30 PM
#87
Thread Starter
Contributing Member
Joined: Dec 2008
Posts: 2,505
Likes: 16
From: San Jose ,Ca
 Apr 28, 2011 | 08:44 PM
#88
Thread Starter
Contributing Member
Joined: Dec 2008
Posts: 2,505
Likes: 16
From: San Jose ,Ca
so yesterday i left all the plastics for the shifter just tacked together with some super glue ..
i havent had any luck on glueing plastics or abs ive tried all kinds of glues and epoxies none work really well. not even the abs glues .
so i picked a different plastic epoxy and did a couple tests .
plastic epoxy , hot glue and tried to melt some pieces together.

Hot glue worked the best , then the epoxy and then the melting... so glued everything up with that.

Started on the cluster, tried to figure out the best way to change out one light to 4x4. last one we cut out a square section , works just wanted to try different.
so here i taped off a small square and with some acetone wiped off some paint.

the owner wants this for his 4x4


some 22 gauge


heres where i left off today (got something in my eye ) hopefully i have some time tomorrow to work on it some more.
i havent had any luck on glueing plastics or abs ive tried all kinds of glues and epoxies none work really well. not even the abs glues .
so i picked a different plastic epoxy and did a couple tests .
plastic epoxy , hot glue and tried to melt some pieces together.
Hot glue worked the best , then the epoxy and then the melting... so glued everything up with that.
Started on the cluster, tried to figure out the best way to change out one light to 4x4. last one we cut out a square section , works just wanted to try different.
so here i taped off a small square and with some acetone wiped off some paint.
the owner wants this for his 4x4
some 22 gauge
heres where i left off today (got something in my eye ) hopefully i have some time tomorrow to work on it some more.
Apr 29, 2011 | 07:18 AM
#90
Thread Starter
Contributing Member
Joined: Dec 2008
Posts: 2,505
Likes: 16
From: San Jose ,Ca
Mt goat posted the part numbers in his thread .. but ill wait for a used one to come up ..
but the canadians can get them at the pick n pulls up there .
https://www.yotatech.com/forums/f160...started-82145/
but the canadians can get them at the pick n pulls up there .https://www.yotatech.com/forums/f160...started-82145/
Apr 29, 2011 | 11:17 AM
#91
Registered User

Joined: Jan 2010
Posts: 3,795
Likes: 33
From: Bloodymore
as usual....impressed!
mating plastics is tricky. i have had success with JB Weld and other epoxies, but only after sanding the two surfaces. the key is to fine the glue that will vulcanize the two plastics, and there are many different plastics, so one glue doesn't work for everything.
there are some 3m epoxies that are incredible, pricey, and not avalable at your local parts counter....internets have them.
Apr 29, 2011 | 05:50 PM
#92
Thread Starter
Contributing Member
Joined: Dec 2008
Posts: 2,505
Likes: 16
From: San Jose ,Ca
as usual....impressed!
mating plastics is tricky. i have had success with JB Weld and other epoxies, but only after sanding the two surfaces. the key is to fine the glue that will vulcanize the two plastics, and there are many different plastics, so one glue doesn't work for everything.
there are some 3m epoxies that are incredible, pricey, and not avalable at your local parts counter....internets have them.
mating plastics is tricky. i have had success with JB Weld and other epoxies, but only after sanding the two surfaces. the key is to fine the glue that will vulcanize the two plastics, and there are many different plastics, so one glue doesn't work for everything.
there are some 3m epoxies that are incredible, pricey, and not avalable at your local parts counter....internets have them.
thanks!
May 2, 2011 | 07:39 AM
#94
Thread Starter
Contributing Member
Joined: Dec 2008
Posts: 2,505
Likes: 16
From: San Jose ,Ca
May 2, 2011 | 01:02 PM
#96

robert - try epoxy called "PC-7 or PC-11". They sell it at our local ACE Hardware, i've never seen it at a big-name store. It's a 2-part paste epoxy that makes a VERY strong bond that will adhere to most surfaces. We use them all the time here in studio and i've used it to repair a lot of stuff these undergrads break. if you use it on plastic you need to make sure you scratch it up really well so it has something to grab (I like to use coarse sandpaper followed by lots of shallow scoring/hash marks cut with a utility knife, then press the epoxy into the recesses very well). i've even repaired some of those heavy-duty "Brute" trashcans that are kinda rubbery plastic - did a 3-inch-long repair after someone decided to slash the side with a shovel - we fill our trashcans with clay slop/reclaim, so it has quite a bit of tension on the repair when filled up, especially when we roll them around studio when full - so far it's held up for a couple years. the PC epoxies can also be carved, sanded and painted once it cures. by far some of the best epoxy that i've ever come across and not ridiculously expensive either.
May 2, 2011 | 07:00 PM
#97
Thread Starter
Contributing Member
Joined: Dec 2008
Posts: 2,505
Likes: 16
From: San Jose ,Ca
yea , thanks ill look into that
robert - try epoxy called "PC-7 or PC-11". They sell it at our local ACE Hardware, i've never seen it at a big-name store. It's a 2-part paste epoxy that makes a VERY strong bond that will adhere to most surfaces. We use them all the time here in studio and i've used it to repair a lot of stuff these undergrads break. if you use it on plastic you need to make sure you scratch it up really well so it has something to grab (I like to use coarse sandpaper followed by lots of shallow scoring/hash marks cut with a utility knife, then press the epoxy into the recesses very well). i've even repaired some of those heavy-duty "Brute" trashcans that are kinda rubbery plastic - did a 3-inch-long repair after someone decided to slash the side with a shovel - we fill our trashcans with clay slop/reclaim, so it has quite a bit of tension on the repair when filled up, especially when we roll them around studio when full - so far it's held up for a couple years. the PC epoxies can also be carved, sanded and painted once it cures. by far some of the best epoxy that i've ever come across and not ridiculously expensive either.
thanks just looked that stuff up , ill look out for it !
May 5, 2011 | 09:54 PM
#98
Thread Starter
Contributing Member
Joined: Dec 2008
Posts: 2,505
Likes: 16
From: San Jose ,Ca
so finally almost done with the cluster.. little cleaning up and then some paint .
its gonna have to wait until next week sometime,though .. friend just dropped of a 2001 camry that the looks like the headgasket went out .. ill be putting a used engine in that along with doing something special for the wife this weekend.
.


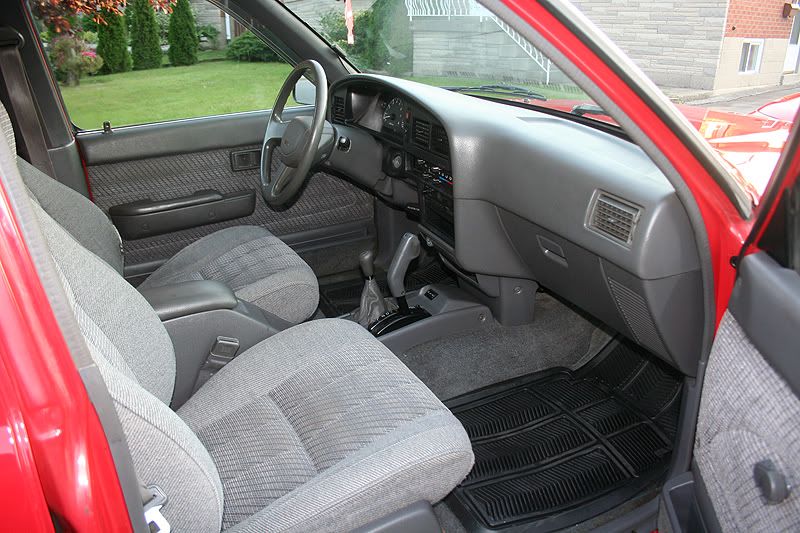
didnt have to cut anything around the dash .

its gonna have to wait until next week sometime,though .. friend just dropped of a 2001 camry that the looks like the headgasket went out .. ill be putting a used engine in that along with doing something special for the wife this weekend.
.
didnt have to cut anything around the dash .
Jun 2, 2011 | 07:00 PM
#100
Thread Starter
Contributing Member
Joined: Dec 2008
Posts: 2,505
Likes: 16
From: San Jose ,Ca
ok so i think its time for an update .. ive been super busy and only had a little time to work on this ..
motor together and installed for good .tranny is installed also.cluster is good just need some wiring ,new cross member radiator and drive shaftes.
heres the good stuff ..Pics!
added the egr tube to the tundra manifolds , all i had was square tube so thats what i used

painted the cluster cover with the taillight paint Vht i think its called .


used my new lathe to cut down the teeth off the drive gear for the speed ometer from the lexus rotor


welded the speedsenor hole off the t-100 extension housing shut and drilled a new hole for the lexus sensor.used a end mill and drill press to mill it flat , worked ok .


original t-100 speed sensor on the right .. electric speed sensor i bought off Dunkin on the left .. this electric speed sensor will work but i really wanted to use my new toy so i build a adapter to fit the sc 400 speed sensor and i can use that one also.I know its a super easy piece to make but for me its the first thing i actually made with the lathe .. really just learning to use it .. sharpening the bits just right is the hardest part

so i never knew this but the speedsensor plastic gears have the number of teeth printed on them .. the old one is 33 teeth and dunkins is 34 teeth.


bottom sensor is off the sc 400 it has the adapter i made on it already.

.. ive been super busy and only had a little time to work on this ..motor together and installed for good .tranny is installed also.cluster is good just need some wiring ,new cross member radiator and drive shaftes.
heres the good stuff ..Pics!
added the egr tube to the tundra manifolds , all i had was square tube so thats what i used
painted the cluster cover with the taillight paint Vht i think its called .
used my new lathe
to cut down the teeth off the drive gear for the speed ometer from the lexus rotorwelded the speedsenor hole off the t-100 extension housing shut and drilled a new hole for the lexus sensor.used a end mill and drill press to mill it flat , worked ok .
original t-100 speed sensor on the right .. electric speed sensor i bought off Dunkin on the left .. this electric speed sensor will work but i really wanted to use my new toy so i build a adapter to fit the sc 400 speed sensor and i can use that one also.I know its a super easy piece to make but for me its the first thing i actually made with the lathe .. really just learning to use it .. sharpening the bits just right is the hardest part
so i never knew this but the speedsensor plastic gears have the number of teeth printed on them .. the old one is 33 teeth and dunkins is 34 teeth.
bottom sensor is off the sc 400 it has the adapter i made on it already.


