
87 4Runner Low SAS
 Aug 4, 2010 | 12:11 PM
#1
Thread Starter
Registered User
Joined: Jun 2010
Posts: 62
Likes: 0
87 4Runner Low SAS
After a year of planning, studying, and collecting parts it finally came time to rid this 87 4Runner of the IFS plague.
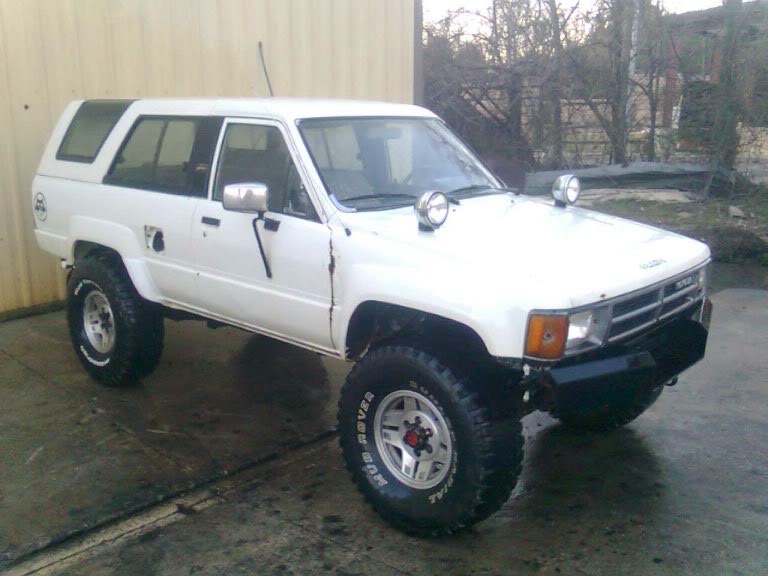


The truck was bought from the original owner and it had sat in the woods for 8 years because it had a rod knocking after an eventful night "mud riding". Once it got to the shop it got a rebuild along with a new head, rod, crank, and fuel pump. Along with this, it also now has 5.29 gears.
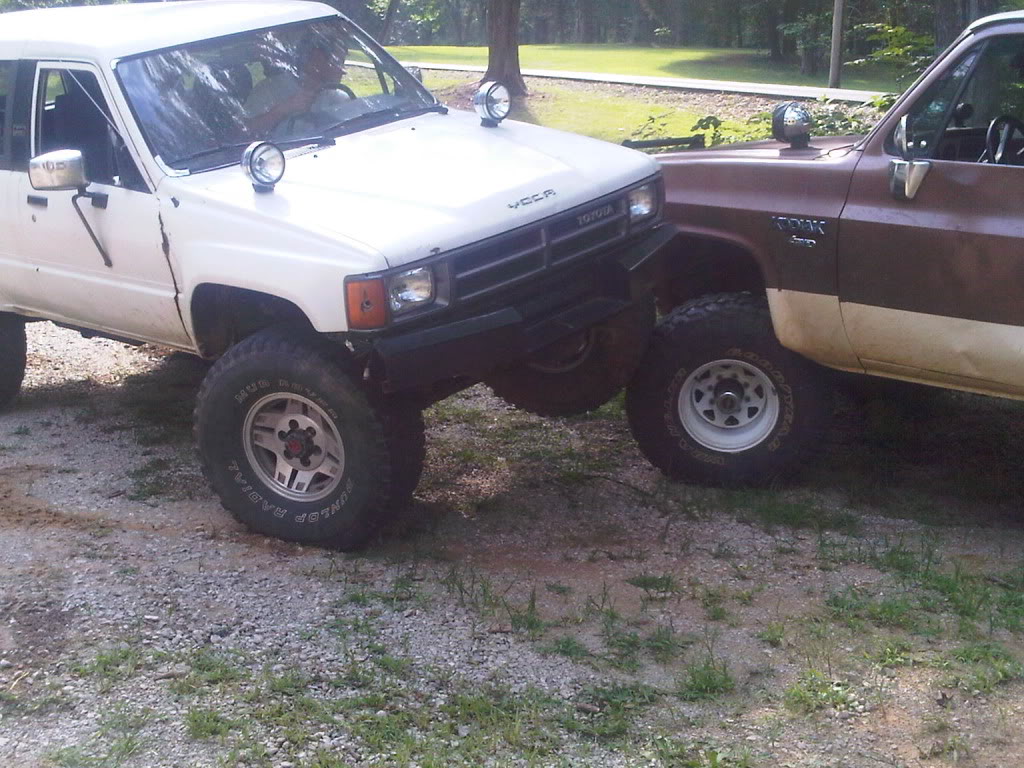
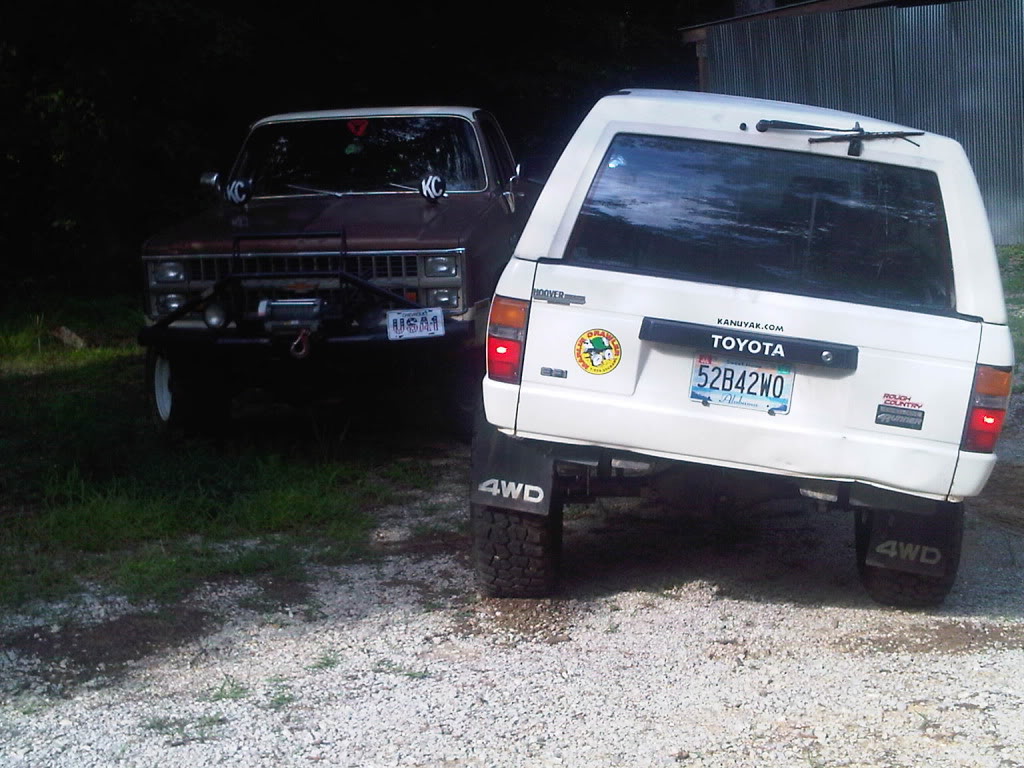
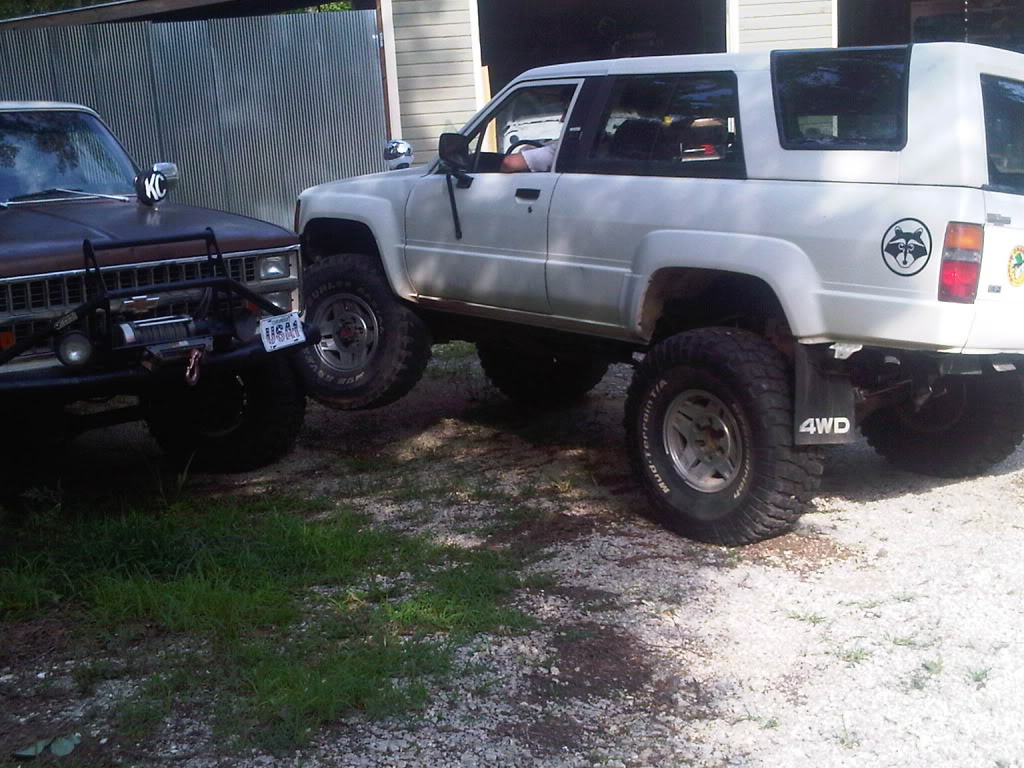
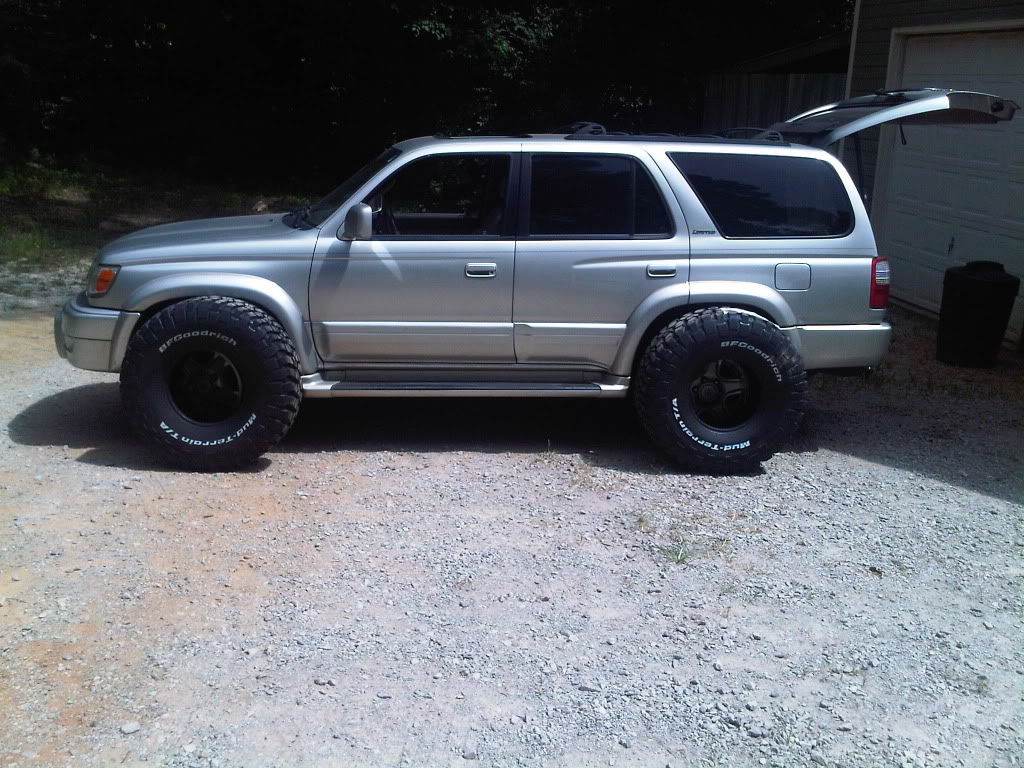
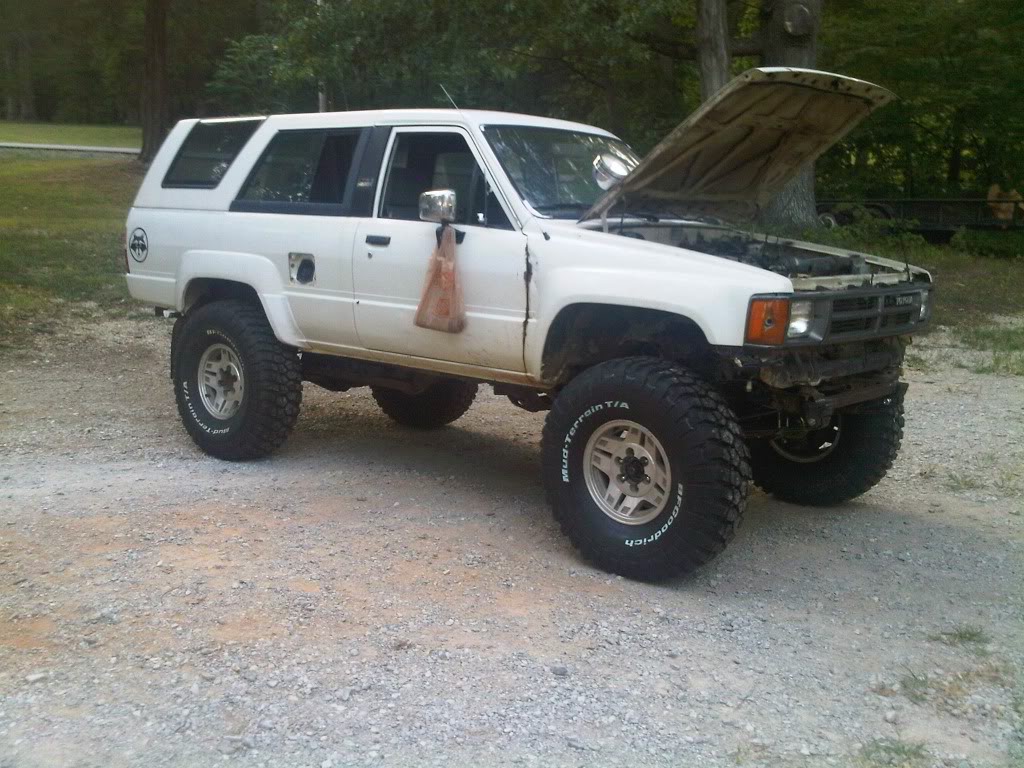
The plan is to keep this SAS low enough to match the existing 63 in. chevy's in the rear with a 4 inch shackle.
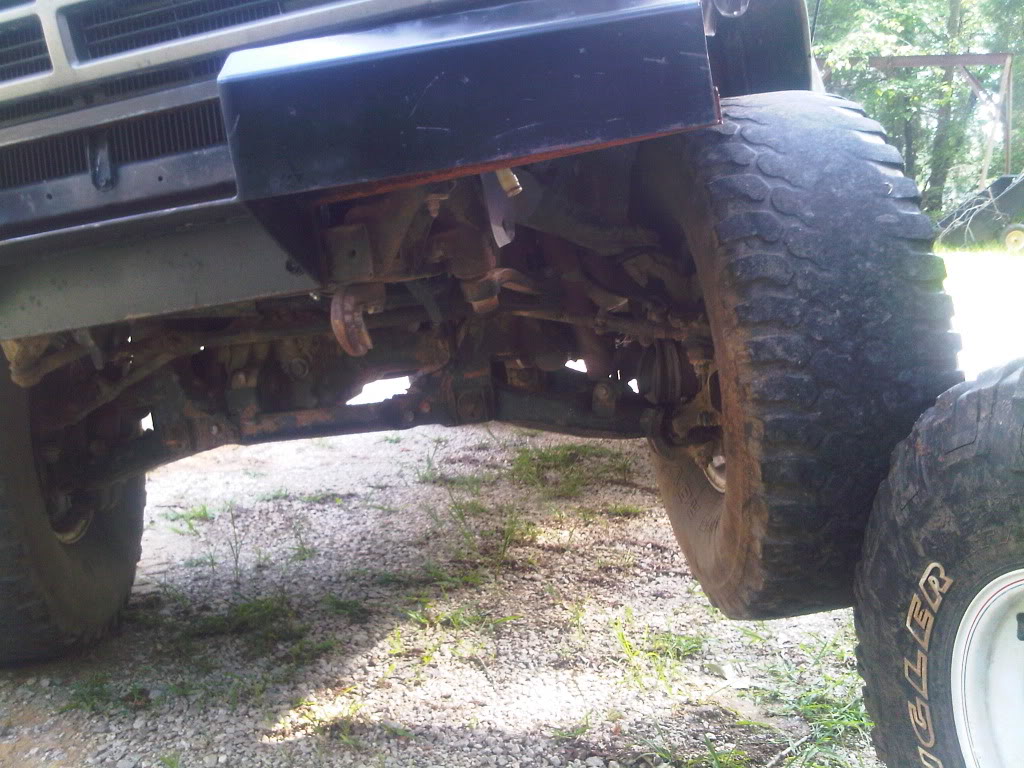
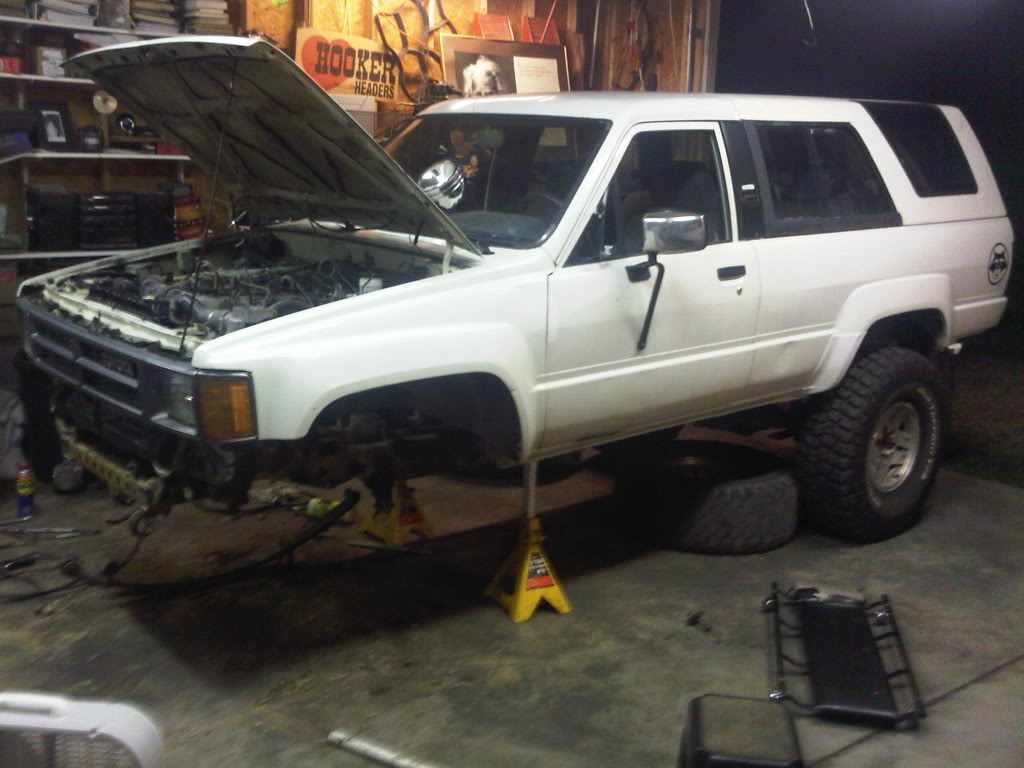
Here some pics of it before it got pulled into the shop to start the swap. Superior ride quality and flex!

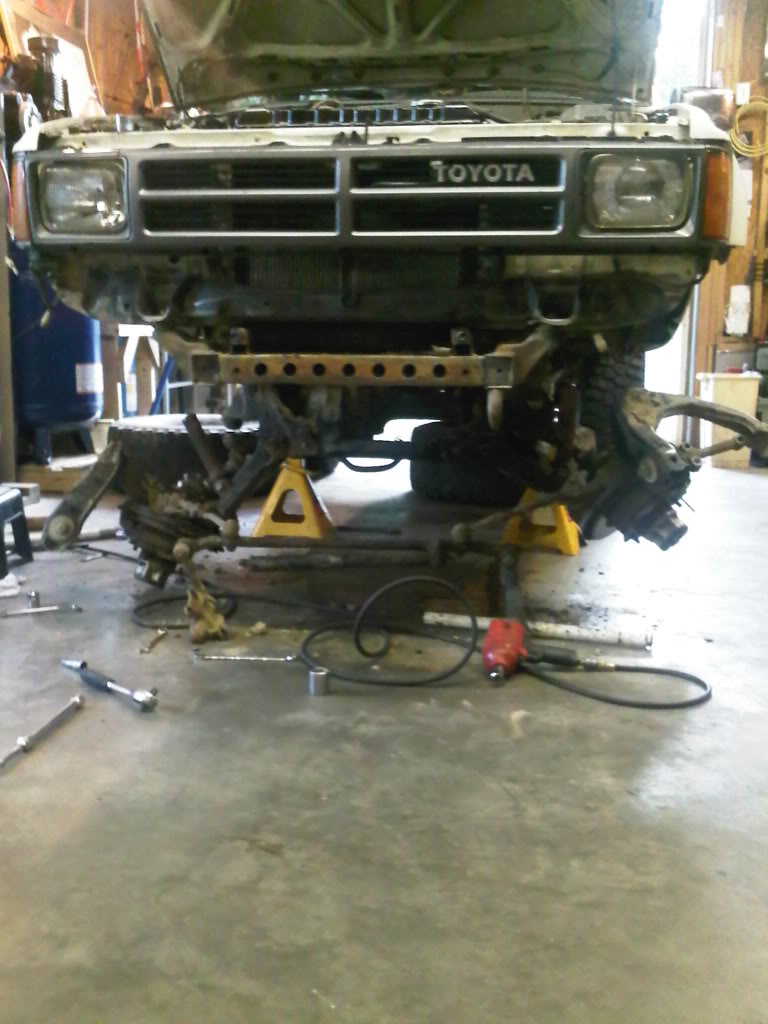
It did my soul good to see it like this
Now onto putting this thing back together. I used the trail gear kit minus the leaf springs because I already planned on RUF. Getting the whole kit was definately worth it because it sure beat piecing the parts together.
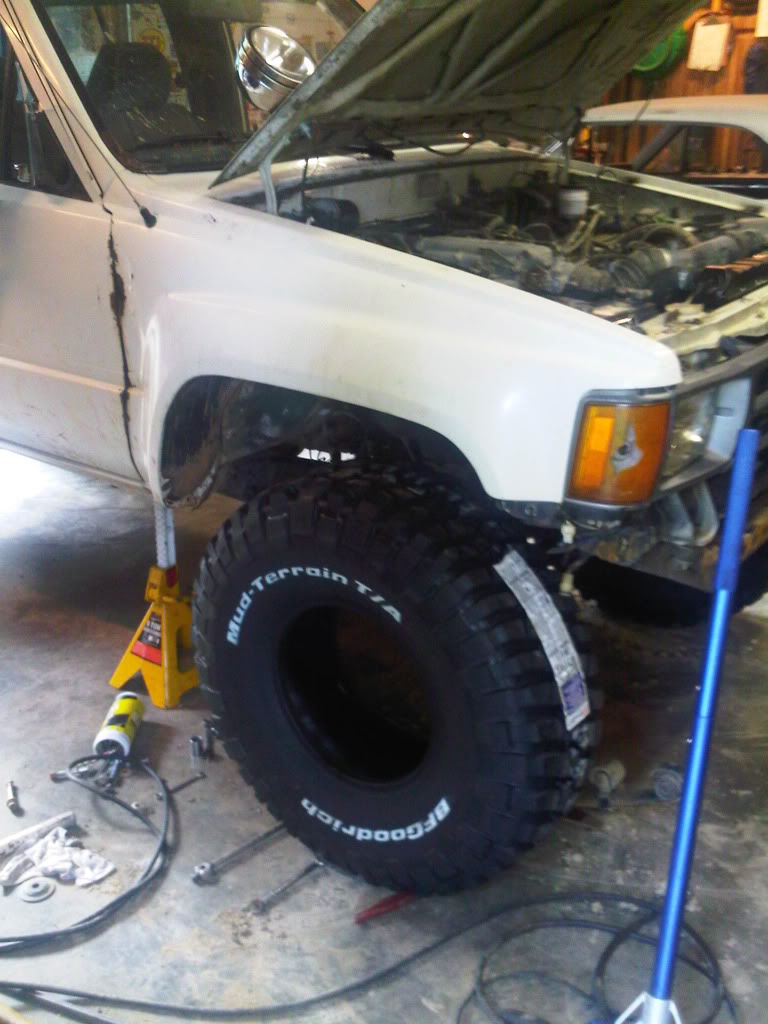
Here are the new tires for the front. Almost made me wanna get some black steelies for it.
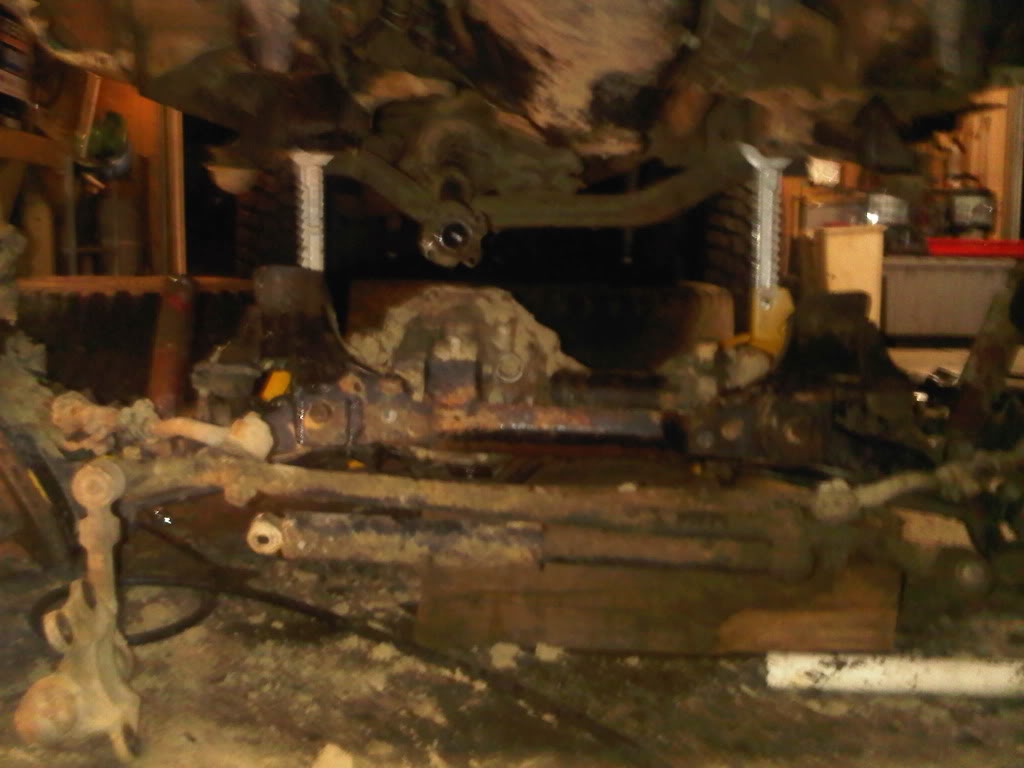
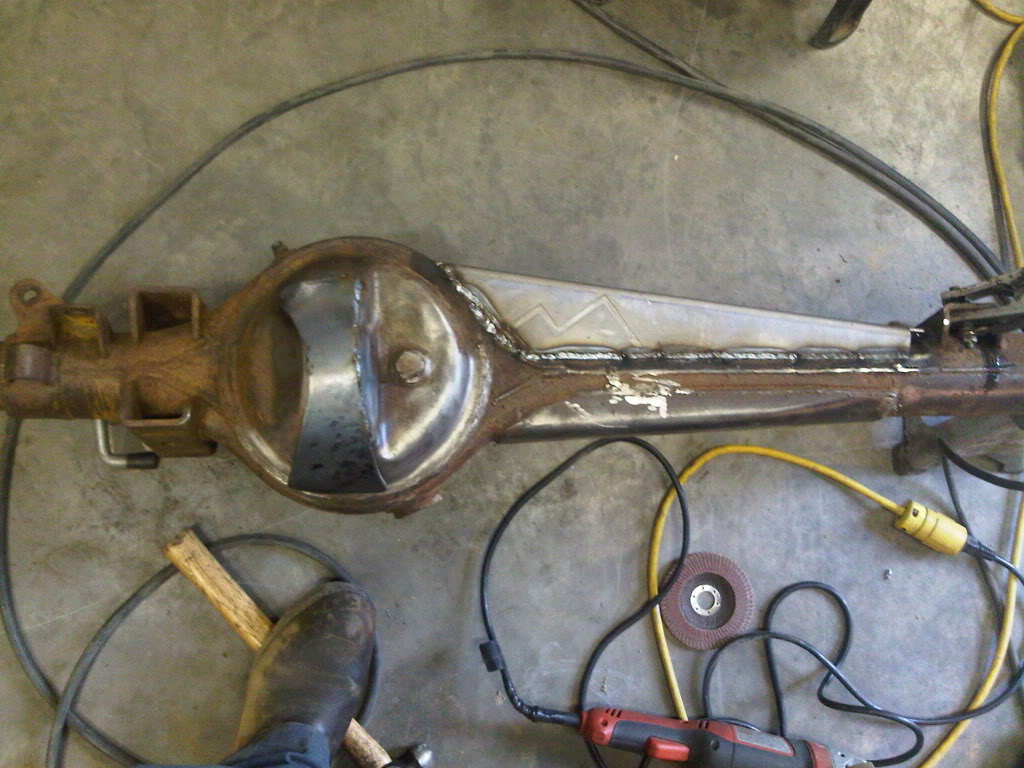
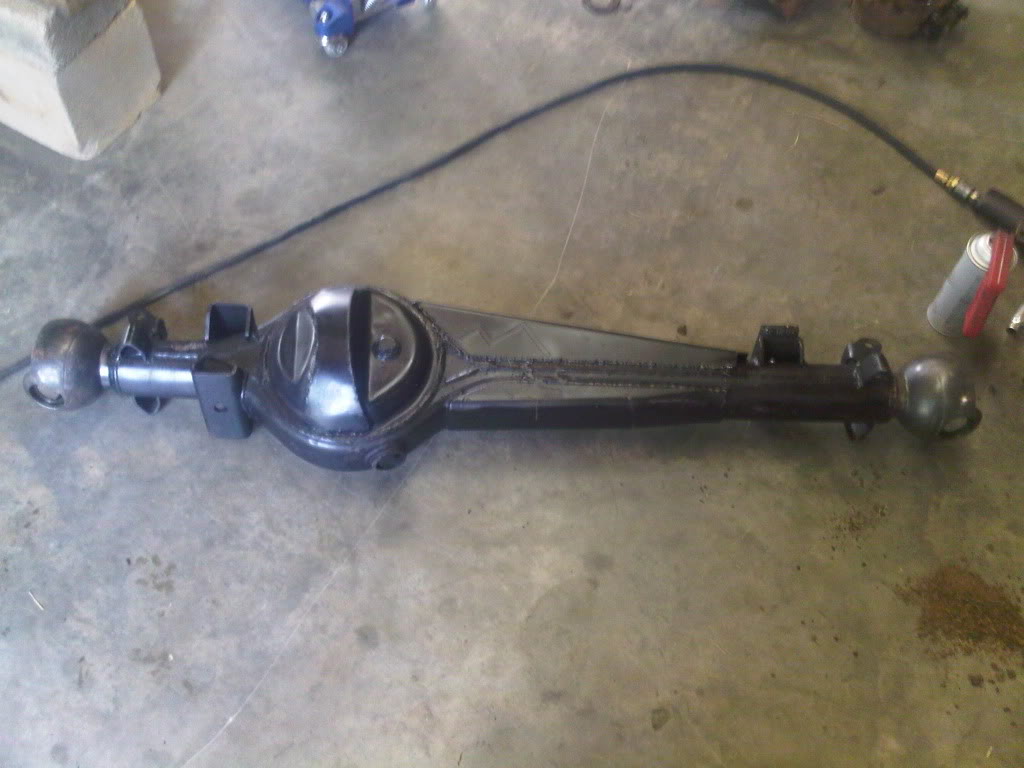
Here is the axle all trussed and welded up.
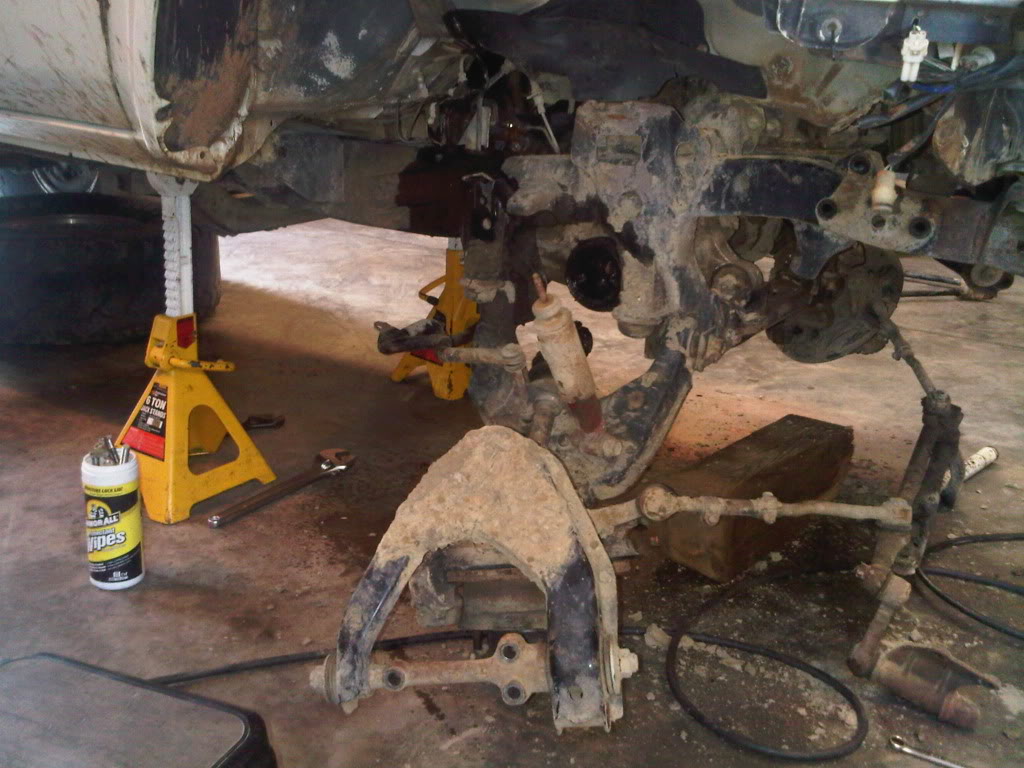
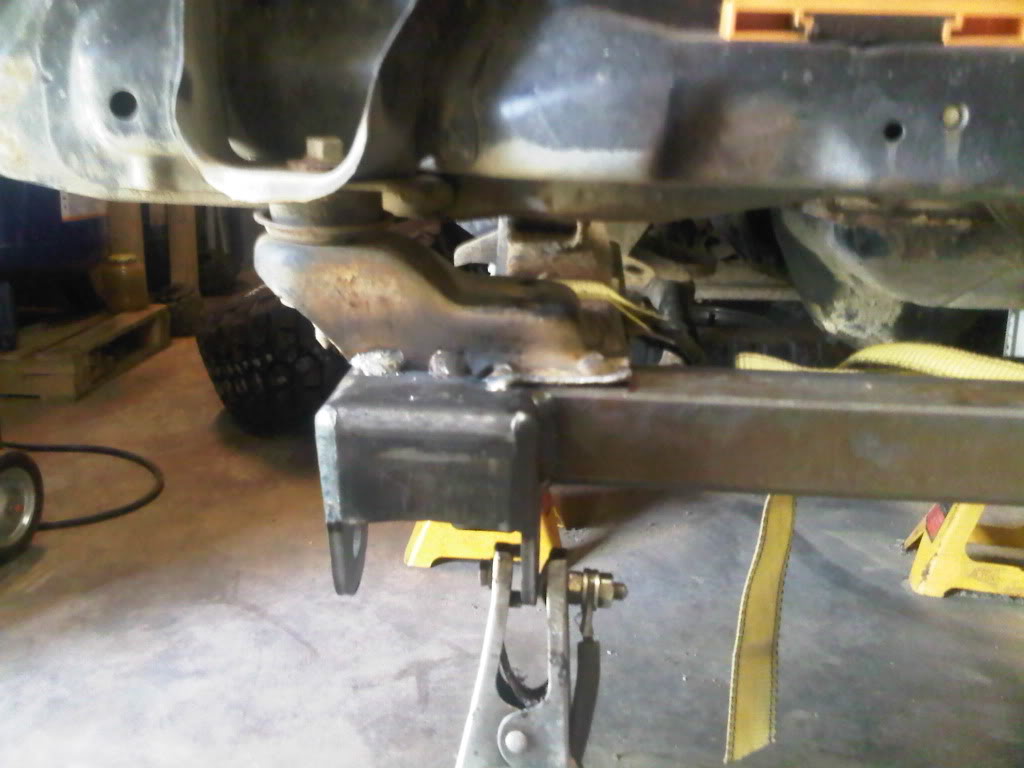
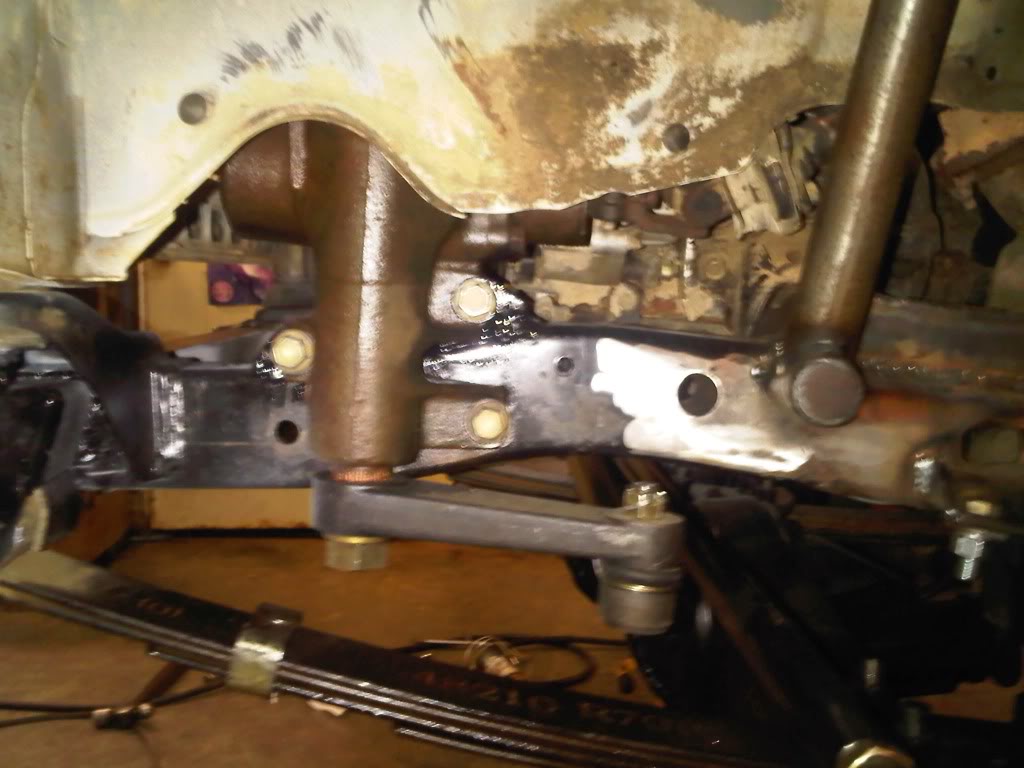
Here's where the low part of this SAS started to come into place. The front passenger side framerail was bent down pretty bad i'm sure from some drunk nights of "mud riding" as you can prolly see from this pic

I had planned on recessing the front hanger anyway so this really was no big deal. So I cut out the original front crossmember and then straightened the bent frame rail. I then notched the original frame and squared up this hanger and burned it in place. I contemplated about putting some 1 inch square tubing above this front hanger to eliminate problems that i might run into but I just said what the hey. I am also running a short shackle in the back instead of the 5 incher that comes in the kit.

Had to take the tires to my buddy to mount them and since my 700R4 went out in my Z then i had to drive this. Couldn't resist myself
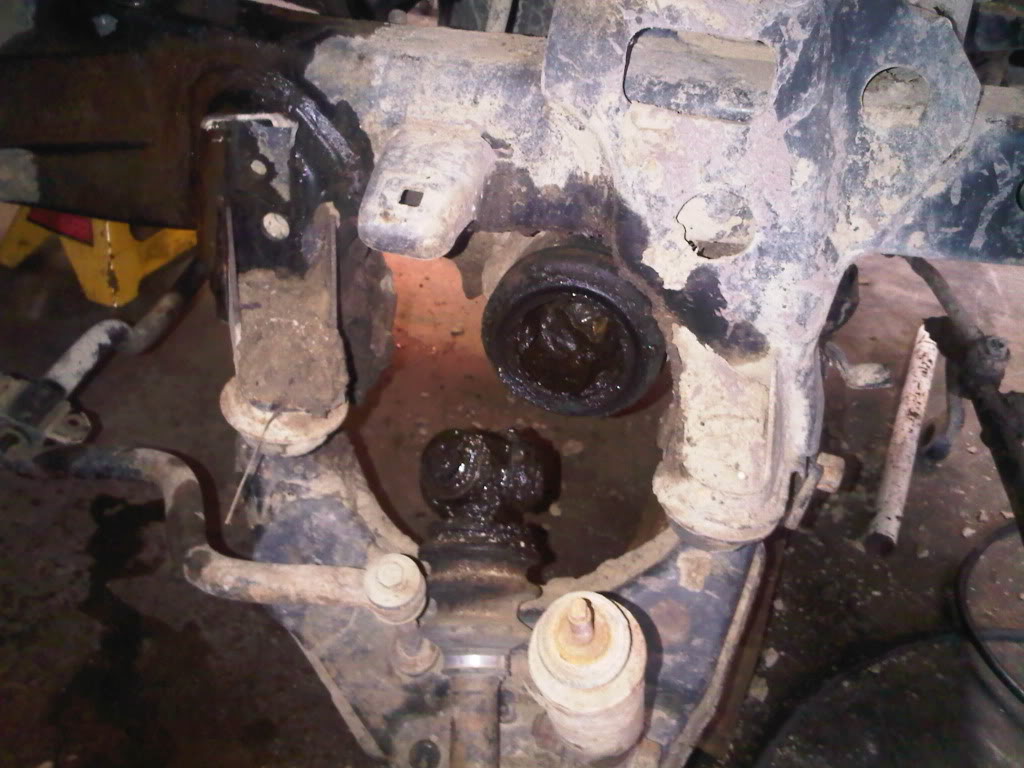
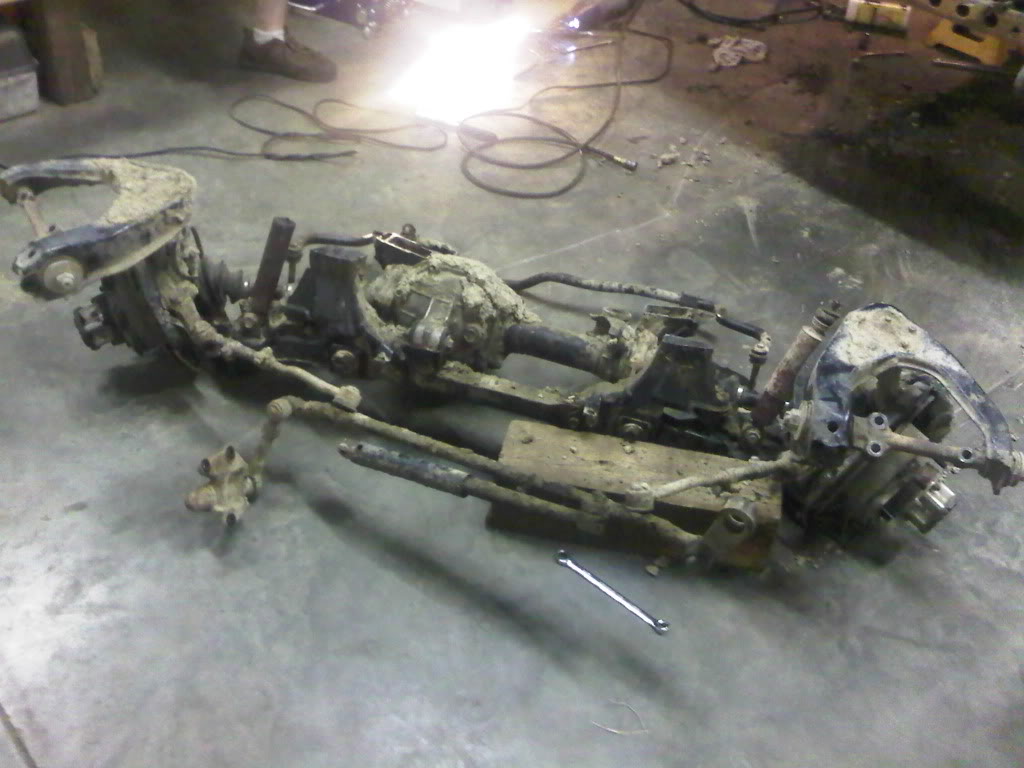
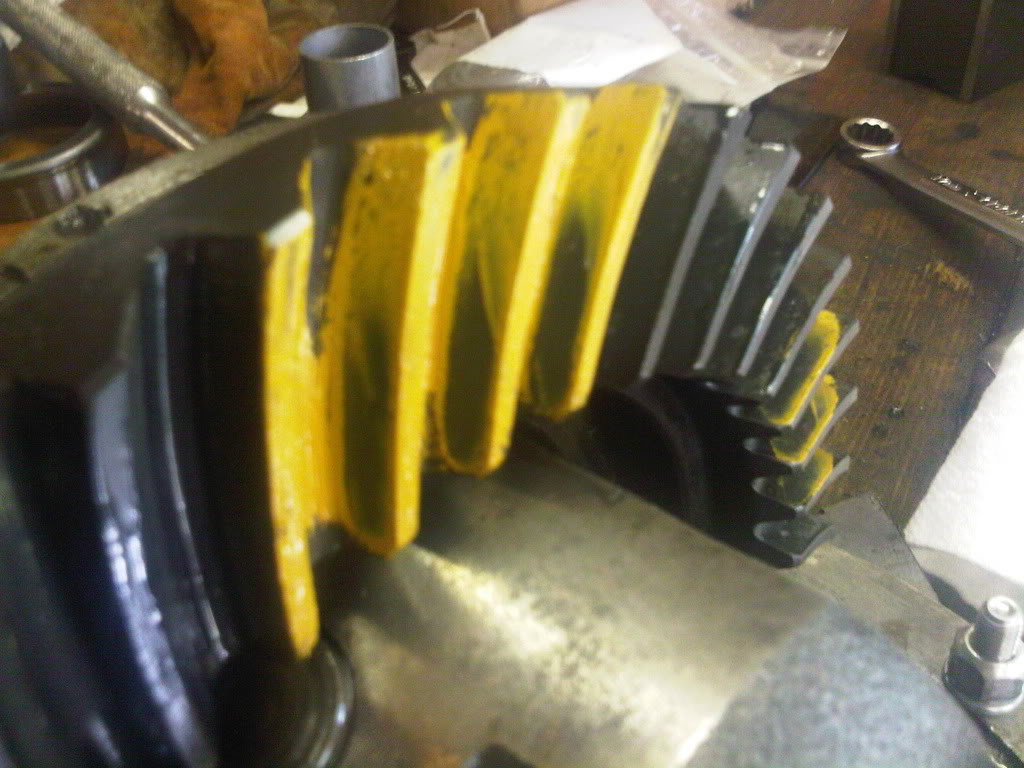
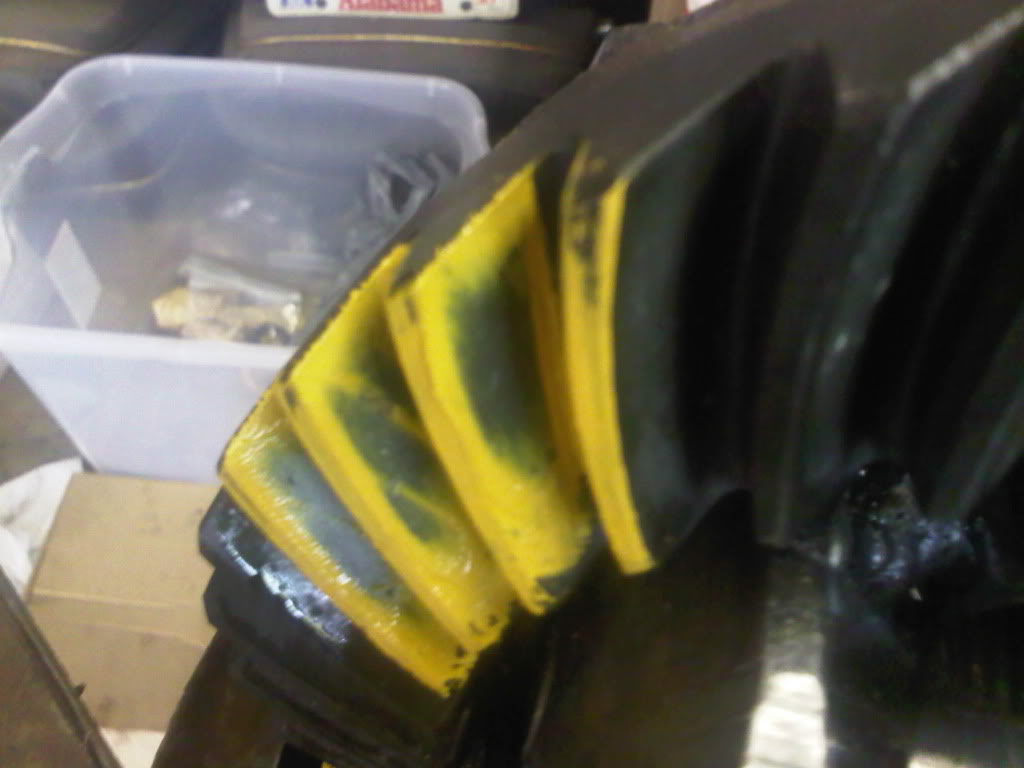
Here's some pics of the front diff after I gotten done setting it up. Using a Lincoln Locker in it also
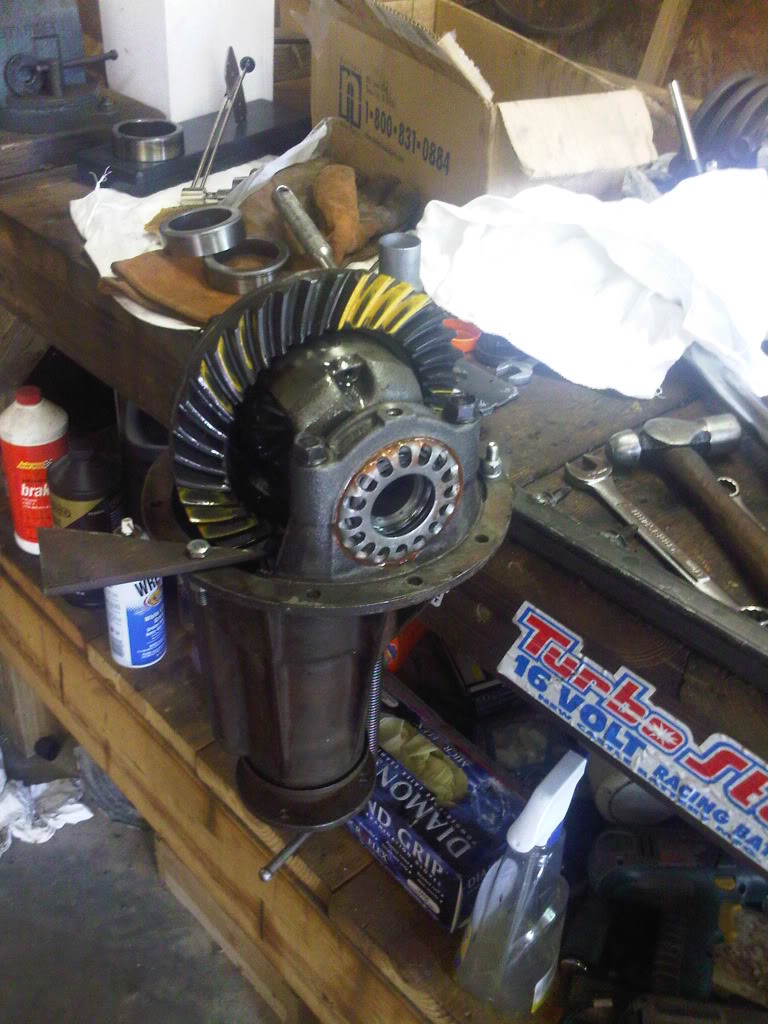
And the front case all purdied up
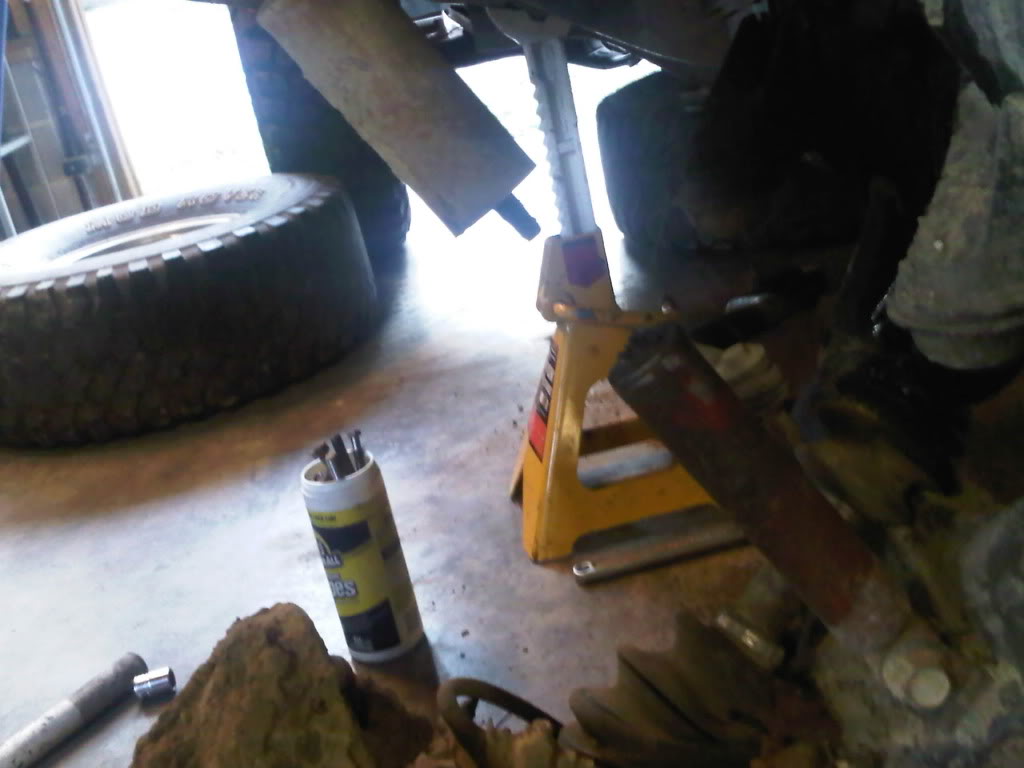
These are pics of me dreaming while I was waiting to get all the outers back from the machine shop.
Then came hanging the front springs. Like I said earlier, I'm using rears up front. The main top 3 leaves are from a set of Downey 2 inch lift springs and the bottom two were some cut down stock leaves. This first pic was of just one leaf added to the pack and me messing around without an axle.

This pic shows the setup I have now minus the attempt of an anti wrap. This setup also shows the 5 inch shackles still on it. I was surprised how good the shackle angle was because I'd been hearing alot about boomerang shackles since the rears are longer.

Here is the setup I am running minus the anti wrap crap I made with too arched of a spring.

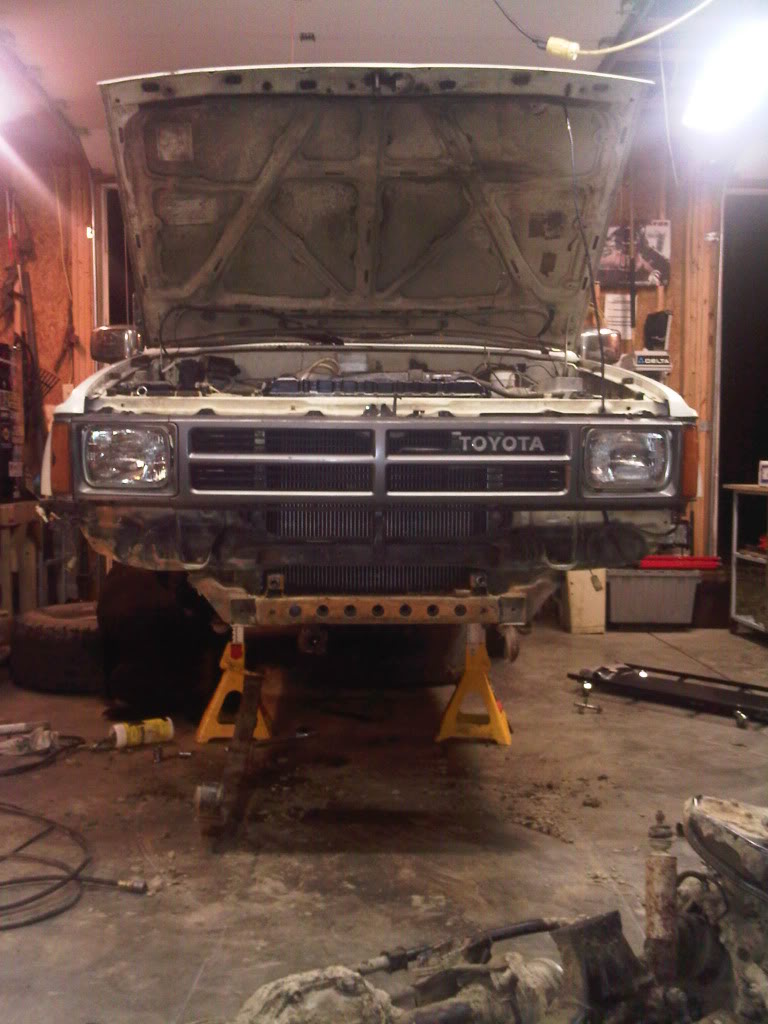
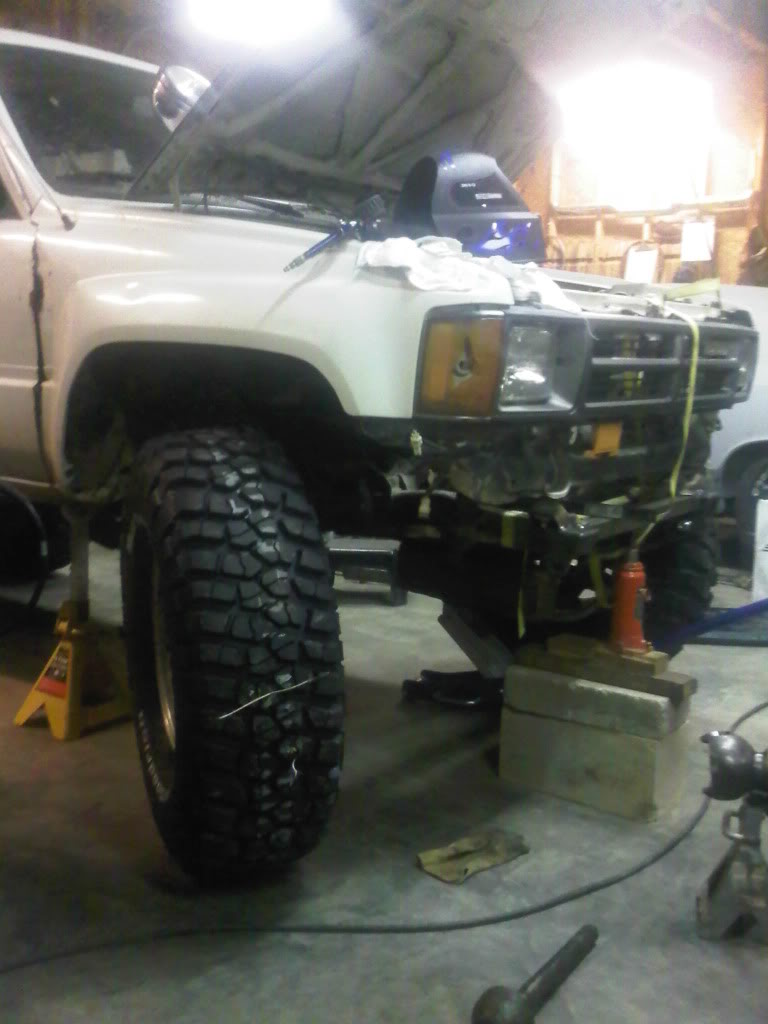
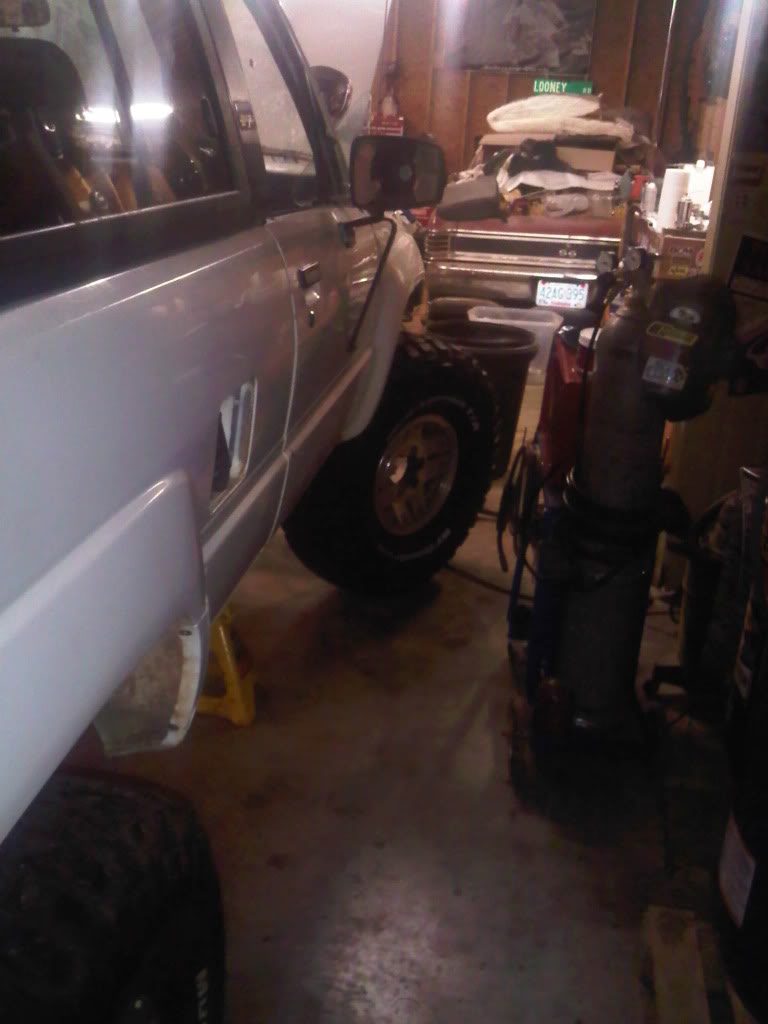
Then I redrilled the perches and the U bolt plates and moved the axle back 1.75 inches. Didn't take any pics of that or what I have done recently but I have been busy with finals the past few weeks. But I have moved the steering box and gotten it sitting on the ground with the new V6 brakes. It still has alot to be done because of figuring about bump stops and clearancing for steering components but I should get it figures out soon. I also am missing one locking hub because the axle I bought was missing one. So i'm gonna try to find one so I can get this thing on the trail. Sorry if all these pics look bad. I took them all on my phone but I plan on getting some better pictures on here soon. I'll leave with this one for now
The truck was bought from the original owner and it had sat in the woods for 8 years because it had a rod knocking after an eventful night "mud riding". Once it got to the shop it got a rebuild along with a new head, rod, crank, and fuel pump. Along with this, it also now has 5.29 gears.
The plan is to keep this SAS low enough to match the existing 63 in. chevy's in the rear with a 4 inch shackle.
Here some pics of it before it got pulled into the shop to start the swap. Superior ride quality and flex!
It did my soul good to see it like this
Now onto putting this thing back together. I used the trail gear kit minus the leaf springs because I already planned on RUF. Getting the whole kit was definately worth it because it sure beat piecing the parts together.
Here are the new tires for the front. Almost made me wanna get some black steelies for it.
Here is the axle all trussed and welded up.
Here's where the low part of this SAS started to come into place. The front passenger side framerail was bent down pretty bad i'm sure from some drunk nights of "mud riding" as you can prolly see from this pic
I had planned on recessing the front hanger anyway so this really was no big deal. So I cut out the original front crossmember and then straightened the bent frame rail. I then notched the original frame and squared up this hanger and burned it in place. I contemplated about putting some 1 inch square tubing above this front hanger to eliminate problems that i might run into but I just said what the hey. I am also running a short shackle in the back instead of the 5 incher that comes in the kit.
Had to take the tires to my buddy to mount them and since my 700R4 went out in my Z then i had to drive this. Couldn't resist myself
Here's some pics of the front diff after I gotten done setting it up. Using a Lincoln Locker in it also
And the front case all purdied up
These are pics of me dreaming while I was waiting to get all the outers back from the machine shop.
Then came hanging the front springs. Like I said earlier, I'm using rears up front. The main top 3 leaves are from a set of Downey 2 inch lift springs and the bottom two were some cut down stock leaves. This first pic was of just one leaf added to the pack and me messing around without an axle.
This pic shows the setup I have now minus the attempt of an anti wrap. This setup also shows the 5 inch shackles still on it. I was surprised how good the shackle angle was because I'd been hearing alot about boomerang shackles since the rears are longer.
Here is the setup I am running minus the anti wrap crap I made with too arched of a spring.
Then I redrilled the perches and the U bolt plates and moved the axle back 1.75 inches. Didn't take any pics of that or what I have done recently but I have been busy with finals the past few weeks. But I have moved the steering box and gotten it sitting on the ground with the new V6 brakes. It still has alot to be done because of figuring about bump stops and clearancing for steering components but I should get it figures out soon. I also am missing one locking hub because the axle I bought was missing one. So i'm gonna try to find one so I can get this thing on the trail. Sorry if all these pics look bad. I took them all on my phone but I plan on getting some better pictures on here soon. I'll leave with this one for now
Aug 5, 2010 | 10:09 AM
#2
Registered User
Joined: Jun 2009
Posts: 414
Likes: 0
From: North Carolina
That's a great ride height. I've been trying to figure out how to keep mine low when I swap. I'd even thought about just using stock front springs + OME rears in the back, hoping that would only pick it up 2-3 inches. How confident are you in your front hanger only being attached at the corners?
Aug 5, 2010 | 10:37 AM
#3
Thread Starter
Registered User
Joined: Jun 2010
Posts: 62
Likes: 0
Thanks man. The front hanger is not fully welded in as of now. Its just welded at the top and the side like you saw. I have the plate and I'm gonna full box in the hanger to the frame so i'm confident it'll be in there when i get it fully welded in.
Aug 5, 2010 | 11:57 AM
#6
Thread Starter
Registered User
Joined: Jun 2010
Posts: 62
Likes: 0
Thanks alot guys! I was wondering what people would think about this thing since it is not your normal sas especially with those stock aluminum wheels!
It actually has no interference problems with the oil pan but since its a IFS frame it does have problems with the frame rails and the tierod and draglink.
I took some pics of it last night because i'm still trying to get everything figured out for my bumpstops and shock locations. Right now it has 2 inches of uptravel because of the interference with the frame and high steer stuff. I'm thinking I might knotch the frame for extra clearance and move my box again but the thing is where my bumpstop is positioned now is perfect because the spring is perfectly flat when bottomed out.
I'm thinking my spring rate is too soft because i'm only running 5 leaves on the front. I'm gonna try to put a long factory leaf in there. Hopefully it won't lift it any but add to the spring rate so it won't bounce so much.


It surprised me how well it flexes. Definately better than IFS and well worth work
It actually has no interference problems with the oil pan but since its a IFS frame it does have problems with the frame rails and the tierod and draglink.
I took some pics of it last night because i'm still trying to get everything figured out for my bumpstops and shock locations. Right now it has 2 inches of uptravel because of the interference with the frame and high steer stuff. I'm thinking I might knotch the frame for extra clearance and move my box again but the thing is where my bumpstop is positioned now is perfect because the spring is perfectly flat when bottomed out.
I'm thinking my spring rate is too soft because i'm only running 5 leaves on the front. I'm gonna try to put a long factory leaf in there. Hopefully it won't lift it any but add to the spring rate so it won't bounce so much.
It surprised me how well it flexes. Definately better than IFS and well worth work
Last edited by Luther Grimace; Aug 5, 2010 at 12:03 PM.
Trending Topics
Aug 5, 2010 | 12:25 PM
#8
Contributing Member
Joined: Apr 2004
Posts: 5,464
Likes: 6
From: Arvada, Colorado
Looks fine man. Bump stop it and set the shocks so they have only 2.5" up at ride height. Then just run it and enjoy the stability.
With the lincoln locker, just a thought, but you might consider hydro assist at some point in the future. Once you get it, you'll wonder how you lived with out it! LOL
With the lincoln locker, just a thought, but you might consider hydro assist at some point in the future. Once you get it, you'll wonder how you lived with out it! LOL
Aug 5, 2010 | 12:32 PM
#10
Thread Starter
Registered User
Joined: Jun 2010
Posts: 62
Likes: 0
Do you mean like 2.5" sticking out when its hitting the stops or at ride height? At ride height now it has 3.5" showing.
Yeah I've thought about that. I'm gonna have to wait til I save up some money and I don't have to pay for my school haha!
The thing about it is I don't want it to hit the bump stops everytime I hit a big bump when trail riding.
Also if anybody has some locking hubs PM me. When I bought this axle that I rebuilt it only had one. I was gonna just replace the hub gear and swap it into my ifs hubs.
Aug 5, 2010 | 01:04 PM
#11
Contributing Member
Joined: Apr 2004
Posts: 5,464
Likes: 6
From: Arvada, Colorado
Yeah, 3.5" is safer. 2.5" would be bare minimum.
I don't think you'll be on the bumpstops every time you hit a bump. You will hit them on most obstacles though, so I'd make sure you get decent ones.
I don't think you'll be on the bumpstops every time you hit a bump. You will hit them on most obstacles though, so I'd make sure you get decent ones.
 Aug 10, 2010 | 01:44 PM
#16

Registered User
Joined: Feb 2007
Posts: 350
Likes: 1
From: Surrey, BC
That looks great!! I have been working on lowering mine over the last year and have it almost were i want it now. I had looked at frenching in the front hanger and after seeing yours I should have lol. I may do that at some point now too.
I have OME HD springs for the front of a 84-85 4runner in my 93 V6 runner. I also used the OME greasable shackle that is 3.5".
I have OME HD springs for the front of a 84-85 4runner in my 93 V6 runner. I also used the OME greasable shackle that is 3.5".
Aug 10, 2010 | 01:54 PM
#17
Thread Starter
Registered User
Joined: Jun 2010
Posts: 62
Likes: 0
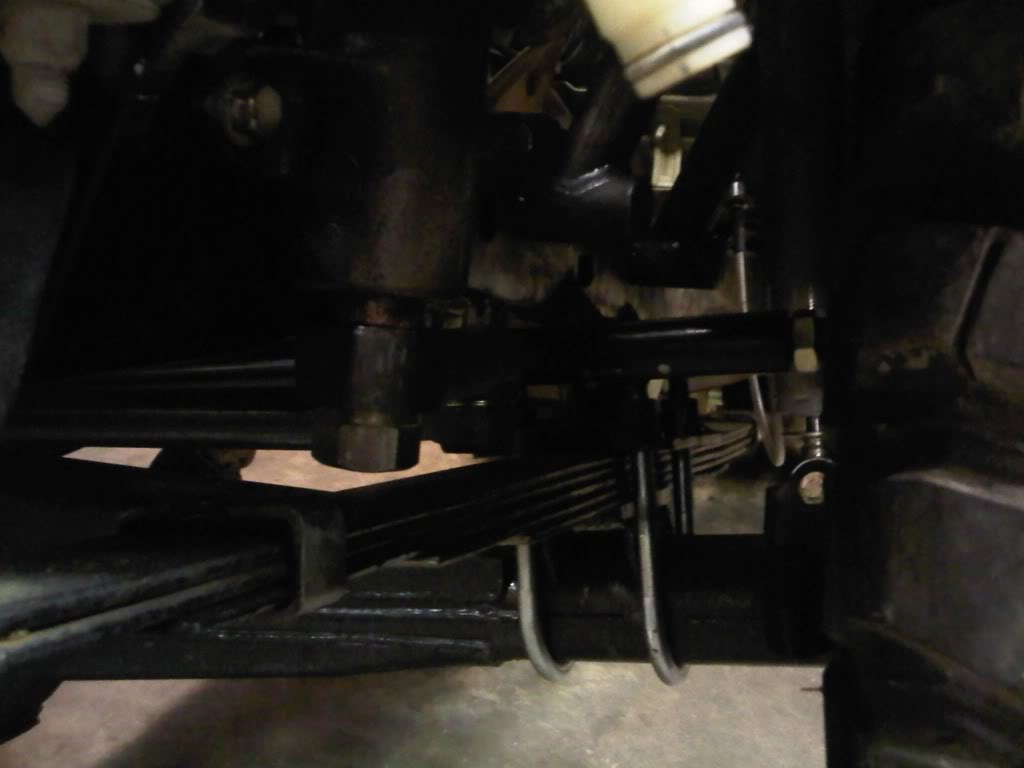
Only problem that frenching the hanger creates is the interference with the steering shaft nut. But as you can see from the picture when the spring is completely flat it still has clearance. The thing that I was so pumped about was when I set it on its own weight with a level on the frame its completly level  . Also the steering box relocation was a piece of cake. Reused one of the factory holes in the frame. I don't see why more people don't do this
. Also the steering box relocation was a piece of cake. Reused one of the factory holes in the frame. I don't see why more people don't do this
Aug 10, 2010 | 03:32 PM
#18
Registered User
Joined: Feb 2007
Posts: 350
Likes: 1
From: Surrey, BC
Only problem that frenching the hanger creates is the interference with the steering shaft nut. But as you can see from the picture when the spring is completely flat it still has clearance. The thing that I was so pumped about was when I set it on its own weight with a level on the frame its completly level . Also the steering box relocation was a piece of cake. Reused one of the factory holes in the frame. I don't see why more people don't do this
. Also the steering box relocation was a piece of cake. Reused one of the factory holes in the frame. I don't see why more people don't do thisWhat length are the shocks and what size tires?
 the low look is really cool. i will be doing the same only im going to use the 3" tg's and run 38" tsl's so it will still be low hehe
Aug 11, 2010 | 10:05 AM
the low look is really cool. i will be doing the same only im going to use the 3" tg's and run 38" tsl's so it will still be low hehe
Aug 11, 2010 | 10:05 AM
#20
Thread Starter
Registered User
Joined: Jun 2010
Posts: 62
Likes: 0
The length of the shocks are 12 inches. They are just the extra reservoir shocks that came with the kit. The tires are 35x12.5-15 BFG KM2s on stock aluminum 15x7 rims.
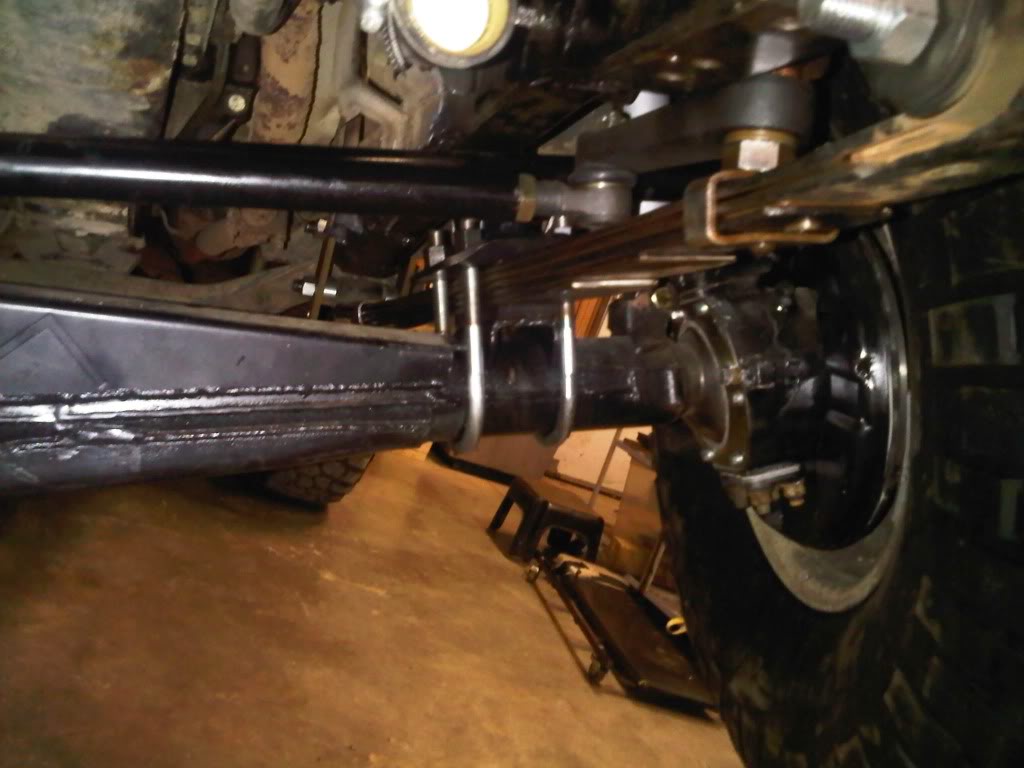
Here are some pics of the steering box relocation you asked for. I left the bolt closest to the axle through the frame in the same spot. I cut off the brackets on top of the frame for the steering box (driver side) and idler arm (passenger side) since they are the same setup since this truck is a passenger side drive in other countries. I welded a piece of 1/8th inch plate underneath the original bracket that sits on top of the frame.
On the hole that used to go through the frame, I used the bracket from the passenger side and cut it as close to the tube as possible. Hard to describe so the picture should show it well.

Only thing I did was loosen the clamp at the firewall and slide the steering shaft in prolly a 1/4 to 1/8 of an inch and I also had to buy a longer section of lower pressure line that runs from the box to the cooler because it was too short.
I got the front hanger fully boxed in last night as well. Would've been alot easier if I had a straight frame to start with on the passenger side. Had to make a patch piece for the hole under the frame. If this was being done on a good frame it would've went alot quicker. Tonight I am gonna install the radiator and get the power steering working again. I still need to get the shock hoops welded in also. I'm gonna take and gut my ifs hubs and run them as dust caps until I can get either the Longfields conversion hub gear or 1 more Aisin Locking hub
Here are some pics of the steering box relocation you asked for. I left the bolt closest to the axle through the frame in the same spot. I cut off the brackets on top of the frame for the steering box (driver side) and idler arm (passenger side) since they are the same setup since this truck is a passenger side drive in other countries. I welded a piece of 1/8th inch plate underneath the original bracket that sits on top of the frame.
On the hole that used to go through the frame, I used the bracket from the passenger side and cut it as close to the tube as possible. Hard to describe so the picture should show it well.
Only thing I did was loosen the clamp at the firewall and slide the steering shaft in prolly a 1/4 to 1/8 of an inch and I also had to buy a longer section of lower pressure line that runs from the box to the cooler because it was too short.
I got the front hanger fully boxed in last night as well. Would've been alot easier if I had a straight frame to start with on the passenger side. Had to make a patch piece for the hole under the frame. If this was being done on a good frame it would've went alot quicker. Tonight I am gonna install the radiator and get the power steering working again. I still need to get the shock hoops welded in also. I'm gonna take and gut my ifs hubs and run them as dust caps until I can get either the Longfields conversion hub gear or 1 more Aisin Locking hub
Last edited by Luther Grimace; Aug 11, 2010 at 10:11 AM.


