


 Mar 23, 2016, 02:55 PM
Last edit by: IB Advertising
See related guides and technical advice from our community experts:
- Toyota 4Runner, Tacoma, and Tundra Paint Modifications<br>Overview of popular modifications to help you customize your Toyota.

Show us your best cheap mods!
Apr 11, 2011 | 09:56 AM
#541
Registered User
Joined: Nov 2010
Posts: 149
Likes: 0
From: colorado springs ,co
yeah just some dinky little AAA battery's so i left it on the bright setting all night just to test it out looked at it this morning and still nice bright
bet if someone was creative enough though they could wire it up to the truck battery
bet if someone was creative enough though they could wire it up to the truck battery

 Apr 11, 2011 | 10:57 AM
#544
Registered User
Joined: Mar 2008
Posts: 4,371
Likes: 6
From: Texas
No pictures of the cowl area guys, sorry I was in a hurry to get the fender back on. The ducting is angled upwards at the bottom and is mounted a couple inches up off the bottom of the cowl interior so water can't get in there. This is just the first attempt. I'll be redoing it later on with some tubing and making a penetration through the cowl to mount a snorkel head, at least that is the plan.


 Apr 11, 2011 | 01:18 PM
#548
Registered User
Joined: Nov 2010
Posts: 149
Likes: 0
From: colorado springs ,co
 Apr 11, 2011 | 03:06 PM
#554

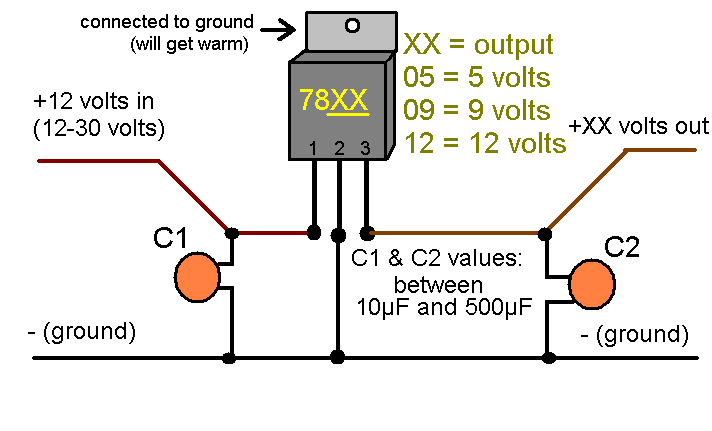
it uses a piece of equipment known as a voltage regulator, which keeps the output voltage at a constant 9v, with a varying input (anywhere from ~10 to 24). the part number is 7809, and i can get a better diagram tomorrow (that one is just a stock photo). pretty easy to wire up and hide in where the batteries used to be
Apr 11, 2011 | 03:08 PM
#555
Apr 11, 2011 | 03:31 PM
#556
then you need a circuit like this:
it uses a piece of equipment known as a voltage regulator, which keeps the output voltage at a constant 9v, with a varying input (anywhere from ~10 to 24). the part number is 7809, and i can get a better diagram tomorrow (that one is just a stock photo). pretty easy to wire up and hide in where the batteries used to be
it uses a piece of equipment known as a voltage regulator, which keeps the output voltage at a constant 9v, with a varying input (anywhere from ~10 to 24). the part number is 7809, and i can get a better diagram tomorrow (that one is just a stock photo). pretty easy to wire up and hide in where the batteries used to be
Haha i hate you Ian! hahaha

 Apr 12, 2011 | 11:17 AM
#560
Registered User
Joined: Jan 2007
Posts: 6,106
Likes: 27
As was suggested, I'll throw this in here too.
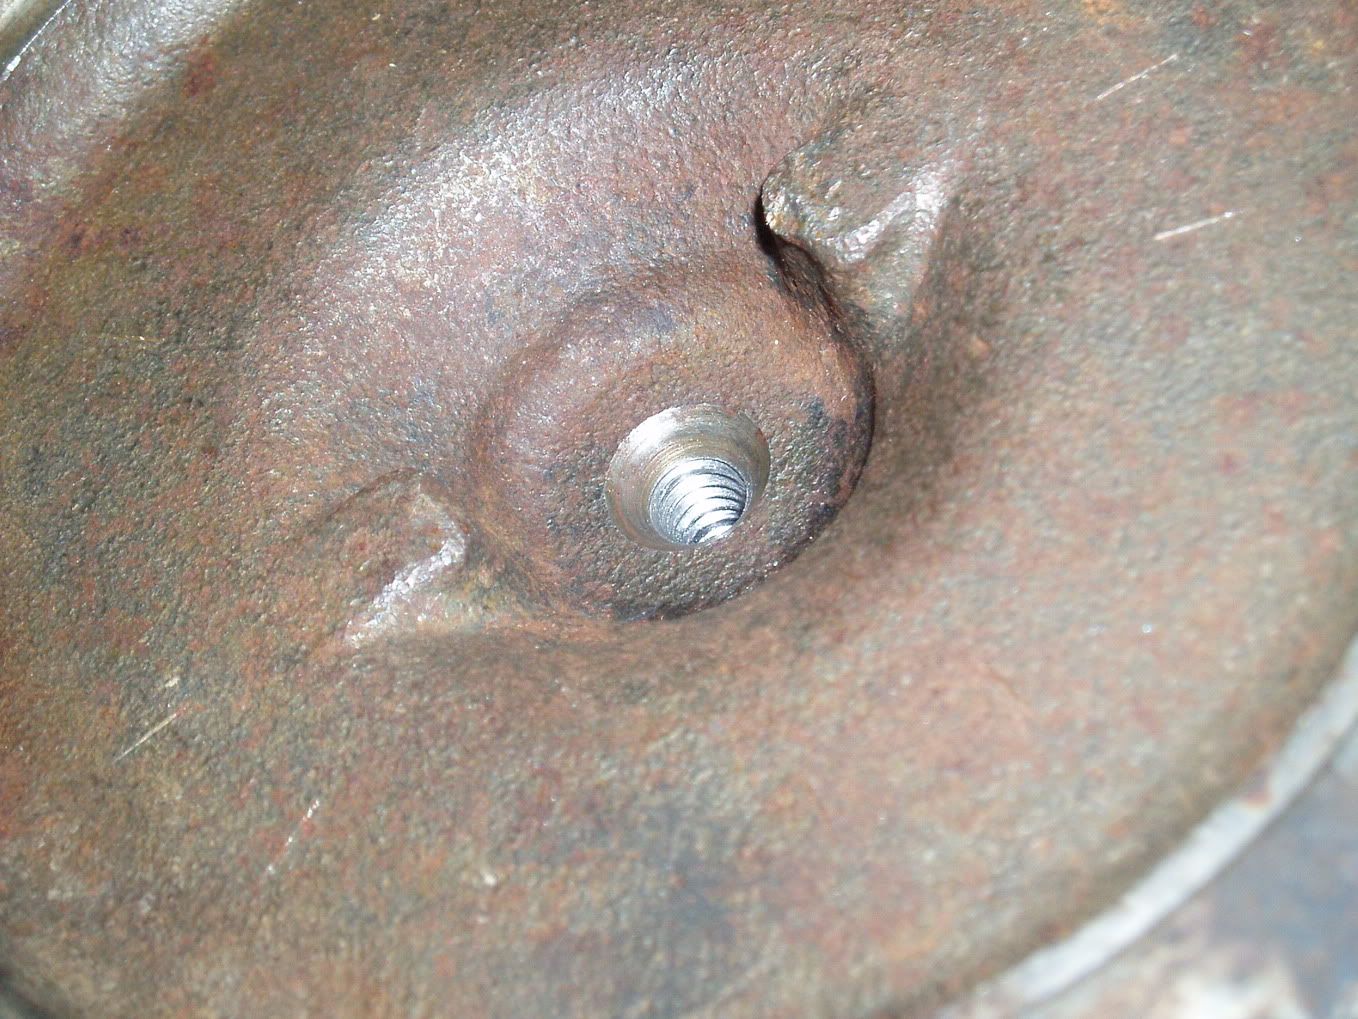
IFS Passenger-Side Axle Stub Shaft Mod.
Why do that you say?
Because this happens.
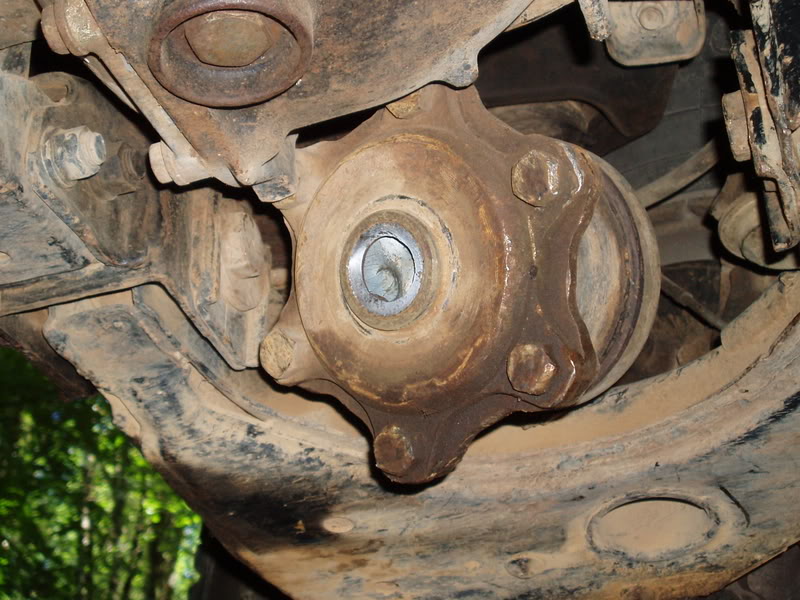

The bolt gives you a pulling/prying point on the piece still stuck in the diff, making it possible to remove. It's held in by a flexible c-clip on the end that requires quite a bit of force to pull past the side-gear before it will slide out. Otherwise you'll have to remove the diff cover and force it out from the inside. This mod will turn a job that would normally take about an hour start to finish, into a 5 minute snap-of-a-finger-quick-bang-done-forget-it deal.
IFS Passenger-Side Axle Stub Shaft Mod.

Because this happens.
The bolt gives you a pulling/prying point on the piece still stuck in the diff, making it possible to remove. It's held in by a flexible c-clip on the end that requires quite a bit of force to pull past the side-gear before it will slide out. Otherwise you'll have to remove the diff cover and force it out from the inside. This mod will turn a job that would normally take about an hour start to finish, into a 5 minute snap-of-a-finger-quick-bang-done-forget-it deal.
Last edited by MudHippy; Apr 28, 2011 at 06:31 PM.


