
Stanprophets Beater 89 Build
 May 5, 2013 | 03:45 PM
#41
Thread Starter
Registered User
Joined: Feb 2013
Posts: 167
Likes: 0
From: Hampton VA
Since I repair vehicles for a living it is a little easier for me to get a job done like this than the average DIY'er. I will get the wife to take pictures while I do it.
Oh and before anyone jumps in, yes I know about the undocumented hidden bolt! lol
I have done a bunch of head gaskets on this engine, but I have never done the chain on one, go figure. But cannot be any worse than the dreaded 2.7 Chrysler water pump and timing chain combo.
 May 5, 2013 | 04:04 PM
#42
Yeah, I have been reading up on it! Someone's pics will always be helpful. I'm debating whether to pull the head or do it with the head on.... Wary of my head gasket leaking, heard of a few doing that when doing it with head on. Also it would make it where I could check my head out and etc.
May 9, 2013 | 06:37 PM
#43
Thread Starter
Registered User
Joined: Feb 2013
Posts: 167
Likes: 0
From: Hampton VA
Ok so the timing chain will not be here until monday, so took some time today to do some work. Wed night the body lift came in so I went to work. 2" kit, drivetrain lift will be after the engine is repaired.
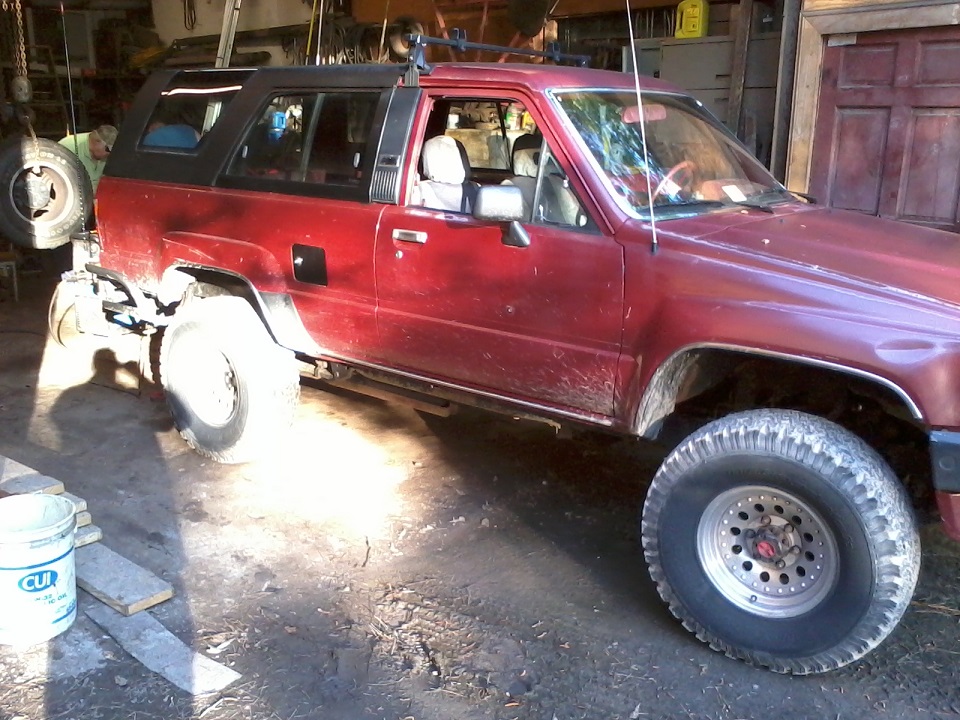
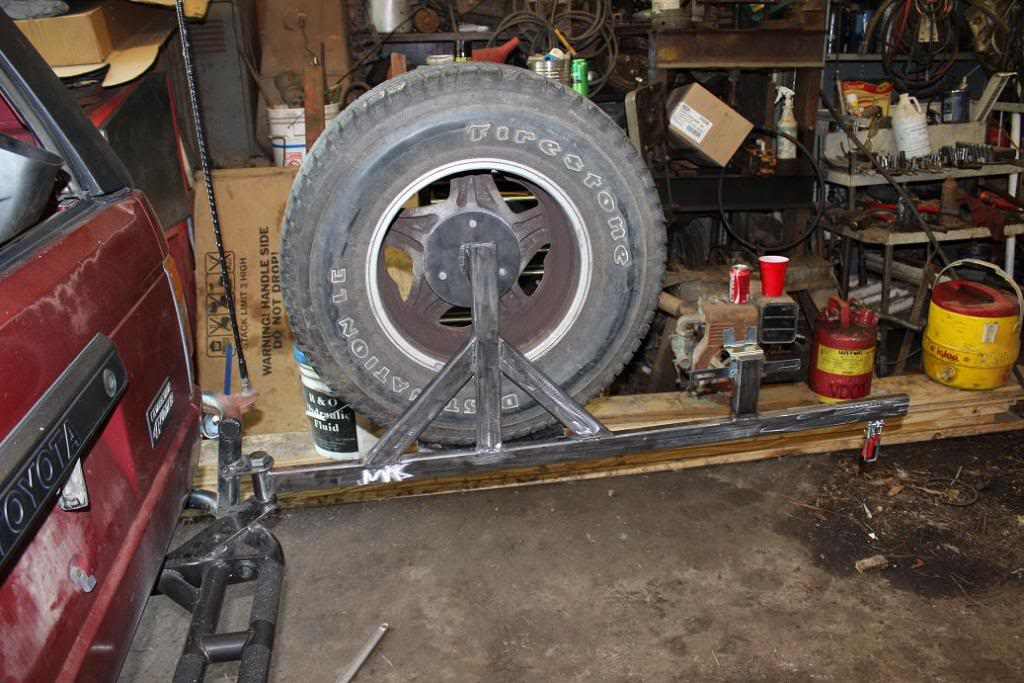
So today began the work on the tire carrier. I got a lot further than the pictures since the batteries died, but I will likley have it finished tomorrow and the progress up loaded. No details for now

So today began the work on the tire carrier. I got a lot further than the pictures since the batteries died, but I will likley have it finished tomorrow and the progress up loaded. No details for now
May 9, 2013 | 06:44 PM
#44
Thread Starter
Registered User
Joined: Feb 2013
Posts: 167
Likes: 0
From: Hampton VA
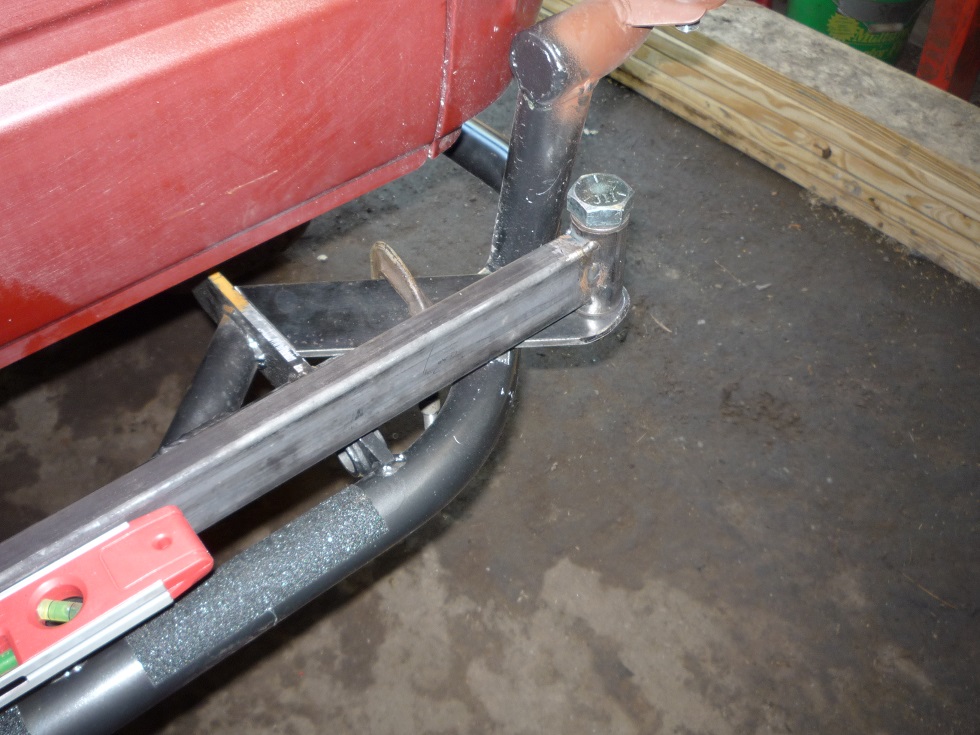
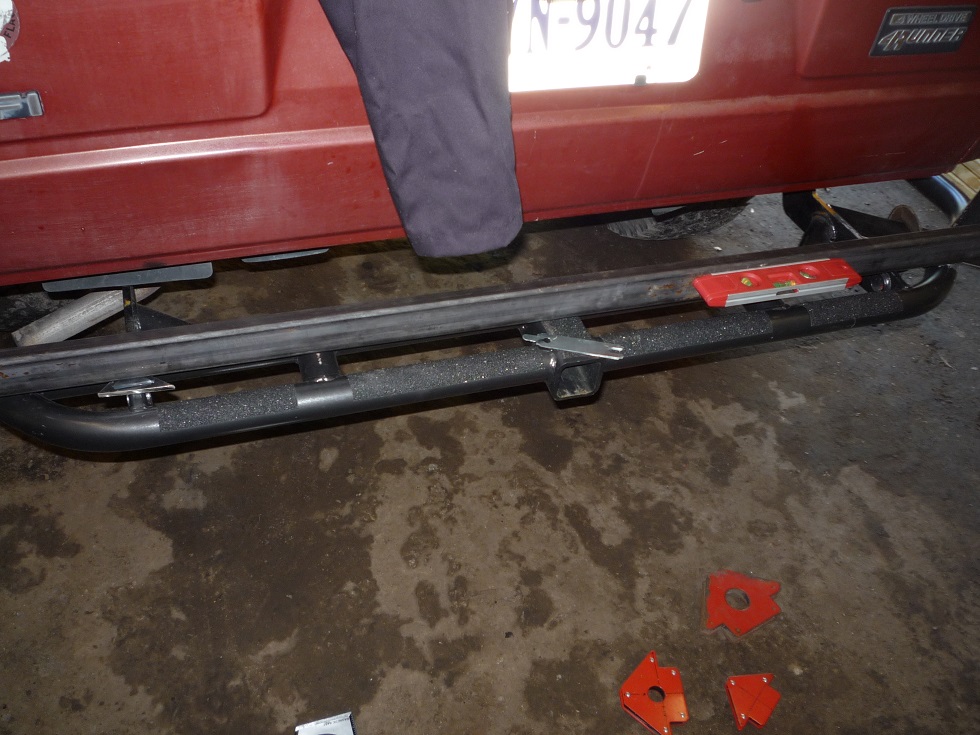
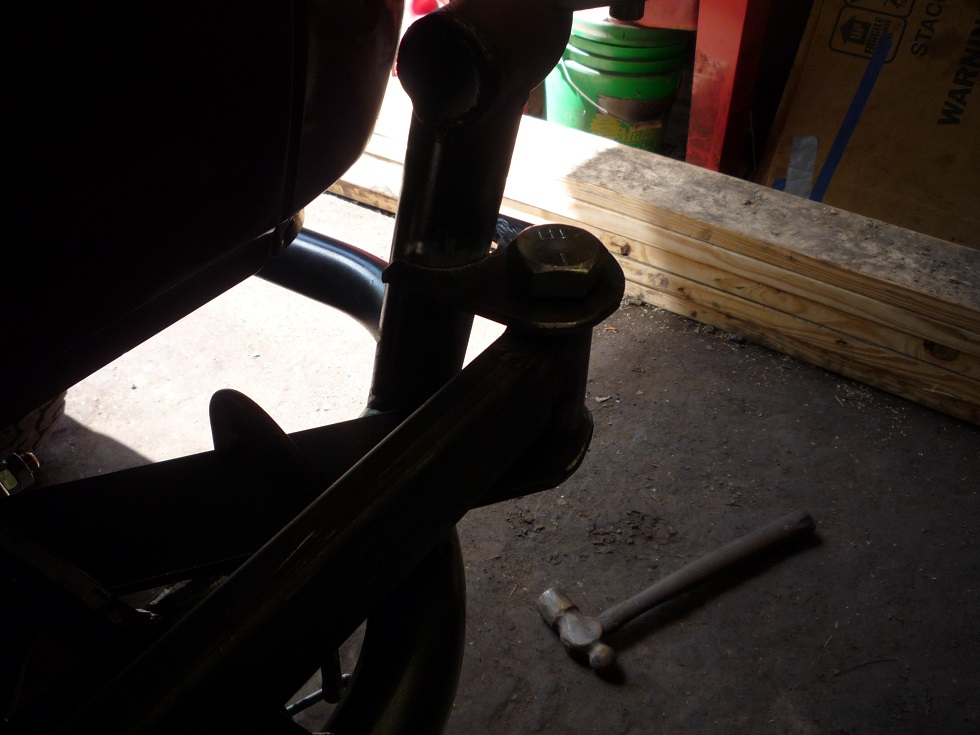
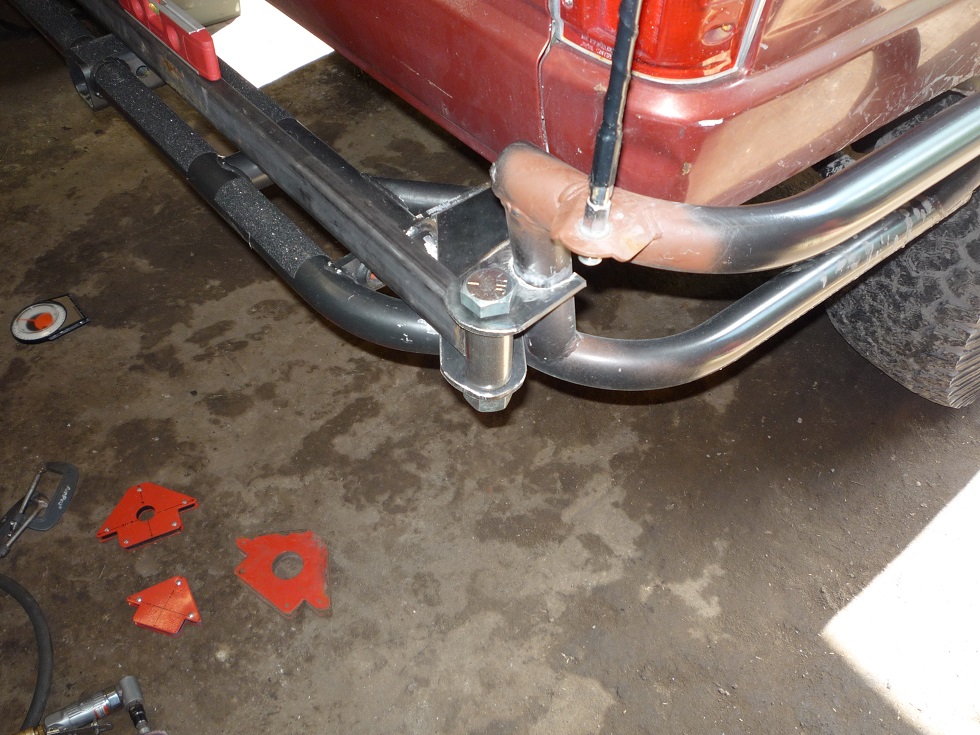
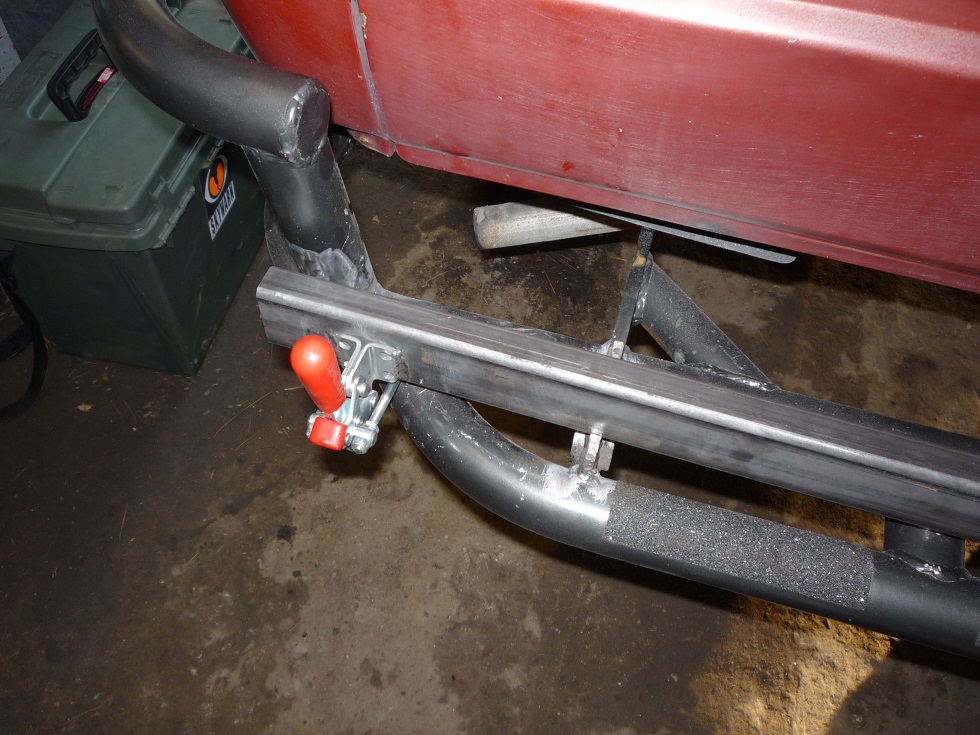
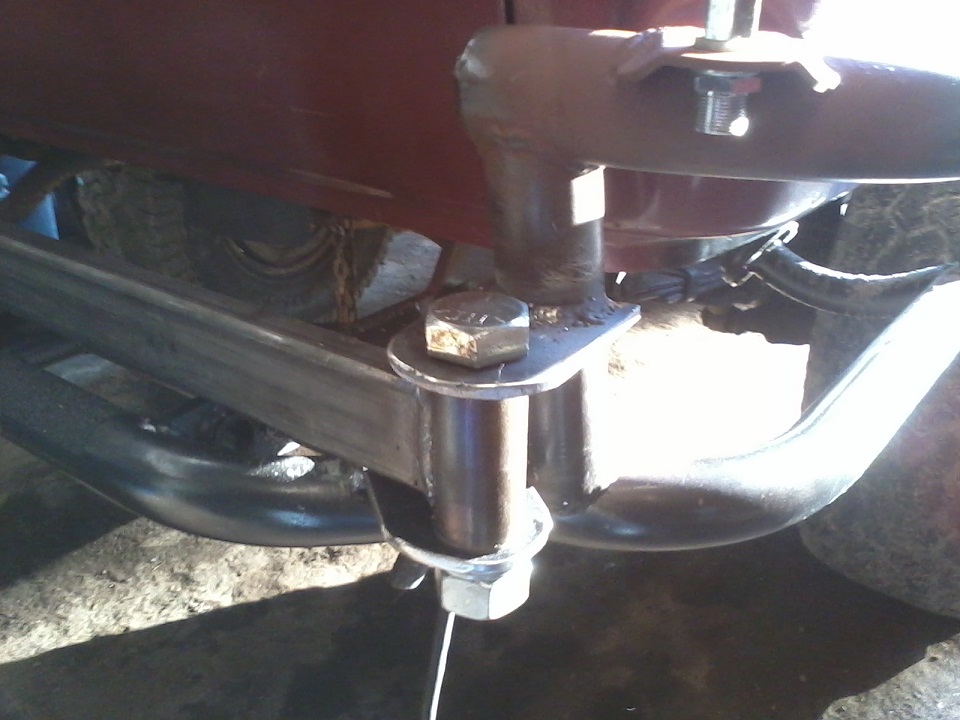
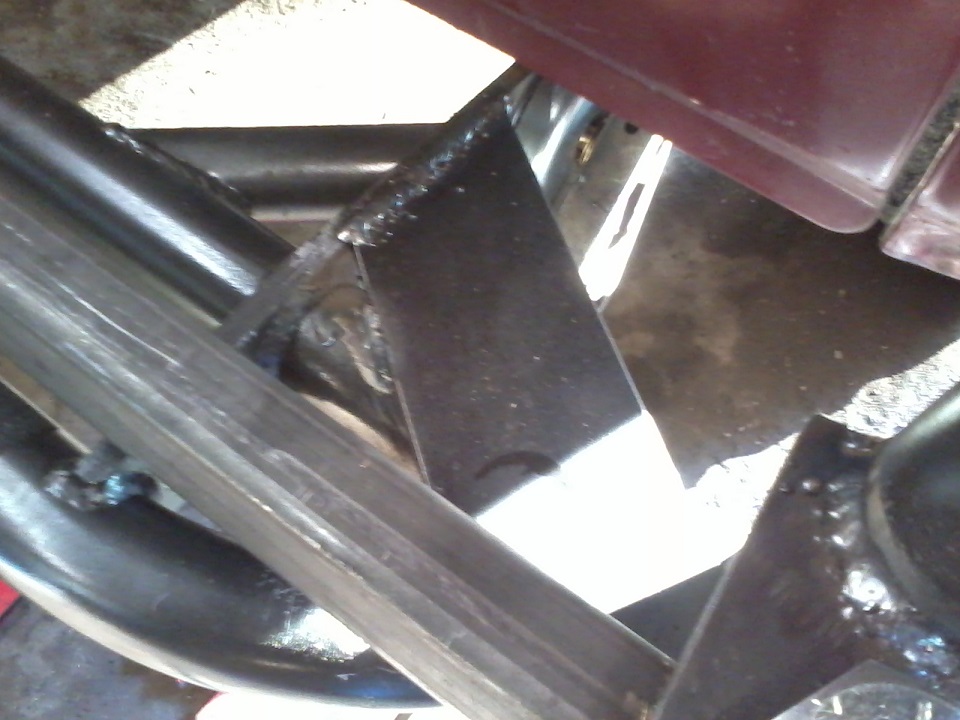
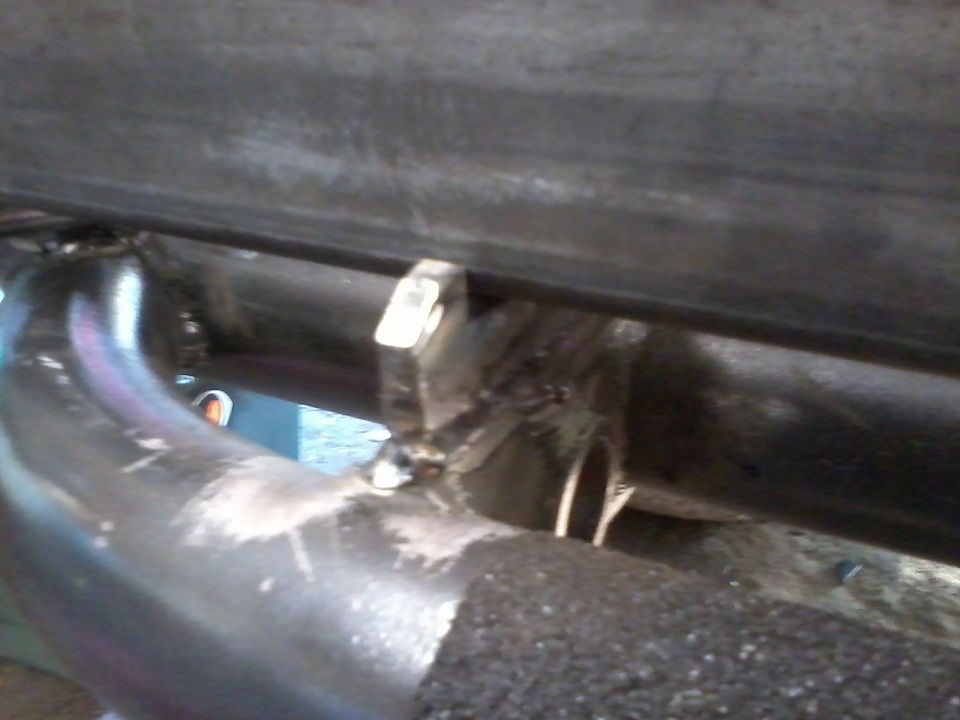
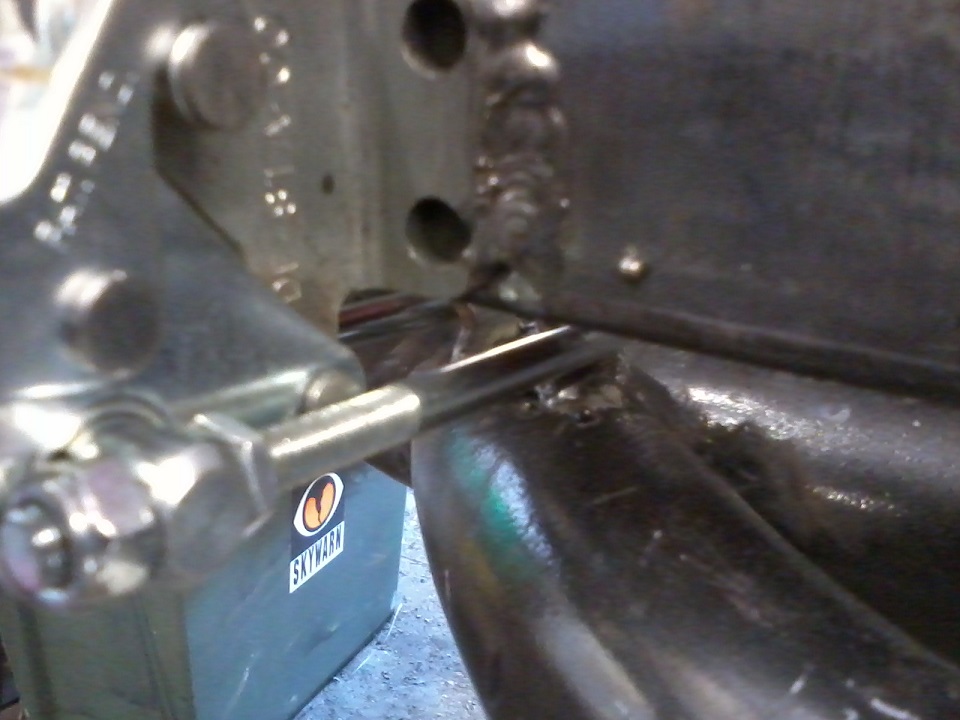
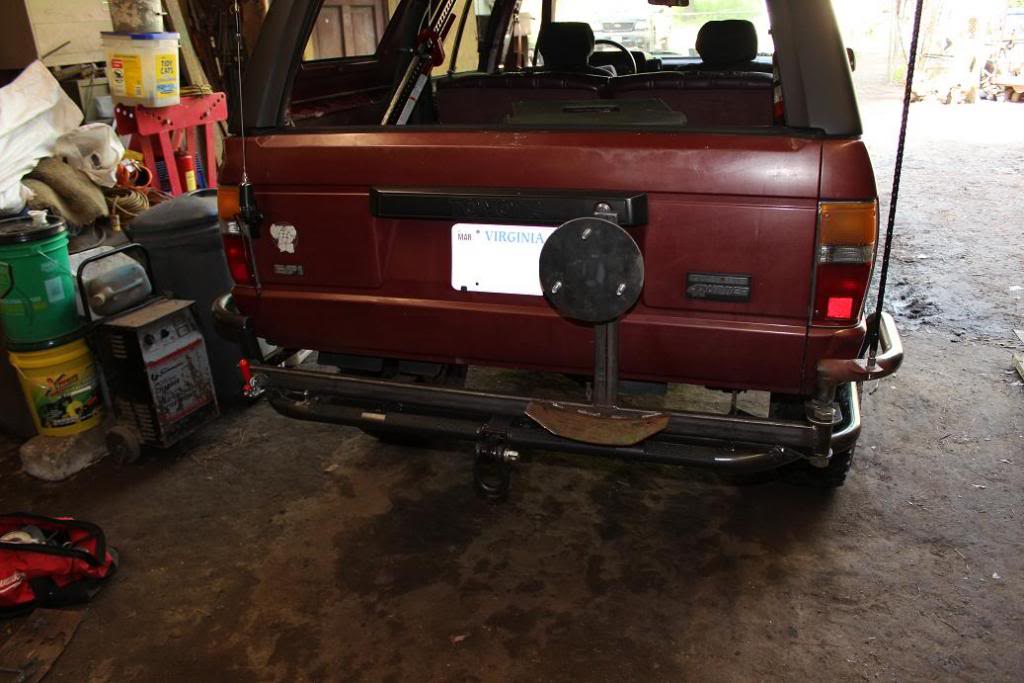
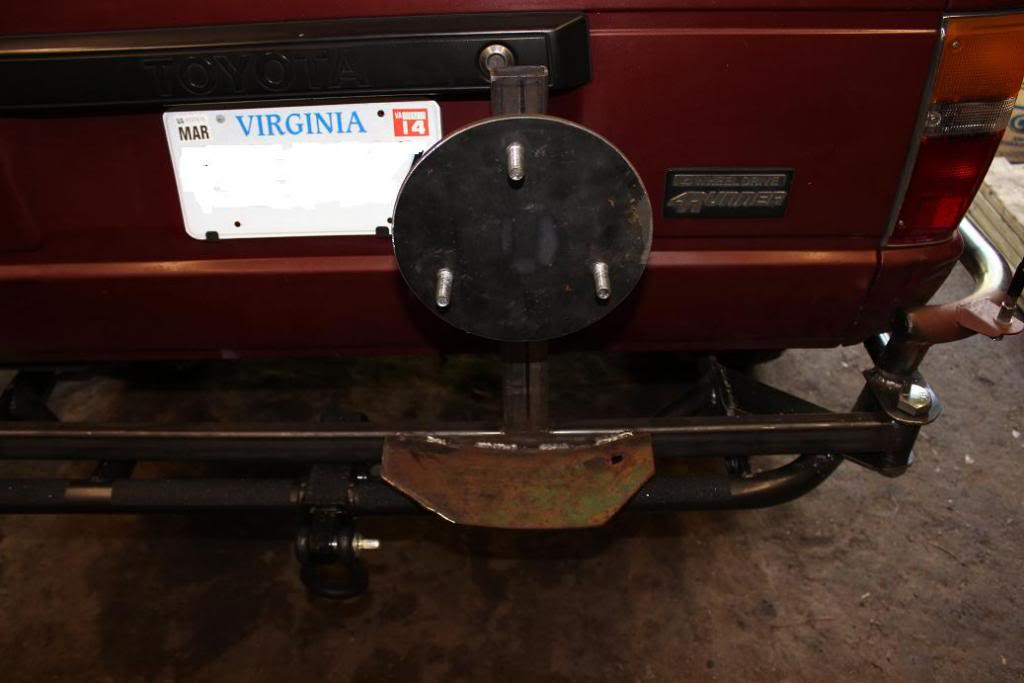
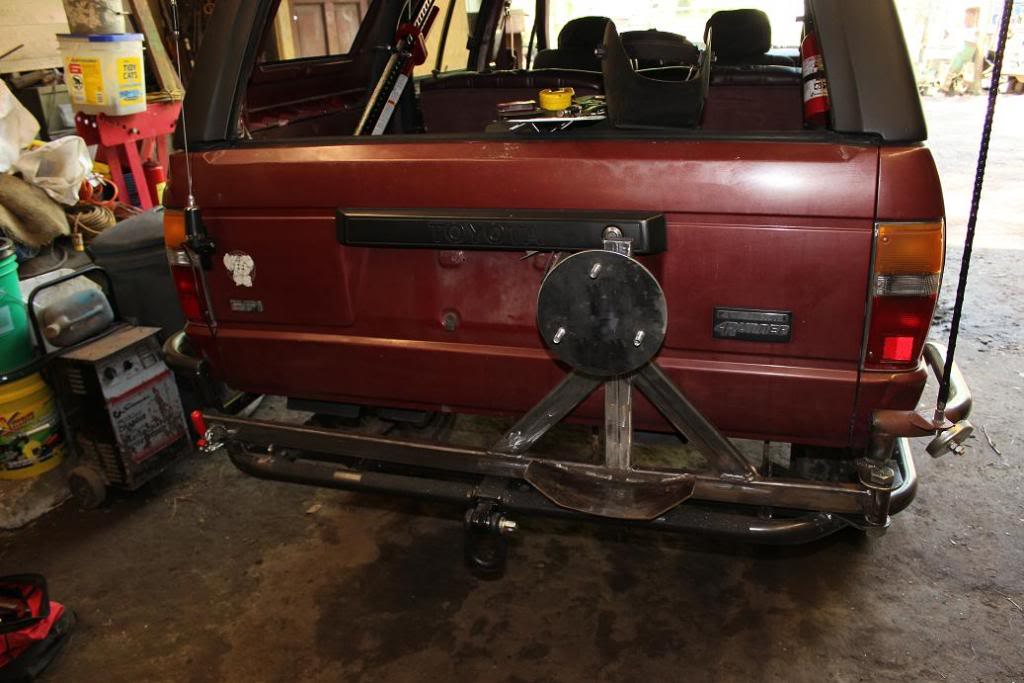
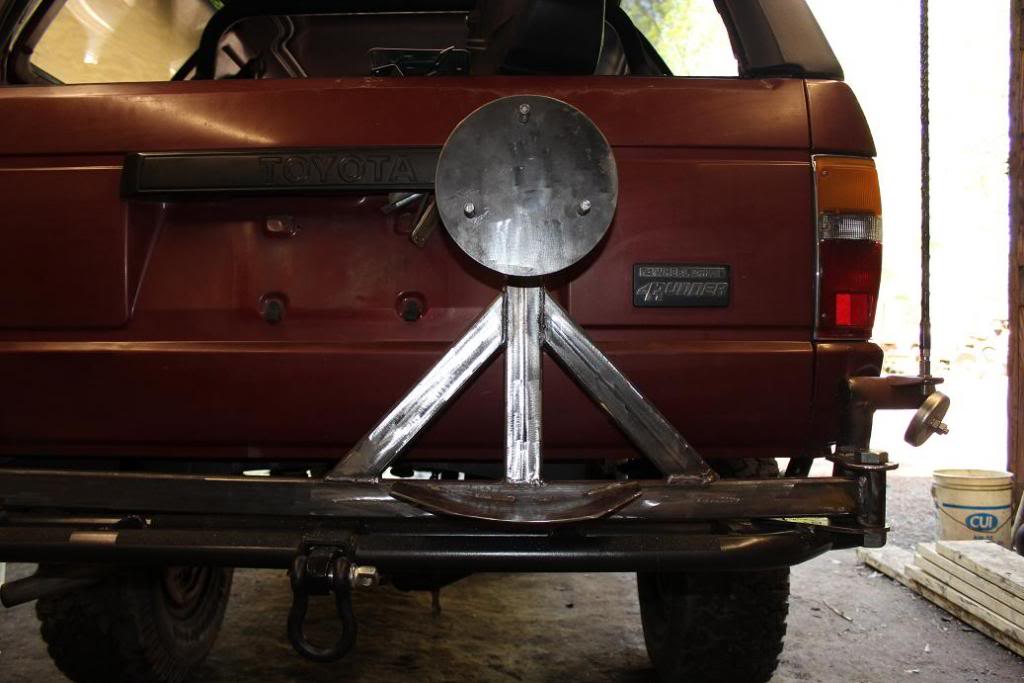
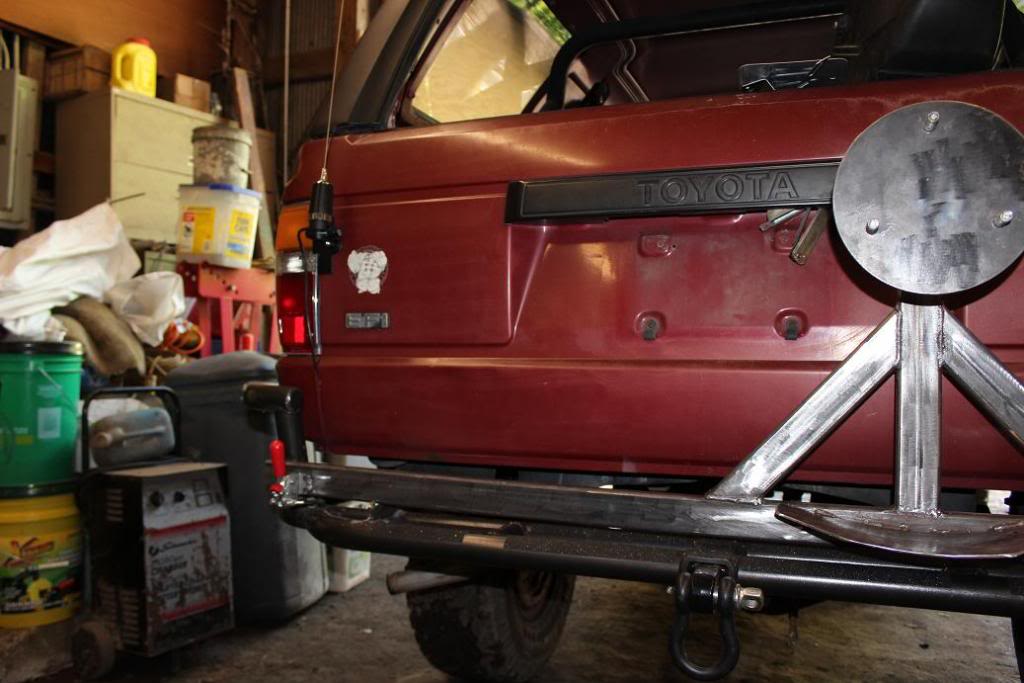
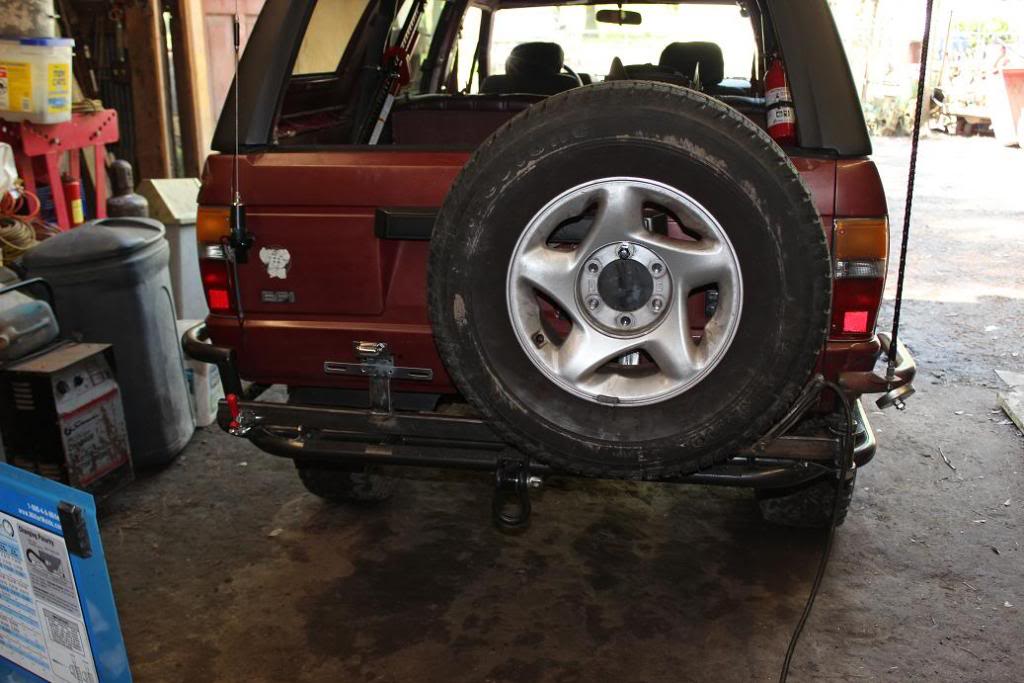
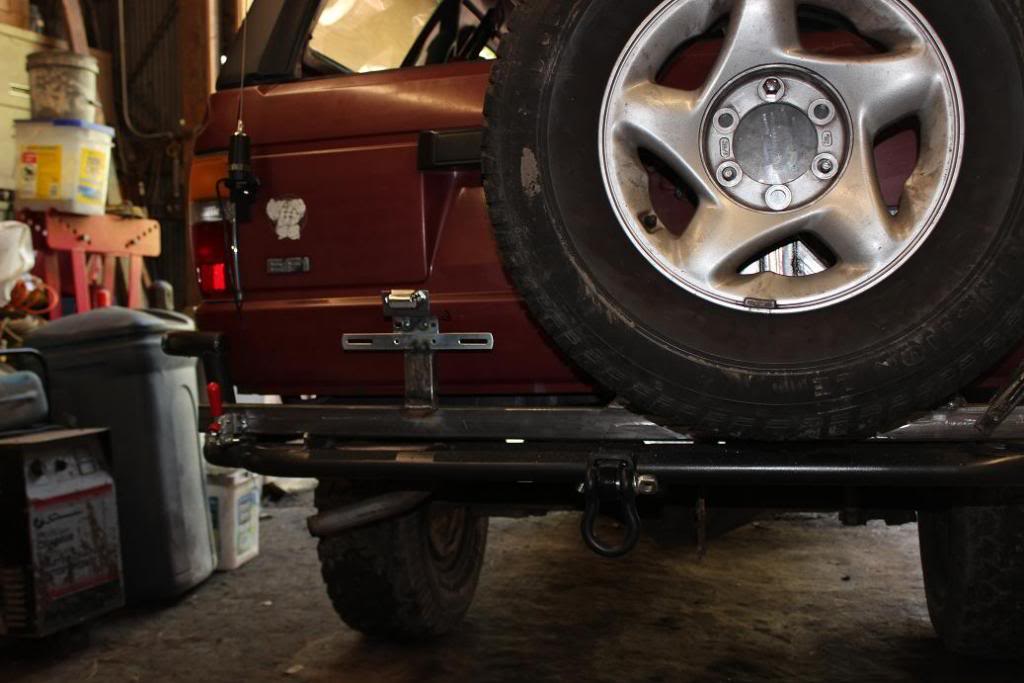
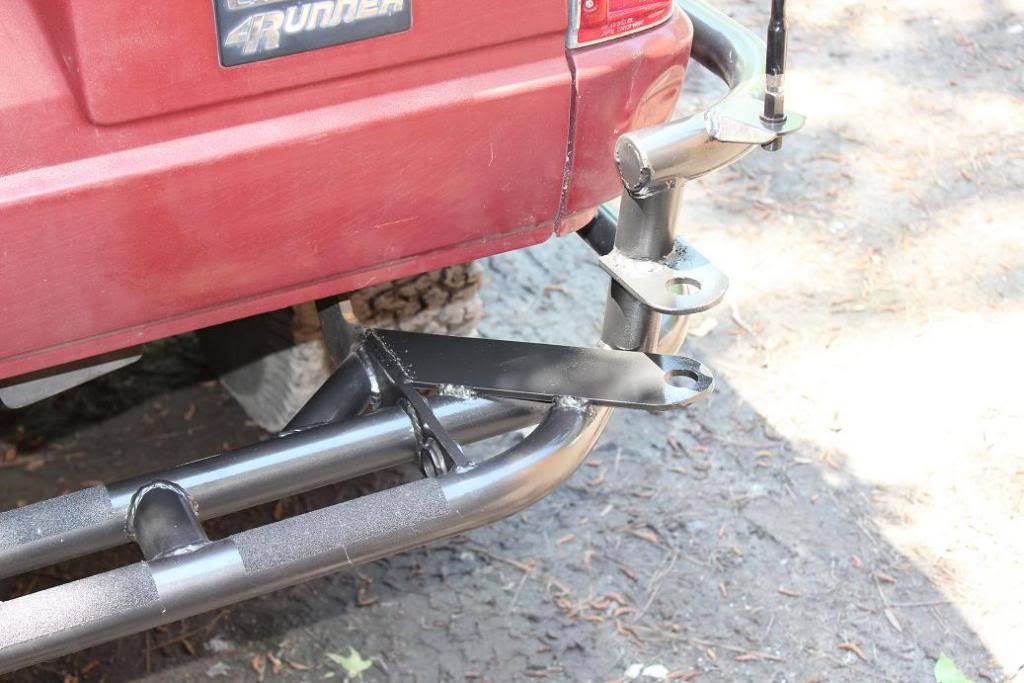
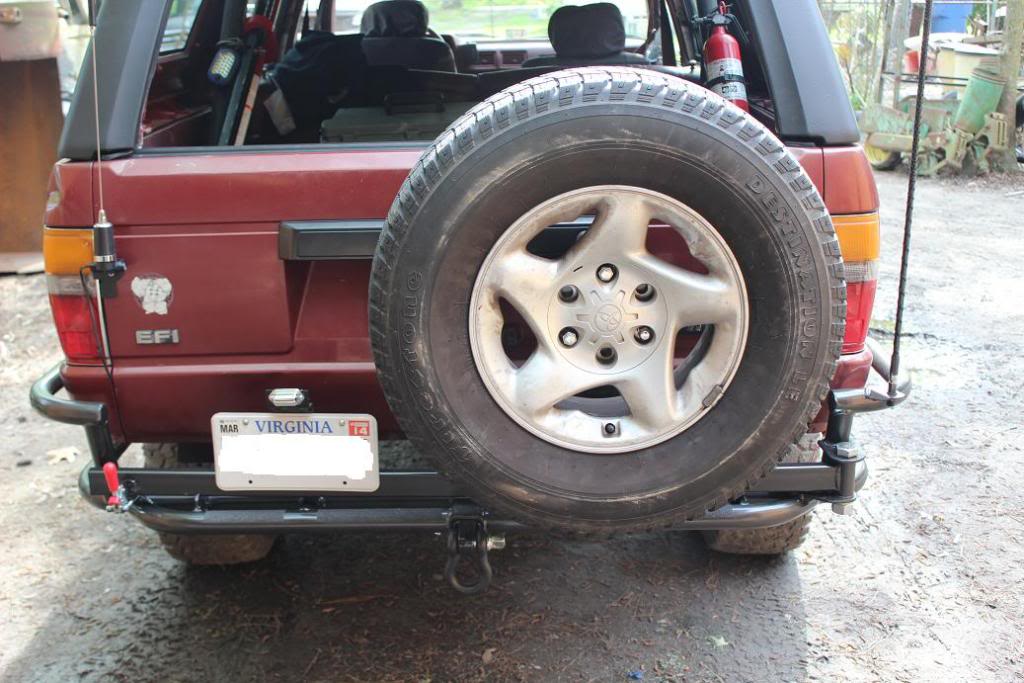
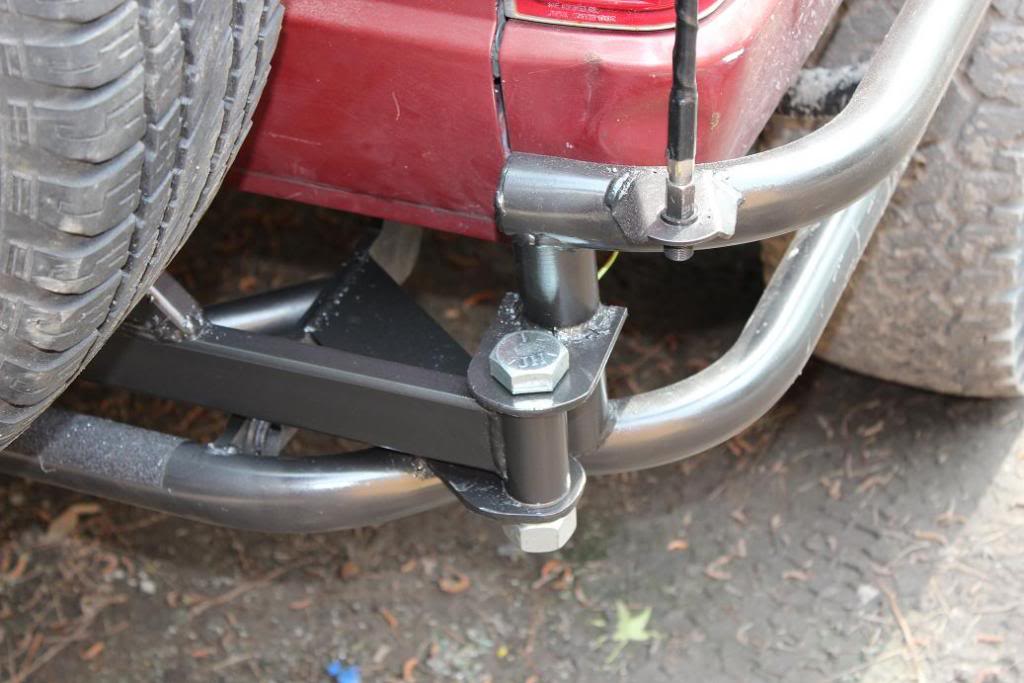
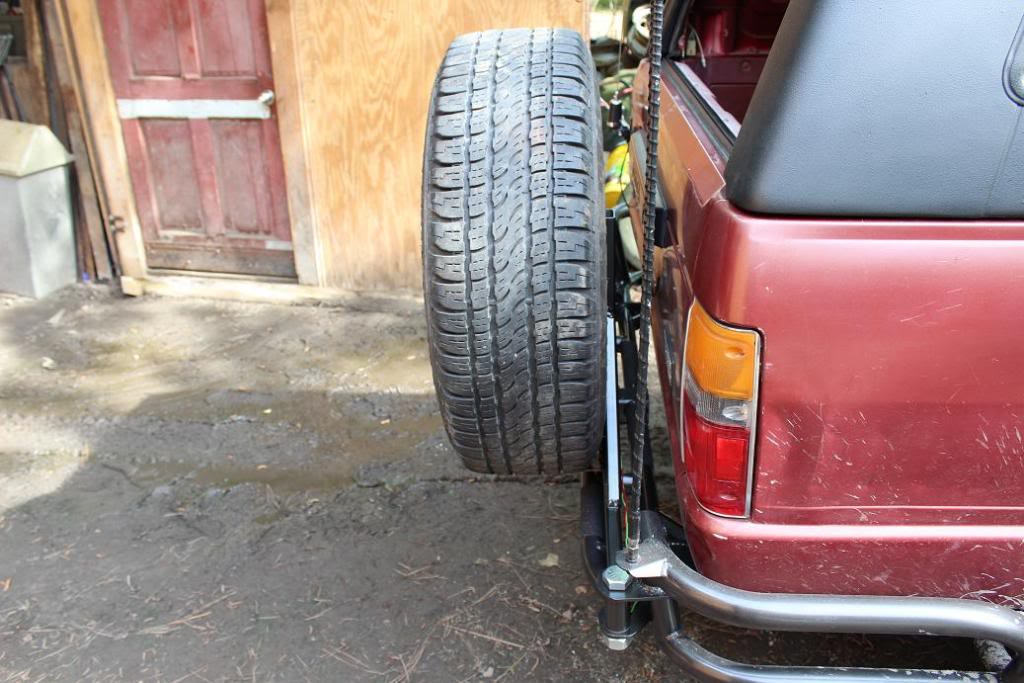
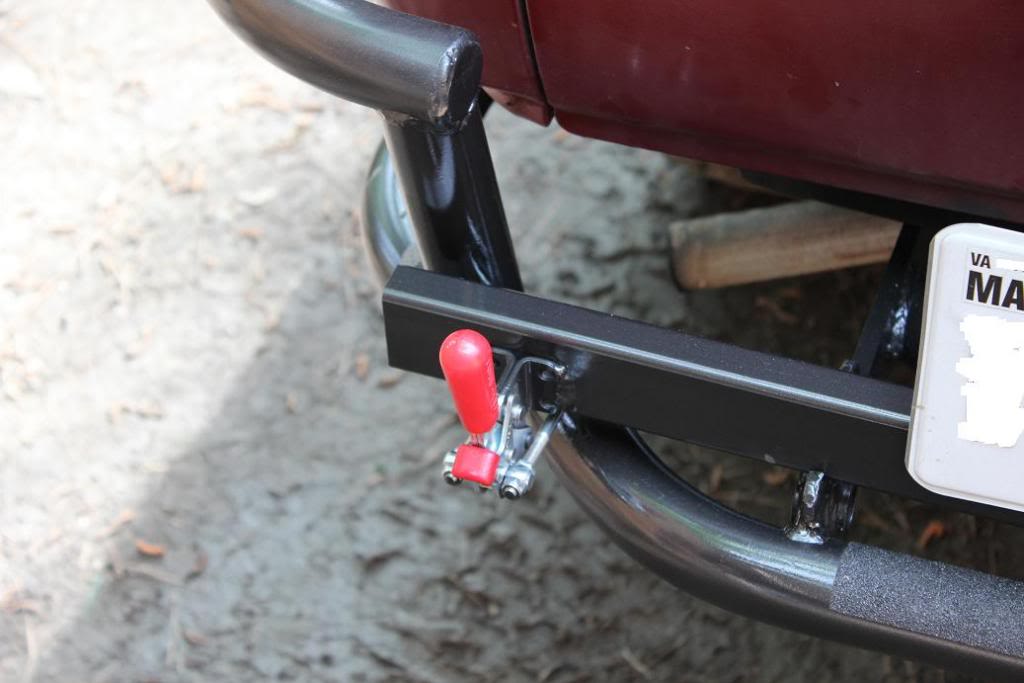
It is solid, and I still need to add the side braces, and some gussets. I also need to build the bracket for the license plate, and wire a light.
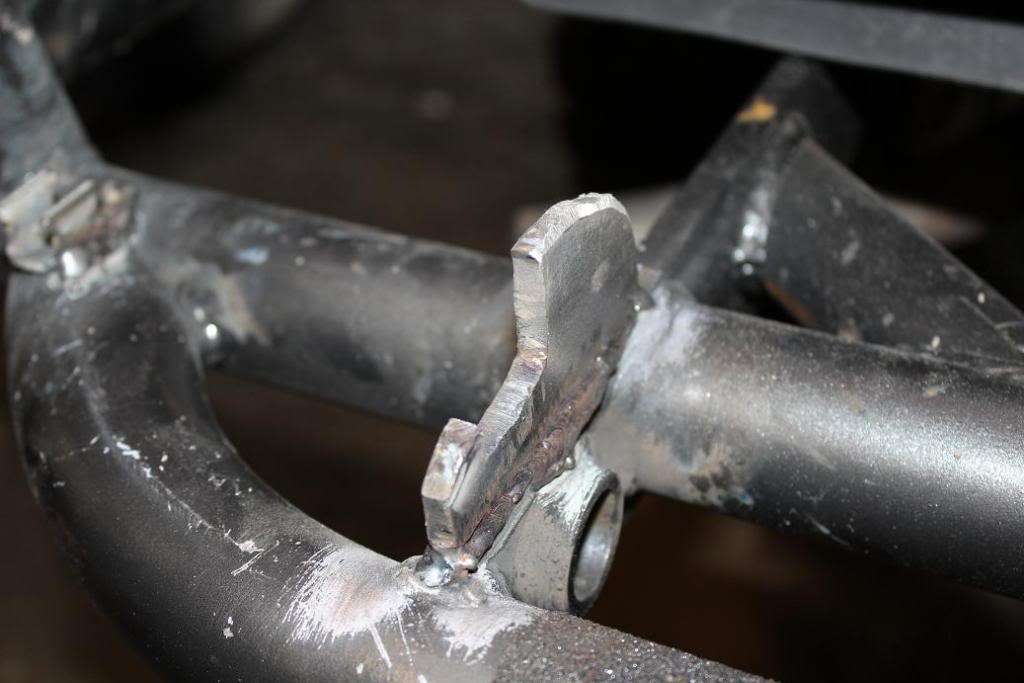
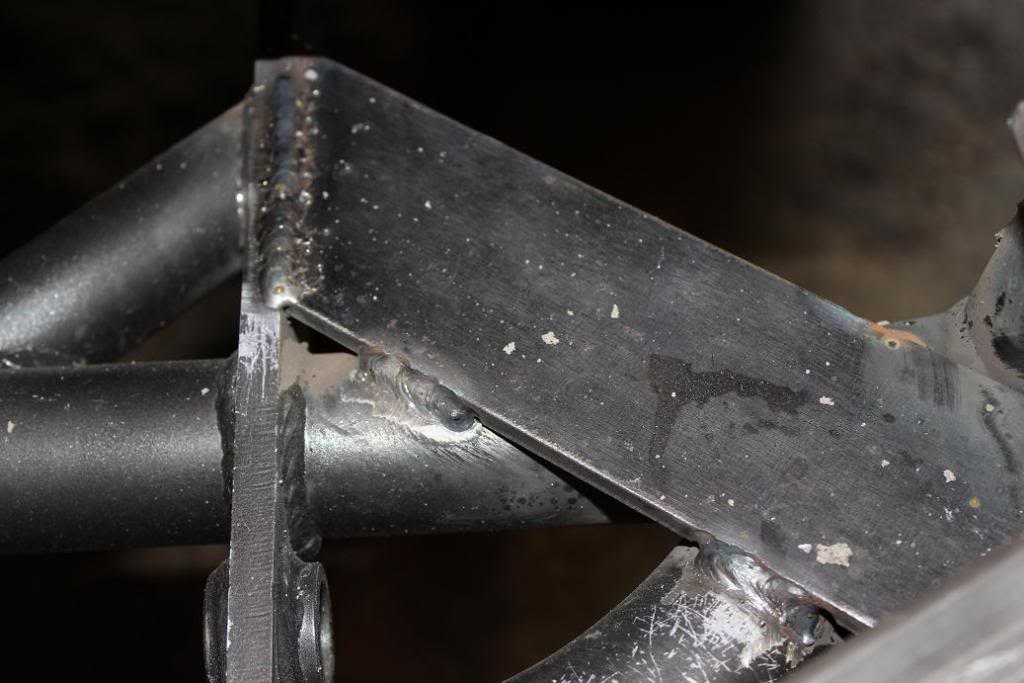
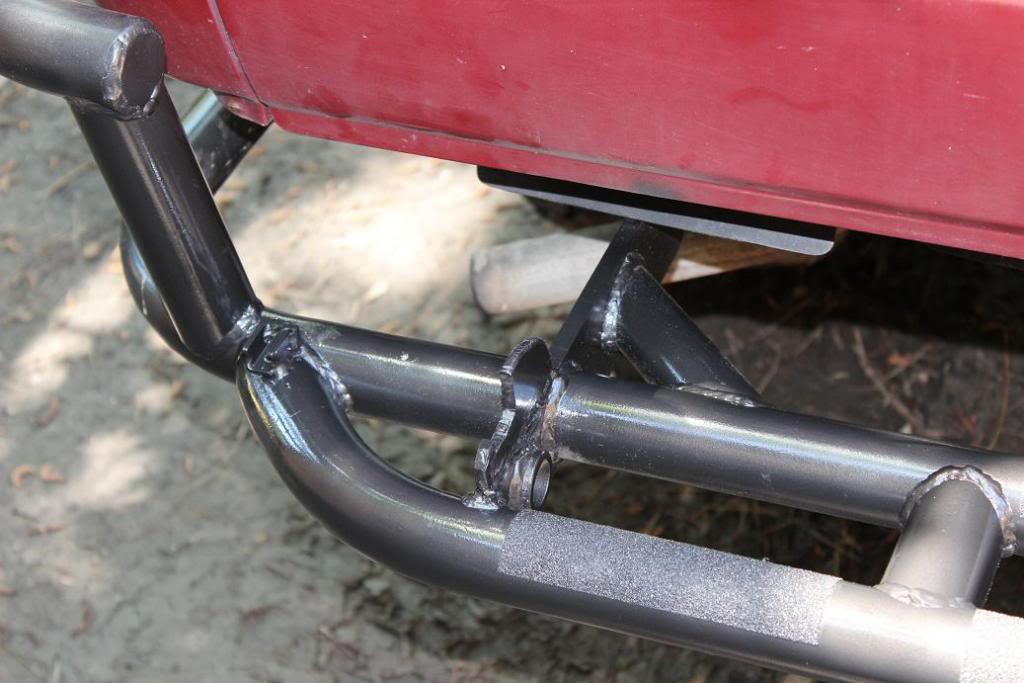
The weight will be supported by the bottom bar, not the top. There is a ledge that the tire sits on. The bolt is a 1" with bronze bushings, using 1/4 plate steel in dual sheer for the hinge. There is a tapered shelf that supports the weight on the opposite edge, it also has a safety notch to keep the weight off the latch.
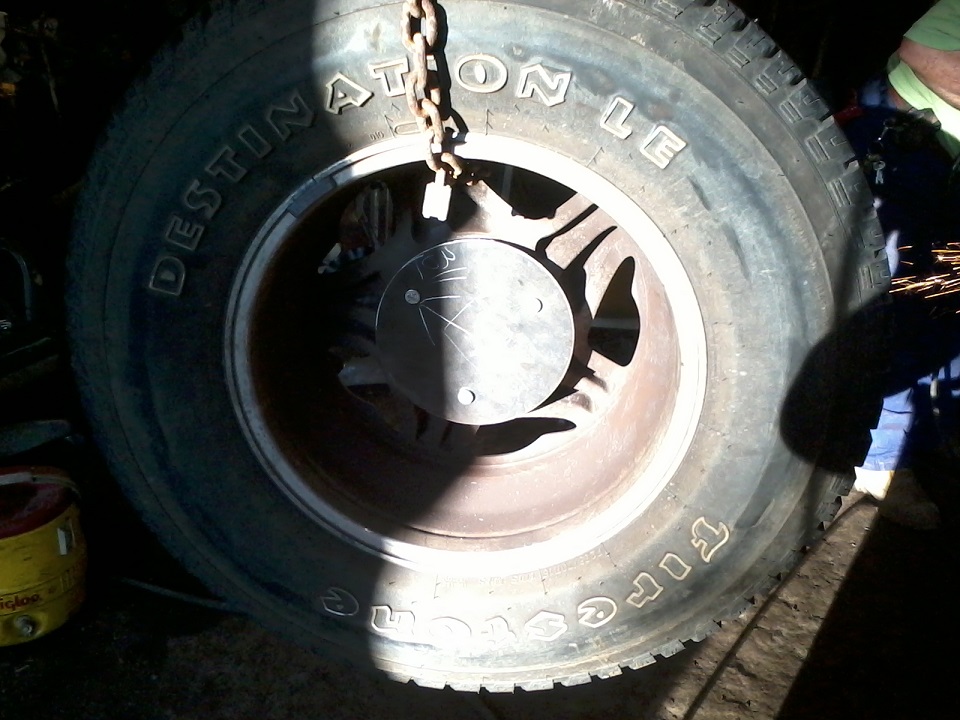
The latch is a locking latch rated for 1000 pounds, it pulls the arm towards the front, and against the stopping tab. The round plate for the tire is 1/4 8" diameter plate that was cut on a plasma table at a local shop where I bought the metal.
The arms are 1x2, but with the design of this thing it saves weight and it will not be going anywhere.
The weight will be supported by the bottom bar, not the top. There is a ledge that the tire sits on. The bolt is a 1" with bronze bushings, using 1/4 plate steel in dual sheer for the hinge. There is a tapered shelf that supports the weight on the opposite edge, it also has a safety notch to keep the weight off the latch.
The latch is a locking latch rated for 1000 pounds, it pulls the arm towards the front, and against the stopping tab. The round plate for the tire is 1/4 8" diameter plate that was cut on a plasma table at a local shop where I bought the metal.
The arms are 1x2, but with the design of this thing it saves weight and it will not be going anywhere.
 May 13, 2013 | 03:11 PM
#46
Thread Starter
Registered User
Joined: Feb 2013
Posts: 167
Likes: 0
From: Hampton VA
Well just got the timing kit in from engine builder, so it looks like more fun this week with the truck. This is the main piece I was waiting on to get this truck ready for some off road this summer. Going to go ahead and do the diff breather mod while I am in there, and replace the ECT.
I will keep this thread updated with pictures of the timing chain tear down.
I will keep this thread updated with pictures of the timing chain tear down.
 May 14, 2013 | 06:34 PM
#49
Subbed to see the t/c with head on pics also...great job on that 1st gen bro. You got mad fab skills. Nice job on the spare tire carrier. I love the first gens too. One quick question...why did you swap out those bigger, stock mirrors for the more common small ones??? I loved those pickup sized mirrors when I was still driving my 88. To each his own, I suppose...I just liked them not only because they were bigger but also because you don't see those mirrors often on the 1st gens...kinda like older Yotas in general. 
May 15, 2013 | 02:18 PM
#50
Thread Starter
Registered User
Joined: Feb 2013
Posts: 167
Likes: 0
From: Hampton VA
Subbed to see the t/c with head on pics also...great job on that 1st gen bro. You got mad fab skills. Nice job on the spare tire carrier. I love the first gens too. One quick question...why did you swap out those bigger, stock mirrors for the more common small ones??? I loved those pickup sized mirrors when I was still driving my 88. To each his own, I suppose...I just liked them not only because they were bigger but also because you don't see those mirrors often on the 1st gens...kinda like older Yotas in general.
The mirrors were rusted so bad that the tension could not be adjusted and they would turn inward while driving. So that made it a little dangerous. I would have preferred to keep the other mirrors on, since they were a dealer add on, but they were beyond repair.
I loaded up a bunch of tools today to take down to my dads to work on it. I wish I could bring my box down, but it ways more than the truck does! I hope to get started tomorrow around 9 am, and I am pretty certain that I could probably get it done in about 4 hours, but I am not going to rush through it.
If the chain goes smooth I may begin the fuel tank lift and cut the skid plate down to match the lift point. Also hope to start taking the measurements for the drive train lift, and see what I would need as far as metal to fabricate the transfer case cross member.
I will try to take some detailed pictures.
May 16, 2013 | 02:56 PM
#53
Thread Starter
Registered User
Joined: Feb 2013
Posts: 167
Likes: 0
From: Hampton VA
So I did not pull the head or the oil pan! 
Ok I posted it in a dedicated thread and will link to it. My chain was in good shape, but the tensioner was sticking. Unfortunately it was not my motor noise, I think I have a bad wrist pin, but I went ahead and did the chain. Took me 4.5 hours, but expect more time when you do yours. Internal engine work is a daily thing for me, I have all the right tools, and of course a compressor.
https://www.yotatech.com/forums/f116.../#post52077789
The timing tensioner sticking was causing the truck to ping bad at factory timing. I now have a bunch more power and the gas mileage improved dramatically, as did idle quality.
It was too damn hot to do anything else, and the garage faces south west, so the sun was beating down on me, I was able to take the 60 mile trip home before traffic got bad.
May 16, 2013 | 05:22 PM
#54
Registered User
Joined: Aug 2011
Posts: 592
Likes: 0
From: Canon City, Colorado
Awesome Runner. Great work. im Sub'd in to see more. Thinking of doing a swing arm bumper similar to that on my 86 truck but not sure. Need bed space for deer and elk season, so might be best option othere then a baja rack
May 24, 2013 | 01:47 PM
#55
Thread Starter
Registered User
Joined: Feb 2013
Posts: 167
Likes: 0
From: Hampton VA
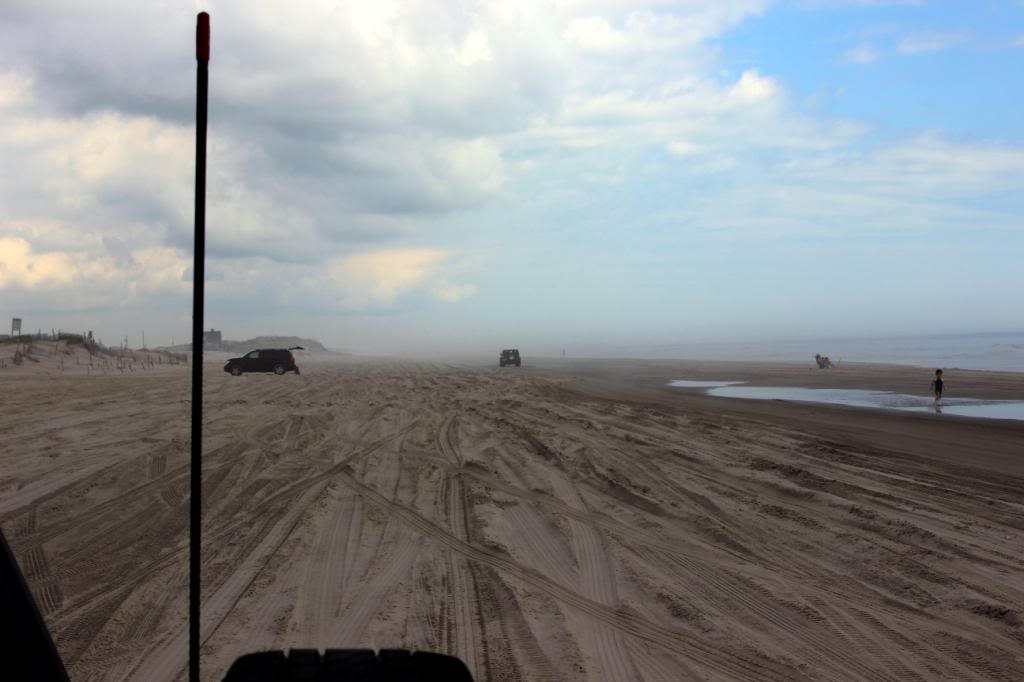
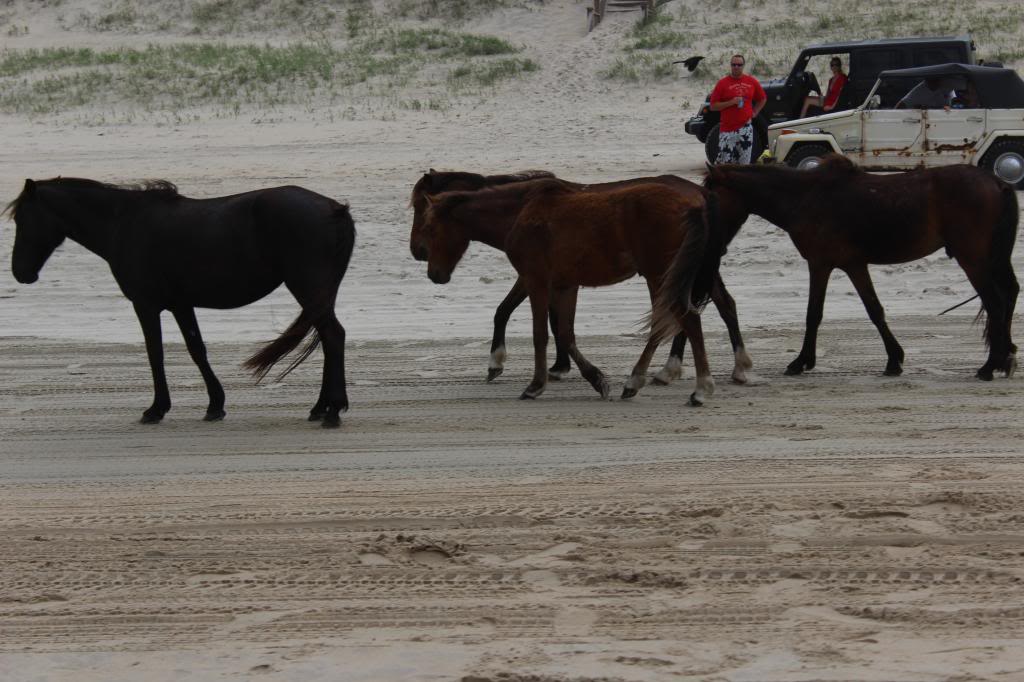
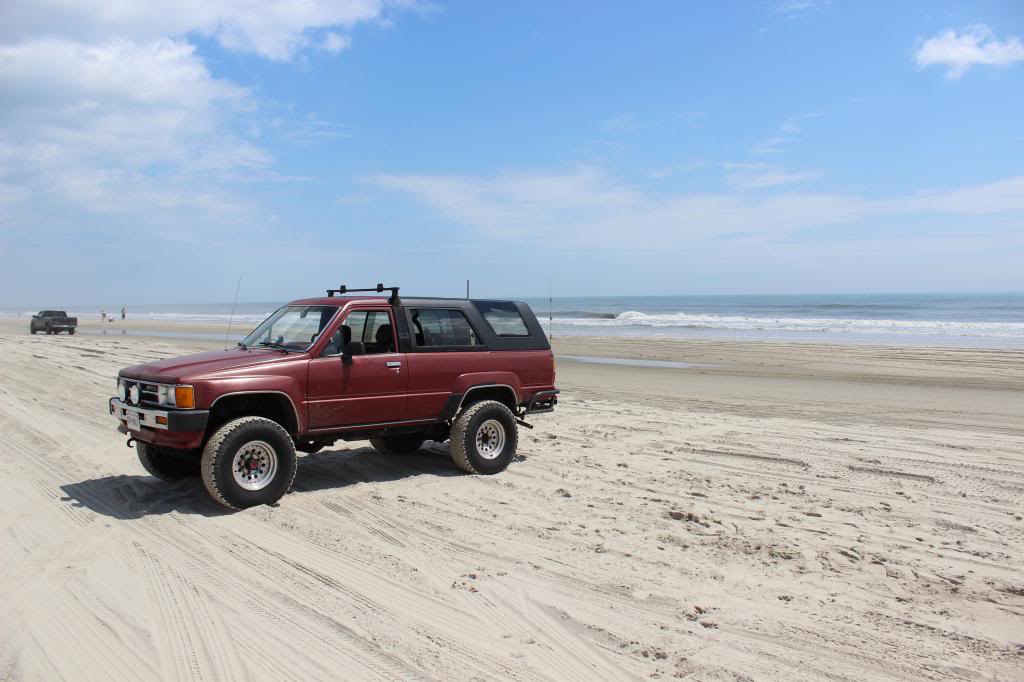
Took the truck on a little offroad trip today. Nothing big, but it was fun. We went down to Corolla NC to the 4x4 beach. Had a blast, only seen 1 vehicle stuck in some really deep sand, it was a Jeep. Guy had a little too much air in his tires and pulled out on his own. I offered to help but he said he was good. Anyways here are some pictures.
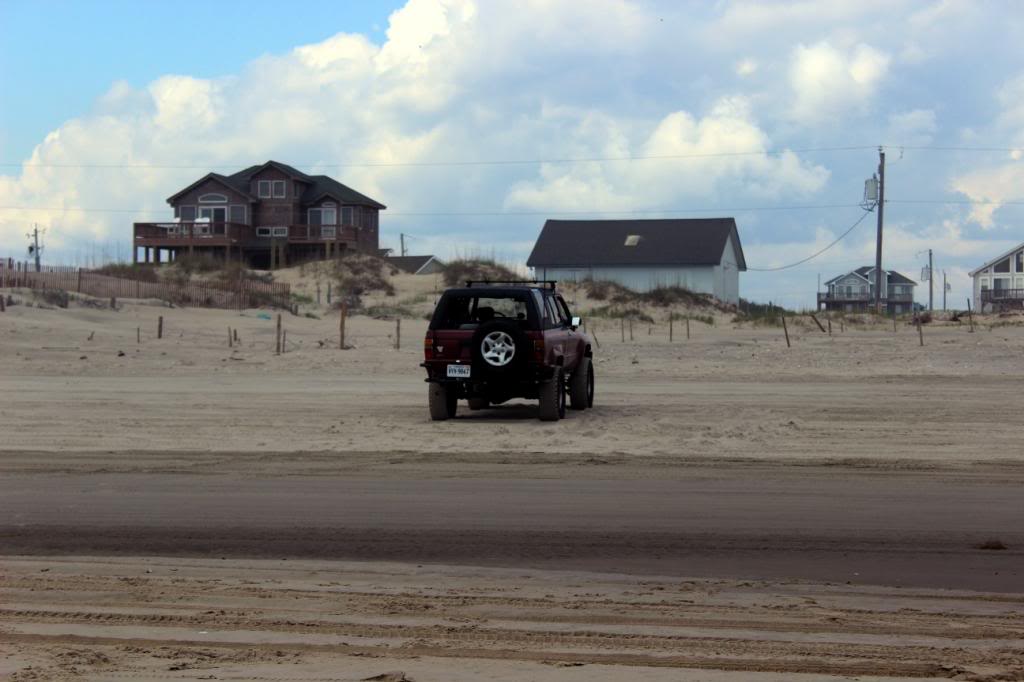
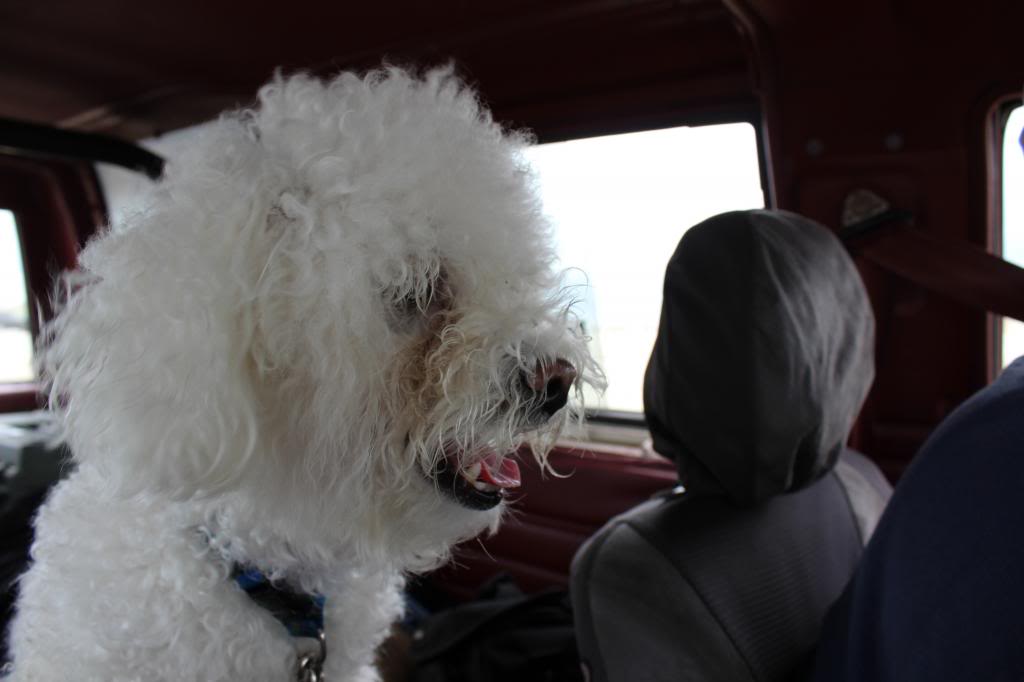
I got the dogs approval on the 4 runner build, he likes it!
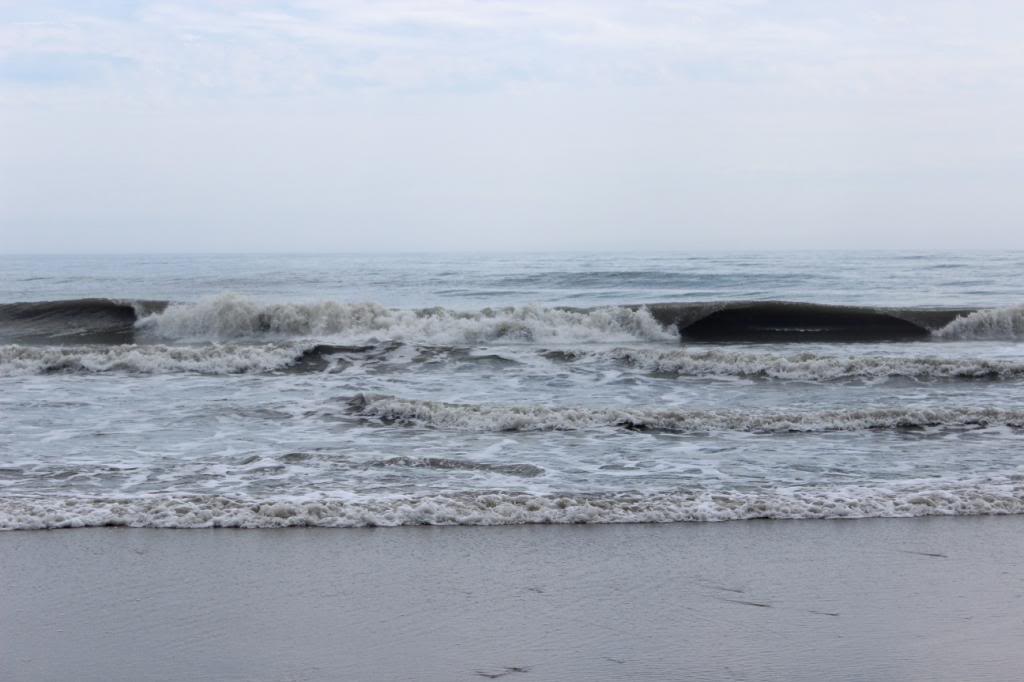
But I think he likes the beach a little more!

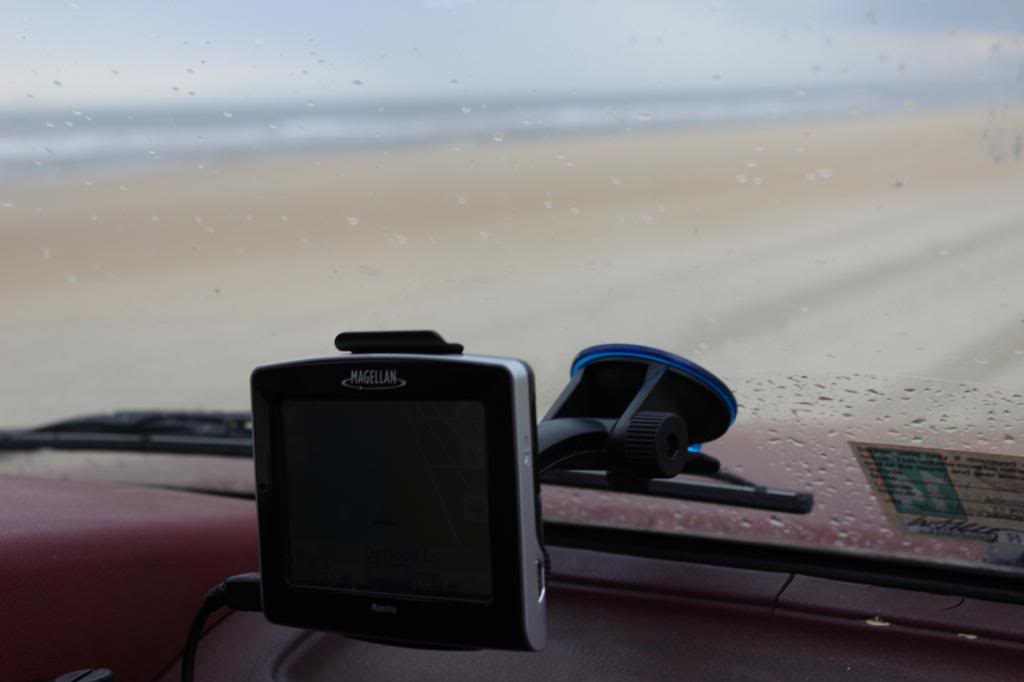
This is why you never trust your GPS when you are off road. It may be hard to see, but trying to find the park in corolla, it is telling me to turn left in 2.1 miles. I am right at the Virginia border traveling south on the beach?
And of course no trip to Corolla is complete without wild horse sightings
I got the dogs approval on the 4 runner build, he likes it!
But I think he likes the beach a little more!
This is why you never trust your GPS when you are off road. It may be hard to see, but trying to find the park in corolla, it is telling me to turn left in 2.1 miles. I am right at the Virginia border traveling south on the beach?
And of course no trip to Corolla is complete without wild horse sightings
May 24, 2013 | 02:59 PM
#56

Registered User
Joined: Feb 2013
Posts: 70
Likes: 0
From: charlottesville virginia
Took the truck on a little offroad trip today. Nothing big, but it was fun. We went down to Corolla NC to the 4x4 beach. Had a blast, only seen 1 vehicle stuck in some really deep sand, it was a Jeep. Guy had a little too much air in his tires and pulled out on his own. I offered to help but he said he was good. Anyways here are some pictures.
I got the dogs approval on the 4 runner build, he likes it!
But I think he likes the beach a little more!
This is why you never trust your GPS when you are off road. It may be hard to see, but trying to find the park in corolla, it is telling me to turn left in 2.1 miles. I am right at the Virginia border traveling south on the beach?
And of course no trip to Corolla is complete without wild horse sightings
May 24, 2013 | 05:55 PM
#57
Beautiful pix, Stan. Reminds me of when my buddies and I went down to spring break in Ft. Lauderdale...driving on the beach around 23 yrs ago. Wish I had my 1st Gen then!  The 4Runner's looking great. Thanks again for the tc thread with pics. When I do mine (soon), I'm gonna start a build thread for my 94 and post pics of the job to inspire more backyard guys like me....
The 4Runner's looking great. Thanks again for the tc thread with pics. When I do mine (soon), I'm gonna start a build thread for my 94 and post pics of the job to inspire more backyard guys like me....
 May 26, 2013 | 03:05 PM
#59
Thread Starter
Registered User
Joined: Feb 2013
Posts: 167
Likes: 0
From: Hampton VA
Ok so I got the front diff breather modded today, and did a nice pressure wash on the truck to make sure any of the salt is gone. I filled the tank yesterday and calculated the fuel economy on the trip to the beach and back. I averaged 21.76 mpg, not bad for about 25 miles of sand driving in 4WH.
I got the surging idle fixed once and for all, the lower outlet pipe from the IAC was clogged, I must have missed it the first time I took it off. So now the idle is fixed I decided to move on to the AC
I got the fuse in that was taken out, and plugged the clutch back in. Put a new belt on the AC compressor. I went ahead and put a 90 degree fitting on the low side R12 fitting that has a screw valve built in, and attached the retrofit fitting on the that. Pulled a vacuum for about 10 min, and turned the valve off. I sat down and ate my lunch, checked the truck about 20 min later and I was still at 30 Hig, so there are no large leaks in the system. Went ahead and put it under a vacuum for about 45 min, and charged it up with about 20 oz of R134a.
Normally on a retrofit to be done properly, more needs to be done. But I was not going to drop a bunch of money to see if a system works or not. Well it works fine and is blowing nice and cold. The Idle Up VSV is bad, the coil for it measured out at 285,000 ohm's, when it should be around 40. So I will have to order one from Toyota, in the mean time I turned the idle up just a bit. No more inside the truck when it is hot and humid as hell out!
Total cost for the AC fix today was 17.00, only needed to buy one can of Freon, and the AC belt. The retrofit low side fitting and angle adapter I had in my tool box, along with another can of Freon that was 3/4 full. So it worked well.
I got the surging idle fixed once and for all, the lower outlet pipe from the IAC was clogged, I must have missed it the first time I took it off. So now the idle is fixed I decided to move on to the AC
I got the fuse in that was taken out, and plugged the clutch back in. Put a new belt on the AC compressor. I went ahead and put a 90 degree fitting on the low side R12 fitting that has a screw valve built in, and attached the retrofit fitting on the that. Pulled a vacuum for about 10 min, and turned the valve off. I sat down and ate my lunch, checked the truck about 20 min later and I was still at 30 Hig, so there are no large leaks in the system. Went ahead and put it under a vacuum for about 45 min, and charged it up with about 20 oz of R134a.
Normally on a retrofit to be done properly, more needs to be done. But I was not going to drop a bunch of money to see if a system works or not. Well it works fine and is blowing nice and cold. The Idle Up VSV is bad, the coil for it measured out at 285,000 ohm's, when it should be around 40. So I will have to order one from Toyota, in the mean time I turned the idle up just a bit. No more
inside the truck when it is hot and humid as hell out!Total cost for the AC fix today was 17.00, only needed to buy one can of Freon, and the AC belt. The retrofit low side fitting and angle adapter I had in my tool box, along with another can of Freon that was 3/4 full. So it worked well.
May 28, 2013 | 01:13 PM
#60

Registered User
Joined: Mar 2013
Posts: 123
Likes: 2
From: VA
Nice work on the tire rack. Glad to see you got ~21mpg, kind of gives me an idea of what I can expect. I'm finally going to get my '87 truck towed to Virginia Beach sometime this week, and hopefully in the next couple of weeks I'll have time to pull out the 22R and tear it down to see what's salvageable.


