
R151F / RF1A rebuild
 Aug 29, 2009 | 01:29 PM
#1
Thread Starter
Registered User
Joined: Apr 2008
Posts: 197
Likes: 0
From: Orygun
R151F / RF1A rebuild
The truck is a 1994 4runner SR5 22RE. A few months ago my tranny went and i found a used turbo setup on craigslist so i jumped. tore it down to visually inspect and clean and put it back together and ran it for the last 4 or 5 months. With knowledge from past experience to NOT put an unknown used transmission in a vehicle i did anyway. Also knowing that i would take it out and rebuild before the winter comes. (I'm a skier and i shall let nothing get in the way of that.) So that time is now. I had a U joint go out in my rear drive line which shook my transfer case output shaft so that it sits loose. So what better time to rebuild than now. i will be starting this afternoon by cleaning and removing. With inspiration from swapped89's chaos build thread (https://www.yotatech.com/f191/swappe...thread-186490/) i want to update daily with laptop on work bench. So here is my start. complete tear down and rebuild. Marlin R151F kit came in the mail today but they are out of stock of Case kits so i am searching other routes.
For now i am going to drive my front wheel drive 4runner down to the wash to pressure wash some icky.

For now i am going to drive my front wheel drive 4runner down to the wash to pressure wash some icky.

 Aug 29, 2009 | 05:44 PM
#5
Thread Starter
Registered User
Joined: Apr 2008
Posts: 197
Likes: 0
From: Orygun
Thanks. This i gonna get fun.
Im in portland. Was just down in ur neck last weekend. hiked the PCT (trail 2000) down west of the triplet sisters
waiting for kit pics to upload then will post. start to tear out and down tomorrow. for now i got burgers on the grill and i'm gonna play like my age and go out on the town for this marvelous Sat night. i'm usually in the woods every weekend so i gotta figure out where my age group hangs out. see what them kids do these days
Aug 29, 2009 | 08:11 PM
#6
Thread Starter
Registered User
Joined: Apr 2008
Posts: 197
Likes: 0
From: Orygun
ok, now for some fake work
I didn't get much done today but ill give em hell tomarrow "dirty rick shanchez"
So i cleaned the truck and made the "shop" up a little better. didn't sweep the street where im working. ill let the church crowed watch me do that in the morning. i did how ever get my tranny kit from marlin.
To start we got a pic of everything that came

And everything i expected to get form marlin
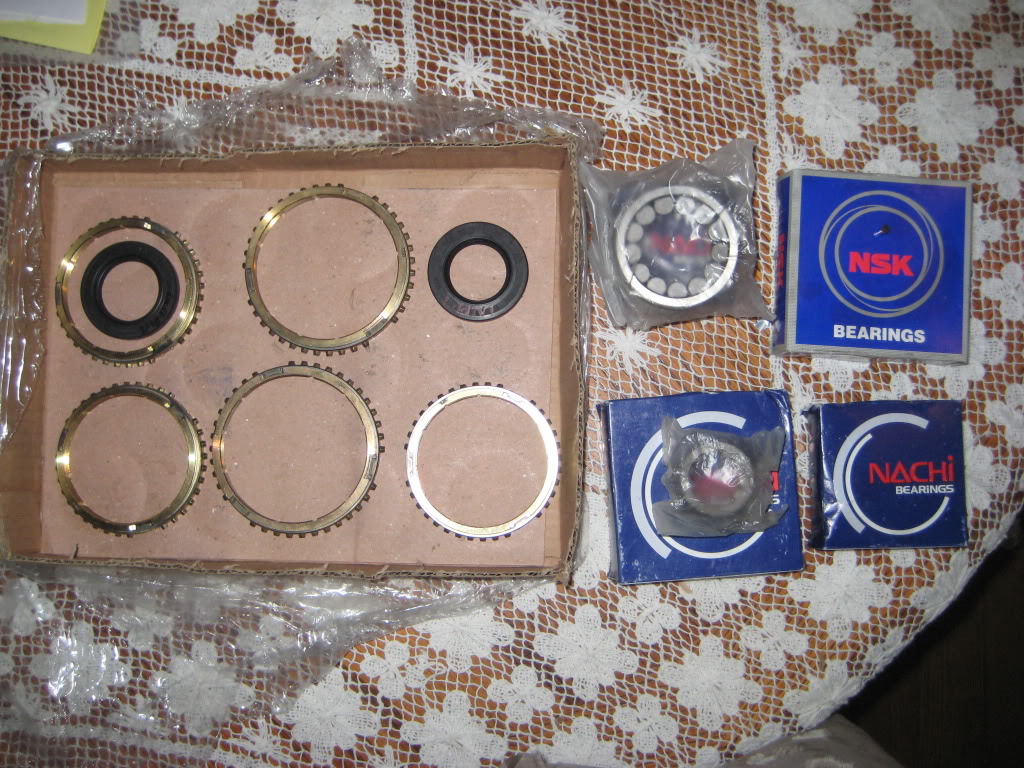
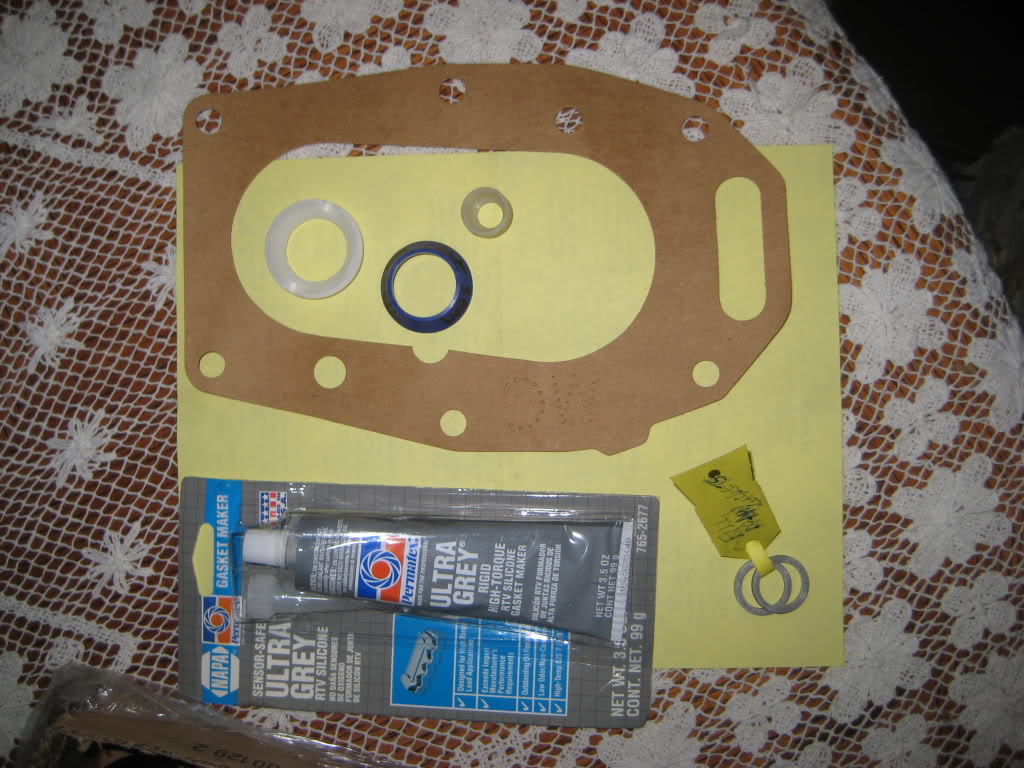
And a bunch of extras i didn't expect. weve got a tranny to case gasket, the blue ring is a t case shift base (with my transmission kit!!!!) white ring is a tranny shift seat and white knob is the shift stick end. also included was some rtv grey (can you say full kit, however i have some fipg) and last x2 NEW DRAIN PLUG WASHERS. o how can marlin possibly know that i would totally put this thing togeather without these had he not sent them.
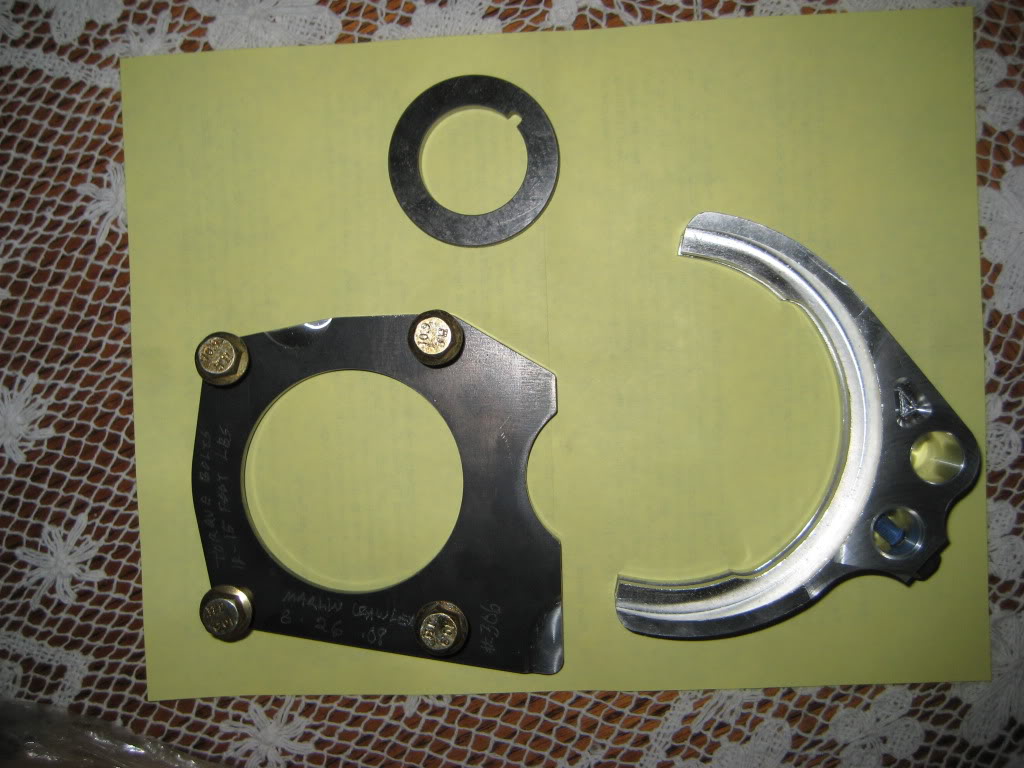
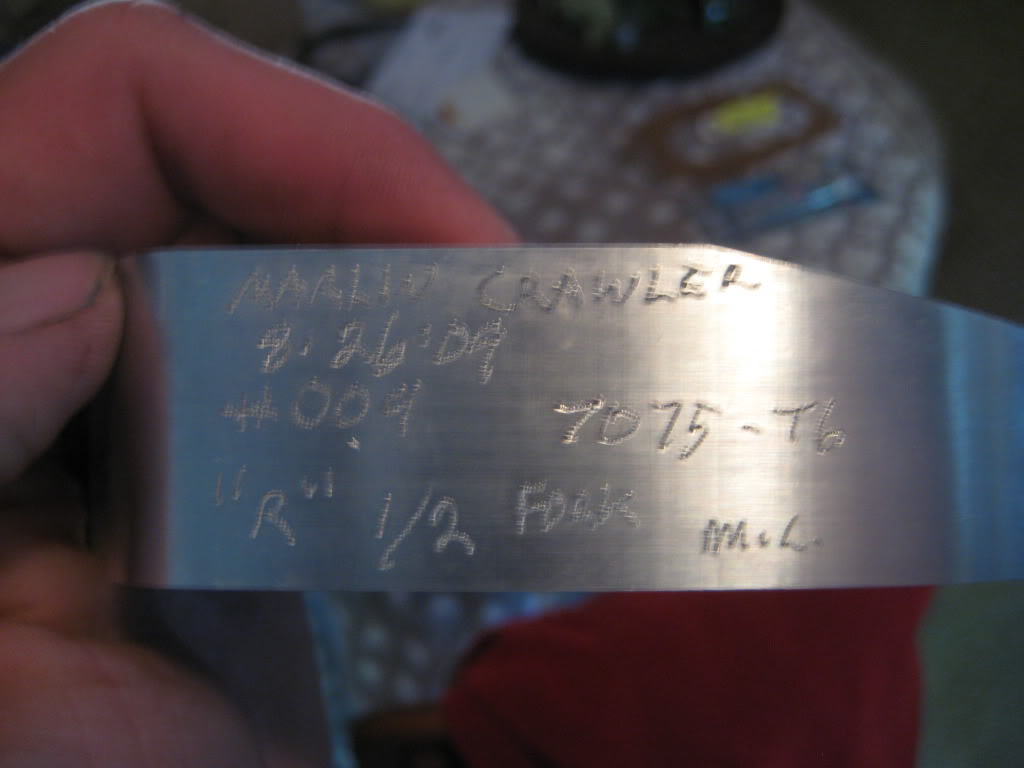
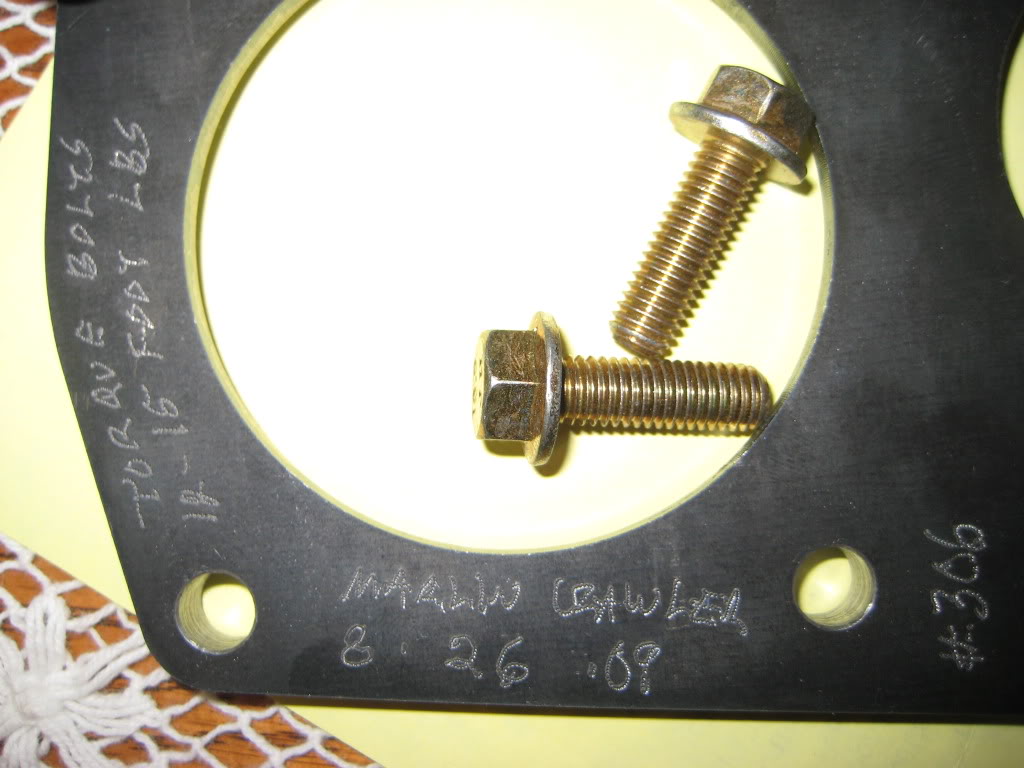
And some heavy duty stuff. billet 1st/2nd shift fork #009. came with a new bolt, thread locked. thanks marlin. hd thrust washer. and heavy duty bearing plate #306
Thats all i got for now. tear down starts high noon. that will give me the morning to get it out of the truck.

So i cleaned the truck and made the "shop" up a little better. didn't sweep the street where im working. ill let the church crowed watch me do that in the morning. i did how ever get my tranny kit from marlin.
To start we got a pic of everything that came
And everything i expected to get form marlin
And a bunch of extras i didn't expect. weve got a tranny to case gasket, the blue ring is a t case shift base (with my transmission kit!!!!) white ring is a tranny shift seat and white knob is the shift stick end. also included was some rtv grey (can you say full kit, however i have some fipg) and last x2 NEW DRAIN PLUG WASHERS. o how can marlin possibly know that i would totally put this thing togeather without these had he not sent them.
And some heavy duty stuff. billet 1st/2nd shift fork #009. came with a new bolt, thread locked. thanks marlin. hd thrust washer. and heavy duty bearing plate #306
Thats all i got for now. tear down starts high noon. that will give me the morning to get it out of the truck.
Last edited by JeEVeS; Sep 4, 2009 at 09:51 PM.
Aug 30, 2009 | 11:25 AM
#7
Thread Starter
Registered User
Joined: Apr 2008
Posts: 197
Likes: 0
From: Orygun
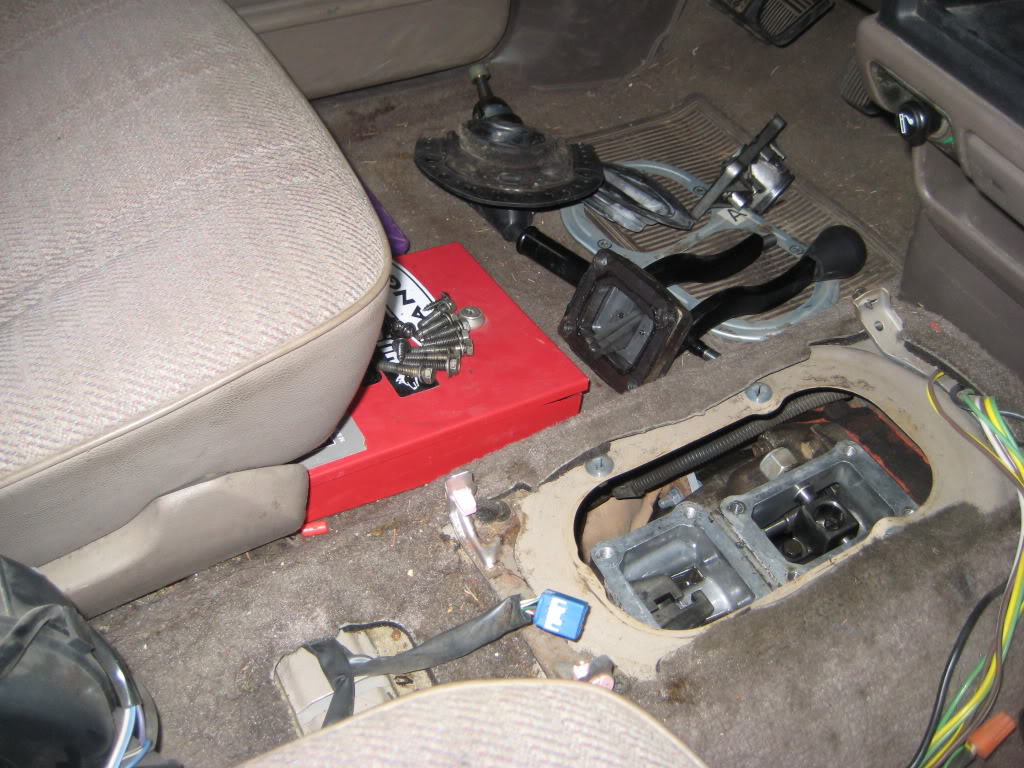
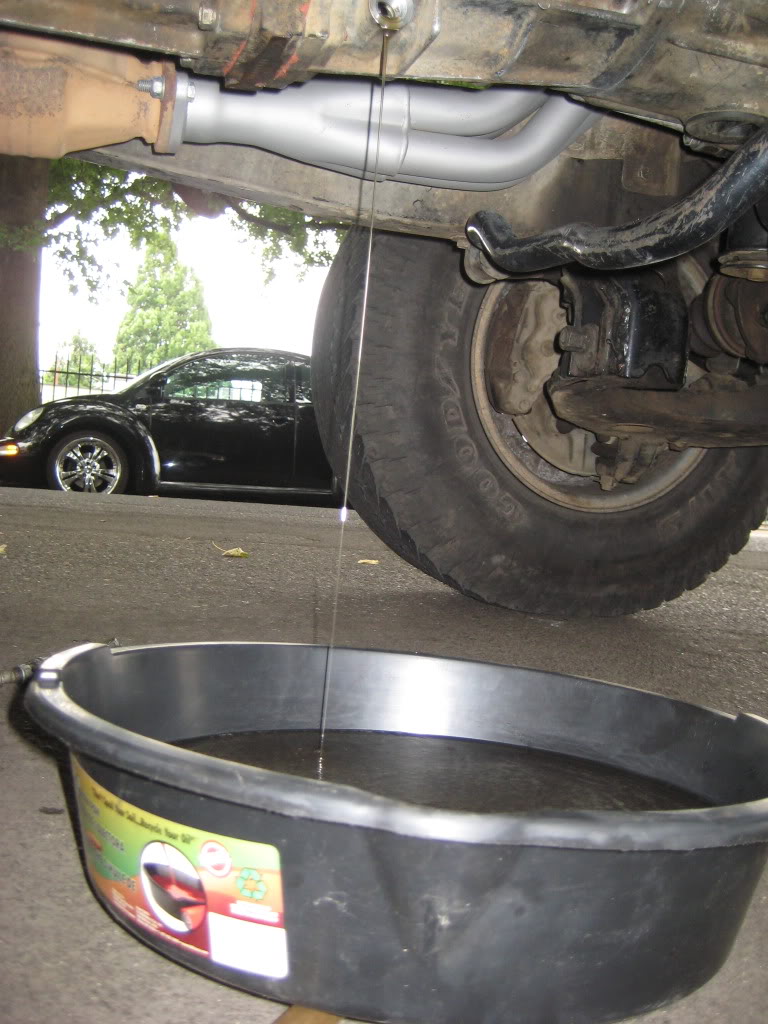
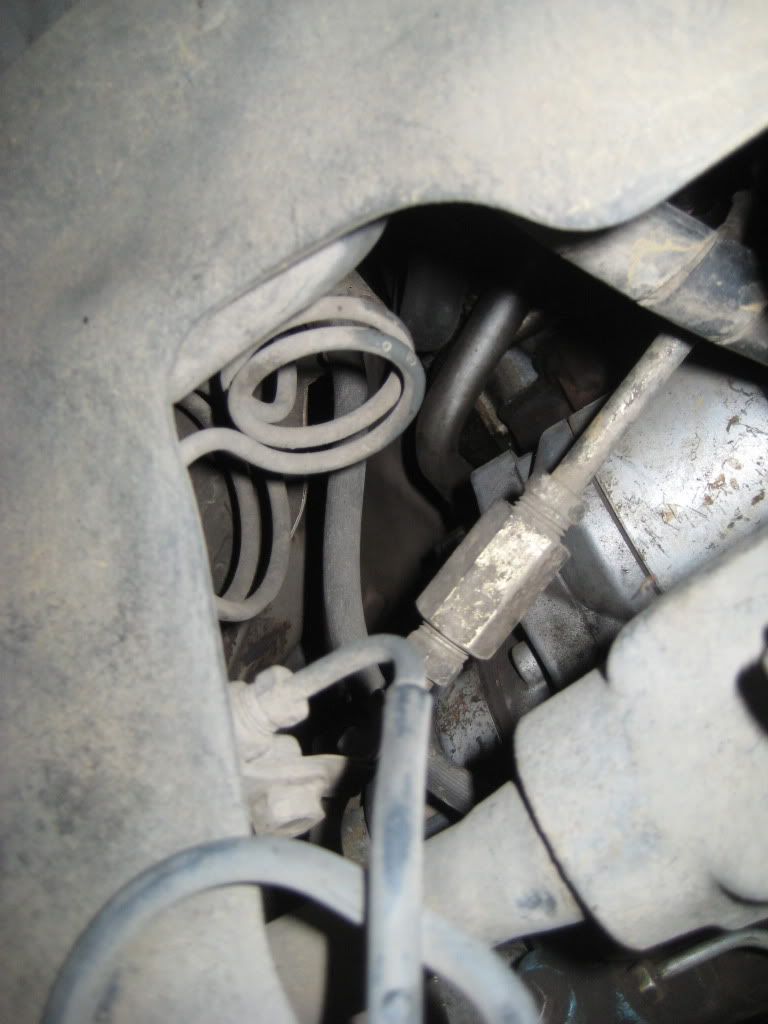
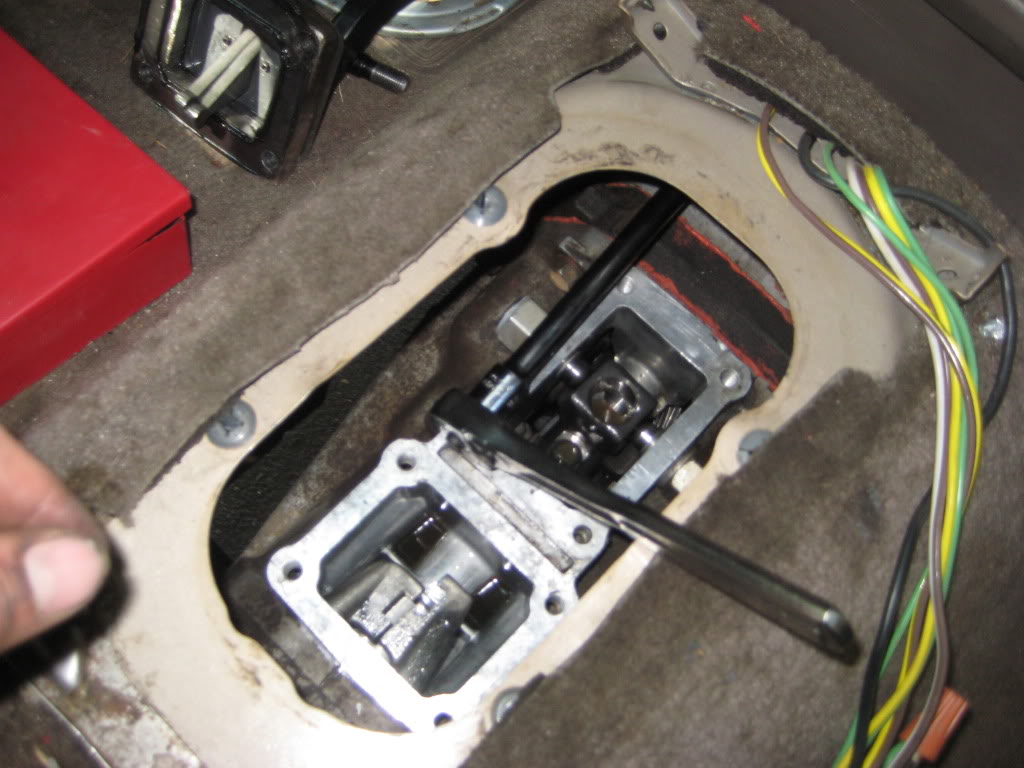
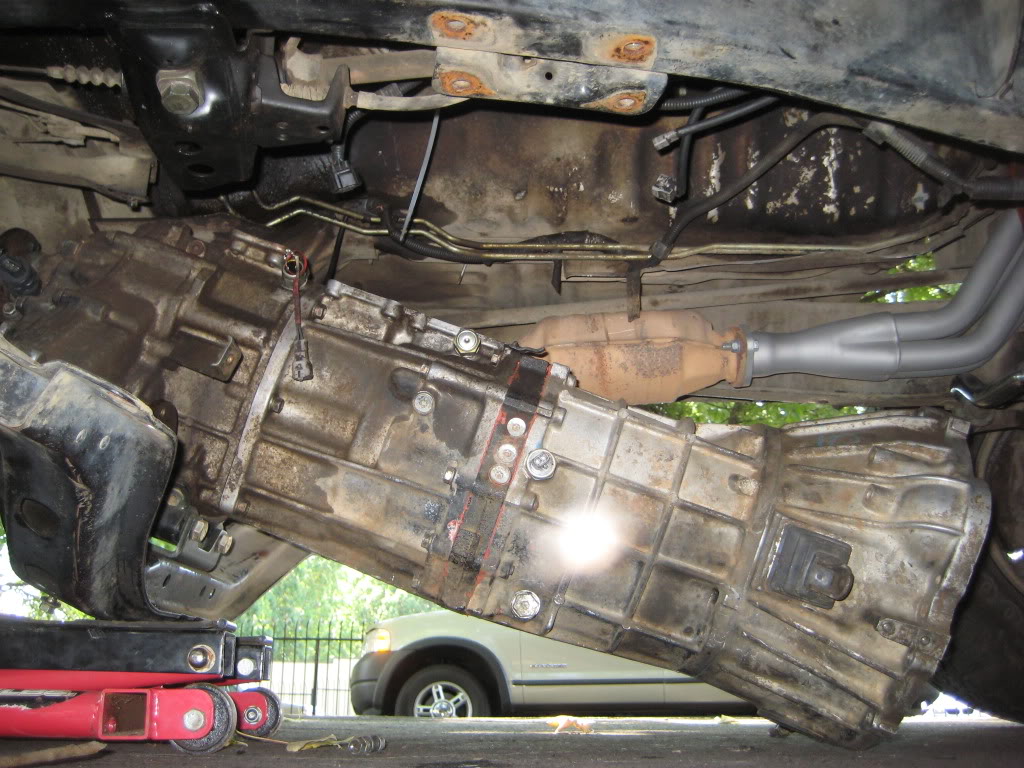
All righty, so i slept in a little latter than figured. Lets see, started by taking off the center console interior and then the rubber boots and shifter bases. Nest to the front and rear drive shafts off, x2 14mm wrenches, and then onto the wires. Disconnect the speedo cable/wire, reverse light wire, 4x4 recognition wire, and one other i believe. drain some oil and make more coffee.
remove starter, i use a 1/4 drive 14 mm with an extension for the lower, and a 14mm gear wrench for the top. an 15 degree 14mm gear wrench might work on the lower. I'll look into ($$) when im on my tools run in a couple days.
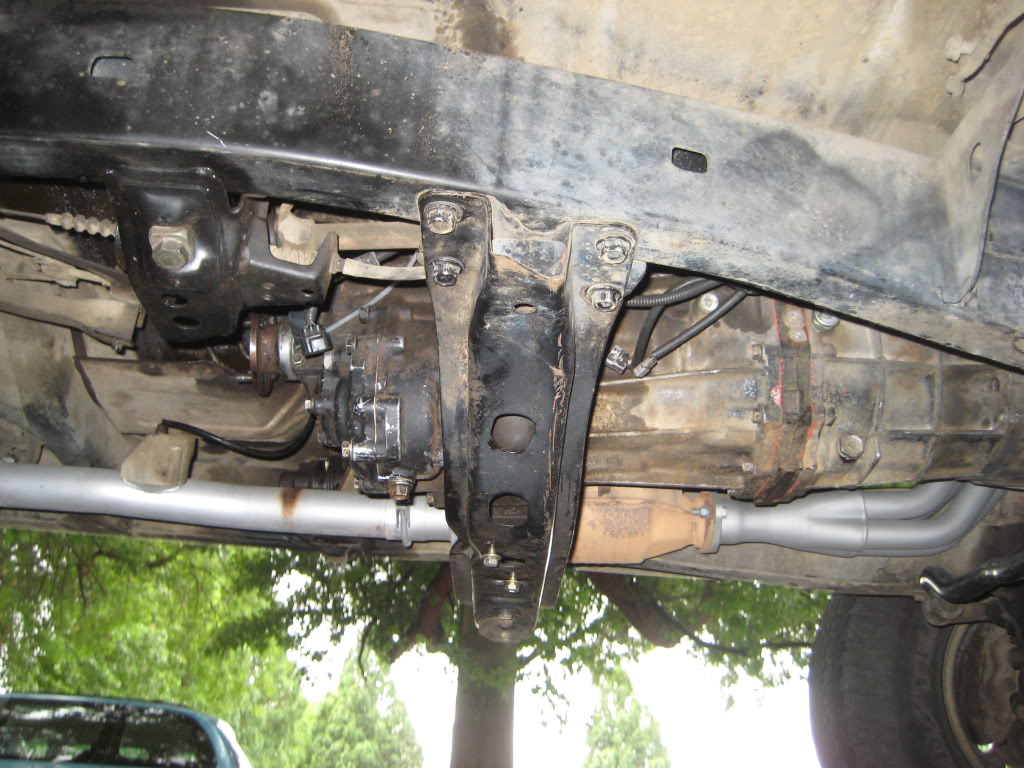
starter off i head for the clutch slave cylinder. 12mm 2 bolts and that off. motorcycle jack under the cross member and 8 17mm bolts off from the cross to the frame. supported and a jack stand ready to hold the engine up. a couple 17mm and 4 or 5 14mm bolts from bell housing to engine. two on top of the bell housing are the most fun. i use all my extensions andmy wrench ends up back near the intermediate plate. some day i wanna drill two holes in front of the gear shift tunnel to remove these two bolts from inside. i also want to do a motor drive-train lift with no body lift making these two holes the only way to remove tranny from motor. Some heavy grunt work (R series trannies are noticeably heavier than say my g58 or w56) and we start to pull the tranny out.
My favorite tool kit. 1/4" drive 5mm - 14mm. i can do almost anything with this kit unless its got 60+ ftlbs on it. perfect for the runner or my bimmer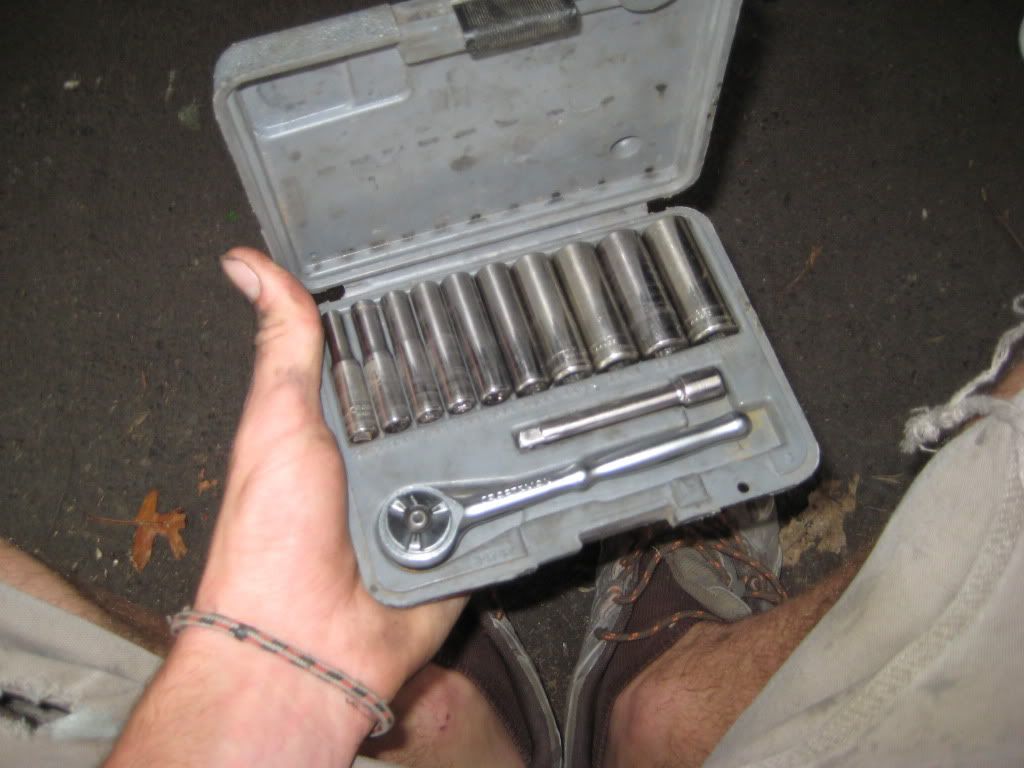
remove starter, i use a 1/4 drive 14 mm with an extension for the lower, and a 14mm gear wrench for the top. an 15 degree 14mm gear wrench might work on the lower. I'll look into ($$) when im on my tools run in a couple days.
starter off i head for the clutch slave cylinder. 12mm 2 bolts and that off. motorcycle jack under the cross member and 8 17mm bolts off from the cross to the frame. supported and a jack stand ready to hold the engine up. a couple 17mm and 4 or 5 14mm bolts from bell housing to engine. two on top of the bell housing are the most fun. i use all my extensions andmy wrench ends up back near the intermediate plate. some day i wanna drill two holes in front of the gear shift tunnel to remove these two bolts from inside. i also want to do a motor drive-train lift with no body lift making these two holes the only way to remove tranny from motor. Some heavy grunt work (R series trannies are noticeably heavier than say my g58 or w56) and we start to pull the tranny out.
My favorite tool kit. 1/4" drive 5mm - 14mm. i can do almost anything with this kit unless its got 60+ ftlbs on it. perfect for the runner or my bimmer
Trending Topics
Aug 30, 2009 | 02:26 PM
#8
Thread Starter
Registered User
Joined: Apr 2008
Posts: 197
Likes: 0
From: Orygun
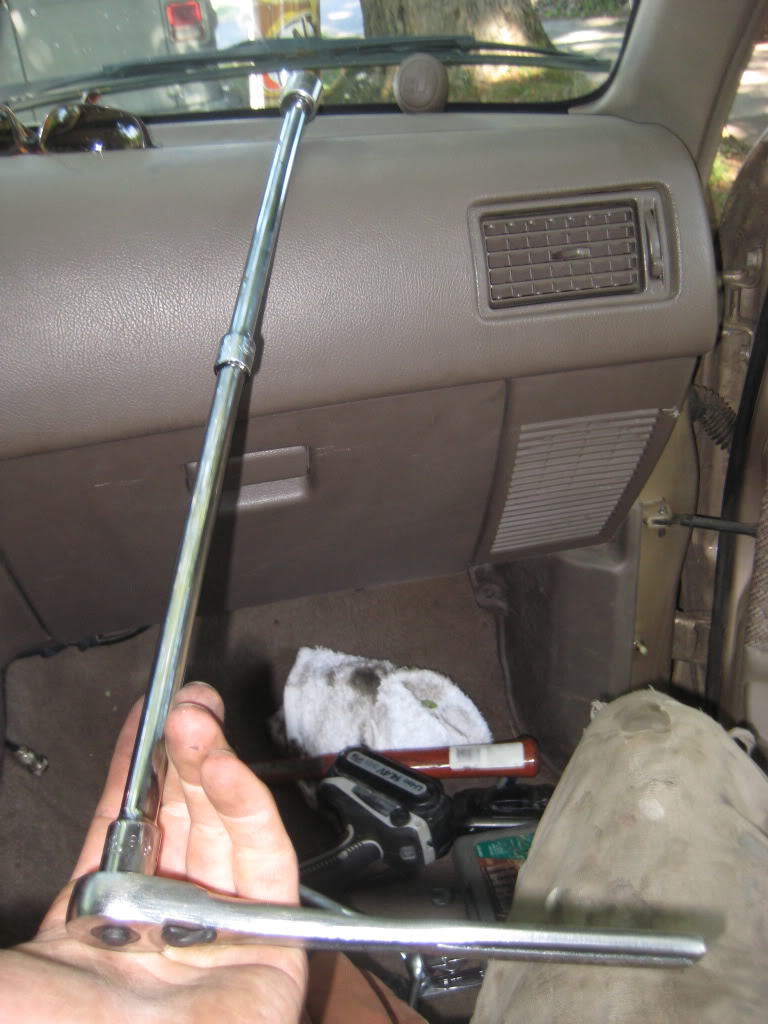
So I took a lil tool run. picked up a couple 10" extensions, one wobble end one reg. i always figured and it turned out to be right, 17mm short socket, x2 10" extensions on rachet (3/8) worked perfectly to get the top two bell housing bolts from the shifter hole.
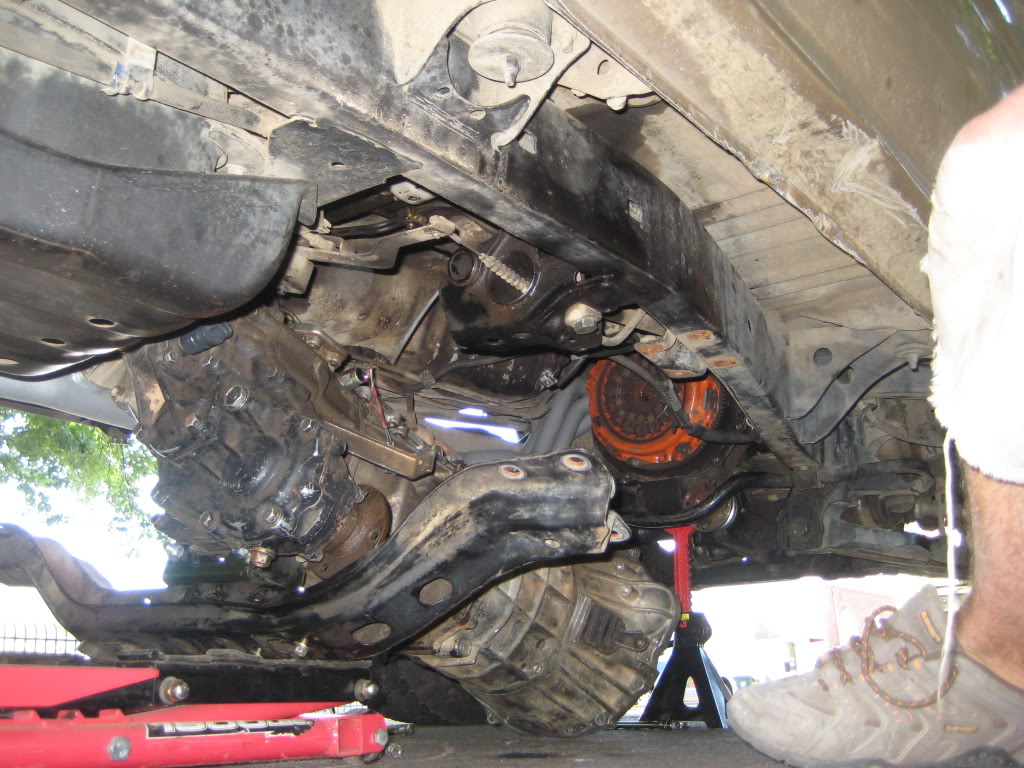
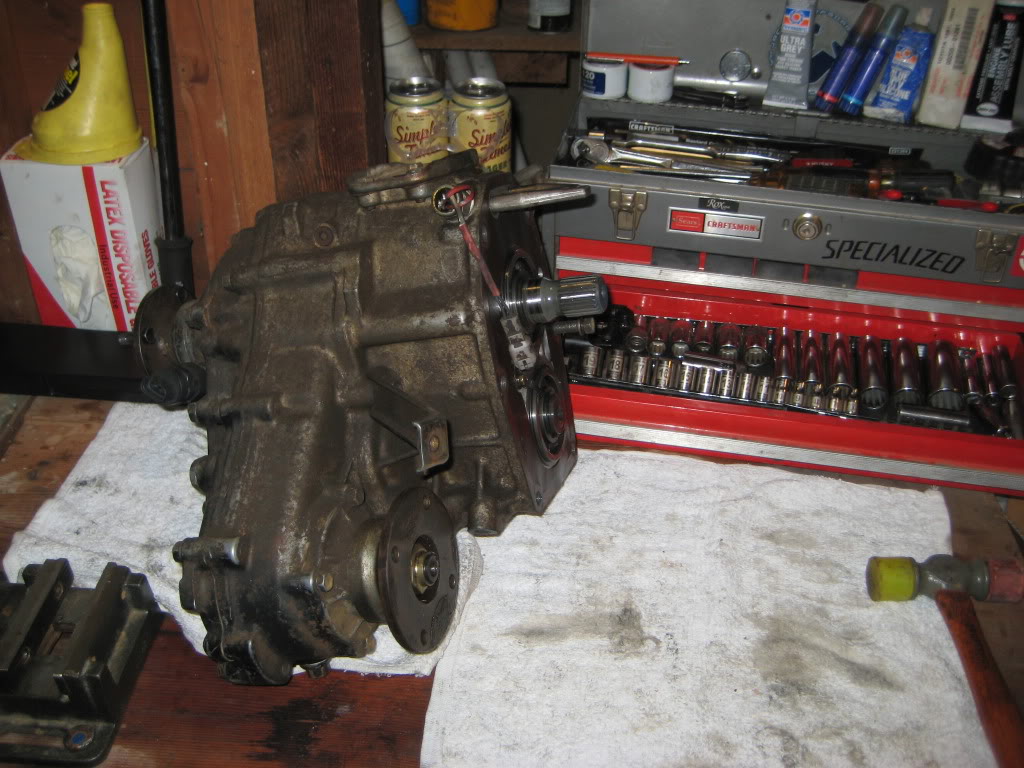
Got those two and then started on the rest, blocked the motor with a jack stand. Left foot on pass front tire, right knee on crossmeber, left forearm on bellhousing, and right hands got the spirit fingers. comes off and out.
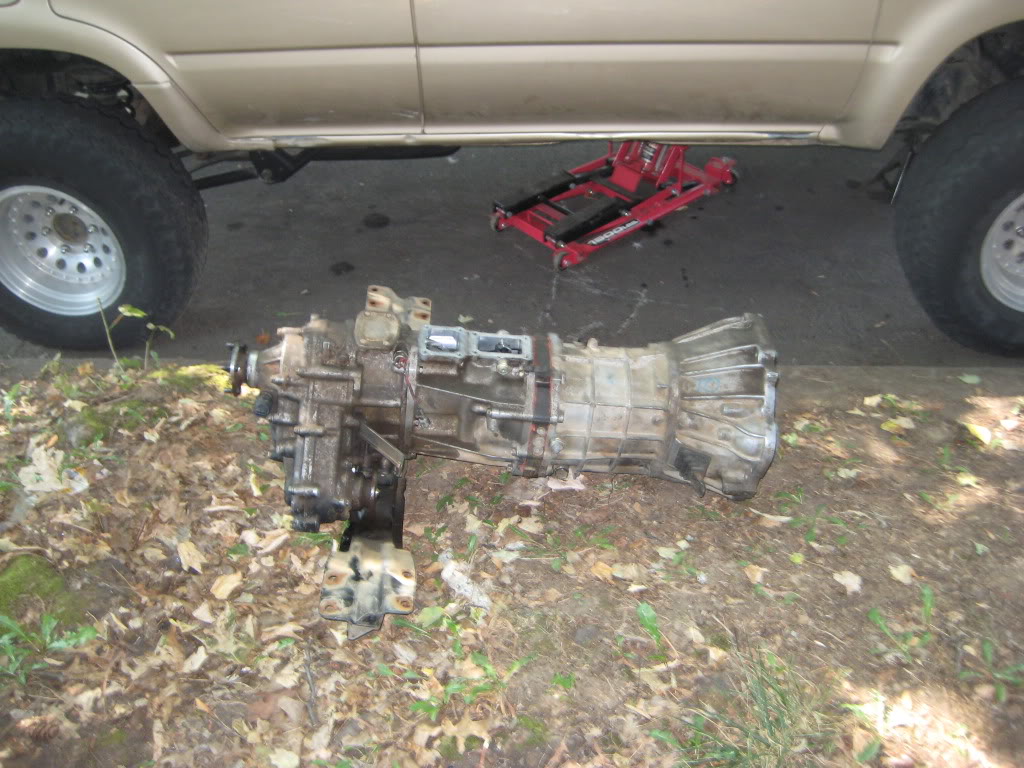
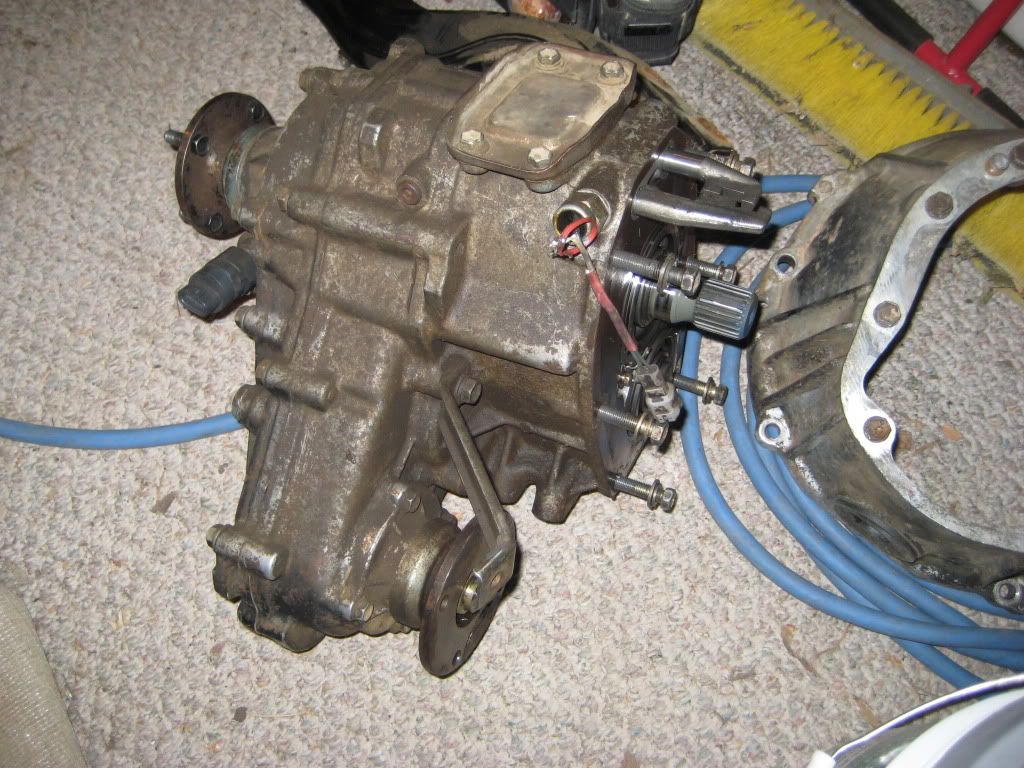
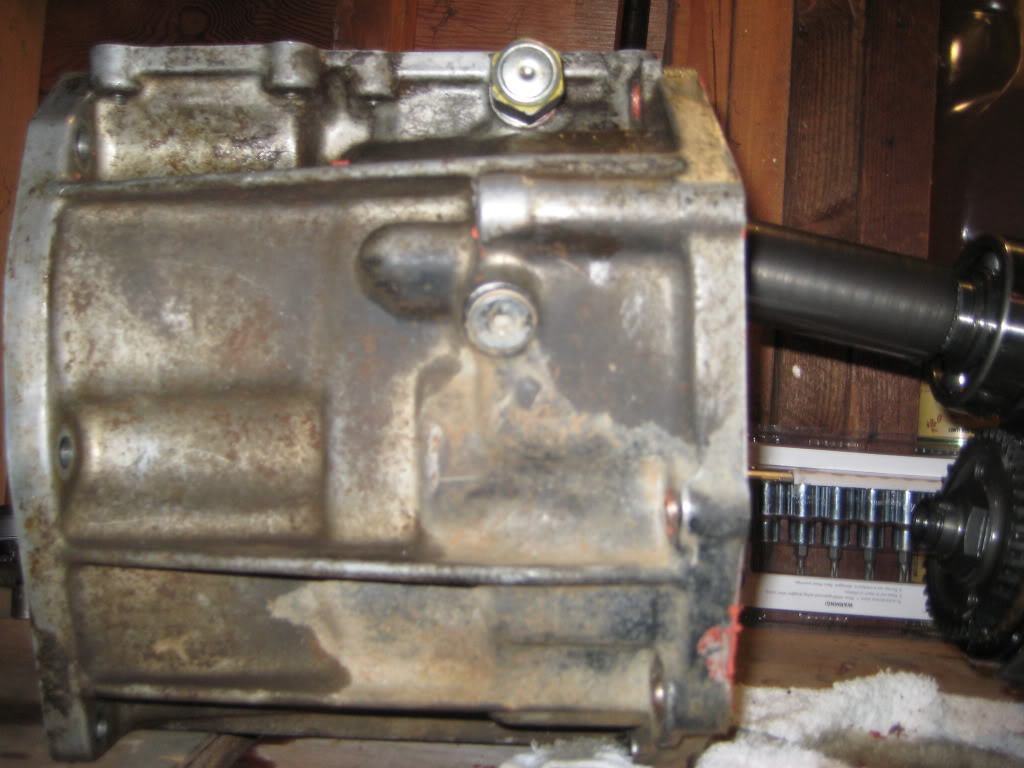
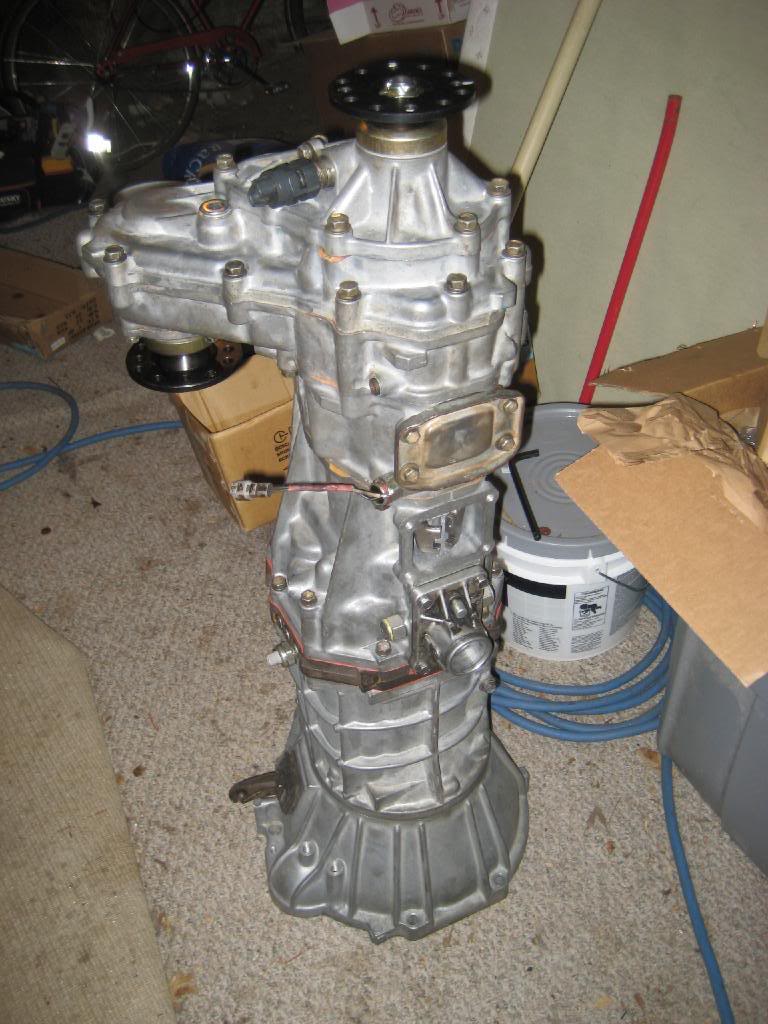
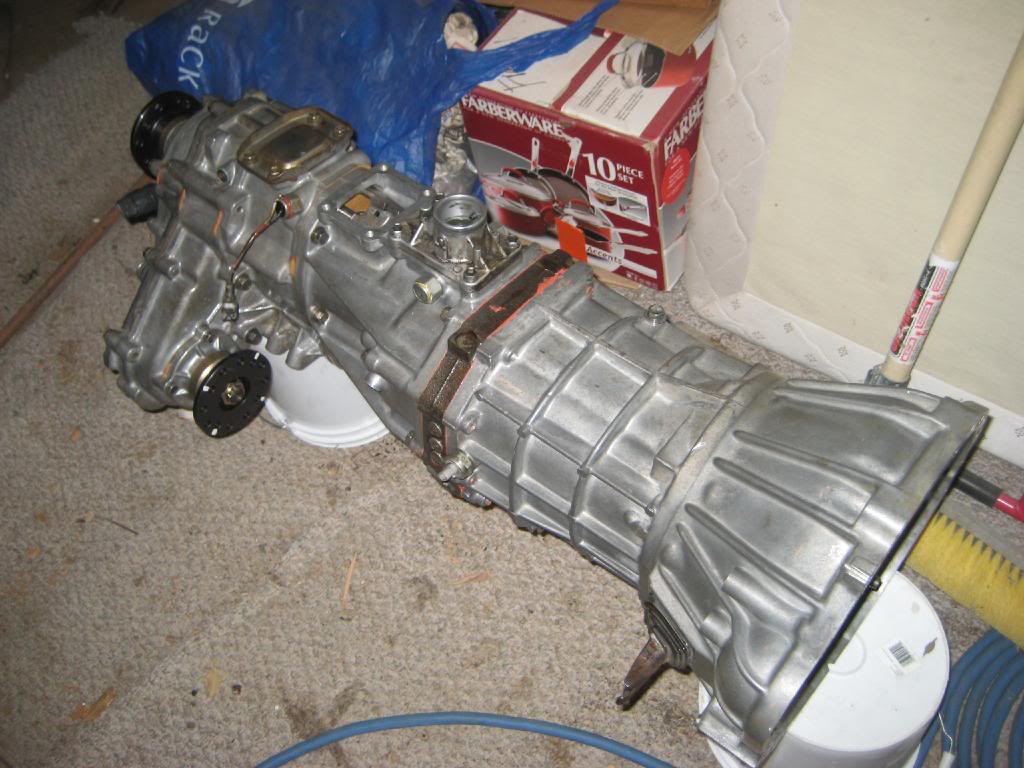
Got it in THE LAB, took the bellhousing and t case off, i gotta order my case kit soon.
Going to bring the dog for a walk and take the front and rear case off the tranny when i return. Also need to clear off my parts table. Grab some baggies and a sharpie.
Got those two and then started on the rest, blocked the motor with a jack stand. Left foot on pass front tire, right knee on crossmeber, left forearm on bellhousing, and right hands got the spirit fingers. comes off and out.
Got it in THE LAB, took the bellhousing and t case off, i gotta order my case kit soon.
Going to bring the dog for a walk and take the front and rear case off the tranny when i return. Also need to clear off my parts table. Grab some baggies and a sharpie.
Aug 30, 2009 | 04:39 PM
#9
Thread Starter
Registered User
Joined: Apr 2008
Posts: 197
Likes: 0
From: Orygun
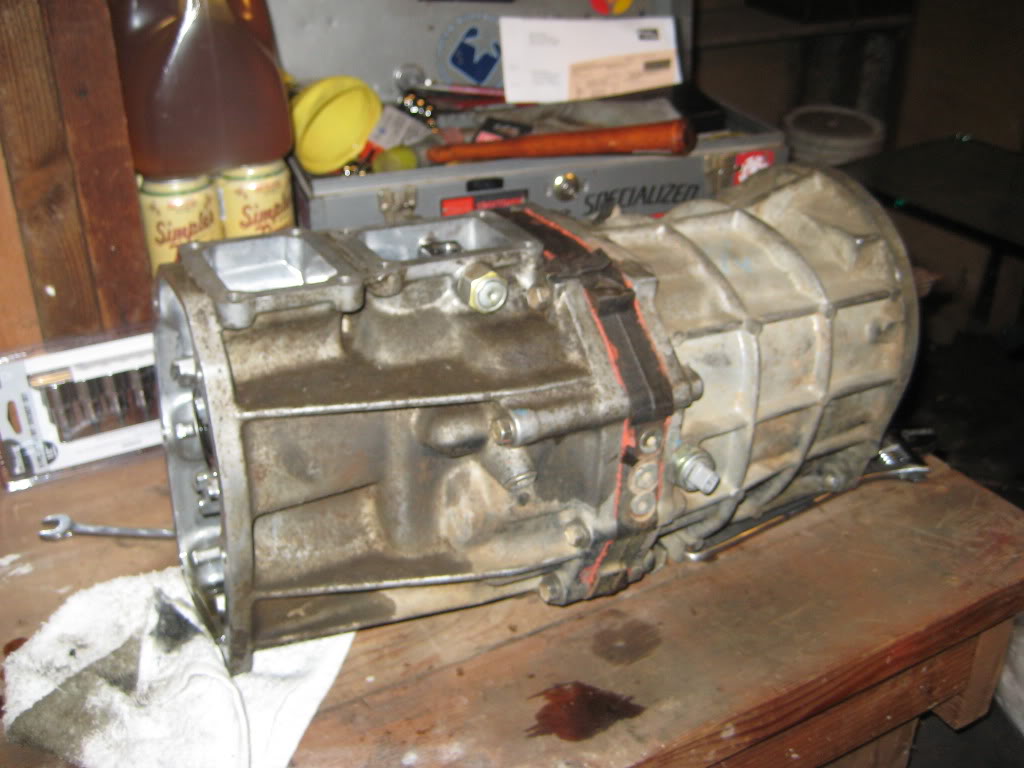
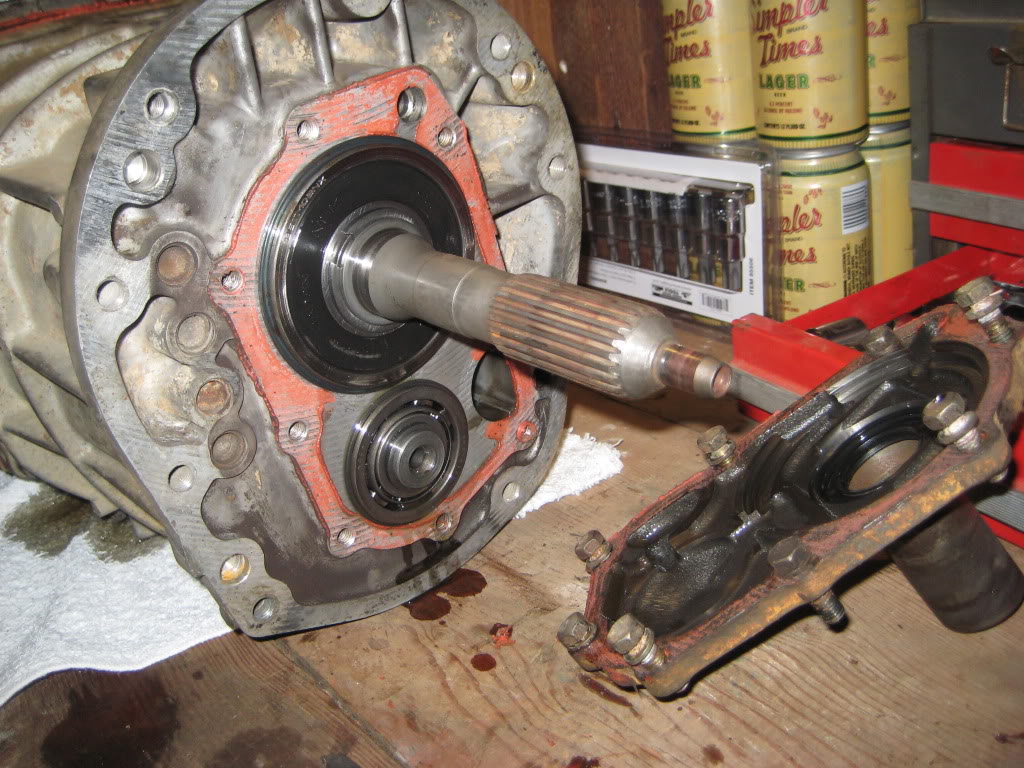
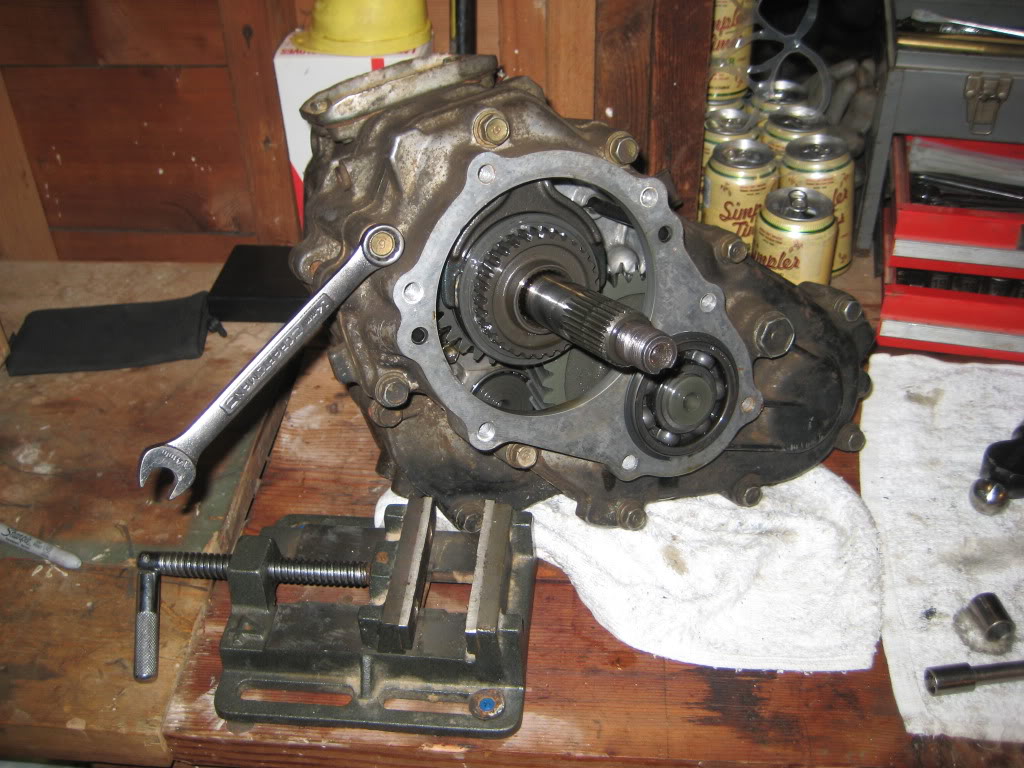
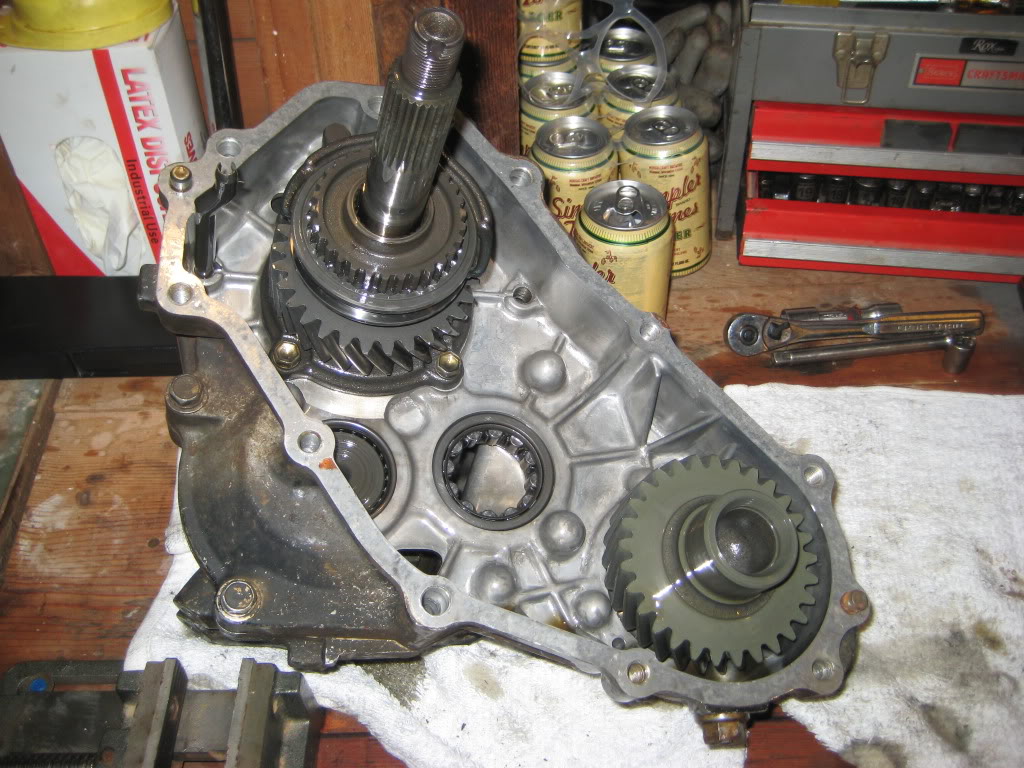
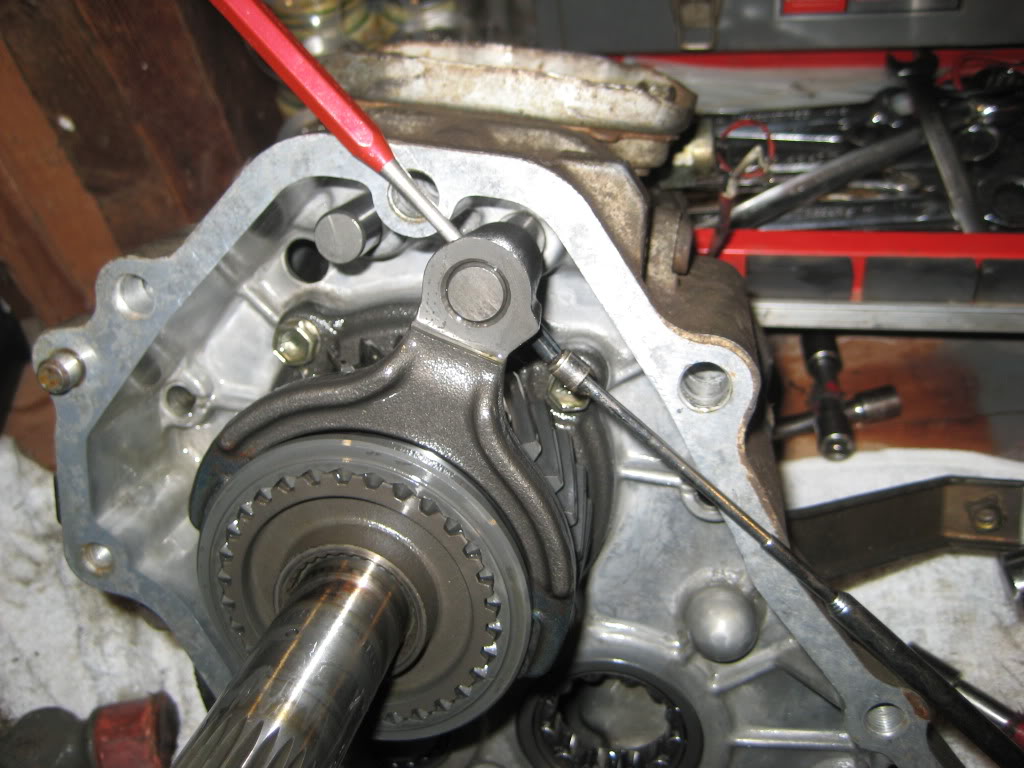
Nice dog walk and were back in the lab. Front bearing retainer removed, x8 12mm bolts, removed input shaft bearing clip and counter shaft bearing clip remove front case
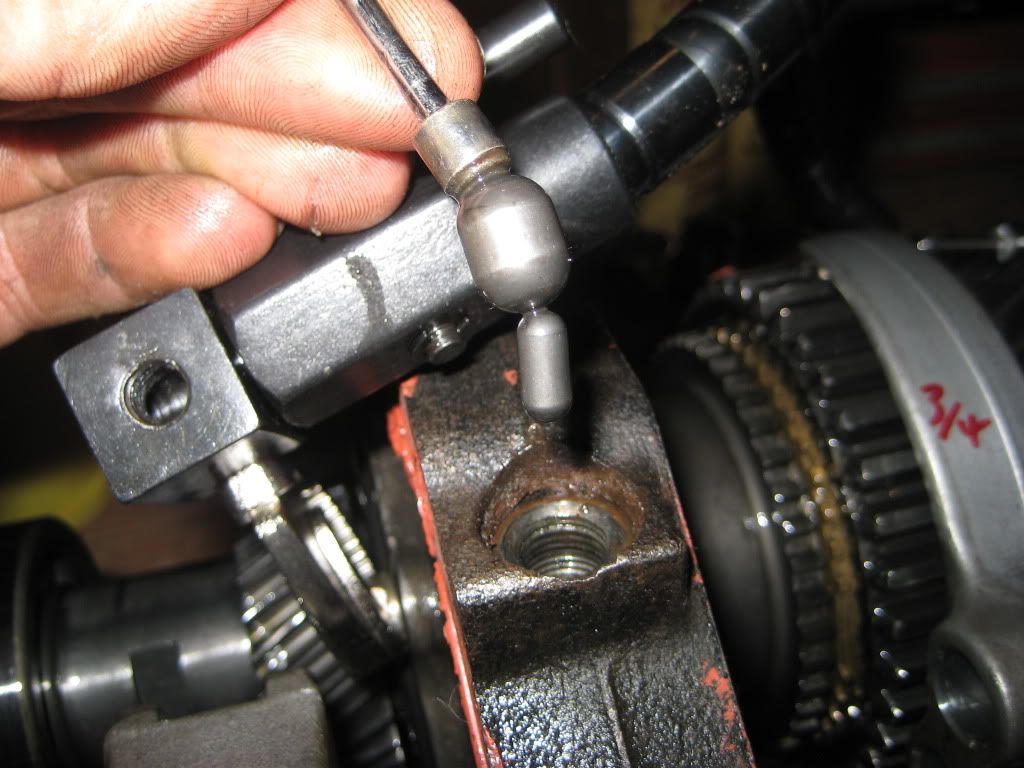
Next remove shift lever shaft bolt (10mm hex), shift lever housing (12mm socket), and shift lever shaft , remove case. Also i loosened the restricter pins on each side of the shifter base to remove everything a little easier. however they are different part numbers and different tensions so keep them in order.

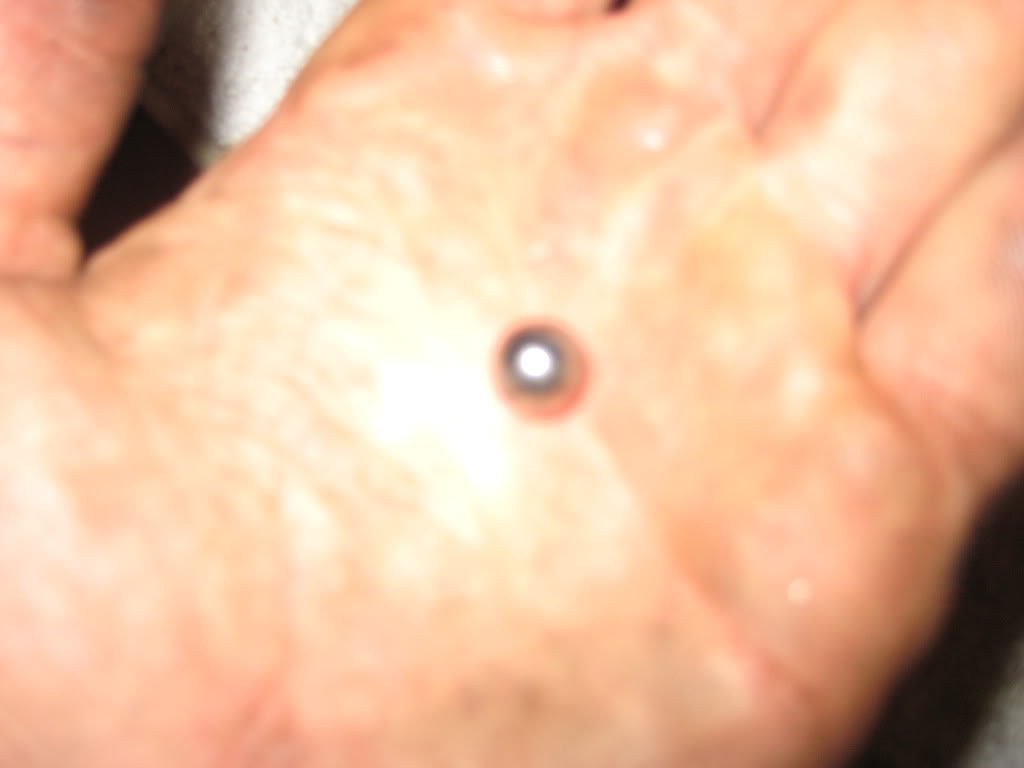
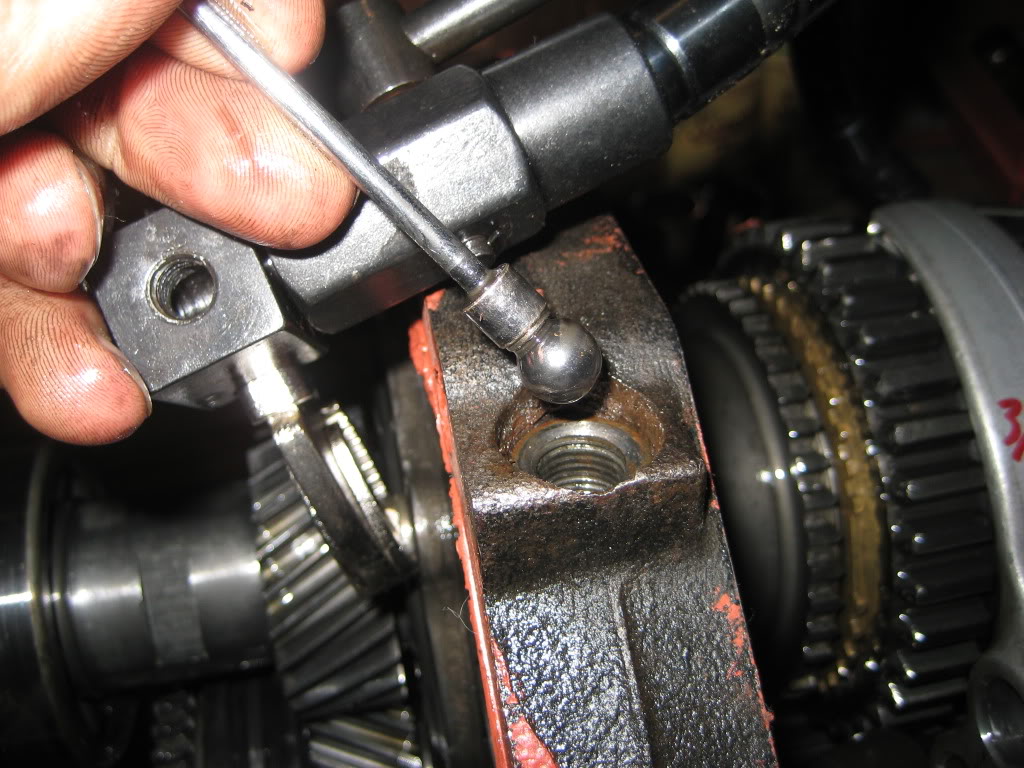
uh o, ball dropped out. haha but i know where it goes. only cause i did it before. this is the same ball that Bill Morgen (http://www.4x4wire.com/toyota/tech/r151f/) found remaining, its the reverse shift ball. it goes on the top pass side of the rear case, after it is all put back together. (Torx 40)
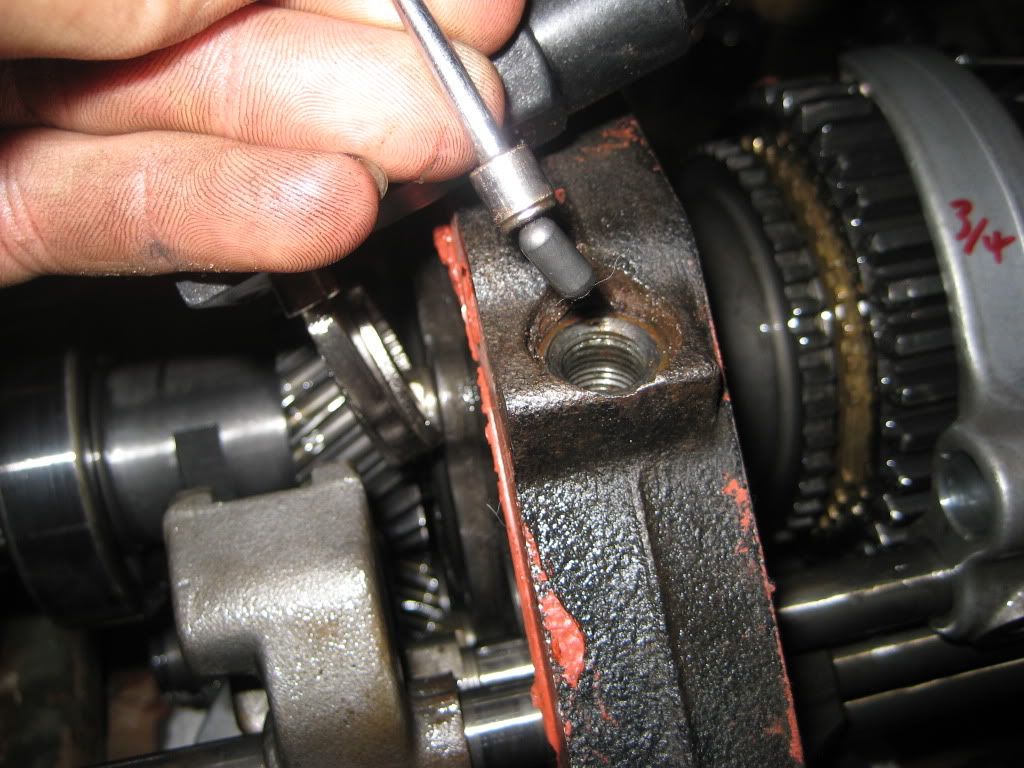
I pulled out the for/aft shift spring, removed T40 bolt and then drove the pin out with a 5/32 punch. I didn't do this before but i am going to have the cases cleaned so i want it bear.
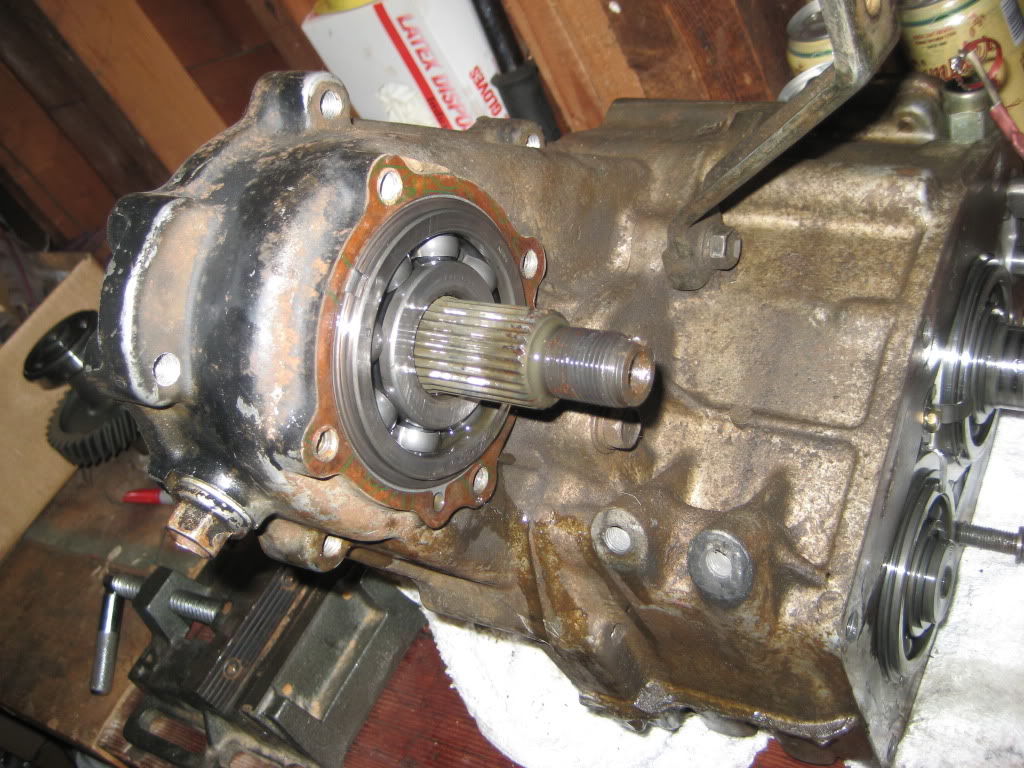
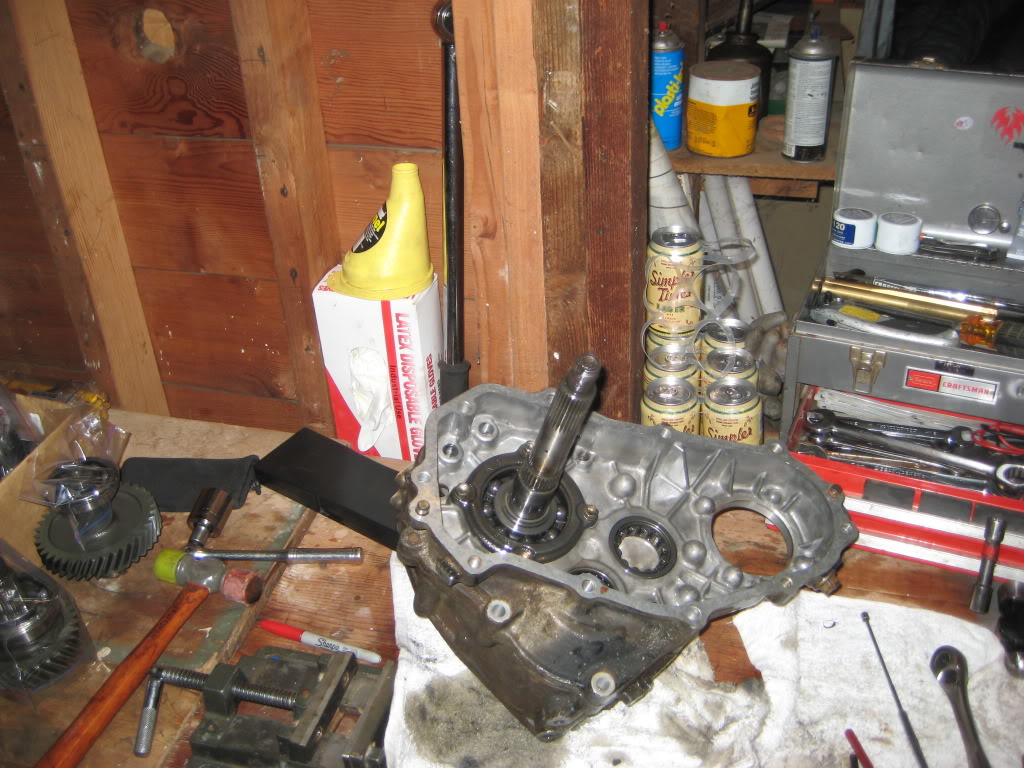
and mount it in the vise
Time for some measurements and tolerances.
Also i mentioned Bill Morgan and his turbo rebuild on 4x4 wire http://www.4x4wire.com/toyota/tech/r151f/ , the first tranny i went into was all his fault. he gave me that go ahead, you can do it atitude that got me in my first tranny. Although its been a trip i curse his name when my home built tranny goes bad
Next remove shift lever shaft bolt (10mm hex), shift lever housing (12mm socket), and shift lever shaft , remove case. Also i loosened the restricter pins on each side of the shifter base to remove everything a little easier. however they are different part numbers and different tensions so keep them in order.
uh o, ball dropped out. haha but i know where it goes. only cause i did it before. this is the same ball that Bill Morgen (http://www.4x4wire.com/toyota/tech/r151f/) found remaining, its the reverse shift ball. it goes on the top pass side of the rear case, after it is all put back together. (Torx 40)
I pulled out the for/aft shift spring, removed T40 bolt and then drove the pin out with a 5/32 punch. I didn't do this before but i am going to have the cases cleaned so i want it bear.
and mount it in the vise
Time for some measurements and tolerances.
Also i mentioned Bill Morgan and his turbo rebuild on 4x4 wire http://www.4x4wire.com/toyota/tech/r151f/ , the first tranny i went into was all his fault. he gave me that go ahead, you can do it atitude that got me in my first tranny. Although its been a trip i curse his name when my home built tranny goes bad
Aug 30, 2009 | 09:11 PM
#10
Thread Starter
Registered User
Joined: Apr 2008
Posts: 197
Likes: 0
From: Orygun
got it broken down and went out for pizza. damn good. upon break down i noticed similar to Bill Morgan, someone forgot to put a c clip back in 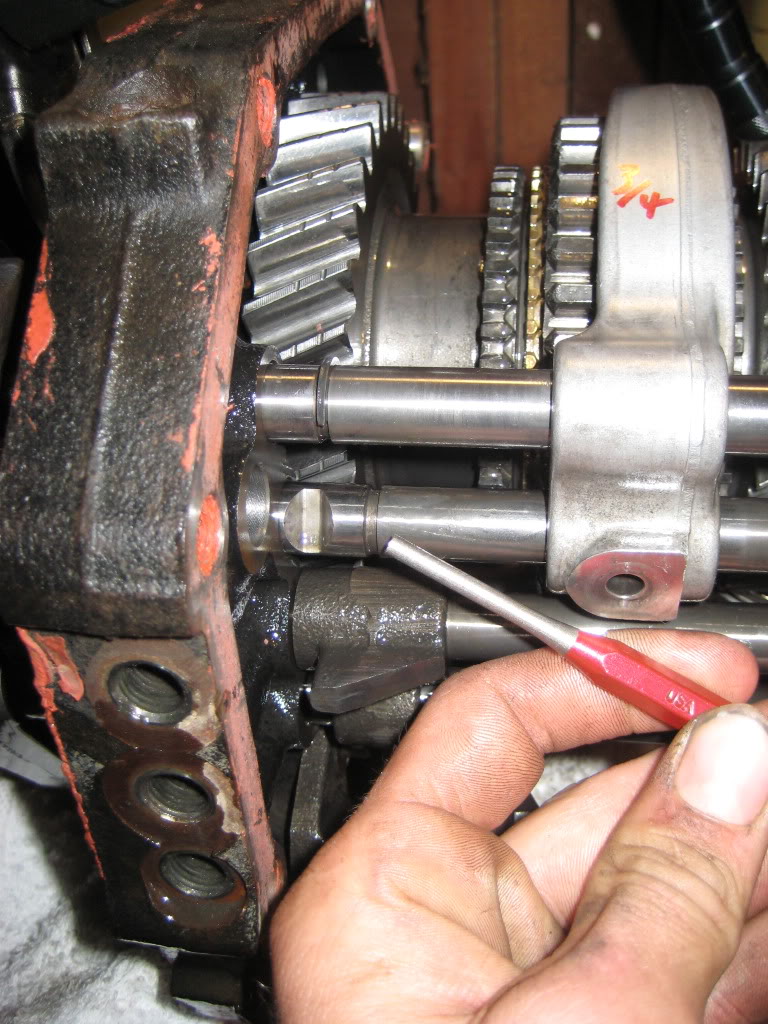
im pretty sure it was even the same one, i need to check into this further but for now its on the dealer parts list. This next bit is more for my recollection but maybe something for the whole internet in the future. The order of the detent balls removal.
First an oblong large dia.

Next a small dai. long inner rail detent
another large detent followed by a small dia inner shaft detent.
and last a short large dia detent.
(i feel this is wrong but its too late, i will come back and double check tomorrow.)
removal of cotter pin for reverse link, i used a 5/32 straight tip punch to drive it through. another trick is i use my magnet wand (lmao, its late, thats really funny) and i put it on the side of the pin that im pushing out. this way it flys out, but is still connected, much easier to find.
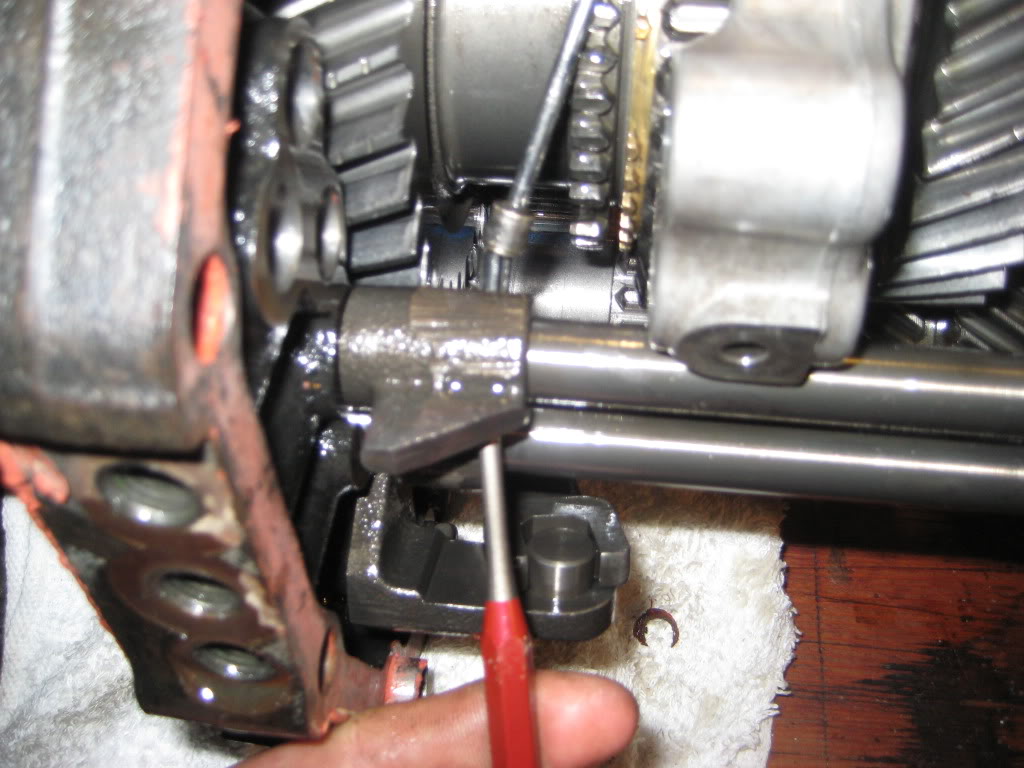
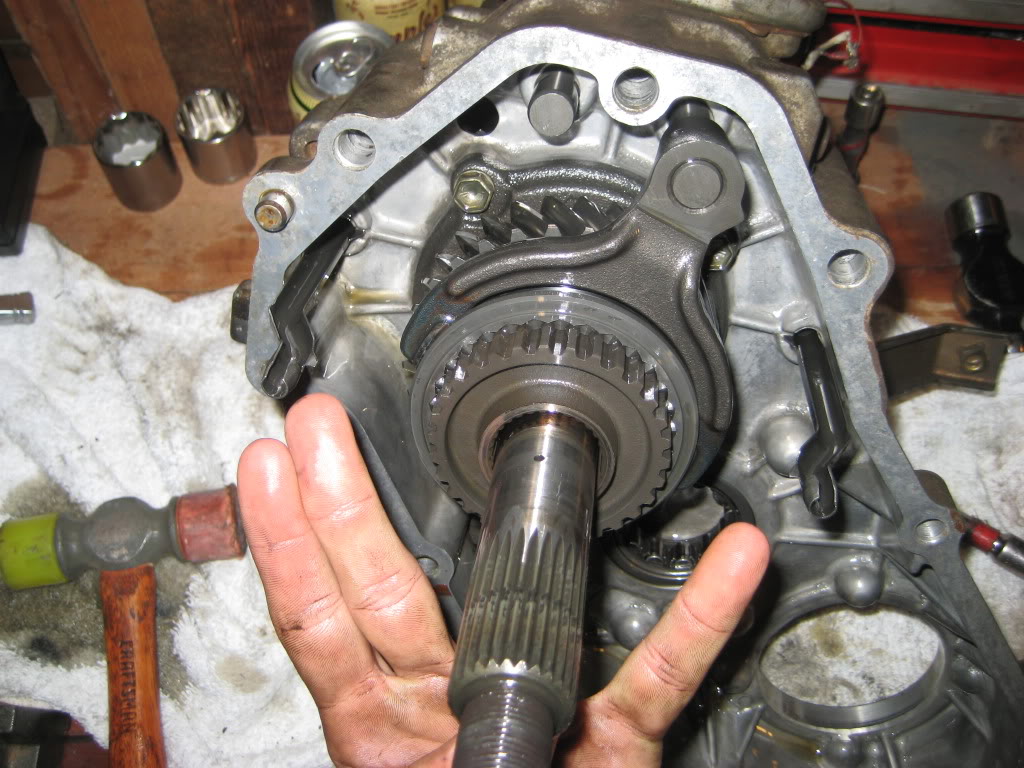
one of the shift shafts with a selector flange on it. there is another detent ball inside of here.

tranny without any shift shafts
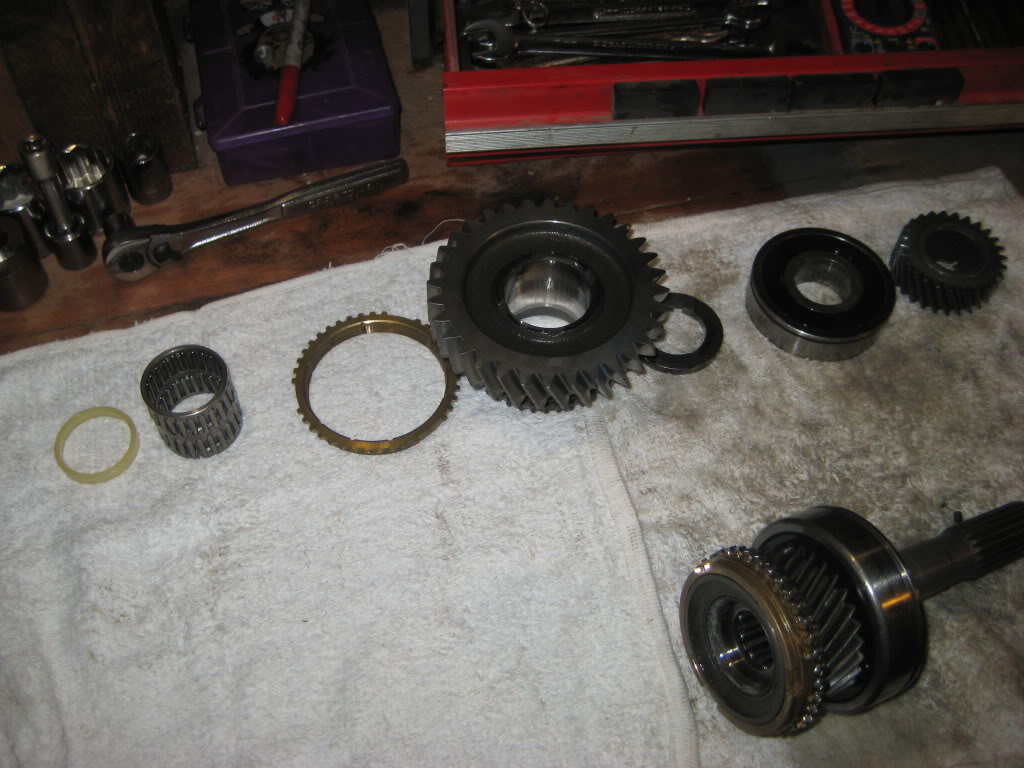
3 jaw puller to remove the rear output sleeve
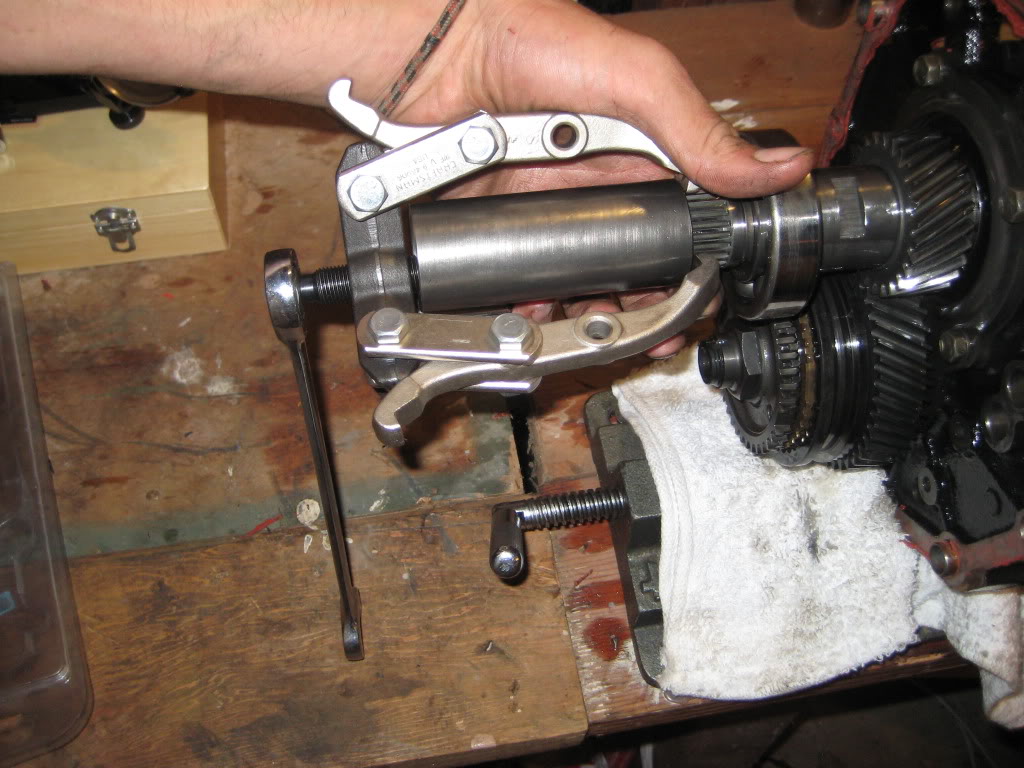
pulling the bearing behind the sleeve and then another sleeve just slides off. for now i believe the next gear can stay, everything else is removed from the other side of the output shaft.
a new socket i picked up today. 32MM, also grabed a 30mm to remove the driveshaft flanges on the tcase to replace with tripple drilled flanges.
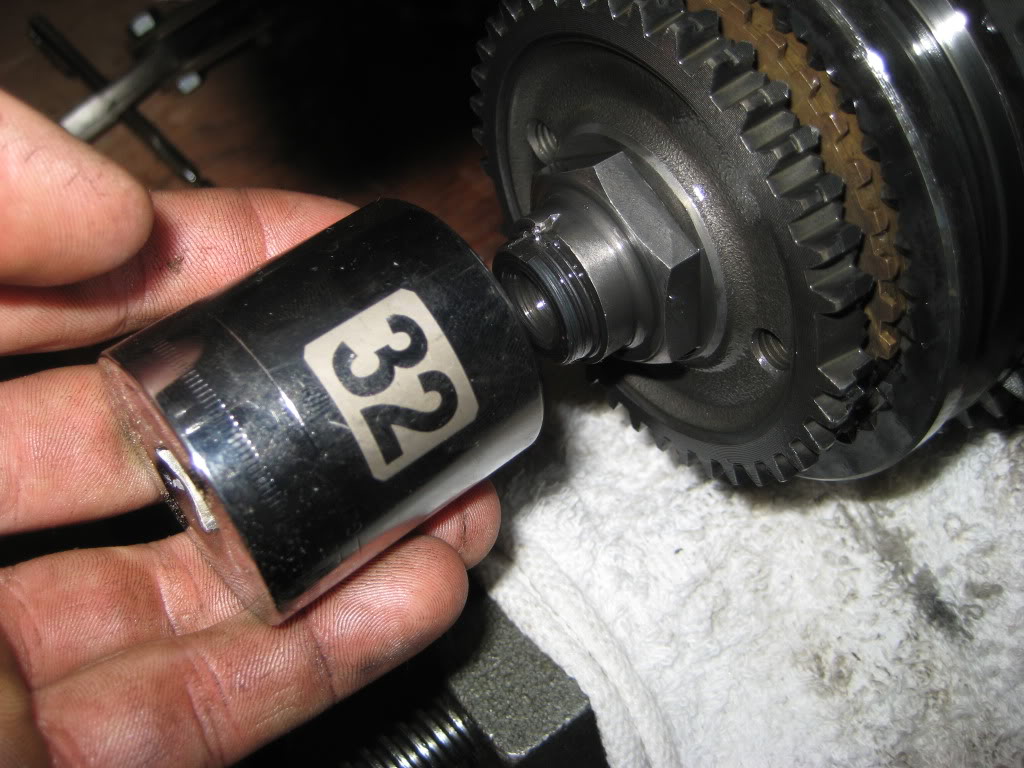
for this step i also put the tranny into 4th and 2nd gear, this locked up the input/counter/ and output shafts. the amount of torque on the 32mm nut is minimal but this makes it easy.

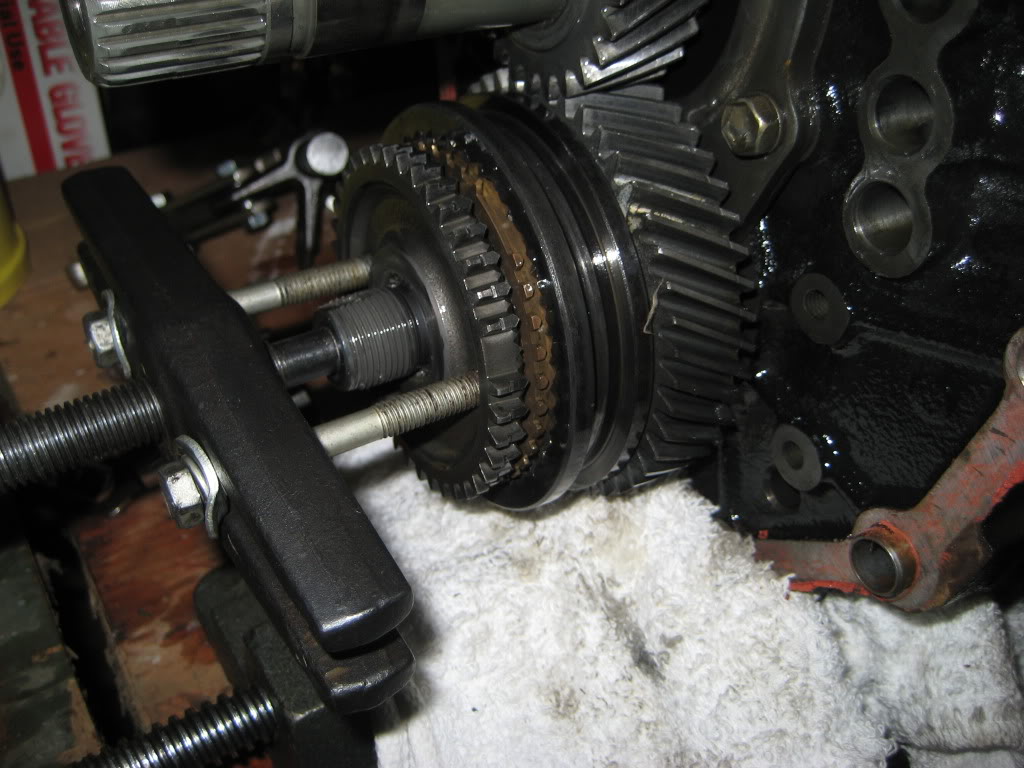
pulling the gear behind the nut. I have a 2/3 jaw puller but went with the bearing puller because there are bolt holes in the gear to pull off from. found some extra yota bolts that were long enough and it came right off.
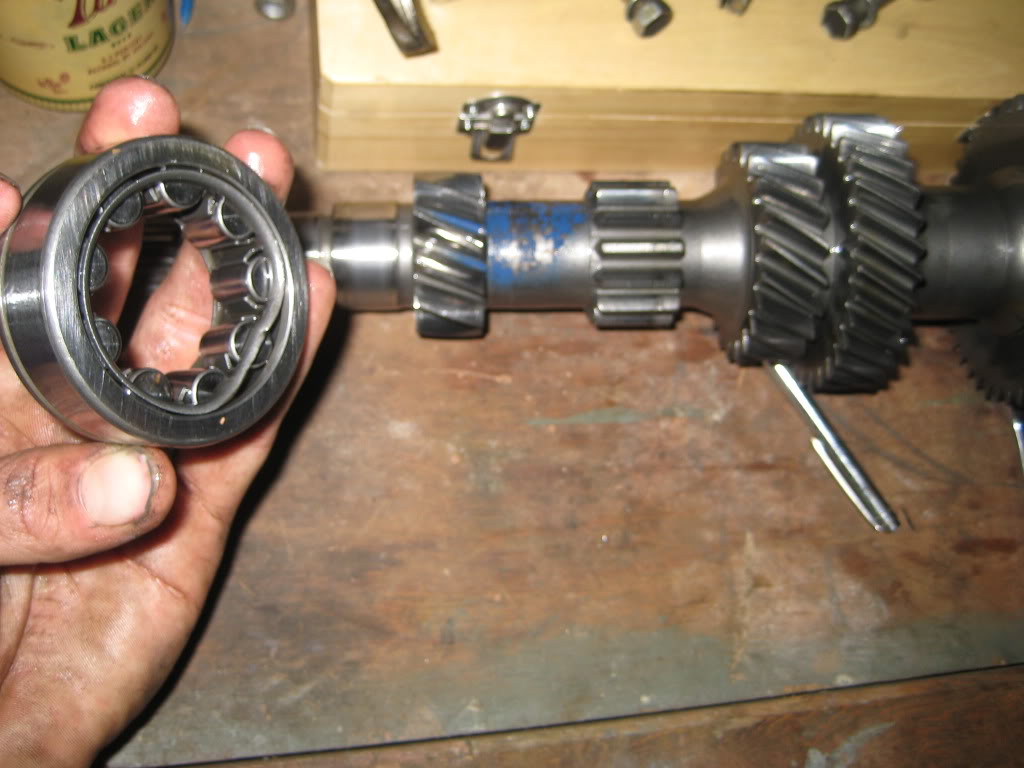
once i pulled the counter shaft and output shaft out of the intermediate plate i noticed the counter shaft bearing had a little battle wound. i don't know if i felt this at all but makes me feel like i got a massive failure right befor it happened.

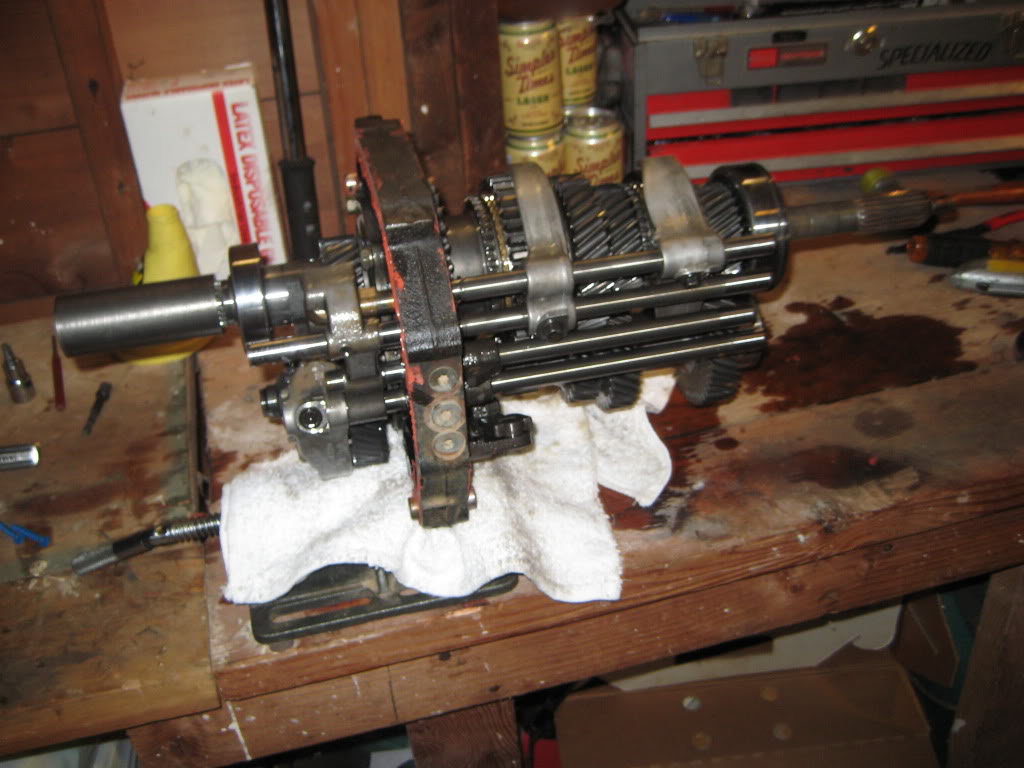
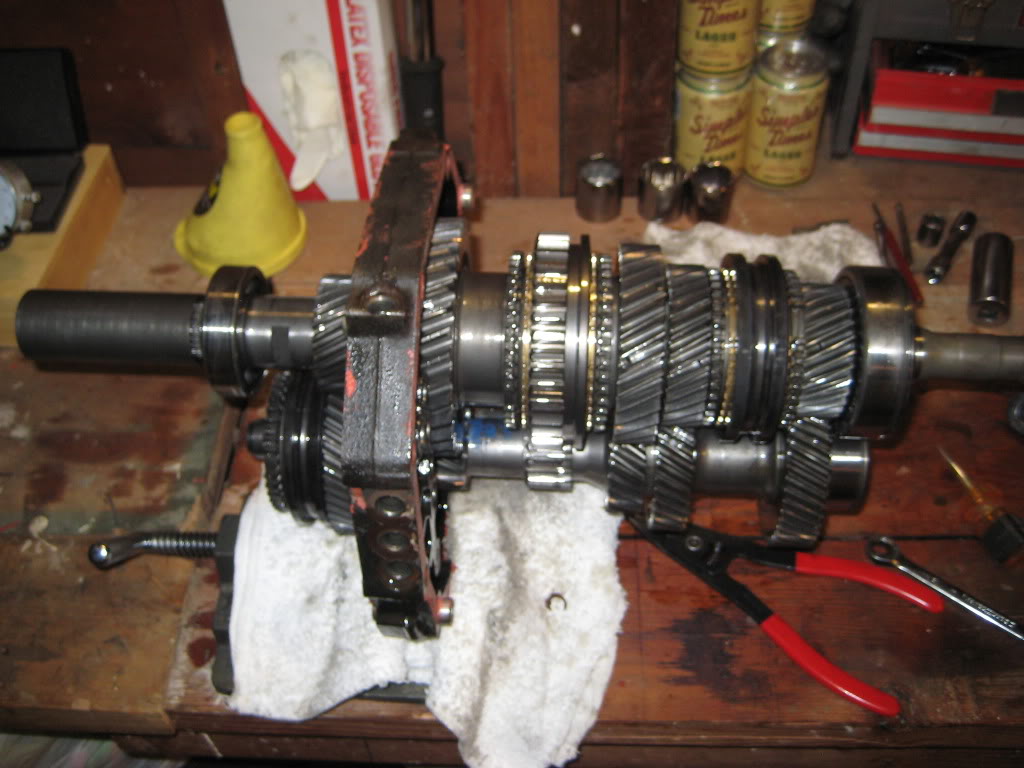
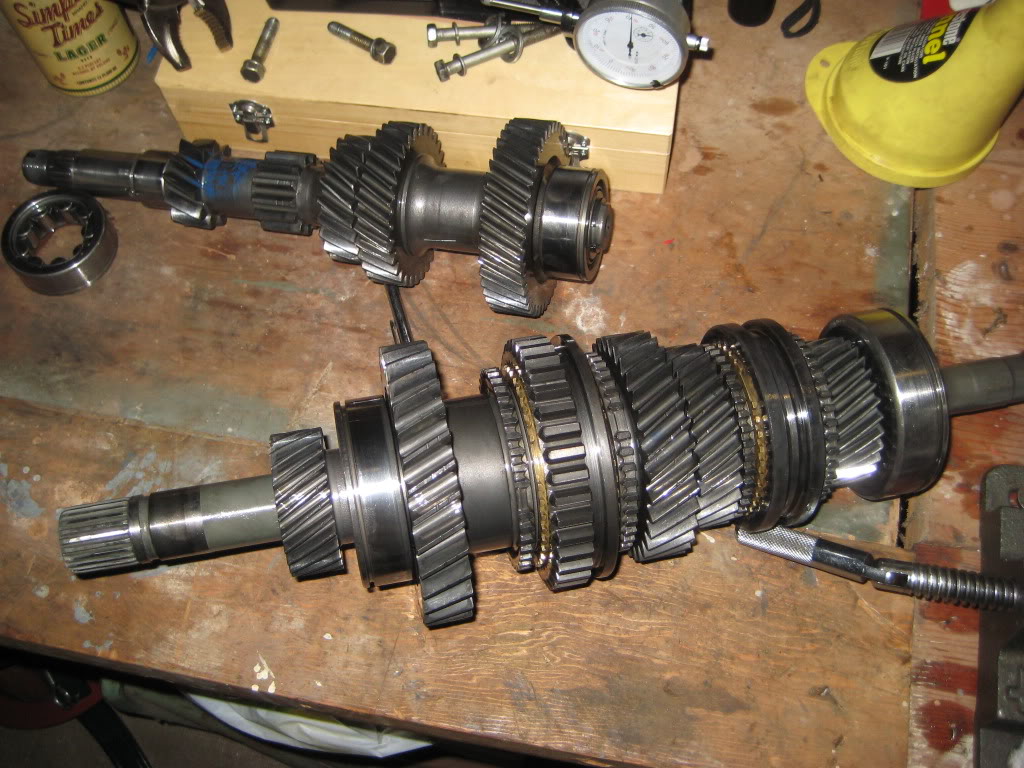
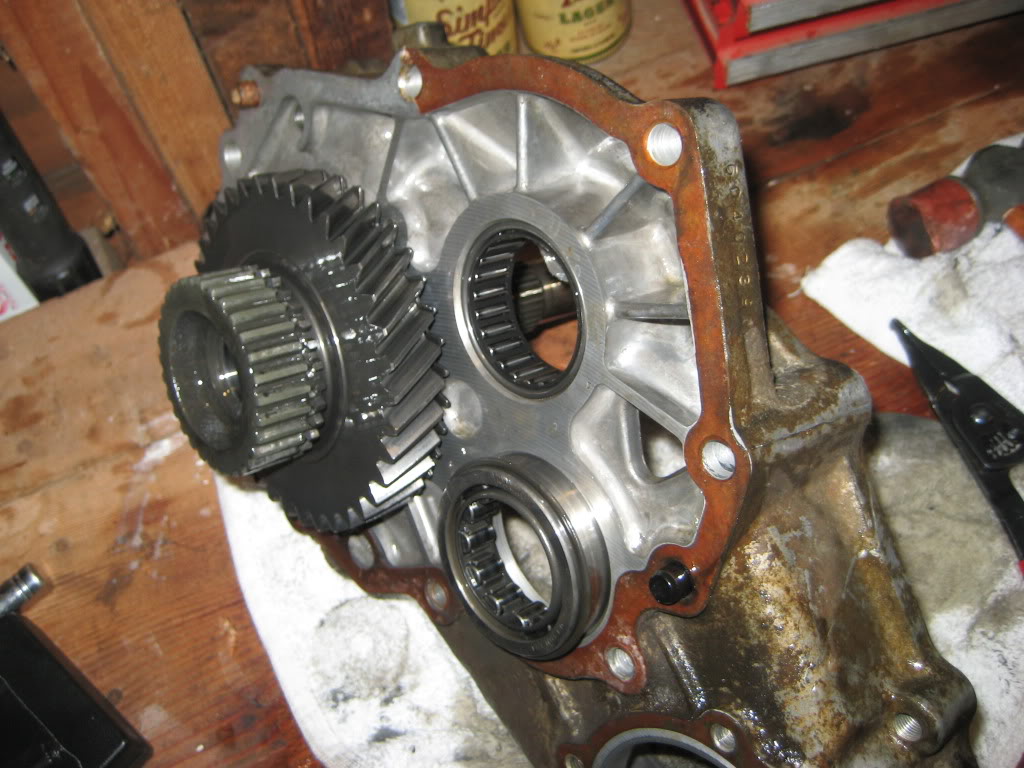
all of the shafts out of the intermediate plate. i will deal with taking these apart tomorrow or Tue., i need to clean the cases cause itll be time for reassembly soon.
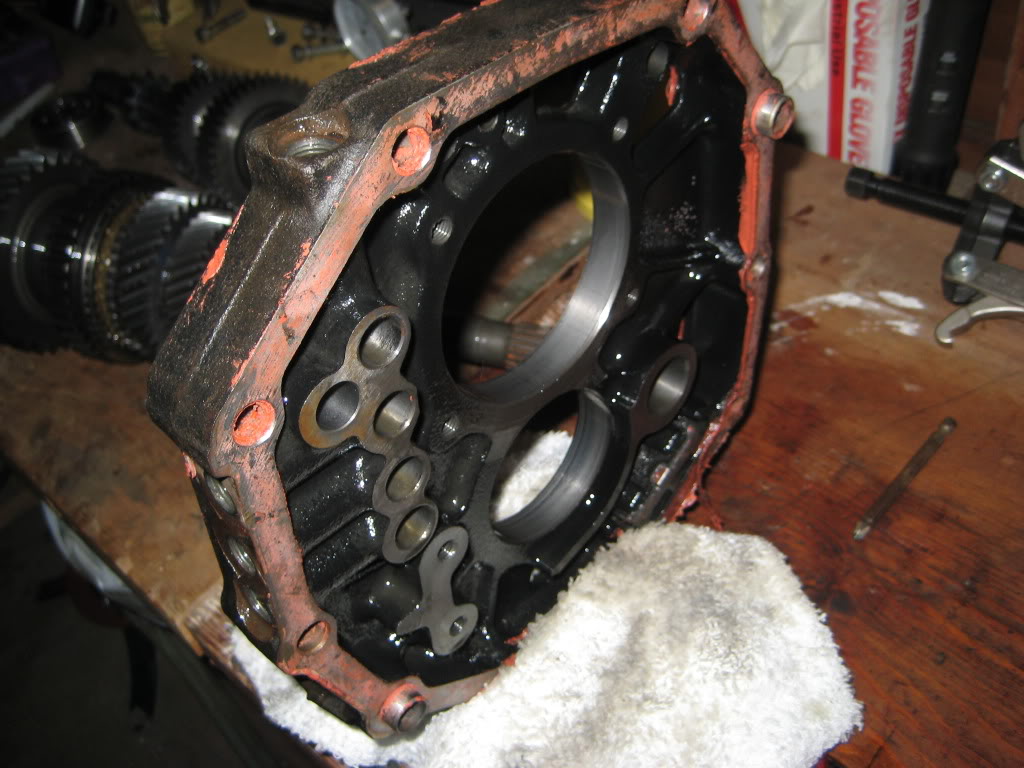
reverse removed and we have a bare intermediate plate, this will get some scrubbing as well.
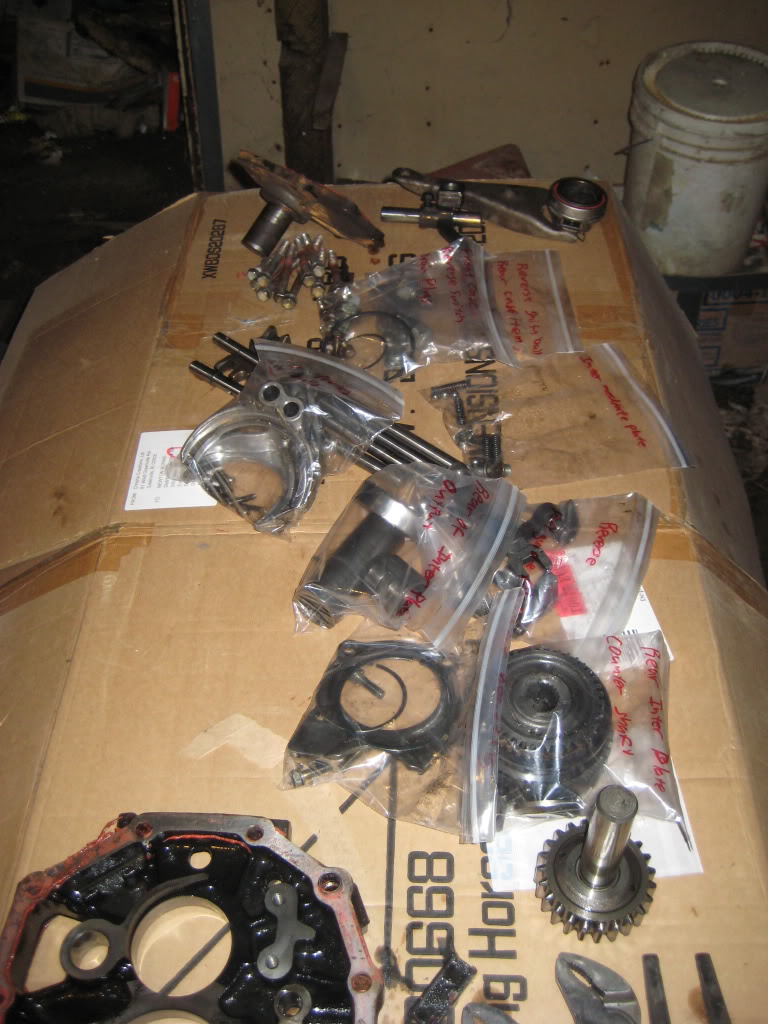
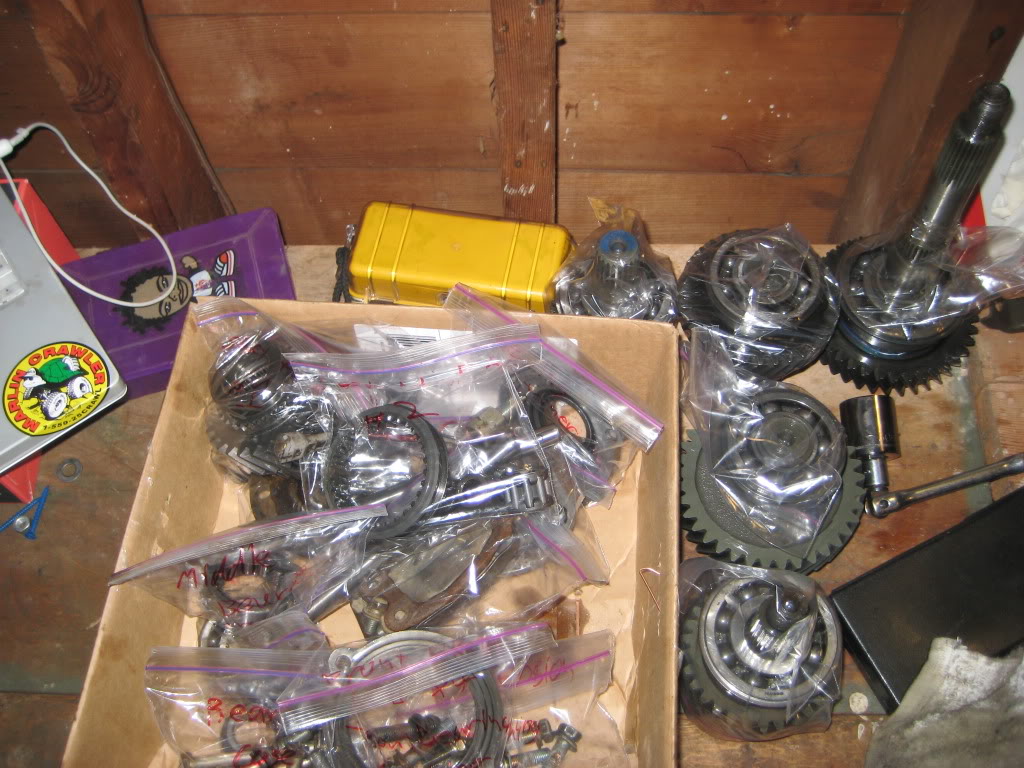
all of my baggies and pieces layed out in my order
and heres the difference between the MC bearing plate and stock and then number 1/2 shift fork MC and stock.
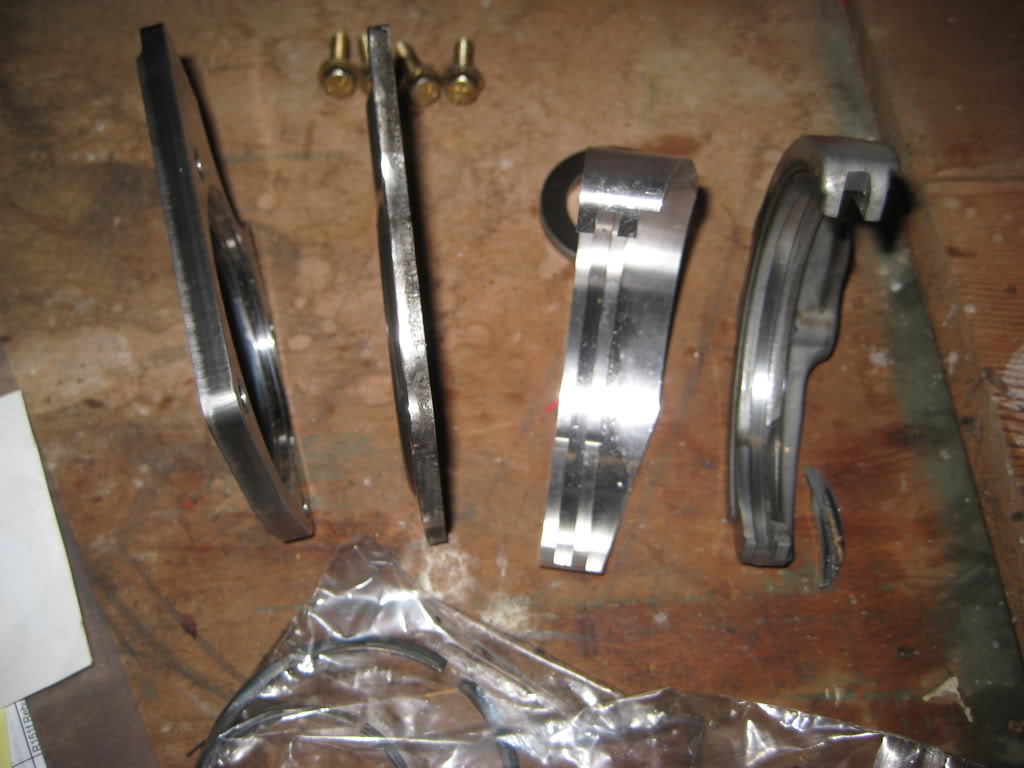
And i hadn't noticed but it definitely looks like i stopped driving and did this in the nic of time. the number 1/2 shift fork had broken. it was just sitting in place but ready to screw my whole world up. if nothing else i am so glad that i caught this befor it became a bigger problem.
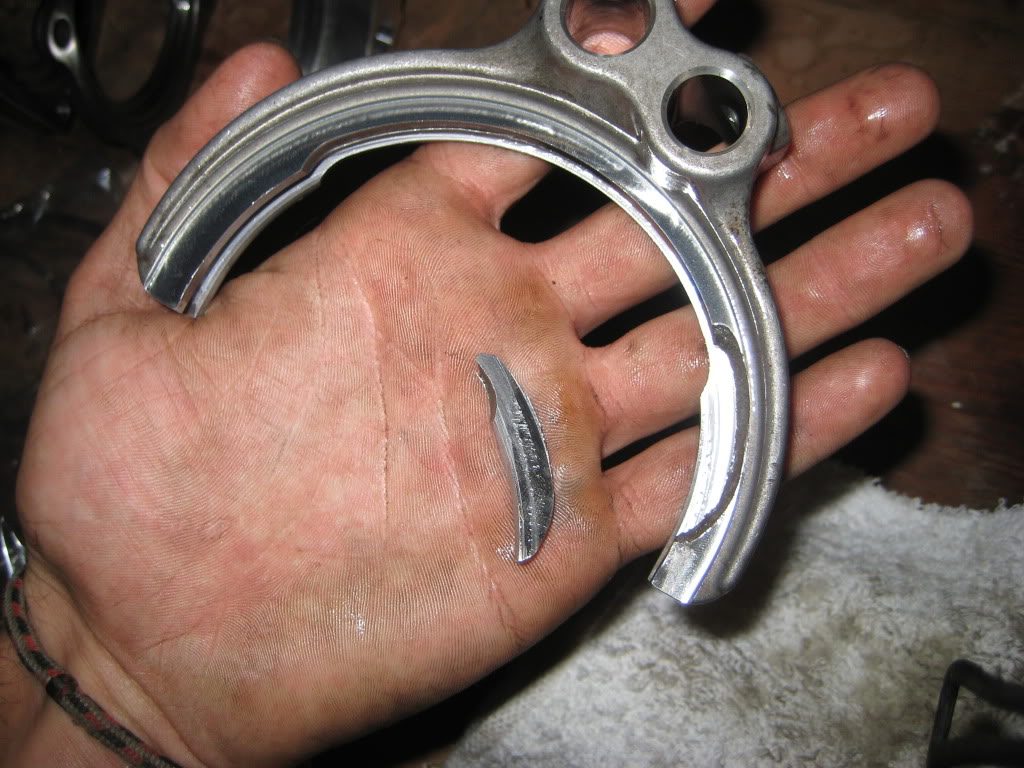
Super happy, pass go collect 200 bones type of happy.
I have a few things i need to pickup but again maybe tue. everything went very well (knock on wood). i need to order my tcase stuff and get the shafts back together so i can order a few size specific c clips. from what i have read they call it blue printing. i figured it was just the way it needed to be. i took allot of measurements and have them written in my book. i don't know if i am gonna post or not cause its allot of one time information. well see. tune in tomorrow for more haps, from the lab.
im pretty sure it was even the same one, i need to check into this further but for now its on the dealer parts list. This next bit is more for my recollection but maybe something for the whole internet in the future. The order of the detent balls removal.
First an oblong large dia.
Next a small dai. long inner rail detent
another large detent followed by a small dia inner shaft detent.
and last a short large dia detent.
(i feel this is wrong but its too late, i will come back and double check tomorrow.)
removal of cotter pin for reverse link, i used a 5/32 straight tip punch to drive it through. another trick is i use my magnet wand (lmao, its late, thats really funny) and i put it on the side of the pin that im pushing out. this way it flys out, but is still connected, much easier to find.
one of the shift shafts with a selector flange on it. there is another detent ball inside of here.
tranny without any shift shafts
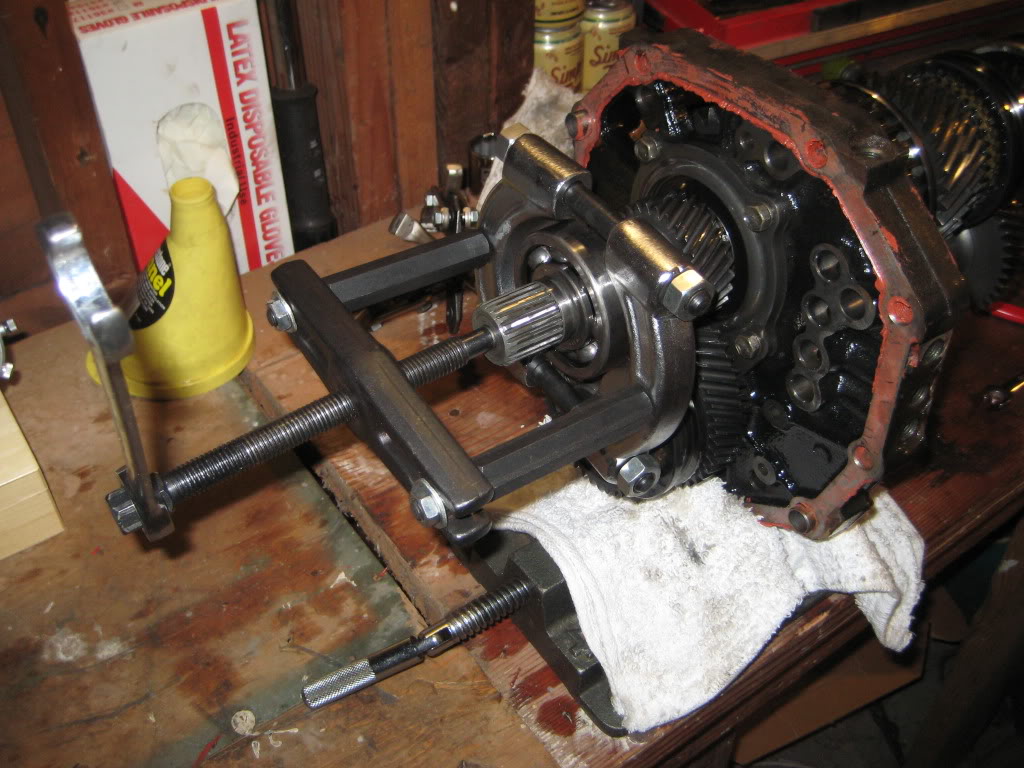
3 jaw puller to remove the rear output sleeve
pulling the bearing behind the sleeve and then another sleeve just slides off. for now i believe the next gear can stay, everything else is removed from the other side of the output shaft.
a new socket i picked up today. 32MM, also grabed a 30mm to remove the driveshaft flanges on the tcase to replace with tripple drilled flanges.
for this step i also put the tranny into 4th and 2nd gear, this locked up the input/counter/ and output shafts. the amount of torque on the 32mm nut is minimal but this makes it easy.
pulling the gear behind the nut. I have a 2/3 jaw puller but went with the bearing puller because there are bolt holes in the gear to pull off from. found some extra yota bolts that were long enough and it came right off.
once i pulled the counter shaft and output shaft out of the intermediate plate i noticed the counter shaft bearing had a little battle wound. i don't know if i felt this at all but makes me feel like i got a massive failure right befor it happened.
all of the shafts out of the intermediate plate. i will deal with taking these apart tomorrow or Tue., i need to clean the cases cause itll be time for reassembly soon.
reverse removed and we have a bare intermediate plate, this will get some scrubbing as well.
all of my baggies and pieces layed out in my order
and heres the difference between the MC bearing plate and stock and then number 1/2 shift fork MC and stock.
And i hadn't noticed but it definitely looks like i stopped driving and did this in the nic of time. the number 1/2 shift fork had broken. it was just sitting in place but ready to screw my whole world up. if nothing else i am so glad that i caught this befor it became a bigger problem.
Super happy, pass go collect 200 bones type of happy.
I have a few things i need to pickup but again maybe tue. everything went very well (knock on wood). i need to order my tcase stuff and get the shafts back together so i can order a few size specific c clips. from what i have read they call it blue printing. i figured it was just the way it needed to be. i took allot of measurements and have them written in my book. i don't know if i am gonna post or not cause its allot of one time information. well see. tune in tomorrow for more haps, from the lab.
Sep 2, 2009 | 07:07 PM
#13
Thread Starter
Registered User
Joined: Apr 2008
Posts: 197
Likes: 0
From: Orygun
Sorry about lack of update but nothing has happened. pushin through at work to finish a house up. long days. Also lookin into another toy. gettin ready to grill right now but i wanted to disassemble and reassemble the input/output shaft tonight. i don't know if ill get there or not. Also the pics are just super high rez on my cannon P&S. put it in micro mode and you can see a flys eyes.
Also got a few things inline for the case. id like to get the tranny back together by the weekend and then do the case. hopefully be rollin by work next week. this will be the third weekend that ive been stuck in town on the weekend. ba humbug.
Also got a few things inline for the case. id like to get the tranny back together by the weekend and then do the case. hopefully be rollin by work next week. this will be the third weekend that ive been stuck in town on the weekend. ba humbug.
Sep 4, 2009 | 09:59 PM
#14
Thread Starter
Registered User
Joined: Apr 2008
Posts: 197
Likes: 0
From: Orygun
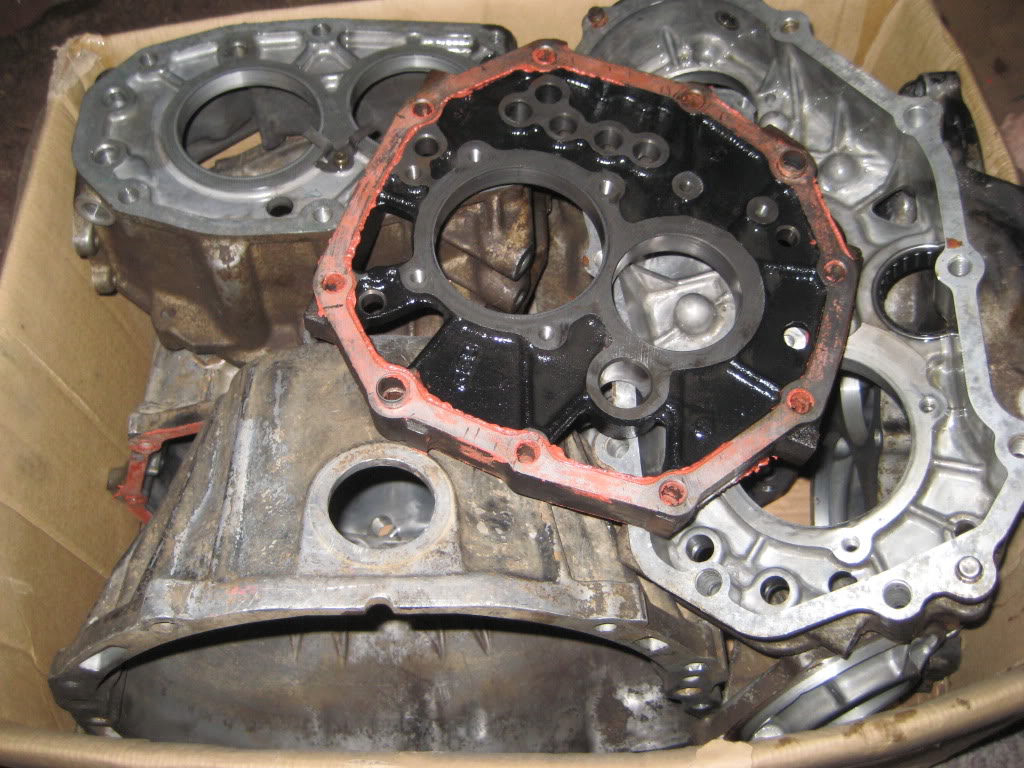
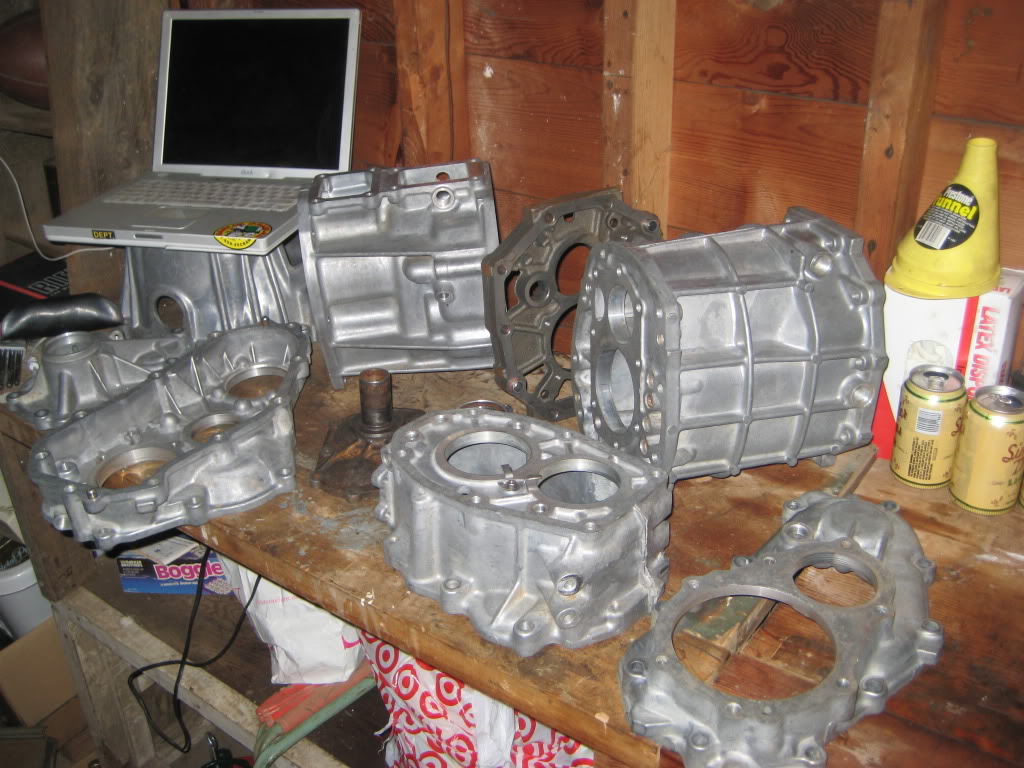
So a long week of work. not enough time to eat let alone wrench. did get a couple things done. all of my cases stripped down and ready to be cleaned. I just got a led on a good local biz.
O and i took my case apart. followed the 85 FSM and it worked beatuifuly. O and to add i followed the 94 4 runner v6 5 speed R150 FSM instead of the 86 R151F FSM. It was close enough for tear down. but i do need to find some torque specs. i know ive seen them somewhere. just gotta look for a sec. A couple things were different it seemed.
pics are uploading and ill post them all in a row when there done
Going to work on the input and output shaft tomorrow. already did the counter shaft bearings. O and Marlins got deals so i had a little more fun. pics in a bit.
Sep 4, 2009 | 10:09 PM
#15

Registered User
Joined: Oct 2007
Posts: 162
Likes: 0
**I'm borrowing your picture links here to clarify, hope I don't screw w/ your photobucket bandwidth.**
IME, This..
Usually occurs if you've used this.

(One fork/leg tip slips and just barely catches between the shell and the bearing cage.)
Keep up with it, great post and definitely needs to go into the FAQ when done. The only other than Bill Morgan's on 4xwire I have ever seen was an involved one on Pirate that was promptly lost to the whole 4RnrRick escapade. I for one appreciate the access to the info, had I to go back in time I'd have copied it all down, even though I can do them*, just for the pictures.
 Kelley
*Too bad it's inappropriate to take pics of a customers job at a dealership, I could provide so much.
p.s. Good Stuff! (Simpler) Spied them in two of your shots now. (Removed my pic, sorry but forum rules apply.)
IME, This..
Usually occurs if you've used this.
(One fork/leg tip slips and just barely catches between the shell and the bearing cage.)
Keep up with it, great post and definitely needs to go into the FAQ when done. The only other than Bill Morgan's on 4xwire I have ever seen was an involved one on Pirate that was promptly lost to the whole 4RnrRick escapade. I for one appreciate the access to the info, had I to go back in time I'd have copied it all down, even though I can do them*, just for the pictures.
Kelley*Too bad it's inappropriate to take pics of a customers job at a dealership, I could provide so much.
p.s. Good Stuff! (Simpler) Spied them in two of your shots now.
(Removed my pic, sorry but forum rules apply.)
Last edited by KelleyC; Sep 4, 2009 at 10:15 PM.


 Sep 5, 2009 | 04:44 PM
#17
Thread Starter
Registered User
Joined: Apr 2008
Posts: 197
Likes: 0
From: Orygun
Keep up with it, great post and definitely needs to go into the FAQ when done. The only other than Bill Morgan's on 4xwire I have ever seen was an involved one on Pirate that was promptly lost to the whole 4RnrRick escapade. I for one appreciate the access to the info, had I to go back in time I'd have copied it all down, even though I can do them*, just for the pictures.
And sorry bought the inappropriate pics. didn't notice they made the shoot. will fix asap.
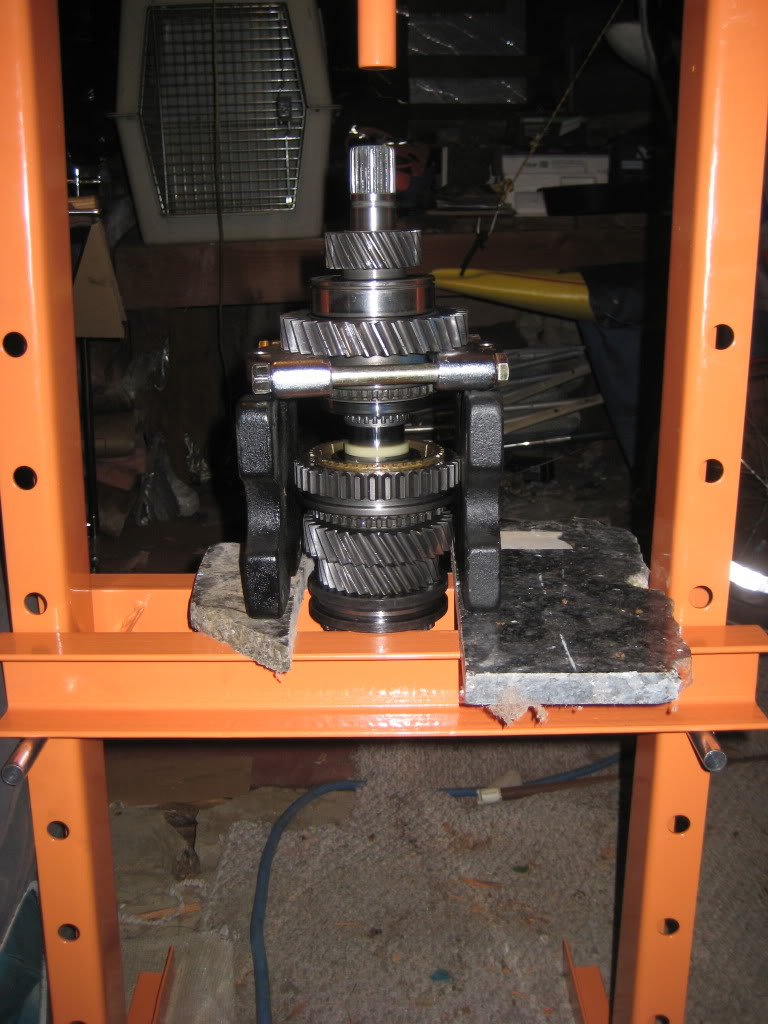
for now, on to pressing some snazz
Sep 10, 2009 | 06:25 PM
#18
Thread Starter
Registered User
Joined: Apr 2008
Posts: 197
Likes: 0
From: Orygun
So no updates really just a few more shoots. Picked up a HF shop press. I hate to love the freight. took my main shaft apart and reassembled with new bearings and syncros using the lapping compound trick. i don't know if i did enough rubbing but i am positive i got all of that crap of my metal. All my alumi is at american metal cleaners up on N vancouver blvd. about 100 bucks and well see the product tomarrow or monday. Also ordered some clips from yota to snug up all my bearings. no hurry cause i ain't got no cases.
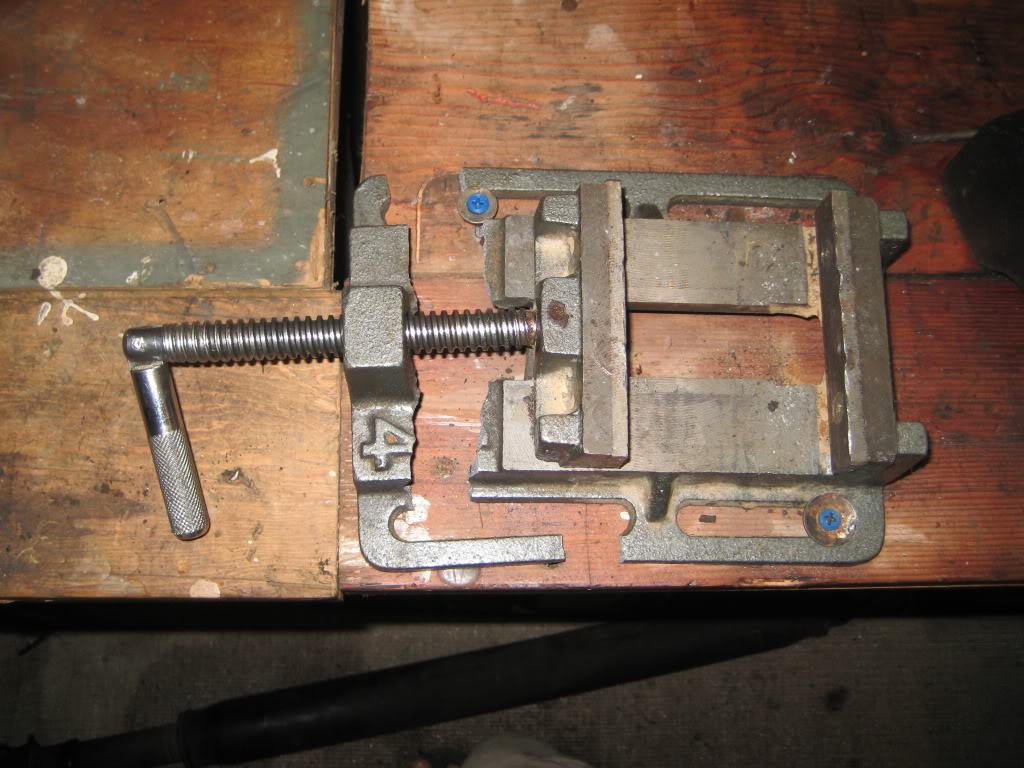
Also took the u joint out of my rear driveshaft yesterday and brokea cheap vise trying to get a cap out. thats a PITA. when i pick that up i will get 2 or 3 for trail spares though i hope i never have to do that on the trail.
Had some fun at Marlin's place but most of that will wait till after winter. no need for go slow goddies during ski season. Also took apart some extra doors for some other fun but not motivated right now for fab work, more motivated for driving my truck. However ive got a bunch of door stuff for sale if anyone is in need. everything but the metal.
Sep 11, 2009 | 04:23 PM
#19
Thread Starter
Registered User
Joined: Apr 2008
Posts: 197
Likes: 0
From: Orygun
Its friday and i got my pieces back from bein dipped. when i dropped them off he said maybe mon or tue. so happy right now that i have them so i can work during the weekend.
so now i start. got a second broken tcase gasket from marlin (shipping bad). and they are out having fun at the round up. errr. i wanna have fun at the round up. so a schucks stop at soem point to sees if theys gots whats is needs. more later
so now i start. got a second broken tcase gasket from marlin (shipping bad). and they are out having fun at the round up. errr. i wanna have fun at the round up. so a schucks stop at soem point to sees if theys gots whats is needs. more later
Sep 20, 2009 | 09:52 PM
#20
Thread Starter
Registered User
Joined: Apr 2008
Posts: 197
Likes: 0
From: Orygun
So i got it together and wudyaknow. i drove it instead of finishing my post. well sorry for the delay but heres the rest.
I got the cases back that Friday, got home and went to work. party at the house but i was in the basement playing. first i put the intermediate plate togeather.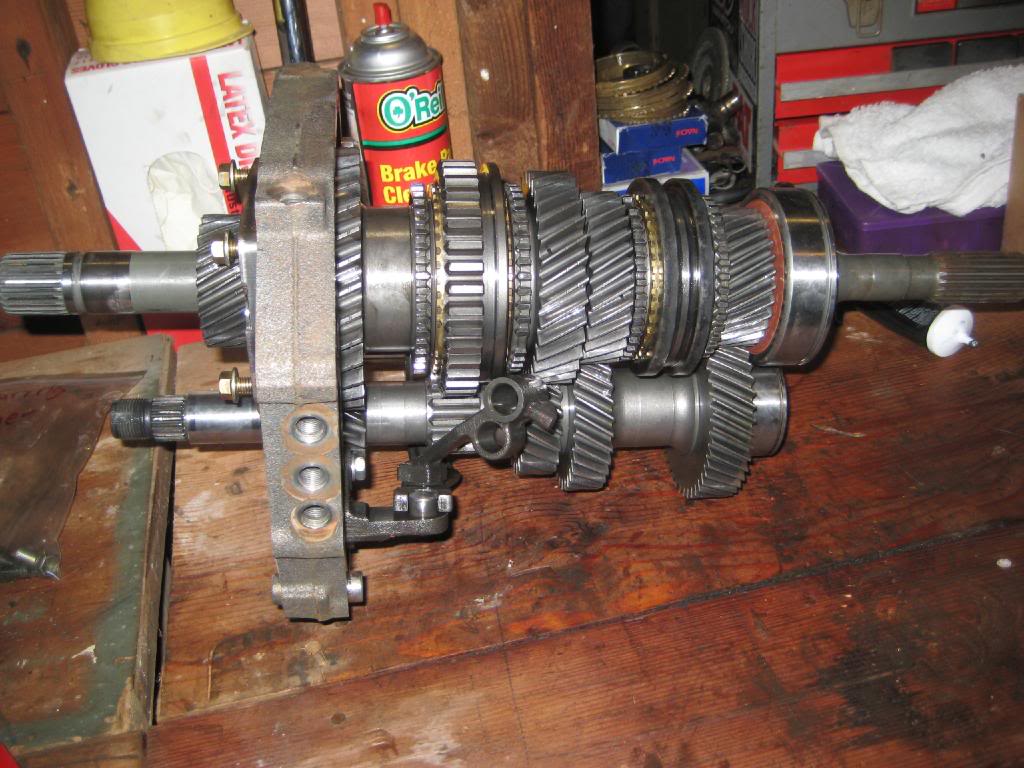
took a little bit to get my forks in order but go there.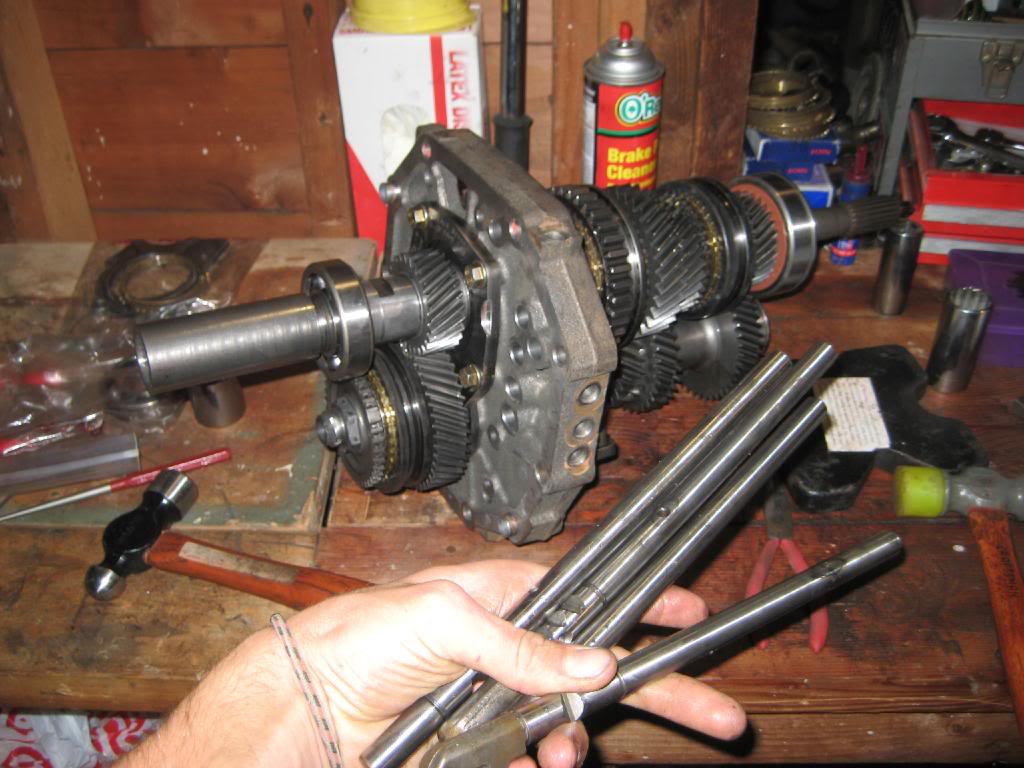
this is where it is important to take pictures and actually understand how everything works. i didn't take pictures of allot during rebuild cause i was busy looking at pictures from the dis assembly. went pretty straight forward. makes sure you know where each of the detent balls goes. i followed my fsm and i found a r151f fsm which was nice but not needed so much. the r150 from my 94 4runner fsm worked very well.
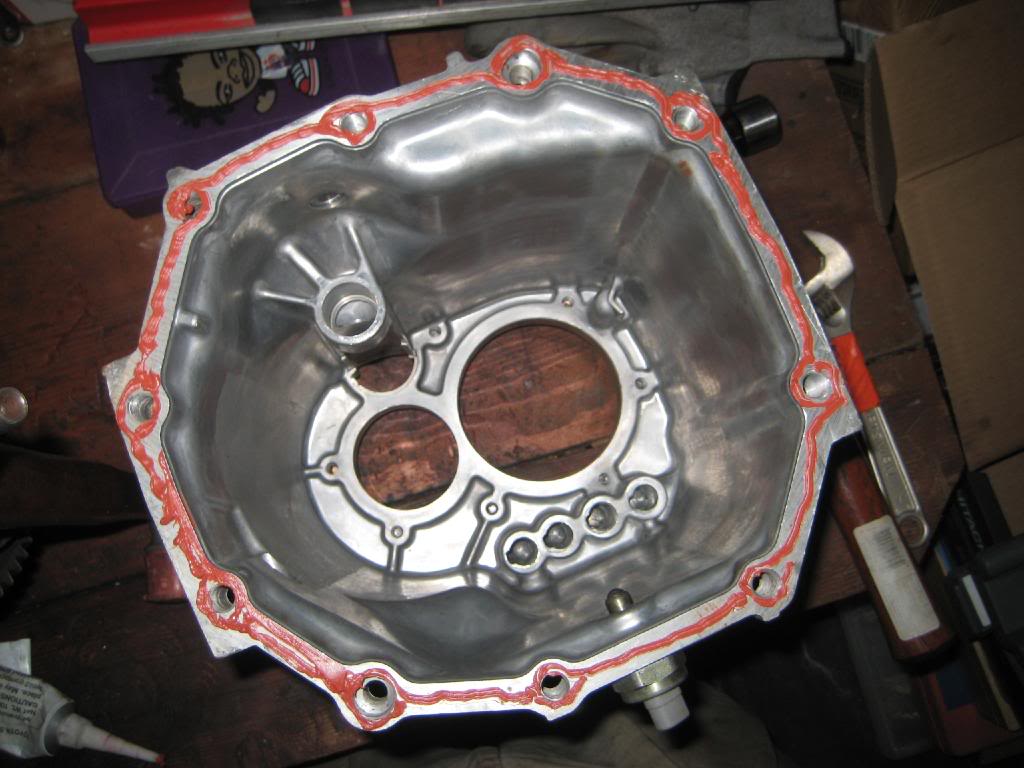
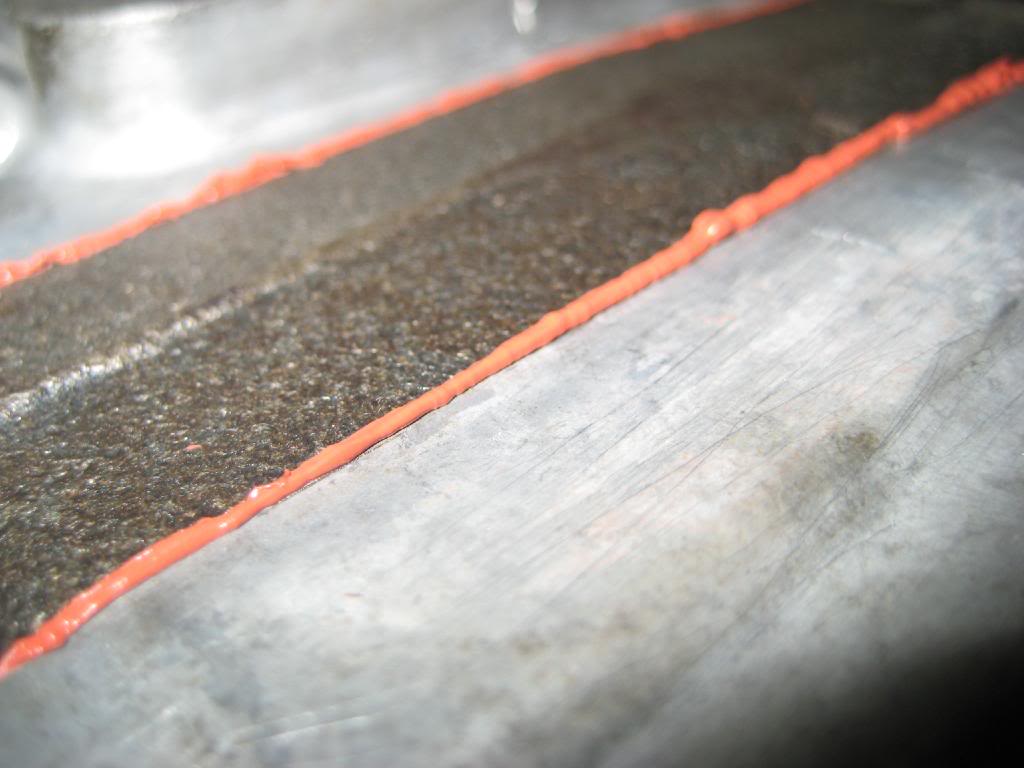
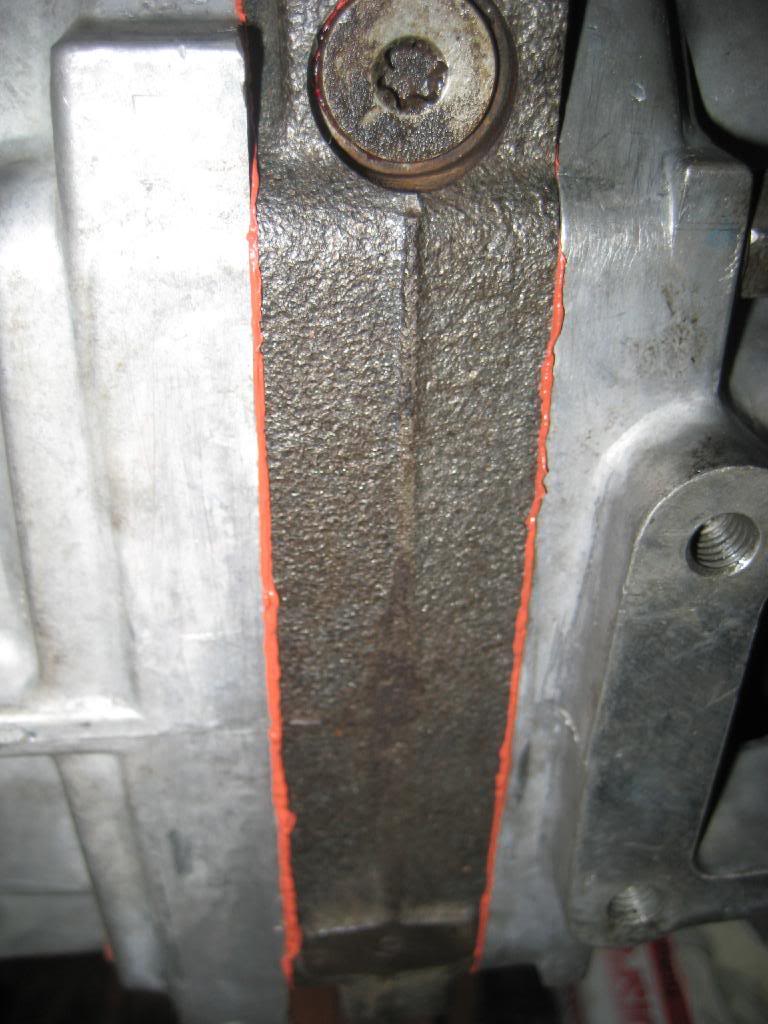
FIPG
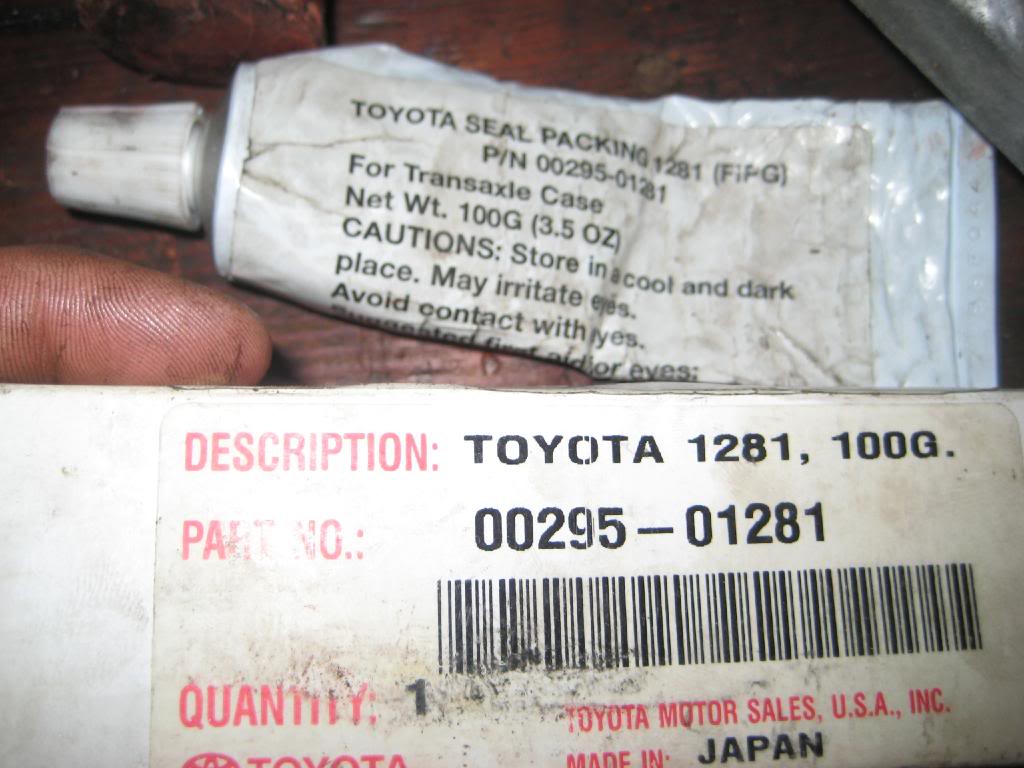
Form in place gasket. orange for tranny and black for oil pan. Chris my dealer guy hooked me up cause he makes some bank off me in oem parts. And heres my bead. if anyone has any opinions good or bad on it i would like to know. I didn't go to motor school or anything just my experience. so i wonder how this looks to a professional.
And for the t case i didn't do much write up cause marlin or trail gear has such good notes on this. I used marlin's 4.7 instructions to do all of my case work. heres the link i used. http://www.marlincrawler.com/tech/gu...1-gear-install
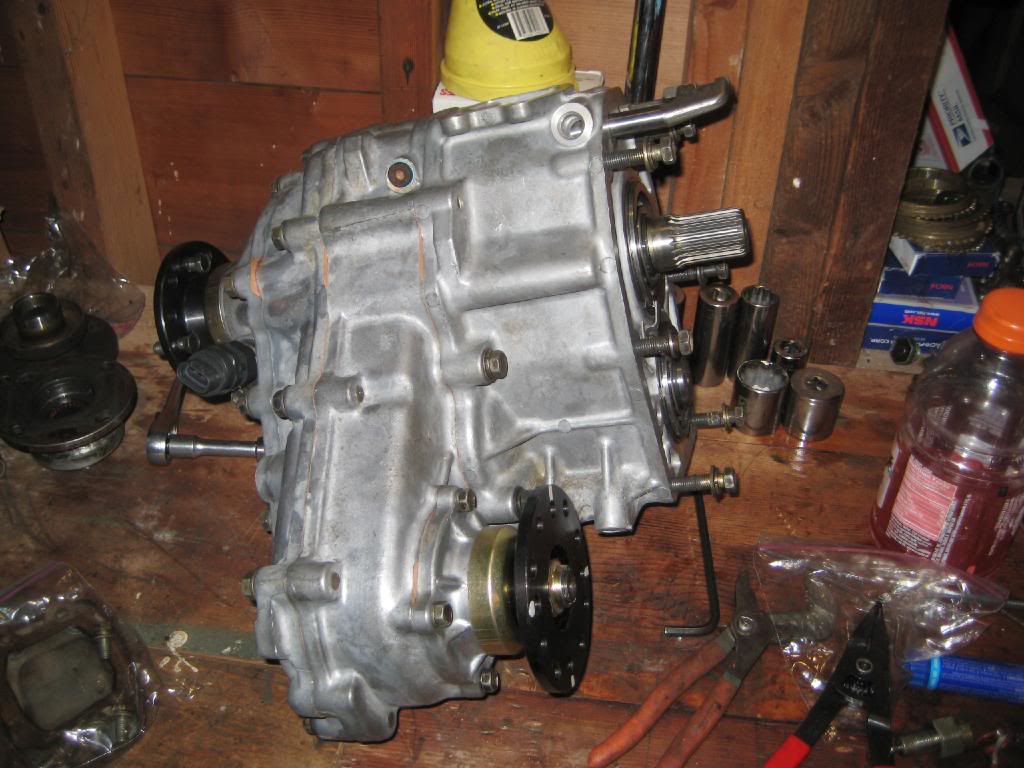
MC triple drilled flanges, MC 4.7, MC gear to pulse speedo thingy, custom 4x4 light switch cause jeni's got ADD, TG Twin Stick
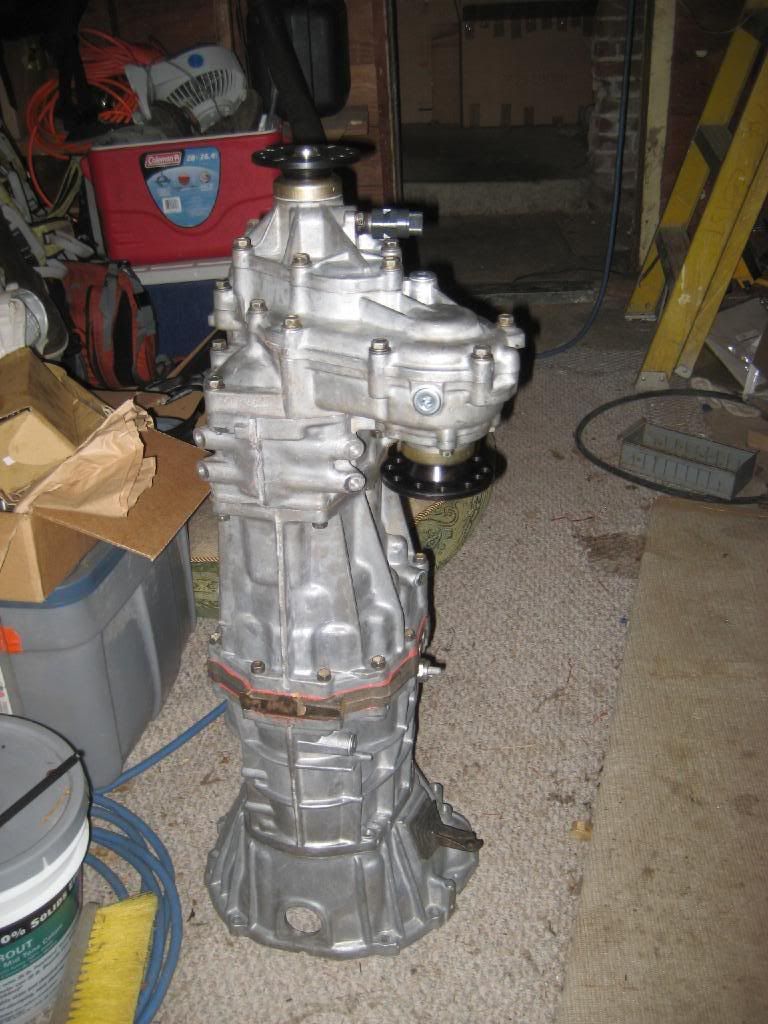
I threw on a (3 or 5) coats of rattle can clear coat. it was a high heat application. then i got dizzy so i went up stairs. Came down stairs and it jsut shines. so happy that i decided to dip and coat the cases. Install went without a hitch. neighbors stoppin by to say. o your takin your tranny out huh. hehe, "nope, jus throwin her back in".
So i have a few side notes that pop into my head every now and then that ill add in. first one being syncros. I did not do any valve lap on 3rd gear just to see how it would be affected. knowing that it would wear in at some point and 3rd seemed like the best no variable i had. i was also unsure of how much rubbing i should do so i tested others as well. 1st gear got the most "work in" and less and less on higher up the chain. again with none on third. everything fells very similar except third. third wants to dog on me every now and then but nothing bad at all. i would say when you use valve lap to do it very shortly. less than a full turn. and then make sure it is immaculately clean.
thats all for now. thanks for tunen in and ill see ya on the road
I got the cases back that Friday, got home and went to work. party at the house but i was in the basement playing. first i put the intermediate plate togeather.
took a little bit to get my forks in order but go there.
this is where it is important to take pictures and actually understand how everything works. i didn't take pictures of allot during rebuild cause i was busy looking at pictures from the dis assembly. went pretty straight forward. makes sure you know where each of the detent balls goes. i followed my fsm and i found a r151f fsm which was nice but not needed so much. the r150 from my 94 4runner fsm worked very well.
FIPG
Form in place gasket. orange for tranny and black for oil pan. Chris my dealer guy hooked me up cause he makes some bank off me in oem parts. And heres my bead. if anyone has any opinions good or bad on it i would like to know. I didn't go to motor school or anything just my experience. so i wonder how this looks to a professional.
And for the t case i didn't do much write up cause marlin or trail gear has such good notes on this. I used marlin's 4.7 instructions to do all of my case work. heres the link i used. http://www.marlincrawler.com/tech/gu...1-gear-install
MC triple drilled flanges, MC 4.7, MC gear to pulse speedo thingy, custom 4x4 light switch cause jeni's got ADD, TG Twin Stick
I threw on a (3 or 5) coats of rattle can clear coat. it was a high heat application. then i got dizzy so i went up stairs. Came down stairs and it jsut shines. so happy that i decided to dip and coat the cases. Install went without a hitch. neighbors stoppin by to say. o your takin your tranny out huh. hehe, "nope, jus throwin her back in".
So i have a few side notes that pop into my head every now and then that ill add in. first one being syncros. I did not do any valve lap on 3rd gear just to see how it would be affected. knowing that it would wear in at some point and 3rd seemed like the best no variable i had. i was also unsure of how much rubbing i should do so i tested others as well. 1st gear got the most "work in" and less and less on higher up the chain. again with none on third. everything fells very similar except third. third wants to dog on me every now and then but nothing bad at all. i would say when you use valve lap to do it very shortly. less than a full turn. and then make sure it is immaculately clean.
thats all for now. thanks for tunen in and ill see ya on the road
Last edited by JeEVeS; Sep 20, 2009 at 09:57 PM.

Thread
Thread Starter
Forum
Replies
Last Post
Dale Johnston
86-95 Trucks & 4Runners (Build-Up Section)
11
Oct 31, 2015 10:22 PM


