
Post Your Pics!!!
 Sep 30, 2012 | 07:34 AM
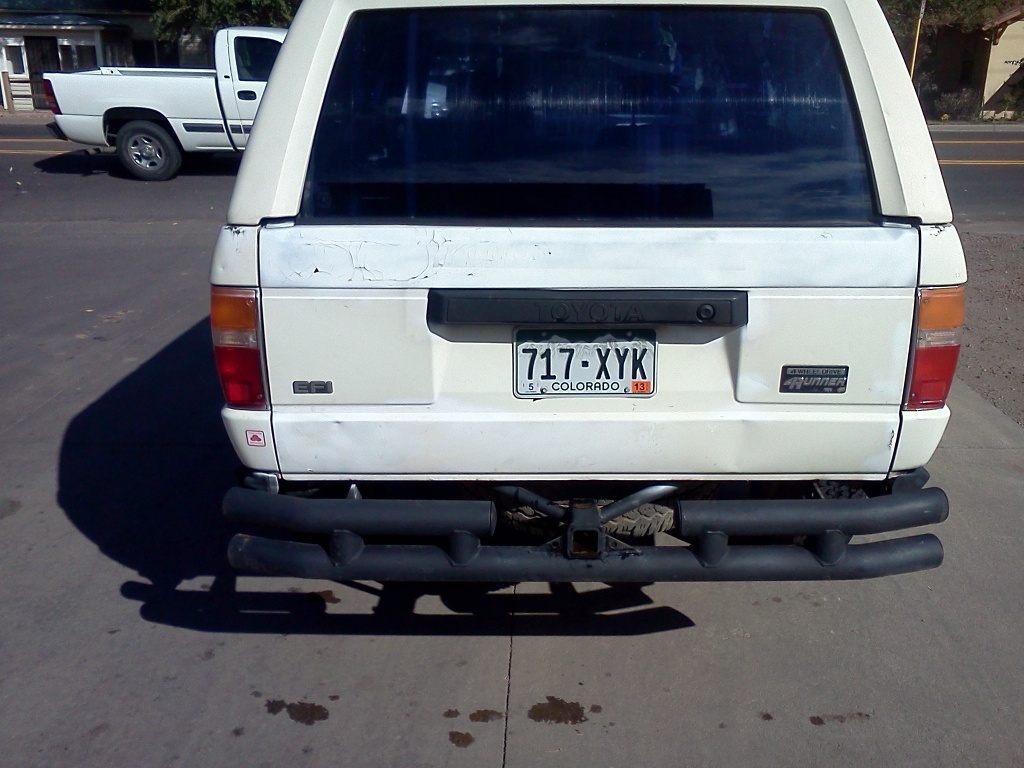
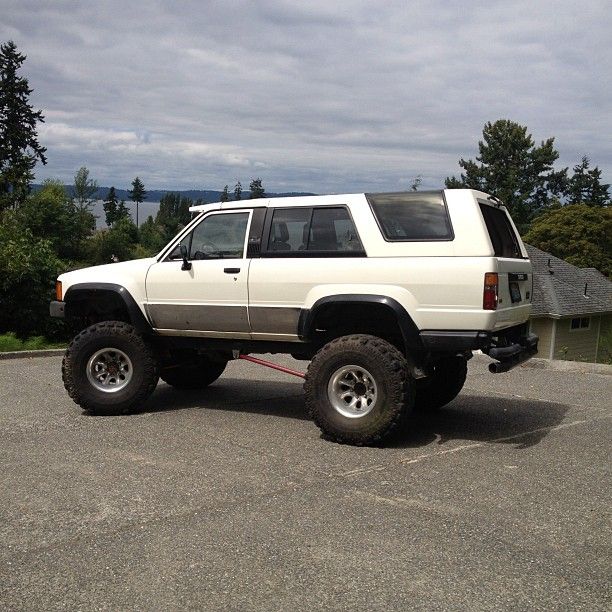
Thought I would post a pic of my latest project. Was used as parts by two others and then me to fix the white 88 4Runner below.
My 86 4Runner

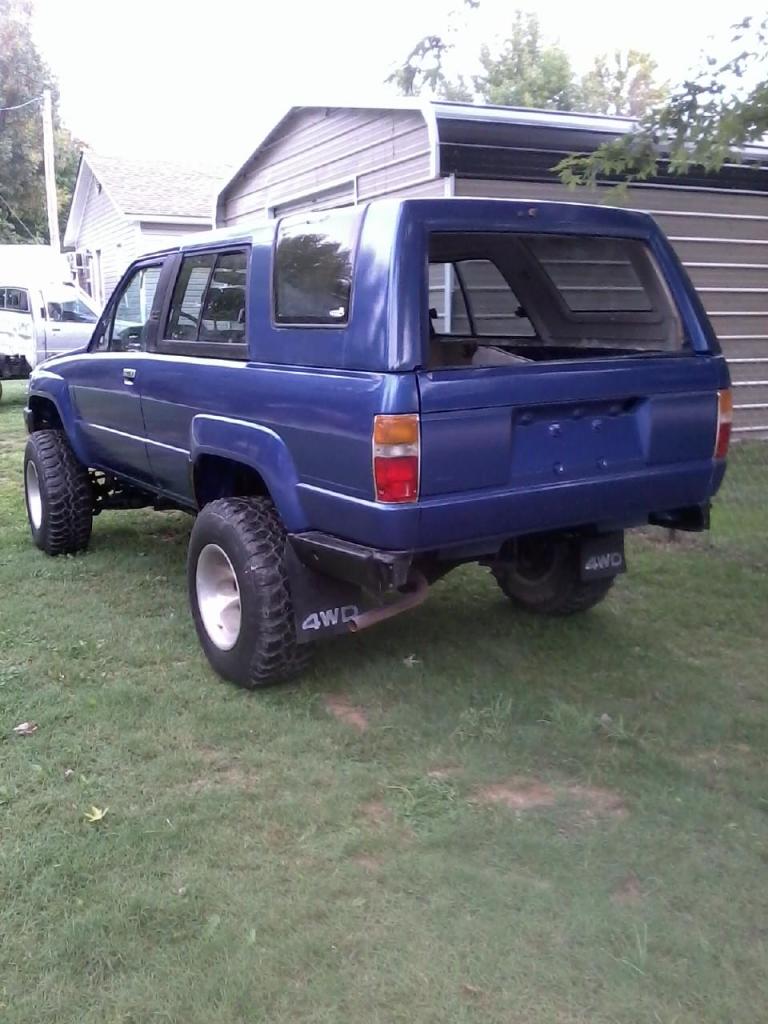
Wifes 88 4Runner.

My 86 4Runner
Wifes 88 4Runner.
Last edited by Terrys87; Sep 30, 2012 at 07:35 AM.
Sep 30, 2012 | 10:48 AM
Registered User
Joined: Sep 2012
Posts: 42
Likes: 0
From: Canon City, Co
The place for my rig pics?
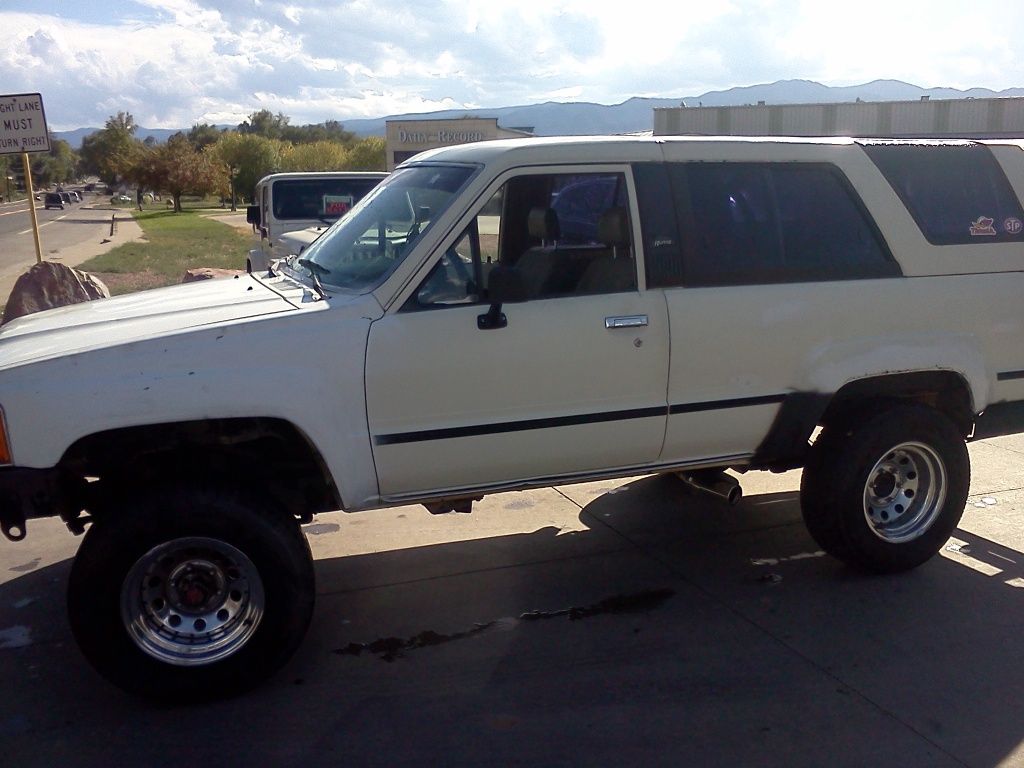
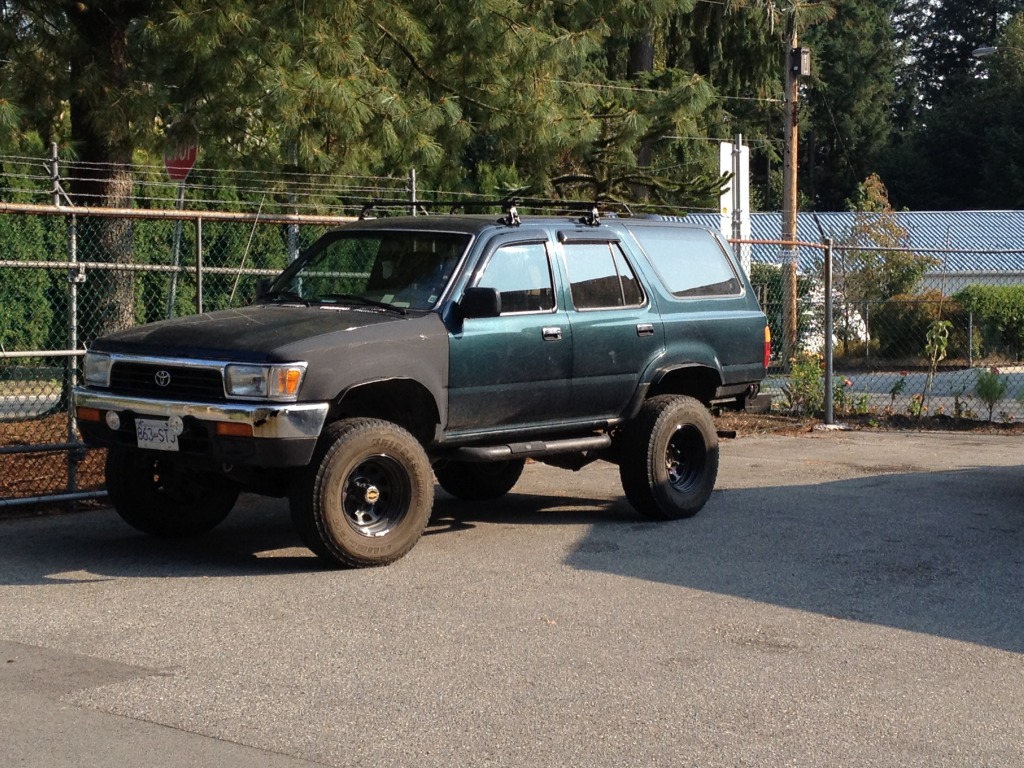
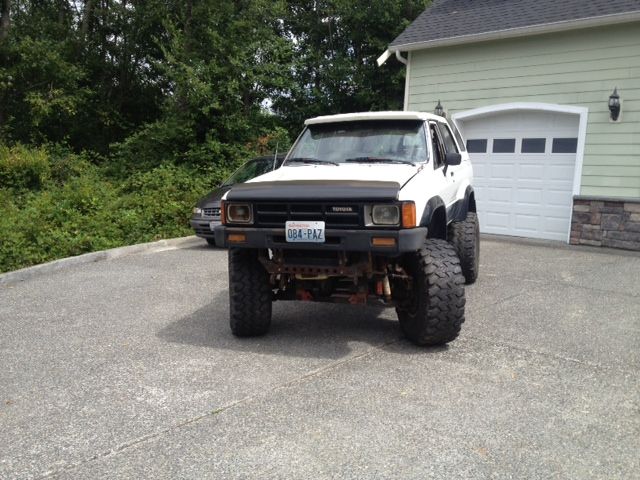
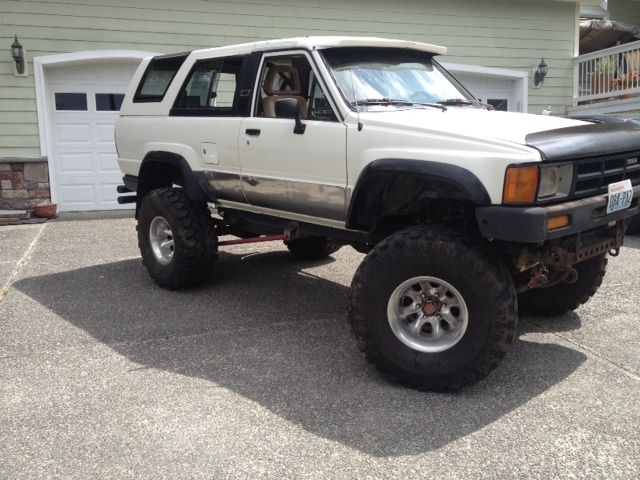
Here is a driver side shot. I took the wheels from my '87 Toy before I scrapped it. (Yes, I just washed it.)

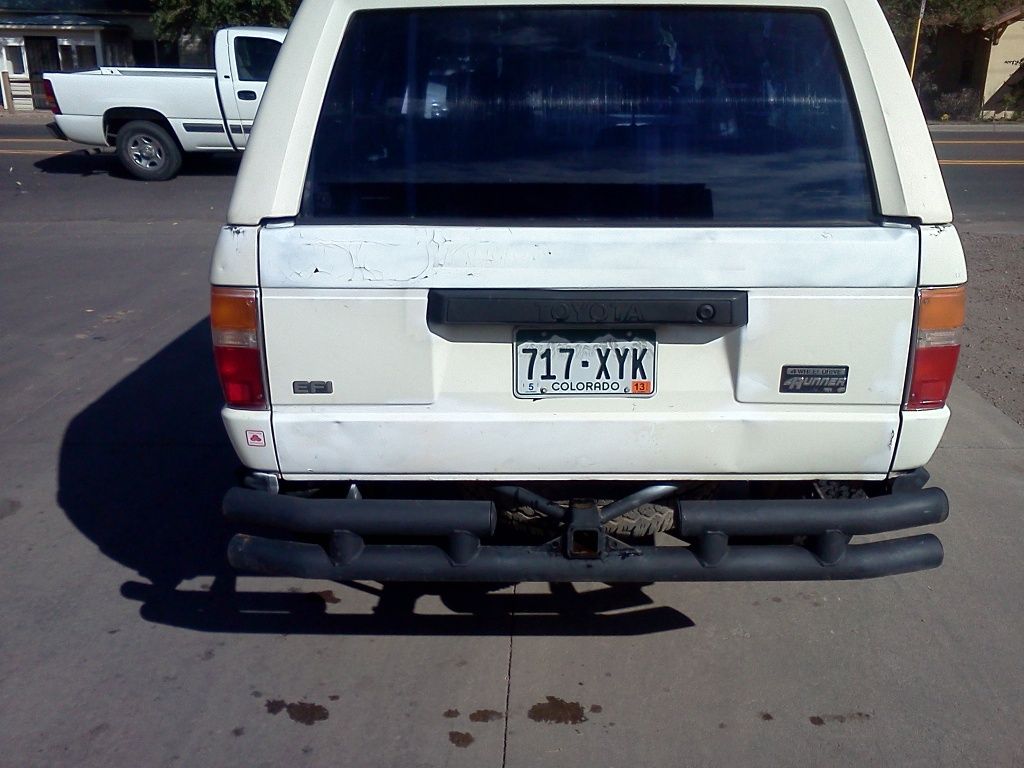
Smitty Bilt rear bumper. I hope to get rid of it soon for something more low pro. I hate scraping it.
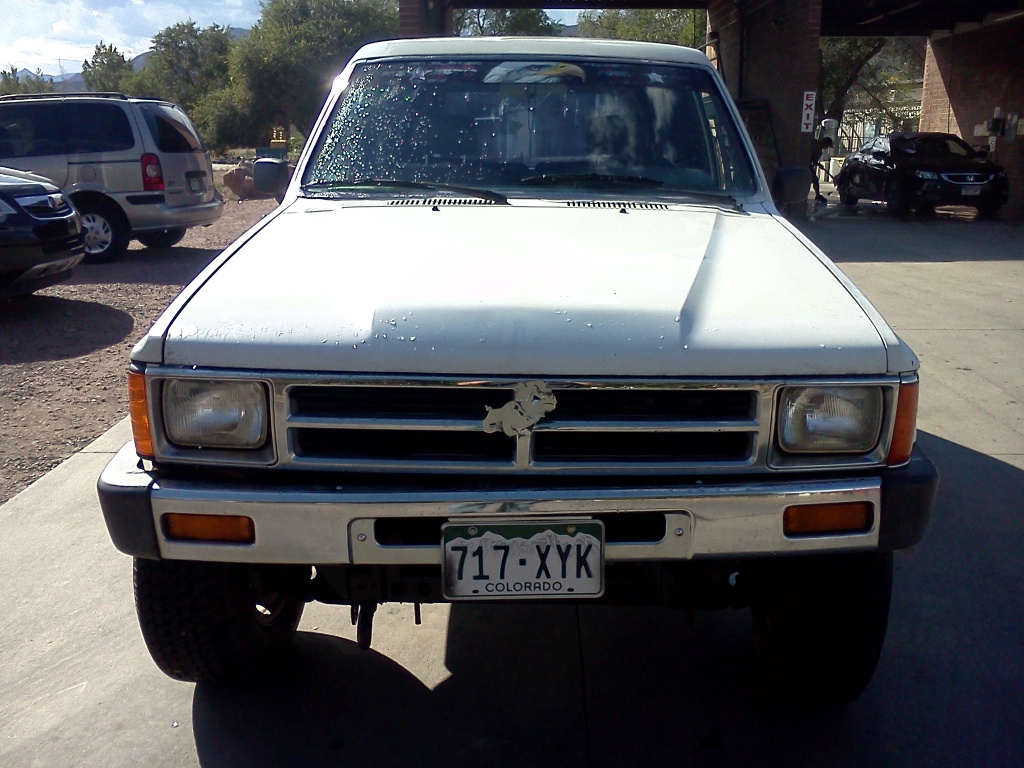
My crooked front bumper. Its the 3rd front bumper (dont ask). It's my frame that is crooked not the bumper brackets. I'm going to reinforce the frame and get a better bumper that isn't so weak.
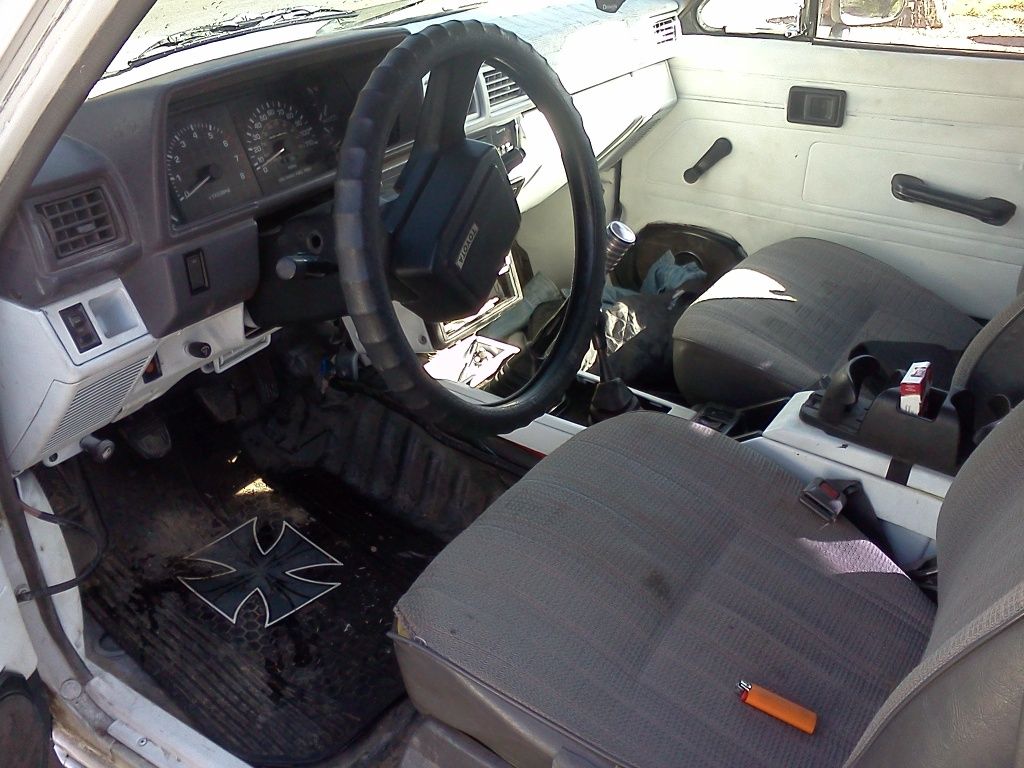
Interior shot. I painted it white. Rhino lined floors under the rubber mats. Gauge cluster is from '87 SR5 (I liked the tach). Lights are red in cluster. 6x9"s in the front doors.

Split backs, solid piece bench. Still all folds. 4x6" speakers in the panels. No speakers by the roll bar anymore.

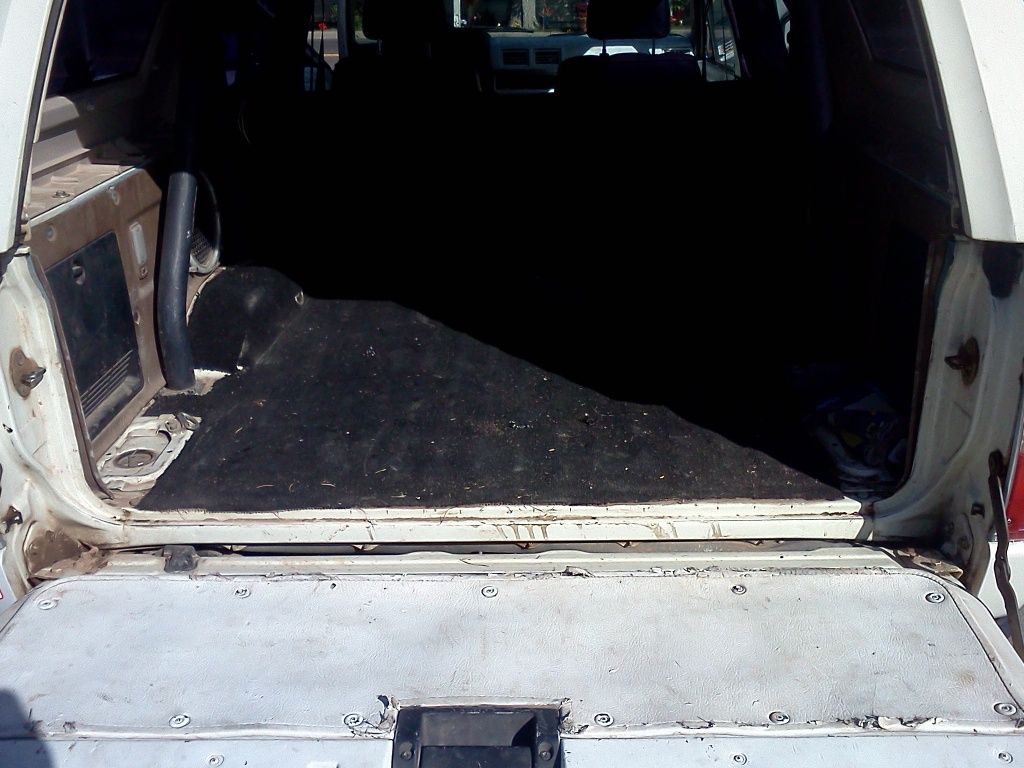
Super awesome custom carpet from Walmart. Glued in with Loctite spray adhesive. The rear panels have "camping bed roll" foam to reduce noise between the panels and the body.

Not the cleanest bay, not the dirtiest. I'm happy to have the stock airbox. When I got the truck it had a half-a$$ed "cold-air".
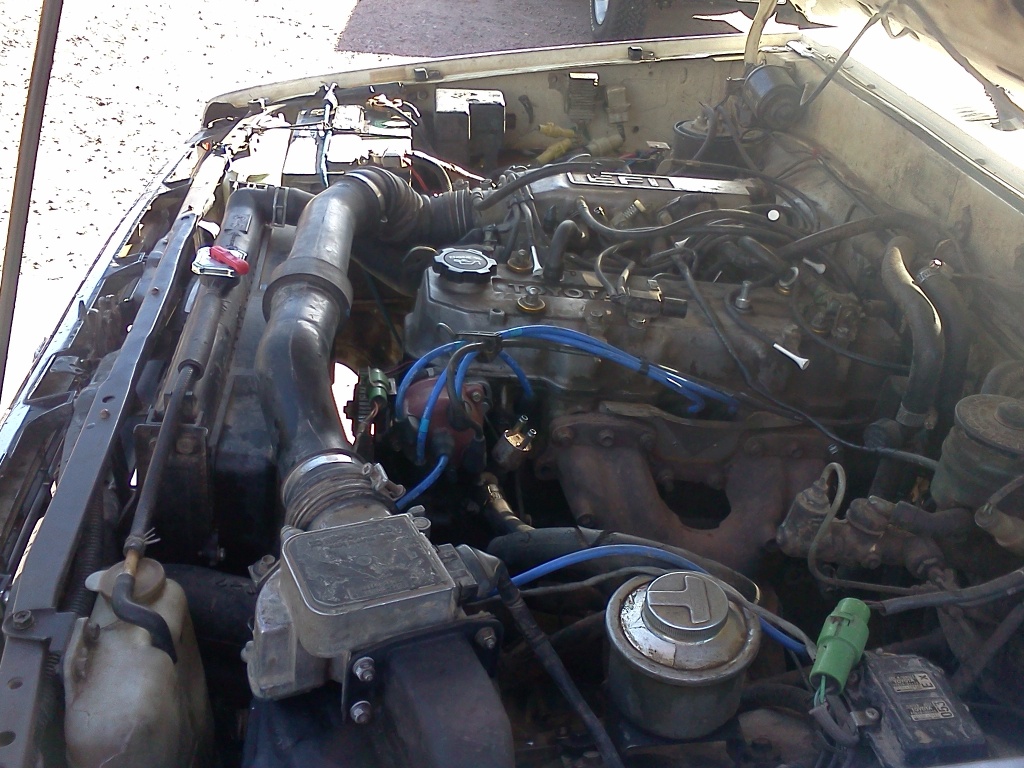
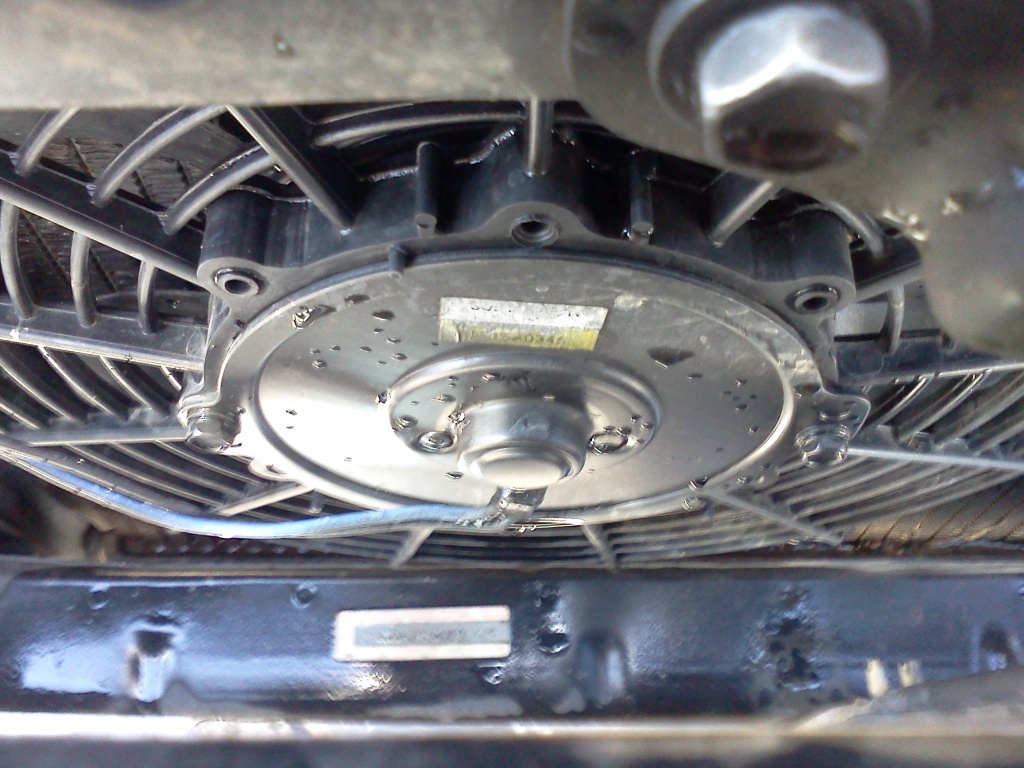
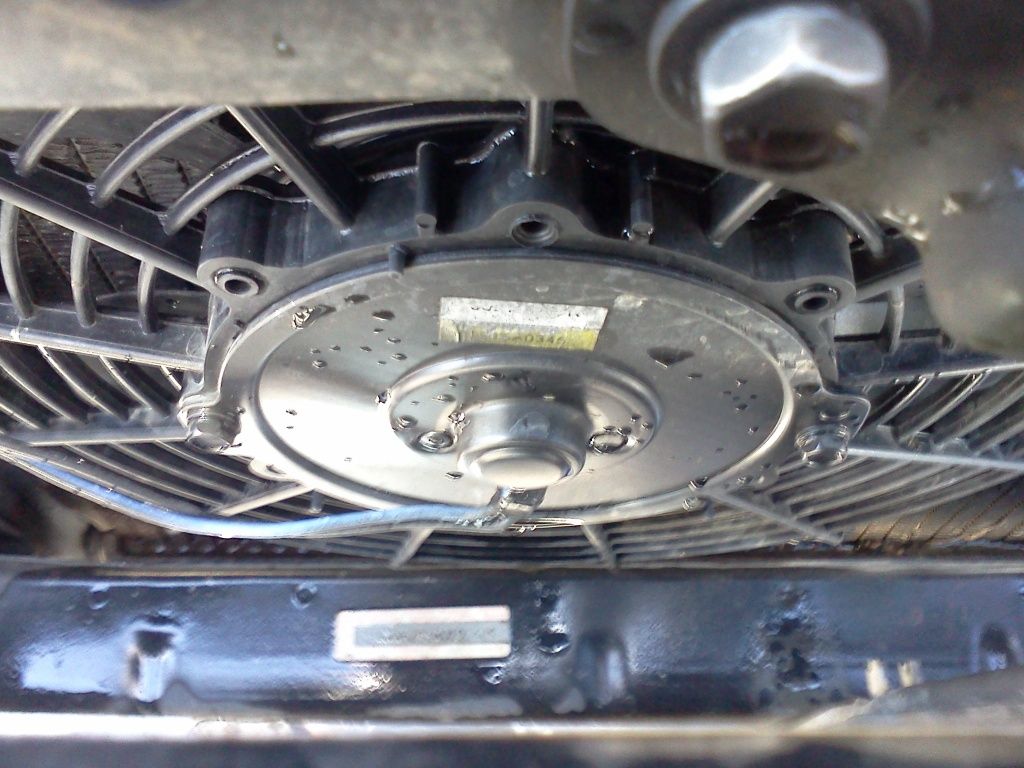
Secondary cooling fan in front of the radiator. It's rigged to a grounded switch next to the stereo.
Smitty Bilt rear bumper. I hope to get rid of it soon for something more low pro. I hate scraping it.
My crooked front bumper. Its the 3rd front bumper (dont ask). It's my frame that is crooked not the bumper brackets. I'm going to reinforce the frame and get a better bumper that isn't so weak.
Interior shot. I painted it white. Rhino lined floors under the rubber mats. Gauge cluster is from '87 SR5 (I liked the tach). Lights are red in cluster. 6x9"s in the front doors.
Split backs, solid piece bench. Still all folds. 4x6" speakers in the panels. No speakers by the roll bar anymore.
Super awesome custom carpet from Walmart. Glued in with Loctite spray adhesive. The rear panels have "camping bed roll" foam to reduce noise between the panels and the body.
Not the cleanest bay, not the dirtiest. I'm happy to have the stock airbox. When I got the truck it had a half-a$$ed "cold-air".
Secondary cooling fan in front of the radiator. It's rigged to a grounded switch next to the stereo.
Last edited by Valerik; Sep 30, 2012 at 10:50 AM.
Sep 30, 2012 | 01:03 PM
Registered User
Joined: Jul 2012
Posts: 28
Likes: 0
From: Florida
Canon City
Hi Valerik!
Nice 4Runner. You've been working hard on it as I can see. I used to live in Canon City years ago, out on Grand Ave. I know you have plenty of off-roading to do there (if that's your thing). The truck looks awesome with God's beautiful country in the background. Would love to see more pics of your progress.
Bob
Here is a driver side shot. I took the wheels from my '87 Toy before I scrapped it. (Yes, I just washed it.)
Smitty Bilt rear bumper. I hope to get rid of it soon for something more low pro. I hate scraping it.
My crooked front bumper. Its the 3rd front bumper (dont ask). It's my frame that is crooked not the bumper brackets. I'm going to reinforce the frame and get a better bumper that isn't so weak.

Interior shot. I painted it white. Rhino lined floors under the rubber mats. Gauge cluster is from '87 SR5 (I liked the tach). Lights are red in cluster. 6x9"s in the front doors.
Split backs, solid piece bench. Still all folds. 4x6" speakers in the panels. No speakers by the roll bar anymore.
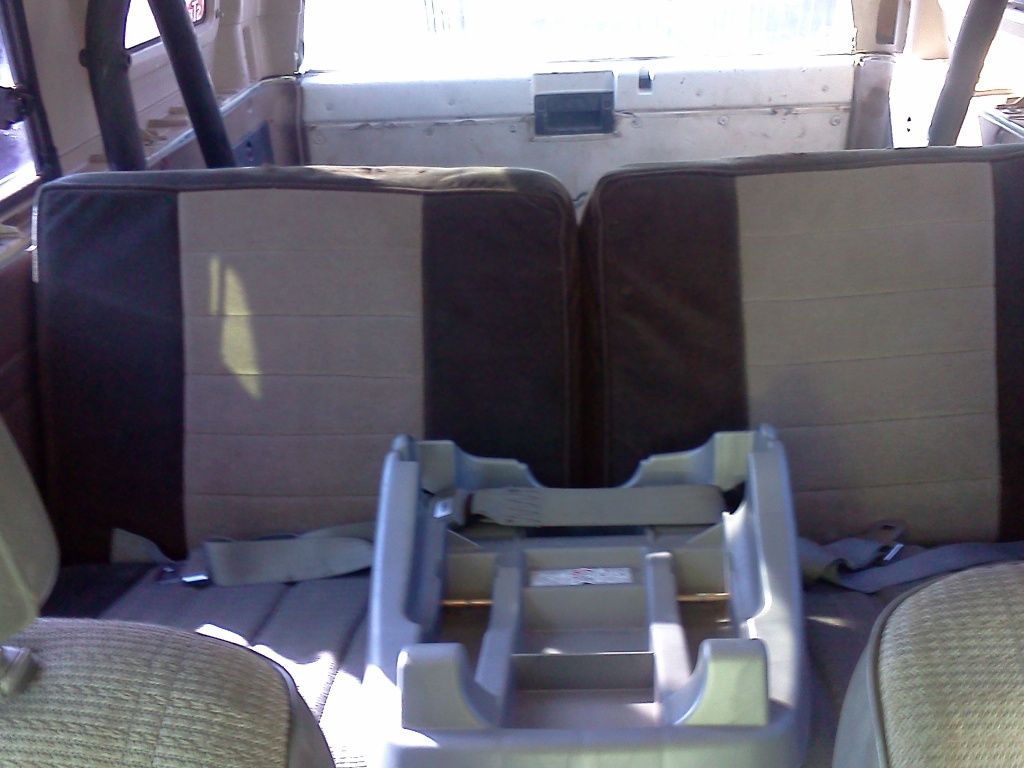
Super awesome custom carpet from Walmart. Glued in with Loctite spray adhesive. The rear panels have "camping bed roll" foam to reduce noise between the panels and the body.
Not the cleanest bay, not the dirtiest. I'm happy to have the stock airbox. When I got the truck it had a half-a$$ed "cold-air".

Secondary cooling fan in front of the radiator. It's rigged to a grounded switch next to the stereo.
Smitty Bilt rear bumper. I hope to get rid of it soon for something more low pro. I hate scraping it.
My crooked front bumper. Its the 3rd front bumper (dont ask). It's my frame that is crooked not the bumper brackets. I'm going to reinforce the frame and get a better bumper that isn't so weak.
Interior shot. I painted it white. Rhino lined floors under the rubber mats. Gauge cluster is from '87 SR5 (I liked the tach). Lights are red in cluster. 6x9"s in the front doors.
Split backs, solid piece bench. Still all folds. 4x6" speakers in the panels. No speakers by the roll bar anymore.
Super awesome custom carpet from Walmart. Glued in with Loctite spray adhesive. The rear panels have "camping bed roll" foam to reduce noise between the panels and the body.
Not the cleanest bay, not the dirtiest. I'm happy to have the stock airbox. When I got the truck it had a half-a$$ed "cold-air".
Secondary cooling fan in front of the radiator. It's rigged to a grounded switch next to the stereo.
Sep 30, 2012 | 10:14 PM
Registered User
Joined: Sep 2012
Posts: 70
Likes: 0
From: British Columbia
WOW CHOOCH! that is the cleanest 3.0 ive ever seen! damn i wish mine was that clean "New" looking. awesome. how much did you pay for the truck, if you dont mind me asking. really sweet man. wow

 Oct 1, 2012 | 06:06 AM
Registered User
Joined: May 2012
Posts: 185
Likes: 0
From: Dublin, Ga
yeah still got to order driver fender and hood most of body work has been finished. getting married in 19 days so my money has been tight the last few months saving up for the honeymoon but it will be well worth it i need a vacation lol
Oct 1, 2012 | 04:33 PM
Registered User
Joined: Jun 2010
Posts: 1,448
Likes: 100
From: Virginia
Badger, congratulations on the new son. Your kids are both beautiful. My 3 all had blue/gray eyes like your daughter but two of them went green at about age 6! Weird! I guess that's why they call them "baby blue."
Valerik, where did you get the cupholders mounted on your console? It looks like it's removable. I like the idea of using those camping pads for insulation. I think you mean the light blue ones Walmart has for about $5. I've been eyeing the ones my sons never take camping with them anymore.
Valerik, where did you get the cupholders mounted on your console? It looks like it's removable. I like the idea of using those camping pads for insulation. I think you mean the light blue ones Walmart has for about $5. I've been eyeing the ones my sons never take camping with them anymore.
Oct 1, 2012 | 04:40 PM
Registered User
Joined: Jan 2011
Posts: 1,369
Likes: 2
From: Clarksville, TN / Ft. Campbell
TY Nervo.. My wife and I both have amazing blue eyes. Hopefully they both stay blue. Although, I wouldn't mind them having some dark emerald green eyes. That'd be cool. I'm just glad neither of them came out with brown eyes lol
 Oct 1, 2012 | 08:15 PM
Hey Hobbies....
I'll probably get privately scolded for enabling, considering there's even a thread now(believe it's a sticky), explaining how to post pics like most of us are.... But meh, I was right where you are, just 'not getting it', ........ so here ya go...........
1. Start an account for free at www.photobucket.com ..........
2. Once you've started your account, 'create an album' just for the rig pictures......
3. Once you've created the album, create sub-albums for each section, like "Pics of my Rig", "Suspension Mods", "Body and Paint Repair", .... etc.(makes things easier to find) Use other main albums for family pics, etc.
4. Once you've created the albums... click "UPLOAD"
5. Then click the big green "SELECT" pop up on the next page....
6. Pick as many as you want, holding down "ctrl" while you click to select pics from different spots on each album.......
7. Once they're lit up blue cuz you've selected them, simply click "OPEN" and they will upload.
8. Once uploaded, you can tag them or whatever, then click "save and continue to my album"...
9. Once in your album, .... You should see 4 options in a column under each pic.... COPY the "IMG" Link-selection on the bottom of the 4, then come here and click PASTE in the window here... voila, you've posted a pic.
HURRY UP, we wanna see! lol.
Last edited by ChefYota4x4; Oct 1, 2012 at 08:16 PM.
 Oct 2, 2012 | 12:56 PM
Registered User
Joined: Jan 2011
Posts: 1,369
Likes: 2
From: Clarksville, TN / Ft. Campbell
hahaha.... I'm doing very well, Chef. I actually woke up this morning feeling like I slept. Little boy is doing great, counting the days till we can wrench together. 859 by the way. lol. Now I have a few days to enjoy being home, get some fishing in, maybe get a little work done on the truck.
Oct 2, 2012 | 01:36 PM
Registered User
Joined: Apr 2012
Posts: 2,817
Likes: 2
From: Los Angeles CA
 Oct 2, 2012 | 01:59 PM

Registered User
Joined: Nov 2011
Posts: 566
Likes: 1
From: Bellingham, WA

 Oct 2, 2012 | 05:01 PM
Registered User
Joined: Nov 2011
Posts: 566
Likes: 1
From: Bellingham, WA


