
Head Gasket Replacement 95 4runner SR5 3VZE
 Oct 20, 2011 | 09:20 PM
#1
Thread Starter
Registered User
Joined: Aug 2011
Posts: 77
Likes: 0
From: Indio California
Head Gasket Replacement 95 4runner SR5 3VZE
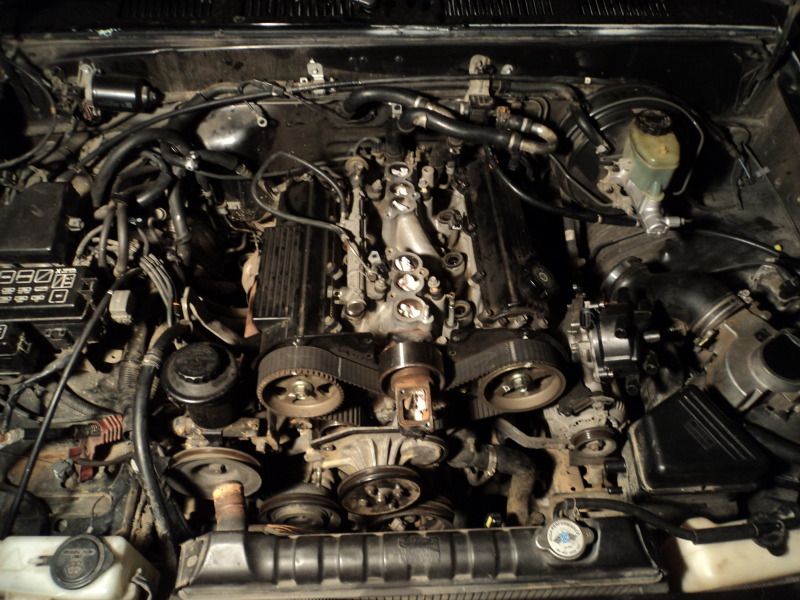
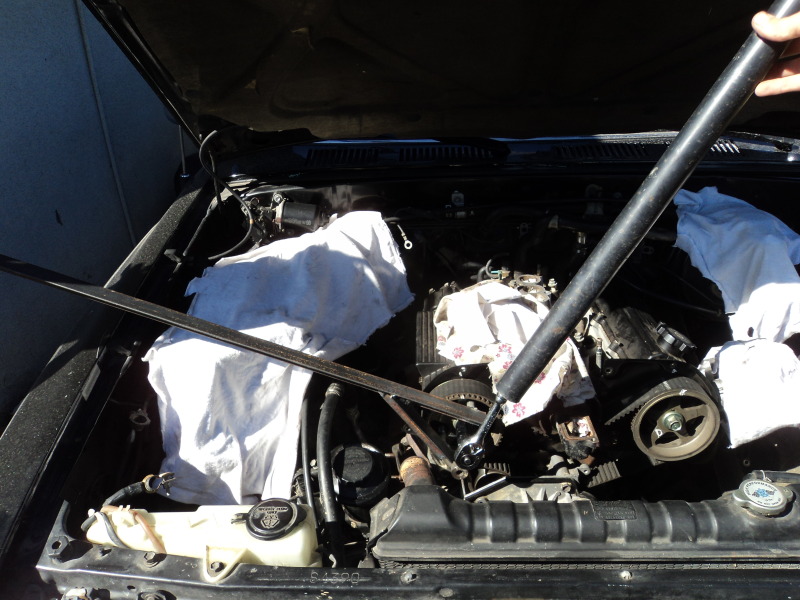
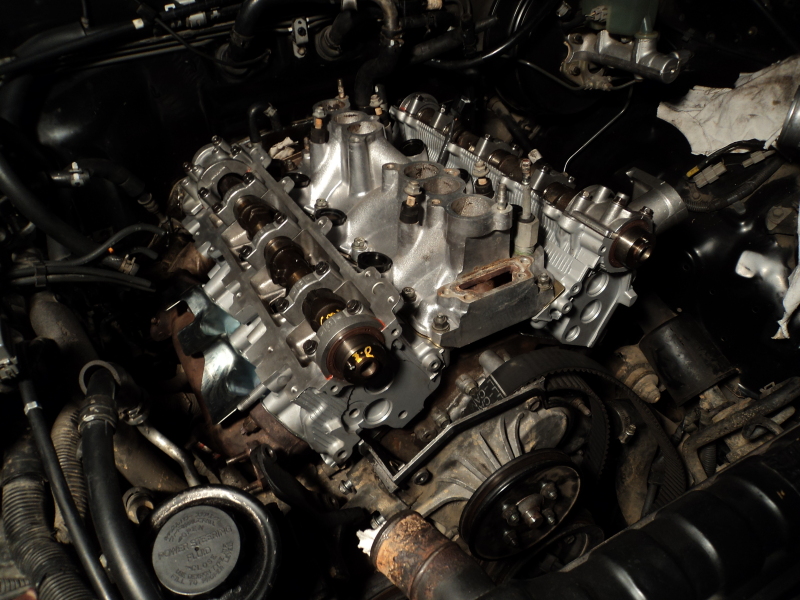
Today I started taking the top end apart. I might have a problem with my timing and I need some advice with the fuel injectors. Here are a few pictures from today.
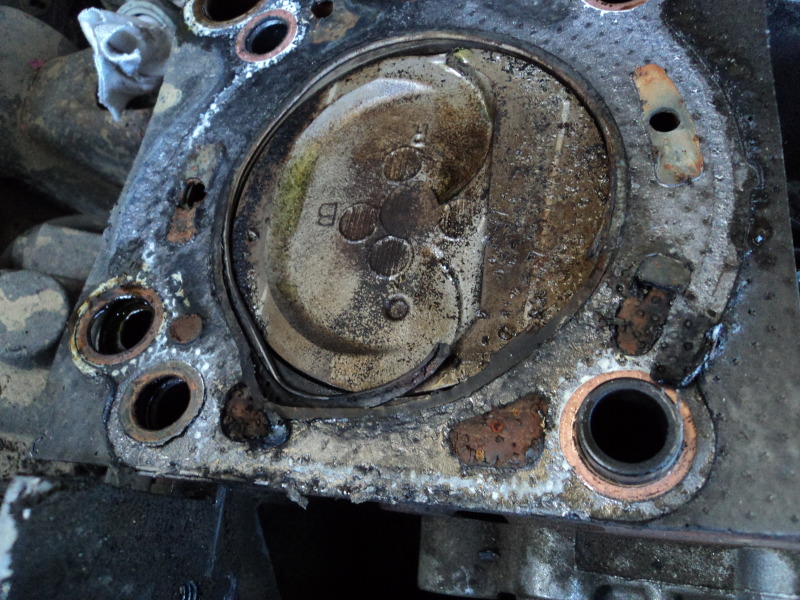
pulled off the injectors on the right side and found this...
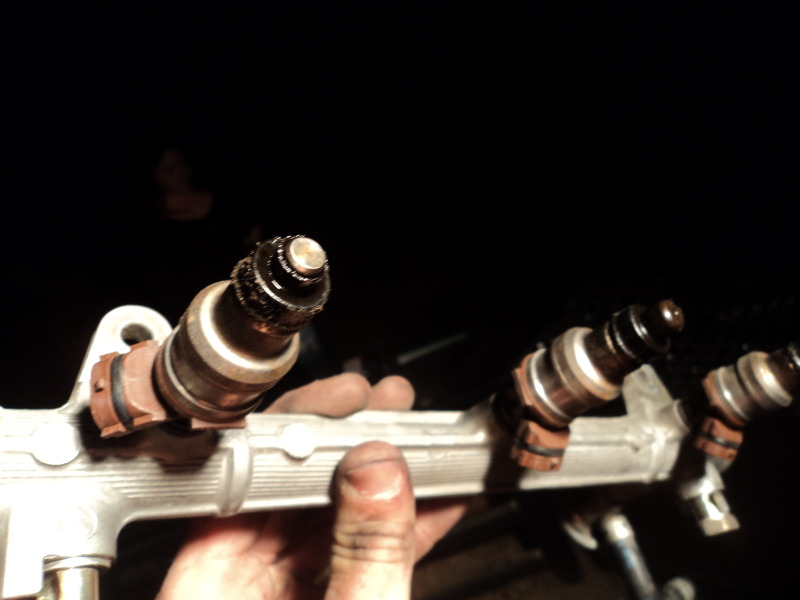
I'm wondering if I have to worry about my timing...
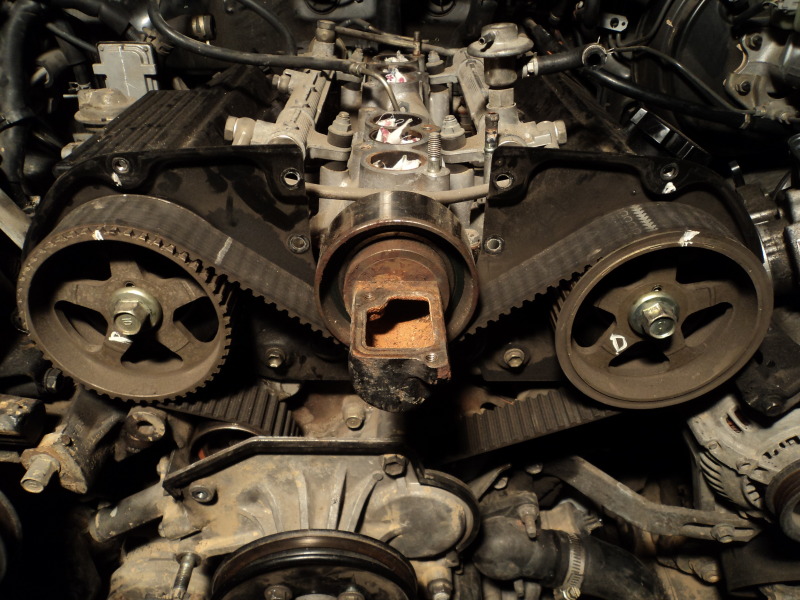


does this mean my cranks off a notch?
pulled off the injectors on the right side and found this...
I'm wondering if I have to worry about my timing...
does this mean my cranks off a notch?
 Oct 21, 2011 | 07:32 AM
#4

Registered User

Joined: Sep 2007
Posts: 8,384
Likes: 875
From: San Francisco East Bay
DO remember to to turn the crank in the right direction (clockwise as you face the engine) when lining up the TDC mark. If you back it up to line up the mark on the cam (for instance) there is enough slack on the tensioner that it can produce that much error.
It looks like you're missing a pintle cap on one of the injectors (don't believe everything you hear; your phone is not a real camera). I reinstalled mine with one cap missing, but I wish now that I hadn't. You can buy them in bulk on eBay, or you can have the injectors serviced and get new ones as part of the price.
It looks like you're missing a pintle cap on one of the injectors (don't believe everything you hear; your phone is not a real camera). I reinstalled mine with one cap missing, but I wish now that I hadn't. You can buy them in bulk on eBay, or you can have the injectors serviced and get new ones as part of the price.
Oct 21, 2011 | 09:58 AM
#6
Thread Starter
Registered User
Joined: Aug 2011
Posts: 77
Likes: 0
From: Indio California
What do you recommend I do to fix it? Pull the tensioner off, adjust the crank to 0 degrees and put it back on? I still need the SST (I will probably make one if I cant rent the tool) I am doing my best to go slow with this job and get everything 100 percent correct. It's my baby
 Oct 21, 2011 | 10:44 AM
#7
Thread Starter
Registered User
Joined: Aug 2011
Posts: 77
Likes: 0
From: Indio California
Found a site that sells the pintle caps. I swear...I am probably never going to call the dealership for help again. Thank yota tech for your support 
http://injector-rehab.com/shop/Bosch...intle-Cap.html
http://injector-rehab.com/shop/Bosch...intle-Cap.html
Trending Topics
 Oct 21, 2011 | 04:44 PM
#9
Registered User
Joined: Sep 2007
Posts: 8,384
Likes: 875
From: San Francisco East Bay
What do you recommend I do to fix it? Pull the tensioner off, adjust the crank to 0 degrees and put it back on? I still need the SST (I will probably make one if I cant rent the tool) I am doing my best to go slow with this job and get everything 100 percent correct. It's my baby
If it's off by less than one tooth, don't adjust it. But think seriously about replacing the timing belt. They're supposed to live only about 60,000miles. The belt isn't that expensive, and you're already 3/4 of the way there on the labor.
You WILL need the "SST" to hold the crank to loosen the crank bolt (you can't remove the timing belt with the harmonic balancer on). But do a search on this site for site-built tools. Most are very clever. Think twice about using the starter or an big impact gun; you're still going to need to put the bolt back in (161 ft-lbs!), you'll need the tool then anyway, so why risk your engine trying to knock the crank bolt out with the starter?
(Others may differ; YMMV)
Last but not least, you WILL need new crush washers on each fuel connection you opened. They are dirt-cheap from the dealership, and I couldn't find anywhere else to get them. The OEM ones are aluminum; some claim success with copper washers, but those are intended for brake systems. Some will claim you can reuse the old washers (in deed, I am guilty on that count), but there just isn't any good reason to risk it. (And no, carefully sanding the washers so you can re-use them doesn't work. They are called CRUSH washers for a reason.)
Last edited by scope103; Oct 21, 2011 at 04:48 PM.
Oct 28, 2011 | 09:31 AM
#11
Thread Starter
Registered User
Joined: Aug 2011
Posts: 77
Likes: 0
From: Indio California
I finished the wrench for the cam gears and it worked beautifully. I have heard from some people the bolts bust right? My bolts loosened left, not sure what was meant by busting right. Gonna remove my heads in a few minutes. I'll post more photos soon.
By the way....does anyone have tips for cleaning the block. I'm planning on swinging by autozone to pick up a few cans of engine cleaner or something to get them prepped for the fresh new gaskets.
Also I did more research on the head gaskets. I read that there is a Multi-Layer Steel design that can handle the head motion better than the Graphite gaskets. Here is more info on them...
To address this engine’s motion problems, one aftermarket gasket manufacturer has come out with a “Multi-Layer Steel” (MLS) replacement head gasket. MLS head gaskets are made of several layers of embossed stainless steel. A thin coating (0.001- to 0.0015-inch) of nitrile rubber or Viton is used on the external surfaces as well as between the layers to provide maximum sealing. MLS gaskets are almost bullet-proof - but also more expensive than conventional soft-faced gaskets. Even so, if you want to fix the problem once and for all, MLS is the way to go in this application.
Although, I have come to consider the exhaust crossover to be the real reason for head gasket failure. It only makes sense that the exhaust pipe being so close to the engine could easily cause it to overheat.
I'm worried about the reason which caused my engine to overheat...I do know that the coolant level was low at the time....I'm going to test my thermostat and I'd like to know how to test my fan clutch. I'd hate to find out what caused the problem after I finish the job.
My timing worked out fine...I had a friend come over and we did more research and figured it all out. We will see how precise the timing is when I crank it over after I put it back together. Thanks for all the advise guys! More photos and info to come soon!!
Oct 28, 2011 | 09:41 AM
#12
Thread Starter
Registered User
Joined: Aug 2011
Posts: 77
Likes: 0
From: Indio California
First, you're not going to adjust the crank. What you MIGHT want to do is set the crank at TDC (zero), and look at the cam shafts. Are they off a WHOLE tooth? If so, you'll loosen the tensioner enough to get the belts off the cams, and move the belts on the cams. Your picture of the crank looks like it's off only about 4 degrees. Since the crank turns twice as fast as the cams, the cams would only be off 2 degrees, or about 1/10 of an inch. Which is much less than one tooth on the belt. Don't get fooled by parallax!
If it's off by less than one tooth, don't adjust it. But think seriously about replacing the timing belt. They're supposed to live only about 60,000miles. The belt isn't that expensive, and you're already 3/4 of the way there on the labor.
You WILL need the "SST" to hold the crank to loosen the crank bolt (you can't remove the timing belt with the harmonic balancer on). But do a search on this site for site-built tools. Most are very clever. Think twice about using the starter or an big impact gun; you're still going to need to put the bolt back in (161 ft-lbs!), you'll need the tool then anyway, so why risk your engine trying to knock the crank bolt out with the starter?
(Others may differ; YMMV)
Last but not least, you WILL need new crush washers on each fuel connection you opened. They are dirt-cheap from the dealership, and I couldn't find anywhere else to get them. The OEM ones are aluminum; some claim success with copper washers, but those are intended for brake systems. Some will claim you can reuse the old washers (in deed, I am guilty on that count), but there just isn't any good reason to risk it. (And no, carefully sanding the washers so you can re-use them doesn't work. They are called CRUSH washers for a reason.)
 but I still need to get the heads to the shop(Candy Man in Bloomington said he'd do both heads, test, adjust, machine, and replace valves at $12 a pop if needed all for $120...sounds a bit cheap to me but he's been in business for 26 years and my friend goes through him all the time. I"m gonna cross my fingers on this one lol.
 Thanks again!
Oct 28, 2011 | 09:44 AM
#13
Thread Starter
Registered User
Joined: Aug 2011
Posts: 77
Likes: 0
From: Indio California
I came across this page and thought I'd share it...pretty helpful info.
http://import-car.com/Article/38945/...kets_fail.aspx
http://import-car.com/Article/38945/...kets_fail.aspx
 Nov 14, 2011 | 09:31 AM
#15
Thread Starter
Registered User
Joined: Aug 2011
Posts: 77
Likes: 0
From: Indio California
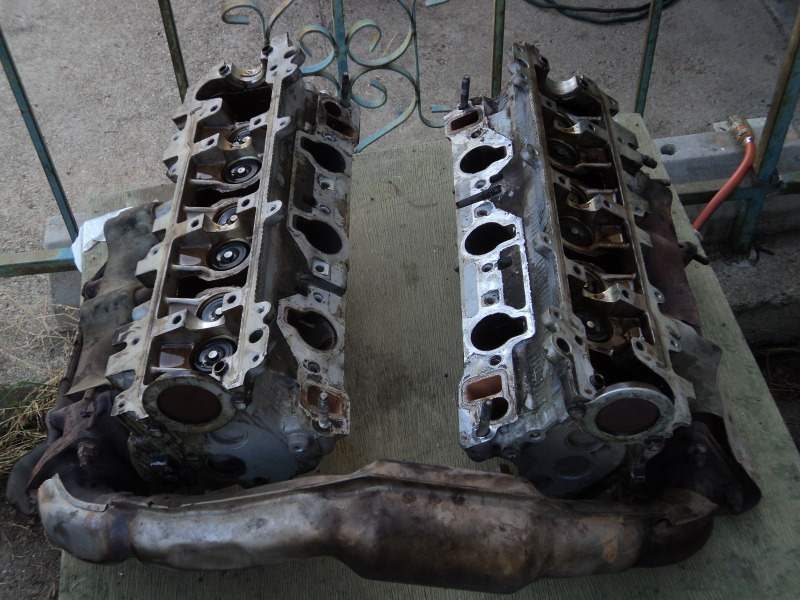
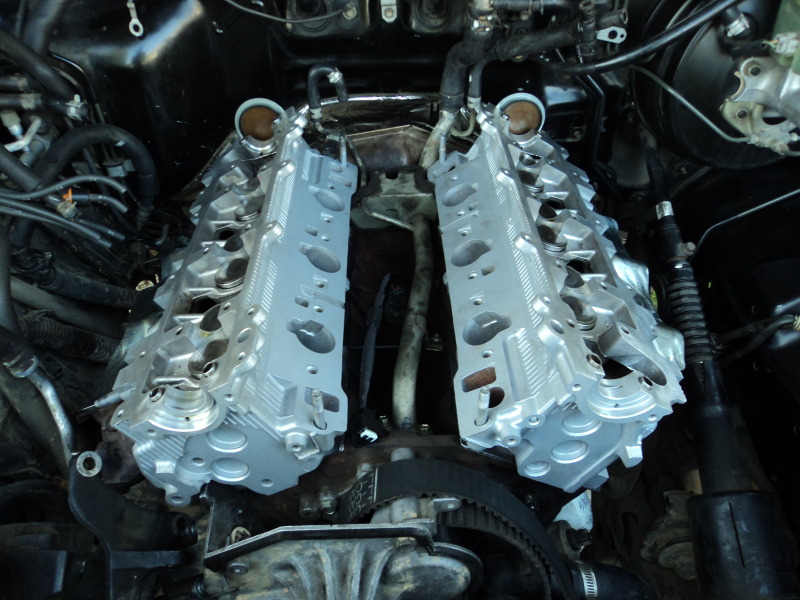
Ok well...not much feedback like I had hoped for but heres an update...I got my heads back from the shop a few days ago, they installed a helicoil for 10 bucks, yay! I attempted to install both heads at the same time...didnt work, scratched a gasket and a new one is being delivered soon(found one for 15 bucks rather than 60 from autozone...gotta love deals on the web! luckily the heads surface is not scratched  I installed the passenger side with the exhaust crossover. should be easier to get the driverside head on and bolt it to the exhaust no prob. everything else should be a breeze.
So whats up with the camshafts cracking at the collar above the no1 piston? mine was cracked in two spots, went to pickapart and all of the ones i pulled out were cracked in the same way. Anyone know why this happens? I ended up buying one from calminitrucks for 50 bucks.
I'm also curious about the pcv valve...I dont like the mess from the crankcase gases and I'm considering getting a breather filter or something and swap it back when I'm getting it smogged. anyone have any input?
I installed the passenger side with the exhaust crossover. should be easier to get the driverside head on and bolt it to the exhaust no prob. everything else should be a breeze. So whats up with the camshafts cracking at the collar above the no1 piston? mine was cracked in two spots, went to pickapart and all of the ones i pulled out were cracked in the same way. Anyone know why this happens? I ended up buying one from calminitrucks for 50 bucks.
I'm also curious about the pcv valve...I dont like the mess from the crankcase gases and I'm considering getting a breather filter or something and swap it back when I'm getting it smogged. anyone have any input?
Nov 14, 2011 | 10:06 AM
#16
Contributing Member
Joined: Apr 2006
Posts: 4,787
Likes: 36
From: TENN Native Languishing in Virginia
Stay with the stock PCV setup. One thing you CAN do is install a canister between the driver side valve cover hose & intake hose to catch any liquids that might come through. The residue in the intake happens with ALL fuel injected engines as there is no fuel in the early intake to wash the goo away. It only comes in at the injector by the intake valve. I've not determined a good way to combat this other than using Seafoam occasionally. A breather will generally not generate sufficient (ANY, actually) vacuum to maintain a positive crankcase ventilation. However, I was always curious why there is a PCV valve on the passenger side valve cover but not the driver side....seems they should be go to the same intake position via one hose with a splitter....anyone know?
Nov 14, 2011 | 12:28 PM
#17
Thread Starter
Registered User
Joined: Aug 2011
Posts: 77
Likes: 0
From: Indio California
Awesome! I ended up breaking the damn hose trying to pull out the old PCV valve, so...I will fab one up and post a photo. I dont understand why automotive manufacturers dont design things like that to help keep engines cleaner.
 Nov 16, 2011 | 08:45 AM
#20
Registered User
Joined: Sep 2005
Posts: 2,074
Likes: 1
From: Binghamton, NY
Ok well...not much feedback like I had hoped for but heres an update...I got my heads back from the shop a few days ago, they installed a helicoil for 10 bucks, yay! I attempted to install both heads at the same time...didnt work, scratched a gasket and a new one is being delivered soon(found one for 15 bucks rather than 60 from autozone...gotta love deals on the web! luckily the heads surface is not scratched I installed the passenger side with the exhaust crossover. should be easier to get the driverside head on and bolt it to the exhaust no prob. everything else should be a breeze.
So whats up with the camshafts cracking at the collar above the no1 piston? mine was cracked in two spots, went to pickapart and all of the ones i pulled out were cracked in the same way. Anyone know why this happens? I ended up buying one from calminitrucks for 50 bucks.
I'm also curious about the pcv valve...I dont like the mess from the crankcase gases and I'm considering getting a breather filter or something and swap it back when I'm getting it smogged. anyone have any input?
I installed the passenger side with the exhaust crossover. should be easier to get the driverside head on and bolt it to the exhaust no prob. everything else should be a breeze. So whats up with the camshafts cracking at the collar above the no1 piston? mine was cracked in two spots, went to pickapart and all of the ones i pulled out were cracked in the same way. Anyone know why this happens? I ended up buying one from calminitrucks for 50 bucks.
I'm also curious about the pcv valve...I dont like the mess from the crankcase gases and I'm considering getting a breather filter or something and swap it back when I'm getting it smogged. anyone have any input?
James


