
BEGINNER'S 22re Timing Chain Failure / replacement / head gasket replacement
 Dec 28, 2010 | 07:44 PM
#122
Registered User
Joined: Apr 2009
Posts: 5,592
Likes: 24
From: Dixon, Ca
Wow this is a saver. I too was in the same boat. I had to pull the head after discovering IK on the inside of the oil filler cap, and then busting off a spark plug in # 4 cyl. Well i never thought I could do it on my own. I did with help from here, via pics and advice. I love this place. Oh and 92 did you change your fuel filter?
Dec 28, 2010 | 08:12 PM
#123
Registered User
Joined: Jan 2010
Posts: 1,803
Likes: 14
From: Bryan Tx,
Funny.... I never stopped to read this since we did ours at the same time and shared notes along the way, but you really have done a wonderful job with this thread. Could you imagine how much easier it would have been for us to have a thread this detailed? Nice job Jerry. This is going to help a lot of people.
Dec 29, 2010 | 01:45 AM
#124
Thread Starter
YotaTech Milestone-Two Millionth Post
Joined: Jan 2009
Posts: 12,009
Likes: 122
From: Northeast Pennsylvania
Wow this is a saver. I too was in the same boat. I had to pull the head after discovering IK on the inside of the oil filler cap, and then busting off a spark plug in # 4 cyl. Well i never thought I could do it on my own. I did with help from here, via pics and advice. I love this place. Oh and 92 did you change your fuel filter?
no TEUF...I didn't.
yeh...I couldn't imagine trying to do this kinda stuff without YOTATECH.
Dec 29, 2010 | 01:47 AM
#125
Thread Starter
YotaTech Milestone-Two Millionth Post
Joined: Jan 2009
Posts: 12,009
Likes: 122
From: Northeast Pennsylvania
Funny.... I never stopped to read this since we did ours at the same time and shared notes along the way, but you really have done a wonderful job with this thread. Could you imagine how much easier it would have been for us to have a thread this detailed? Nice job Jerry. This is going to help a lot of people.
Rob...
I had said several times at the start in my original thread, I think, that I needed, we needed , a set of instructions that starts off at "open the hood" and details it every step of the way. I'm hoping I accomplished something close to that here.
 Awesome thread!!! Gunna come in handy during my rebuild.... Subscribed!!! lol
  Jan 16, 2011 | 04:48 PM
#128
Registered User
Joined: Aug 2008
Posts: 1,068
Likes: 4
From: Calgary, AB
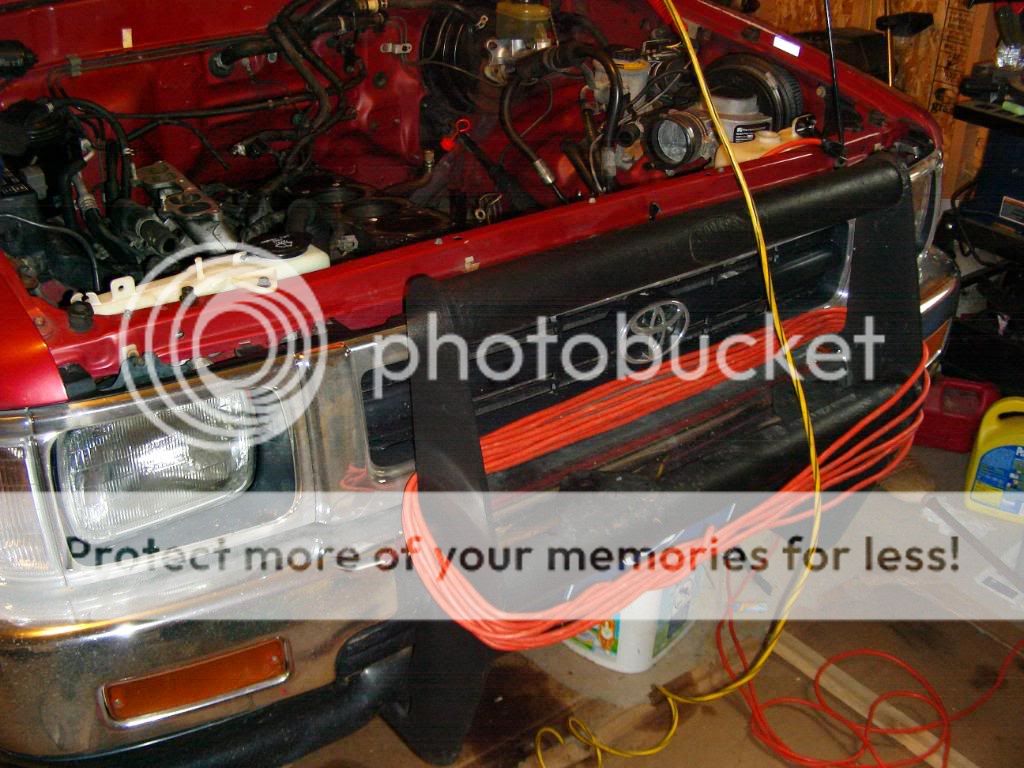
Nice write-up. It looks like you had a heck of a lot of trouble with the crank pulley bolt. I'll give you and any readers who may have issues a little hint. As you've found out it can be a real pain with an auto, or if you have a motor out of the car.
What I do, it to first put the motor at bottom dead center for #1 cylinder. I usually just stick a welding rod, or thin screwdriver in to the spark plug hole, and watch until it bottoms out, and starts coming back up.
Take some plastic feeder line from a weed whacker. The thickest stuff is about 1/4" in diameter, and is usually orange. This works best. You can get it at any hardware store in a big roll for a few bucks. Feed a few feet of this into the cylinder through the spark-plug hole, making sure to leave a bit sticking out so you can pull on it later.
Put a socket on the pulley bolt, and spin the motor counter-clockwise. As the piston comes up, it will eventually try to compress the plastic line, and bind the motor. Now, you can throw your big breaker bar on the bolt, and crack it loose no problem.
Once the bolt is loose, crank the motor slightly clockwise, and pull the line out of the cylinder. You're done.
The plastic line is soft enough that it will not damage any surfaces inside the cylinder, yet it will displace enough volunme within the cylinder to securely bind the motor, and prevent it from spinning. I've taken off lots of pulley bolts with this method, and it works great.
Hope it helps.
Edit: Another quick suggestion, while you have everything apart anyways, spend the extra 100 bucks, and get a performace cam for the motor. It's the best time to install it when the top end is all apart.
Last edited by annoyingrob; Jan 16, 2011 at 04:52 PM.
Jan 16, 2011 | 04:58 PM
#129
Thread Starter
YotaTech Milestone-Two Millionth Post
Joined: Jan 2009
Posts: 12,009
Likes: 122
From: Northeast Pennsylvania
i saw a similar hint somewhere about feeding some rope in the hole as well.
as far as the cam, absolutely the right time and place to so it. i chose to not upgrade, no regrets. was always happy or at least satisfied with my motor and know every nuance of it.....how much i can haul, how fast i can merge, what my mpg's should be.
but certainly, i won't argue, the performance gains are well documented with the cam change.
Feb 13, 2011 | 09:53 AM
#130

Registered User
Joined: Feb 2011
Posts: 4
Likes: 0
here's the tool you are supposed to use on an AUTOMATIC transmission


good luck finding that...
so i came up with my own way of doing this job....
NOPE this isn't right!!!!

so i dug into my bag of gear from when i was in the fire department / rescue / medic unit days and we used to go rappelling and stuff like that...
about a 20 foot piece of webbing

wrapped around a pad intended to put under a carpet to keep it from sliding (see what i'm getting at?)
tied off to the driver's side frame

and looped around a few times and anchored elsewhere...in my case, my push bar

and then using a 6-point socket and a breaker bar.....you get this...
whoops!


this S.O.B. is on there better than i thought......so that's when i bought a real breaker bar (1/2'' drive) and a 3 foot piece of black pipe and a 6-point, impact socket from SEARS.
all this for this little bolt

and now with the pulley securely held still, the right tools and some assistance from my son to hold the hood up because i was sure i was going to be knocked unconscious by knocking the hood prop out and smashing my head.....with a little effort and alot of leverage, "click" it was done...
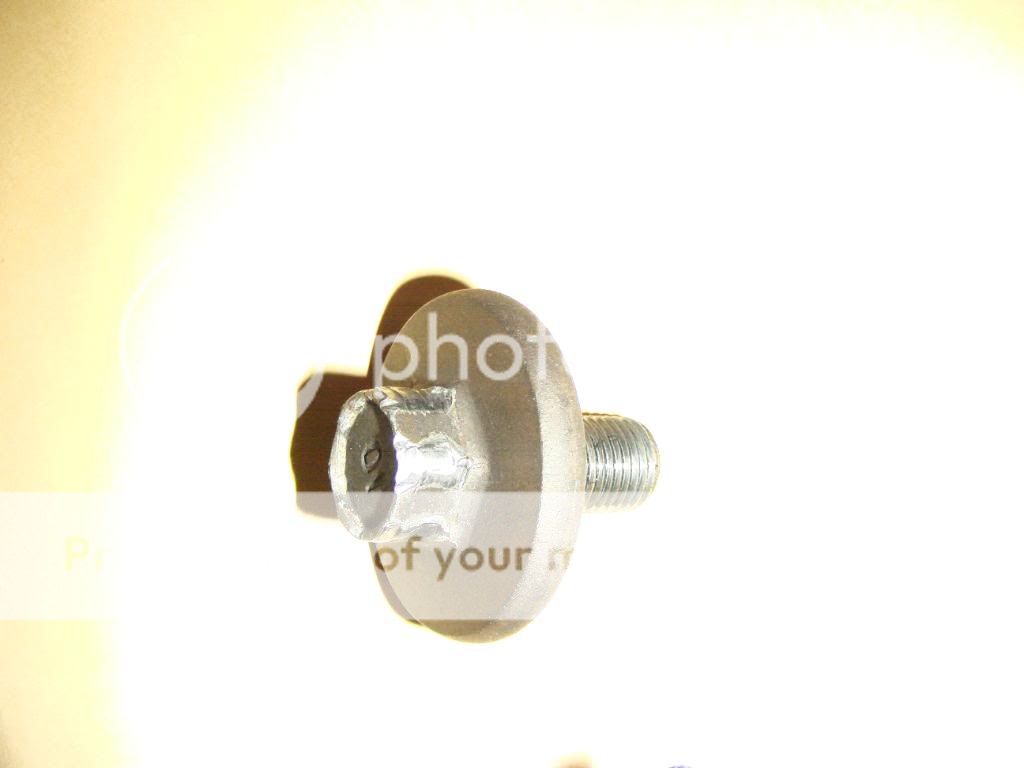
Is this the best way to do it.....probably not....but it did the trick for me and same trick in reverse to get the bolt tight again for reassembly. i read several times about the "tap the starter" trick but was nervous to try that....i like to figure stuff out myself too....so i was quite proud i came up with this way of doing it.
good luck finding that...
so i came up with my own way of doing this job....
NOPE this isn't right!!!!
so i dug into my bag of gear from when i was in the fire department / rescue / medic unit days and we used to go rappelling and stuff like that...
about a 20 foot piece of webbing
wrapped around a pad intended to put under a carpet to keep it from sliding (see what i'm getting at?)
tied off to the driver's side frame
and looped around a few times and anchored elsewhere...in my case, my push bar
and then using a 6-point socket and a breaker bar.....you get this...
whoops!
this S.O.B. is on there better than i thought......so that's when i bought a real breaker bar (1/2'' drive) and a 3 foot piece of black pipe and a 6-point, impact socket from SEARS.
all this for this little bolt
and now with the pulley securely held still, the right tools and some assistance from my son to hold the hood up because i was sure i was going to be knocked unconscious by knocking the hood prop out and smashing my head.....with a little effort and alot of leverage, "click" it was done...
Is this the best way to do it.....probably not....but it did the trick for me and same trick in reverse to get the bolt tight again for reassembly. i read several times about the "tap the starter" trick but was nervous to try that....i like to figure stuff out myself too....so i was quite proud i came up with this way of doing it.
Mar 11, 2011 | 05:02 PM
#131
Registered User
Joined: May 2010
Posts: 96
Likes: 0
From: Humboldt, CA
Wishing I had the resources and time like you guys to take out my whole engine and just fix everything wrong with it. It's so hard working with it in the engine bay. Currently replacing the manifold gaskets and such. The lower part is off but still in the bay because of the wiring harness. Super pissed right now...btw this thread is lovely and helps out a lot with locating stuff and such.
Mar 11, 2011 | 06:15 PM
#132
Registered User
Joined: Jul 2009
Posts: 319
Likes: 0
From: Denver, Colorado
Wishing I had the resources and time like you guys to take out my whole engine and just fix everything wrong with it. It's so hard working with it in the engine bay. Currently replacing the manifold gaskets and such. The lower part is off but still in the bay because of the wiring harness. Super pissed right now...btw this thread is lovely and helps out a lot with locating stuff and such.
 Mar 11, 2011 | 06:32 PM
#133
Registered User
Joined: May 2010
Posts: 96
Likes: 0
From: Humboldt, CA
Mar 12, 2011 | 07:02 AM
#135
Registered User
Joined: Jun 2009
Posts: 63
Likes: 0
From: Los Angeles, Ca
Wishing I had the resources and time like you guys to take out my whole engine and just fix everything wrong with it. It's so hard working with it in the engine bay. Currently replacing the manifold gaskets and such. The lower part is off but still in the bay because of the wiring harness. Super pissed right now...btw this thread is lovely and helps out a lot with locating stuff and such.
I was in the same spot as you last week, and pulled the wiring harness after tryin to clean the lower EFI that was still in the bay. Pulled the wire harness, and was able to remove and clean the lower EFI, and bolt it to the head and install it as one unit back to the block.
 Mar 15, 2011 | 05:14 PM
#137
Thread Starter
YotaTech Milestone-Two Millionth Post
Joined: Jan 2009
Posts: 12,009
Likes: 122
From: Northeast Pennsylvania
the night it failed, the 2nd time (it happened twice....if you read the 1st post in THREAD "A"...the whole story is there), the noise did not go away. i drove about 4 or 5 miles for pizza and on the way home the temp started going up and the the truck just shut off......in other words....that time it was fast.


