
Another 88 rebuild/questions thread (in Hawaii)
 Mar 25, 2010 | 01:48 PM
#148
Thread Starter
Registered User
Joined: Jul 2005
Posts: 195
Likes: 0
From: Currently Hilo Hawaii, Saipan 670 Is Home
no can complete. diff is blocking the socket wrench. i need that combo wrench now. shlajl;kfj! noone is responding to texts so now i gotta walk. yay me.
Mar 25, 2010 | 04:24 PM
#149
Thread Starter
Registered User
Joined: Jul 2005
Posts: 195
Likes: 0
From: Currently Hilo Hawaii, Saipan 670 Is Home
back from sears. spent 13 bucks on a single 6 point 17mm combo wrench! damn man. I also got a gasket scraper. Then went to home depot and got a razor scraper and crescent wrench for the knock sensor. I had a spark of genuis while in home depot and picked up some sort of puller device. I noticed an eyelet hook thing on the celing and decided that hoisting the head up from there would be great since I need the head to hover while feeding the wires through the lower intake manifold.
I'm gonna try this 17 mm combo wrench but I know it's gonna be hard without the cheater bar
I'm gonna try this 17 mm combo wrench but I know it's gonna be hard without the cheater bar
Mar 25, 2010 | 04:36 PM
#151

Registered User
Joined: Jan 2009
Posts: 175
Likes: 0
I think he got naked again..... chelu, put your clothes back on and try this. if you are using the box end on the nut/bolt, put another box end on the open end side of the 17mm wrench and use that as your cheater bar.....
 Mar 25, 2010 | 07:00 PM
#154
Thread Starter
Registered User
Joined: Jul 2005
Posts: 195
Likes: 0
From: Currently Hilo Hawaii, Saipan 670 Is Home
Backing up heres the break down:
I woke up and read the thread (not naked) then went to lumpys page and got naked. I'm just joking, For the record: I Was NEVER naked while on yotatech.
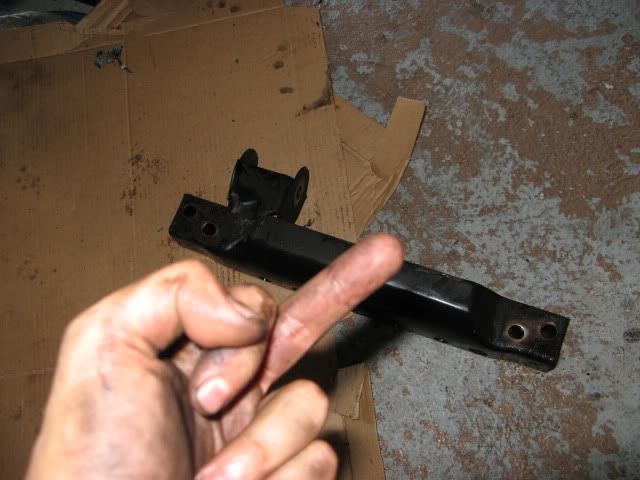
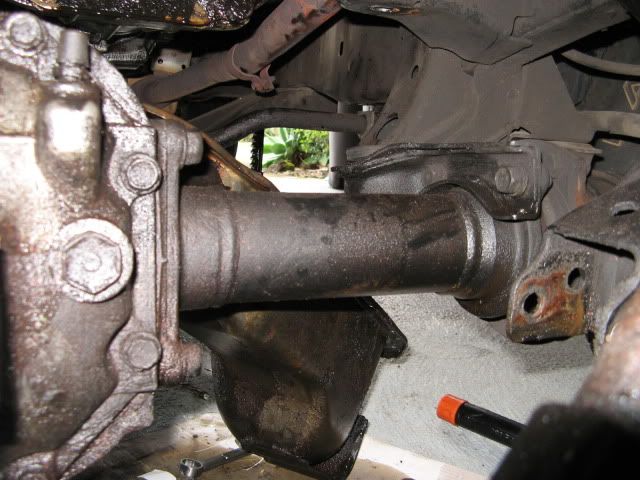
Anyways, I got working early and spent atleast an hour and a half trying to get the front diff crossmember off. I got the two driver side bolts off using a creative cheater bar-socket wrench trick. I would get the socket wrench in place the angle the cheater bar in then get enough leverage to move it like one click. I managed to get both off and looked at the passenger side. No bueno. The diff is too close to the bolt so only a combo wrench could fit.
My cousin picked me up and we went to sears and waited for atleast 40 mins to get someone to open the display case. I was | | close to getting this magnetic pat that holds tool and stuff but decided against it since that's a luxury. After get my wrench and gasket scraper (previous one which uses razor blades scared me enough times to be super glued shut. Which inhibits blade change...) then went to home depot to get a pulley and rope but got talked into getting a Maasdam "pow'r-pull" which is safer than having my roommate hold a rope. While there I got more razor blades.
Moving along My cousin and I started on the two passenger side bolts. The first trick we tried was using the open end on the bolt (diff was too close to allow the closed end to slip over) and using the breaker bar to leverage the wrench against the crossmember. That worked till the nut was in such a position that we had no leverage. The next trick did work:
For this next trick you will need two people.
With the two people at opposite ends of the truck (north-south) have one person hold the wrench while the second hits the wrench. It worked like a charm and I couldn't be happier.
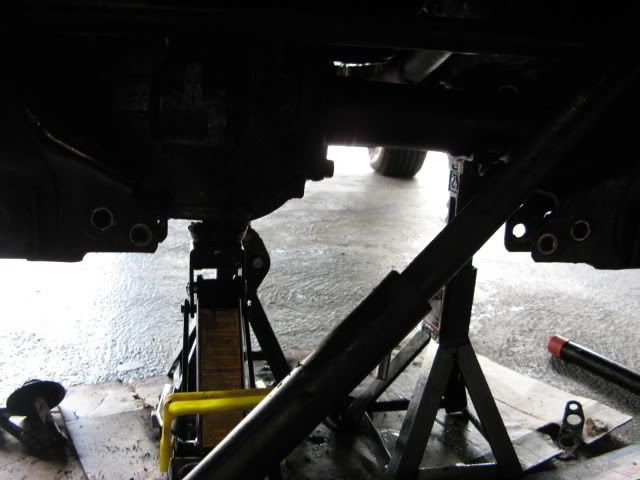
After we got the bolts off, a couple swings of the good old (new in my case) claw hammer and the Mother*&$&#*)@ crossmember came off
I had to massage the diff. for a bit before it finally hung low enough to work the pan out.
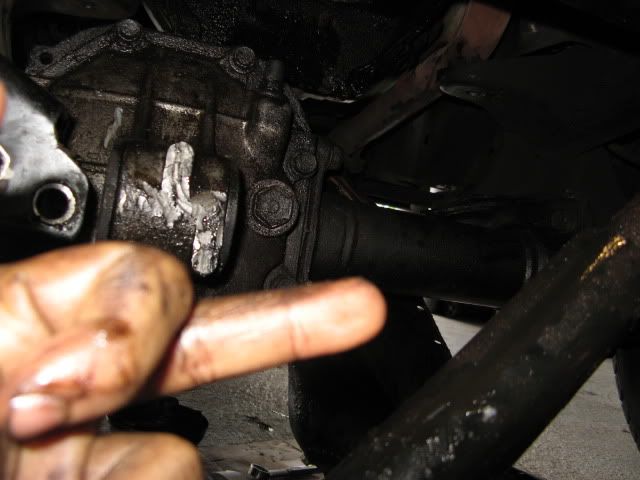
But wait! the pan won't come off! I massaged and massaged and no happy ending... Turns out there are FOUR bolts that hold the pick up in place
Here is the one I missed:
It is closest to the crank.
After I got that off the pan dropped and I celebrated.
you can see it in the corner
What goodies did I find?
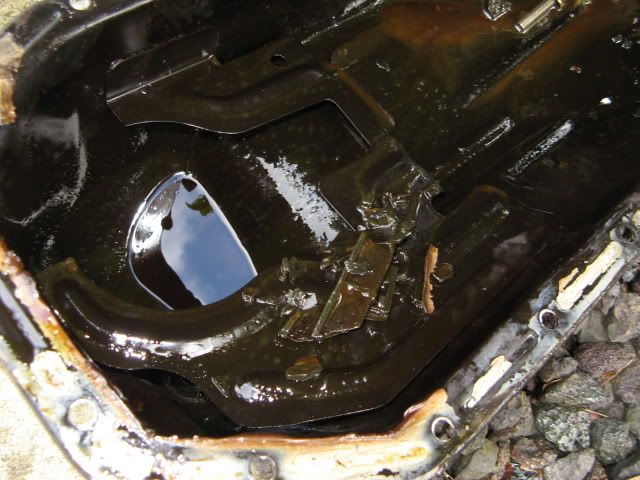

So I cleaned the pan up and removed most of the gasket stuff left over. The strainer was pretty good so it only took a bit of brake cleaner blasting.

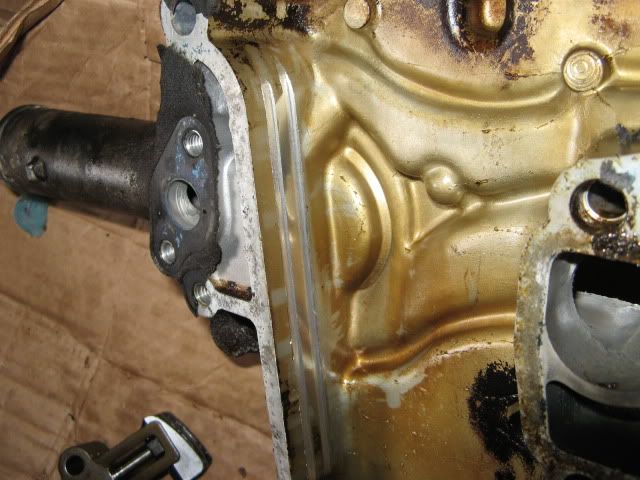
For reference here is my guide and tensioner. I am glad I got to it before I ate through.
That's all for today. Christ it was long but I feel like a little bit confidence came back.
For tomorrow:
- Clean gasket remains on bottom of block
- Clean gasket remains on head
- Clean gasket remains on top of block.
Maybe:
- Get head back on.
- I read somewhere that you gotta put the head on first in order to properly set up
the timing components. Please correct me if I'm wrong.
Quite a day today got the crossmember off and oil pan and got three new cuts.
I woke up and read the thread (not naked) then went to lumpys page and got naked. I'm just joking, For the record: I Was NEVER naked while on yotatech.
Anyways, I got working early and spent atleast an hour and a half trying to get the front diff crossmember off. I got the two driver side bolts off using a creative cheater bar-socket wrench trick. I would get the socket wrench in place the angle the cheater bar in then get enough leverage to move it like one click. I managed to get both off and looked at the passenger side. No bueno. The diff is too close to the bolt so only a combo wrench could fit.
My cousin picked me up and we went to sears and waited for atleast 40 mins to get someone to open the display case. I was | | close to getting this magnetic pat that holds tool and stuff but decided against it since that's a luxury. After get my wrench and gasket scraper (previous one which uses razor blades scared me enough times to be super glued shut. Which inhibits blade change...) then went to home depot to get a pulley and rope but got talked into getting a Maasdam "pow'r-pull" which is safer than having my roommate hold a rope. While there I got more razor blades.
Moving along My cousin and I started on the two passenger side bolts. The first trick we tried was using the open end on the bolt (diff was too close to allow the closed end to slip over) and using the breaker bar to leverage the wrench against the crossmember. That worked till the nut was in such a position that we had no leverage. The next trick did work:
For this next trick you will need two people.
With the two people at opposite ends of the truck (north-south) have one person hold the wrench while the second hits the wrench. It worked like a charm and I couldn't be happier.
After we got the bolts off, a couple swings of the good old (new in my case) claw hammer and the Mother*&$&#*)@ crossmember came off
I had to massage the diff. for a bit before it finally hung low enough to work the pan out.
But wait! the pan won't come off! I massaged and massaged and no happy ending... Turns out there are FOUR bolts that hold the pick up in place
Here is the one I missed:
It is closest to the crank.
After I got that off the pan dropped and I celebrated.
you can see it in the corner
What goodies did I find?
So I cleaned the pan up and removed most of the gasket stuff left over. The strainer was pretty good so it only took a bit of brake cleaner blasting.
For reference here is my guide and tensioner. I am glad I got to it before I ate through.
That's all for today. Christ it was long but I feel like a little bit confidence came back.
For tomorrow:
- Clean gasket remains on bottom of block
- Clean gasket remains on head
- Clean gasket remains on top of block.
Maybe:
- Get head back on.
- I read somewhere that you gotta put the head on first in order to properly set up
the timing components. Please correct me if I'm wrong.
Quite a day today got the crossmember off and oil pan and got three new cuts.
Mar 25, 2010 | 07:28 PM
#156

Registered User
Joined: May 2009
Posts: 586
Likes: 2
From: Arizona
Your engine is amazingly clean inside. Good thing you pulled the pan to clean out the guide parts.
When you put the oil pickup tube back on, don't forget the gasket. There's only one. It goes under the tube flange that takes 2 bolts.
Re: head or cover first, take your pick. There are pros and cons both ways. I ended up installing the head first. Either way, put the oil pan on after the cover.
When you put the oil pickup tube back on, don't forget the gasket. There's only one. It goes under the tube flange that takes 2 bolts.
Re: head or cover first, take your pick. There are pros and cons both ways. I ended up installing the head first. Either way, put the oil pan on after the cover.
Last edited by flyingbrass; Mar 25, 2010 at 07:30 PM.
Mar 25, 2010 | 07:34 PM
#157
Thread Starter
Registered User
Joined: Jul 2005
Posts: 195
Likes: 0
From: Currently Hilo Hawaii, Saipan 670 Is Home
Your engine is amazingly clean inside. Good thing you pulled the pan to clean out the guide parts.
When you put the oil pickup tube back on, don't forget the gasket. There's only one. It goes under the tube flange that takes 2 bolts.
Re: head or cover first, take your pick. There are pros and cons both ways. I ended up installing the head first. Either way, put the oil pan on after the cover.
When you put the oil pickup tube back on, don't forget the gasket. There's only one. It goes under the tube flange that takes 2 bolts.
Re: head or cover first, take your pick. There are pros and cons both ways. I ended up installing the head first. Either way, put the oil pan on after the cover.
Mar 25, 2010 | 07:35 PM
#158
Thread Starter
Registered User
Joined: Jul 2005
Posts: 195
Likes: 0
From: Currently Hilo Hawaii, Saipan 670 Is Home
Oh question to all:
How do you prime the oil pump? Does it need to be done? When I rebuilt my 92 with my cousin he didn't prime it, he just ran the starter for a little bit.
How do you prime the oil pump? Does it need to be done? When I rebuilt my 92 with my cousin he didn't prime it, he just ran the starter for a little bit.
Mar 25, 2010 | 07:58 PM
#159
Registered User
Joined: May 2009
Posts: 586
Likes: 2
From: Arizona
Synthetic oils clean better (due to the esters they contain according to sb5walker, who seems to have done his research -- see this post in particular).
I packed Vaseline into my oil pump gears before putting the pump on. I recommend using something in there to prime.
BTW, a few small dabs of grease help hold the oil pump o-ring in its groove as you install the pump.
I packed Vaseline into my oil pump gears before putting the pump on. I recommend using something in there to prime.
BTW, a few small dabs of grease help hold the oil pump o-ring in its groove as you install the pump.


