
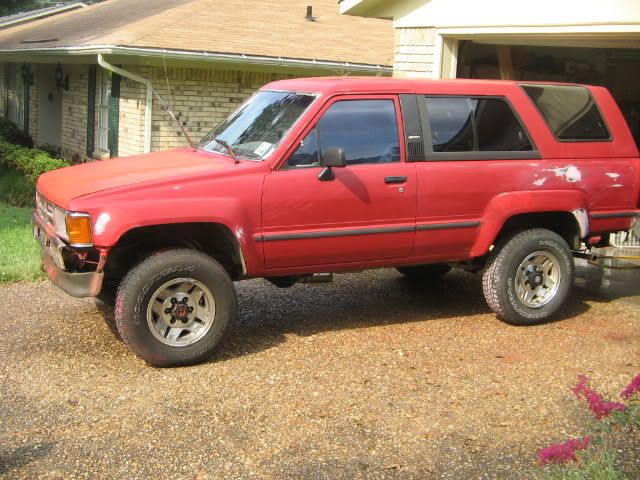
$50.00 paint job
 Aug 23, 2007 | 12:27 PM
#61
Thread Starter
Contributing Member
iTrader: (1)
Joined: Jul 2007
Posts: 1,391
Likes: 1
From: shreveport, La
4hummer, did you have a lot of orange peel on your first couple of coats. my bubbles were the size of pin heads, and got smaller with more oms mixed with the paint. nice job by the way. your motor looks really nice. i am going to order the same color vacuum line. nice job all around. oh, and i think your front bumper looks fine.
Aug 23, 2007 | 12:49 PM
#62
Registered User
Joined: Jul 2004
Posts: 1,969
Likes: 1
From: Canada
No Orange Peel after I perfected the technique... you wan't the paint THIN.
Lot's of layers and wet sanding between every few coats.
The paint should go on with tons of tiny little bubbles that "skate" (for the lack of a better word) across the surface and pop right away.
Best example is this pic: You can see the "skating" or running I'm talking about, and the bubbles that will pop in a couple seconds and level out. If the paint it too thick the bubbles don't pop right away, and create a crater when they dry.
Last edited by 4Hummer; Aug 23, 2007 at 12:53 PM.
Aug 23, 2007 | 04:51 PM
#63
Registered User
Joined: Jul 2006
Posts: 844
Likes: 0
From: Halifax, NS, Canada
another thing to remember is the "roll and tip" method. roll your paint on, wait a minute, and then go over it in the opposing direction with a dry, clean foam brush. that pops the bubbles for you.
the original moparts guy actually suggested tipping with another foam roller, whatever works.
the original moparts guy actually suggested tipping with another foam roller, whatever works.
Aug 23, 2007 | 07:47 PM
#65
Registered User
Joined: Aug 2007
Posts: 3,371
Likes: 3
From: Here in the PNW
you could also try rustoleum spray paint, i did mine like that and it looks great! here are some pics-
the whole truck:

here is a 5" away pic to show the texture, you can't really tell but it's really smooth:

the whole truck:
here is a 5" away pic to show the texture, you can't really tell but it's really smooth:
 Aug 25, 2007 | 05:16 AM
#67
Thread Starter
Contributing Member
iTrader: (1)
Joined: Jul 2007
Posts: 1,391
Likes: 1
From: shreveport, La
here are the pics of the tailgate. i wet sanded with 400 grit last night. i got up early and washed it the went over it with acetone, and then tack ragged it.
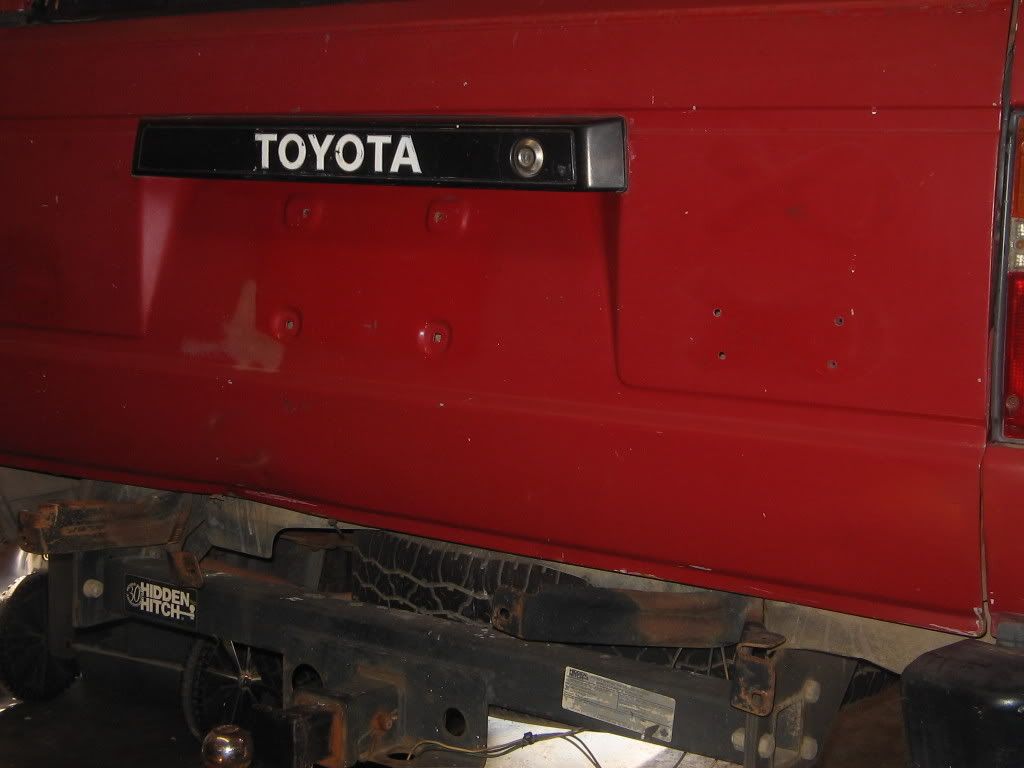
i did not dilute the interlux paint with anything, it is a little thinner than the rustoleum. this coat is straight out of the can. it flowed real well, but for some reason it wanted to bubble up real bad on the right side of the tailgate.
you have to keep your roller loaded up because it wants to dry before you can give it a final roll to knock down any bubbles.. i am going to mix a little o.m.s. with it next time to see if it will flow even better and a take a little longer to dry.
it leveled out much better than the rustoleum and has a better sheen as well. seems to cover the old paint better.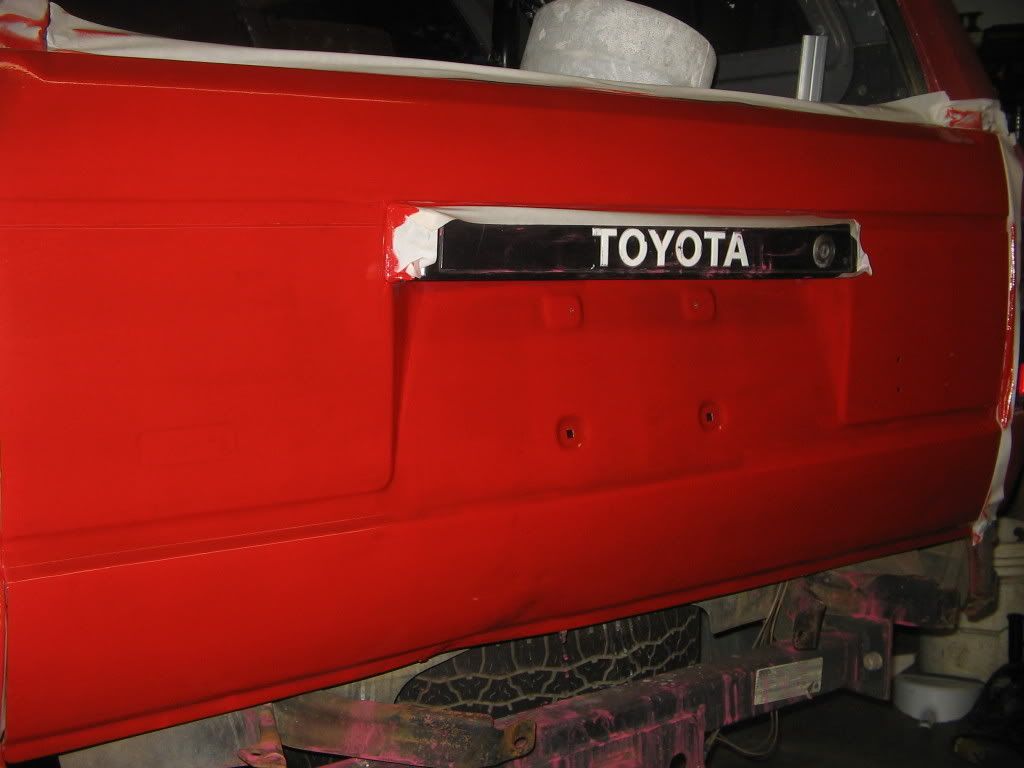
i will post a pic of it when it dries. the interlux is the way to go. my fifty dollar paint job just went up to $100. interlux recommends 2-3 coats, so i am going to guess 1 quart per coat.
 Aug 25, 2007 | 08:58 AM
#69
Thread Starter
Contributing Member
iTrader: (1)
Joined: Jul 2007
Posts: 1,391
Likes: 1
From: shreveport, La
i am just hard headed. it is very red. it is dry know and shines like the sun. i am going to wet sand it tomorrow morning to get what little bit of orange peel out of it, and then put on the second coat. it feels smoother than the rustoleum.
cjm, did you add any o.m.s. to yours?
cjm, did you add any o.m.s. to yours?


 Aug 25, 2007 | 07:44 PM
#74
Registered User
Joined: Aug 2006
Posts: 4,940
Likes: 2
From: Central NJ
i am just hard headed. it is very red. it is dry know and shines like the sun. i am going to wet sand it tomorrow morning to get what little bit of orange peel out of it, and then put on the second coat. it feels smoother than the rustoleum.
cjm, did you add any o.m.s. to yours?
cjm, did you add any o.m.s. to yours?
Aug 31, 2007 | 03:10 PM
#75
Thread Starter
Contributing Member
iTrader: (1)
Joined: Jul 2007
Posts: 1,391
Likes: 1
From: shreveport, La
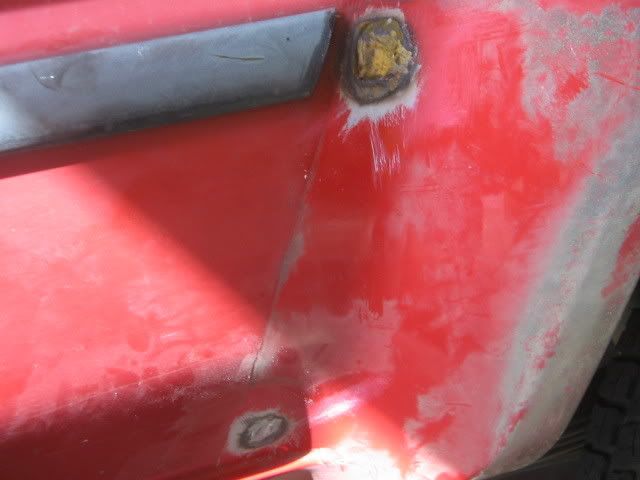
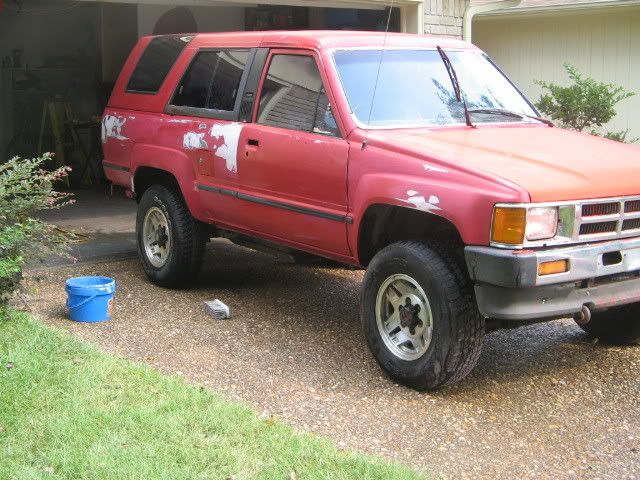
i am going to start rolling paint in the morning. spent last week replacing the rusted panels. spent today sanding and repairing the old bondo the previous owner did, and sanding off those freaking strips. i'll be posting lots of pics tomorrow. by the way, i used a marker to mark areas for bondo. bondo does not stick in areas where there is marker. the bondo would peel right off of those areas, so i sanded and refilled them.
holes from the fender protector that i patched
left side body work
right side body work
holes from the fender protector that i patched
left side body work
right side body work
Sep 1, 2007 | 06:31 AM
#76
Thread Starter
Contributing Member
iTrader: (1)
Joined: Jul 2007
Posts: 1,391
Likes: 1
From: shreveport, La
the first coat of paint is on, and let me say that the results are freaking unbelievable!!!! i rolled the stuff on like i was paint the outside of my house. i have to go run and will post pics along with write up in a couple of hours. damn, i would of never have thought this would turn out so good.....
Sep 1, 2007 | 09:44 AM
#77
Thread Starter
Contributing Member
iTrader: (1)
Joined: Jul 2007
Posts: 1,391
Likes: 1
From: shreveport, La
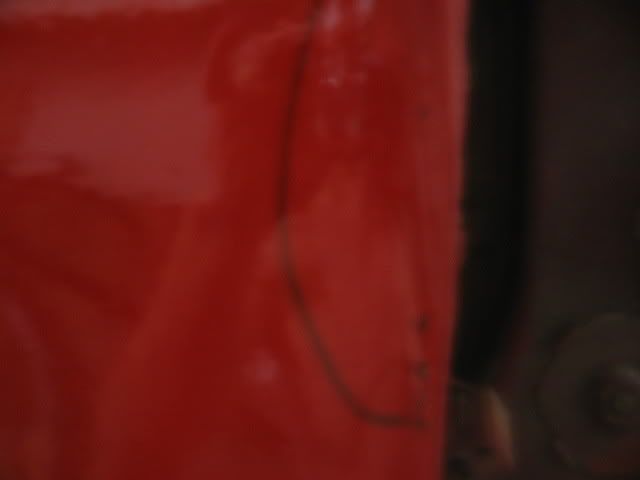
here you can see that the marker bleed thru the paint, and i will have to sand and prime and paint again.
here is a shot from the top when the paint is wet.
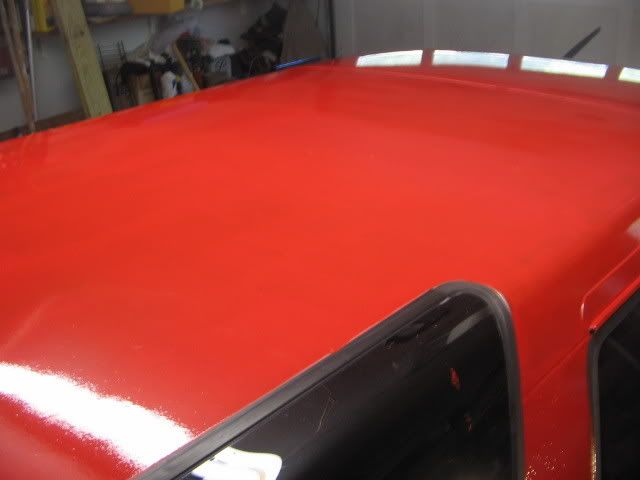
i started rolling on the top being careful to be even and not leaving any lines. then, then i said screw it, and started rolling like i was painting my house. the paint levels very well, if you have any big bubbles roll back over them, and then if they do not go away in a few minutes take a foam brush lightly dipped in paint and hold the handle 90 degrees to the surface and lightly brush the bubbles out , and go slow.
i had a few runs and i was able to take the roller back over them, and roll them out, this was when the paint was almost dry. more pics to come.
here is a shot from the top when the paint is wet.
i started rolling on the top being careful to be even and not leaving any lines. then, then i said screw it, and started rolling like i was painting my house. the paint levels very well, if you have any big bubbles roll back over them, and then if they do not go away in a few minutes take a foam brush lightly dipped in paint and hold the handle 90 degrees to the surface and lightly brush the bubbles out , and go slow.
i had a few runs and i was able to take the roller back over them, and roll them out, this was when the paint was almost dry. more pics to come.
Sep 1, 2007 | 12:57 PM
#79
Thread Starter
Contributing Member
iTrader: (1)
Joined: Jul 2007
Posts: 1,391
Likes: 1
From: shreveport, La
here is a shot of the side. the light in the garage is terrible, so i am going to wait till tomorrow after i put the second coat on and roll it outside and take more pics. very happy so far. this pic does not do it justice.

Last edited by TORTIS; Sep 1, 2007 at 12:58 PM.


