
3vze pull/install w/ trans attached (pics)
 Apr 18, 2006 | 02:12 PM
#1
Thread Starter
Registered User
Joined: Aug 2005
Posts: 2,419
Likes: 8
From: Peoria IL
3vze pull/install w/ trans attached (pics)
This past weekend i finished putting my 3vze (3.0) back in my truck after my mild rebuild. HG, bearings, head surfaced.
see https://www.yotatech.com/forums/f116/my-3-slow-rebuild-70519/ for the motor tare down and build up
see https://www.yotatech.com/forums/f116/3vze-rebuild-update-pics-75914/ for the motor removal
and this tread for some pointers on the install.
NOTE you will HAVE to take the front drive shaft off the front diff. (ask me how i know) I had the assm all worked into place and relized i needed the last little inch that the drive shaft takes up when bolted to the flange.
the setup
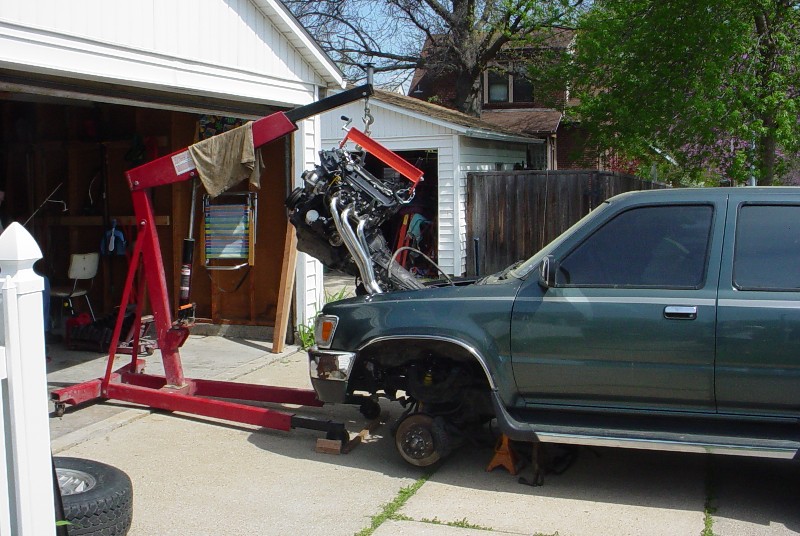
youll need a good amount of overhead height and an engine leveler for shure
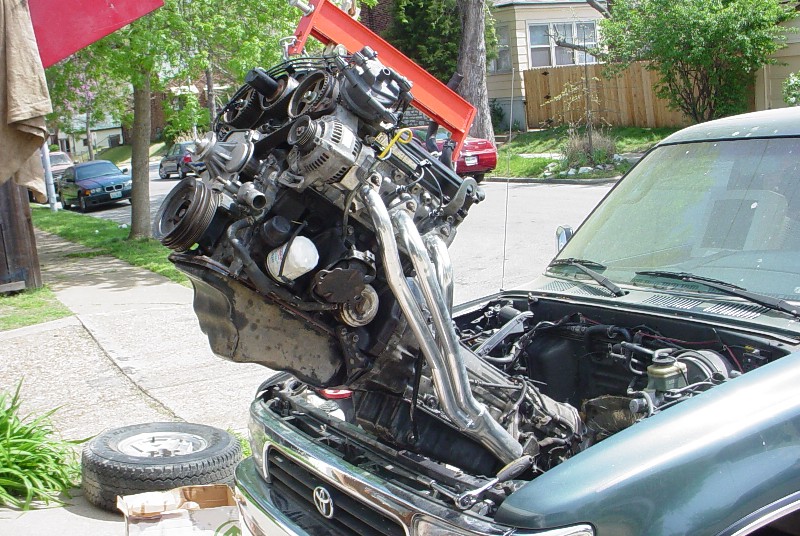
I opted to install just the pass side downey header at the time of the install, i wanted to keep the pass side off for more room to work over there and whatnot. I do belive it would go fine if you had both on.
shortly after the above pic you start to get the crank pully down into the condensor area. youll want to cover the condensor with a piece of plywood as any minor bump and your crushing fins. in my case i brushed against the plywood fairly firmly in order to sqeek things in. had the plywood not been there im shure the condensor would be toast.
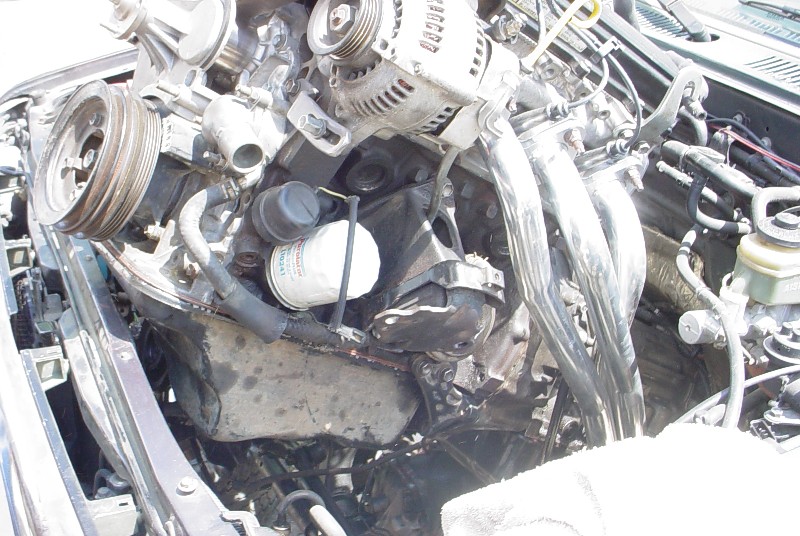
at the same time the above photo was taken i also took the time to hook up all the little wires/sensors that have inline connectors to the auto (a340H) tranny as they are still easy to get to but after this point would become difficult to get to quicly.
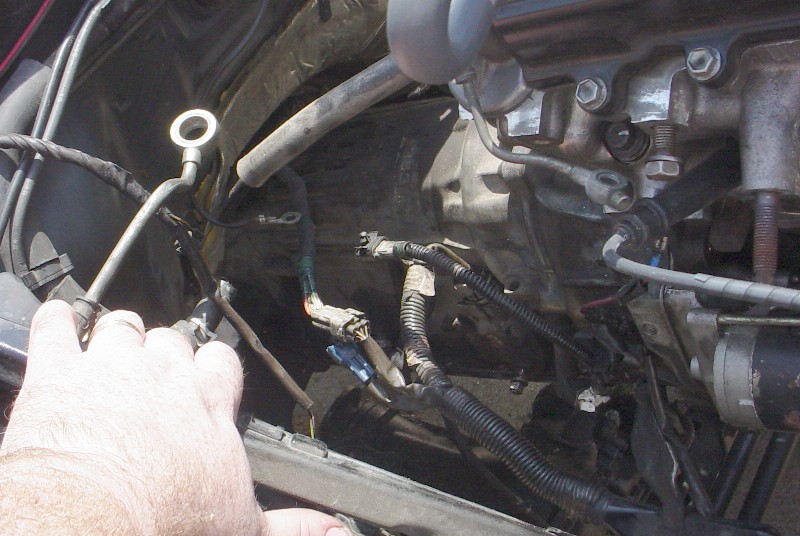
after you have the connectors on the tranny, it takes litterly a min to drop the hoist down, shove it in, and bring the floor jack in to pick up the tranny under the truck to help guid things into place.
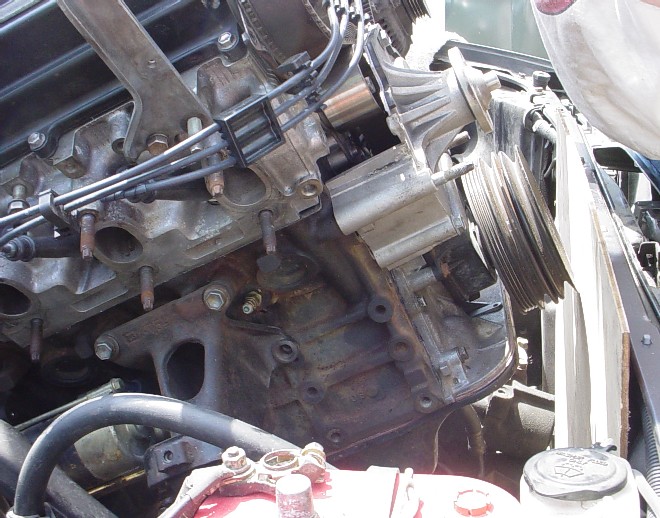
I glided right into the motor mounts almost effortlessly.
Time between start and finsh on dropping the combined unit in was only like 2 hrs but most of that was spent gettign stuff ready. The amount of time jacking aroud with the hoist and motor (getting it in) was only about 20-30 min.

At this point its must a matter of putting all the little wires and hoses on, checking timming and fireing it up! (although this "step" is likely to take the rest of the week working a few hrs a night)
see https://www.yotatech.com/forums/f116/my-3-slow-rebuild-70519/ for the motor tare down and build up
see https://www.yotatech.com/forums/f116/3vze-rebuild-update-pics-75914/ for the motor removal
and this tread for some pointers on the install.
NOTE you will HAVE to take the front drive shaft off the front diff. (ask me how i know) I had the assm all worked into place and relized i needed the last little inch that the drive shaft takes up when bolted to the flange.
the setup
youll need a good amount of overhead height and an engine leveler for shure
I opted to install just the pass side downey header at the time of the install, i wanted to keep the pass side off for more room to work over there and whatnot. I do belive it would go fine if you had both on.
shortly after the above pic you start to get the crank pully down into the condensor area. youll want to cover the condensor with a piece of plywood as any minor bump and your crushing fins. in my case i brushed against the plywood fairly firmly in order to sqeek things in. had the plywood not been there im shure the condensor would be toast.
at the same time the above photo was taken i also took the time to hook up all the little wires/sensors that have inline connectors to the auto (a340H) tranny as they are still easy to get to but after this point would become difficult to get to quicly.
after you have the connectors on the tranny, it takes litterly a min to drop the hoist down, shove it in, and bring the floor jack in to pick up the tranny under the truck to help guid things into place.
I glided right into the motor mounts almost effortlessly.
Time between start and finsh on dropping the combined unit in was only like 2 hrs but most of that was spent gettign stuff ready. The amount of time jacking aroud with the hoist and motor (getting it in) was only about 20-30 min.
At this point its must a matter of putting all the little wires and hoses on, checking timming and fireing it up! (although this "step" is likely to take the rest of the week working a few hrs a night)
Last edited by snap-on; Apr 18, 2006 at 02:15 PM.
Apr 18, 2006 | 02:17 PM
#2
Thread Starter
Registered User
Joined: Aug 2005
Posts: 2,419
Likes: 8
From: Peoria IL
few other notes, the header design of downy vs NWOR is VERY noticable in how they fit in the engine compartment. Ill try to snap a few shots of the diffrance between my truck (NWOR) and the 4runner (downey)
I also used the stock manafold studs, and cut the flanges of my downey headers...
I also used the stock manafold studs, and cut the flanges of my downey headers...


Trending Topics
Apr 18, 2006 | 05:10 PM
#9
Contributing Member
Joined: Aug 2005
Posts: 591
Likes: 2
From: Orange County, California
Originally Posted by snap-on
few other notes, the header design of downy vs NWOR is VERY noticable in how they fit in the engine compartment. Ill try to snap a few shots of the diffrance between my truck (NWOR) and the 4runner (downey)
I also used the stock manafold studs, and cut the flanges of my downey headers...
I also used the stock manafold studs, and cut the flanges of my downey headers...
Apr 19, 2006 | 05:16 AM
#10
Thread Starter
Registered User
Joined: Aug 2005
Posts: 2,419
Likes: 8
From: Peoria IL
Originally Posted by mt_goat
Wow, great job! Did you do that by yourself? Was it hard to get the tranny on with the engine out, did you do it with the engine hanging or what?
It was fairly easy to get the engine on the trans. Easyer than it would have been if it was in the truck thats for shure!
insert part A into slot B
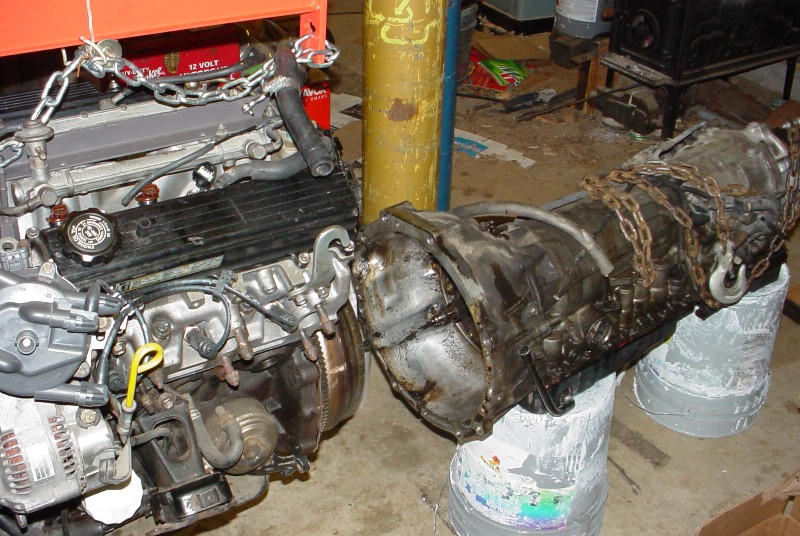
with the engine leveler i was able to match the "pitch" of the trans perfectly the hoist made it easy to match the hight perfectly and the fact that it rolled ment it slipped right in with virutally no effort! (ill set that up for someone else
 )
Apr 19, 2006 | 05:44 AM
)
Apr 19, 2006 | 05:44 AM
#12
Contributing Member
Joined: Nov 2002
Posts: 10,666
Likes: 5
From: Oklahoma State
Originally Posted by snap-on
few other notes, the header design of downy vs NWOR is VERY noticable in how they fit in the engine compartment. Ill try to snap a few shots of the diffrance between my truck (NWOR) and the 4runner (downey)
I also used the stock manafold studs, and cut the flanges of my downey headers...
I also used the stock manafold studs, and cut the flanges of my downey headers...
Apr 19, 2006 | 06:07 AM
#13
Thread Starter
Registered User
Joined: Aug 2005
Posts: 2,419
Likes: 8
From: Peoria IL
Originally Posted by mt_goat
I'd love to see a pic of it clearing the radiator support. Did the leveler do that or was a buddy holding the tranny up? Way to go dude, just like the FSM says to do it.
leveler does that. in the very first picture, thats the height the lift has to be.
with the leveler at the back the asm sits ALMOST level. So its fairly easy to clear the front rad support. once the tail is sitting inside the engine compartment, you just start cranking on the leveler and the tail starts dropping down in the hole. you kinda have to skunch (tecnical term) the lift forward as your doing so but no big deal... at maxium tilt is when i snapped the first pic.
i didnt start leveling it out untill shortly before i took like the 3rd pic.
and finished leveling it out just after i took the 4th pic (and hooked up the connectors)
As of the flanges, i cut them before i bolted it up. The flanges didnt really change shape much after i cut them free. just enough to bairly pinch the cut off wheel which makes things fun... but they bolted on fine.
Apr 19, 2006 | 06:52 AM
#15
Thread Starter
Registered User
Joined: Aug 2005
Posts: 2,419
Likes: 8
From: Peoria IL
Originally Posted by mt_goat
Ok one more question, where did you attach the leveler to the engine? It looks like you didn't use the drivers side hook.
Although ive ment to take a few detail pics of it, i havnt gotten around to doing it.
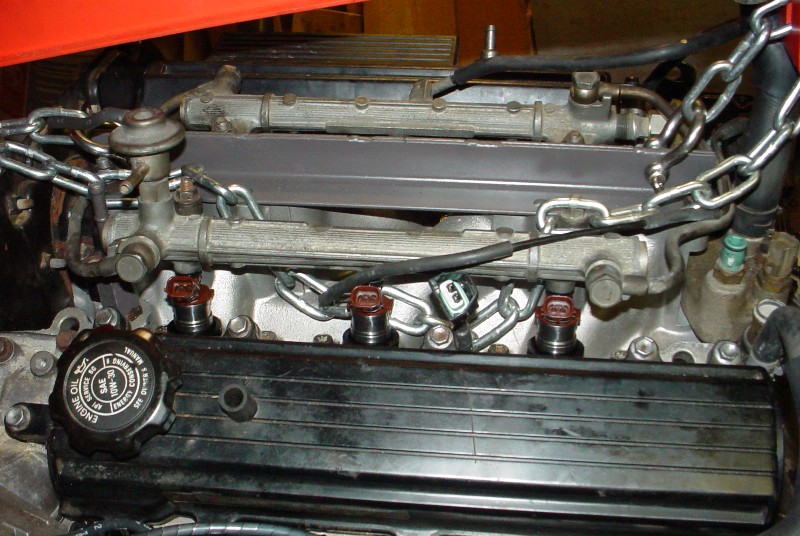
its a custom engine hoist thingie i fabed up. bolts to the top of the lower plenum useing between 2 and all the avliable bolts. I used the two studs and the first 2 bolts. (4 total) then use to small d-rings i picked up at the hardware store.
It allows you to perfectly align the leveler over the centerline of the motor so 1) it hangs level 2) the tilting action of the leveler has the desired effect ... as opposed to being sckewed at some 45deg angle across the top of the motor from the stock 2 hanger points.
Apr 1, 2014 | 07:08 AM
#16
Registered User
Joined: Apr 2014
Posts: 1
Likes: 0
From: Arlington, TX
1990 4runner 3.0 motor swap
I just recently blew a head gasket so I started taking apart the motor, but the further I got into the motor the worse it looked. It has 409k miles so it definitely needs a deep clean and rebuild, but I found a new motor for a good price with a 5 year warranty so I've been leaning towards that. I figured that I'd just pull the old motor and put in the new one and then just rebuild the old one as a hobby for the next couple months or so. I've been looking at some of the pictures posted on here and they've been really helpful.
Thank you
Thank you

Thread
Thread Starter
Forum
Replies
Last Post


