
2JZ-GE + turbo swap
 May 21, 2006 | 02:47 AM
#1
Thread Starter
Contributing Member
Joined: May 2003
Posts: 460
Likes: 0
From: the Netherlands
2JZ-GE + turbo swap UPDATE
Quit some time ago I got a 2JZ-GE from a Lexus as a replacement for my 7M-GE. Thinking this would be a easy swap cause I allready made everything fit for the 7M-GE. I could not have been more wrong.
I have been prepping the engine for a year now (very limeted free time due to my job and family) and found that most components do not fit, are in the wrong place, are never made by toyota etc. etc.
So last year I attempted to change the sump, which is in front of the engine. I have a LC SAS and HP diff, so I quickly found I needed to make a new sump. Rear model now.
OEM sump spaver or bracket or whatever you call this:

My first poor attempt to weld aluminum which has been dipped in oil for 7 years:
This has become the worst piece of crap I ever welded. A bitch to weld and leak after leak. Plus it warped 1/2" over its length. Time for a new one.
This time I made it in steel. The biggest problem was the oil suction tube, which is not connected to the pump directly, but to the frame between the sump and the engineblock. So this had to be build in to the steel sump (normal type like the 3VZ-E), had to be straight and level, plus there an oil seal in there also.
Took me a week or 2 to build this:
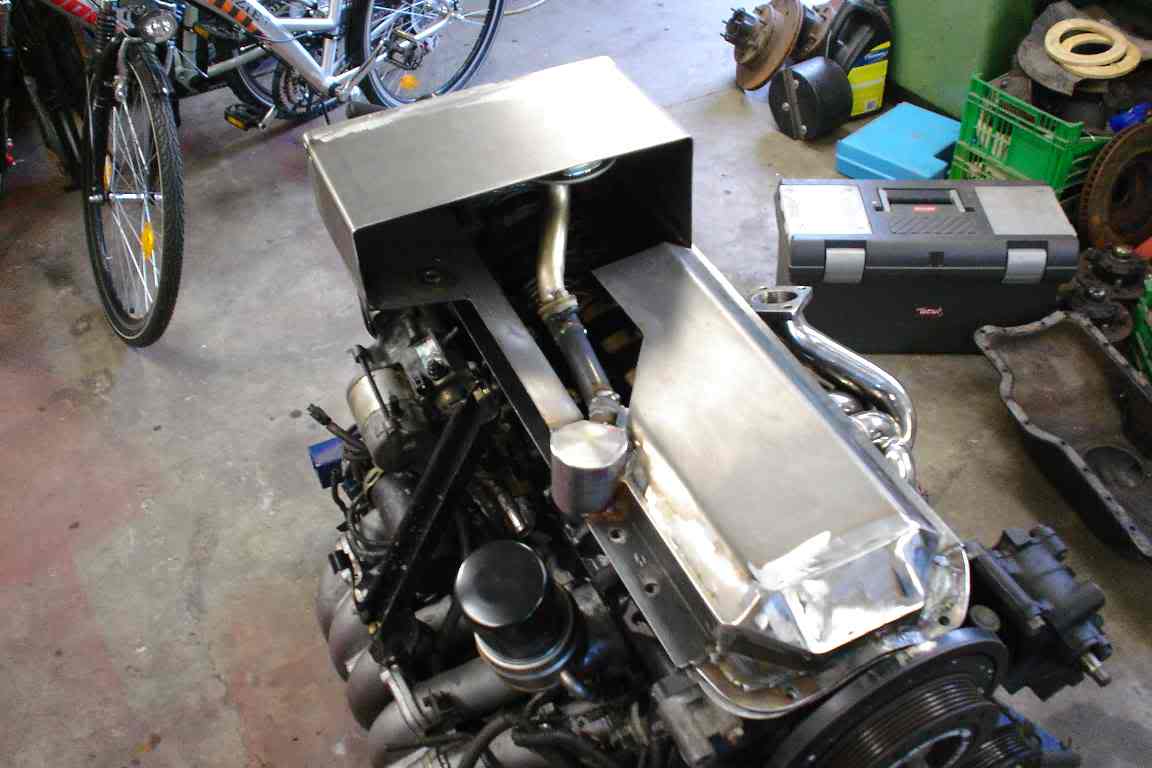
Looks odd, but should fit like a glove. Holds 5.5 liters, like the stock one.
Next I found that the oil filter bracket manifold thingy places the oil filter in the excact same spot as my engine mount.
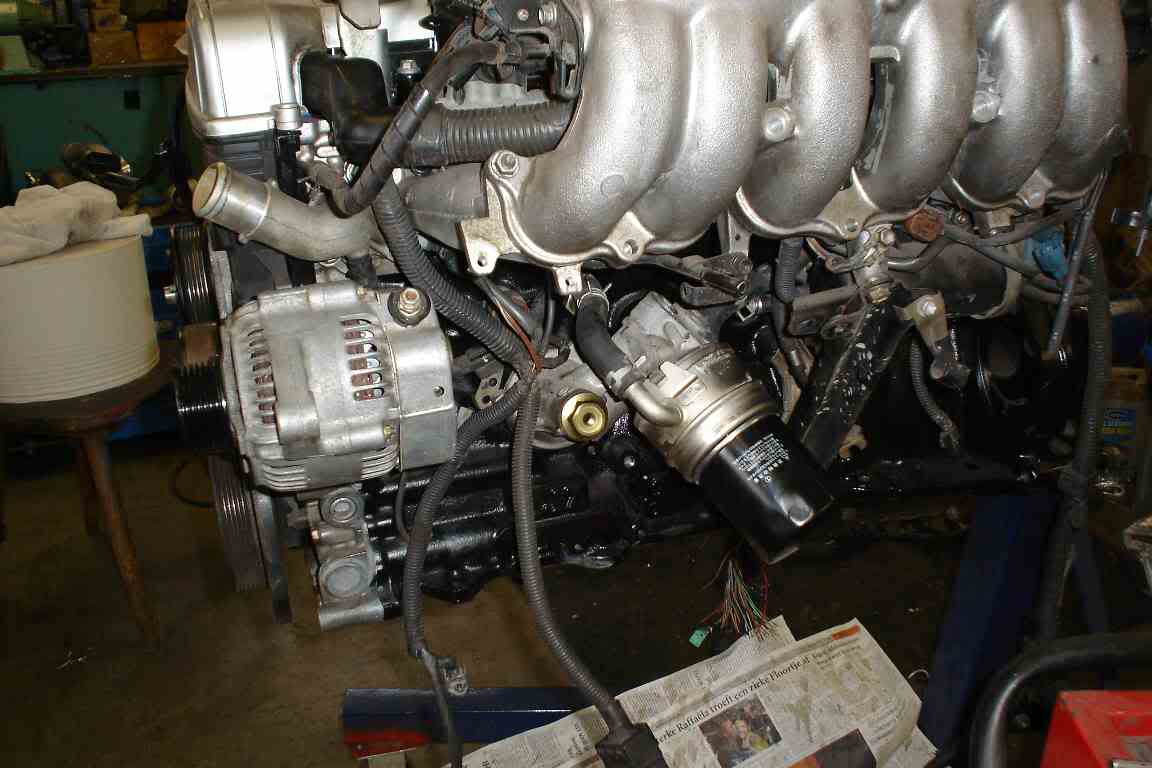
I searched my crap and found that a 7M-GTE model bracket would fit better.
Even the 2JZ-GE oil cooler can be used (internal threads are identical) on the 7M type brachet.
Now the oil filter is placed like this:
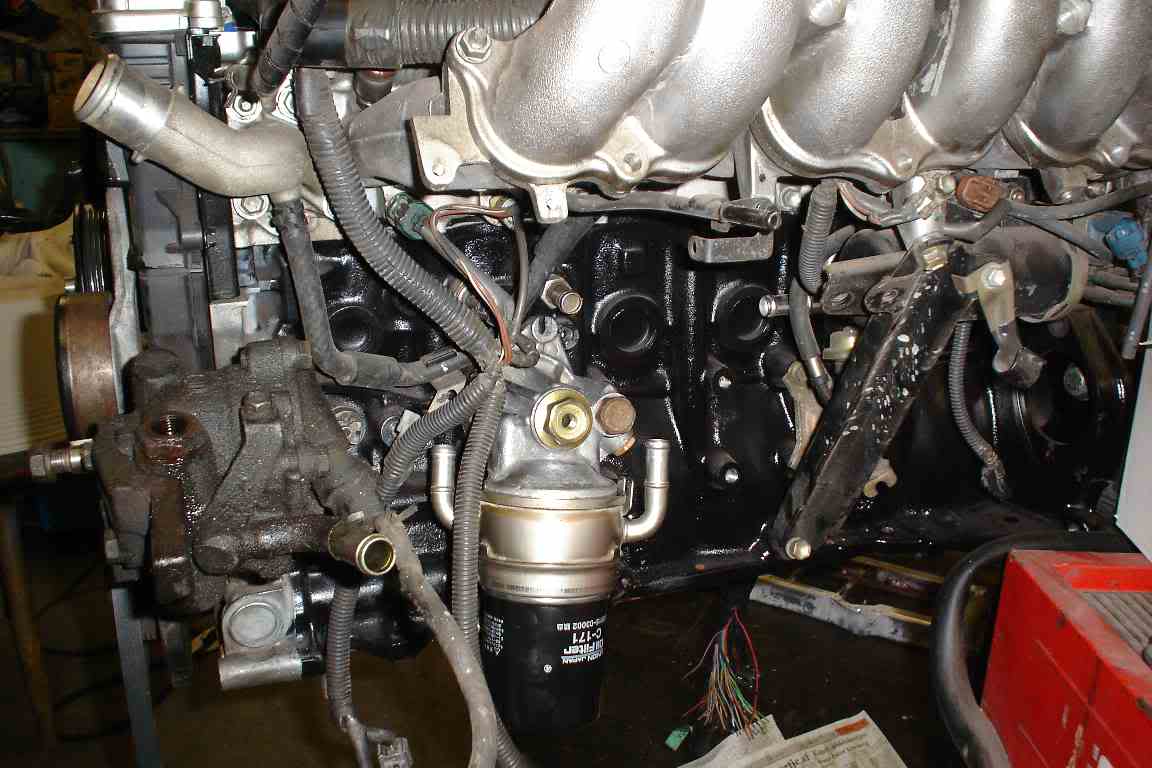
I used a LC80 generator, 7M-GTE steering pump and lost the viscous fan. I even grinded of the stud for more clearance between the radiator. I used the pulleys from the 2JZ series cause the have a wider belt. I neede to make a special collar for fitting the 2JZ pulley on the 7M pump cause the hole was too large. A few new brackets were made from aluminium and the front now looks like this.

I have been prepping the engine for a year now (very limeted free time due to my job and family) and found that most components do not fit, are in the wrong place, are never made by toyota etc. etc.
So last year I attempted to change the sump, which is in front of the engine. I have a LC SAS and HP diff, so I quickly found I needed to make a new sump. Rear model now.
OEM sump spaver or bracket or whatever you call this:
My first poor attempt to weld aluminum which has been dipped in oil for 7 years:
This has become the worst piece of crap I ever welded. A bitch to weld and leak after leak. Plus it warped 1/2" over its length. Time for a new one.
This time I made it in steel. The biggest problem was the oil suction tube, which is not connected to the pump directly, but to the frame between the sump and the engineblock. So this had to be build in to the steel sump (normal type like the 3VZ-E), had to be straight and level, plus there an oil seal in there also.
Took me a week or 2 to build this:
Looks odd, but should fit like a glove. Holds 5.5 liters, like the stock one.
Next I found that the oil filter bracket manifold thingy places the oil filter in the excact same spot as my engine mount.
I searched my crap and found that a 7M-GTE model bracket would fit better.
Even the 2JZ-GE oil cooler can be used (internal threads are identical) on the 7M type brachet.
Now the oil filter is placed like this:
I used a LC80 generator, 7M-GTE steering pump and lost the viscous fan. I even grinded of the stud for more clearance between the radiator. I used the pulleys from the 2JZ series cause the have a wider belt. I neede to make a special collar for fitting the 2JZ pulley on the 7M pump cause the hole was too large. A few new brackets were made from aluminium and the front now looks like this.
Last edited by 4runner4ever; Oct 15, 2006 at 09:55 AM.
May 21, 2006 | 02:52 AM
#2
Thread Starter
Contributing Member
Joined: May 2003
Posts: 460
Likes: 0
From: the Netherlands
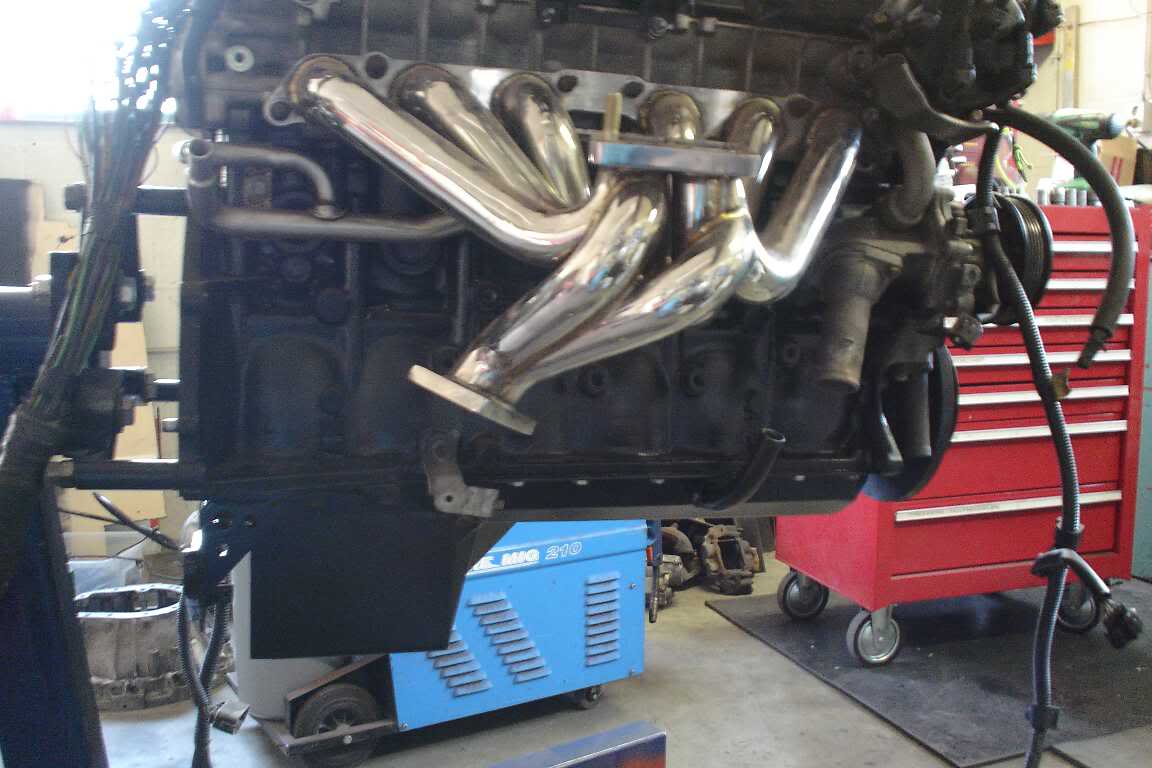
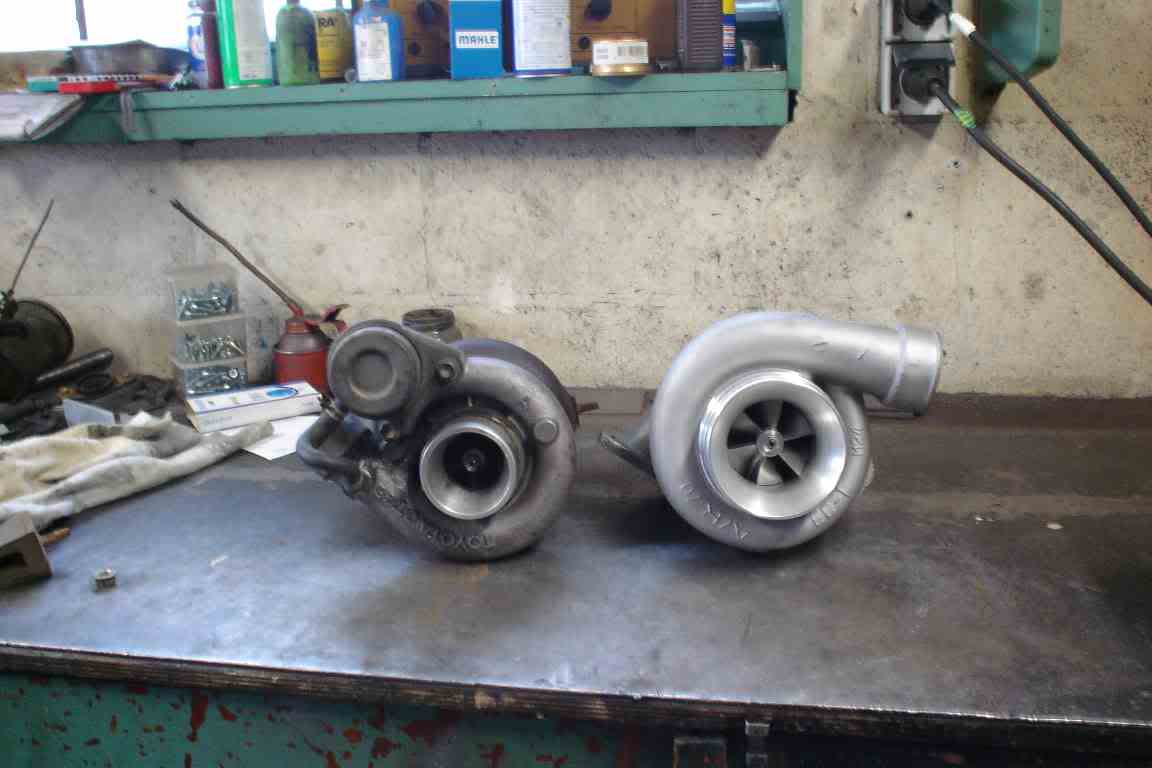
You can also see the turbo and manifold. I still need to rotate the turbo slightly so I need to cut up that new shinny stainless manifold. 
Here's a 7M-GTE turbo compared to my new one:
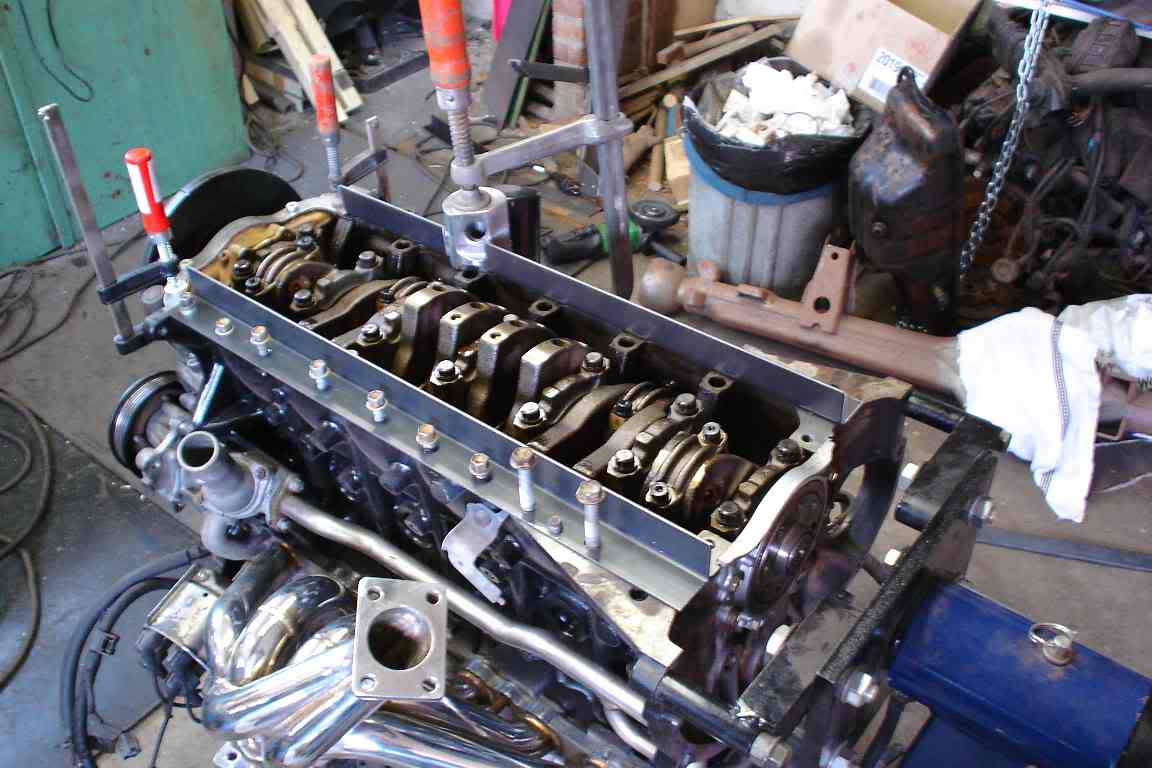
In between all of this I have removed everything from the engine except the head. I now the engine is in excellent shape cause the guy I got it from has swapped in a 2JZ-GTE.
All parts were checked, cleaned, painted, new seal, bearings , plugs, rotor, etc. etc.
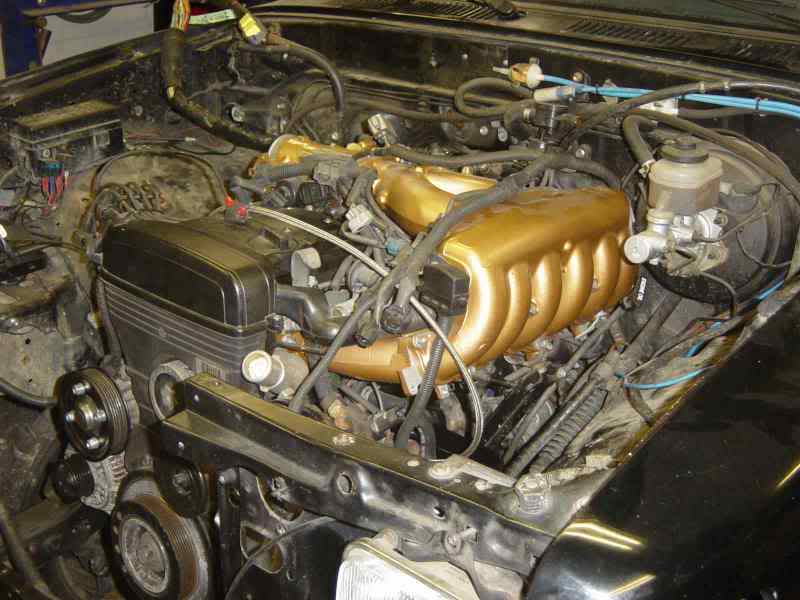
I painted the manifolds bronze for a diffferent look. All other parts are black now.
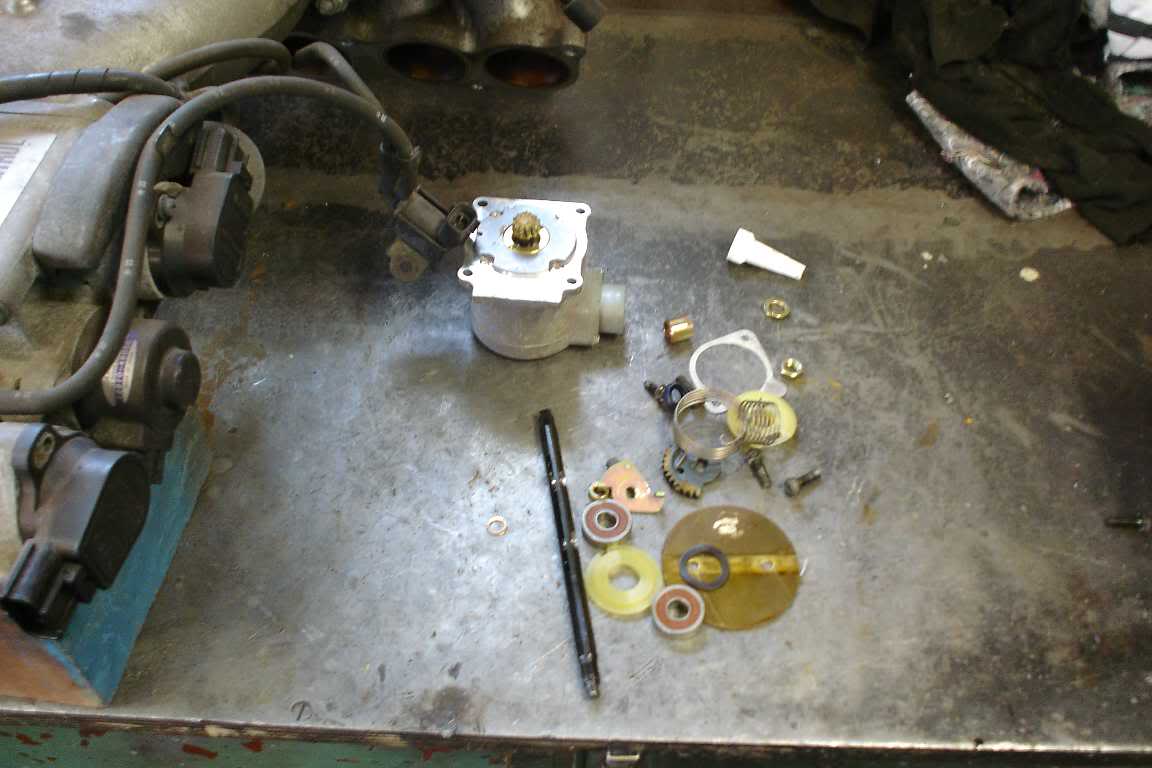
I removed the traction controll valve and servo cause I'm gone use my R150f.
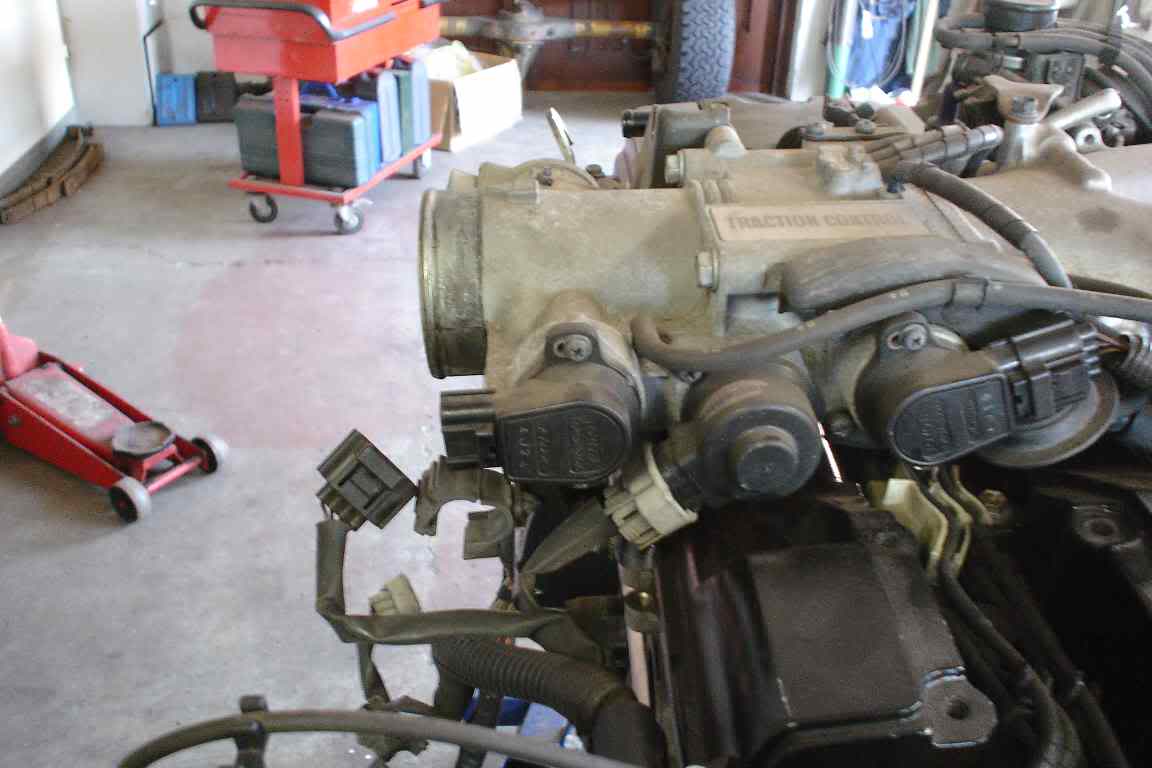
Removing butterfly:
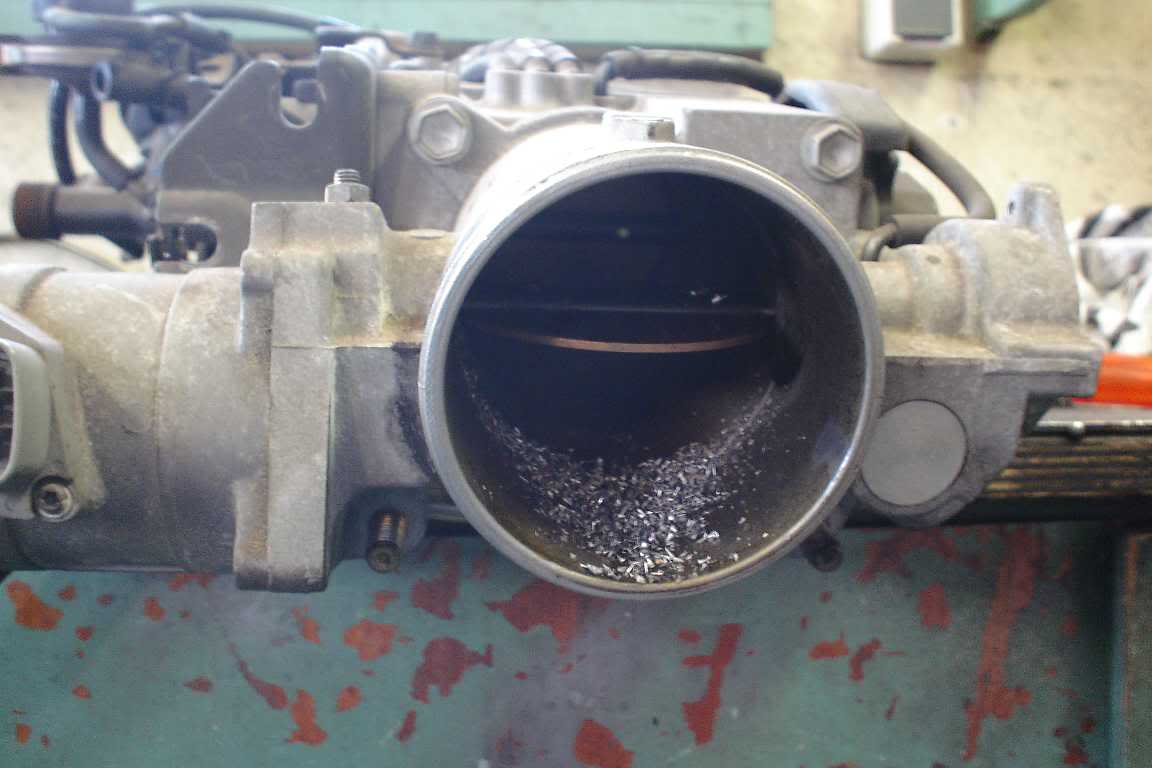
I used DEVCON to fill the holes. Still have to make a few cover plates to fill the holes were the servo and crap was.
This was removed:
Here's a 7M-GTE turbo compared to my new one:
In between all of this I have removed everything from the engine except the head. I now the engine is in excellent shape cause the guy I got it from has swapped in a 2JZ-GTE.
All parts were checked, cleaned, painted, new seal, bearings , plugs, rotor, etc. etc.
I painted the manifolds bronze for a diffferent look. All other parts are black now.
I removed the traction controll valve and servo cause I'm gone use my R150f.
Removing butterfly:
I used DEVCON to fill the holes. Still have to make a few cover plates to fill the holes were the servo and crap was.
This was removed:
May 21, 2006 | 02:54 AM
#3
Thread Starter
Contributing Member
Joined: May 2003
Posts: 460
Likes: 0
From: the Netherlands
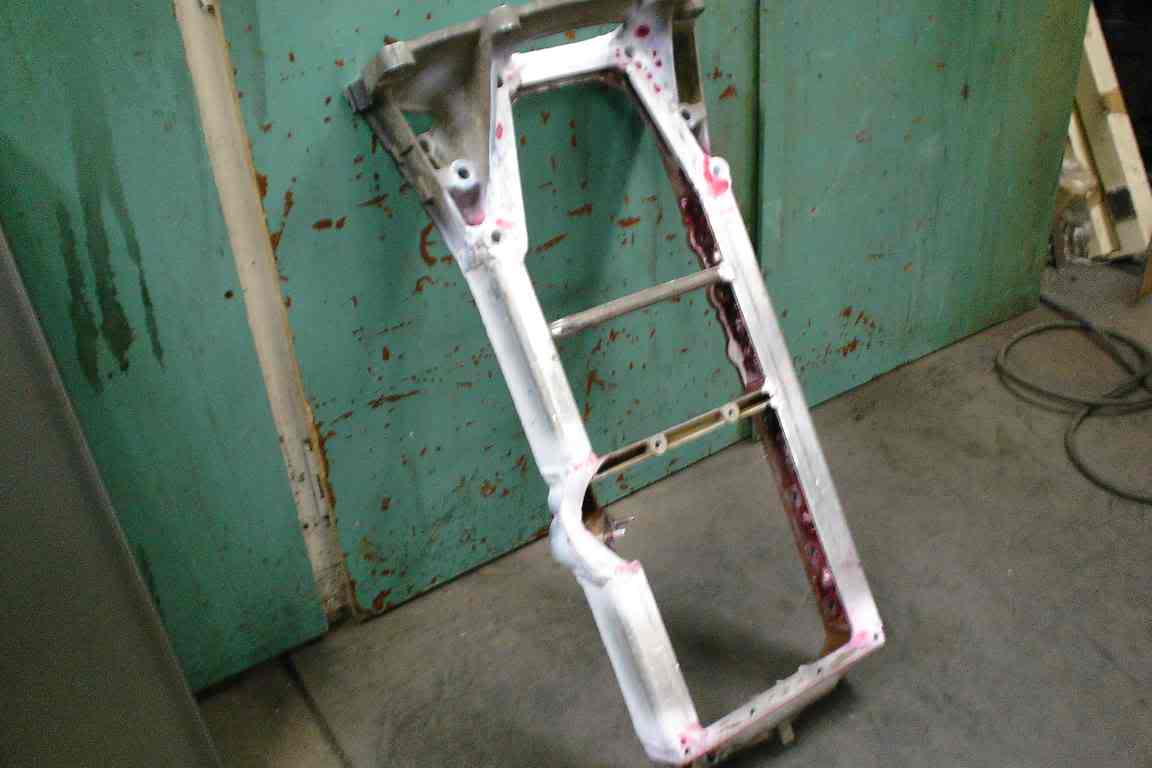
Another thing that went totally wrong and pissed me off big time was the bellhouse.
Since the R150f has shorter input shaft there is no stock (manually shifted) bellhouse available. You need to make a new custom one or use a supra R type gearbox.
I made my own bellhouse and it came out like this:
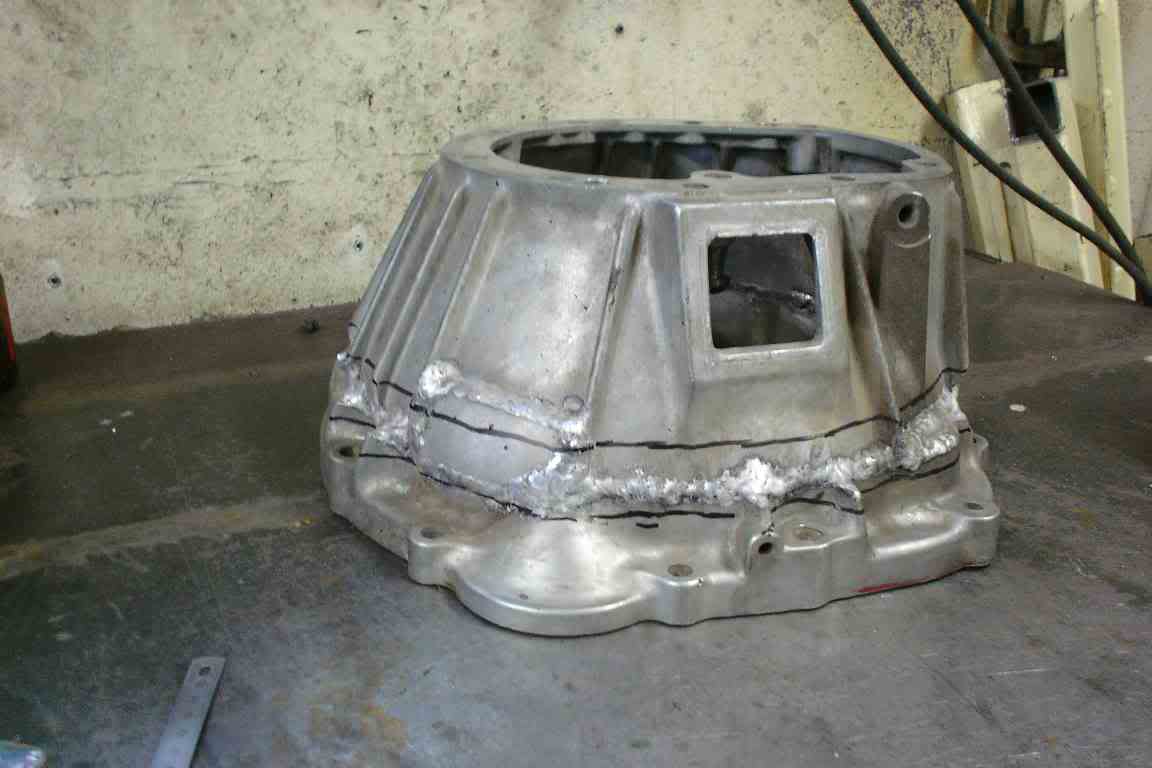
As you can see (the 2 marks) I made it 30mm too tall.


I have to stop smoking weed when I take measurements.
So I cut it up yesterday and removed a piece:
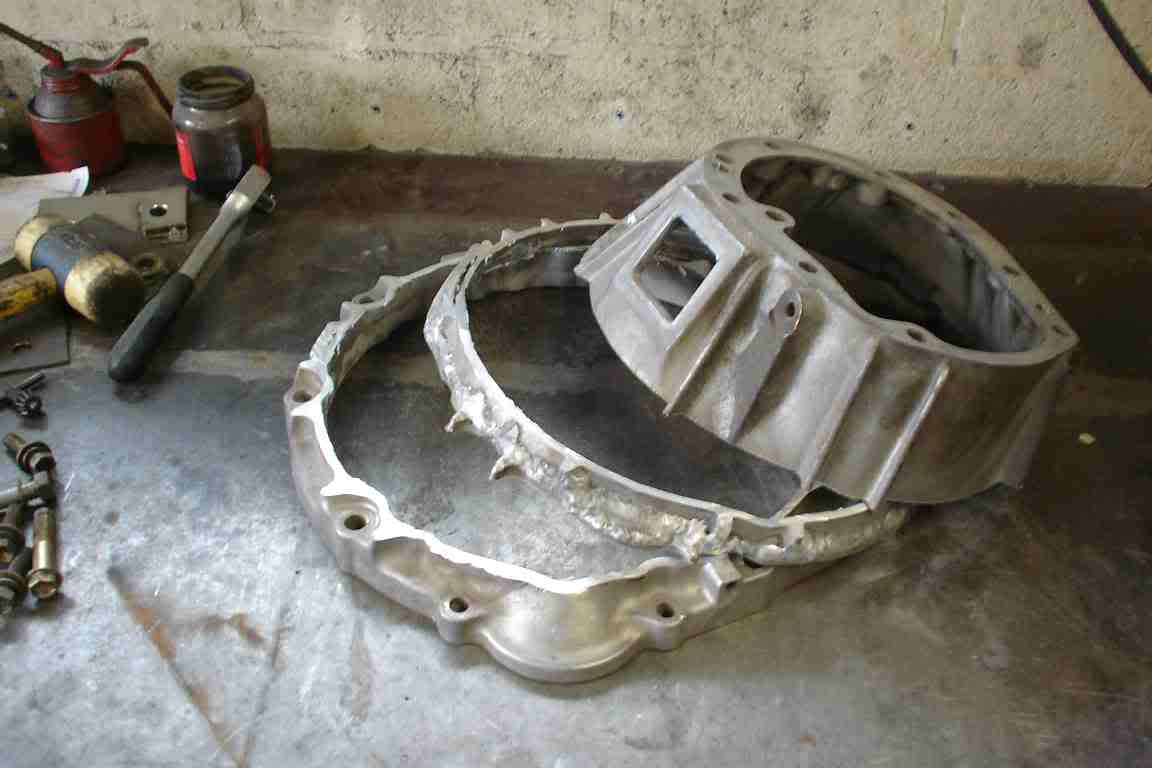
I made a new improved jig using a liniar guiding block which got lost at work. :p This has like no play whatsoever.
I used that to align the 2 pieces so I could weld it. A new supra bellhouse was used as the mold. The ring which attaches to the engine is from a 2JZ auto, and the piece for the gearbox is from a LC LJ70. This also uses an R tranny.
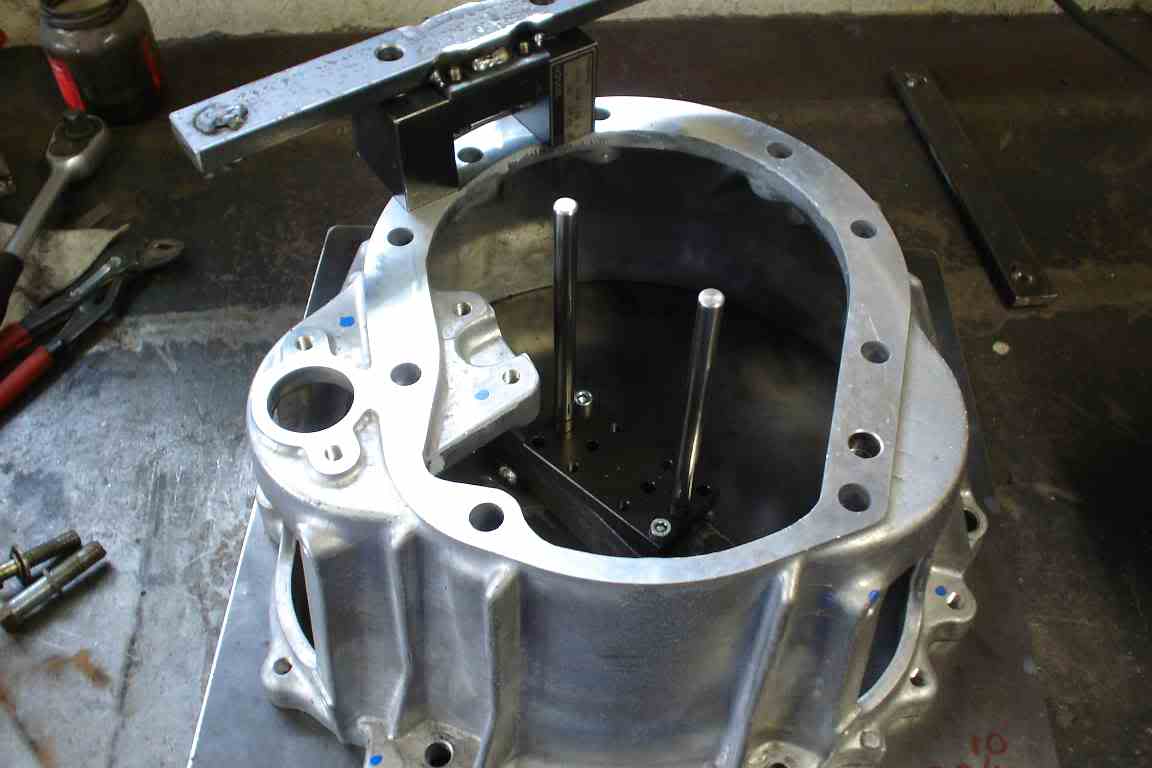
Now I'm off welding and finishing the bellhouse, attach a slave cilinder etc.
I hope to start the actuall swap next thursday. If not I will have to wait a few weeks cause I'm off sleeping in hotels and stuff. I'll try to post some pics later today If the bellhouse is finished.
Since the R150f has shorter input shaft there is no stock (manually shifted) bellhouse available. You need to make a new custom one or use a supra R type gearbox.
I made my own bellhouse and it came out like this:
As you can see (the 2 marks) I made it 30mm too tall.
I have to stop smoking weed when I take measurements.
So I cut it up yesterday and removed a piece:
I made a new improved jig using a liniar guiding block which got lost at work. :p This has like no play whatsoever.
I used that to align the 2 pieces so I could weld it. A new supra bellhouse was used as the mold. The ring which attaches to the engine is from a 2JZ auto, and the piece for the gearbox is from a LC LJ70. This also uses an R tranny.
Now I'm off welding and finishing the bellhouse, attach a slave cilinder etc.
I hope to start the actuall swap next thursday. If not I will have to wait a few weeks cause I'm off sleeping in hotels and stuff. I'll try to post some pics later today If the bellhouse is finished.
 , good job
  Oct 15, 2006 | 09:54 AM
#6
Thread Starter
Contributing Member
Joined: May 2003
Posts: 460
Likes: 0
From: the Netherlands
swap started
I'ts been a while, but the time has come to start the swap.
Since my last post I did not do anything, but cover the engine up and store all the stuff in a corner.
The 7M-GE has reached the end of its life with numerous oil leaks and major loss of compression on 4 cylinders.
So time to swap.
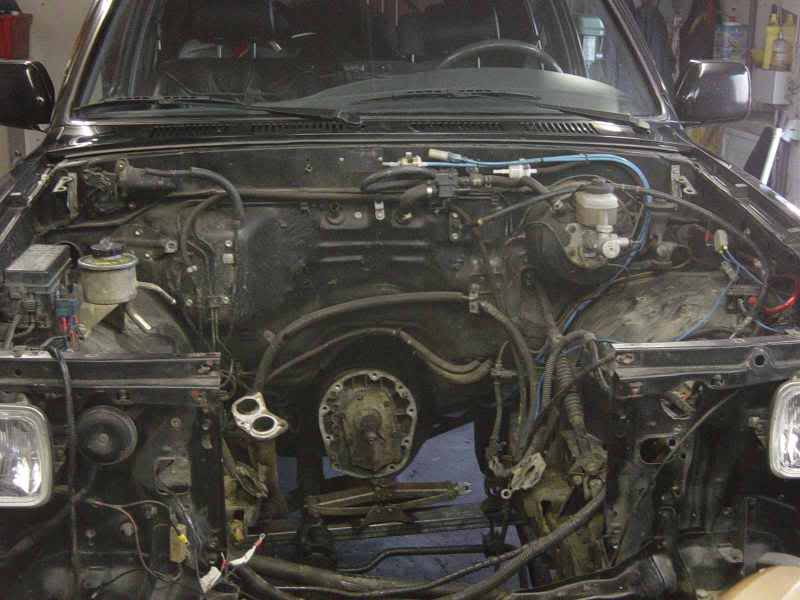
This is how everything looked this morning;
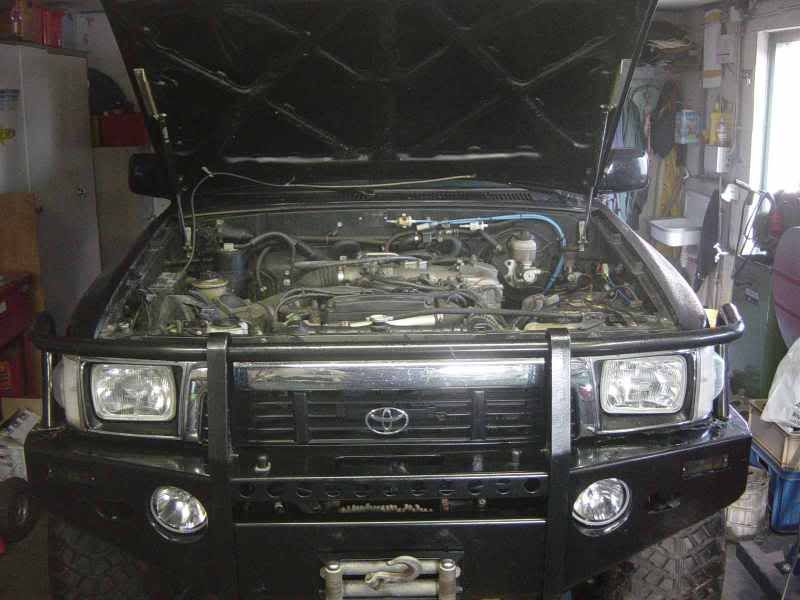
It took quit a while to get everything off, I did take my time labelling most of the electronics.
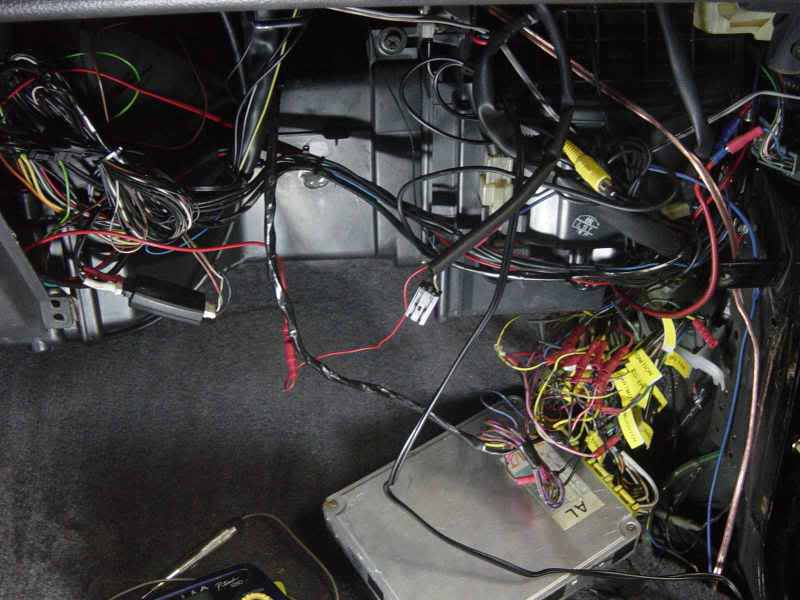
After that I removed all 7M-Ge wiring and other crap. Now after the better part of a saterday:
I'll be measuring and fitting tonight and start mounting it tomorrow.
Keep ya all posted.
Since my last post I did not do anything, but cover the engine up and store all the stuff in a corner.
The 7M-GE has reached the end of its life with numerous oil leaks and major loss of compression on 4 cylinders.
So time to swap.
This is how everything looked this morning;
It took quit a while to get everything off, I did take my time labelling most of the electronics.
After that I removed all 7M-Ge wiring and other crap. Now after the better part of a saterday:
I'll be measuring and fitting tonight and start mounting it tomorrow.
Keep ya all posted.
Oct 16, 2006 | 12:04 PM
#7
Thread Starter
Contributing Member
Joined: May 2003
Posts: 460
Likes: 0
From: the Netherlands
Today I finished the bellhouse. Had to add a spacer, welded on the bracket for the clutch slave cyl. etc. I'll try to find someone tomorrow who can mill it before final assembly.
For now I put the engine in without the clutch to see if everything lines up. Some shaking and cursing and the tranny popped into the topbearing.
Looks like this now:
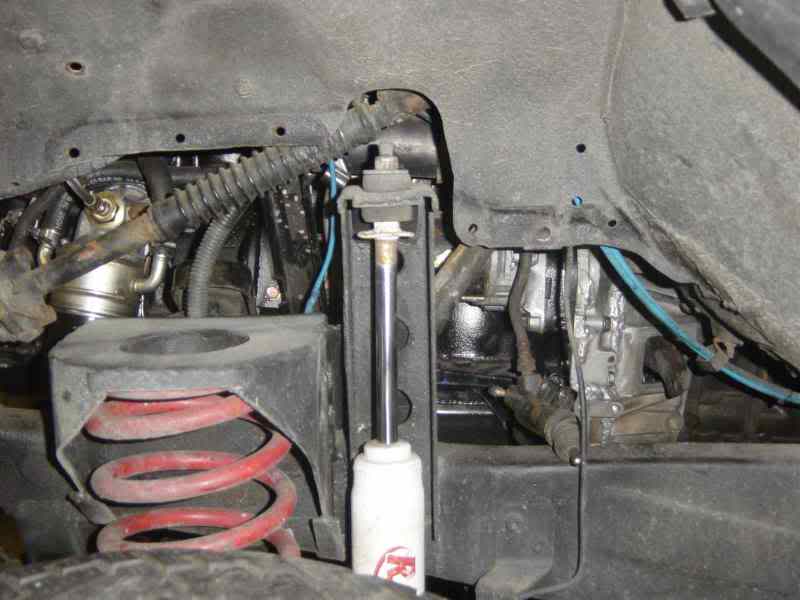
I made about half of the plates for the engine brackets but did not have time to finish them. Everything seems to fit with the exception of the intakeplenum/vacuum brakebooster, my new made sump and the wastegate tube/enginebushing. The sump will definately hit the front axle diff housing or the high pinion diff housing.
I'll need to take it apart again and remove one side and norrow it.
The intakeplenum can be grounded down or I'll move the vacuumbooster a few mm. Or both.
Maybe I'll place the engine slightly out of center.
I'll mounted the turbo to see if it all will fit and it looks like it will.
I plan on driving the stock setup first witout turbo and see what happens. After a week or maybe a month I will mount the turbo, new fuel pump, reprogram the ECU etc.
This is how she rest for now.
O yeah, the radiator fits but I do have to remove the belt to mount/remove it.
For now I put the engine in without the clutch to see if everything lines up. Some shaking and cursing and the tranny popped into the topbearing.
Looks like this now:
I made about half of the plates for the engine brackets but did not have time to finish them. Everything seems to fit with the exception of the intakeplenum/vacuum brakebooster, my new made sump and the wastegate tube/enginebushing. The sump will definately hit the front axle diff housing or the high pinion diff housing.
I'll need to take it apart again and remove one side and norrow it.
The intakeplenum can be grounded down or I'll move the vacuumbooster a few mm. Or both.
Maybe I'll place the engine slightly out of center.
I'll mounted the turbo to see if it all will fit and it looks like it will.
I plan on driving the stock setup first witout turbo and see what happens. After a week or maybe a month I will mount the turbo, new fuel pump, reprogram the ECU etc.
This is how she rest for now.
O yeah, the radiator fits but I do have to remove the belt to mount/remove it.
Trending Topics
 Oct 17, 2006 | 11:17 AM
#10
Thread Starter
Contributing Member
Joined: May 2003
Posts: 460
Likes: 0
From: the Netherlands
Thanks. I hope it all works like planned.
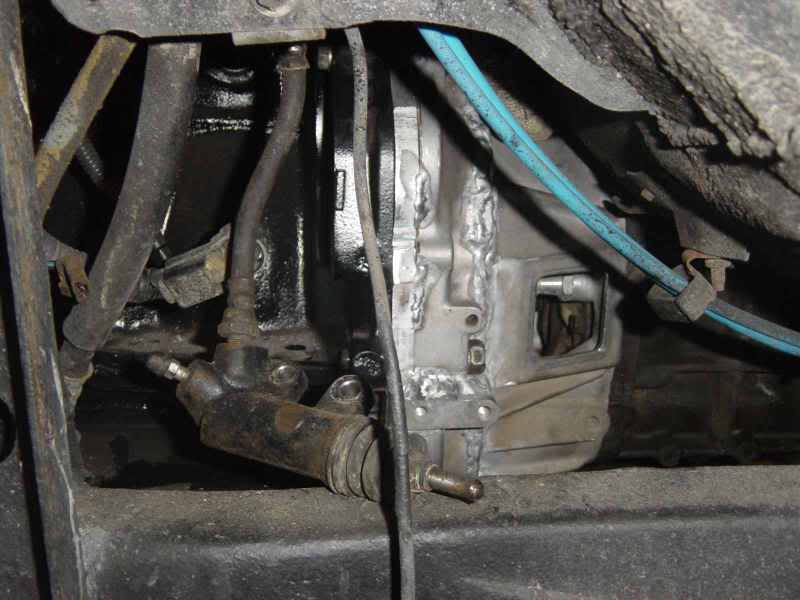
I fabbed some basis motormounts and moved the tranny back about 1/2".

The oil filterhousing from the 7M-GTe fits fine. I never had access that easy to an oil filter.
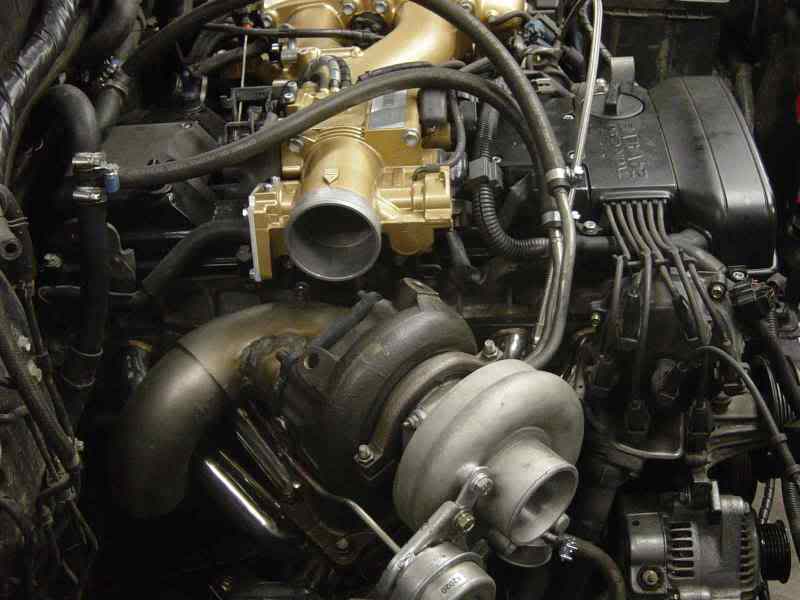
The exhaust side is done too. The curved turbo exhaust (not shown in the pic) fits just above the rubber motormount.

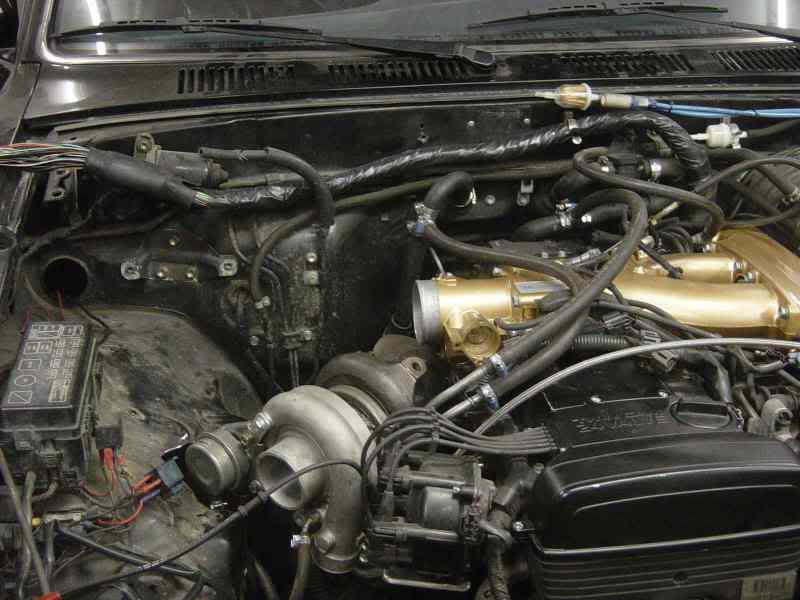
I'm not sure if I will use this turbo. I'm gone pick up another one tomorrow to see if it fits better. My intake is just above the turbohousing so there is limited room.
The wastegate will also be tricky due to limited space. Maybe I'll use a toyota CT26 with internal wastegate. I'll see what I can find tomorrow.
I also found that a 2JZ-GE and GTE use a fuel pump ECU which controls pump rpm's/pressure.
Since I don't have one (the 7M-GE also use a 'flapper' type AFM with a fuelpump switch) I will need to get that ECU tomorrow also.
I fabbed some basis motormounts and moved the tranny back about 1/2".
The oil filterhousing from the 7M-GTe fits fine. I never had access that easy to an oil filter.
The exhaust side is done too. The curved turbo exhaust (not shown in the pic) fits just above the rubber motormount.
I'm not sure if I will use this turbo. I'm gone pick up another one tomorrow to see if it fits better. My intake is just above the turbohousing so there is limited room.
The wastegate will also be tricky due to limited space. Maybe I'll use a toyota CT26 with internal wastegate. I'll see what I can find tomorrow.
I also found that a 2JZ-GE and GTE use a fuel pump ECU which controls pump rpm's/pressure.
Since I don't have one (the 7M-GE also use a 'flapper' type AFM with a fuelpump switch) I will need to get that ECU tomorrow also.
Oct 20, 2006 | 11:53 AM
#11
Thread Starter
Contributing Member
Joined: May 2003
Posts: 460
Likes: 0
From: the Netherlands
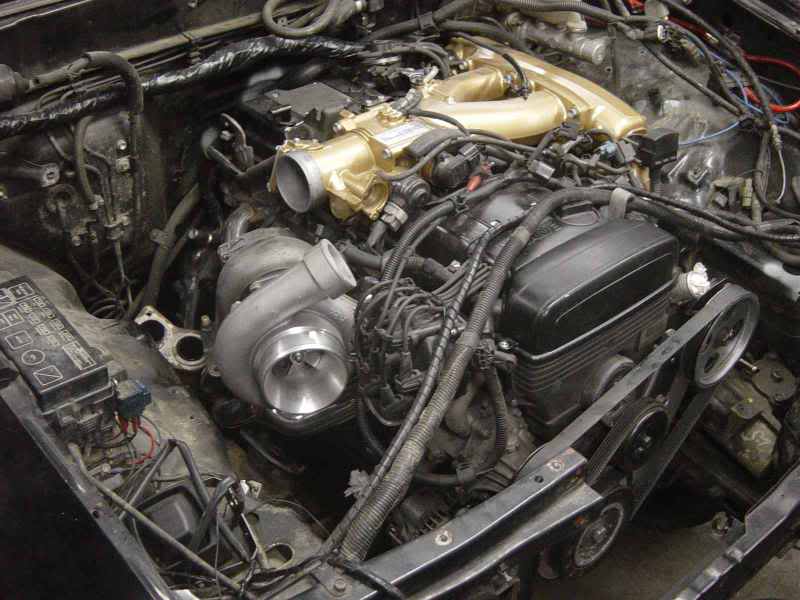
Got plenty of work done the last 2 days. I picked up a new turbo, a CT26 from a 7M-GTE. It has been mounted, but they opted to use a larger turbo. So 0 Km's for this one.
I also picked up several welding flanges, hoses, bent aluminium pipe etc.
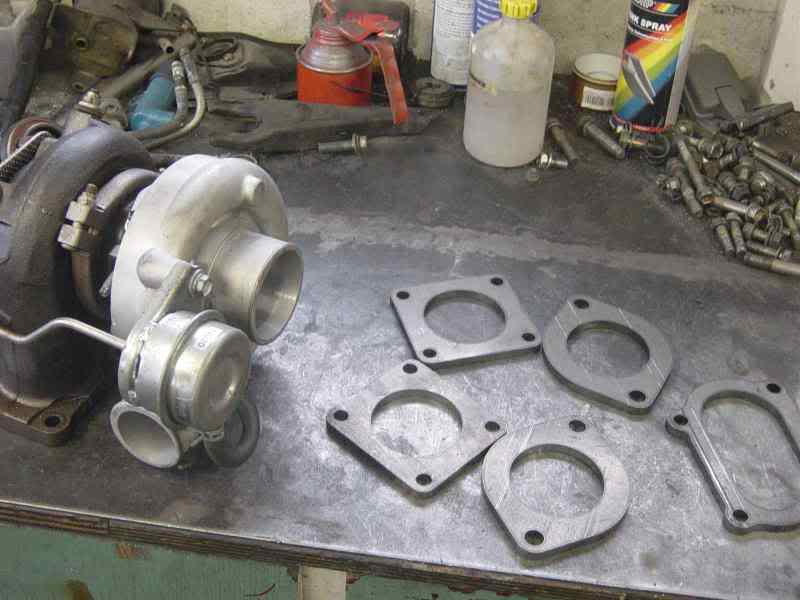
The current turbo setup was too large and I simply had a hard time fitting it. So the slightly smaller CT26 was okay, but it needed to be altered in order to fit.
So I opened her up, rotate the exhaust flange, rotate the wastegate actuator and put her back together.
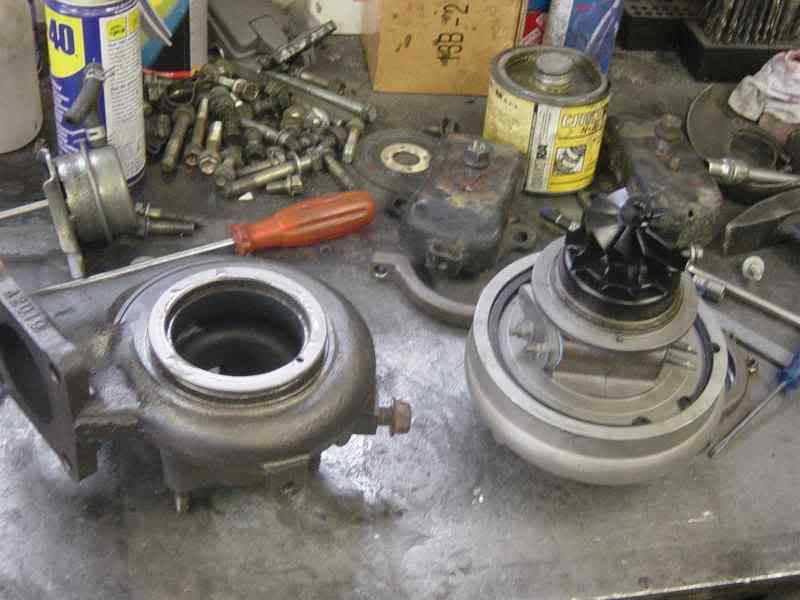
I made several small brackets and stuff, made the oil pressure line for the turbo etc.
The bellhouse is milled and ready.
The exhaust turbo elbow is also done. I can now hook up the 3" pipe anyway I want (as long as its down ).
).
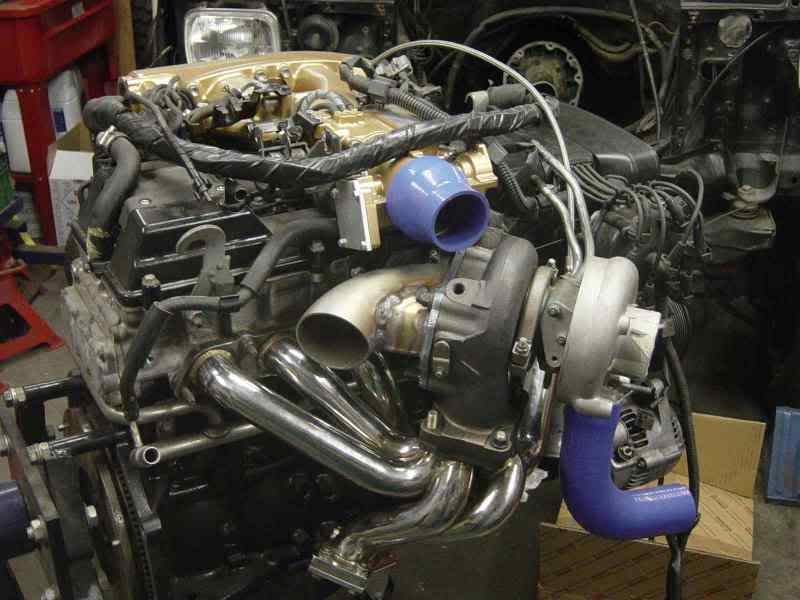
I think I figured out how everything is gone be routed and this is how I guess it will be looking.
Tomorrow she will be going in for the last time. All mechanical stuff is now done or prepped.
I also picked up several welding flanges, hoses, bent aluminium pipe etc.
The current turbo setup was too large and I simply had a hard time fitting it. So the slightly smaller CT26 was okay, but it needed to be altered in order to fit.
So I opened her up, rotate the exhaust flange, rotate the wastegate actuator and put her back together.
I made several small brackets and stuff, made the oil pressure line for the turbo etc.
The bellhouse is milled and ready.
The exhaust turbo elbow is also done. I can now hook up the 3" pipe anyway I want (as long as its down
).I think I figured out how everything is gone be routed and this is how I guess it will be looking.
Tomorrow she will be going in for the last time. All mechanical stuff is now done or prepped.


 Oct 20, 2006 | 10:30 PM
#15
Thread Starter
Contributing Member
Joined: May 2003
Posts: 460
Likes: 0
From: the Netherlands
I'm gone run the used clutch from the 7M-GE for now, it's identical to the 2JZ-GE clutch. I do not know if she will hold, but there's only one way to find out.
From my point of view the swap isn't going that fast cause people keep showing up on my frontdoor. Replaced a turbo on a Hilux diesel yesterday etc.
But from now on everybody who needs something done has to wait cause I need the 4R next week. Monday actually.:pat:
From my point of view the swap isn't going that fast cause people keep showing up on my frontdoor. Replaced a turbo on a Hilux diesel yesterday etc.
But from now on everybody who needs something done has to wait cause I need the 4R next week. Monday actually.:pat:
Oct 21, 2006 | 12:10 PM
#16
Thread Starter
Contributing Member
Joined: May 2003
Posts: 460
Likes: 0
From: the Netherlands
it's in!
Finished up lots of small stuff today , did some spraying and make a new frame strut for the panhard bar. This one I can bolt off in case I need to remove the sump.
The bellhousing is on the gearbox and everything is ready to go.
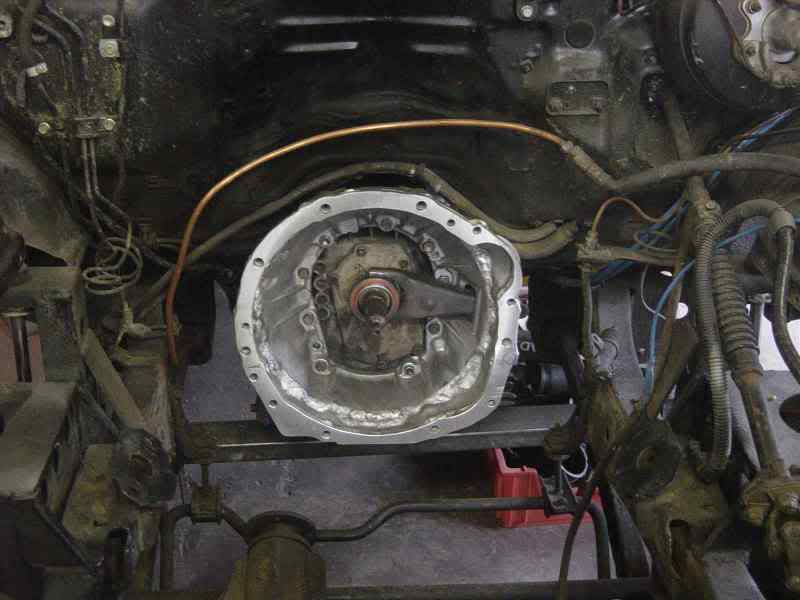
I put the engine in this night and bolted the bellhouse down. Now I just have to mount some bolts and I can start hooking everything up.
The starter has a tight fit, but hey, it fits. I'm gone run into problems with the fuel hookup since I made the dipstick just about in front of it.
That's it for now. I badly need a shower and a bed.
The bellhousing is on the gearbox and everything is ready to go.
I put the engine in this night and bolted the bellhouse down. Now I just have to mount some bolts and I can start hooking everything up.
The starter has a tight fit, but hey, it fits. I'm gone run into problems with the fuel hookup since I made the dipstick just about in front of it.
That's it for now. I badly need a shower and a bed.
Oct 21, 2006 | 10:30 PM
#19
Thread Starter
Contributing Member
Joined: May 2003
Posts: 460
Likes: 0
From: the Netherlands
I'm not really sure how much hp it will generate. I'm hoping for 300-350. It's not just a slap on turbo, the finetuning will yeild the most gain.
I can't run too much boost since its a high compression engine.
And I don't want to change to a thicker headgasket and adjustable cam gears.
I allready have an appointment with a supra specialist who will reprogram the ECU and do the other necessary mods to make sure its a fast (and reliable) engine.
He allready told me that I most likely need a bigger fuelpump and larger injectors. He's probably right but I'm trusting him with this since I don't know anything about EFI engines.
Oct 22, 2006 | 11:22 AM
#20
Thread Starter
Contributing Member
Joined: May 2003
Posts: 460
Likes: 0
From: the Netherlands
Today I started hooking everything up.
The clutch is done and works.
Vacuumlines are hooked up.
Powersteering pressure line is done.
Exhaust manifold and turbo are done. Turbo is hooked up.
Turbo gets oil (on starter only).
Starter works offcourse.
Engine and gearbox are bolted down.
Gas line is fixed.
New bracket for throttle cable and a new shorter cable has been used.
Unfortunately i did not get it done this weekend. I'll try to get another day off and try to finish it tomorrow.


