
22R Rebuild
 Dec 16, 2009 | 07:46 PM
#182

Thread Starter
Registered User
Joined: May 2009
Posts: 586
Likes: 2
From: Arizona
Ted recommended sanding. Here's what he wrote:
----------------------------
First be sure you have them in facing correctly they are directional. Be sure the center main cap is not reversed, too.
Then use some emory and a very flat block and lightly sand them until you get the fit you want. Usually it only take 3/4 swipes, you only need about .004".
We have had to fit a few, it's a bit rare when no damage is present but there is no other way. We see them from time to time, they were fitted at the factory originally.
and
One tip, if you rotate the shaft a few dozen times, then remove it, the areas rubbing will show a shiney spot, that can let you know what points to address when fitting.
-------------------------------
The metal shavings I saw and picked out came from the upper halves. The crank must have gouged/shaved the outer faces of the upper washers as I set it in because the gouges aren't in line with rotation. I don't know if the faces are damaged enough to worry about.
I couldn't get a good picture, but this one gives an idea:
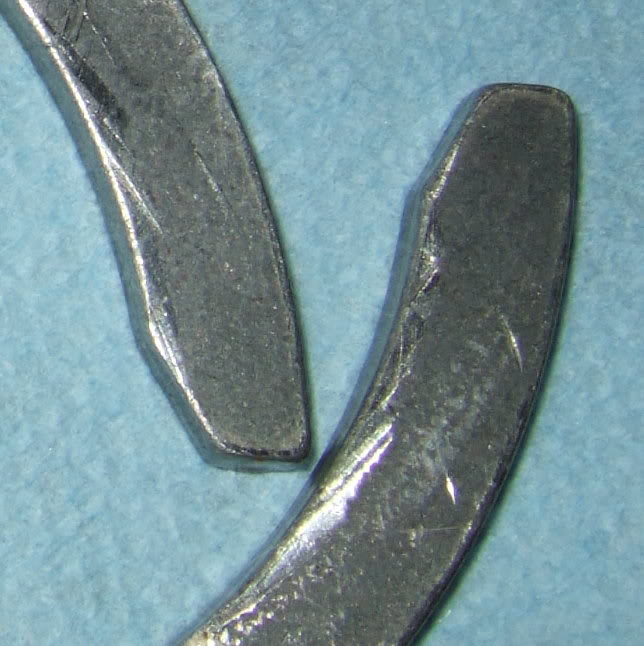
From rotating the crank, there is a wear line showing in the face of one of the upper halves. The other upper has only some minor burnishing along the inner edge. I don't see any wear marks on the lowers.
I measured my old thrust washers and the new ones. My calipers read to the nearest .0005, but are only supposed to be accurate to +/- .001. Old and new are close in size. If I take what the calipers show at face value, the total difference (thickness of both sides combined) is .002" or less.
Old rear: both halves .1065"
Old front: both halves .1070"
New uppers: .1075"
New lowers: .1075", .1080"
I didn't measure thrust clearance when I took the engine apart, but I pushed the crank back and forth. It was snug. If I noticed any movement at all it was very little.
My old washers have a few corrosion spots, but aren't overly worn. Not sure if I should reuse them or sand the new ones down. Depends on if those areas shaved out of the new ones are a concern.
----------------------------
First be sure you have them in facing correctly they are directional. Be sure the center main cap is not reversed, too.
Then use some emory and a very flat block and lightly sand them until you get the fit you want. Usually it only take 3/4 swipes, you only need about .004".
We have had to fit a few, it's a bit rare when no damage is present but there is no other way. We see them from time to time, they were fitted at the factory originally.
and
One tip, if you rotate the shaft a few dozen times, then remove it, the areas rubbing will show a shiney spot, that can let you know what points to address when fitting.
-------------------------------
The metal shavings I saw and picked out came from the upper halves. The crank must have gouged/shaved the outer faces of the upper washers as I set it in because the gouges aren't in line with rotation. I don't know if the faces are damaged enough to worry about.
I couldn't get a good picture, but this one gives an idea:
From rotating the crank, there is a wear line showing in the face of one of the upper halves. The other upper has only some minor burnishing along the inner edge. I don't see any wear marks on the lowers.
I measured my old thrust washers and the new ones. My calipers read to the nearest .0005, but are only supposed to be accurate to +/- .001. Old and new are close in size. If I take what the calipers show at face value, the total difference (thickness of both sides combined) is .002" or less.
Old rear: both halves .1065"
Old front: both halves .1070"
New uppers: .1075"
New lowers: .1075", .1080"
I didn't measure thrust clearance when I took the engine apart, but I pushed the crank back and forth. It was snug. If I noticed any movement at all it was very little.
My old washers have a few corrosion spots, but aren't overly worn. Not sure if I should reuse them or sand the new ones down. Depends on if those areas shaved out of the new ones are a concern.
Dec 17, 2009 | 06:53 PM
#183
Thread Starter
Registered User
Joined: May 2009
Posts: 586
Likes: 2
From: Arizona
Ted advised replacing those scraped thrust washers, so I bought a new set today. They measure about the same.
I sanded them lightly with 600 grit paper taped to glass to knock off the higher spots. Even after that, the crank doesn't have much play. With just the uppers in, when pulling and pushing on the crank I can hear lube squish, but can't see or feel any movement. Can't squeeze a .002" feeler in on the "more open" side.
So, to get a better idea of what I'm aiming for I put my old original upper washers in. The crank moves. Not much, but the lube squish sound is more pronounced, and a .002" feeler fit between the upper washer and the crank surface. I didn't try thicker feelers.
I don't think feelers are a good way to measure thrust clearance. I'm hoping to round up a dial indicator.
I would have never guessed something as simple as thrust washers would be so much hassle.
Dec 17, 2009 | 08:12 PM
#184

Registered User
Joined: Apr 2009
Posts: 89
Likes: 0
From: Salt Lake City UT
A dial indicator with a magnetic base is a much better way to go. You can pick one up from Harbor Freight that will work for what your doing that isn't real expensive. I normally use a small pry bar to make sure that I'm getting all the play that it there, but you use a light pressure. The thing is you want to see a repeatable number. Your thick lube might be stealing some of your play, and the bar will help you make sure your reading all of it. I'm kinda strange, but I check the crank, then turn it 180 and check again.
Dec 17, 2009 | 09:26 PM
#185
Thread Starter
Registered User
Joined: May 2009
Posts: 586
Likes: 2
From: Arizona
Thanks for the advice, broncbob. I'm strange too, so I'll check the crank all around. I'll use a dial, whether borrowed or bought.
Thrust washers aren't perfectly flat. I doubt their corresponding slots in the block and cap are either. And, you have to get the cap centered.
New washers should have higher spots that will quickly wear down as they get happy with the crank running against them. So, I'm thinking as long as there's at least .001" actual thrust clearance measured with a dial indicator after the center cap is reasonably centered and torqued, everything should be fine.
Last edited by flyingbrass; Dec 17, 2009 at 09:32 PM.
Dec 18, 2009 | 03:59 PM
#188
Thread Starter
Registered User
Joined: May 2009
Posts: 586
Likes: 2
From: Arizona
Without using lube/grease on the backs of the washers they'll fall out when setting the crank in. Even 30 weight oil wasn't enough to hold them in place.
Ted said he wipes some grease on the backs, but checking clearance dry makes sense. I wiped most of the lube off the washers and where they ride, set the crank in, and rolled the upper washers in place.
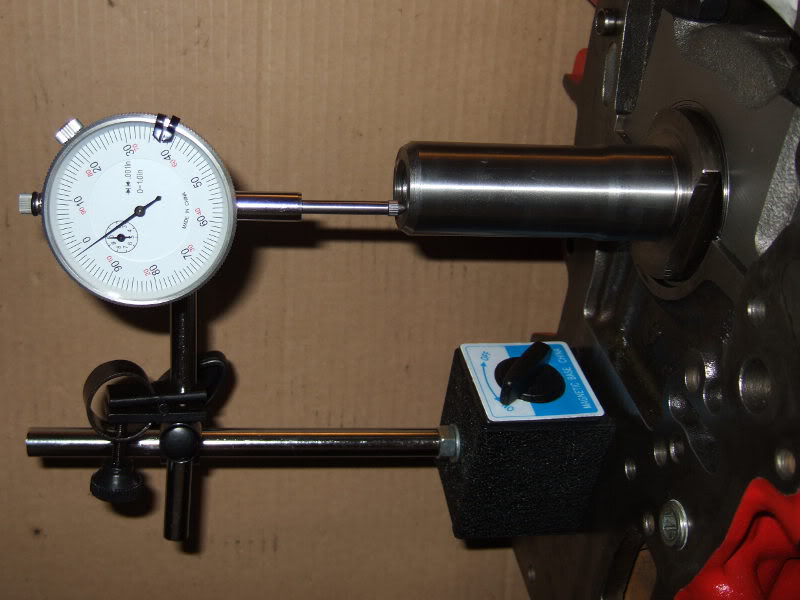
I got a dial indicator and magnetic base from Harbor Freight for $20. This is definitely the way to go. It's far better than fooling around with feeler gauges and will be useful for other things. The crank has .004" play with my old upper halves, and .003" with my new sanded halves.
I might just reuse my old washers. Could swap front and rear to give the rear a fresh face. Almost all the wear occurs on the rear washer.
Ted said he wipes some grease on the backs, but checking clearance dry makes sense. I wiped most of the lube off the washers and where they ride, set the crank in, and rolled the upper washers in place.
I got a dial indicator and magnetic base from Harbor Freight for $20. This is definitely the way to go. It's far better than fooling around with feeler gauges and will be useful for other things. The crank has .004" play with my old upper halves, and .003" with my new sanded halves.
I might just reuse my old washers. Could swap front and rear to give the rear a fresh face. Almost all the wear occurs on the rear washer.
Dec 19, 2009 | 11:08 PM
#189
Thread Starter
Registered User
Joined: May 2009
Posts: 586
Likes: 2
From: Arizona
I'm reusing my old washers. I swapped front and rear. Some mild prying in each direction shows thrust clearance to be about .005". It was the same after rotating the crank 180 degrees.
Here's a guy who ran a lot of miles with no thrust washers: http://www.deaven.net/~deaven/Truck/index.html
Here's a guy who ran a lot of miles with no thrust washers: http://www.deaven.net/~deaven/Truck/index.html
Last edited by flyingbrass; Dec 19, 2009 at 11:14 PM.
Dec 20, 2009 | 01:22 AM
#190
Thread Starter
Registered User
Joined: May 2009
Posts: 586
Likes: 2
From: Arizona
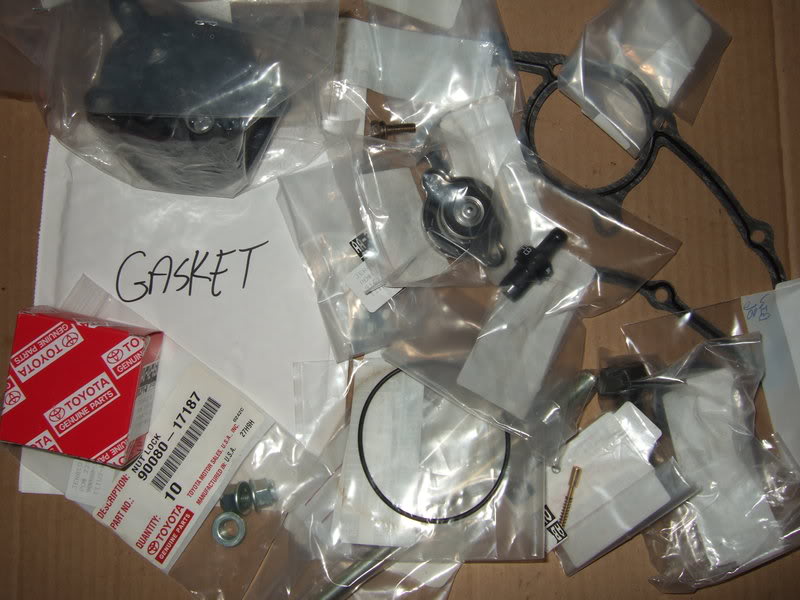
I forgot to mention I got in another order of goodies from Toyota some time ago. $80 worth. Prices on some OEM items online are the same or even slightly cheaper than buying similar, probably worse quality, parts at Autozone, etc.
I got some replacement bolts, new oil dipstick tube (which doesn't include the attachment bracket), and other odds 'n ends. Radiator cap. Distributor cap and rotor. PCV valve, etc. Added in a new horn contact plunger. I was planning on shimming up the contact plate to fix my long-broken horn, but heard that fix doesn't last very long.
When I'm done with this project I'll post a list of parts used and costs.
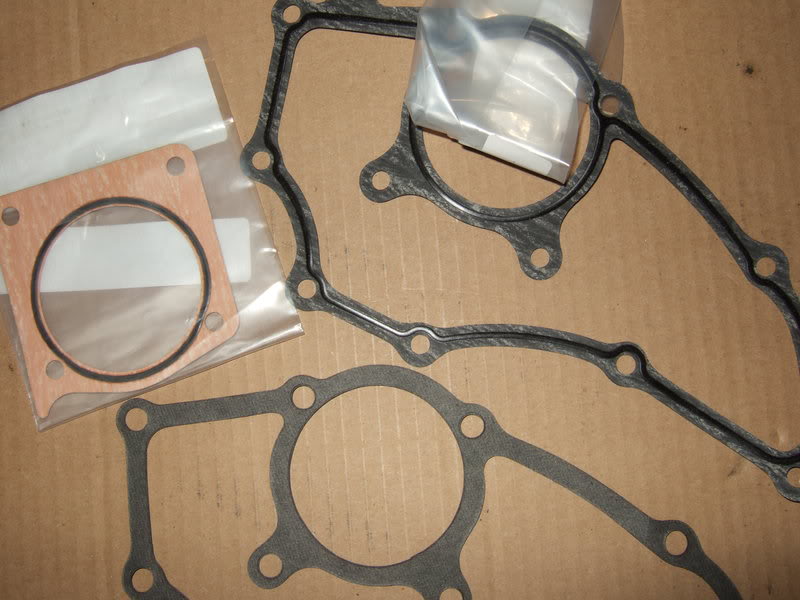
22R's have a plate under the intake that houses within it a smaller heating element. The gasket that came in my kit from Engnbldr for the big plate didn't fit very well. The bolt holes were off. A gasket in Stace's "use it if you need it" pile was closer and probably would have worked. I decided to buy an OEM one because the intake would have to come off to deal with this gasket. I couldn't find a gasket for the square heating thing in my kit or Stace's stuff, so I ordered one too. BTW, I'm having a hard time removing the old gasket material. It laughs at gasket remover.
The Toyota gaskets have some sort of sealing bead pre-applied. Compare:
I got some replacement bolts, new oil dipstick tube (which doesn't include the attachment bracket), and other odds 'n ends. Radiator cap. Distributor cap and rotor. PCV valve, etc. Added in a new horn contact plunger. I was planning on shimming up the contact plate to fix my long-broken horn, but heard that fix doesn't last very long.
When I'm done with this project I'll post a list of parts used and costs.
22R's have a plate under the intake that houses within it a smaller heating element. The gasket that came in my kit from Engnbldr for the big plate didn't fit very well. The bolt holes were off. A gasket in Stace's "use it if you need it" pile was closer and probably would have worked. I decided to buy an OEM one because the intake would have to come off to deal with this gasket. I couldn't find a gasket for the square heating thing in my kit or Stace's stuff, so I ordered one too. BTW, I'm having a hard time removing the old gasket material. It laughs at gasket remover.
The Toyota gaskets have some sort of sealing bead pre-applied. Compare:
Last edited by flyingbrass; Dec 20, 2009 at 01:34 AM.
Dec 20, 2009 | 06:20 PM
#192
Registered User
Joined: Nov 2008
Posts: 101
Likes: 0
From: Logan, UT
flying brass, do you by chance know what that plate under the intake is called ? while throwing my motor back in, one of the bolts ( the one in the corner closest to the fuel pump) broke, i did not realize that that bolt was of any significance and so i went ahead and left the broken stud in, so now the plate does not get snug with the intake and it causes a steady coolant leak.
 Dec 20, 2009 | 07:29 PM
#196
Thread Starter
Registered User
Joined: May 2009
Posts: 586
Likes: 2
From: Arizona
I don't know the part number for the bolts through the bracket. The bracket and those bolts aren't shown in the manifold section. Maybe try the fuel section? They are the same diameter as the other 5 but are a little longer.
The water bypass flange/plate gasket I got is 16347-35050.
The water bypass flange/plate gasket I got is 16347-35050.
Last edited by flyingbrass; Dec 20, 2009 at 07:32 PM.
Dec 22, 2009 | 01:17 AM
#197
Thread Starter
Registered User
Joined: May 2009
Posts: 586
Likes: 2
From: Arizona
Two pistons are in. Their rod bearings plastigaged fine.
The dinky ring expander I bought only pushes on the ends of the rings. It doesn't support them around the edge. The end holders stick out far enough inside the ring circumference to require expanding the rings more than really necessary. If you position the ends nearer the edge they pop out. Piece of junk. I put the rings on by hand. Still have 2 more pistons to go, so I might yet break a ring.
The crank required effort to turn but seemed to rotate smoothly with 2 pistons in. After sitting a day I can't get the crank to budge with the tools on hand. I don't have a wrench big enough to fit the flats on the crank (about 1 9/16") to rotate it. Channel locks worked before but started chewing up the flats. Tonight I slid the crank pulley on and tried using a strap wrench. Didn't work. I'll buy a big crescent wrench.
If I do this again I'll use oil on the bearings, not assembly lube. The Lucas brand lube I've been using is too thick and sticky, even worse after the parts have sat in a given position for awhile. I'm sure my crank would turn far easier without it.
I used 30 weight oil in the cylinders and on the pistons. What to use on rings seems to be another area of differing opinions: dunk the pistons in motor oil, use only a few squirts of motor oil on the rings, don't oil them at all, use 2-stroke oil, WD-40, etc. I trickled a little oil onto the rings and smeared it all around the pistons. Good enough.
Last edited by flyingbrass; Dec 22, 2009 at 01:19 AM.
Dec 22, 2009 | 11:05 AM
#200
Thread Starter
Registered User
Joined: May 2009
Posts: 586
Likes: 2
From: Arizona
Here's a pic, krj. You can loosen a set screw and rotate the bezel to zero if you like, but it's not necessary for this purpose. Pry the crank one way and note what the dial says. Pry it the other way and compare.
Future plans are to redo the whole brake system (it's all original), new tires, new front axles, rebuild or swap tranny, do something about the sagging rear springs (new ones or ZUK mod), repair or replace the leaky shell, eventually put an electric locker in the rear. Better bumpers, maybe some armor underneath. Sliders? A roll cage. Paint the truck.
In the more distant future maybe SAS, regear, bigger tires. If/when I get another vehicle for around town this pickup can evolve into more of a trail rig.


