
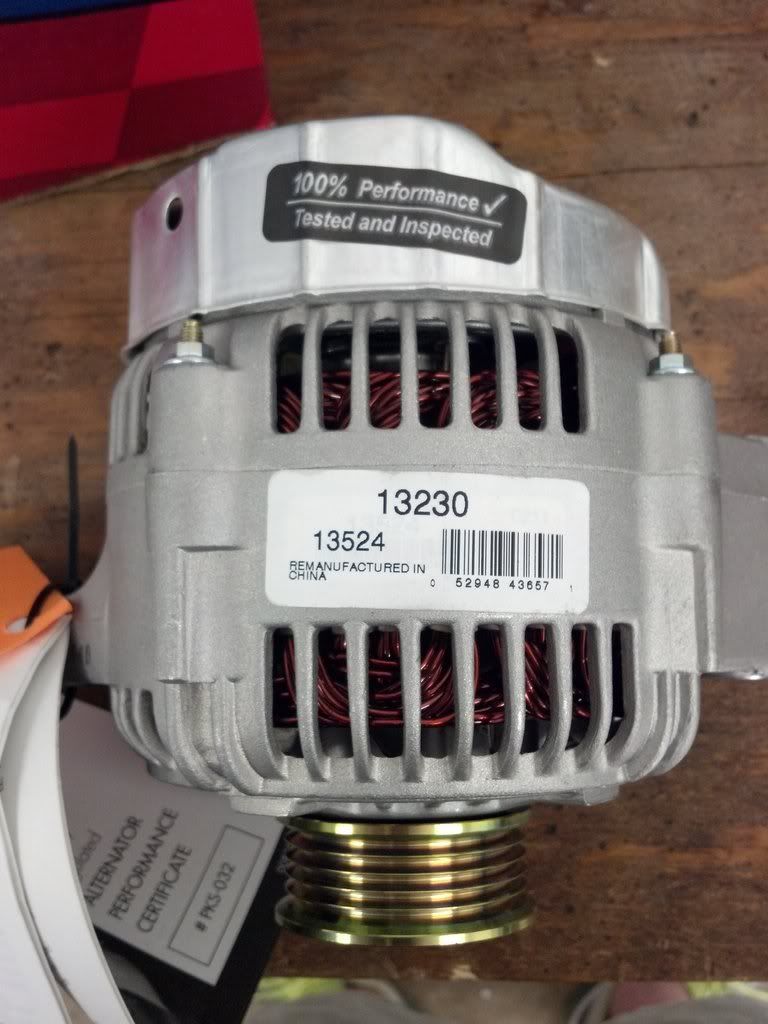
120amp Jaguar Alternator Upgrade **HOW TOO**
 Jul 24, 2012 | 01:31 PM
#41
Thread Starter
Registered User
Joined: Apr 2012
Posts: 69
Likes: 0
Use a drill press and a step drill bit...and ONLY do the inside of the pully, you step it out to the size where it will sit relatively flush to the alternator without interfering with any functions, and when you impact on the factory pully it will stay tight.
**be careful not to go too far...the pully will not work backwards, and you will have to source a new pully**
My install went pretty much flawlessly, however be sure to plug up the alternator BEFORE mounting to the brackets...the hard water line makes it near impossible on the 22re's.
One thing i noticed with my alternator (from a junk yard) was that idle Amps's were a little low...I'm thinking this because the yota pully is larger than the factory Jag serpentine pully?
IS there a company that makes a small diameter factory V-belt pully to bolt up to these alts to turn more RPMs / higher Amps at idle speeds?
Maybe the alternator I have is just wore out....
Hope this helps the 22RE guys out
I to would like to look for a smaller pulley though. anyone have any ideas on this???
Jul 26, 2012 | 06:38 PM
#42
Registered User
Joined: Oct 2007
Posts: 69
Likes: 0
From: Loganville, GA
Ok guys, I swapped out the Alternator for a brand new duralast unit and got a hella huge Deka Deep cycle / 1000 CCA battery. I was thinking this would solve EVERYthing, however I am running into a few problems. I know this is a lot of questions, so please bear with me...
The headlights flicker as the alternator turns faster, and I am not sure why. I can tell that certain electrical items still place major drain on the volt meter in the cab.
My impression is that maybe the ground wire is not big enough off the battery---could this be the case? Also as a side note, I ran the alternator power cable DIRECTLY to the battery, and then replaced the fusible link wire from the factory toyota fuse block with a 175A link and solid cable, and ran it directly to the battery separate from the alternator wire. Could this arise a problem with flickering lights, etc?
Also, my second guess would be that maybe the factory ground for the alternator (I'm assuming in the factory toyota wiring harness) may not be big enough for the new 120A alternator. Could this be the case? If so, which prong / wire in the wiring harness does the ground for the alternator, and would it be possible to splice in a much larger ground and just run it to the frame?
Also, does the battery need to be ground to the frame, or to the engine block? Mine is currently ground to the engine block. I am not against getting a second ground and going to the frame.
Any knowledgeable electrical guys got some input that could be of use?! I got a big wheeling trip this weekend, and could use some help FAST!!!
Jul 26, 2012 | 07:01 PM
#43
Registered User
Joined: Dec 2009
Posts: 2,762
Likes: 1
the battery needs a ground to the body. the body needs a ground cable to the engine. if your using factory size cables, you should be fine. even tho its a 120amp alternator, it doesnt output its max and only when needed. at idle, it should only be putting out 30amps and less if the battery is fully charged already
Jul 26, 2012 | 09:04 PM
#44
Registered User
Joined: Oct 2007
Posts: 69
Likes: 0
From: Loganville, GA
the battery needs a ground to the body. the body needs a ground cable to the engine. if your using factory size cables, you should be fine. even tho its a 120amp alternator, it doesnt output its max and only when needed. at idle, it should only be putting out 30amps and less if the battery is fully charged already
really strange issues going on....
Jul 26, 2012 | 10:01 PM
#45
Dixie, Toyo is far more apt than I am in regard to electical 101-102 and through the 1,000,003, most likely! hahaha... However, as he mentioned, you need to have the battery ground wire running to the block AND the chassis(It runs a few inches to the fender wall, just in front of the Fusible link box...... And there SHOULD DEFINITELY be a threaded hole for it, right there. The ground cable you have off the battery should already have 2 wires, a 4-6AWG wire and the 10-14AWG smaller wire coming right out of the battery ground terminal, running to the fender wall.
Far as the wiring directly to the fusible link box, etc.,.. not sure. However, I do know that the ground that comes out of the harness and bolts, on mine at least, to one of the Power Steering Bracket-to-Head Bolts/bracket, is plenty for many guys, even running the GM 1 wire conversion. I've read plenty of threads with that mod where they are fully satisfied with the current/sharing no signs of flickering, etc. Something either within your system or possibly how you've now got things wired could likely be causing the problem. I would run my multi-meter on everything involved, including any grounds, checking for current/resistance/amperage.
It looks as if you have lots of accent lights/rock lights, too, right Dixie?
I know someone like you, Toyo, or Ian or RB, can pin this down better than I could.
Jul 26, 2012 | 10:42 PM
#46
Here's a pic of where, at least on mine, the second ground terminal wire goes to, in the top of the picture, just around the middle, on the fender wall... There is a threaded hole there, original toyota bolt.
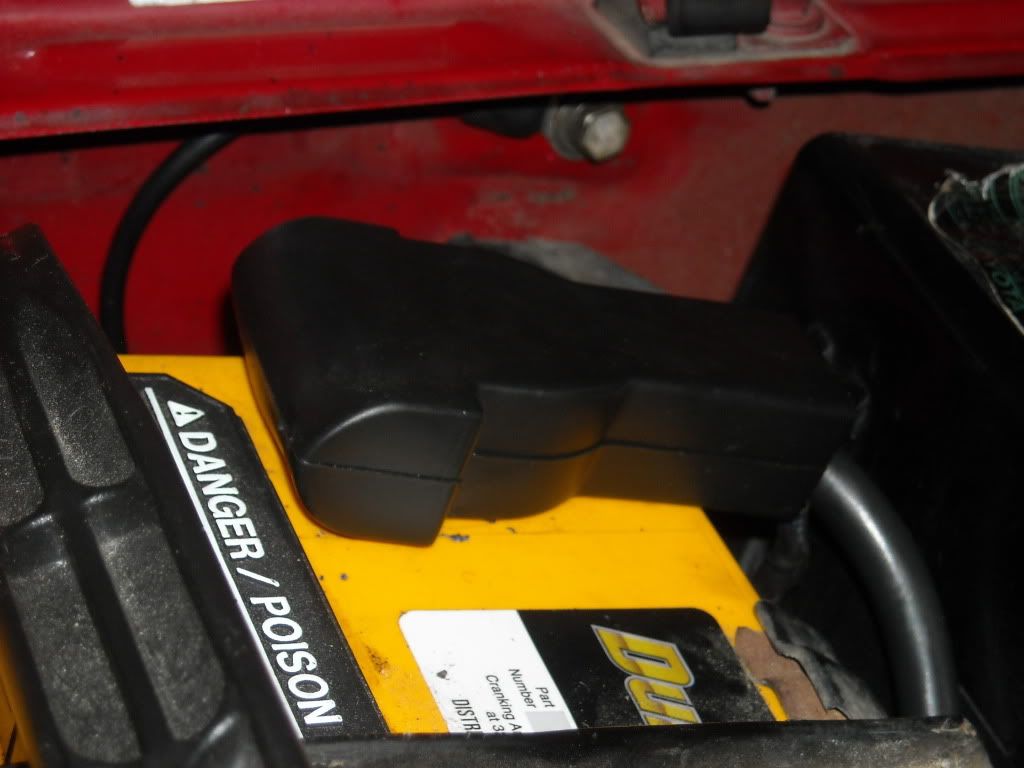
Also, ........ That fusible link box is just that, a fusible link.. BUT, as I remember it being explained to me(probably very poorly explained by myself, haha)..... The BARS in that 80A portion in that box.... those are very important and are routed from the battery to that BAR, via the fusible link wire, ...which 'BRINGS HOT 12V' to the entire chassis electrical, after it's a complete circuit including the alternator/ and also serves in charging the battery once the cycle is complete........???? haha... Hey, I'm trying. I just know that many people remove that 10AWG factory wire and run a 4AWG wire, often, to power the whole system. I would assume this would help in keeping the full capability of current flowing back to the battery from the Alternator at the quickest rate possible, no?
Also, ........ That fusible link box is just that, a fusible link.. BUT, as I remember it being explained to me(probably very poorly explained by myself, haha)..... The BARS in that 80A portion in that box.... those are very important and are routed from the battery to that BAR, via the fusible link wire, ...which 'BRINGS HOT 12V' to the entire chassis electrical, after it's a complete circuit including the alternator/ and also serves in charging the battery once the cycle is complete........???? haha... Hey, I'm trying. I just know that many people remove that 10AWG factory wire and run a 4AWG wire, often, to power the whole system. I would assume this would help in keeping the full capability of current flowing back to the battery from the Alternator at the quickest rate possible, no?
Jul 26, 2012 | 11:23 PM
#47
Registered User
Joined: Oct 2007
Posts: 69
Likes: 0
From: Loganville, GA
Chefyota, thanks for the insight...
in looking back to my recent engine rebuild, i did notice at least 2 of the 4 engine grounds were not connected. I remember a ground-looking wire on the back of the head going to nothing, because it was broken...lol...I'm sure hooking that back to something on the firewall would help. I also know the smaller batt-to-body ground wire is stripped as well...so I will be making one of those too.
I also found a page that covers all the grounds, and I need to make sure the alt wiring harness ground that goes to the PS is connected...that could be where my issues are too.
Jul 27, 2012 | 12:20 AM
#48
The one on the back of the head? Also has a bolt hole right behind it on the firewall. That is often forgotten as people try to lift up the head and take it off... Only to drop the head back down as it's ripped out of their hands,  haha... OR, it just rips in half, maybe? Whatcha think? Coulda happened.
Yeah, track all that stuff down and go get em!
haha... OR, it just rips in half, maybe? Whatcha think? Coulda happened. Yeah, track all that stuff down and go get em!
Jul 27, 2012 | 10:26 PM
#49
Registered User
Joined: Oct 2007
Posts: 69
Likes: 0
From: Loganville, GA
The one on the back of the head? Also has a bolt hole right behind it on the firewall. That is often forgotten as people try to lift up the head and take it off... Only to drop the head back down as it's ripped out of their hands, haha... OR, it just rips in half, maybe? Whatcha think? Coulda happened.
Yeah, track all that stuff down and go get em!
haha... OR, it just rips in half, maybe? Whatcha think? Coulda happened. Yeah, track all that stuff down and go get em!
Still need to verify the alt's direct ground to the PS pully, or make another directly to body though...but for now, it's running MUCH better. Seeing as how I finished at 2am, I have a big trip at Durhamtown later today that the truck is running in.
Thanks for all the insight guys, hope this will help anyone that has shared this dilemma with their modifications.

 HAVE FUN! haha.
Jul 29, 2012 | 10:45 PM
HAVE FUN! haha.
Jul 29, 2012 | 10:45 PM
#51
Registered User
Joined: Mar 2010
Posts: 304
Likes: 1
From: Scottsdale, AZ
Hey Chef!--sorry I'm just replying to your hello above, but I just got back to this thread.
I have been thinking about the pulley issue and how the OP just mounted his to the taper of the alternator shaft, even though the pulley ID mount is too small... I love this alternator idea, but I think mounting the factory pulley with no mods, and bending the upper alternator mounting bracket is not the best idea.
As for the pulley, either the factory Toyota pulley should be drilled out, being careful to keep the hole centered, or a new pulley should be used. If you are getting a new pulley anyway, it would be great to get a smaller pulley to keep the alternator at it's ideal RPM. The outer diameter of the Jag pulley it comes with would be ideal. (all this was said above, I am just recaping)
Why? First, the pulley does not line up with the other pulleys in the system. Secondly, there has to be a very small contact point between the edge of the pulley, and the tappered section of the alternator shaft. I just can't see this as being good, and I suspect it will cause alignment/balance issues like it did for the OP with the first alternator.
As for beding the bracket (upper tension bracket), I can't see how that will help align the pulley as the bottom bracket can't allow for the alternator to move at all (except to rotate and tighten the belt).
Ultimately, the Jaguar XJ6 alternator swap should be a direct replacement of the alternator, no mods, with the exception of a drilled out or new pulley.
Just my thoughts on the what we have all been saying--I'm not at all trying to take away from the great post and idea!
Last edited by MortonPhotographic; Jul 29, 2012 at 10:48 PM.
Nov 26, 2012 | 07:14 PM
#52
Registered User


Joined: Mar 2012
Posts: 7,125
Likes: 681
If it doesn't go away after a couple of days (to allaw things to dry thoroughly) the XJ6 Jag is surely the way to go.
Happy Holidays!
Aug 12, 2013 | 08:02 AM
#55
Registered User
Joined: Jun 2009
Posts: 572
Likes: 0
From: Virginia Beach, VA
So since I've put this alternator in, I've had issues with around 14.5V-15.5 volts at idle to high idle. I have also burnt up two coils. Is there a voltage regulator on the JAG alternator? I read somewhere that the OEM voltage regulator for 87 22R pickups was inside the alternator, but I need to find a way to integrate one or ensure the jag has one and get it replaced. Can someone chime in? At this rate I'll be running through a battery and coil every few months, and I want to fix the cause of the problem and not the problem. Thanks.
Aug 12, 2013 | 10:49 AM
#56
Dang! Sorry to hear man! I'm glad I bookmarked this... I'm not sure on adding an external regulator but I'm sure you can figure it out... I will try to look into that a little bit when I can because I am about to upgrade my alternator. Just want to be sure I get something that is it going to fry anything... Have the same coil for 27 years.... Stuff like you're going through kinda freaks me out, but I'm sure there is a remedy. Best wishes man!
Mar 28, 2014 | 09:10 AM
#57
I'm considering doing this upgrade but have read about some electrical complications from others that have done this. I spent some time on the phone this morning with Charlie at All Charged Up in Anderson, SC -- awesome guy!!! He figured out the issue and told me that it didn't make sense for me to buy from him since I live in Oregon.
Here's what he shared:
-Both the Jag and Toy alternator share the same Denso plug, however the terminals are wired differently. Therefore, it is not truly plug and play as is.
-He said that if you undo the back cover and swap in the Toy's regulator (which contains the harness plug), you will end up with the correct regulator and correct wiring. Then it will be plug and play.
Now that this is cleared up, I'm going to try this in the next few weeks.
And if you ever have a chance to send some business Charlie's way, please do!
May 15, 2014 | 07:22 PM
#59

Registered User
Joined: Aug 2010
Posts: 115
Likes: 0
Okay guys. I have a 1982 22r, that year alt has a square plug, not the denso round plug. I am wondering if I can cut my alt harness plug off, rewire in a alt lead repair harness with the round denso plug, (like the 85 and ups come with) and then plug and play it into the JAG alt that bolts in? If I can does anyone have a wiring diagram for the jag alt? I read previously that some of the jag terminals on the actual alt are not correct for the toyota plugs? Is the alt marked? so I can match my wires to the correct terminals?


