When you click on links to various merchants on this site and make a purchase, this can result in this site earning a commission. Affiliate programs and affiliations include, but are not limited to, the eBay Partner Network.
Build your own 3.4 crossover pipe UPDATE- 8/24/2013
here you go, I took lots of pics, and I will do what I can for describing what I did, I had a total of $3.00 in it.
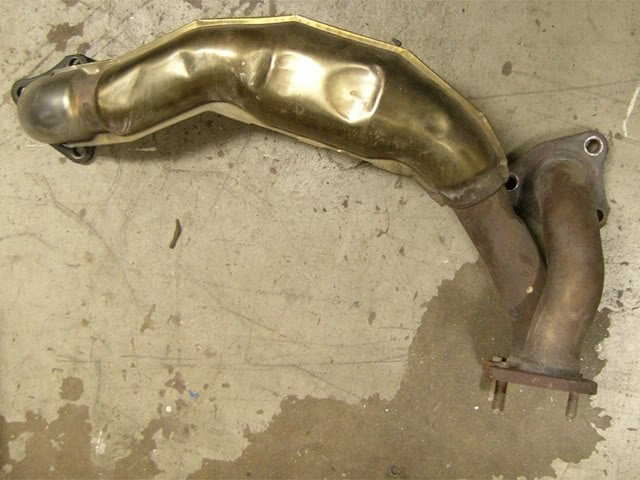
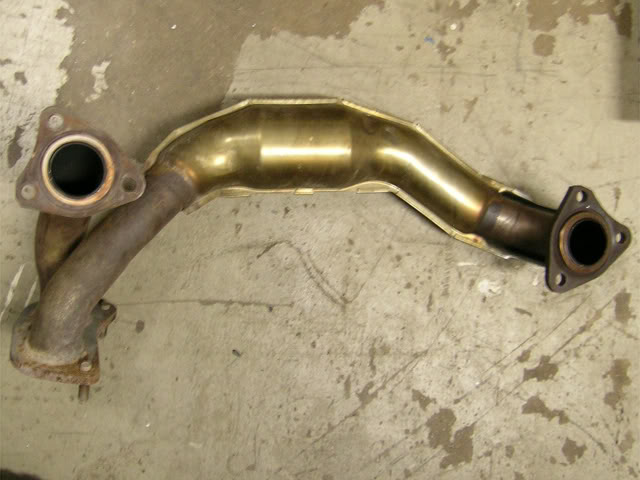
obviously this is the factory pipe, it just has the heat shield removed
took and cleaned all the mud off
here is one of the factory welds, I cut the weld, without cutting the pipe
here is what it looks like with one pipe removed, I used a cut off wheel and a die grinder to get in the area where the two pipes came together.
you can see here that I left the factory weld on the pipe, it makes it nice when re-welding it back together, and also you know how far the pipe goes into the flange.
another one with the weld cut
here is the pie with the flanges cut off, I didn't cut the short pipe off of the big flange, it worked without needing to. I also marked right and left on the flew, so I can put it in the same way.
I'm not sure how many pics I can put in one post, so I am going to post this and start another post, so if you can, don't post yet until I am done, thanks.
Last edited by Jason4X4; Jan 19, 2018 at 05:47 PM.
as you can see, the flex cuts don't line up, so I took it to the grinder to get the angles right
closer
even closer, NOTE, you can also see that I did wind up flipping the flex over, my right mark is now on the left
I wound up getting a piece of pipe to put inbetween here, I think it would have been able to be welded without it, but I wanted to make sure that the flex wasn't going to interfer with the trans bolts
engine clearance
I am going to do another post now, please hold...
Last edited by Jason4X4; Jan 19, 2018 at 05:54 PM.
you can see here the how much room there is for the transmission and bolts
another pic before welding
one more
head clearance
tacked in place
driver side clearance
tacked in place
the two pipes are close, but they don't touch, they can be tacked together, but I didn't
all welded up, I am using a flux core wire welder, they look better after I wire brush them
final clearances
since we used the factory down pipe, I had to move the o2 sensor cause it was hitting the frame, I also had to cut an ear off of this pipe at the flange, I just don't have a pic of it
used the factory o2 sensor hole as the second o2 sensor hole for the 3.4. yes it is in front of the cat, but it has a dummy box on it.
That;s all I have, this was on an 89 4runner, which I believe is the first gen(?). anyway, it worked for me, so good luck...
Last edited by Jason4X4; Jan 19, 2018 at 06:03 PM.
Excellent writeup! I might just add that the later 5VZFE models have a different crossover. I'll try to post a pic of the newer style factory crossover later. What is involved with removing the heat shield on the older style crossover?
Ok, here's the pics of the newer style 5VZFE crossover design, 2001 and up Tacos, (not sure about 4runner years):
As you can see they are very different designs, as are the exhaust manifolds from 2001 and up. The newer style use double wall tubing (most evident in the last pic) and it appears to have no flex coupling. These newer style look like it would be nearly impossible to flip around like you have done with older style. Lets put it this way, it would be easier to build one from scratch. The only thing you could use would be the flanges and if you used the stock exhaust manifolds you would need those flanges badly.
BTW I've been told the flanges are different between the older style and newer style. Yeah I think I like the older style crossover better, but I've heard that the newer style exhaust manifolds have better flow.
When I was working on cutting the flanges off of mine for the exh shop, I noticed that if you cut the flanges off and flip them so that the part that meets the exh manifold faces you, a 2" hole saw fit perfect inside of it. It wont mess up the flange, cuts the factory welds, and leaves you with the perfect starting point for welding up a new exhaust system and/or a crossover.
There is another possibility, the stock 5VZFE crossover could be used and then routed back to the drivers side under the truck much like guys have to do with headers. I'll probabily look into doing that if my custom crossover ever has a crack develop.
When I was working on cutting the flanges off of mine for the exh shop, I noticed that if you cut the flanges off and flip them so that the part that meets the exh manifold faces you, a 2" hole saw fit perfect inside of it. It wont mess up the flange, cuts the factory welds, and leaves you with the perfect starting point for welding up a new exhaust system and/or a crossover.
Do you still have the rest of it? What does that double wall tubing look like from a cross section, I mean is there some kind of material between the walls?
Do you still have the rest of it? What does that double wall tubing look like from a cross section, I mean is there some kind of material between the walls?
I gave the rest of it to the scrap metal guys. There was nothing between the walls of the tubing where I cut it, just air.
I tried to re-use that double flange connector, like you did, but it ended up not fitting between the frame and my firewall! I had to pull the whole engine out and have it cut off and replaced with a single collector.
Problem was that I paid to have an exhaust shop do it! Argh!
And do it again, the right way. Glad to see you got yours to fit.
thanks for posting this. great photo documentation. that's going to make things alot easier on us when we try it, assuming we don't have robd's problem. i wonder if there's a difference in the clearance on first and second gen 4runners? definitely something else to think about. thanks again- john
where in Tucson are you, I go down there frequently, maybe i'll have to stop by.
this is kind of a nomadic swap. i'm removing the 3.4 around 22nd and pantano. from there it goes to my work(dodge and ft lowell), where i will be doing the timing belt and water pump, oil pan and dipstick, spark plugs and wires, and hopefully the crossover fitting before i even remove the 3.0(only driver). we have a big shop with a polished concrete floor, rollup door and forklift(aka. engine hoist). since the housing market croaked, we're not using that shop for work at all. i'm going to try to make the stay there as short as possible just in case business picks up. once the 5vz is in my 4runner, i'll be towing it to my house(glenn and campbell) to do the wiring and other stuff without having to feel pressured. so far it seems like the biggest hurdle is going to be scheduling. i can't get back to work on the removal of the 5vz for probably a week and a half, since i can only work on it over the weekend and the seller is going out of town this coming one. i was hoping to have it all ready to be pulled after working on it yesterday, but i got a horrible case of food poisoning this weekend, which had me throwing up from midnight till 6am saturday night. i wasn't going to let anything stop me from starting, but i did get there an hour and a half later than i wanted, and had to leave by a certain time. still, i feel like i made decent progress for the time spent and physical condition of myself. anyway, hopefully the engine will be at our shop by the 16th. you're welcome to come check it out if you're down here on a saturday or sunday in the few weekends after that. input from someone who's done one of these certainly couldn't hurt. i'll let you know for sure when i get the 3.4 relocated. take care- john
GREAT INFO!! I have been doing this same thing on all of my swaps.
The crossover pipes are ALL the same on Tacoma's and 4Runners from 1995.5 to 2000 then they went to the double wall set up as seen in the above pictures.

 Mar 2, 2008 | 06:13 AM