
Homemade Coolant System Pressure Tester!
 11-25-2013, 05:24 PM
#1
Registered User
Thread Starter
Homemade Coolant System Pressure Tester!
My 87' 4runner had a mysterious coolant loss that for the life of me i could not figure out. I had no obvious leaks, no drips, no head gasket symptoms, etc. I finally convinced myself it was the head gasket and was preparing to pull the head when i had the idea to try and pressure test the coolant system. I tried renting a pressure tester from the local parts store, but their testers are only for checking radiator caps unless you have the adapter for our radiators, which they don't rent. Adapters are usually around $40. Being the penultimate cheapskate that I am, i set upon the task of simply making my own. Let the adventure begin!
Theory- The radiator cap is actually a 2 way valve. Liquids expand as they are heated, so if your engine is full of coolant, it needs a place to go. As the coolant heats up, the resultant pressure overwhelms the spring loaded bottom seal on the radiator cap (13 psi in our trucks) and flows into the coolant reservoir. Upon the engine cooling down, the coolant contracts and draws the fluid from the reservoir back into the engine through another, weaker, 1-way valve that keeps coolant in the engine until it heats up and again overwhelms the spring loaded seal. For this pressure test, we will apply pressure through the hose leading from the overflow reservoir to the radiator. This will allow us to test the entire cooling system including the cap, without buying any adaptors. If you have a hard to find leak, this is a really easy way to find it!
Parts list
-Bicycle pump - Bought at thrift store, $3
-6ft 1/4" vinyl tubing $1.14
-1/8" 2 sided plastic hose barb
Procedure-
1-Cut the hose off the bicycle pump. We will connect the plastic tubing directly to the pump.
2-Attatch one end of the hose to the bike pump nipple. I don't know how much bike pumps vary, but this one fit perfectly.
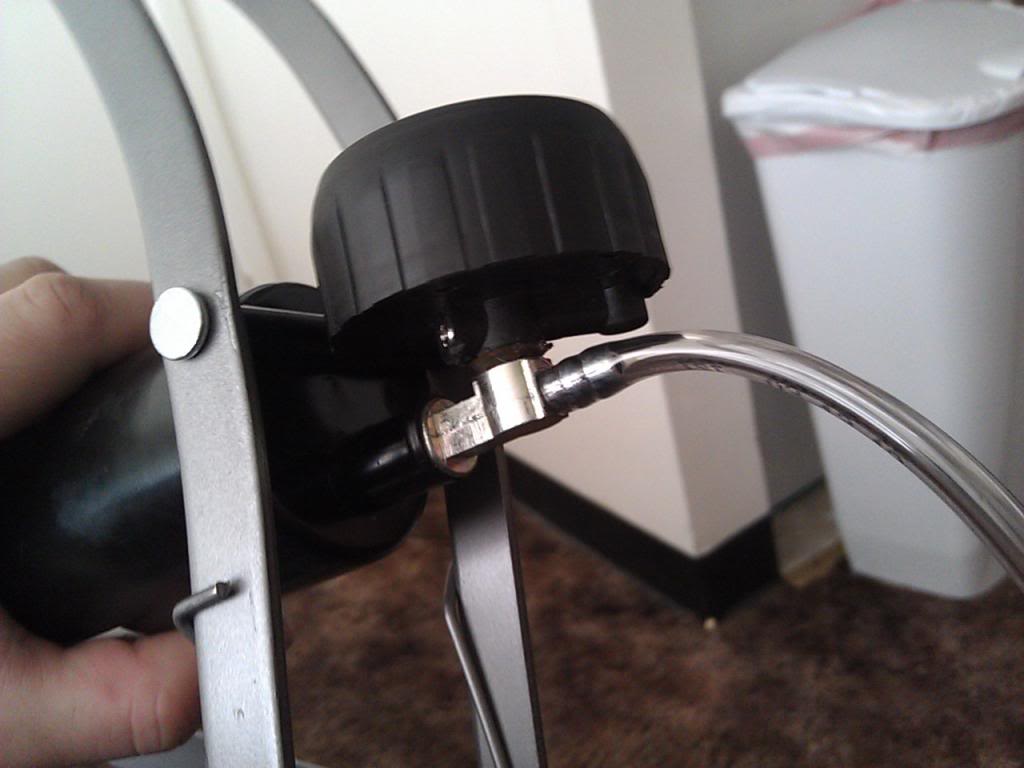
3-Attach the hose barb into the other side of the hose
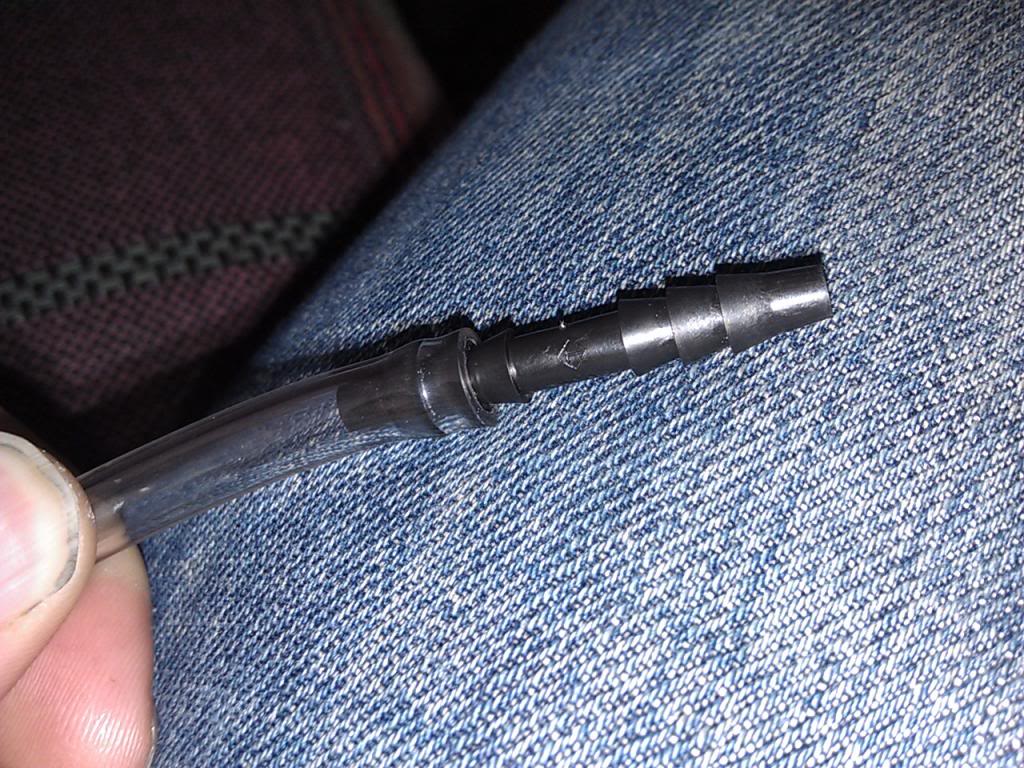
4-Insert the hose barb with hose attatched into the hose leading to the radiator. For me the hose fit perfectly snug with the hose barb attatched. You may need to use a hose clamp, zip tie, etc. The barb really isn't necessary, i was actually going to do this a different way but this worked fine, so i just kept it in.
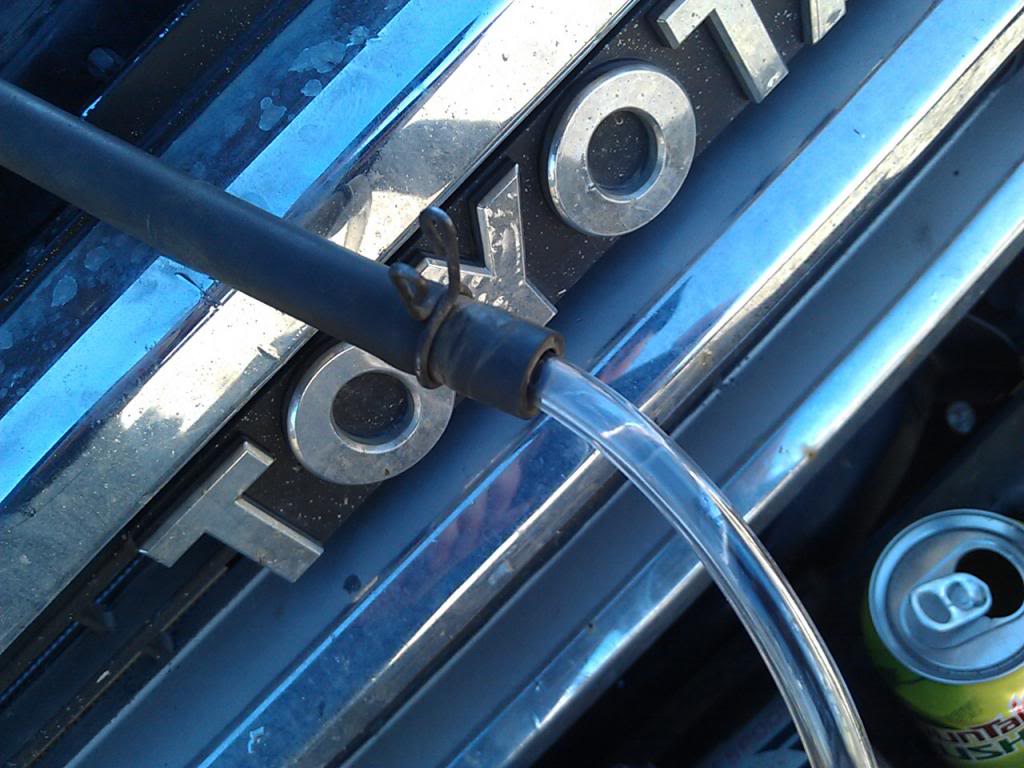
5-Apply pressure to the cooling system with the bike pump. Make sure all the hose connections are tight and don't leak. It doesnt do any good to go over 13 psi as that is the maximum pressure the system will see.
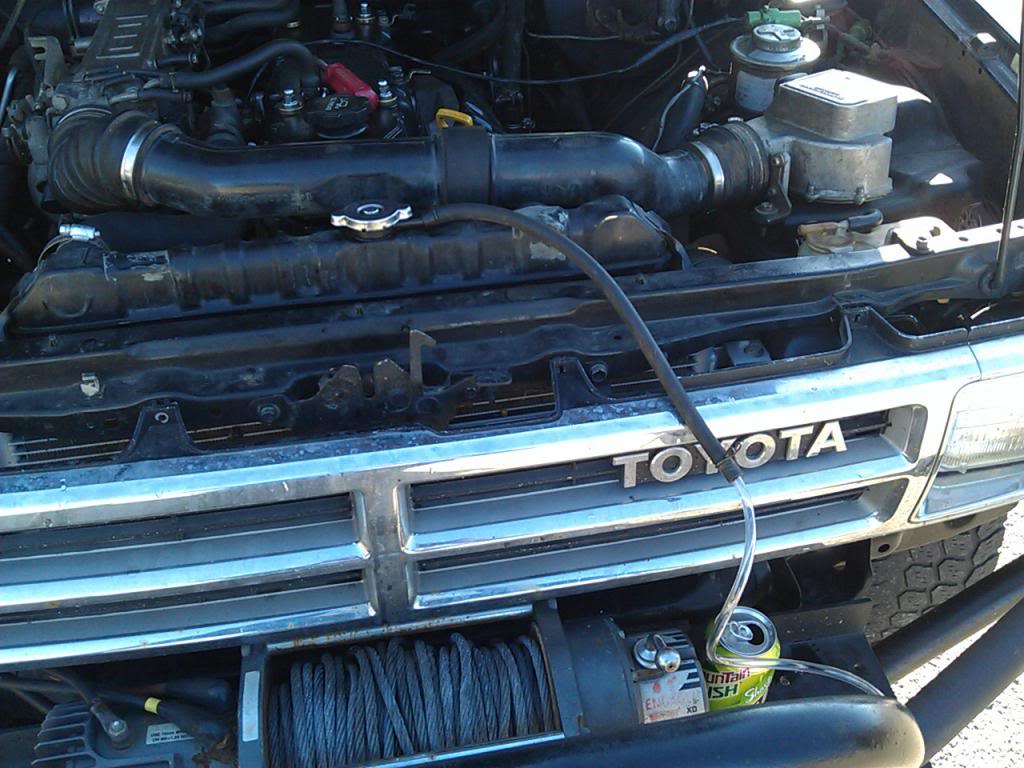
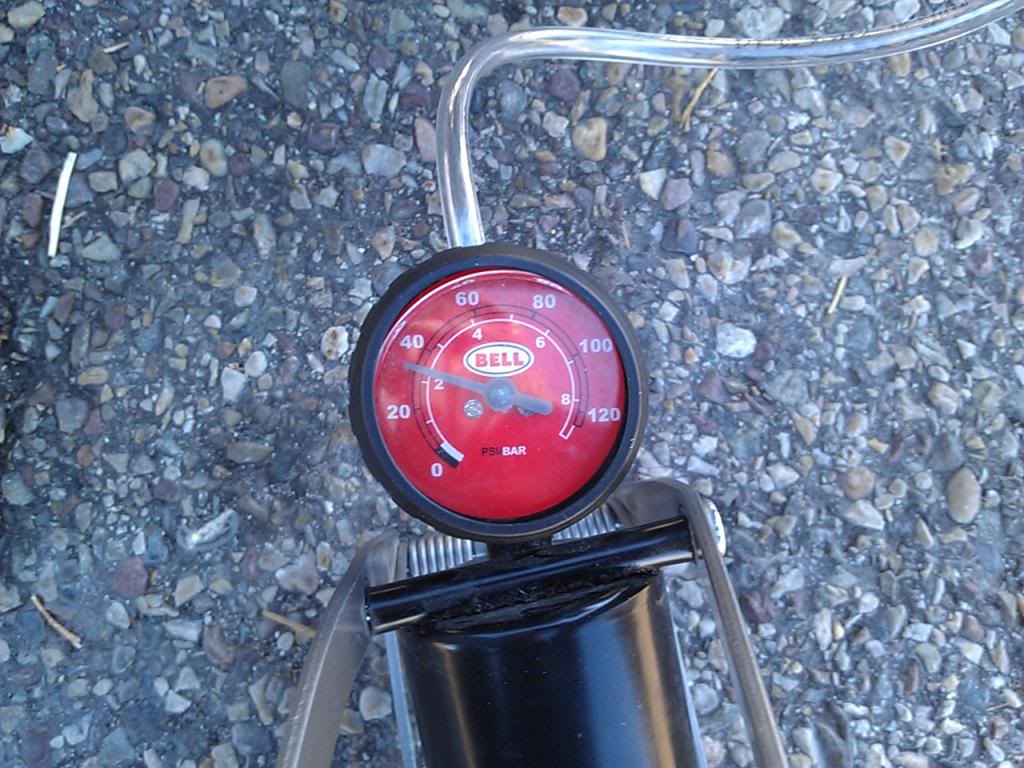
6-After applying pressure and verifying it is holding pressure with the gauge on the bike pump, look for leaks! It may take a little while before any appear, so be patient!
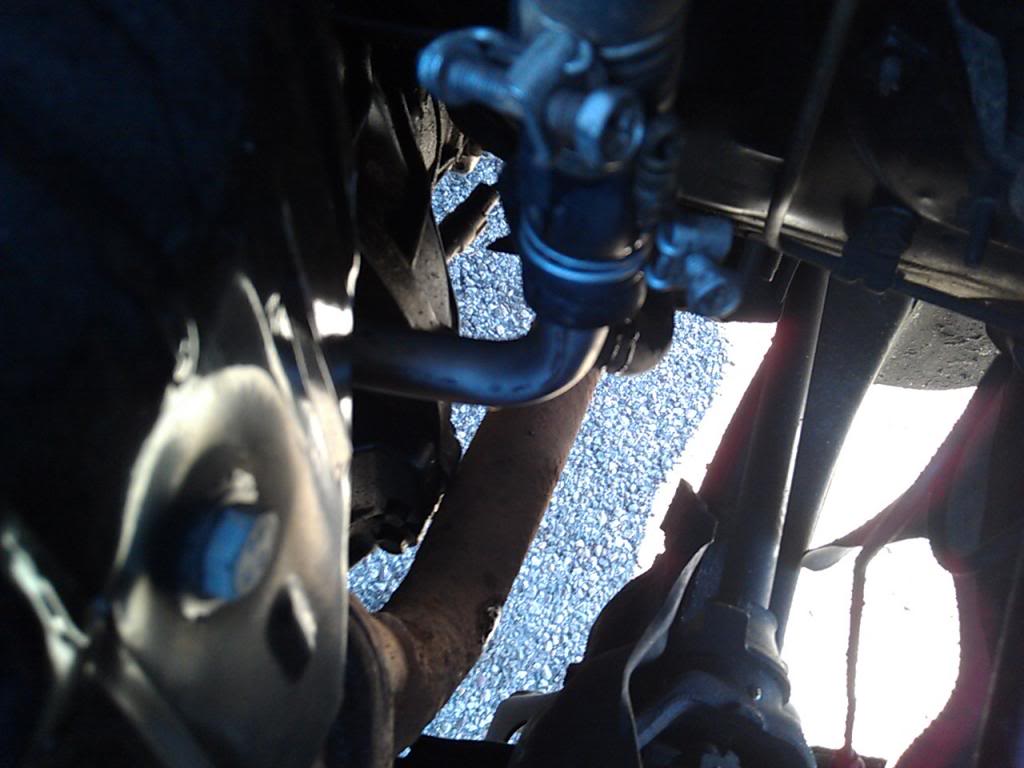
Mine turned out to be dripping right onto the exhaust so it would have been more or less impossible to find otherwise. This is more or less just a proof of concept, so you can find any way you want to connect the bike pump to the hose, but this is what worked for me.

 11-27-2013, 08:22 PM
#3
Registered User
Join Date: Nov 2008
Location: Vancouver< WA
Posts: 247
Likes: 0
Received 0 Likes
on
0 Posts
Thanks inferno. I am going to try this. In order to test the whole system would it be necessary to remove the thermostat? Also, what do you think about going a little over 13 lbs to find any potential future leaks?
11-27-2013, 08:30 PM
#4
Registered User
Thread Starter
It should pressurize the entire system even without taking out the thermostat. You don't need flow to have pressure. I actually did go a bit over 13 to make sure i had no leaks. Went up to about 20 and they started to come out of the woodwork! Found 4 in total!
Trending Topics
11-28-2013, 04:50 PM
#8
Registered User
Join Date: Nov 2007
Location: Dillsburg, PA
Posts: 954
Likes: 0
Received 0 Likes
on
0 Posts
The FSM shows to test at 17 psi. But do this on 20 year old hoses, and you'll end up replacing them all. I was tired of the leaks, and just got done with testing leaks, when the last one I found was at the heater valve.
11-28-2013, 05:00 PM
#9
Registered User
Nothing wrong with replacing old hoses. Better to have them fail now then later on when they fail on their own while your out wheeling or 30 miles from the nearest service or parts house.
11-28-2013, 05:04 PM
#10
Registered User
Join Date: Nov 2007
Location: Dillsburg, PA
Posts: 954
Likes: 0
Received 0 Likes
on
0 Posts
I agree. Would love to have the system hold 15 psi for 2 days straight.
Tired of smelling coolant after the truck sits in the garage.
Tired of smelling coolant after the truck sits in the garage.
Last edited by Cyberman; 11-28-2013 at 05:05 PM.
 10-22-2015, 02:06 PM
#12
Registered User

Join Date: Sep 2007
Location: San Francisco East Bay
Posts: 8,254
Likes: 0
Received 822 Likes
on
649 Posts
Well, that's actually the magic of this system. No gauge on a bicycle pump reads accurately enough to hit 13psi or 17psi, so you pump it up til your gauge reads "about" 20, then quickly disconnect it. The radiator cap will bleed off anything over 13psi, and you will reduce your risk of damaging something.
Of course, as Cyberman pointed out, the "better" test is to 17psi. You could do that by putting one or two layers of inner tube under the radiator cap; it would require a higher pressure to push it far enough to open. The problem would be reaching 17psi without actually getting it to, say, 23psi - the "modified" radiator cap may not open at that too-high pressure. So I would pick up a gauge with a more sensible range (probably 0-30) . A little plumbing would be involved, but not too much.
Of course, as Cyberman pointed out, the "better" test is to 17psi. You could do that by putting one or two layers of inner tube under the radiator cap; it would require a higher pressure to push it far enough to open. The problem would be reaching 17psi without actually getting it to, say, 23psi - the "modified" radiator cap may not open at that too-high pressure. So I would pick up a gauge with a more sensible range (probably 0-30) . A little plumbing would be involved, but not too much.


Thread
Thread Starter
Forum
Replies
Last Post
TJWilly
95.5-2004 Tacomas & 96-2002 4Runners
6
07-31-2015 02:05 PM
itzmywife's
95.5-2004 Tacomas & 96-2002 4Runners
2
07-25-2015 04:55 PM
the1998sr5
95.5-2004 Tacomas & 96-2002 4Runners
6
07-16-2015 06:20 AM


