
3vze Top End rebuild...W/pics...slowly
 Feb 8, 2005 | 07:13 PM
#1
Thread Starter
Registered User
Joined: Jan 2005
Posts: 571
Likes: 0
From: Moreno Valley, Ca
3vze Top End rebuild...W/pics...slowly
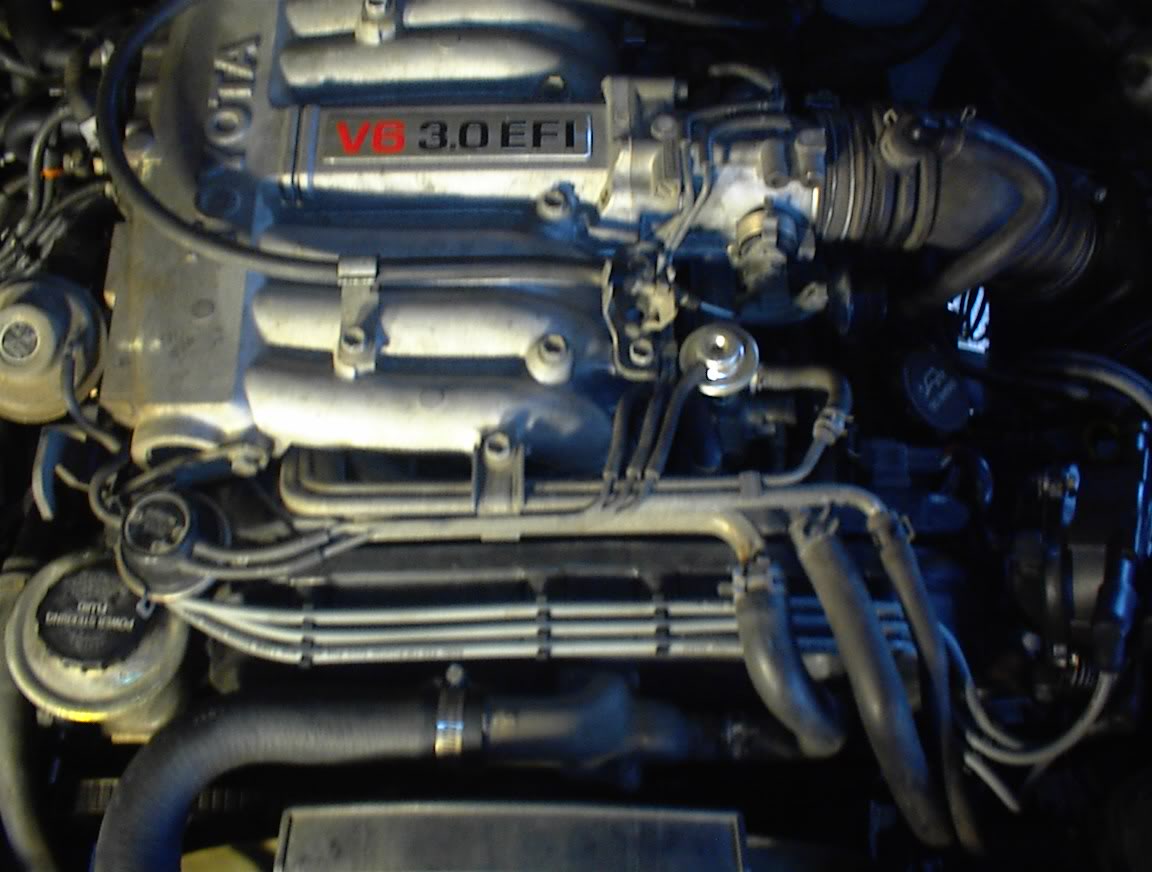
As you know I'm basically rebuilding my top end. So tonight I finally got started and took some pics. It will be slow going as I'm not a mechanic and started before Drkgypsy made it over(man is he going to have FUN piecing this mess back together with me  ). Parts on order, machine shop lined up. Let the dismantling begin.
Angles of the engine area:
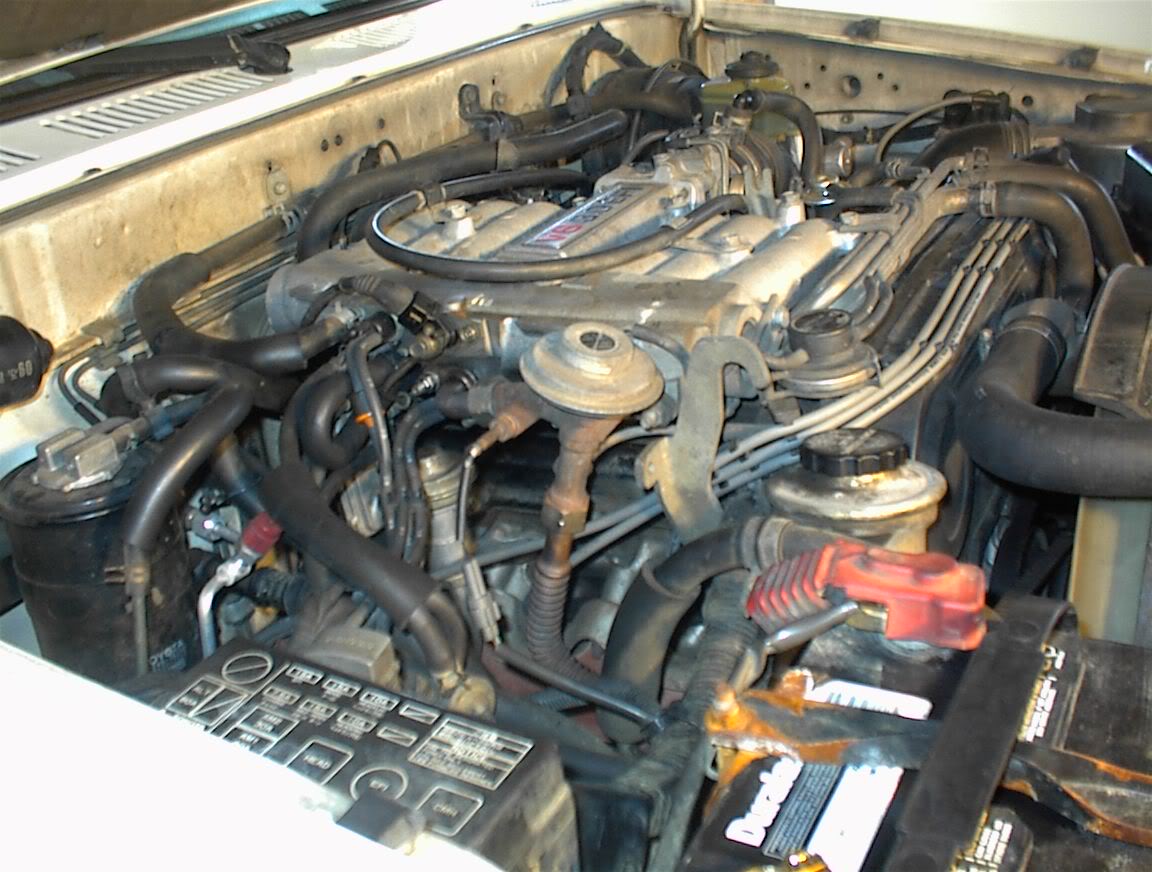


Room to work in:
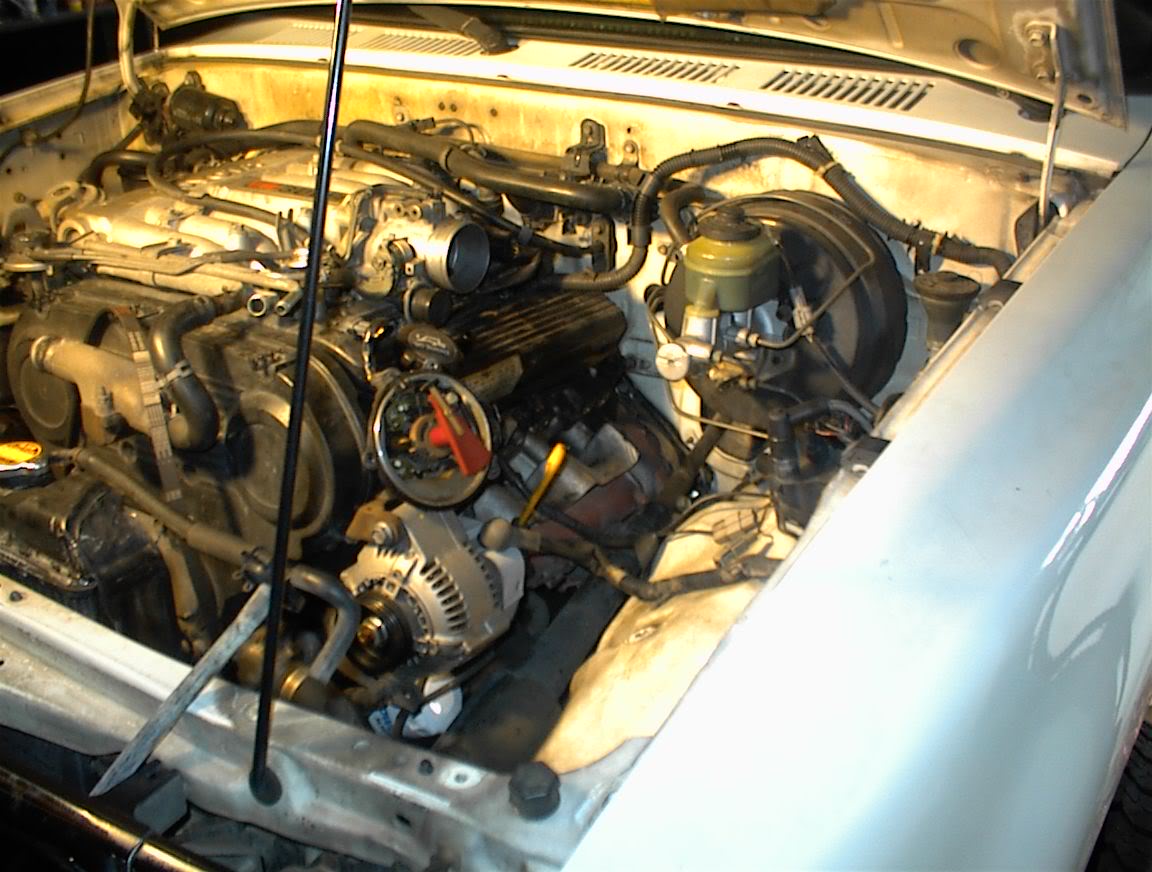

Goal to remove tonight:
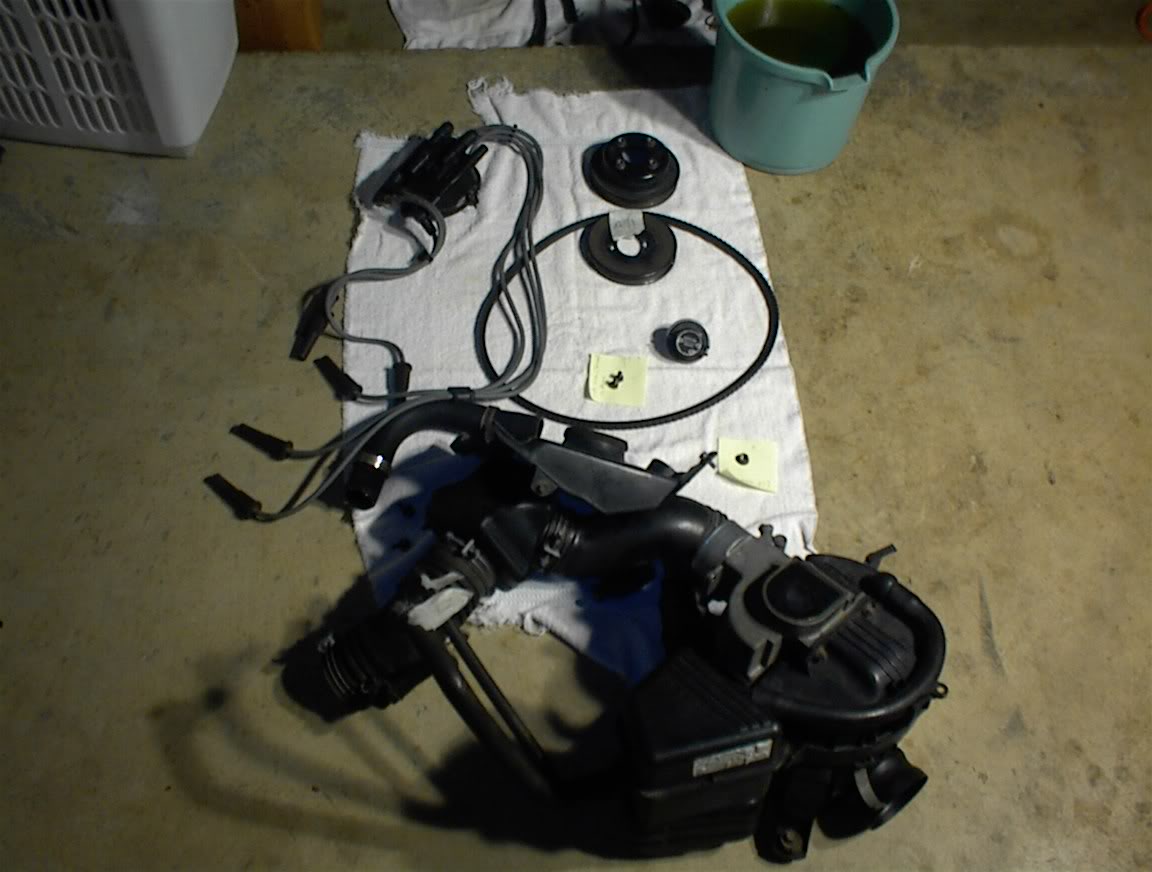
Success:
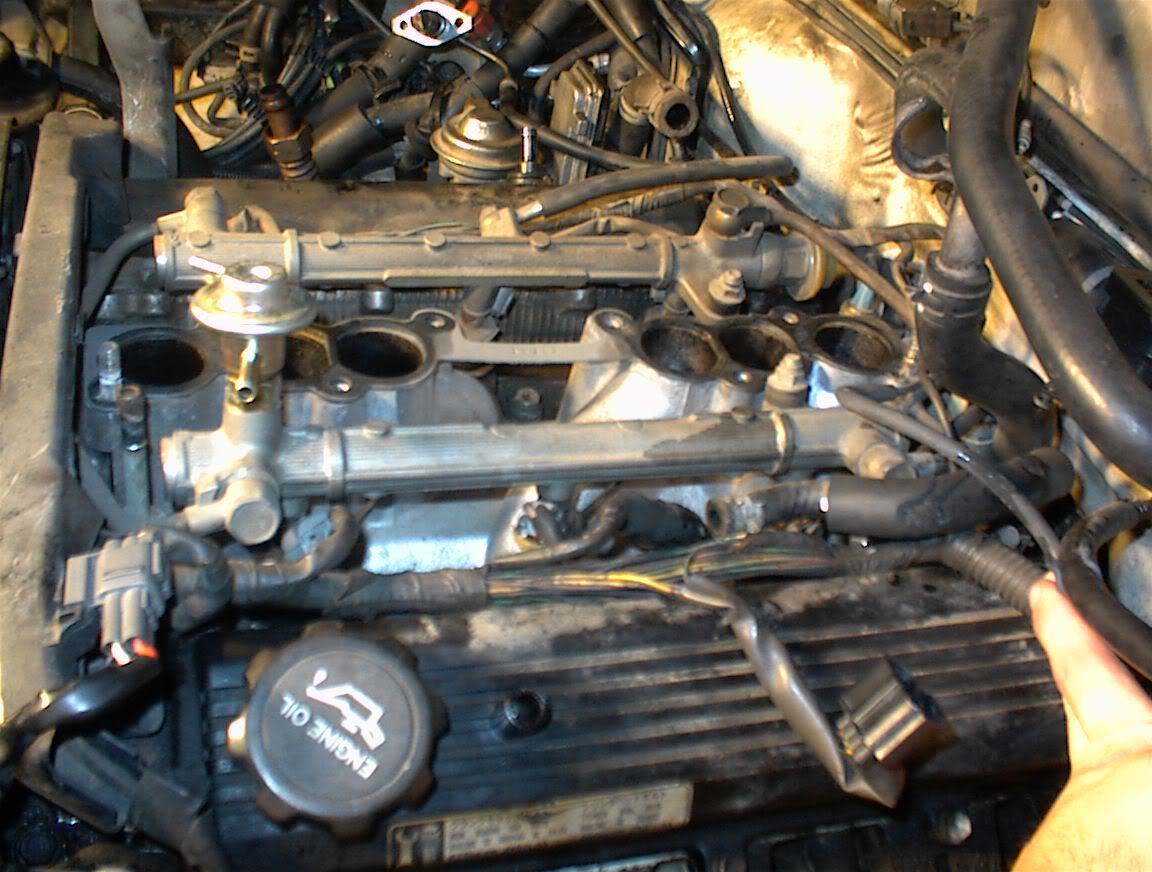
The mess:
). Parts on order, machine shop lined up. Let the dismantling begin.Angles of the engine area:
Room to work in:
Goal to remove tonight:
Success:
The mess:
Feb 8, 2005 | 07:17 PM
#2
Thread Starter
Registered User
Joined: Jan 2005
Posts: 571
Likes: 0
From: Moreno Valley, Ca
Sorry for the large pics if needed I'll resize them.
Parts are ordered. Going to a larger valve on the heads. Downey headers and new HP exhaust. 2" body lift and I just found out I'll be getting an early B-Day gift of new skyjacker shocks (currently all 4 corners ride on economy monroe shocks -- Not designed for my yota). Love ya sweety, no, not you guys on the forum...Nothing personal.
The Project has began
-=Morphine=-
EDIT:::
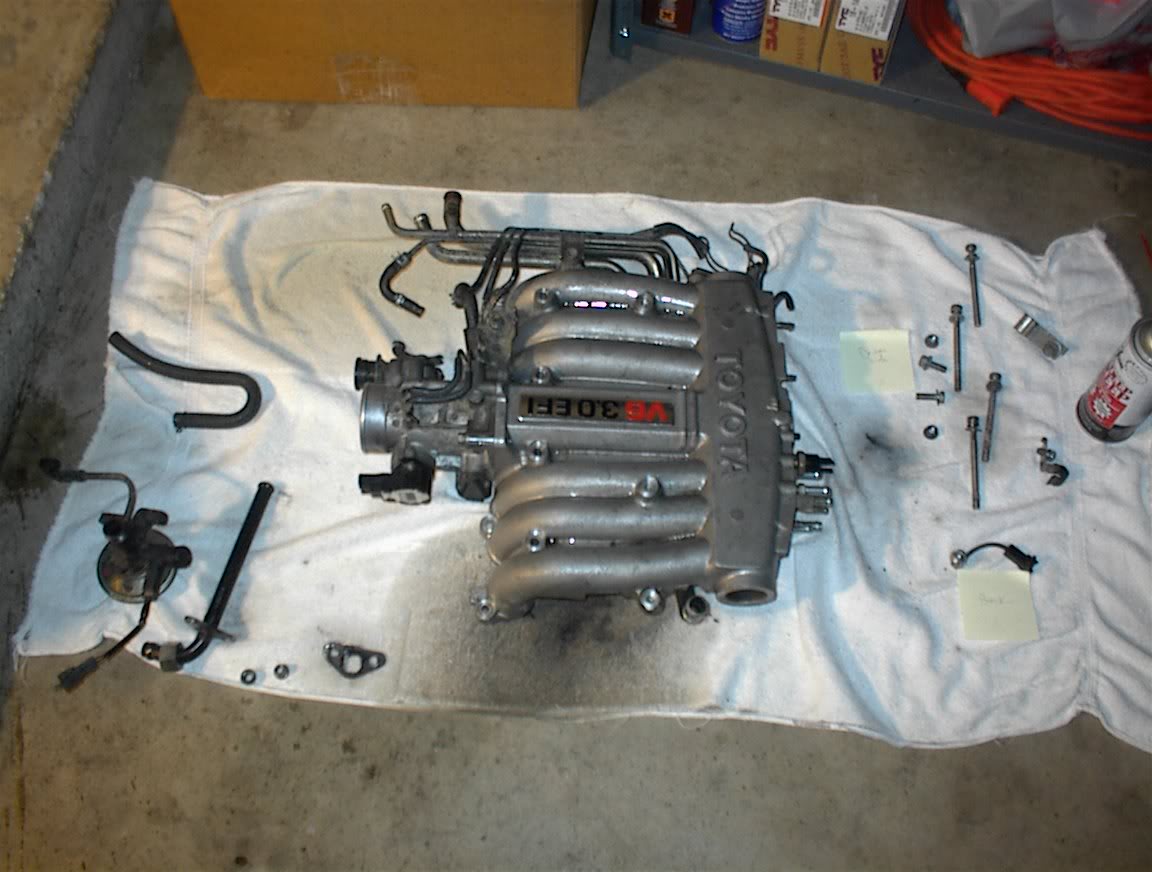
Is it common for this gasket to be cracked into 3 pieces when you remove the air intake manifold?

The Project has began
-=Morphine=-
EDIT:::
Is it common for this gasket to be cracked into 3 pieces when you remove the air intake manifold?
Last edited by Morphine; Feb 8, 2005 at 07:22 PM.
Feb 8, 2005 | 07:28 PM
#3
Contributing Member
Joined: May 2004
Posts: 3,400
Likes: 0
From: Tucson, AZ
What is a top end rebuild? Not sure about the gasket, never had my 3.0 appart that far before I sold it although I needed to because the valve cover on that side leaked. Doesn't look TOO bad but sill a lot of work for a valve cover!
Feb 8, 2005 | 07:33 PM
#4
Thread Starter
Registered User
Joined: Jan 2005
Posts: 571
Likes: 0
From: Moreno Valley, Ca
Well I'm calling it a Top End Rebuild.
Bike4miles, as the title says, that's what I'm callingit. Machining the heads, valve job, adjustment, new gaskets, hoses, etc.
Basically Cylinder #6 is shot to hell and the other 5 are weak. Hope that explains my intentions.
-=Morphine=-
Basically Cylinder #6 is shot to hell and the other 5 are weak. Hope that explains my intentions.
-=Morphine=-
Feb 8, 2005 | 07:36 PM
#5
Registered User
Joined: Apr 2004
Posts: 2,583
Likes: 1
From: NV
Originally Posted by Morphine
EDIT:::
Is it common for this gasket to be cracked into 3 pieces when you remove the air intake manifold?
Yes. I've removed my plenum many times and it's always in 2-3 pieces. You oughta see what my engine compartment looks like right now. Good luck dood!


Trending Topics
Feb 8, 2005 | 07:51 PM
#8
Registered User
Joined: Apr 2004
Posts: 2,583
Likes: 1
From: NV
Originally Posted by bike4miles
Ok, got it. Hey ChickenLover, is that your radiator I see still mounted? How did you get all that stuff out without smashing it? That's always the first thing I take out.
Nah, the radiator was the first thing to go. That's just the 'thing' that sits in front of the radiator. Sorry, I can't think of what it's called.
 Feb 8, 2005 | 11:20 PM
#10
Thread Starter
Registered User
Joined: Jan 2005
Posts: 571
Likes: 0
From: Moreno Valley, Ca
OK help please.
Midnight wrenching or the Haynes manual I'm using....but something doesn't seem right. Alright, Air intake manifold (plenum) is off, so are the valve covers for both sides. Next the manual says to remove the "intake Manifold" between both sides. Ok, however I still have the timing belt and cover and everything else on up front - minus the fan and shroud still on. The Intake manifold appears to be connected to these items. Am I wrong? Should I remove the timing belt and upfront pulley's and belts, then the intake manifold? Anyone off tomorrow and want to come up and help? Pizza and soft drinks? If it gets done BEER!!! 
Please guide me O'ye wonderful and full of the Yota knowledge followers of yotatech.
-=Morphine=-
Please guide me O'ye wonderful and full of the Yota knowledge followers of yotatech.
-=Morphine=-
Feb 9, 2005 | 12:59 AM
#11
Registered User
Joined: Jul 2004
Posts: 263
Likes: 1
From: Pennsylvania
Originally Posted by Morphine
Midnight wrenching or the Haynes manual I'm using....but something doesn't seem right. Alright, Air intake manifold (plenum) is off, so are the valve covers for both sides. Next the manual says to remove the "intake Manifold" between both sides. Ok, however I still have the timing belt and cover and everything else on up front - minus the fan and shroud still on. The Intake manifold appears to be connected to these items. Am I wrong? Should I remove the timing belt and upfront pulley's and belts, then the intake manifold? Anyone off tomorrow and want to come up and help? Pizza and soft drinks? If it gets done BEER!!!
Please guide me O'ye wonderful and full of the Yota knowledge followers of yotatech.
-=Morphine=-
Please guide me O'ye wonderful and full of the Yota knowledge followers of yotatech.
-=Morphine=-
Feb 9, 2005 | 05:33 AM
#12
Registered User
Joined: Feb 2003
Posts: 3,689
Likes: 4
From: Sarasota, FL
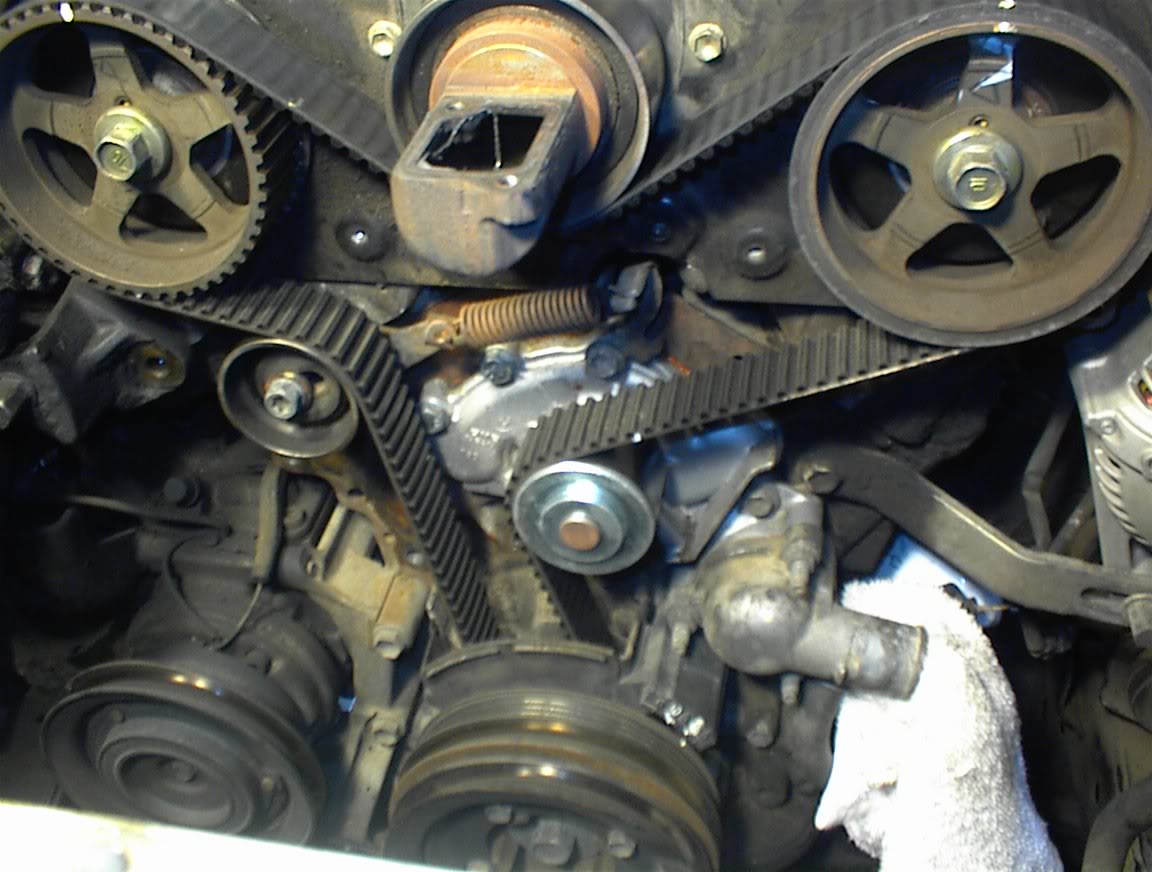
Agreed, and yes that lower intake plenum has the #2 idler for the timing belt attached to it. Pull the timing belt like nunsa said, (after setting the engine to TDC) then attack you cam gears (goodluck hehehehehe they are nasty SOBs to get off) only then can you take the rear timing covers off, then the fuel lines/rails/injectors, then lower intake.
I did find a place online that sells new heads that are ported polished with oversized intake and exhuast valves, AND have 4 cam profiles for this engine!!! The heads come already set up to go. The cost however is 1200 + 600 core charge!! :eek:
I did find a place online that sells new heads that are ported polished with oversized intake and exhuast valves, AND have 4 cam profiles for this engine!!! The heads come already set up to go. The cost however is 1200 + 600 core charge!! :eek:
Last edited by Bumpin' Yota; Feb 9, 2005 at 05:34 AM.
Feb 9, 2005 | 08:41 AM
#13
Thread Starter
Registered User
Joined: Jan 2005
Posts: 571
Likes: 0
From: Moreno Valley, Ca
thanks, now back to the wrenching.
Ok, timing belt and accessories are next. I already set TDC and marked it, so I'm good there. I've heard from many sources to replace the knock sensor and wire now so that's been added to the list.
Bumpin' yota - Out of my price. Thats almost the amount that this repair is gonna cost me. I would like to check them out if you have a link. Curiosity killed the called.
I have carboard and post-it notes labeling everything and my digicam is going crazy. Putting here back together is going to be a PITA.
Is there an acceptable number of parts that can be leftoff and she'll still run fine? j/k
j/k
-=Morphine=-
Bumpin' yota - Out of my price. Thats almost the amount that this repair is gonna cost me. I would like to check them out if you have a link. Curiosity killed the called.
I have carboard and post-it notes labeling everything and my digicam is going crazy. Putting here back together is going to be a PITA.
Is there an acceptable number of parts that can be leftoff and she'll still run fine?
j/k-=Morphine=-
Feb 9, 2005 | 07:15 PM
#15
Thread Starter
Registered User
Joined: Jan 2005
Posts: 571
Likes: 0
From: Moreno Valley, Ca
Projects getting bigger than I thought
Ok, with so much torn off the engine I decided to take a stab at some body work while I'm at it. In tearing down my 3vze I've found the fuel injectors (2 of them) were held to the electrical connector with zip ties. Completely fouled up I'll be sending them for a cleaning and comlete flow test to Cruzinperformance. Heads will be going to the shop on friday. Here are some more pics...
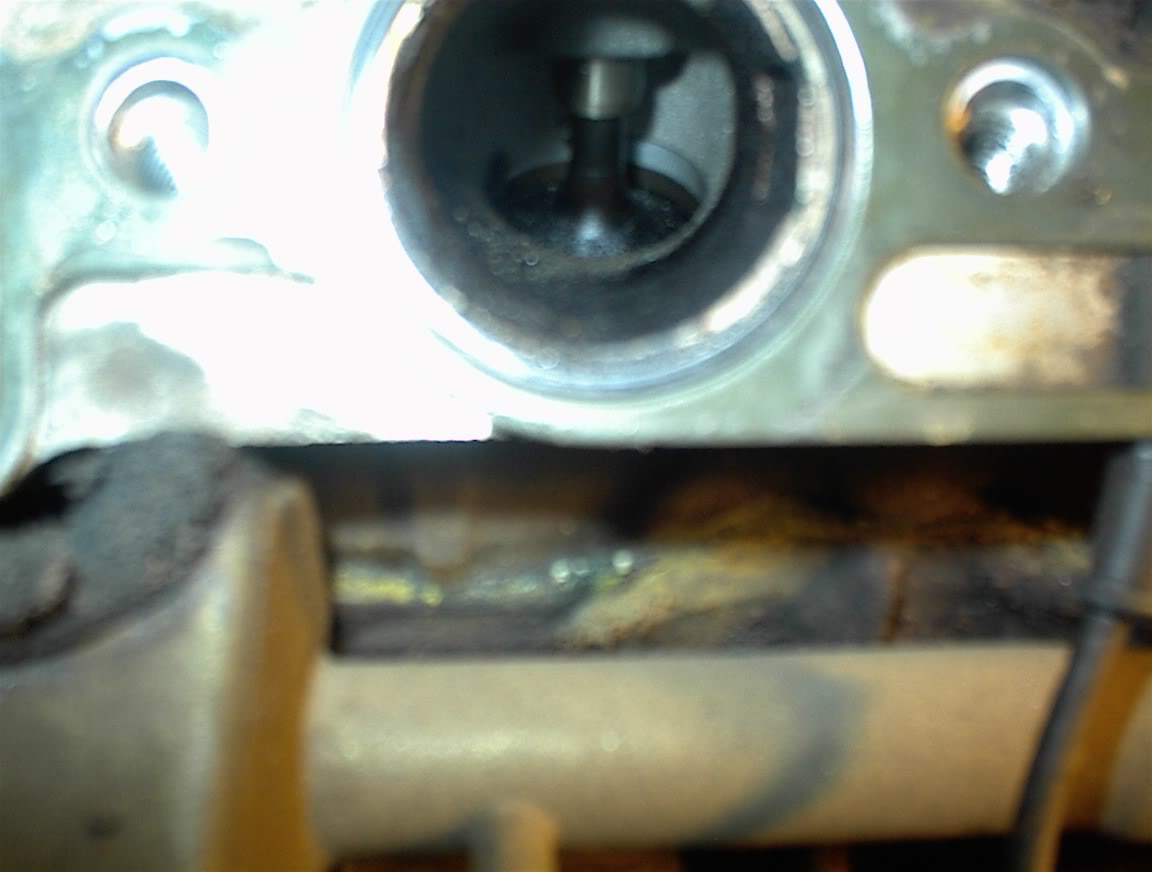
Timing belt
Is this the knock sensor?
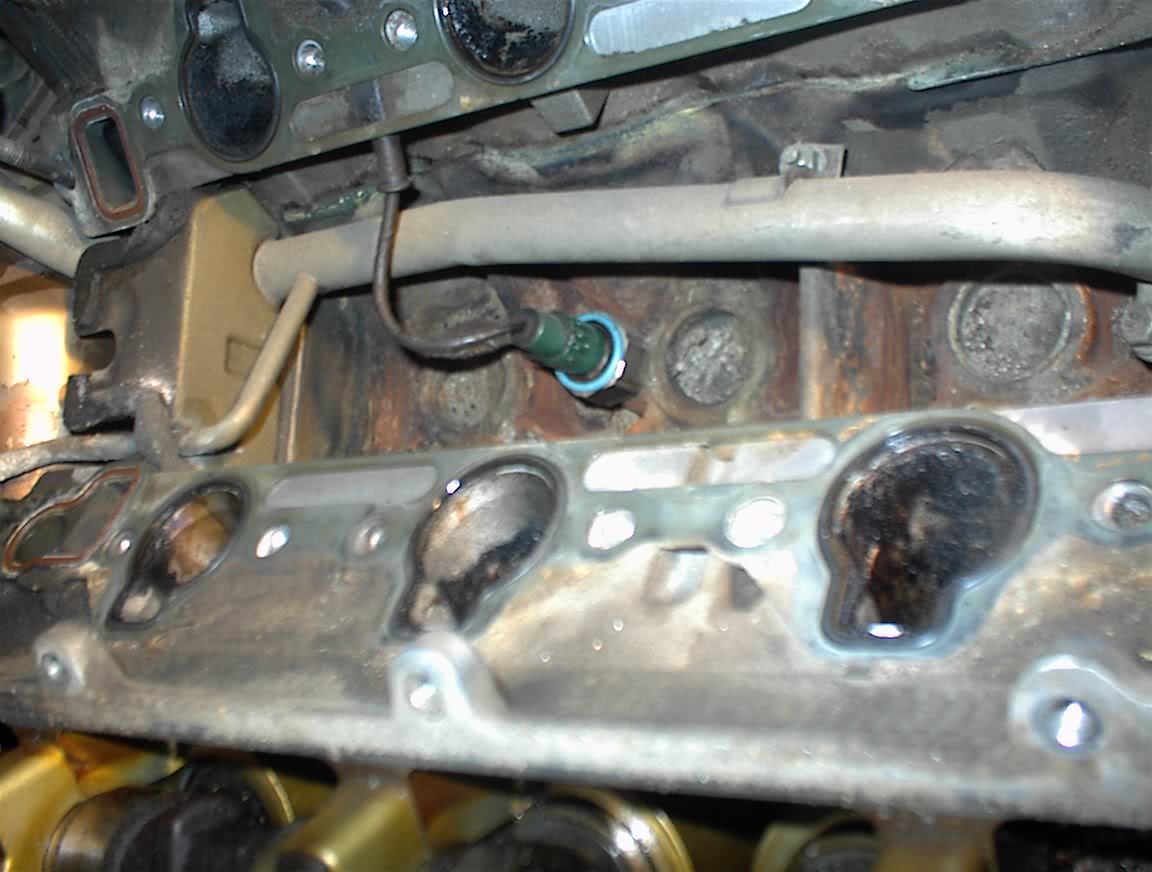
Valve covers off
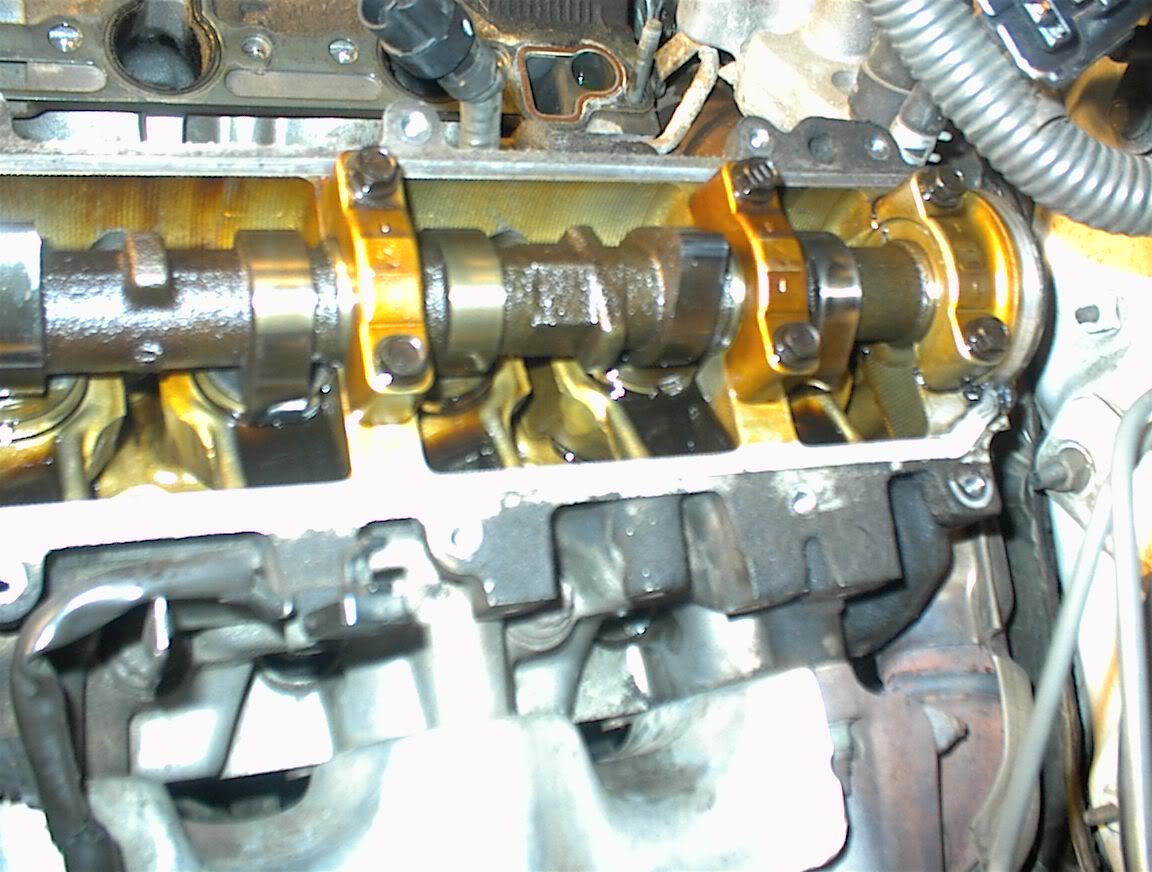
Dirty and carbon/crap build up.
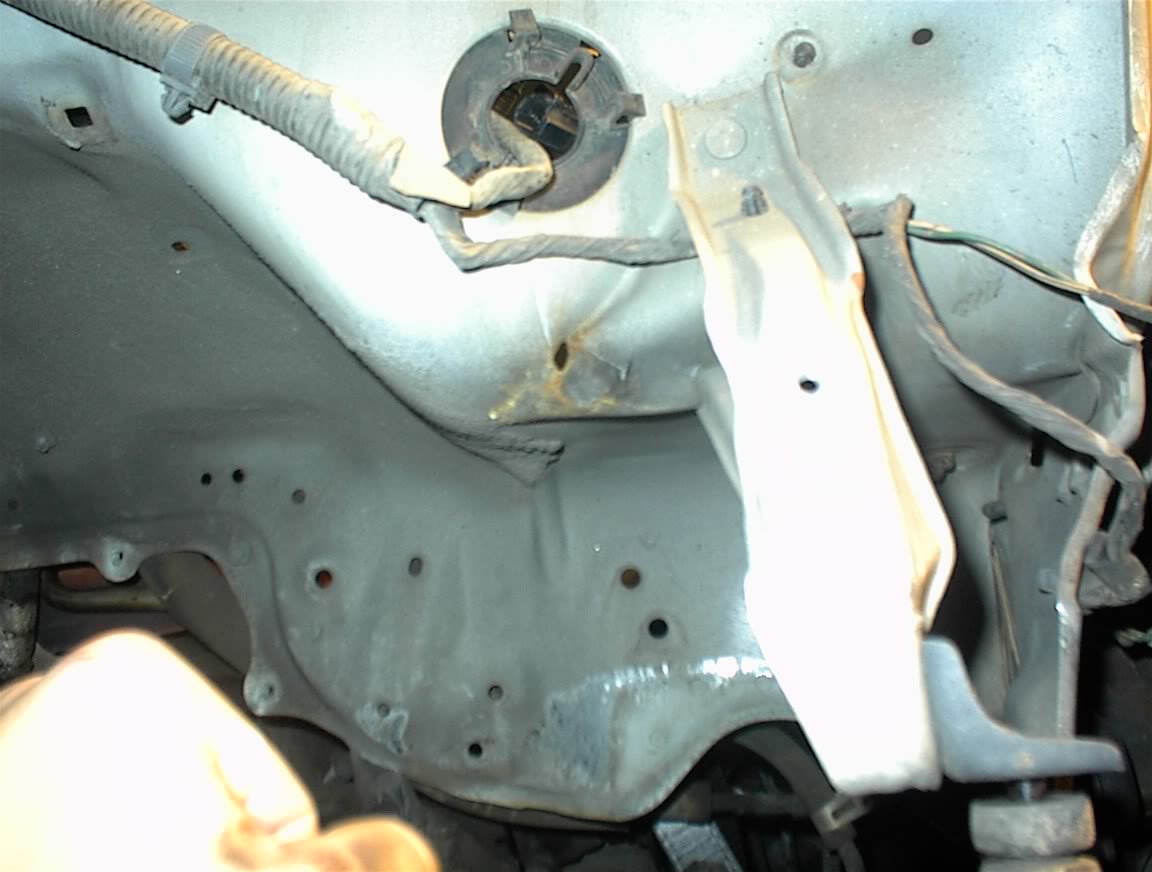
Start to work on the body

Close up of the dent fron behind the fender
Timing belt
Is this the knock sensor?
Valve covers off
Dirty and carbon/crap build up.
Start to work on the body
Close up of the dent fron behind the fender
Feb 9, 2005 | 07:48 PM
#16
Registered User
Joined: Feb 2003
Posts: 3,689
Likes: 4
From: Sarasota, FL
Niiice! Good luck with that crank pully and the cam pullys! 
That website you wanted that has:
Performance Heads w/4 cam lobe options
Big Bore TBs
Forged cranks
Forged rods
Cast race prepped rods
Forged pistons
Moly ring
Head Studs ----- something you and I should get
3vze STROKER KIT!!
That site gives me ALL kinds of ideas!!
EDIT: Whoops forgot the URL...LOL
http://toyotaperformance.com/3_0l.htm
Anyone got a few grand I can have?
Last edited by Bumpin' Yota; Feb 9, 2005 at 07:49 PM.
Feb 9, 2005 | 07:52 PM
#18

Registered User
Joined: Feb 2005
Posts: 344
Likes: 0
From: Atsugi Japan
Morph,
Sorry man I forgot to send you this really cool web site. You can print out the steps for taking apart the head and many other things. http://www1.autozone.com/servlet/UiB...3d8017957f.jsp
it is should be one line in the address bar with no spaces and type it just like you see it here. I have printed it out a couple of times (only the part for the 3vz) and have the pages real handy while I working. I have checked them against the chiltons I have; and for the most part excatly the same. the printed pages are cool cause I do not have to worry about greasy finger prints on the import parts of the book.
Your tracking right...good luck
Feb 9, 2005 | 08:02 PM
#20
Registered User
Joined: Feb 2005
Posts: 344
Likes: 0
From: Atsugi Japan
Morph,
sorry as I read it online it hacked up the web address. let me try again
www1.autozone.com/servlet/Uibroker?ForwardPage=
/az/cds/en_us/0900823d/80/17/95/7f/
0900823d8017957f.jsp
http://www1.autozone.com/servlet/UiB.../cds/en_us/090
0823d/80/17/95/7f/0900823d8017957f.jsp
try that...should work better
Dragon
Last edited by dragon564; Feb 9, 2005 at 08:06 PM. Reason: web address incomplete


