Toyota Tundra: How to Replace Serpentine Belt
Serpentine belts are rugged and can handle many miles before replacement is necessary. That being said, many individuals test their luck by running the belt far past its recommended maintenance interval. If you consider that a broken belt can cause serious engine damage or a loss of power steering control, it is clear that spending a few bucks on a new belt is not such a big deal after all.
This article applies to the Toyota Tundra (1999-present).
The serpentine belt is used to transfer engine power to the various accessories responsible for safe vehicle operation. This essential belt is often an overlooked maintenance item that can have dire consequences to the vehicle if it breaks. Considering the belt drives accessories such as the water pump, power steering pump, and alternator, a belt failure can lead to engine overheating, or worse, loss of vehicle control. Serpentine belts are quite strong and can last 100k miles; however, dirt, debris, water, and oil contamination can prematurely wear a belt. Similarly, belts tend to age, become brittle and weather-cracked, so it is typically a good idea to occasionally inspect the belt for wear. Most agree that belts should be replaced every 40,000 to 60,000 miles to ensure problem-free operation. Considering the job only takes a few minutes to complete, there is no need to risk the safety of yourself or your vehicle in order to save a few bucks. This article will outline the serpentine belt replacement procedure for 1999 to present Toyota Tundras.

Materials Needed
- Metric socket set
- Metric wrench set (optional)
- Screwdriver
- 3/8" drive ratchet and extension
- 3/8" or 1/2" drive breaker bar
- New belt
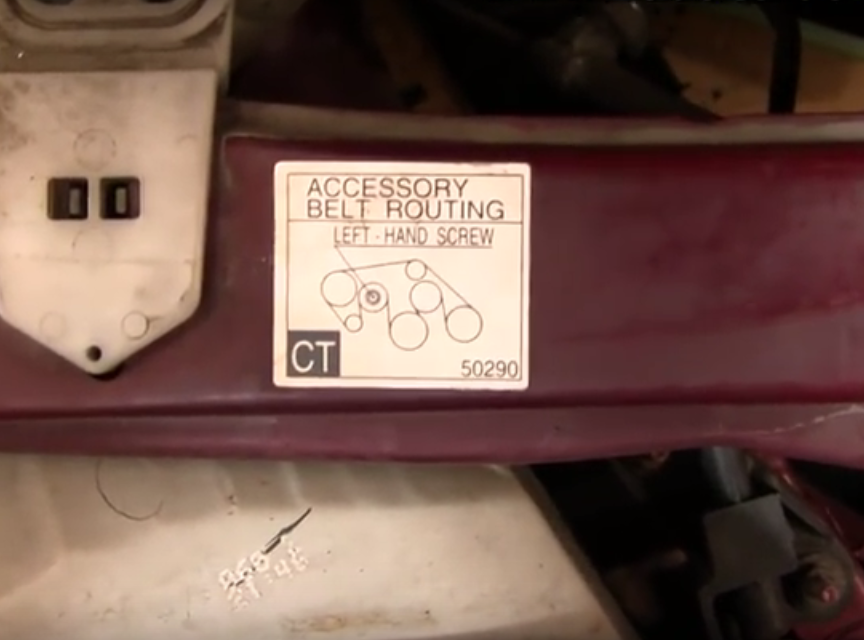
Step 1 – Belt routing orientation
It is always a good idea to familiarize yourself with the belt routing orientation before beginning the serpentine belt replacement procedure. There is typically a belt routing diagram located under the hood that shows the proper belt routing for the particular engine equipped in the truck. These decals have a tendency to peel off or wear away, so if your decal is not legible, refer to your owner's manual or draw a diagram to aid in belt installation.
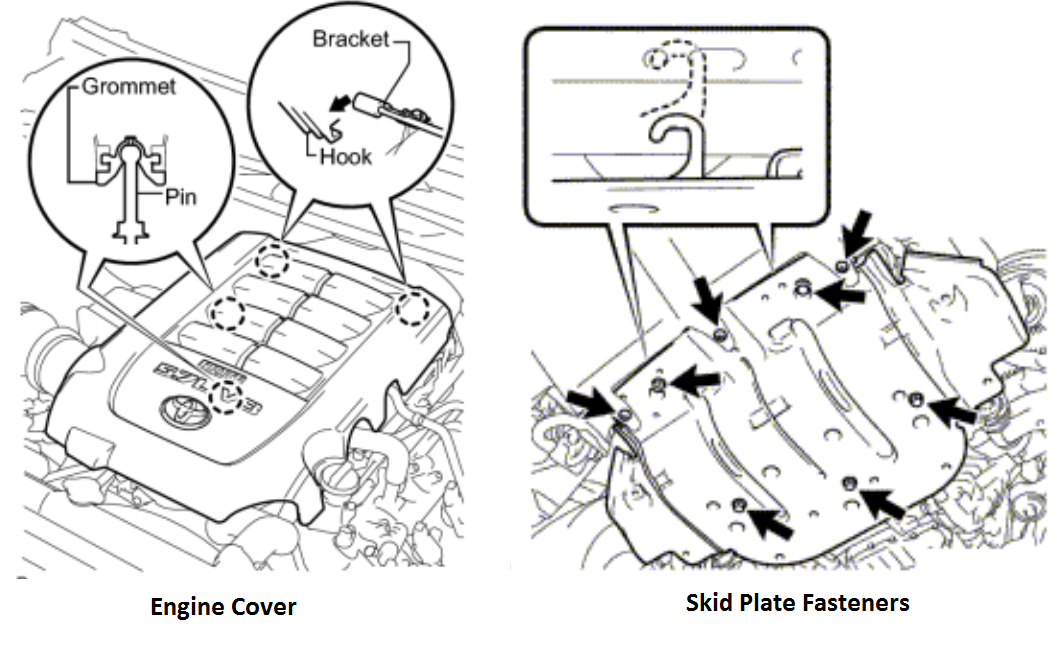
Step 2 – Remove engine covers and intake tube
Depending on the year model of your Tundra, the engine covers or intake tube may need to be removed for best access to the serpentine belt.
- The 2007 and newer Tundras have a fairly large engine cover that is easily removed by simply lifting the front of the cover off of its support pins and detaching the (2) hooks at the rear of the cover. Additionally, greater access to the belt and tensioner can be gained by removing the skid plate and working from the underside of the truck. Remove the (3) screws at the front of the skid plate, as well as the (5) mounting fasteners before sliding the skid plate towards the rear of the truck for removal.
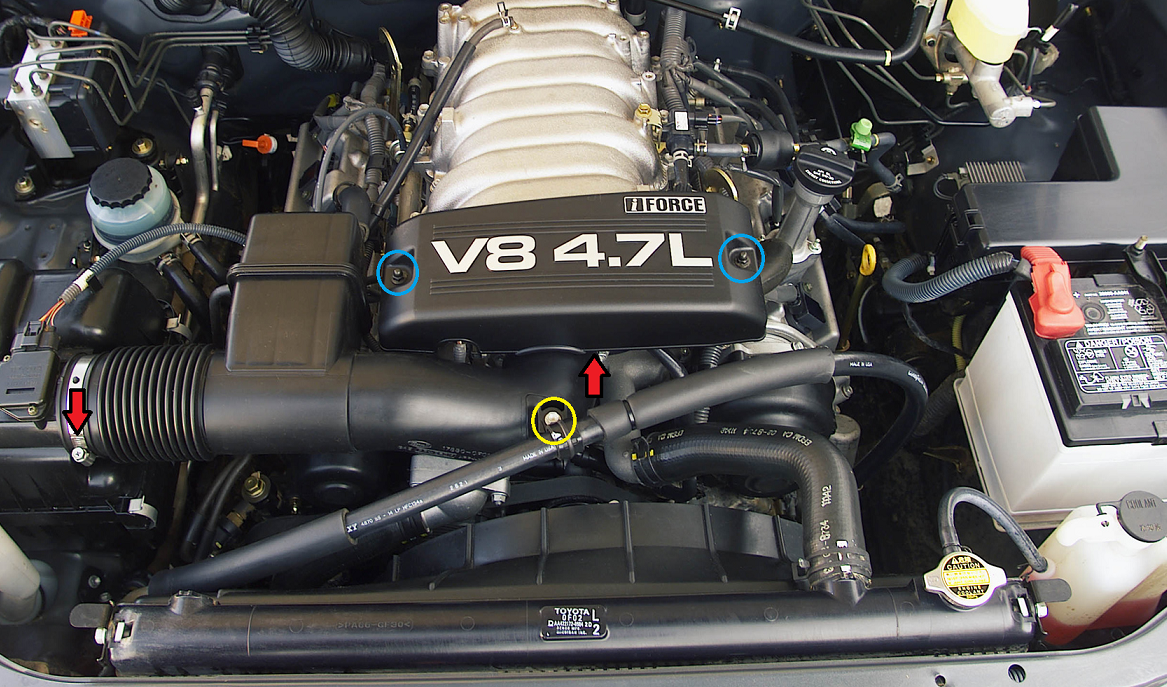
- The belt on 2006 and older Tundras can be accessed by separating the intake tube from the throttle body and air box. First remove the small throttle body/engine cover, then remove hose support clamp (yellow circle) and the clamps from intake tube (red arrows) before sliding the tube off of the throttle body and air box. The tube can be laid over the top of the engine to prevent having to disconnect any additional hoses.
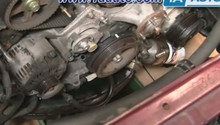
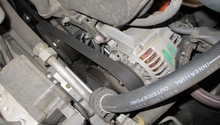
Step 3 – Remove serpentine belt
Locate the belt tensioner as indicated by the belt routing diagram or owner's manual. Using the appropriate sized wrench or socket and breaker bar, turn the tensioner in a counter-clockwise direction to relieve the belt tension; for most Tundra's, this a 17mm deep socket. While tension is relieved, slide the belt off of the tensioner pulley before carefully releasing the tensioner. Remove the serpentine belt from the engine.
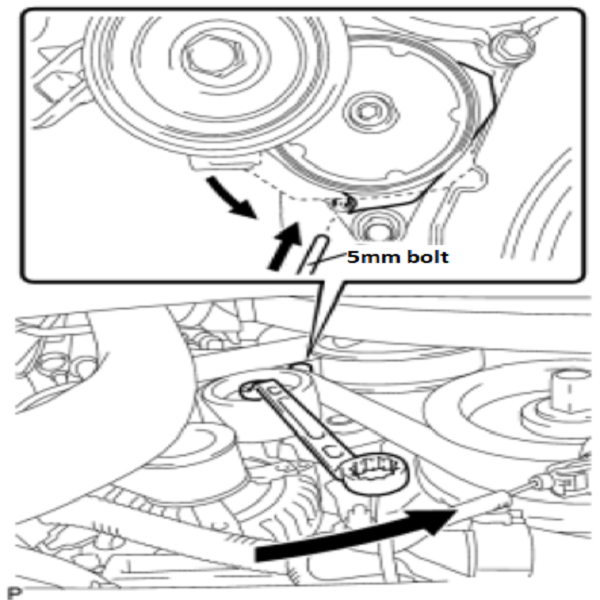
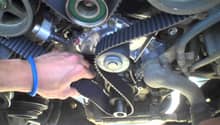
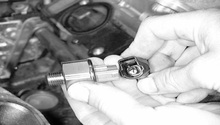
Figure 4. Tensioner pulley and tensioner locking bolt. 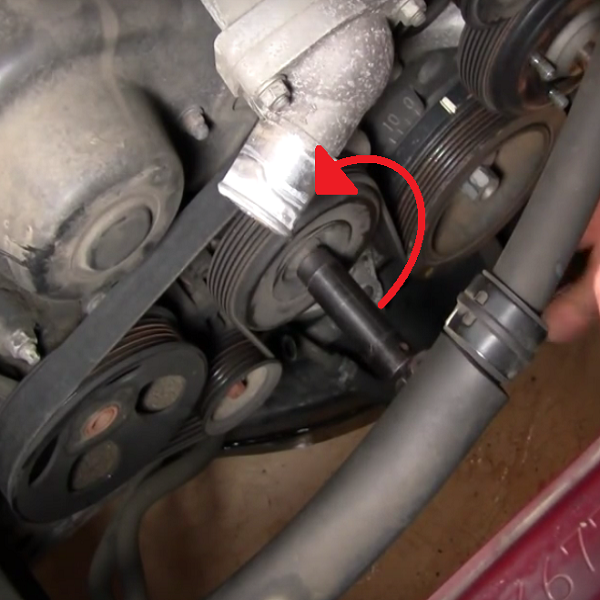
Figure 5. Relieving belt tension.
Pro Tip
Depending on the year and engine size, a small hole just below the tensioner may be available to accept a 5mm bolt to lock the tensioner in the open position after relieving belt tension. This can allow for easier belt installation without having to keep pressure on the tensioner with a wrench.
Step 4 – Install new belt
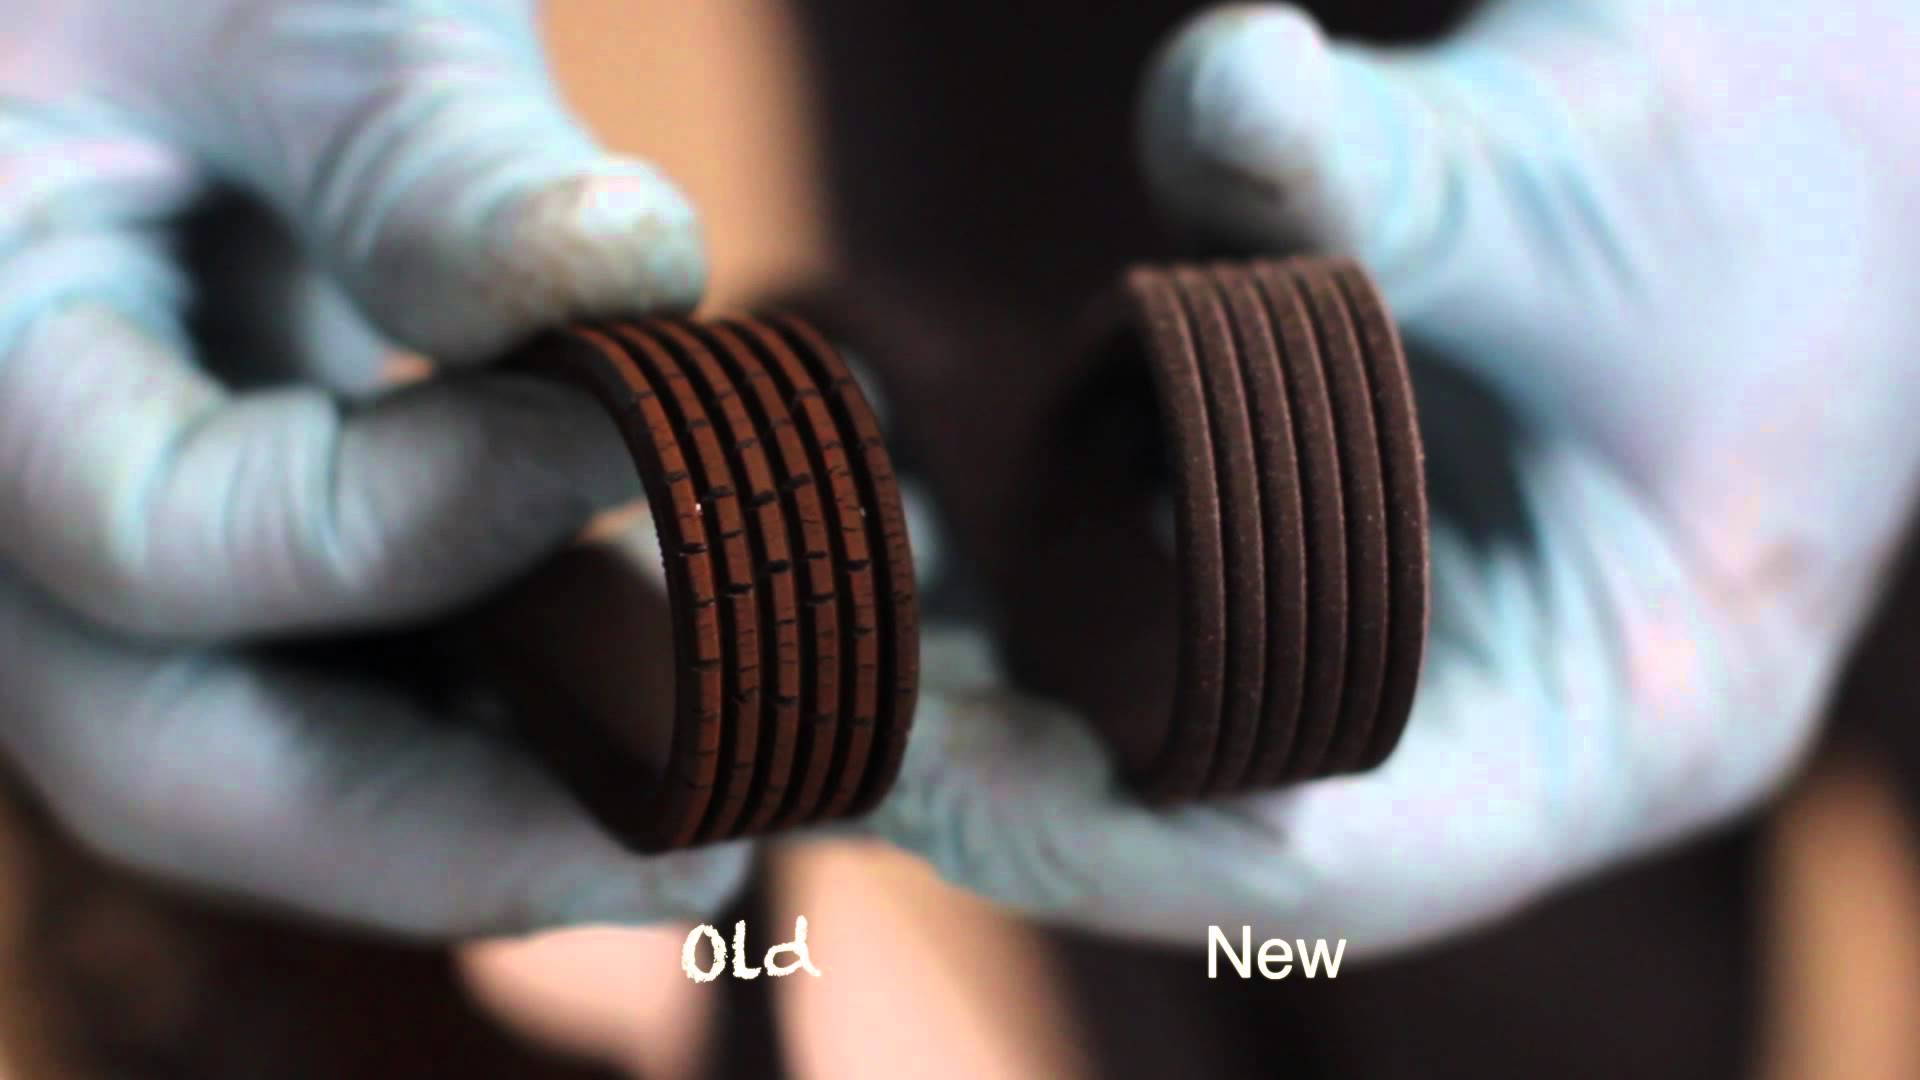
Before installing the belt, it is always a good idea to compare the length of the new belt to the old belt to ensure it is the correct part for your truck.
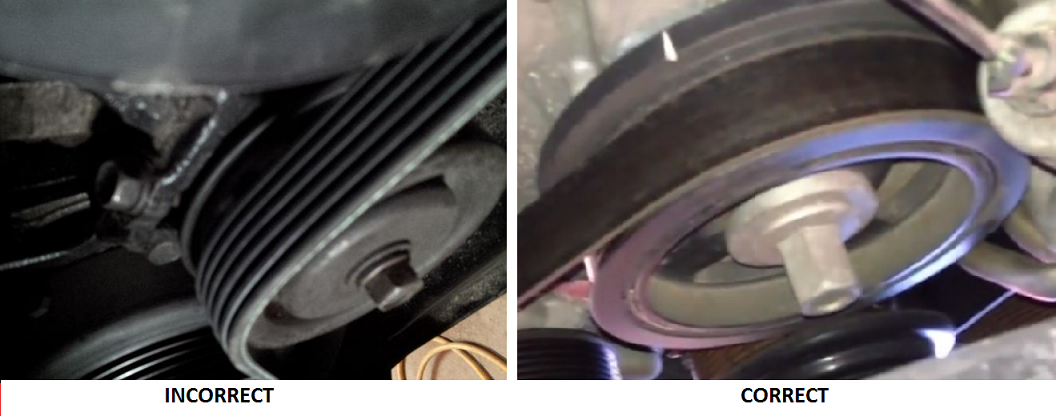
- Route the serpentine belt around the various pulleys, making sure it matches the belt routing diagram as mentioned in Step 1. Most agree that it is best to first start the belt on the crank pulley before routing it around the other accessories.
- With the belt routed and centered in the accessory pulleys, once again relieve pressure on the belt tensioner before sliding the belt over the tensioner pulley.
- Examine the belt to ensure it is still centered in all of the pulleys. Adjust it if necessary.
Step 5 – Re-installation
With the belt in place, the engine can be started to make sure that the belt is running straight and true. If your engine configuration required removal of the intake tube to access the belt, re-install the tube before starting the engine. Re-install the engine cover and skid plate (if applicable) after confirming the belt is properly installed.
Pro Tip
Instead of throwing the old belt away, keep it in the truck as a spare. You never know when a broken belt will leave you on the side of the road.
Featured Videos: Serpentine Belt Replacement
-
Serpentine Belt Replacement
-
How to Replace Serpentine Belt
Related Discussions
- Serpentine Belt Idler Pulley? - YotaTech.com
- Replacing Serpentine Belt - YotaTech.com
- Help with Squeaky Belt - YotaTech.com