Toyota 4Runner 1984-1995: How to Replace Knock Sensor
Replace a faulty knock sensor. How difficult could that be? Very. Read on.
This article applies to the Toyota 4Runner (1984-1995).
The OBD code of 52 can mean that your 4Runner’s knock sensor has failed. Or, maybe that the knock sensor is still good, but its pigtail or plug to the ECU has a short or broken connection. Changing the knock sensor is not a quick operation, nor a task for the mind. It involves clearing off and removing both layers of the intake manifold.
The knock sensor is basically a microphone, set to respond to the sound frequencies of engine knocks. Like many audio components, it’s piezoelectric, meaning it produces its own electrical current when it “hears” engine knock. As sound travels in waves, the output produced by the knock sensor is an AC signal.
If and when the knock sensor fails, not only does it trigger the 52 code and turn on the check engine light, your 4Runner will suffer bad gas mileage, lower power, and hesitation during acceleration. This is because when the PCM loses contact with the knock sensor, besides generating the 52 code, it also slows the ignition timing, and although driving around with the ignition retarded doesn’t hurt the engine, it does do damage to your engine’s performance and emission control.

Note: The Pro Cost is only for labor, parts will cost an extra $200. Also, if it is the wiring harness that needs replacing, the DIY cost will be $20-25.
Materials Needed
- Socket set with 10, 12, 14 and 17mm sockets, plus both a long and short extension
- 27mm socket for the knock sensor; deep well is better
- Very small sockets and 1/4 drive, plus an extension
- Big open-ended adjustable wrench
- Torque wrench
- Screwdrivers
- Pliers; angled needle nose pliers will be invaluable in removing/reinstalling hose clamps
- Razors for scraping gaskets
- Tape and pen for labeling hoses
- A bucket and funnel for draining/refilling your coolant
- A magnetic pen-type tool is very useful for getting nuts/bolts in/out of tight spots
- RTV sealant
- Set of intake manifold gaskets (one for the air intake, two for the heads, one for the water bypass, and one for the EGR valve)
- Eight copper O-rings for the fuel pipes (non-reusable crush-seal parts, about $10)
- A Factory Service Manual that covers the 3VZE V6 (refer to the "Engine Mechanical - Cylinder Head" and "Engine Mechanical - Timing Belt” sections; the info is all there, including the torque specs.)
Replacing the knock sensor yourself can take days. Having it done at a service center or dealership can also take days, plus cost a whole lot more money.
A replacement knock sensor can cost as much as $160. A “generic equivalent” can be found on eBay for half that amount. The sensor’s wiring harness is also expensive: typically $20-$25. And if the connection between the sensor and the wiring harness is bad, you really should replace both, as it’s the same amount of work to dig them out.
Before going through the time and expense involved in this operation, it’s advised that you make sure that your knock sensor is bad, and not its plug, or the connection of that plug to the ECU. There are ways to test the knock sensor integrity with a VOM, but you might consider going to a good service center, or even a dealership, to verify that the sensor is bad, and not the integrity of its external connection.
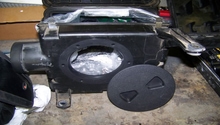
Step 1 – Remove the air intake system
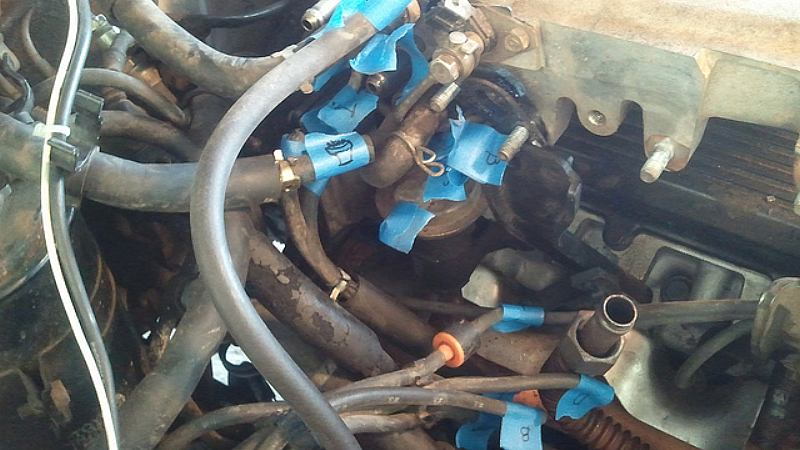
Carefully label, then disconnect all of the vacuum hoses as well as electrical connections connected to the air intake and throttle body. There are many.
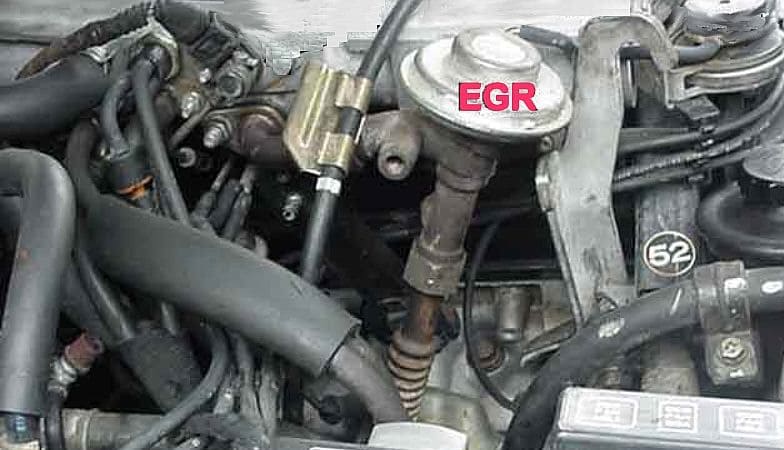
Disconnect the two flanges on either side of the EGR, and the two union nuts on the tubes coming out of it. Remove the EGR.
Pro Tip
After you’ve removed the intake manifold, check to make sure the EGR passageway through the manifold is not clogged or obstructed. If it is, carefully clear it out before reassembly.
Unhook the connections to the throttle body, including the large air intake tube. Label them as well. Disconnect and label the electrical connections also.
Disconnect the coolant hose routed along the fire wall that connects to the intake plenum. It’s a good idea to plug the open end of the disconnected hose to minimize coolant spillage.
Next, disconnect the ground wire near the rear of the air intake, and remove the bolt on top of the plenum that holds the throttle cable in place. The throttle cable is removed by loosening one of the two nuts holding it to the throttle body, and pulling the end of the cable out and setting it aside.
Remove all of the bolts, four long ones and shorter ones, holding the air intake plenum to the intake manifold. The throttle body can’t come off at this point because of a hose connected to its rear end from underneath the plenum. Unplugging this hose from the manifold is the easiest way to free the throttle body.

Also, disconnect the valve cover vent because it will hang up on other hoses, even though it’s unplugged from the plenum. Remove the air intake plenum and set it aside. When pulling the air intake plenum off, there will still be a bit of coolant inside that will pour out of the hoses, depending on how much you tilt the plenum.
Step 2 – Remove the wiring
There are numerous electrical connections that need to be unplugged. Also, the main wiring housing that runs along the front of the engine will need to be unbolted and moved out of the way.
In addition, unplug:
- The plug from each injector.
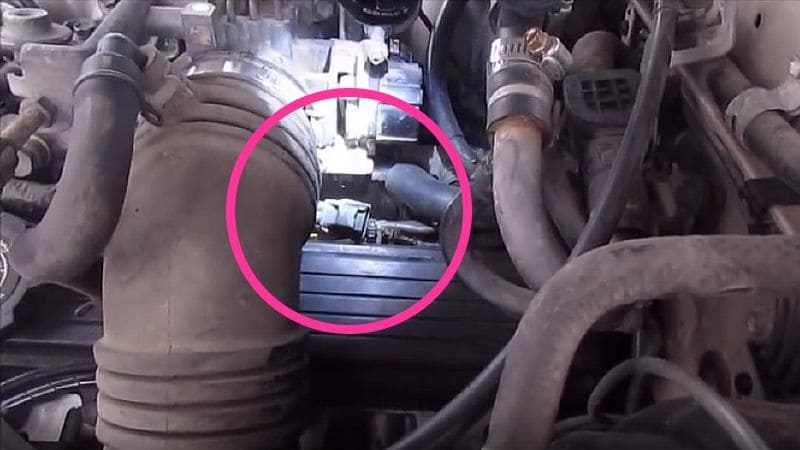
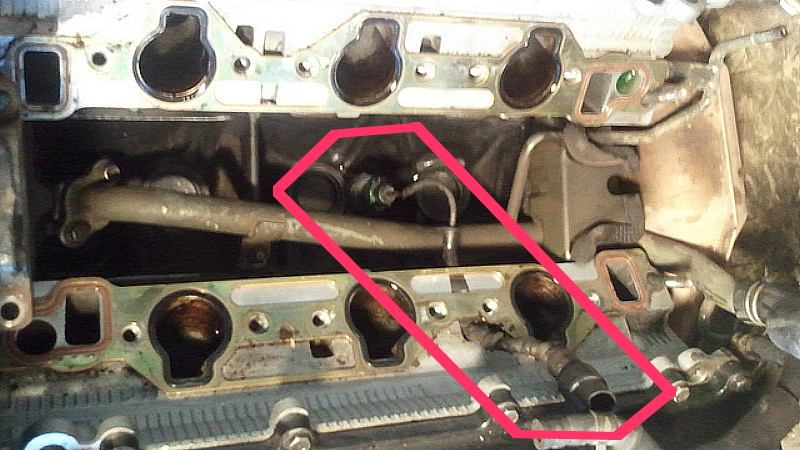
- The knock sensor plug, located near the middle of the driver side.
- The three wiring plugs and one ground plug on the water bypass behind the intake manifold.
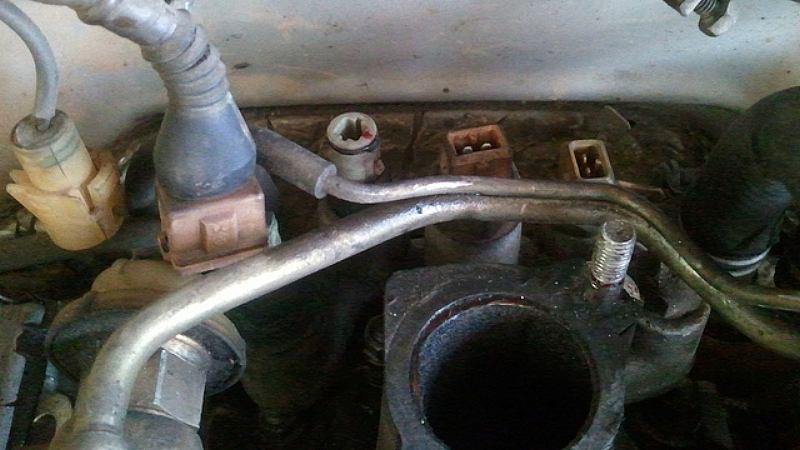
- The ground connection under the distributor (the white object just above the oil dipstick ring).
- The green connector near the front driver side of the valve cover. Note that one of the bolts that secures the wiring housing is underneath this.
Unbolt the wiring housing, removing the bolt under the green connector, and another bolt on the passenger side engine hook, near the power steering pump. If everything has been unplugged, you should be able to pull the wiring housing—and everything connected to it—up and out of the way.
With everything disconnected now, the engine should look like this:

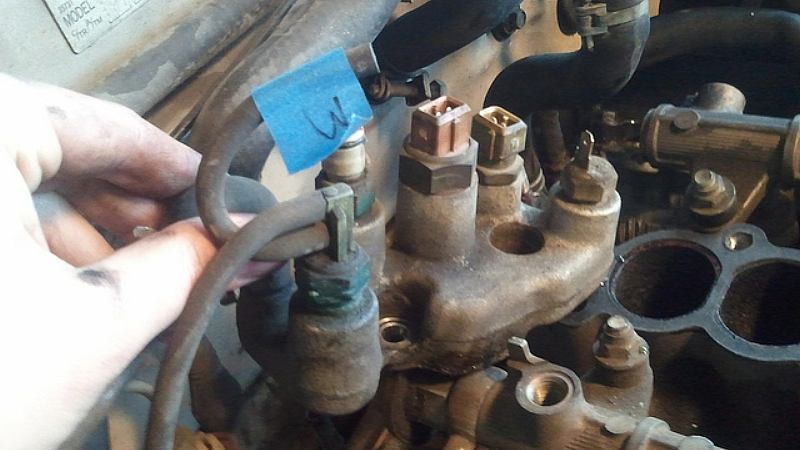
Unplug the three passenger side spark plug wires from the distributor, and label them (using the number on the distributor cap). Set the three wires out of the way.
Step 3 – Remove fuel pipes, timing belt cover, idler pulley, and water bypass
With the electrical connections now unplugged, there is a hose connected to it on the passenger side that needs to be labeled, and removed. You can label and disconnect the vacuum hoses attached to the water bypass, or leave them connected when you move the water bypass out of the way.
With a 17mm socket, remove the number 2 and number 3 fuel pipes, which run between the front and back of the two fuel rails. Have some rags handy and no open flames, because when these lines open, fuel will run out.
Pro Tip
Always work in a well-ventilated area when encountering gasoline fumes.
Unplug the single vacuum tube atop the rear fuel crossover pipe.
Remove the large union nut on the passenger side fuel rail that connects to the main fuel line. If it won’t loosen, don’t break the fuel rail. Because the intake manifold doesn’t need to come completely off to change the knock sensor, the passenger side fuel rail can remain connected to the head with the bolt holding it to the head near the rear of the valve cover. However, this will make it trickier to extract the manifold without bending the metal fuel line.
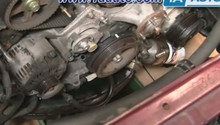
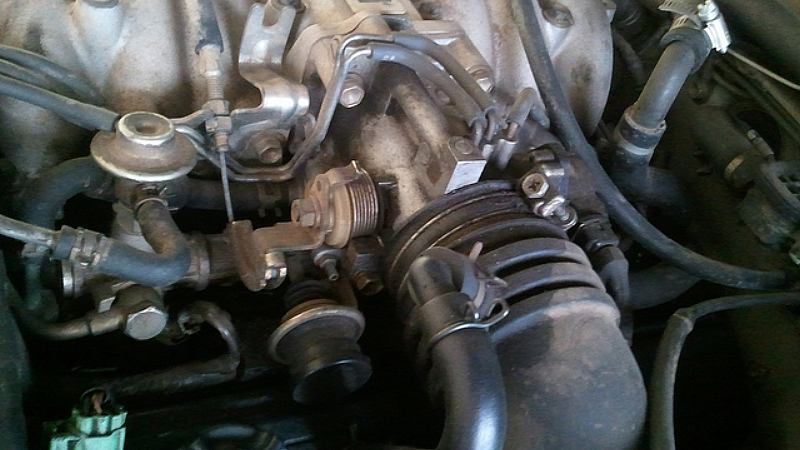
Remove the idler pulley. Start by unbolting the two nuts located on the water outlet; the square metal object that comes out of the timing belt cover with a hose running to the air intake, and a large hose connected to the radiator. Once the water outlet is loose, unplug the large hose from the radiator by gently pulling and twisting it off.
With a small socket set carefully, unscrew the two studs from the water outlet.
Remove the timing belt cover. To to this you’ll have to first pry off the wire stays for the spark plug wires. These are plastic clips which can be twisted a small amount to see where they’re clipped on. With the clips off, the bolts holding the timing belt cover are exposed. Remove these bolts, being aware that there are a number of bolts, including one that may be blocked by the power steering vane pump. If this is the case, loosen the lower nut on the power steering tension adjustment arm with a box wrench and a breaker bar. With the nut loose, pry the power steering vane pump out of the war to remove the last bolt.
Pro Tip
Don't forget to get the power steering vane pump back into position and tighten the adjusting arm nut after you've replaced the knock sensor.
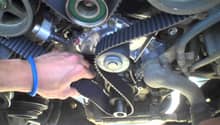
With the plastic timing belt cover removed, the idler pulley is visible, and you can remove the four bolts holding the #4 timing belt cover in place, which is a small metal plate that bolts to the larger plate.
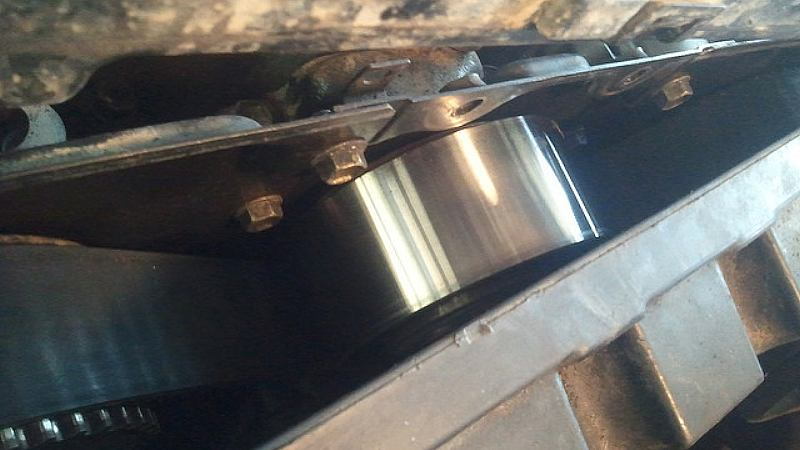
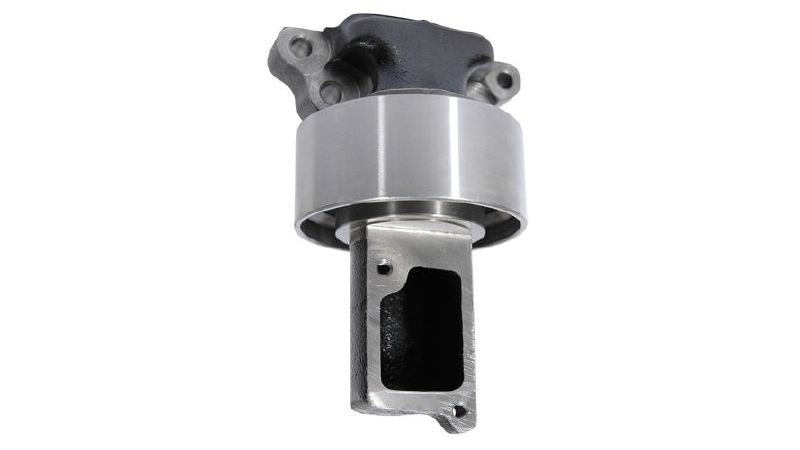
With the #4 timing belt cover removed, you will be able to access the water outlet/idler pulley. Remove the four bolts that hold the water outlet/idler pulley to the manifold, then pull the water outlet/idler pulley back and out.
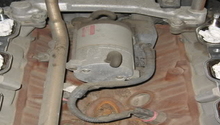
Step 4 – Remove the intake manifold
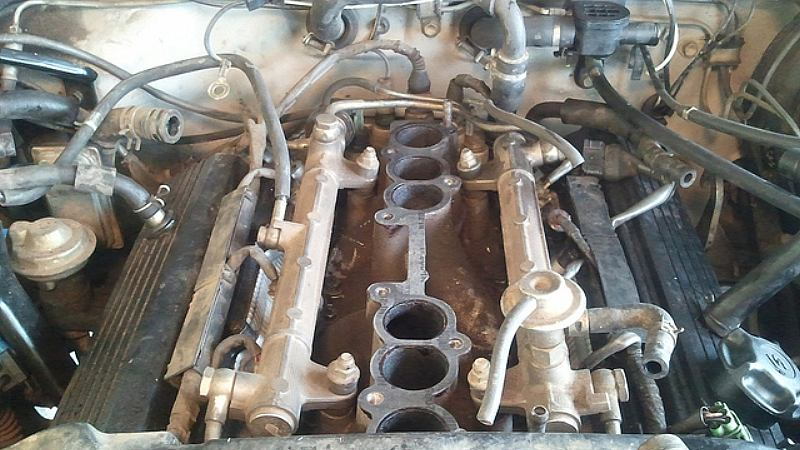
Four nuts (two in the front and two in the back) and 12 bolts hold the intake manifold in place. These bolts have star-heads (Torx), but a regular 12mm socket will work. An extension can give the necessary torque. With all 16 attachment points removed, the only connection to the intake manifold is a hose in the rear and on the driver side that will need to be undone or held out of the way. Then the intake manifold can be lifted off.
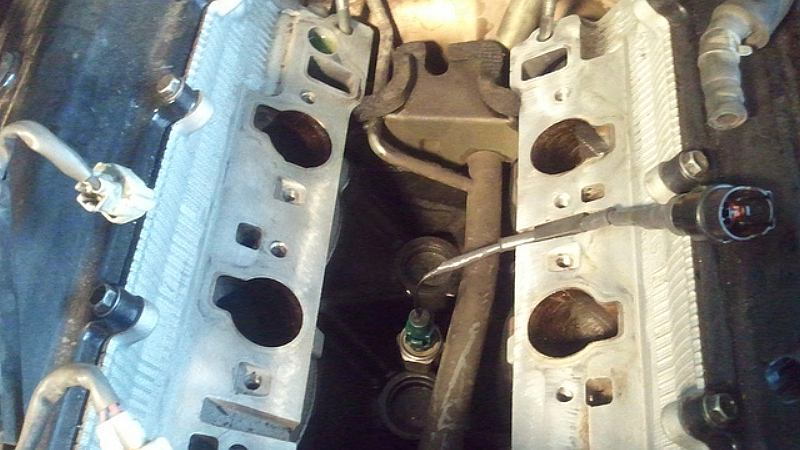
Step 5 – Remove and replace the knock sensor
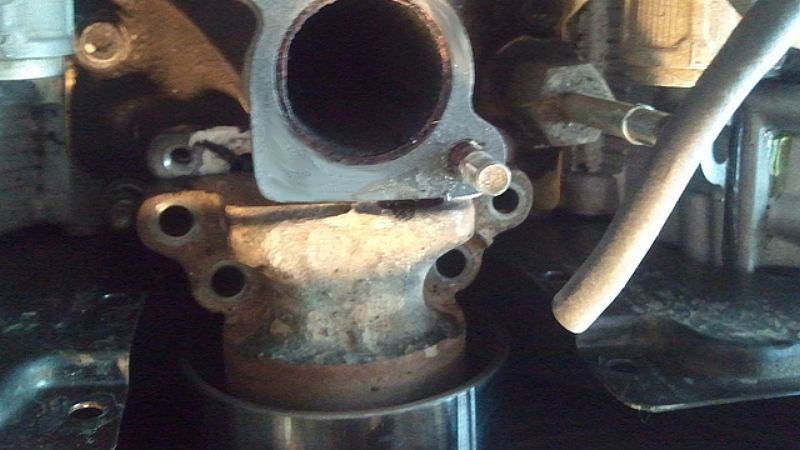
The knock sensor now exposed is the only wire going to the engine block in this location. Note that it has a small valley cut out under the gasket on the driver side head for its wiring pigtail to exit. To completely remove the knock sensor, this gasket will first have to be removed.
Step 6 – Reassemble the engine
Carefully scrape the old gaskets off, down to bare metal. The gasket between the air intake plenum and the intake manifold is attached with RTV (Room Temperature Vulcanized silicone), an adhesive; so is the small gasket for the water bypass in the back of the manifold.
The water outlet and the idler pulley have grooves for RTV. Take care when putting the idler pulley back on not to smear the RTV you’ve applied on the bottom of the outlet that mates to the intake manifold.
- Reinstall the intake manifold.
- Reinstall the timing belt cover, fuel and coolant lines, and pullies.
- Reinstall the fuel rail, injectors and wiring.
- Reinstall the rest of the intake, emissions systems and wiring.
You’re done. No more knocks!
Related Discussions
- Intake Manifold Removal and Knock Sensor Replacement - YotaTech.com
- 3VZE - Code 52 Knock Sensor - YotaTech.com
- 3.0L Knock Sensor - YotaTech.com
- Knock Sensor Issue - YotaTech.com