Toyota 4Runner 1996-2002: How to Increase Airflow into the Engine
Read on to see how to increase engine airflow, sound, and power using basic tools in your own driveway.
This article applies to the Toyota 4Runner (1996-2002).
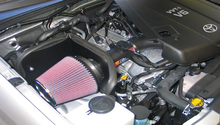
If you have ever felt an immediate boost after replacing a very dirty engine air filter, then you've demonstrated that increasing airflow improves engine power. The goal is to increase airflow without allowing dirt and water into the engine. This DIY addresses three popular ways to increase the 4Runner intake growl and power by as much as eight HP at wide-open-throttle. It can also be quickly changed for engine protection from dirt and water, when off-road wheeling.
The deck plate is actually designed as a seal-able service line pass-through for recreational vehicles. However, it works very well to temporarily open the 4Runner engine air filter box for improved airflow and closes water-tight when not in use. It looks good, too.

Materials Needed
- Intake air filter
- Deck plate: 4"
- Hole saw: 4.5"
- Sensor safe sealant
- Stainless screws: 8 x 1/2"
- Screen 6" x 6"
- Stainless hose clamp: 4"
- Socket wrench set with extension
- Phillips screwdriver
- Blue painter's tape
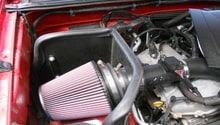
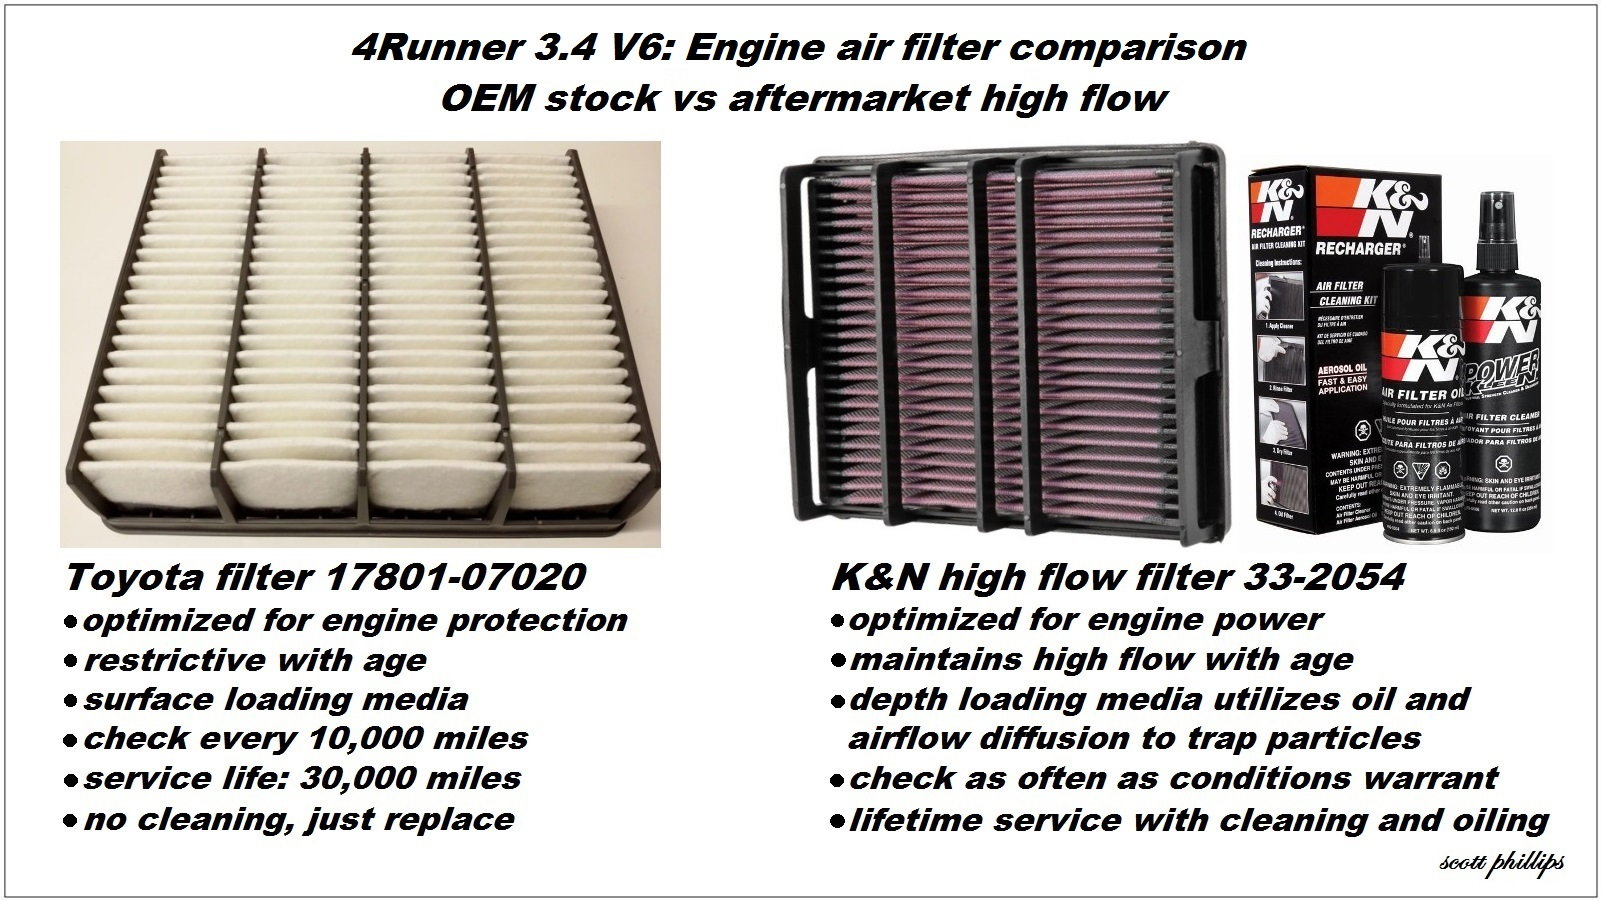
Step 1 – Install high flow air filter
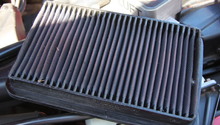
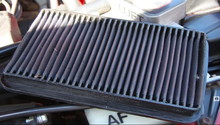
The 4Runner stock air filter balances acceptable power with maximum dirt protection. It is a dense barrier filter with very small pores in the material that physically block dirt and dust particles. As dirt builds up on the material's surface, the pores are blocked and airflow decreases. Engine power is lost, but the engine is well protected from dirt. The replacement interval is around 30,000 miles.
The high flow filter must have larger pores in order to flow more air (in physics, there is no free lunch). With larger pore size, the filter relies on advanced design to stop dirt particles that would otherwise pass through. The fibers are arranged so that airflow must follow a curved path. When small particles attempt to follow the curved airflow, they are intercepted by catching on the tacky sides of the oiled fibers. Larger particles cannot follow the curved airflow and impact directly on the media. By manipulating airflow and utilizing tacky media, high flow filters capture dirt that is smaller than the media pores. The high flow filter must be regularly cleaned for best operation.
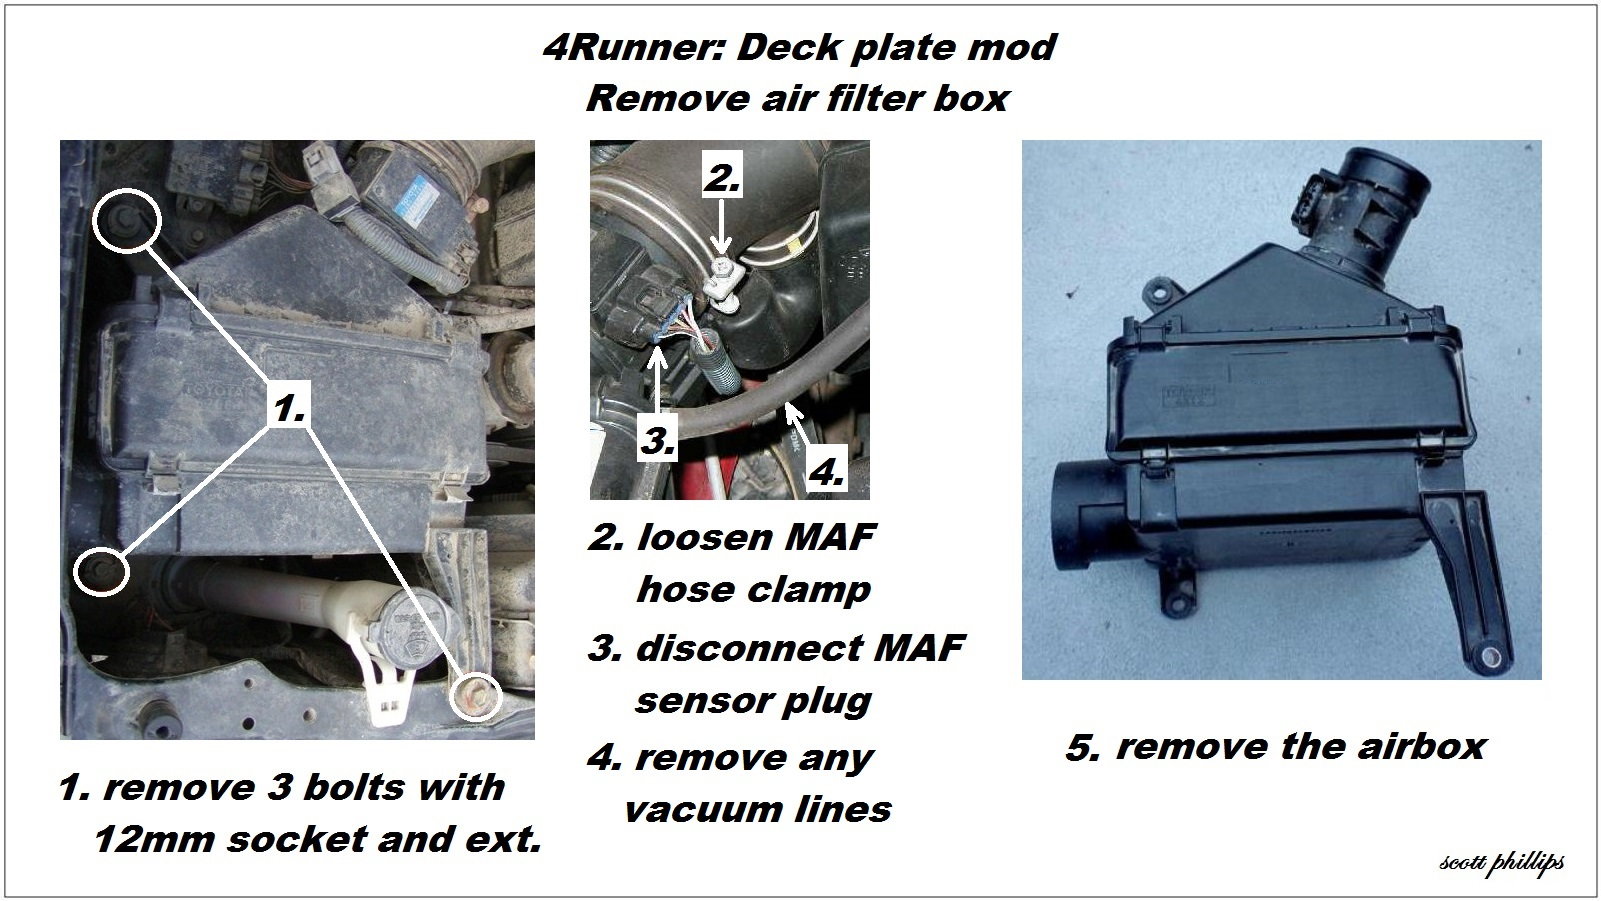
Step 2 – Remove air filter box for deck plate modification
- Use the 12mm socket with extension to remove the three bolts on the airbox.
- Loosen the Mass Airflow (MAF) sensor hose clamp.
- Disconnect the MAF sensor plug.
- Pull off and label any vacuum lines to the airbox, as needed.
- Slip the airbox out of the intake fittings and remove it.
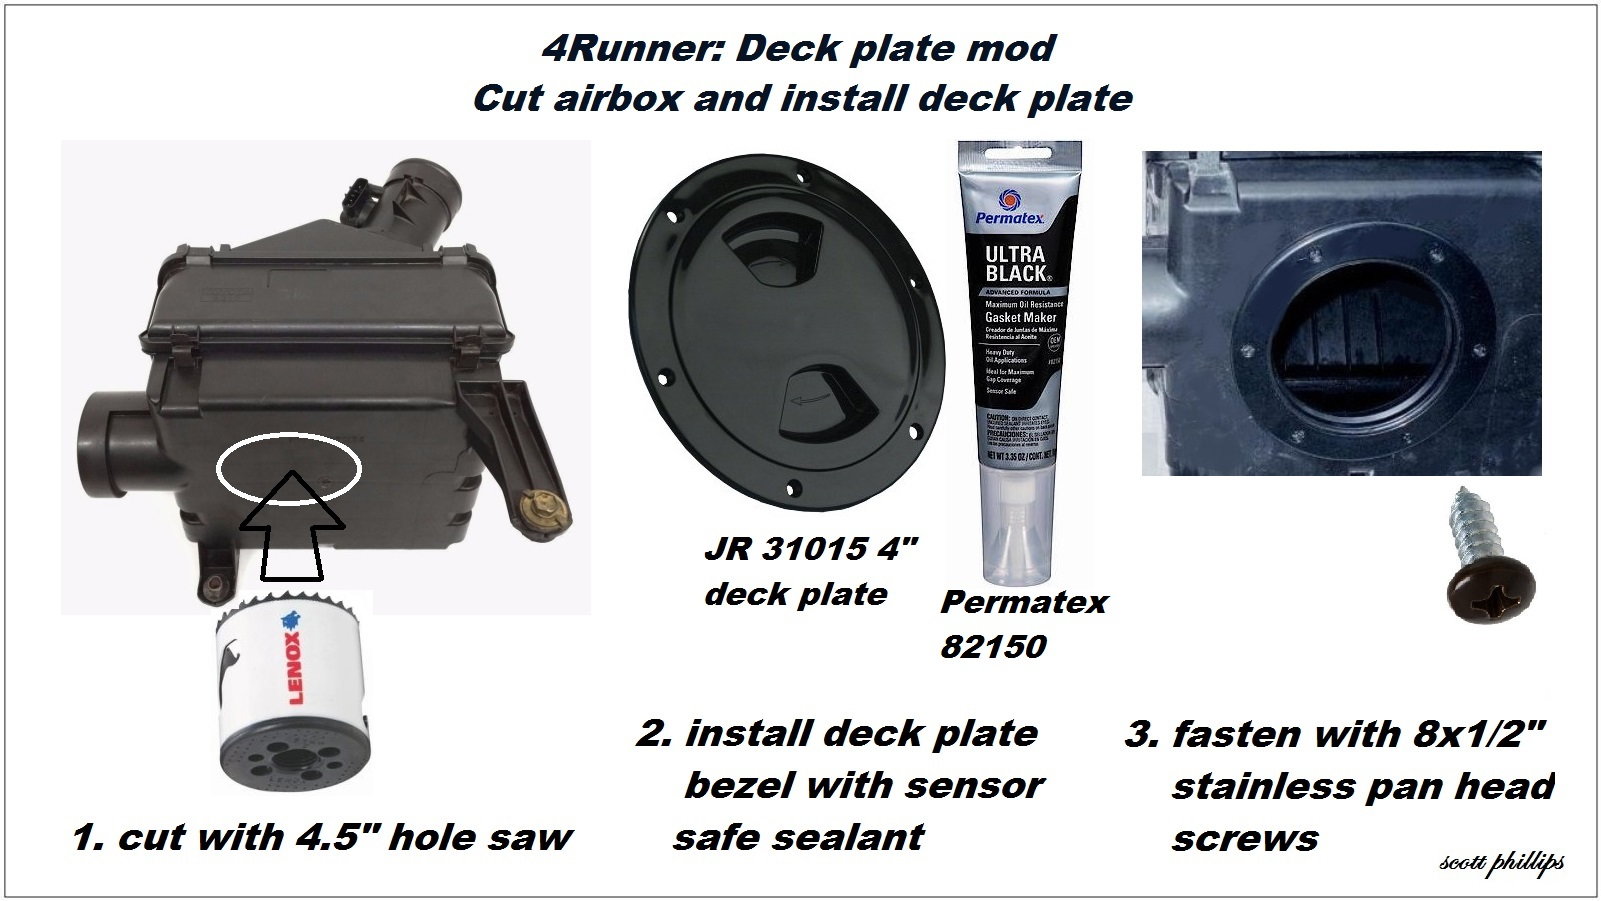
Step 3 – Install deck plate
The JR Products 4" deck plate shown requires a 4.5" hole saw. Ensure that your hole saw is correctly sized to your deck plate.
- Tape over the inside and outside openings to the MAF sensor, to keep it clean.
- Cut the hole in the upper, outboard front of the airbox. Placing the deck plate near the upper, outboard corner avoids conflict with the washer bottle neck.
- Test fit the deck plate bezel and mark and drill the six screw holes.
- Seal the deck plate bezel to the airbox with sensor safe sealant.
- Fasten the six bezel screws. Do not over-tighten in the plastic.
- Allow the sealant to cure.
- Thoroughly clean all plastic shavings from the airbox.
- Remove the tape from the MAF openings.
Pro Tip
You can add a leaf screen by attaching the 6" x 6" screen material to the back flange of the deck plate with the stainless 4" hose clamp.
Step 4 – Reinstall airbox
- Slip the airbox into the intake fittings and tighten the three bolts.
- Tighten the MAF hose clamp.
- Connect the MAF sensor plug.
- Connect any vacuum hoses, as needed.
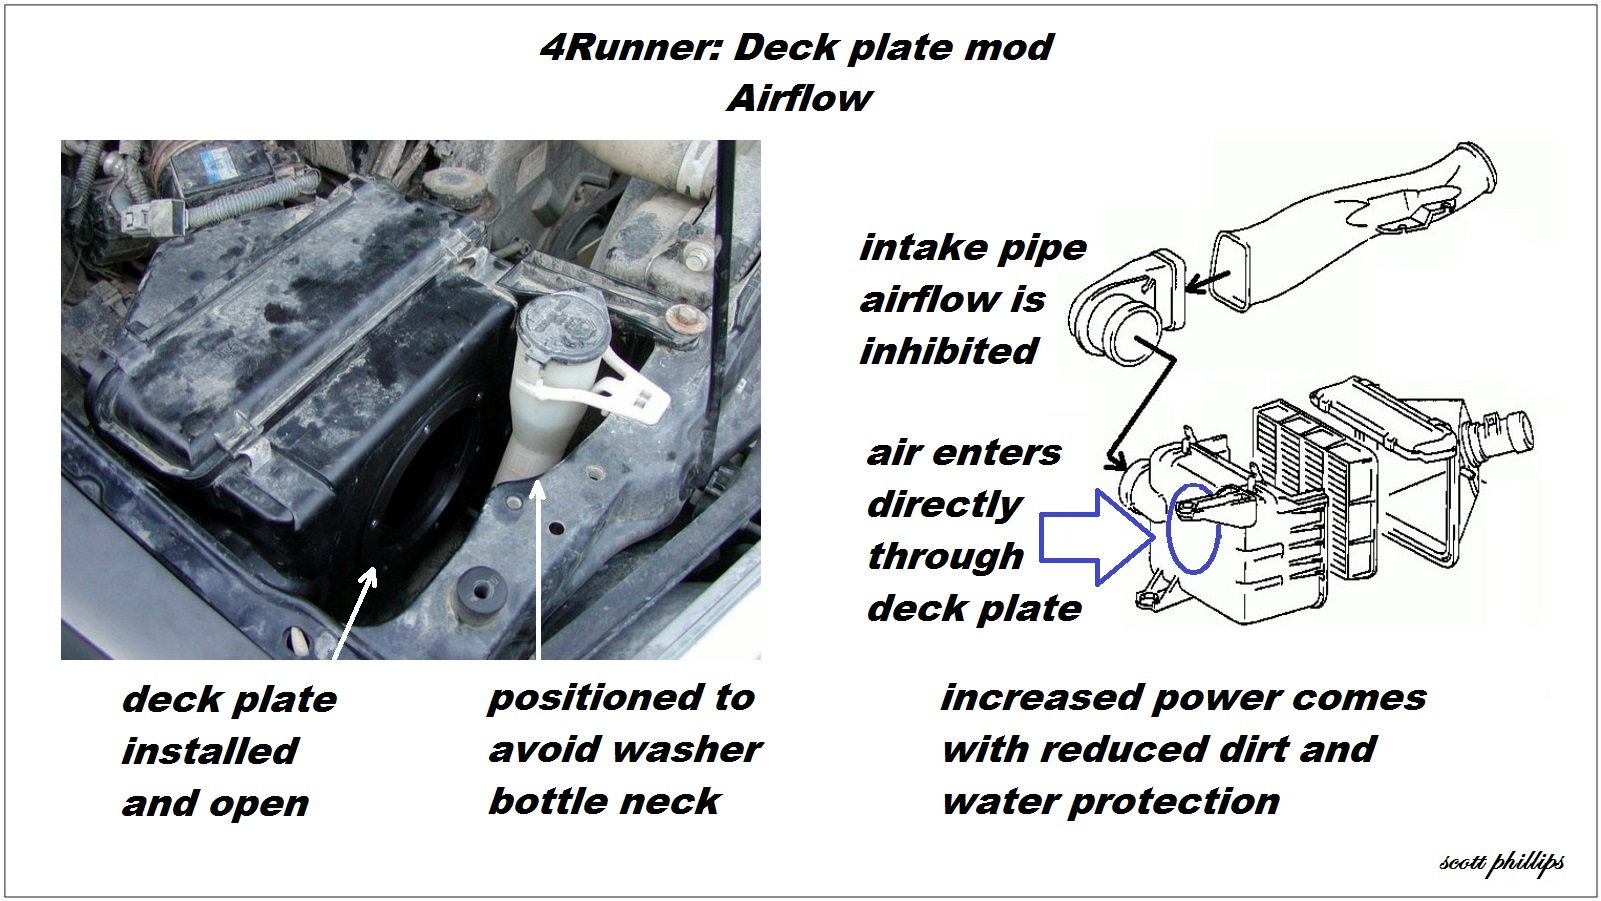
- Remove the deck plate cap for direct airflow and power.
- Install the deck plate cap for greater dirt and water protection.
Step 5 – Air intake silencer removal
Replacing the air intake silencer with a straight pipe will add an aggressive growl to your 4Runner. See how to do it here: How to Remove Air Intake Silencer.
Step 6 – Optional ECU relearn
Pull the electronic fuel injection (EFI) fuse for 30 minutes, then replace it. This allows the ECU to do a mixture relearn. However, it is not necessary, as the ECU will also learn as you drive.
- If the 4Runner is RPM hunting somewhat during idle, allow it to idle for about 15 minutes before driving.
- Check the intake ducting and vacuum lines for leaks.
- Enjoy your 4Runner's improved power.
Featured Video: Deckplate Mod Walkthrough: 3rd Gen 4Runner
Related Discussions
- The Deckplate Mod - YotaTech.com
- 2.7L Deckmod Complete! - YotaTech.com