Toyota 4Runner 1996-2002: How to Replace Accessory Drive Belts
Replacing the drive belts on your 4Runner is pretty easy and worth doing. You can save $200.
This article applies to the Toyota 4Runner V6 (1996-2002).
The drive belts in your truck are critical. Without them, the power steering wouldn't work, the air conditioning wouldn't cool, and the alternator wouldn't charge. The belts are of ribbed design and last for quite a long time, but I would not wait until one breaks or slips to change them. They are pretty easy to change and you can do it to save a couple hundred bucks. Allow a couple hours just to be sure, and next time you can do it in 45 minutes. Let's do it!

Materials Needed
- Air conditioning belt
- Alternator belt
- Power steering belt
- 3/8" drive ratchet and extensions
- Universal joint for ratchet
- 10, 12, and 14mm socket
- 12 and 14mm wrench
- Ratcheting 12 and 14mm wrench
Toyota uses ribbed belts on your 4Runner that have to be adjusted manually.
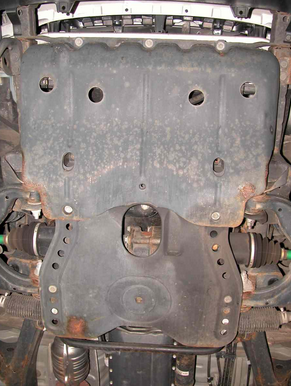
Step 1 – Remove skid plate
It is much easier to get to the belts if the skid plate (or plates) is out of the way. Remove the bolts with a 12mm socket.
Pro Tip
You can take the upper radiator hose off if you think it will get in your way. If you do, remember to refill the coolant.
Step 2 – Loosen power steering belt
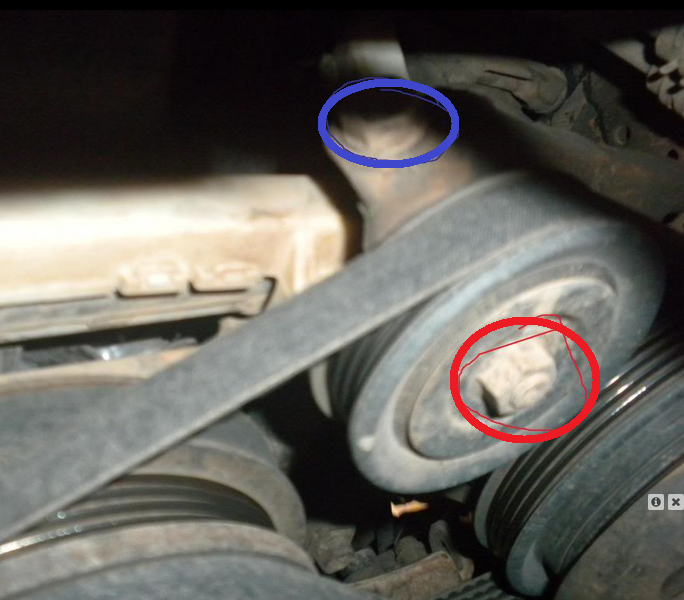
Start with the worst and the rest will be easy. The P/S belt is the outermost one on the pulley.
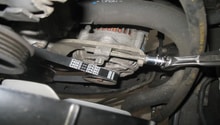
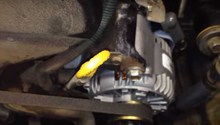
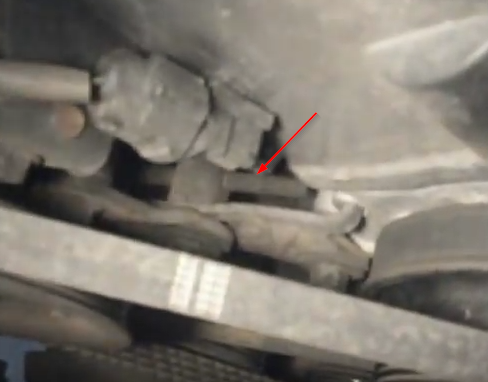
The P/S pump swings on the upper bolt. Loosen it with a 14mm wrench. If you have the ratcheting wrench, it makes things much easier. Next use the 14mm wrench to loosen the nut next to it in Figures 3 and 4.
The adjuster for the P/S pump is under and behind the pump itself. You really can't get a picture of it, but part of it is shown in Figure 4.
The bolt needs to be loosened up quite a lot for the belt to come off. You may be able to take the air box off to gain better access. Use what you have to, as this is the worst part.
Step 3 – Loosen A/C belt
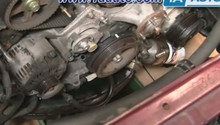
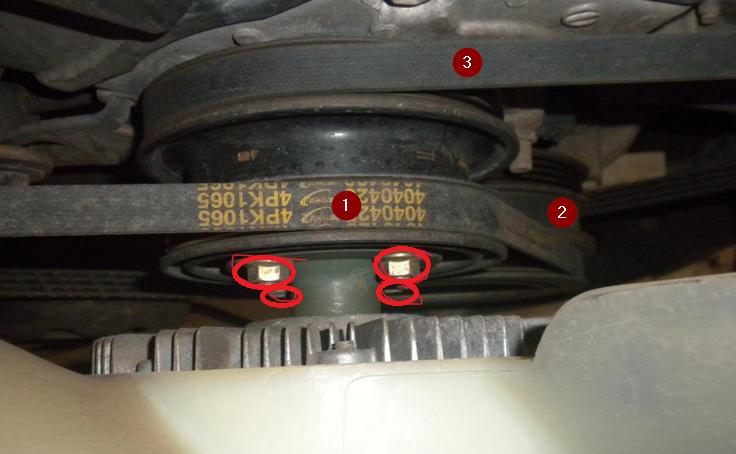
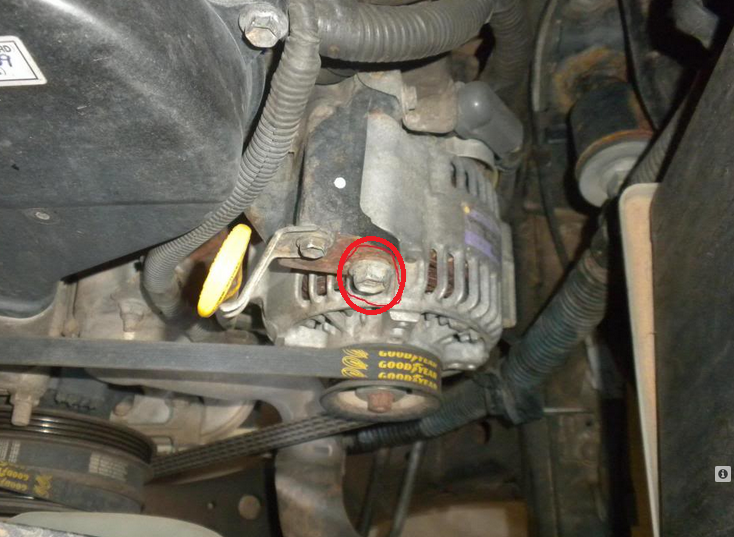
This is really why you took the skid plate off. From underneath, loosen the nut shown in Figure 5 (circled in red) with a 14mm wrench or socket. The actual adjuster is circled in blue and is also 14mm. Loosen it so the belt is really loose.
Pro Tip
Use any combination of wrenches and ratchets it takes to loosen the bolts and nuts.
Step 4 – Loosen alternator belt
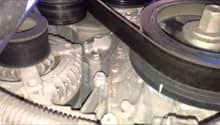
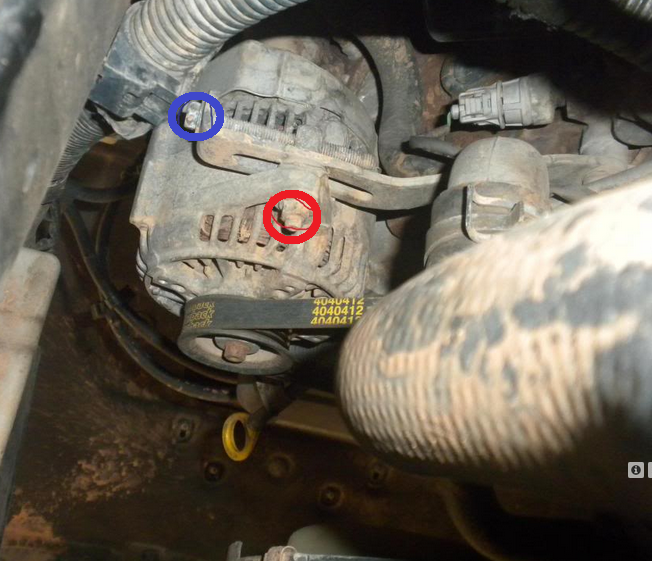
From the top, loosen the alternator pivot bolt with a 14mm wrench or socket.
From the bottom, loosen the nut circled in red with a 14mm. The adjuster bolt is also 14mm and needs to be loosened quite a bit so the belt will come off.
Step 5 – Remove and replace belts
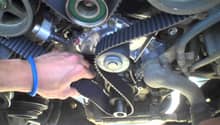
Remove the belts one at a time by snaking them through the fan blades. As you take them off, mark which is which and match to the new belts exactly. Snake the new belts through the fan and on to the appropriate pulleys like the old belts, starting with the alternator belt.
Pro Tip
Everyone seems to have their favorite brand of belts, but be sure to use the best you can. OEM belts are great if you can get them reasonable.
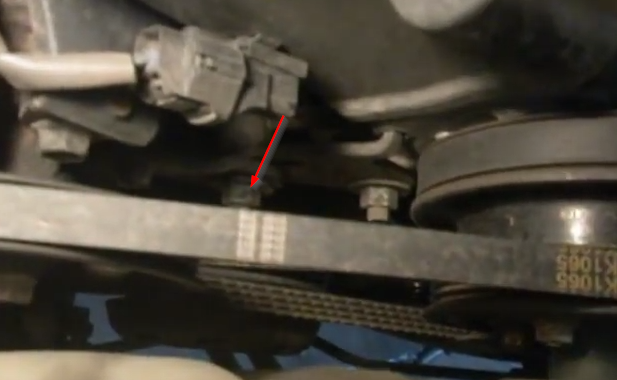
Step 6 – Tension belts
The belts must be manually tensioned. A tension gauge works well, or the old rule of thumb is 1/4" to 1/2" deflection on pulleys that are less than 6" apart from their centers and 1/2" deflection on pulleys that are 6" apart from their centers. They need to be tight, so they don't slip, but not too tight.
Step 7 – Reassembly
With the belts reinstalled and tensioned, all that remains is the refit the skid plates and start the truck. Listen for any squealing or noise that could indicate an improperly installed or tensioned belt. If everything checks out, then you are done.
Featured Video: Toyota V6 Drive Belt Replacement
Related Discussions
- How to Change Drive Belts on V6 - YotaTech.com
- Changing Belts on 3rd Gen - YotaTech.com
- Drive Belt Replacement - YotaTech.com