
deck plate mod about to be done. some small questions about tools
 Jun 2, 2006 | 10:20 AM
#1
Thread Starter
Banned
Joined: May 2006
Posts: 0
Likes: 0
deck plate mod about to be done. some small questions about tools
Ive been researching different methods of installing this deckplate.. I guess you could call me paranoid as my dad is very skilled but hasnt let me do a damn thing in my life by myself and Im scared to do anything. Plus he bitches at me about his tools.
would using a hole saw be easier then a jigsaw perhaps.. both my father and some guy told me that their wasnt a 4 1/4 hole saw (i know hes lieing) my dad said they are expensive. point is whats the easiest way out.
i was looking at two bolts that would need a long rachet head right? and do I have to take the maf sensor out. anyway to keep it from being harmed? Im scared if i pulled that out id eff it up.
Thanks for any help and however stupid of questions these may be
Jun 2, 2006 | 10:26 AM
#2
I used a dremel tool for mine. I bought it for about $45 at Sears and have used it countless times since. A 4.5" hole saw will be rather expensive. A jig might work too, but you'll have to drill some small pilot holes first--should work fine, just cut carefully.
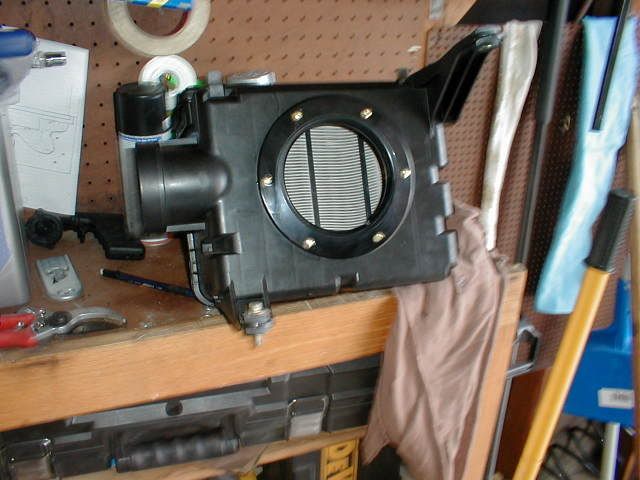
I would recommend putting some mesh in front of the intake. I am amazed what I find in the screen and certainly wouldn't want those items clogging my airfilter.


I would recommend putting some mesh in front of the intake. I am amazed what I find in the screen and certainly wouldn't want those items clogging my airfilter.
Jun 2, 2006 | 10:27 AM
#3
Contributing Member
Joined: Sep 2002
Posts: 4,749
Likes: 0
From: Santa Clarita, California
A hole saw sure makes it easier. They're like $20 or so for a 4.5".
You'll need some ratchet extensions to easily get to a couple of the airbox bolts.
Look at the writeups and threads for this mod - there are a bunch and they'll take the guesswork out of it. I was a bit aprehensive before doing this mod too (due to technical/wrenching inexperience) but it's really not too difficult at all.
Jun 2, 2006 | 10:27 AM
#4
Contributing Member
Joined: Dec 2003
Posts: 3,659
Likes: 0
From: Between a rock and a hard place, AZ
They aren't stupid questions. But, have you checked out Atwinda's writeup on Mor4wd.com? It's a GREAT writeup, and pretty much explains everything. I used a Dremel tool to do mine, and it worked great. Just make sure you clean the box out really well before re-installation. You'll do fine. Good luck! 
Jun 2, 2006 | 10:44 AM
#6
I had looked into doing this mod, but went w/ the air elbow mod instead. Yes you can buy a 4 1/4" hole saw that attaches to a drill. I looked at them at Lowe's and they sell them for $30.00. That's a little pricey since I'd only use it one time, but it would allow you to make a quick hole. Anyway, just wanted to let you know that hole saw size is out there, but is pricey.
Trending Topics
Jun 2, 2006 | 11:03 AM
#8
Contributing Member
Joined: Oct 2005
Posts: 2,346
Likes: 0
From: Smoky San Diego
I used a regular drill to do mine  took a while and made a mess, but it turned out fine. Ya, that one bolt up front needs a long extension that makes it a biatch to work with. I would highly recommend removing the MAF and the whole airbox to make sure no bits get where they shouldn't.
took a while and made a mess, but it turned out fine. Ya, that one bolt up front needs a long extension that makes it a biatch to work with. I would highly recommend removing the MAF and the whole airbox to make sure no bits get where they shouldn't.
Jun 2, 2006 | 12:05 PM
#10

Contributing Member
Joined: Mar 2005
Posts: 1,909
Likes: 0
I also used a rotozip on mine. The lip of the deck plate wil easily cover any small errors. The cost of a hole saw is not cost effective unless there is no other way or you already have one which it sounds like you do not.
I will 3rd that removing ithe entire air box is nec and taking off the MAF sensor is a good idea also.
I will 3rd that removing ithe entire air box is nec and taking off the MAF sensor is a good idea also.
Jun 2, 2006 | 12:11 PM
#11
Registered User
Joined: Jun 2005
Posts: 209
Likes: 0
From: Gilbert, AZ
When we did the airbox mod on my wifes 4Runner last weekend we used only a few tools: A drill with a couple of different bits, jig saw, 12mm socket, extensions, socket wrench, phillips screwdriver, and a piece of 60 grit sandpaper.
Remove airbox, remove MAF from airbox, mark airbox, drill hole for jig saw blade, cut hole with jigsaw, drill screw holes using deckplate as template, sand the edges to get crap off edges, wash airbox with garden hose, dry airbox, clean MAF with electrical contact cleaner (optional), cut screen to size, install deckplate, tighten bolts, clamp screen on inside, install MAF, dance a happy dance, install airbox, drop in new air filter, reset ECU (EFI Fuse), drive happy!!
We didn't use the sealant that others used because we don't go mudding, she just wanted the free HP and MPG.
The wife did most of the work because I had already done mine last year and she wanted to learn.
Jun 2, 2006 | 12:17 PM
#12
Contributing Member
Joined: Mar 2006
Posts: 106
Likes: 0
From: Denver, CO
I bought one of these at Harbor Freight and it worked great. Just make sure you tighten every set screw real well. Don't forget the "electronic safe" silicon gasket sealant. I like the screen, I should probably install one of those :pat: no problems ...so far
Jun 2, 2006 | 12:43 PM
#13
Would more than do the job and a set is only $13. It's not the best quality, but for something you may only use once, why pay $30 for it???
http://www.harborfreight.com/cpi/cta...emnumber=36222
http://www.harborfreight.com/cpi/cta...emnumber=36222
Jun 2, 2006 | 01:57 PM
#14
Contributing Member
Joined: Mar 2006
Posts: 106
Likes: 0
From: Denver, CO
When you buy the hole-saw, take your deckplate with you to compare sizes. When I did mine I found that most hole-saws were either too large or too small to work with the deck plate I bought. The adjustable one that Harbor Freight sells runs ~$8.
Jun 2, 2006 | 03:47 PM
#15
Registered User
Joined: Jun 2005
Posts: 209
Likes: 0
From: Gilbert, AZ
Originally Posted by ac808m
When you buy the hole-saw, take your deckplate with you to compare sizes. When I did mine I found that most hole-saws were either too large or too small to work with the deck plate I bought. The adjustable one that Harbor Freight sells runs ~$8.
Jun 2, 2006 | 07:12 PM
#19
Contributing Member
Joined: May 2006
Posts: 219
Likes: 0
From: Houston
neliconcept
I'm a noob to modifying my 4 runner, but everyone on this website makes it easier than I think it is.
I installed my deckplate last weekend and it was easier than I thought. I used a jigsaw to cut the hole because it's what I had and cutting the plastic wasn't hard at all. Like everyone said, make sure you clean out the airbox after cutting the hole. I used a damp rag and compressed air several times to make sure I got every little shard of plastic.
You will definitely hear and feel the difference when you reinstall the airbox and hit the road.
Last edited by saulgoode; Jun 2, 2006 at 07:14 PM.
Jun 2, 2006 | 08:07 PM
#20
Contributing Member
Joined: Mar 2005
Posts: 1,909
Likes: 0
Originally Posted by ajw62428
The plate mod looks pretty cool but is there really a difference between that and just removing the 90deg elbow?
I absolutely felt a throttle response differance after this and the Amsoil filter.


