
Phantez's 87 Toyota Pickup build
 Jun 28, 2014 | 12:00 AM
#1

Thread Starter
Registered User
Joined: Jan 2008
Posts: 67
Likes: 0
From: Cedar Rapids, IA
Phantez's 87 Toyota Pickup build
This is going to be a pretty slow, medium to low budget build. The main focus for my spare funds goes towards the 240sx and drifting, but I wanted to have a truck to wheel with my brother and his TJ. I decided to get an old toyota because I miss my 85 4runner sr5 I had a few years back. It was loaded with all the options - power windows, sunroof, a/c, inclinometer, sr5 print cloth seats, everything. Even the power antenna worked.

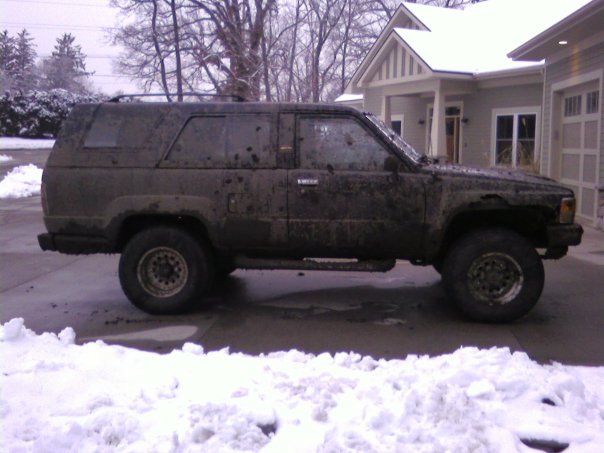
Sold that truck in 2009 for $1,500. Never should have done that.
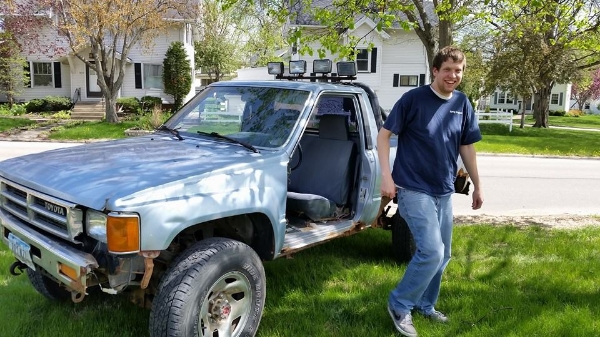
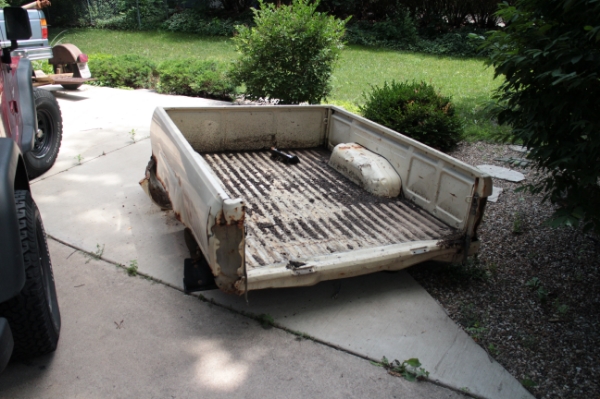
About a month ago, I picked up this little fine piece of machinery for $460 at a garage sale. It's an 88 pickup. It looks like crap and the frame is all rotted beyond repair. Someone previously threw some scrap metal on there with some crappy welding work and that's pretty much all thats holding it together, but the engine and drivetrain are good.
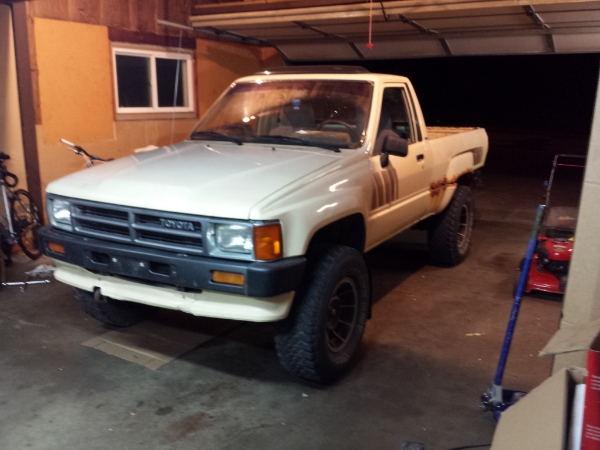
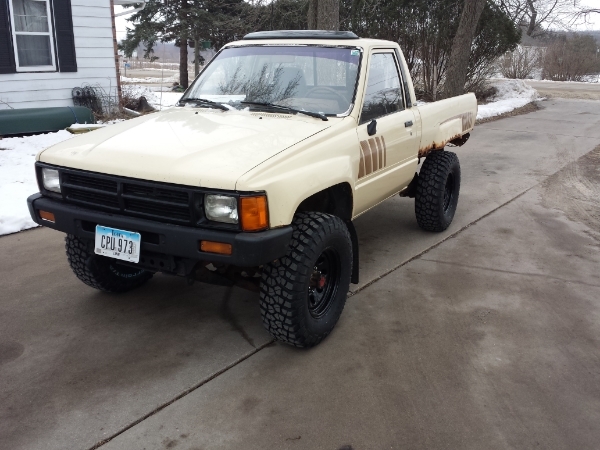
It was time to start looking for a good chassis to use. This week I found an 87 toyota pickup with a good frame, but the engine had a nasty rod knock. Not exactly what I wanted since I would've liked to have the strait axle, but that can always be changed down the road. The box was also rusted and a bit bent up, but that can be fixed too. I ended up talking the guy down to $600 and trailered it home.
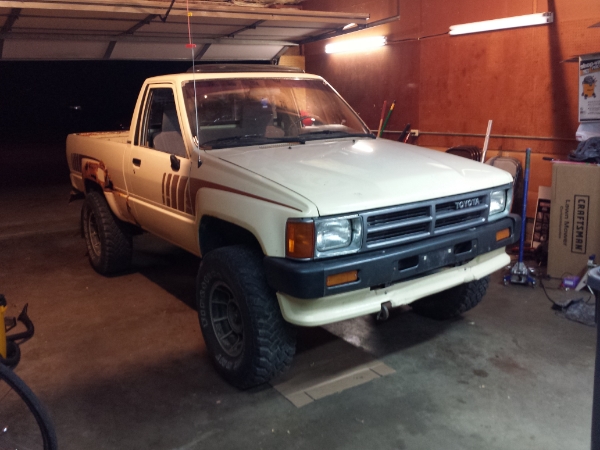

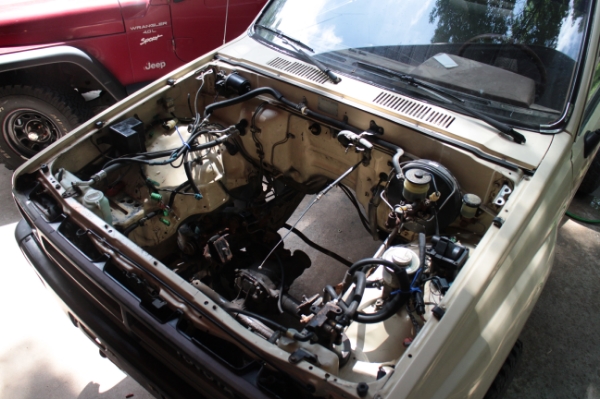
At this point, I have a lot of work ahead of me. I need pull the engine from the blue truck to put in the tan one. The tan truck also has a busted windshield which I'm going to try pulling from the blue one as well as a few other misc pieces. It's nice having your own parts truck. In the process it's also going to be converted to fuel injection since the blue one is EFI and the bad engine was carburated.
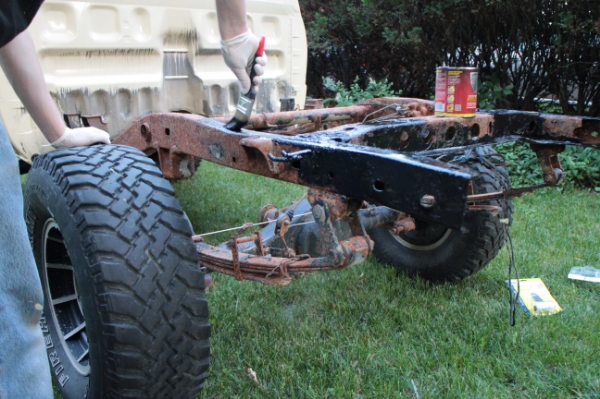
After work tonight I started tearing into the new truck and pulled the bad engine out. After draining out the fluids, it looks like the rod knock was the result of a blown head gasket that wasn't attended to.
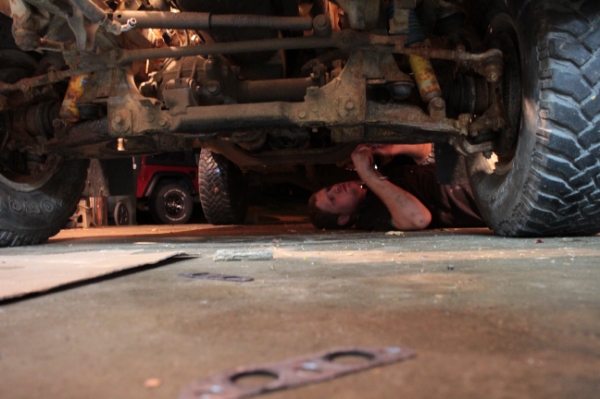
Always nice to con a buddy into helping

Ready for a good power wash to clean up all that gravel dust.
And that's where I left it for tonight. I'm curious to see how far along I get over the weekend.
As far as other plans, I just want to get some 4x innovations tube doors and a lunch box locker in the rear. That should get me by for a light/moderate wheeler until I feel the need to splurge on a nice SAS swap, but that'll be a while. I'll keep this thread updated as things move along.


Sold that truck in 2009 for $1,500. Never should have done that.
About a month ago, I picked up this little fine piece of machinery for $460 at a garage sale. It's an 88 pickup. It looks like crap and the frame is all rotted beyond repair. Someone previously threw some scrap metal on there with some crappy welding work and that's pretty much all thats holding it together, but the engine and drivetrain are good.

It was time to start looking for a good chassis to use. This week I found an 87 toyota pickup with a good frame, but the engine had a nasty rod knock. Not exactly what I wanted since I would've liked to have the strait axle, but that can always be changed down the road. The box was also rusted and a bit bent up, but that can be fixed too. I ended up talking the guy down to $600 and trailered it home.


At this point, I have a lot of work ahead of me. I need pull the engine from the blue truck to put in the tan one. The tan truck also has a busted windshield which I'm going to try pulling from the blue one as well as a few other misc pieces. It's nice having your own parts truck. In the process it's also going to be converted to fuel injection since the blue one is EFI and the bad engine was carburated.
After work tonight I started tearing into the new truck and pulled the bad engine out. After draining out the fluids, it looks like the rod knock was the result of a blown head gasket that wasn't attended to.

Always nice to con a buddy into helping


Ready for a good power wash to clean up all that gravel dust.

And that's where I left it for tonight. I'm curious to see how far along I get over the weekend.
As far as other plans, I just want to get some 4x innovations tube doors and a lunch box locker in the rear. That should get me by for a light/moderate wheeler until I feel the need to splurge on a nice SAS swap, but that'll be a while. I'll keep this thread updated as things move along.
Last edited by Phantez; Jul 29, 2014 at 10:27 PM.
Jul 2, 2014 | 09:11 PM
#3
Thread Starter
Registered User
Joined: Jan 2008
Posts: 67
Likes: 0
From: Cedar Rapids, IA
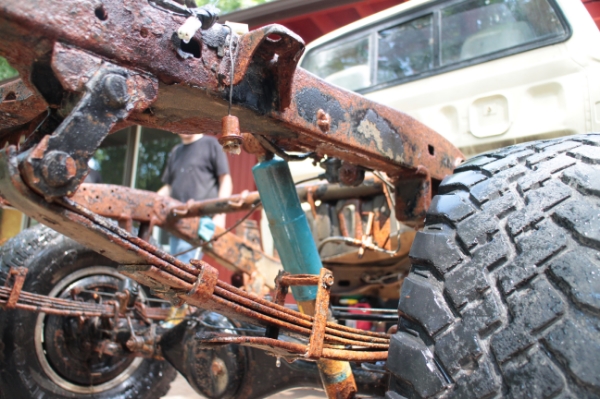
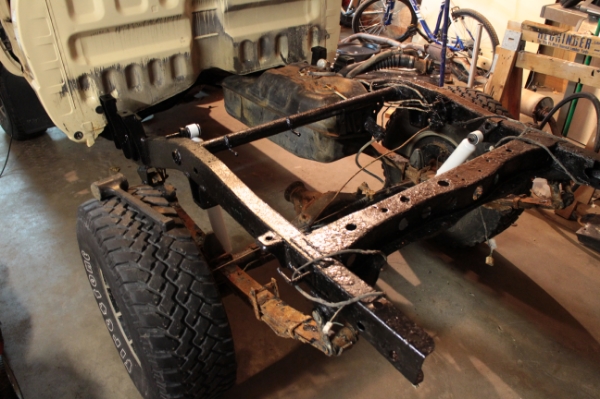
I have some progress to post since I've last been on here. Over the weekend I pulled the box and gas tank, then gave it a good pressure wash to clean it all up. The frame looks great for an Iowa truck, just surface rust. I'm going to clean it up with some por-15.
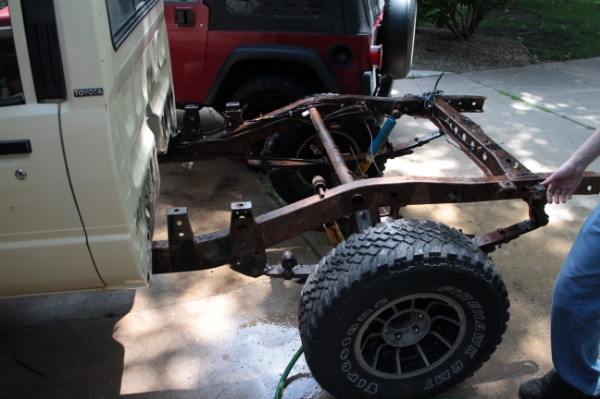
I was originally thinking I would put new fiberglass sides on the box, but it's pretty bent up where it was hit and I don't think it would ever look right. I'm just going to flatbed the truck as a temporary solution to at least make it legal and keep an eye out for a clean box next time I travel south.
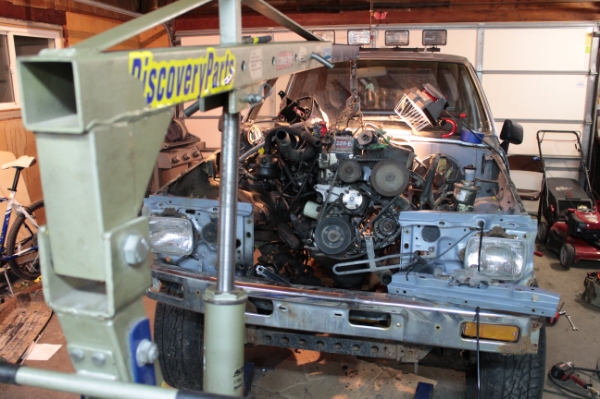
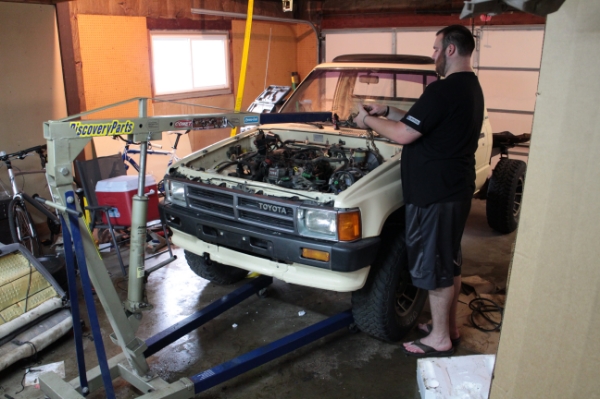
Next, we pulled the donor truck to the wash to clean up the engine. It's had a bad crank shaft seal for quite some time and was caked with oil.
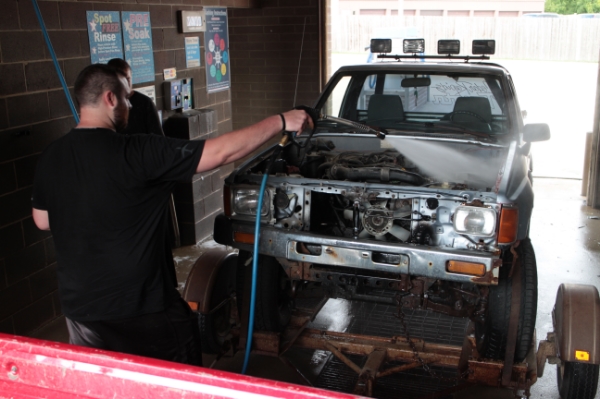
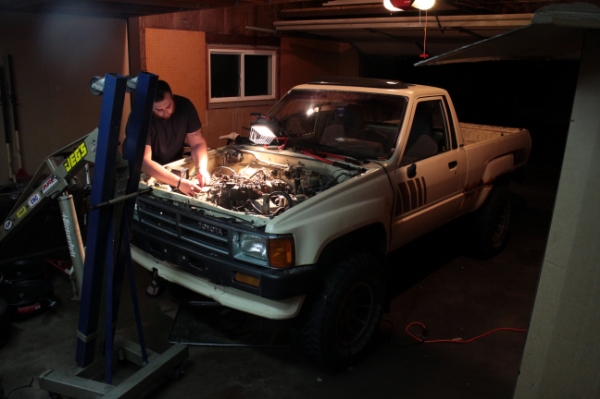
Tonight I got the engine ready to be pulled. It's ready to go next time I'm in the garage. On a side note; If there's anything you could use off this truck, PM me with an offer and I'll let you know if I have it. It'll be going to the junk yard soon. (I'm keeping the wheels, tires, and locking hubs)
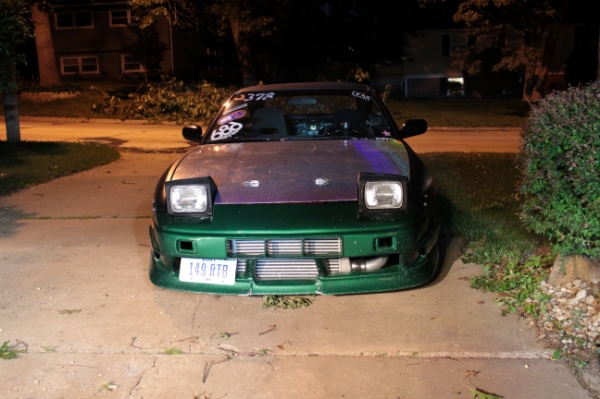
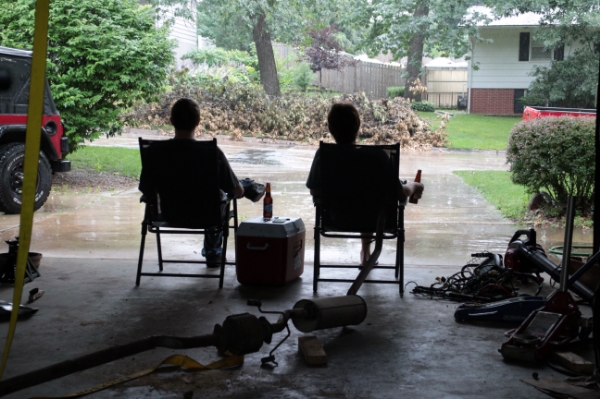
I decided to drive the drift car to the garage tonight. All that brush across the street is a tree that was knocked down during big storm we had on Monday
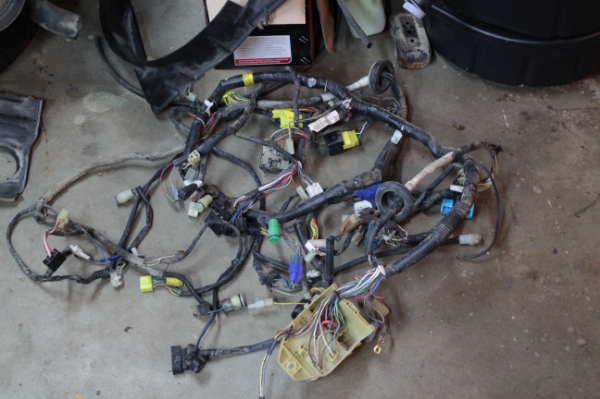
We decided that the best route to take with the wiring for the EFI swap is to just move all the wiring over. The way this harness is set up would be an pain in the ass to splice together. The only thing I'll need to deal with at that point is wiring for A/C since the EFI harness wasn't set up for it.
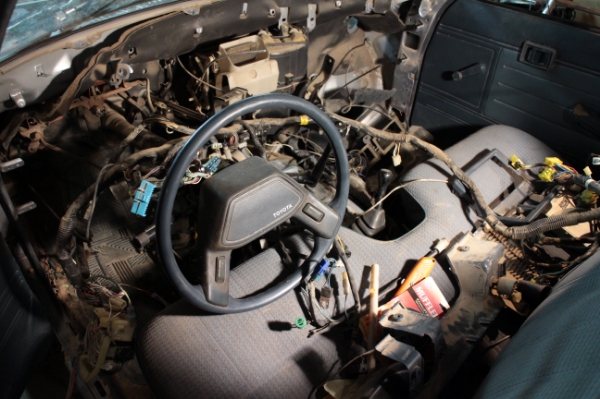
And that's where I left tonight. The only thing holding up the harness from coming out is a branch of wire that goes along the bottom of the drivers side door, then feeds under the carpet below the seat. I can't figure out where it goes and the bolts for the seat are too rusted to move. Does anyone know where it leads to so I can unplug it at the source and see if I can pull it through under the carpet?
I was also wondering about the front hubs. The tan truck doesn't have manual lockers and seems to just be locked all the time. It doesn't look like my truck has the vacuum operated system which looks like it wasn't introduced until 89. Can I just throw the manual hubs on here from the blue truck and call it good? I want to switch it over because I think I'm going to put lock right up front.
Any input or suggestions for the build is appreciated


I was originally thinking I would put new fiberglass sides on the box, but it's pretty bent up where it was hit and I don't think it would ever look right. I'm just going to flatbed the truck as a temporary solution to at least make it legal and keep an eye out for a clean box next time I travel south.

Next, we pulled the donor truck to the wash to clean up the engine. It's had a bad crank shaft seal for quite some time and was caked with oil.

Tonight I got the engine ready to be pulled. It's ready to go next time I'm in the garage. On a side note; If there's anything you could use off this truck, PM me with an offer and I'll let you know if I have it. It'll be going to the junk yard soon. (I'm keeping the wheels, tires, and locking hubs)

I decided to drive the drift car to the garage tonight. All that brush across the street is a tree that was knocked down during big storm we had on Monday

We decided that the best route to take with the wiring for the EFI swap is to just move all the wiring over. The way this harness is set up would be an pain in the ass to splice together. The only thing I'll need to deal with at that point is wiring for A/C since the EFI harness wasn't set up for it.

And that's where I left tonight. The only thing holding up the harness from coming out is a branch of wire that goes along the bottom of the drivers side door, then feeds under the carpet below the seat. I can't figure out where it goes and the bolts for the seat are too rusted to move. Does anyone know where it leads to so I can unplug it at the source and see if I can pull it through under the carpet?
I was also wondering about the front hubs. The tan truck doesn't have manual lockers and seems to just be locked all the time. It doesn't look like my truck has the vacuum operated system which looks like it wasn't introduced until 89. Can I just throw the manual hubs on here from the blue truck and call it good? I want to switch it over because I think I'm going to put lock right up front.
Any input or suggestions for the build is appreciated
Last edited by Phantez; Jul 2, 2014 at 09:44 PM.
Jul 3, 2014 | 01:39 AM
#4
The wire goes to your seat belt and it will have a plastic clip that will keep your from just pulling it thru along with some tar like material that is on the floor and it is really sticky. I think if you jut try pulling it, it will break the wire.
I think you can just move the hubs over and call it good but not sure on that one. Here is a link for coverting for 22r to 22re https://www.yotatech.com/forums/f116...4-88-a-278925/
As I understand it, these trucks did not come with AC but was added at the dealer. I beleive the wiring is there and just not hooked up. I added AC to one of my trucks but still need a compressor and to get it running to see if it works. It will have dimples in the firewall as to where to drill out to add the condenser.
Welcome to Yotatech. I like seeing some in depth builds.
Jul 3, 2014 | 06:28 AM
#5
Registered User
Joined: Jan 2011
Posts: 1,051
Likes: 0
From: Memphis, TN
Manual hubs are relatively easy to find. You can get them plus parts from marlin crawler.com
Or luck upon some here in the classifieds or eBay/craigslist.
Once you put that lunchbox locker in, your truck will be nearly unstoppable for most light wheeling. I say wheel that crap until you break the IFS off! Reach it's limits and replace it with a solid axle.
Also, any specs on the 240sx? My friends got an rb26ett swap (cliche, yeah..) that he's pushed to about 600 hp. He's got pretty deep pockets, to say the least.
Jul 3, 2014 | 11:21 AM
#6
Thread Starter
Registered User
Joined: Jan 2008
Posts: 67
Likes: 0
From: Cedar Rapids, IA
Terrys87 - Thanks for the link. All the guides I've found have been pretty vague in some areas. This will come in handy for sure.
Roark - I already have the manual hubs from the donor truck. I just wanted to make sure can just switch them over without doing anything else to the truck.
The 240 isn't anything crazy. It's an s15 sr20. t28 turbo pushing about 1 bar. Probably somewhere around 275hp-ish. Other than that, just basic stuff. Tomei LSD, PBM coilovers, solid aluminum subframe bushings, 1 piece drive shaft, etc. Just enough to have some fun thrashing it around on the race track.
Trending Topics
Jul 5, 2014 | 10:42 PM
#8
Thread Starter
Registered User
Joined: Jan 2008
Posts: 67
Likes: 0
From: Cedar Rapids, IA
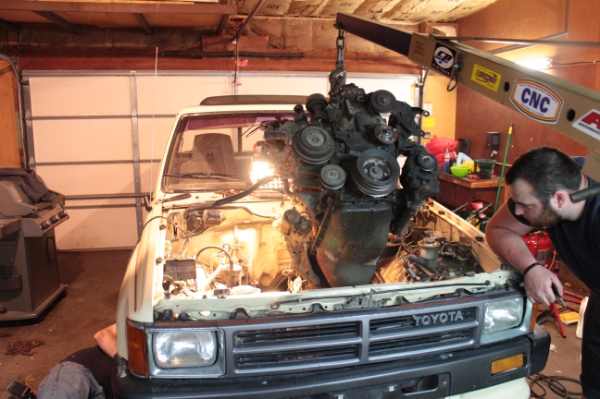
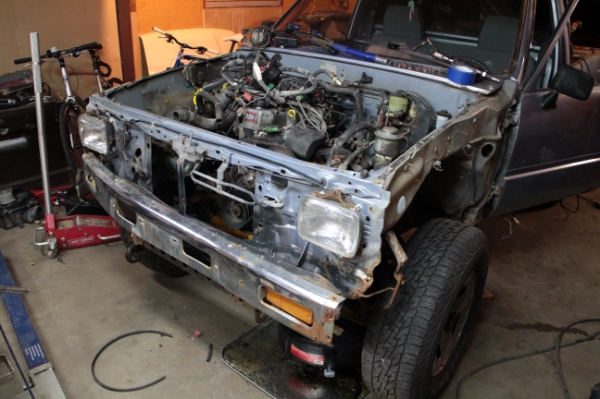
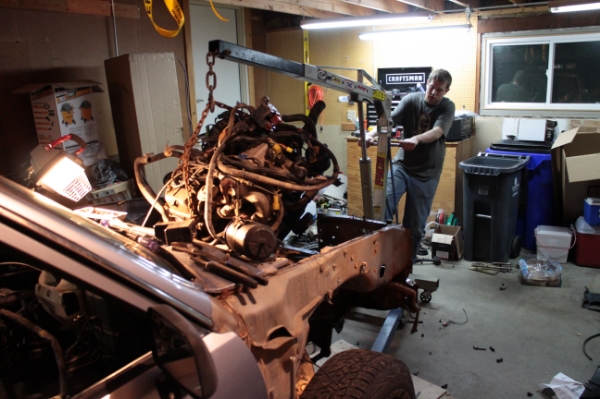
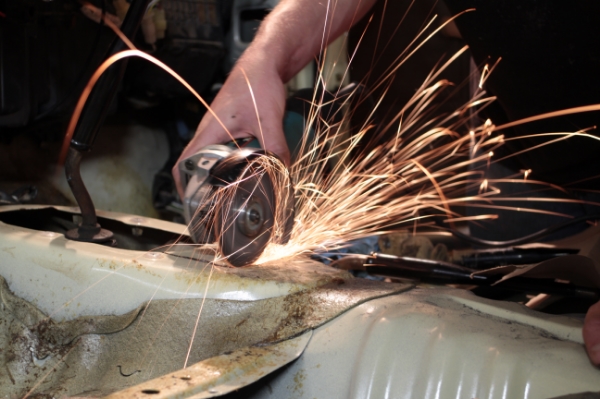
Got the motor pulled out of the donor truck and started working on tuning it up a bit and replacing some gaskets. We decided to cut out the radiator support to make it a little easier on us since it's going to the junk yard anyway.
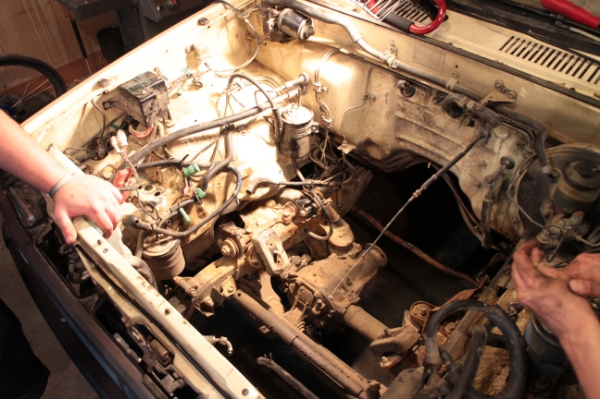
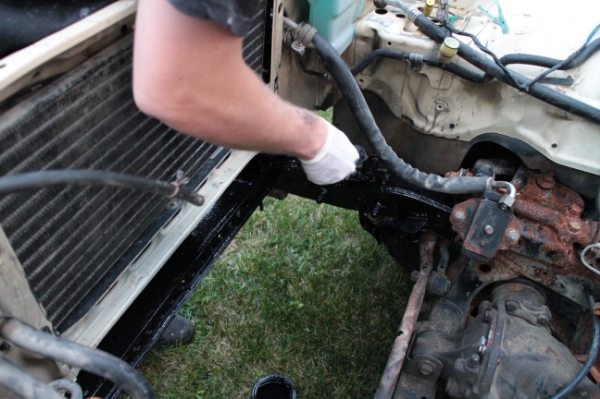
Once the engine was out, we started cleaning up the tan one to get it ready for it's new engine and wiring harness. It looks like it hasn't been cleaned out in ages.
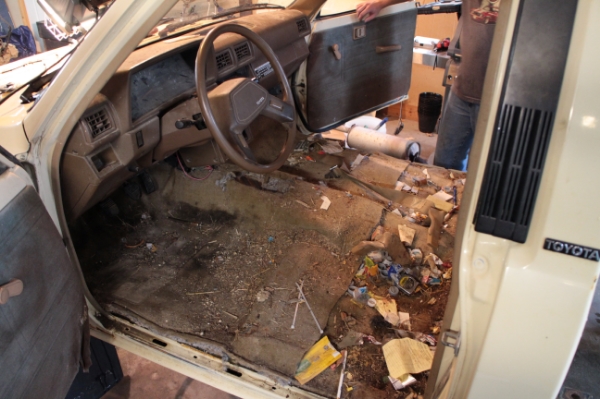
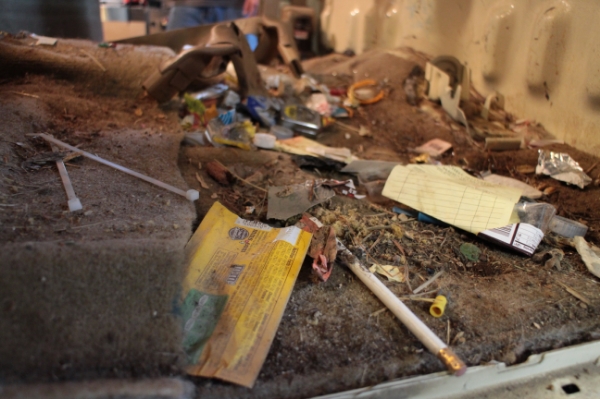
Couple hours later
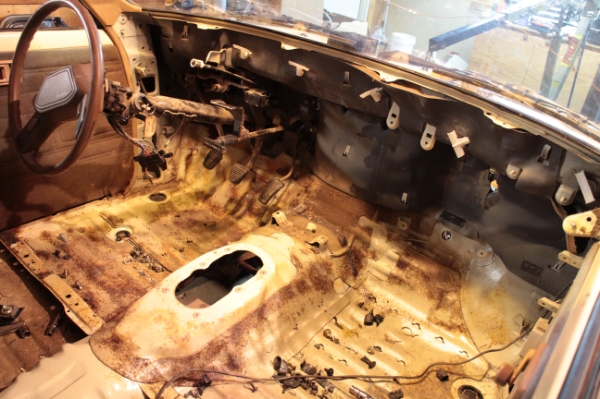
Ready for the new EFI wiring harness


Once the engine was out, we started cleaning up the tan one to get it ready for it's new engine and wiring harness. It looks like it hasn't been cleaned out in ages.


Couple hours later

Ready for the new EFI wiring harness

Last edited by Phantez; Jul 5, 2014 at 10:47 PM.
Jul 29, 2014 | 10:06 PM
#9
Thread Starter
Registered User
Joined: Jan 2008
Posts: 67
Likes: 0
From: Cedar Rapids, IA
I've been slacking on updating the thread lately, but I've also been caught up in other projects around the house so it hasn't been moving as quickly either
I coated the frame with POR-15. I was really impressed with how easily this stuff applied and spread on the frame. The truck looks so much better after coating it.
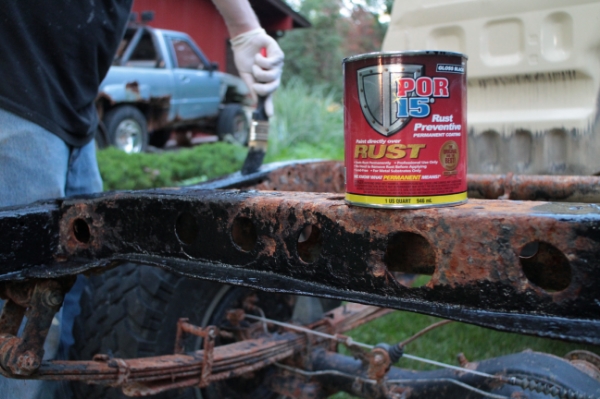
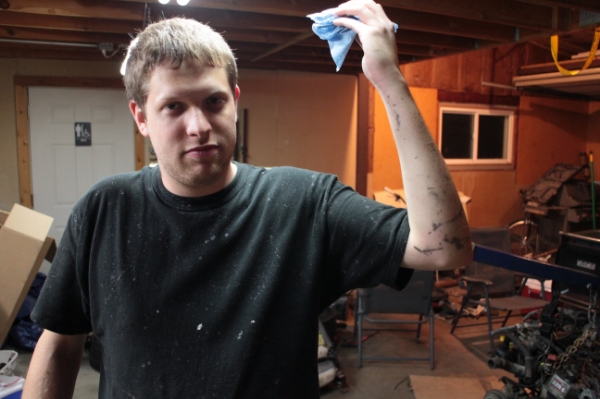
It started raining part way through, which made for a great excuse to sit back and have a beer
This crap was on my arm for two weeks
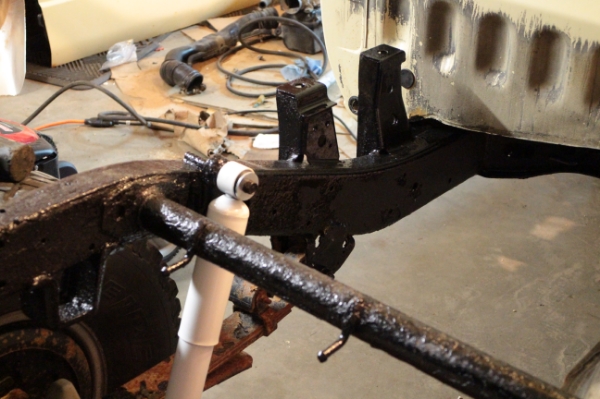
After mounting the fuel tank back up. I was going to coat that too, but I found that it had a big wet spot on the back where it's leaking so I'm just going to order a new one once the truck is running.
I also dropped the engine in.
I was trying to figure out how I wanted to give power to the fuel pump, and decided the easiest/best way is to just take the rear harness off the blue truck and just swap that in. This means that every single wire that was in the blue truck is in the tan one now. I never would have thought I would have to move over all the wiring to make it work, but I guess that's why I've read the swap from carb to EFI is a wiring nightmare.
I'm a little confused when it comes to connecting the fuel lines. I'm used to my Nissan which is just a simple feed and return, and just connects to either side of the fuel rail and fuel filter and that's it. I can see where the return comes off the fuel pressure regulator, but I don't see where the feed connects on the engine. I'm also unsure of where the third line needs to go. From what i've read it's just a vent, but I don't know where it needs go in the engine bay
I coated the frame with POR-15. I was really impressed with how easily this stuff applied and spread on the frame. The truck looks so much better after coating it.


It started raining part way through, which made for a great excuse to sit back and have a beer


This crap was on my arm for two weeks


After mounting the fuel tank back up. I was going to coat that too, but I found that it had a big wet spot on the back where it's leaking so I'm just going to order a new one once the truck is running.

I also dropped the engine in.

I was trying to figure out how I wanted to give power to the fuel pump, and decided the easiest/best way is to just take the rear harness off the blue truck and just swap that in. This means that every single wire that was in the blue truck is in the tan one now. I never would have thought I would have to move over all the wiring to make it work, but I guess that's why I've read the swap from carb to EFI is a wiring nightmare.
I'm a little confused when it comes to connecting the fuel lines. I'm used to my Nissan which is just a simple feed and return, and just connects to either side of the fuel rail and fuel filter and that's it. I can see where the return comes off the fuel pressure regulator, but I don't see where the feed connects on the engine. I'm also unsure of where the third line needs to go. From what i've read it's just a vent, but I don't know where it needs go in the engine bay
Last edited by Phantez; Jul 29, 2014 at 10:27 PM.
Jul 30, 2014 | 12:10 AM
#10
Looks like you are making some progress. While you have the harness out, now is a good time to clean the ventilation system out. It will have dusty vents and the AC and Heater core is most likely got a bunch of junk in there as well.
It is easy to pull the Blower Assembly and AC Evaporator out and reinstall them. Just above the blower, there is a stove pipe that goes up to the windshield cowl and lit may have a bunch of debris up there as well.
On the fuel line, you will need to take the bottom line off of the fuel injected truck and move it over to the project truck. You were correct in needing all of the wiring harness. Don't skip the headlight harness as well. I have seen one wire connector in the fuse box that is different and you will not be able to get your blower motor to your heater/ac system to work. I forget which year that was on that I seen it and it may not apply to all years, but it does exist. It may look the same but is not always wired the same.
The fuel line which is under a lot of pressure connects to the fuel pump assembly can be rusted sometimes. Be careful when trying to separate the line from the pump assembly. The rubber end will have a banjo fitting that goes up to the fuel filter. It will connect to the front of the fuel filter closest to the core support. The fuel filter will have an arrow or be marked "In" or "Out" on the ends of the filter. The "In" should be closest to the core support, and the "Out will be closest to the firewall. From the Out of the filter, it will go up to your fuel rail. The arrow should be facing the firewall as it is showing fuel flow.
While you are working on the fuel system, this is a good time to fill the fuel lines with PB Blaster or Marvel Mystery Oil and let them soak a few days and blow them out with and air hose. I have seen several Return lines clogged and a lot of nasty stuff comes out of those lines.
On your fuel tank, I have cleaned them out with white vinegar and then coated them with Red Kote. I have listed in my builds in the link below. These tanks get nasty as well. Red Kote will seal up several leaks. This is if you don't replace the tank.
Last edited by Terrys87; Jul 30, 2014 at 12:12 AM.
Aug 1, 2014 | 07:34 PM
#11
Thread Starter
Registered User
Joined: Jan 2008
Posts: 67
Likes: 0
From: Cedar Rapids, IA
Looks like you are making some progress. While you have the harness out, now is a good time to clean the ventilation system out. It will have dusty vents and the AC and Heater core is most likely got a bunch of junk in there as well.
It is easy to pull the Blower Assembly and AC Evaporator out and reinstall them. Just above the blower, there is a stove pipe that goes up to the windshield cowl and lit may have a bunch of debris up there as well.
On the fuel line, you will need to take the bottom line off of the fuel injected truck and move it over to the project truck. You were correct in needing all of the wiring harness. Don't skip the headlight harness as well. I have seen one wire connector in the fuse box that is different and you will not be able to get your blower motor to your heater/ac system to work. I forget which year that was on that I seen it and it may not apply to all years, but it does exist. It may look the same but is not always wired the same.
The fuel line which is under a lot of pressure connects to the fuel pump assembly can be rusted sometimes. Be careful when trying to separate the line from the pump assembly. The rubber end will have a banjo fitting that goes up to the fuel filter. It will connect to the front of the fuel filter closest to the core support. The fuel filter will have an arrow or be marked "In" or "Out" on the ends of the filter. The "In" should be closest to the core support, and the "Out will be closest to the firewall. From the Out of the filter, it will go up to your fuel rail. The arrow should be facing the firewall as it is showing fuel flow.
While you are working on the fuel system, this is a good time to fill the fuel lines with PB Blaster or Marvel Mystery Oil and let them soak a few days and blow them out with and air hose. I have seen several Return lines clogged and a lot of nasty stuff comes out of those lines.
On your fuel tank, I have cleaned them out with white vinegar and then coated them with Red Kote. I have listed in my builds in the link below. These tanks get nasty as well. Red Kote will seal up several leaks. This is if you don't replace the tank.
It is easy to pull the Blower Assembly and AC Evaporator out and reinstall them. Just above the blower, there is a stove pipe that goes up to the windshield cowl and lit may have a bunch of debris up there as well.
On the fuel line, you will need to take the bottom line off of the fuel injected truck and move it over to the project truck. You were correct in needing all of the wiring harness. Don't skip the headlight harness as well. I have seen one wire connector in the fuse box that is different and you will not be able to get your blower motor to your heater/ac system to work. I forget which year that was on that I seen it and it may not apply to all years, but it does exist. It may look the same but is not always wired the same.
The fuel line which is under a lot of pressure connects to the fuel pump assembly can be rusted sometimes. Be careful when trying to separate the line from the pump assembly. The rubber end will have a banjo fitting that goes up to the fuel filter. It will connect to the front of the fuel filter closest to the core support. The fuel filter will have an arrow or be marked "In" or "Out" on the ends of the filter. The "In" should be closest to the core support, and the "Out will be closest to the firewall. From the Out of the filter, it will go up to your fuel rail. The arrow should be facing the firewall as it is showing fuel flow.
While you are working on the fuel system, this is a good time to fill the fuel lines with PB Blaster or Marvel Mystery Oil and let them soak a few days and blow them out with and air hose. I have seen several Return lines clogged and a lot of nasty stuff comes out of those lines.
On your fuel tank, I have cleaned them out with white vinegar and then coated them with Red Kote. I have listed in my builds in the link below. These tanks get nasty as well. Red Kote will seal up several leaks. This is if you don't replace the tank.

I found the line feeding into the fuel filter. That sucker is tucked up in there like I can't believe. I'm disappointed I didn't replace it while the engine was out. I didn't realize that was mounted to the engine block
Im having a hard time telling which line is which coming off the gas tank. I'm assuming the larger line is the vent, and the two smaller ones are the feed and return?

I'm also thinking about removing the charcoal canister. It doesn't fit in it's stock location anymore since it interferes with the intake manifold whereas the carb used to clear it. From what i've read, it just cleans the air coming out of the vent from the gas tank. Can I just leave the hose that fed into the canister open somewhere and cap off the vacuum source? I don't really want to mess with rigging up a new bracket for some emissions junk I don't need.
Aug 2, 2014 | 01:42 AM
#12
That fuel filter on the frame in the above picture is for the carbed motor. You will need to do away with it. Also you are going to need to swap tanks. That looks like you installed the fuel injected tank to me but cant really tell in the pictures. I will try and get a picture of my tank as the bed is off of it and post some picture with some info later when I get home.
I installed my canister just to keep it from having in vacuum issues and not to throw any codes.
I installed my canister just to keep it from having in vacuum issues and not to throw any codes.
Aug 2, 2014 | 08:47 AM
#13
Thread Starter
Registered User
Joined: Jan 2008
Posts: 67
Likes: 0
From: Cedar Rapids, IA
That fuel filter on the frame in the above picture is for the carbed motor. You will need to do away with it. Also you are going to need to swap tanks. That looks like you installed the fuel injected tank to me but cant really tell in the pictures. I will try and get a picture of my tank as the bed is off of it and post some picture with some info later when I get home.
I installed my canister just to keep it from having in vacuum issues and not to throw any codes.
I installed my canister just to keep it from having in vacuum issues and not to throw any codes.
Is there any difference between the gauge clusters that came on the EFI vs the carb trucks? I'd like to keep the cluster that came on the carb truck since it would have accurate mileage for the chassis but I didn't know if it would have different warning lights on it or something.
Last edited by Phantez; Aug 2, 2014 at 08:49 AM.
Aug 3, 2014 | 12:46 AM
#14
I forgot to get a picture for you for the lines. I will try to remember to do that tomorrow. The gauge cluster will work for you. Some of these trucks the tachometer doesn't always work when added but there is a wiring trick you can do to make it work for you if you need to do that to make it work.
Here is what you do to make the tach work. Run a wire from the negative side of the distributor to the "P" on the back of the cluster. No way of telling which trucks are prewired for the tach that I know of. Just have to plug it in and see. If it doesn't work, adding this wire will make it work.
Copied...
I am starting on getting the tach working. I found this on getting the tach wired up if it doesn't have the factory wiring. I will post good pics if this works.
LINK>>>> I found http://www.siestaoffroad.com/clustertech.html
Back of gauge is marked with a "p".
Aug 3, 2014 | 09:04 PM
#15
Thread Starter
Registered User
Joined: Jan 2008
Posts: 67
Likes: 0
From: Cedar Rapids, IA
Unfortunately, neither of my clusters have a tach, which is something I would like to change out some day. It's good to know everything else is the same though.
I ended up figuring out the fuel lines through trial and error end finally fired up the engine. This victory ended up being short lived when I discovered that I can't put the transfer case shifter in. I kept the transmission that was on the EFI engine, and the shifters are about 3 inches further back than the one that was in originally in there. I had no idea they would be different. Which is the better transmission and what are the differences? I feel committed to using the transmission that's in there at this point and just cutting and patching the floor to make it work. It'll be covered up by a vinyl floor mat anyway.
I ended up figuring out the fuel lines through trial and error end finally fired up the engine. This victory ended up being short lived when I discovered that I can't put the transfer case shifter in. I kept the transmission that was on the EFI engine, and the shifters are about 3 inches further back than the one that was in originally in there. I had no idea they would be different. Which is the better transmission and what are the differences? I feel committed to using the transmission that's in there at this point and just cutting and patching the floor to make it work. It'll be covered up by a vinyl floor mat anyway.
Aug 5, 2014 | 11:02 PM
#16
Thread Starter
Registered User
Joined: Jan 2008
Posts: 67
Likes: 0
From: Cedar Rapids, IA
I did some wrenching on the yota tonight. Connected up the drive shafts as well as a few other necessities for it to go down the road.
I cut out a small part of the floor so the transfer case shifter would fit. I figure I'll be cutting it out more down the road some day if I decide to upgrade to dual cases, so it's no biggie
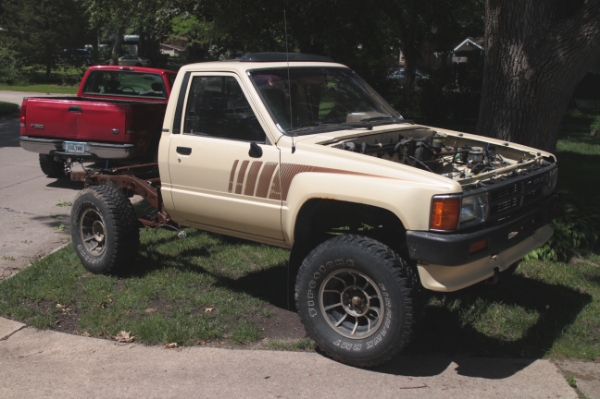
After fitting everything up, I took it for a little test drive.
I still need to install all of the interior pieces, and there's a dozen other small things here and there that need to be done before it's really "driving". I also want to replace all of the brakes and install my locking hubs from the donor truck. I'm probably going to throw the old box on it so it's legal and cruise around in it this weekend so see what else needs to be buttoned up. The plan is to go on a 4 wheeling trip in September.
Last edited by Phantez; Aug 6, 2014 at 06:53 AM.
Aug 9, 2014 | 11:53 PM
#17
Thread Starter
Registered User
Joined: Jan 2008
Posts: 67
Likes: 0
From: Cedar Rapids, IA
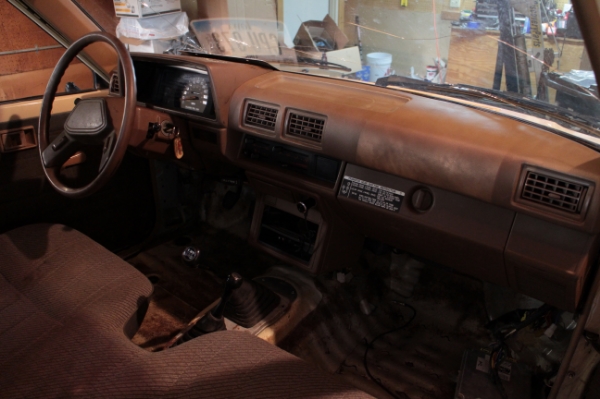
Today, I worked on putting the interior together. I still need to order a vinyl floor for it and I would like to replace the factory bench seat with some nicer bucket seats when I find some I like
It had been a few weeks since I tore out the interior, so it was a bit of a puzzle figuring how the hvac system and dash board went together

All finished up.
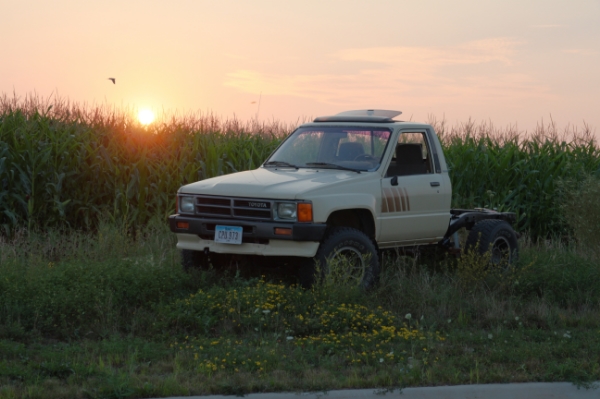
After getting the interior back together, I zip tied the tail lights on to the frame rails and went on a short cruise. Being in Iowa, we felt it would be appropriate to take some pictures in a corn field.
There are still a few mechanical things I still need to address. There are two clunking noises in the front end. I'm pretty confident one of them is a bad strut, but I'm not sure about the other. I'm sure I'll be chasing around little bugs for a while. I still have to put the new brakes on it and swap on the selectable hubs as well.
Now that the truck is up and running, I wanted to give my input on the EFI swap. I've read about people talking about collecting parts over time to put it together and yada yada yada. Honestly, now that I know what's involved, I don't think I would even attempt this swap if I didn't have a complete donor vehicle. There are so many parts that are needed that it would take forever to collect, and probably cost much more than just finding a rotted out donor to buy. The wiring side of it alone is worth having the donor vehicle. Just my two cents.
It had been a few weeks since I tore out the interior, so it was a bit of a puzzle figuring how the hvac system and dash board went together

All finished up.

After getting the interior back together, I zip tied the tail lights on to the frame rails and went on a short cruise. Being in Iowa, we felt it would be appropriate to take some pictures in a corn field.

There are still a few mechanical things I still need to address. There are two clunking noises in the front end. I'm pretty confident one of them is a bad strut, but I'm not sure about the other. I'm sure I'll be chasing around little bugs for a while. I still have to put the new brakes on it and swap on the selectable hubs as well.
Now that the truck is up and running, I wanted to give my input on the EFI swap. I've read about people talking about collecting parts over time to put it together and yada yada yada. Honestly, now that I know what's involved, I don't think I would even attempt this swap if I didn't have a complete donor vehicle. There are so many parts that are needed that it would take forever to collect, and probably cost much more than just finding a rotted out donor to buy. The wiring side of it alone is worth having the donor vehicle. Just my two cents.
Last edited by Phantez; Aug 10, 2014 at 12:01 AM.
Aug 10, 2014 | 05:59 AM
#18
Registered User
Joined: Dec 2008
Posts: 2,391
Likes: 1
From: tecumseh nebraska
Great job,that was quite a task...as for the tranny and transfer case,there's a handful of different combinations that were offered,in my opinion,I would of kept the entire drive train from the donor truck.parts are very expensive from the dealer and junkyard Toyotas are getting harder to find d as well.your truck has some sweet factory graphics as well.if your thinking of doing a lunch box locker. In the front,I did one that's pretty well explained in my build thread.and it works superb.
Feb 24, 2015 | 06:03 PM
#19
Thread Starter
Registered User
Joined: Jan 2008
Posts: 67
Likes: 0
From: Cedar Rapids, IA
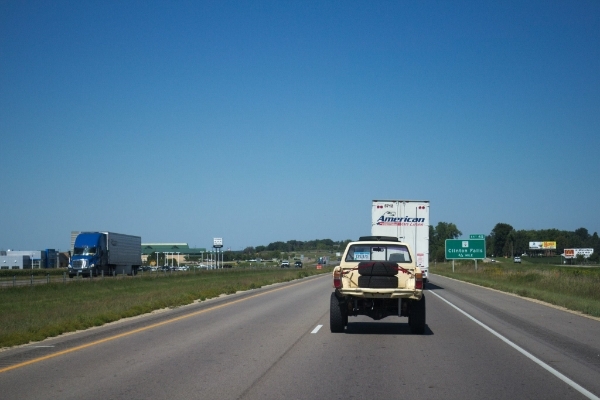
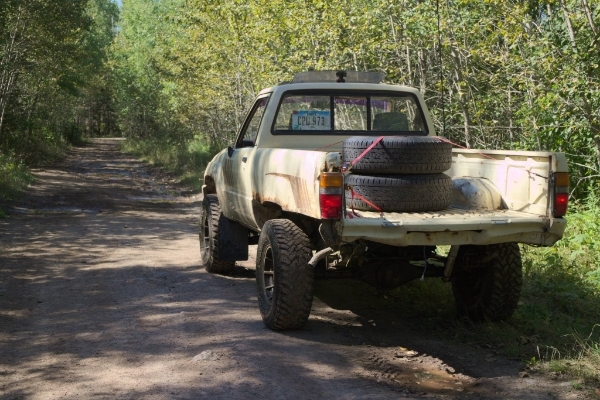
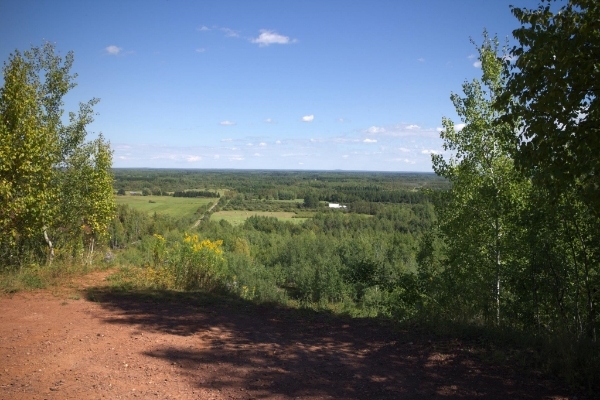
I haven't posted anything in here for a while. I did break in the truck on the trails in the fall and it did great. We went to the Iron Range ORV in Gilbert MN.
I drove the truck the 6 hour drive out there and back, which unfortunately meant putting the rusted crap box back on there. Didn't want to get a ticket for uncovered tires and I needed room to store stuff. The tires on it were dried out and cracking, so I brought two spares off the parts truck to be safe.
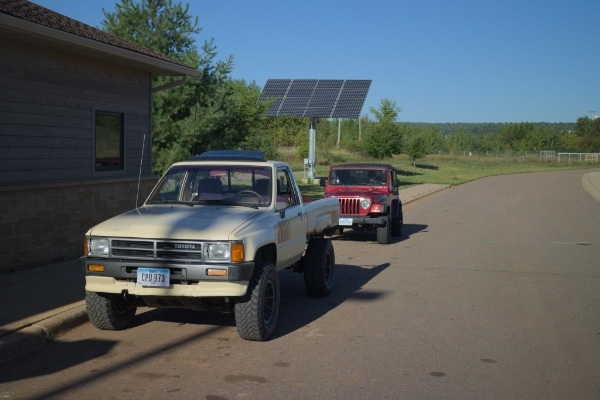
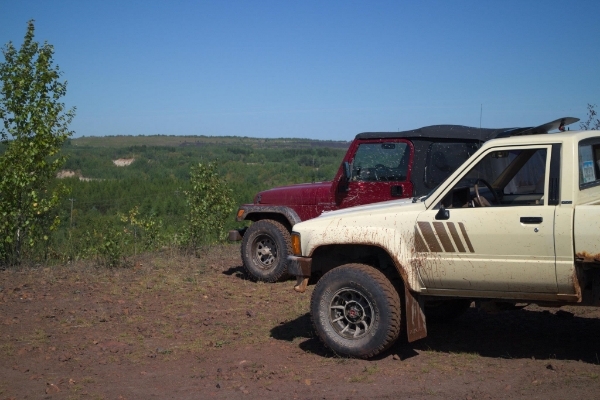
Check in at the Iron Range. I was there wheeling with my brother in his Jeep
Starting off
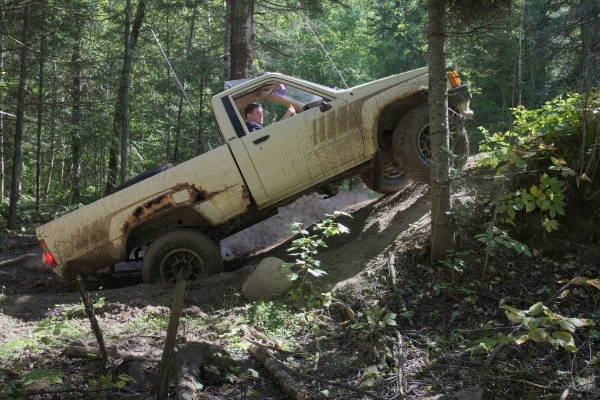
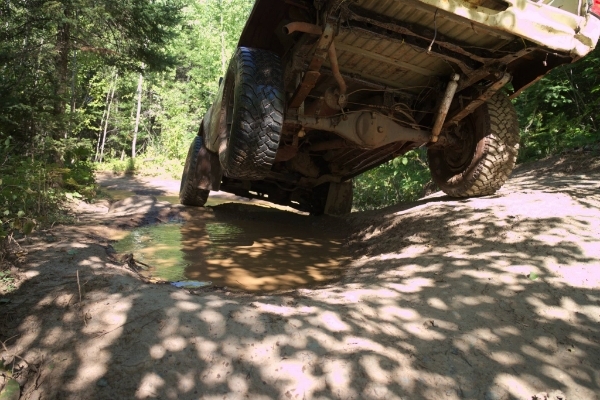
A lot of these trails were a good challenge for the stock yota. I unfortunately couldn't make this little hill. The deep ruts were a challenge for my worn 31" tires and kept bottoming out on my skid plate and axle. Unfortunately, the Jeep made it... time for upgrades! I can't let that happen!
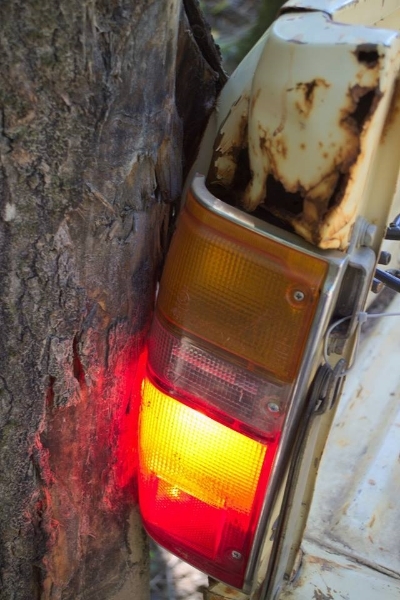
The rut threw the rear of the truck into a tree, barely missing my tail light. Thankfully I didn't get a new box before this haha
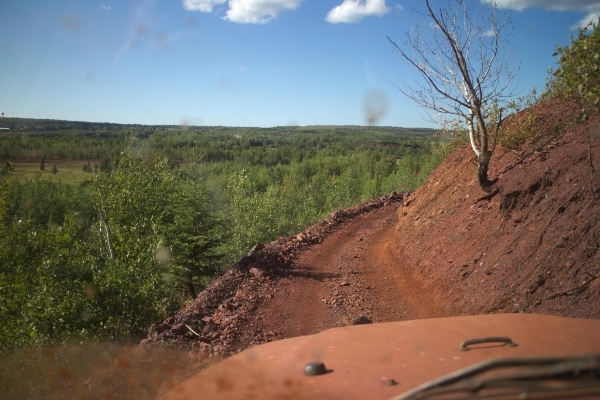
There were some pretty cool views out there on some parts of the trails
Somehow managed to make it through a black diamond trail with open diffs
Some poo came out going around this corner
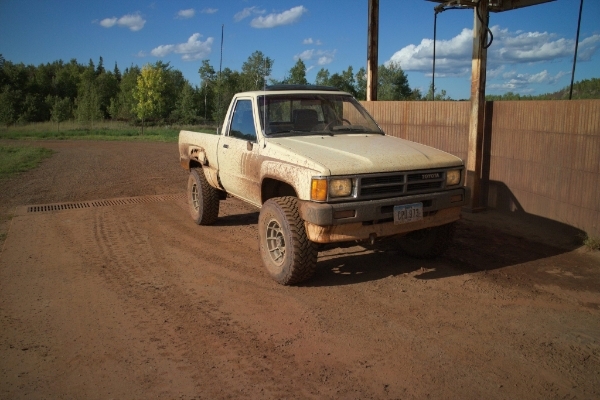
Wash bays on the way out. I've learned I hate this red clay. The bottom of my truck is still stained red from this crap months later
As it turns out, I was right to worry about the tires for that trip. Somehow they were fine 12 hours of highway driving and an entire day of wheeling, then a couple weeks later one just randomly split down the middle on my way home from work.
The truck sat for a while at this point. It's winter and I didn't want to drive it in the sludge. I feel like it absorbs salt like a sponge.
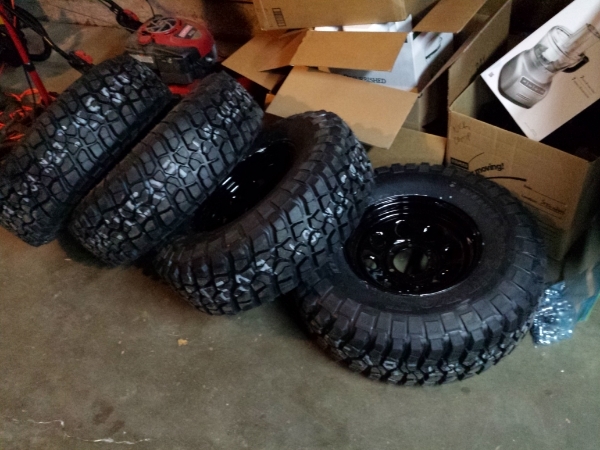
Finally got a good deal on some new wheels and tires from Discount Tire in town. They're still just 31x10.5, but I'm sure they'll perform much better on the trails. I'm going to be wheeling at Southern Missouri Offroad Range in April. I'm thinking about getting a lock-rite in the rear before then. I'll have to see if it'll fit in the budget before I go.
I drove the truck the 6 hour drive out there and back, which unfortunately meant putting the rusted crap box back on there. Didn't want to get a ticket for uncovered tires and I needed room to store stuff. The tires on it were dried out and cracking, so I brought two spares off the parts truck to be safe.

Check in at the Iron Range. I was there wheeling with my brother in his Jeep

Starting off

A lot of these trails were a good challenge for the stock yota. I unfortunately couldn't make this little hill. The deep ruts were a challenge for my worn 31" tires and kept bottoming out on my skid plate and axle. Unfortunately, the Jeep made it... time for upgrades! I can't let that happen!

The rut threw the rear of the truck into a tree, barely missing my tail light. Thankfully I didn't get a new box before this haha

There were some pretty cool views out there on some parts of the trails


Somehow managed to make it through a black diamond trail with open diffs

Some poo came out going around this corner

Wash bays on the way out. I've learned I hate this red clay. The bottom of my truck is still stained red from this crap months later

As it turns out, I was right to worry about the tires for that trip. Somehow they were fine 12 hours of highway driving and an entire day of wheeling, then a couple weeks later one just randomly split down the middle on my way home from work.
The truck sat for a while at this point. It's winter and I didn't want to drive it in the sludge. I feel like it absorbs salt like a sponge.
Finally got a good deal on some new wheels and tires from Discount Tire in town. They're still just 31x10.5, but I'm sure they'll perform much better on the trails. I'm going to be wheeling at Southern Missouri Offroad Range in April. I'm thinking about getting a lock-rite in the rear before then. I'll have to see if it'll fit in the budget before I go.


Last edited by Phantez; Feb 24, 2015 at 08:47 PM.
Sep 3, 2015 | 02:00 PM
#20
Thread Starter
Registered User
Joined: Jan 2008
Posts: 67
Likes: 0
From: Cedar Rapids, IA
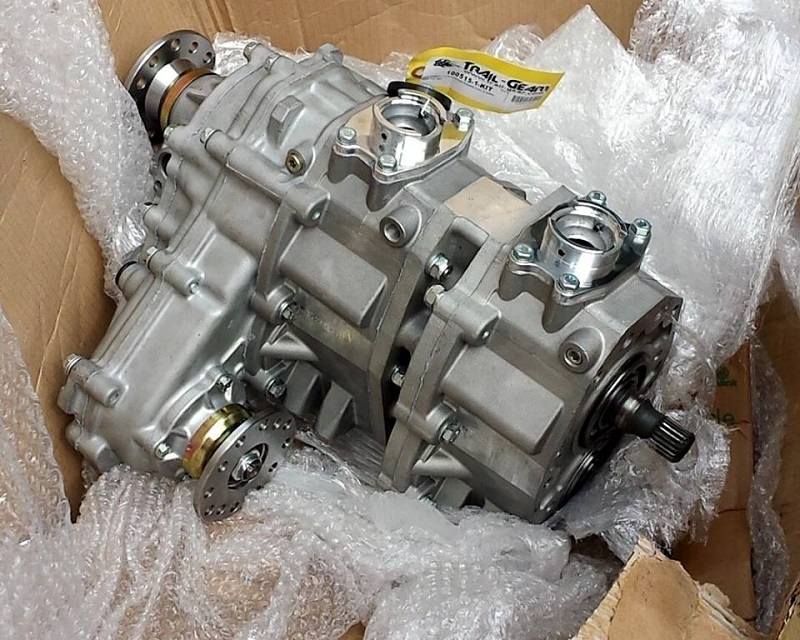
Brown Santa came today and he brought crawler parts. The stock low range gearing on this truck is one of the biggest problems Ive had to deal with on some of the more technical trails that we've been doing. I'm always finding myself having to ride the clutch. Next comes lockers, which i'll probably do in the spring. I was going to do dual cases in the spring, however Trail-Gear had their end of summer sale so I bought it while it was discounted. I picked up the standard 2.28 front case and 4.70 rear case setup. I'll post back up when I get everything installed - I'm still waiting on more parts to arrive.

Last edited by Phantez; Sep 4, 2015 at 06:03 AM.

Thread
Thread Starter
Forum
Replies
Last Post
6th Gear
84-85 Trucks & 4Runners (Build-Up Section)
19
Dec 10, 2019 07:31 AM
Aleeex_u
86-95 Trucks & 4Runners
10
Jun 5, 2016 06:52 PM
Peteyg39@hotmail.com
Newbie Tech Section
1
Jun 26, 2015 08:15 AM


