
FourwheelinVT's 94 pickup build-up
 Mar 4, 2012 | 12:42 AM
#1
Thread Starter
Registered User
Joined: Aug 2010
Posts: 165
Likes: 0
From: South Royalton, VT
FourwheelinVT's 94 pickup build-up
Hey everyone,
I'm starting this thread as a place to keep track of my progress with my build. I never made a build thread for it and thought now would be as good as ever! I have owned my Toyota for about 6 years now and have already completed a frame swap/ re-build of 2 trucks into 1. Due to family/money/time issues it took me almost 3 years to finish putting it all back together.
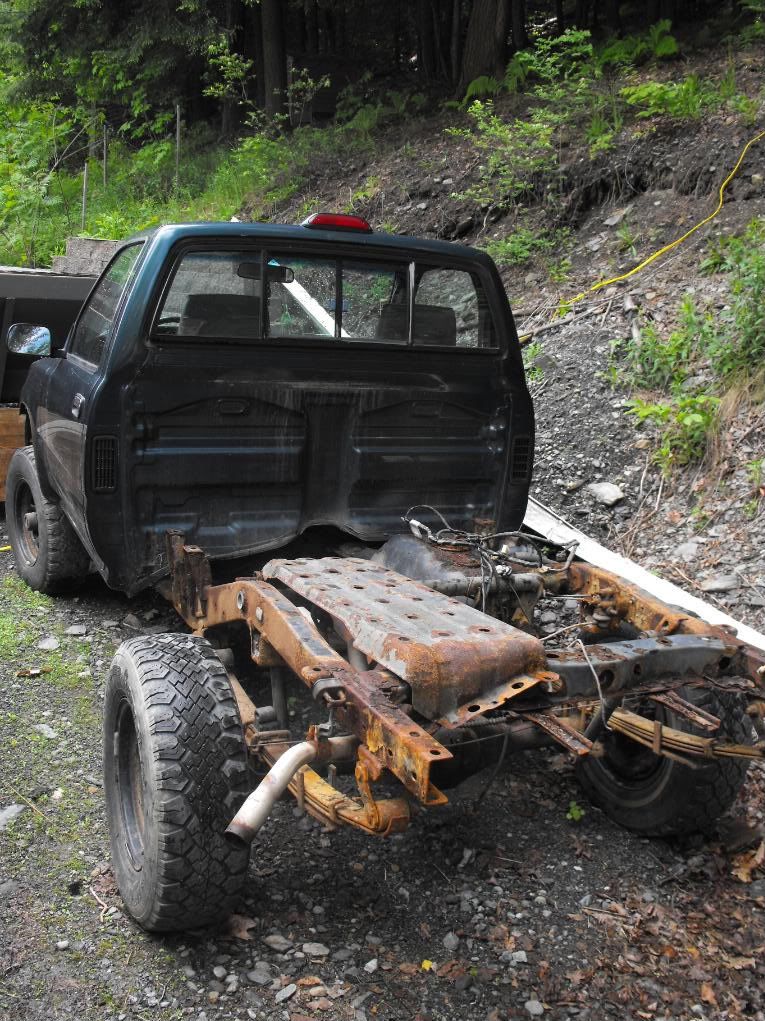
In the spring of 2008 I parked my truck (green truck) because of a rusted out frame and control arms (looked like swiss cheese) and decided to do a frame swap.
At this point I bought an identical 94 pickup (blue truck) from my brother in-law. It came from Florida a few years before but had been sitting in his yard for a couple years due to a blown motor (timing chain wore though mixing oil and coolant). For whatever reason I don't have any pictures of the trucks before I started, but this was the first one I could find. I already took the bed off the green truck and sold it to help fund the project.
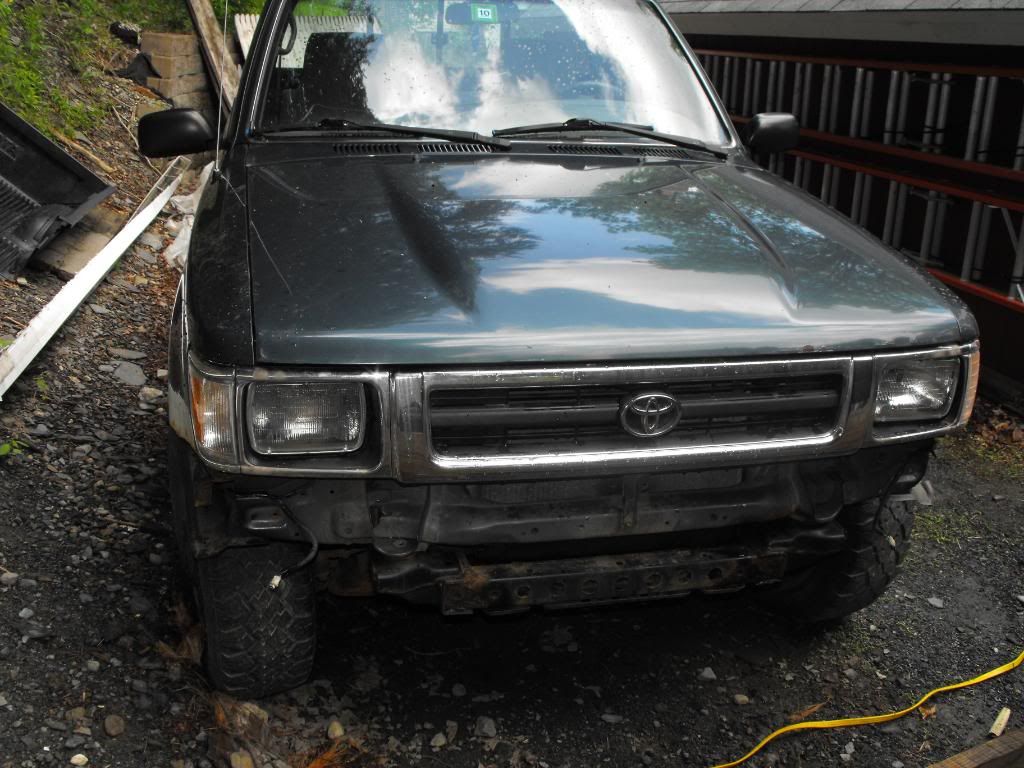
And one from the front
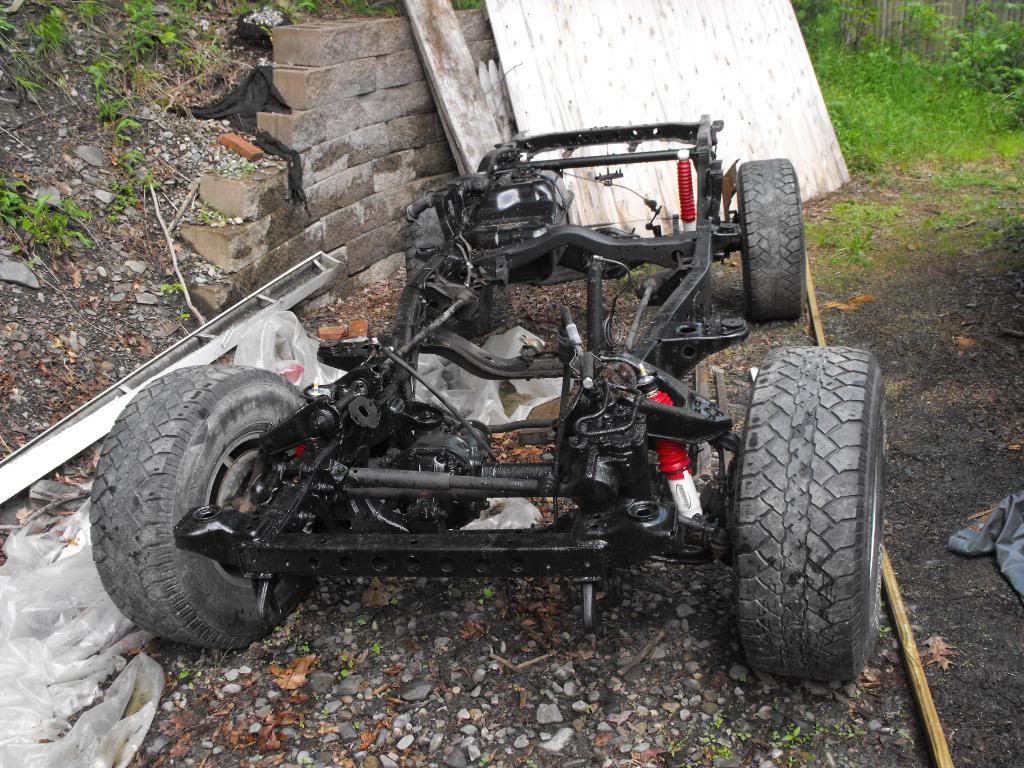
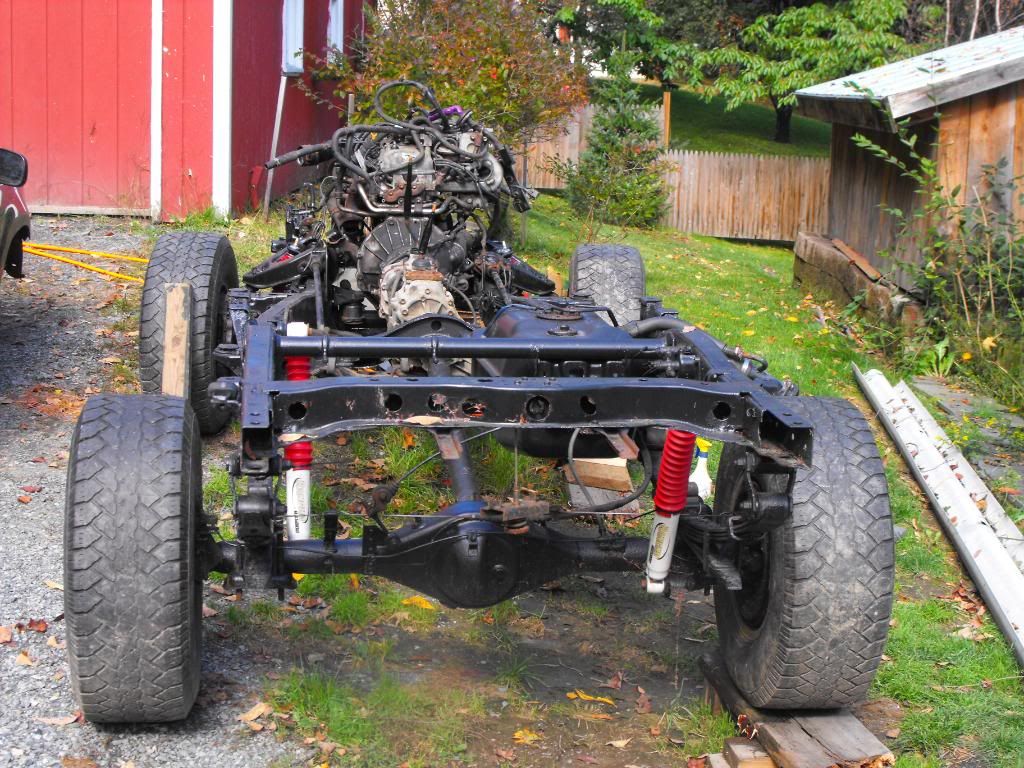
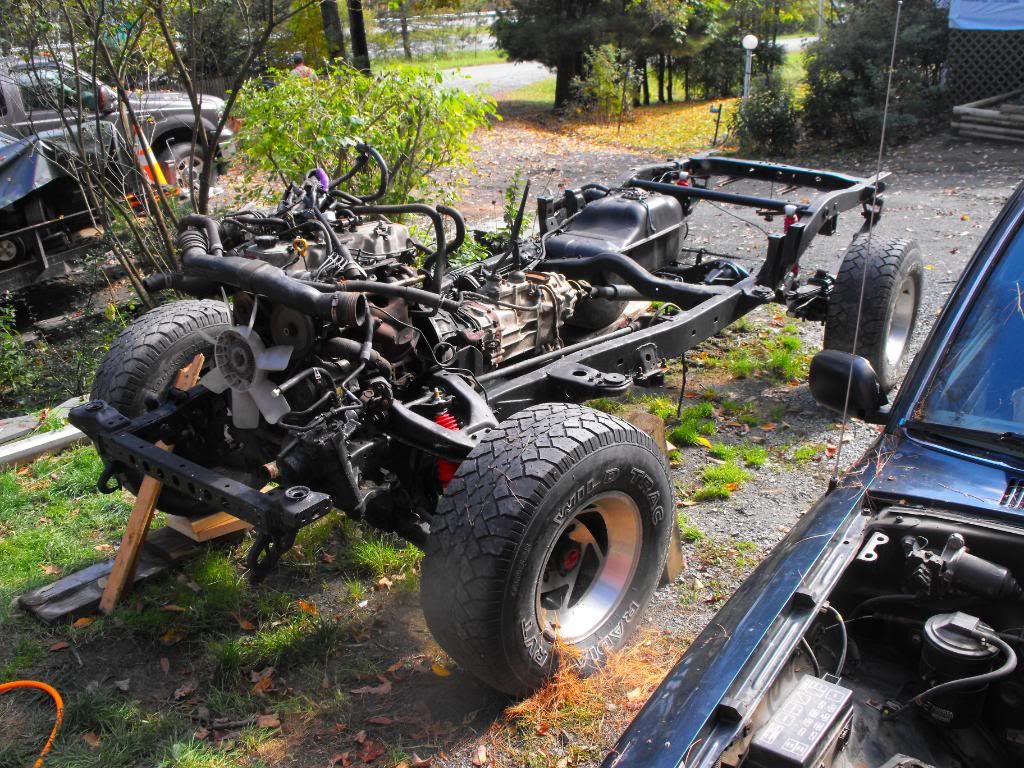
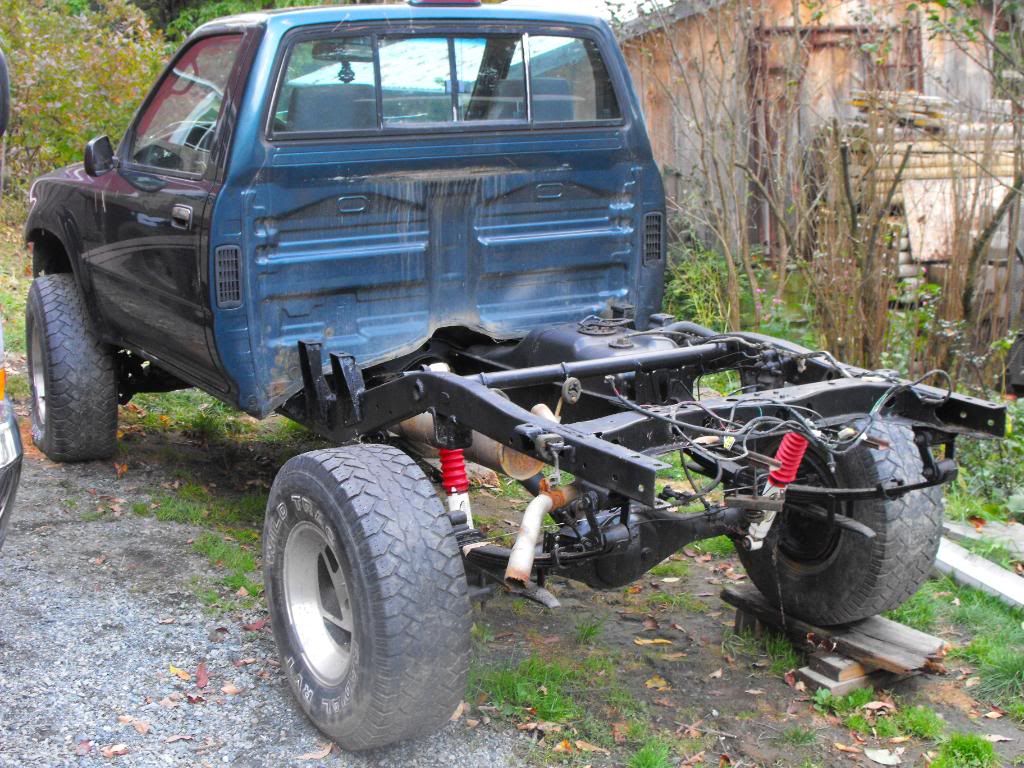
From there I disassembled the blue truck and painted the frame with the Eastwood frame restoration kit. I had photos of lifting the cab off with an excavator but they got lost during an external hard drive failure.
Here's the frame painted and with new shocks.
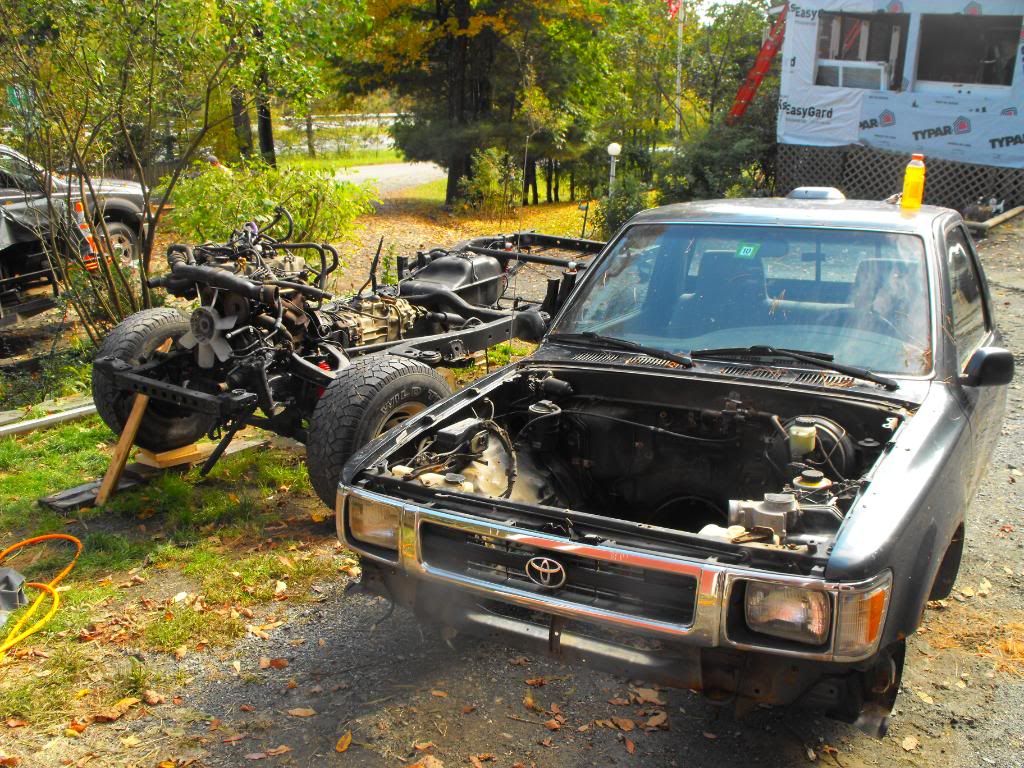
Then it sat all winter in the snow waiting until spring of '09. I got back to work on it and took apart the green truck and cut up the bad frame for scrap metal. After I removed the good motor(22RE, 65,000mi) I took it to a friend of mine (who was a Toyota mech, now he works for Honda). He helped me put in a new Marlin clutch, head gasket and timing chain kit. After that I got the motor mounted on the new frame.
Then I got ready to put the cab back on.
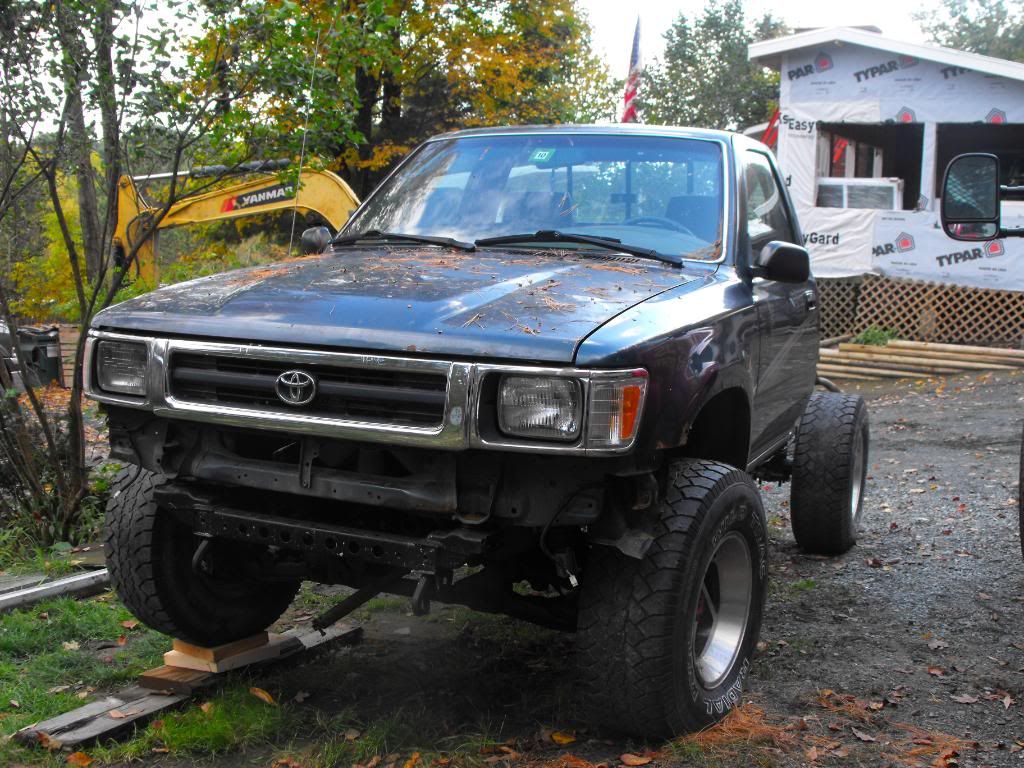
After the cab was back on, winter came and it sat again until spring of 2010. During the summer work was really busy and I didn't get as much done as I wanted. But I finished hooking up the wiring, brake lines, radiador, and installed a 4Crawler body lift when I bolted down the cab. At this point I also switched my leaf springs from stock with an add-a-leaf to stock with shackles, so that it would flex better.
In the fall every thing was ready to start it up. Some minor timing adjustment and it fired up! Man that sounded good after 2 years of work. Once again it sat in the snowbank for winter waiting to be finished.
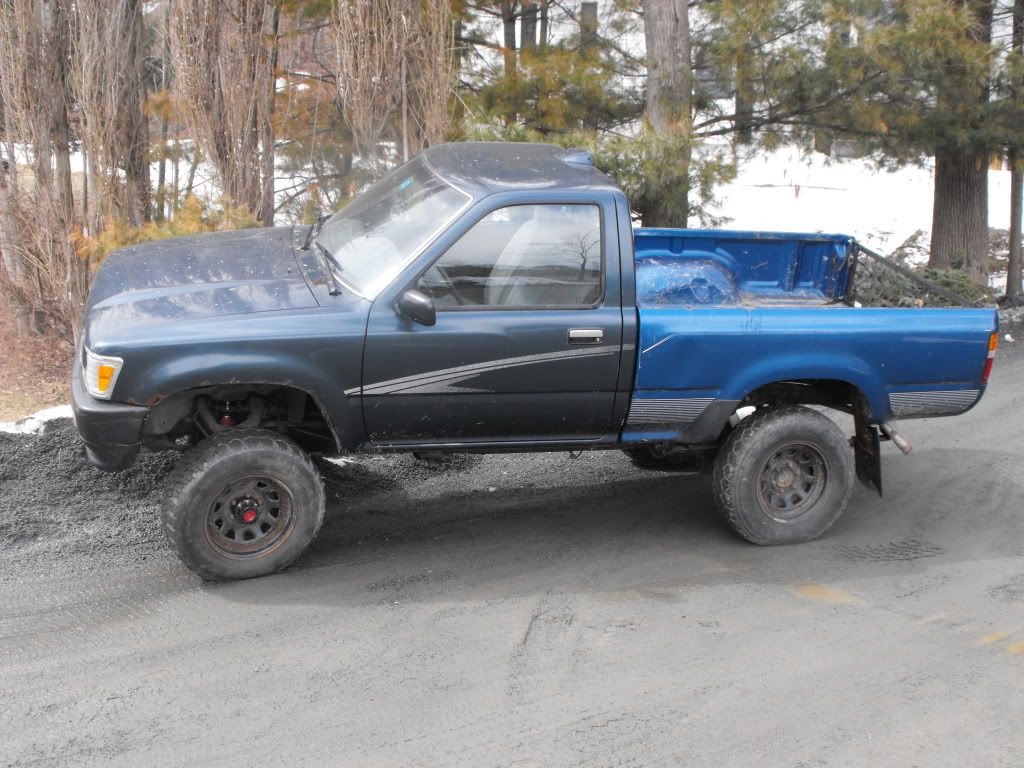
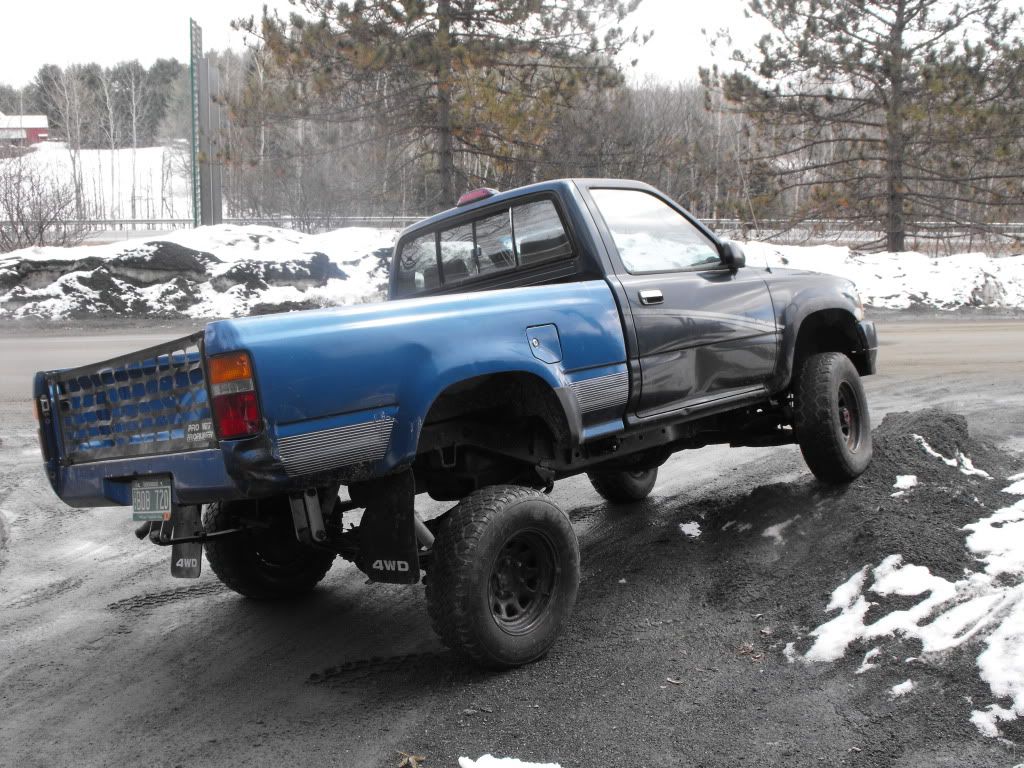
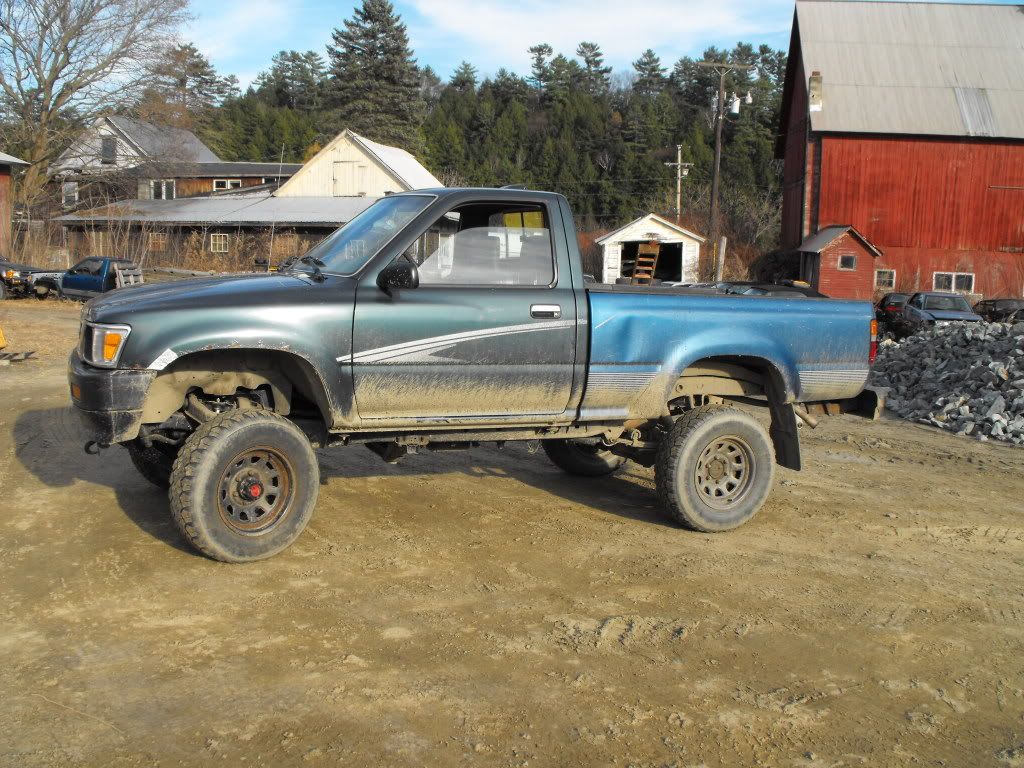
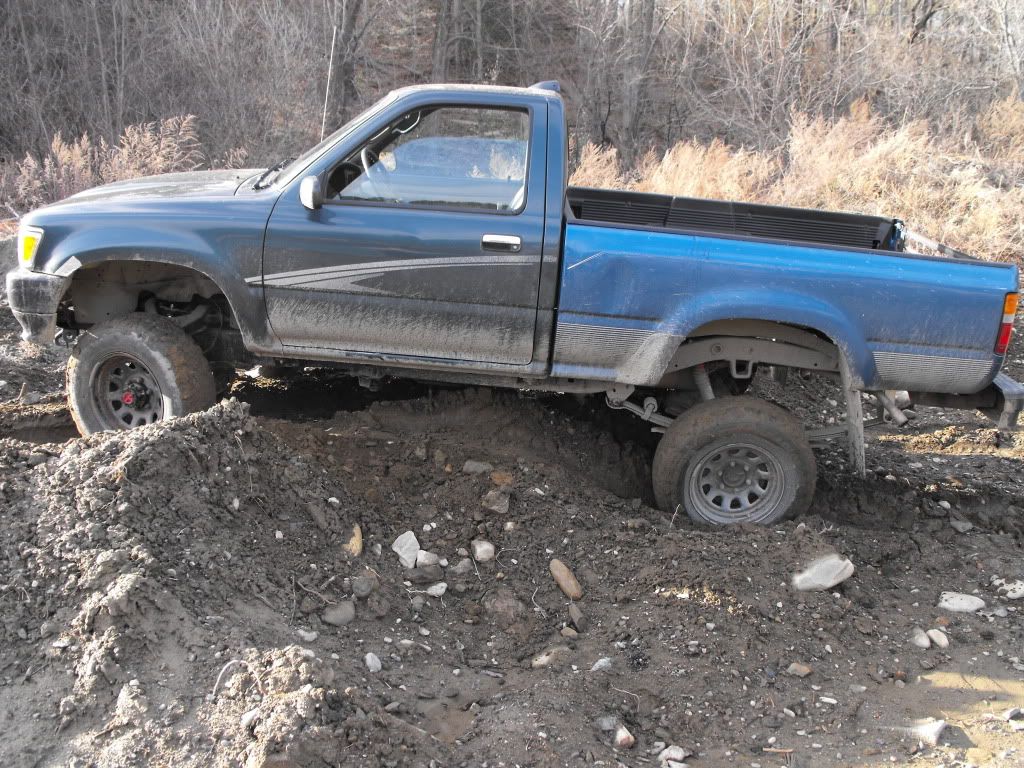
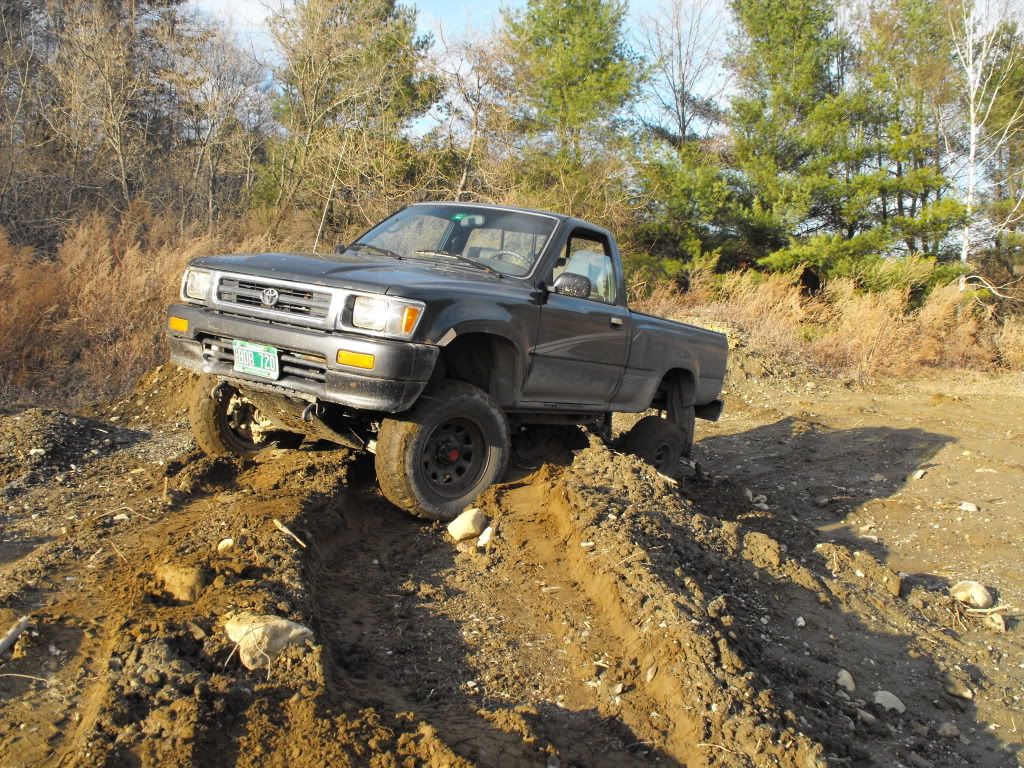
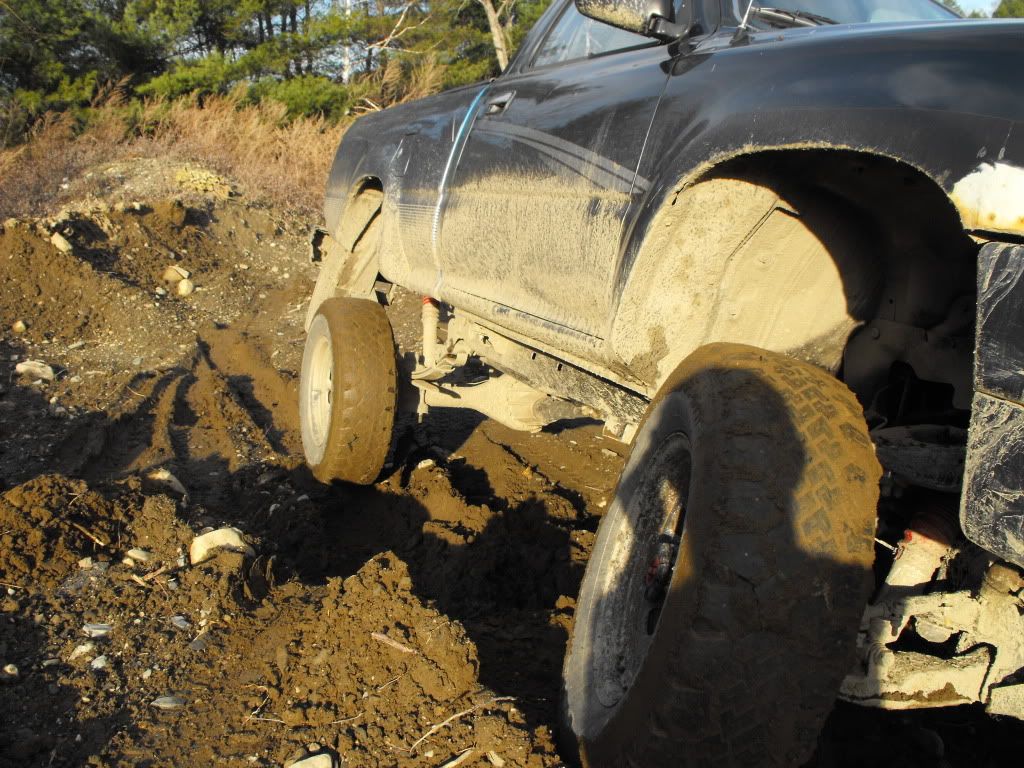
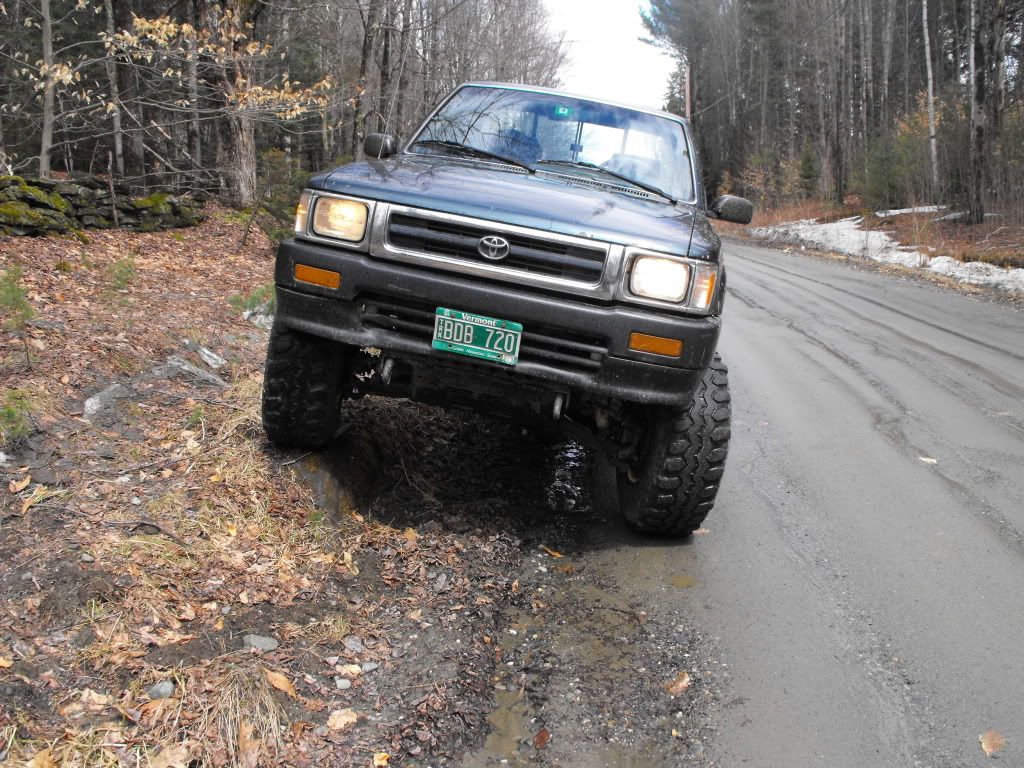
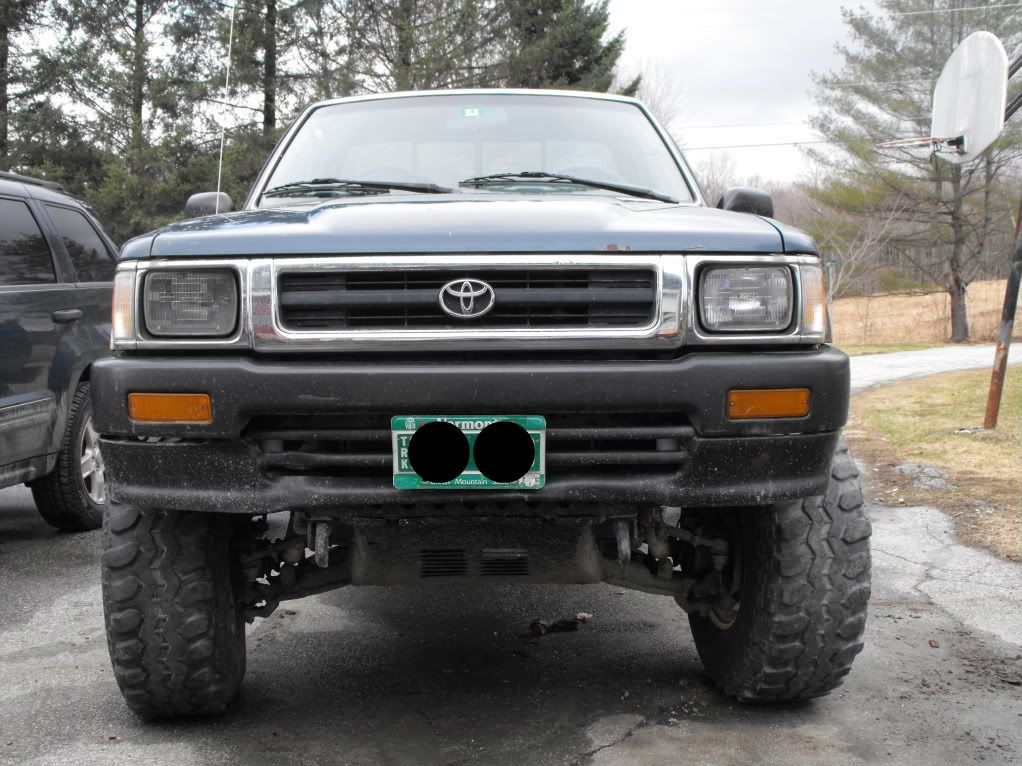
When spring finally came there was lots of work to be done. But first a test run (before BJ spacers and with stock tires)
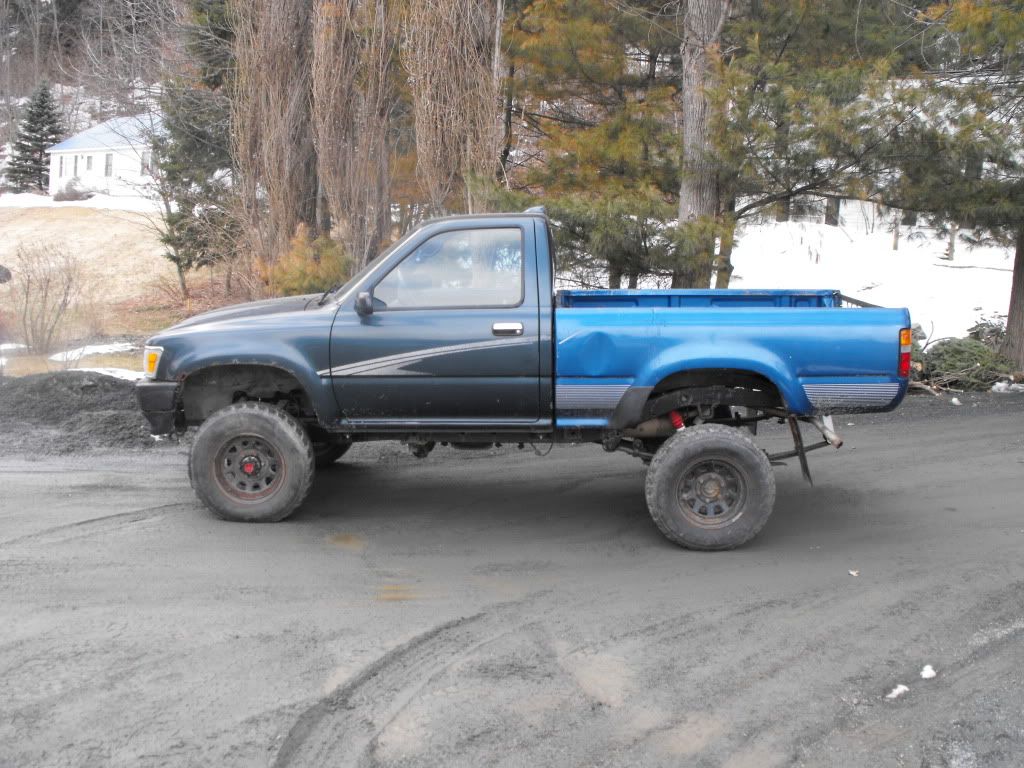
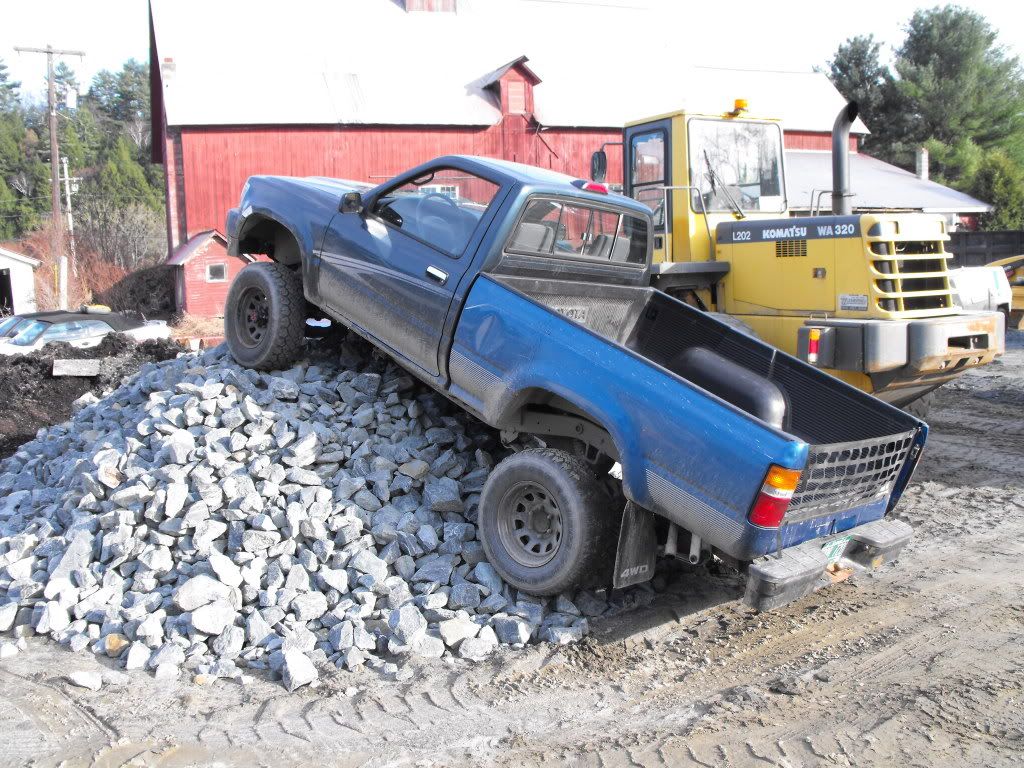
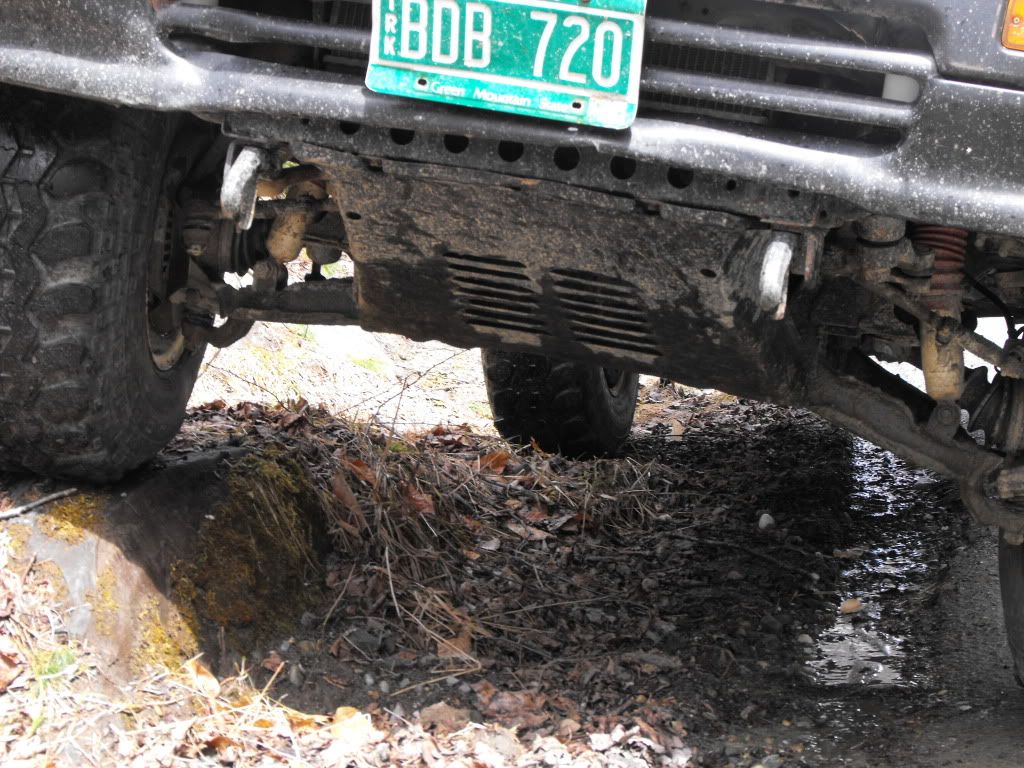
A little flexing
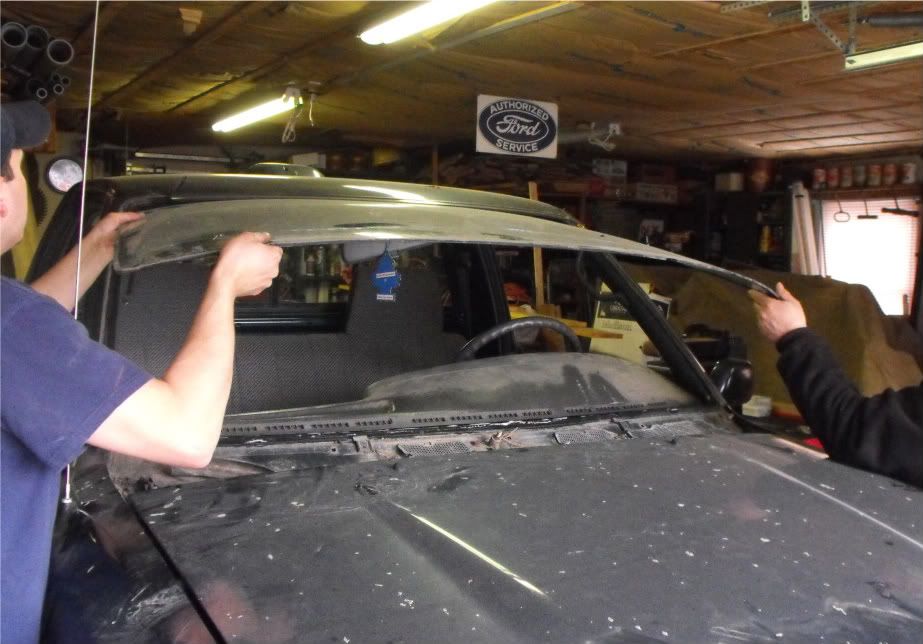
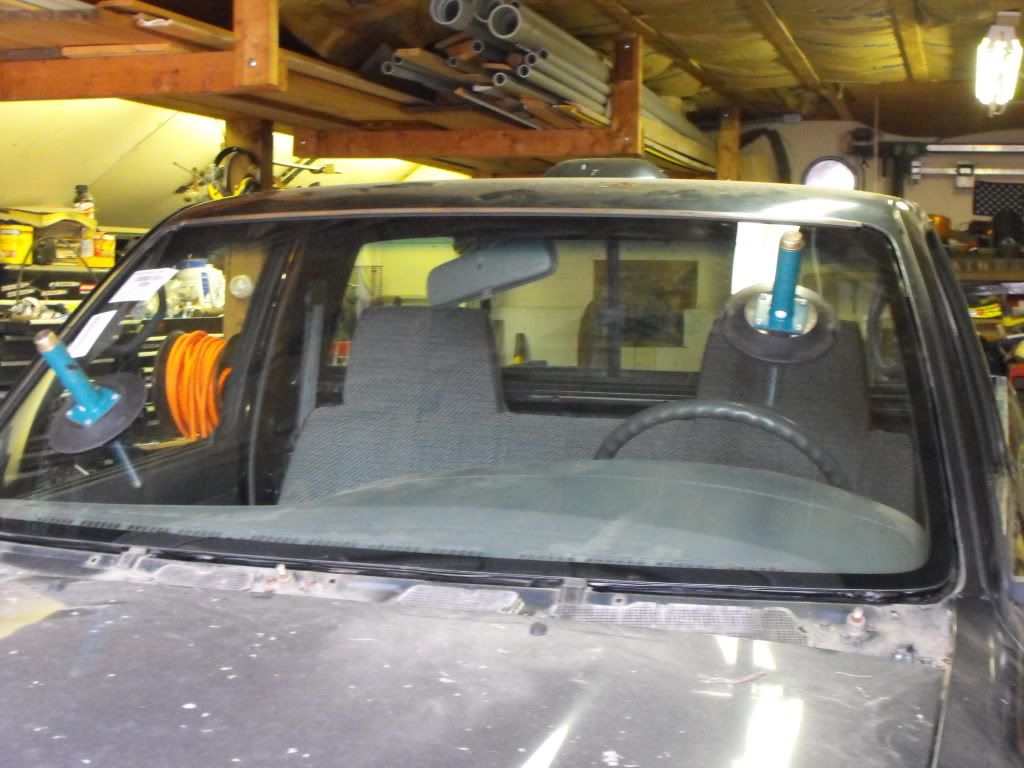
I got a new windshield put in because the old one was cracked.
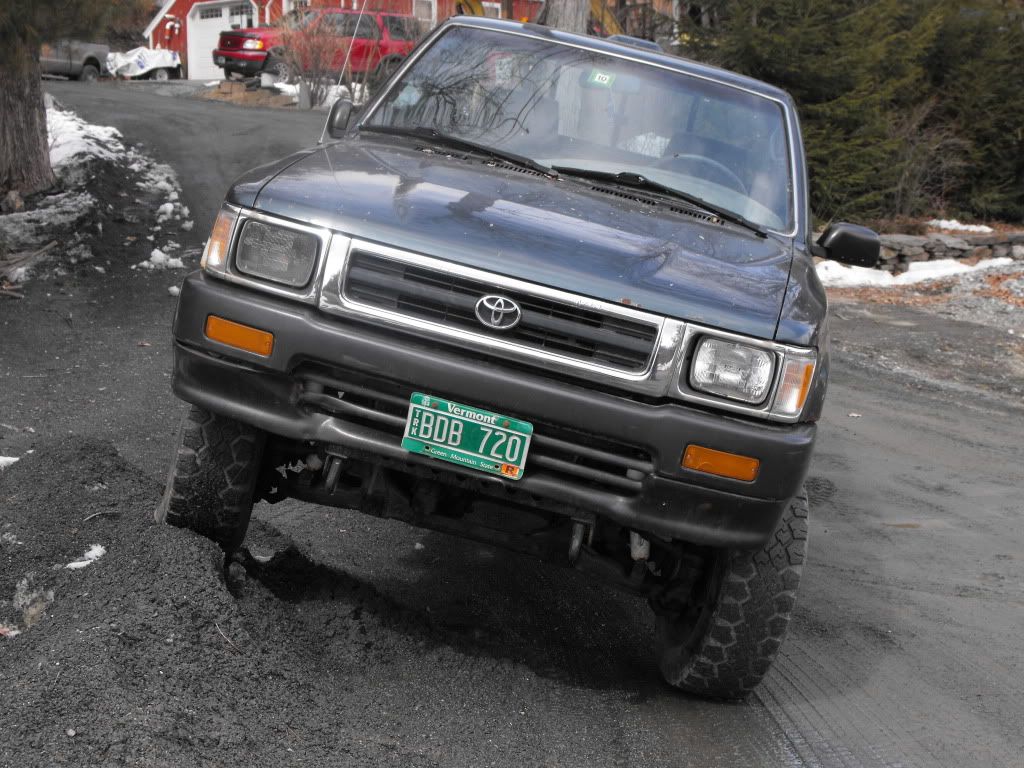
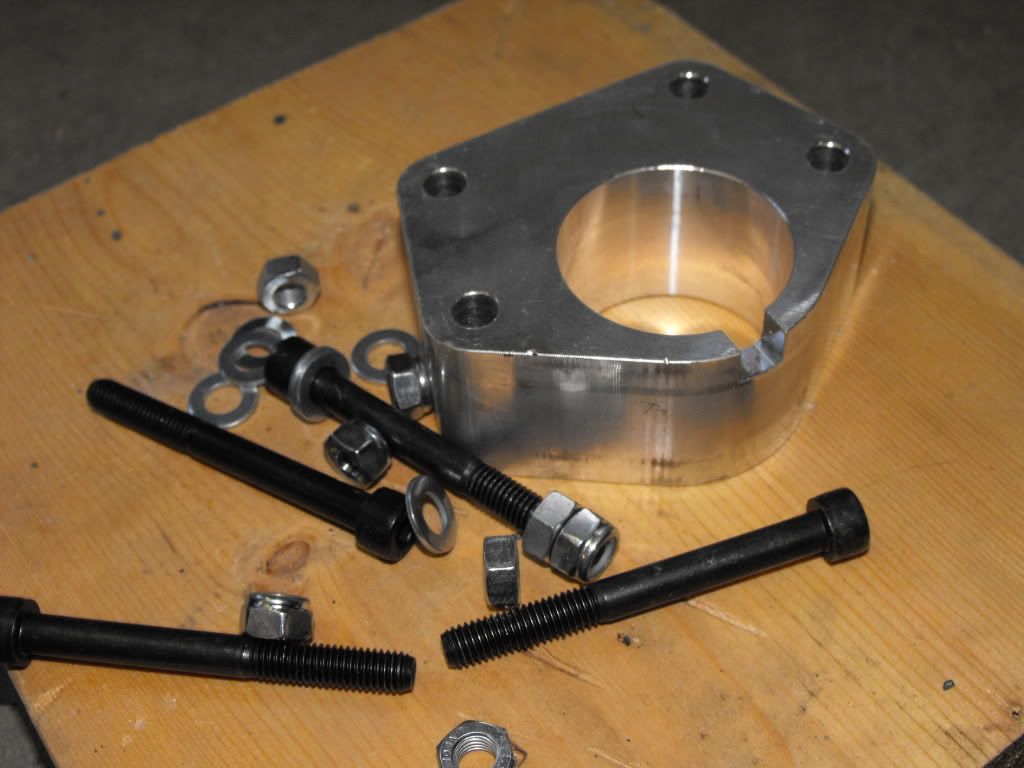
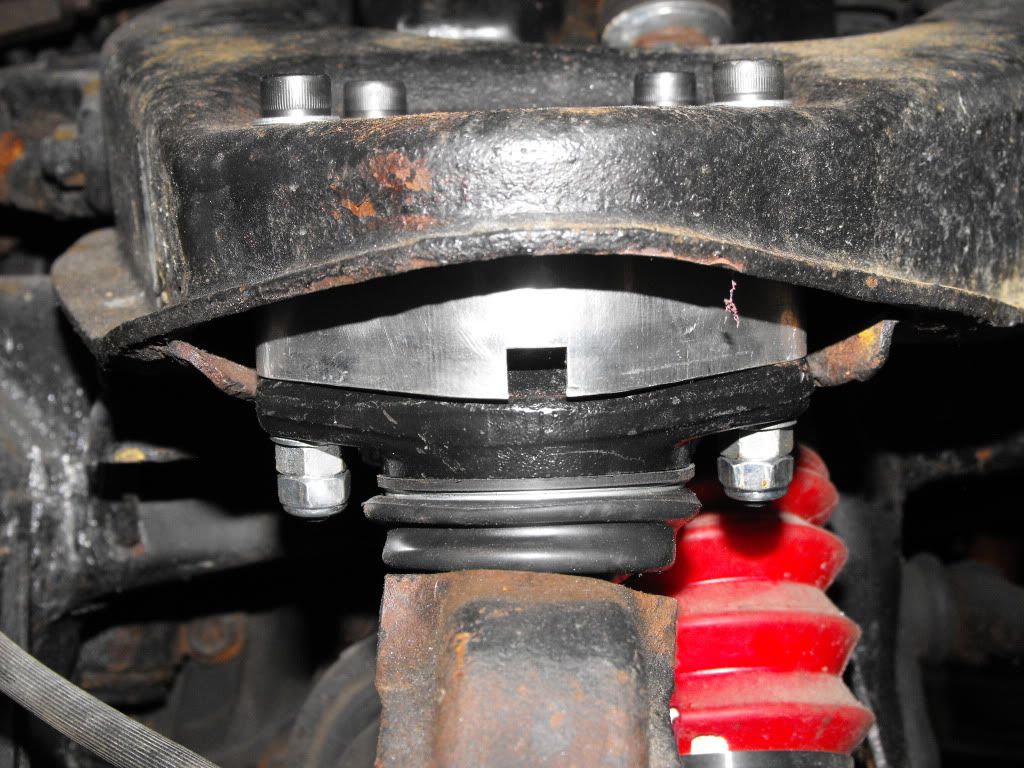
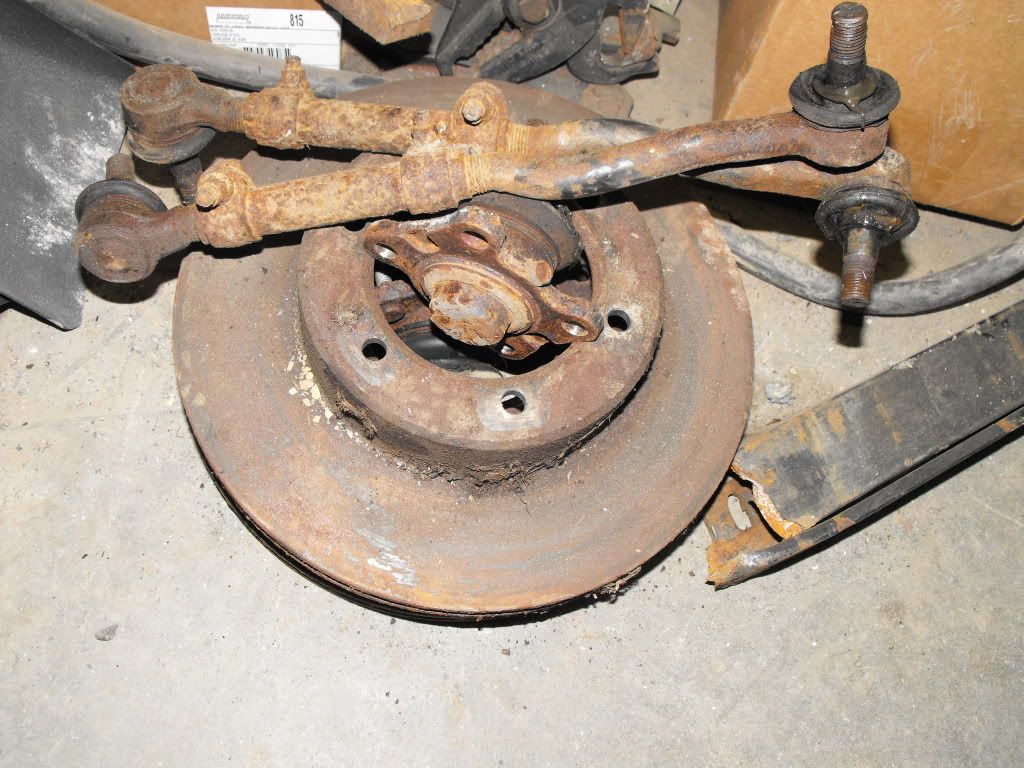
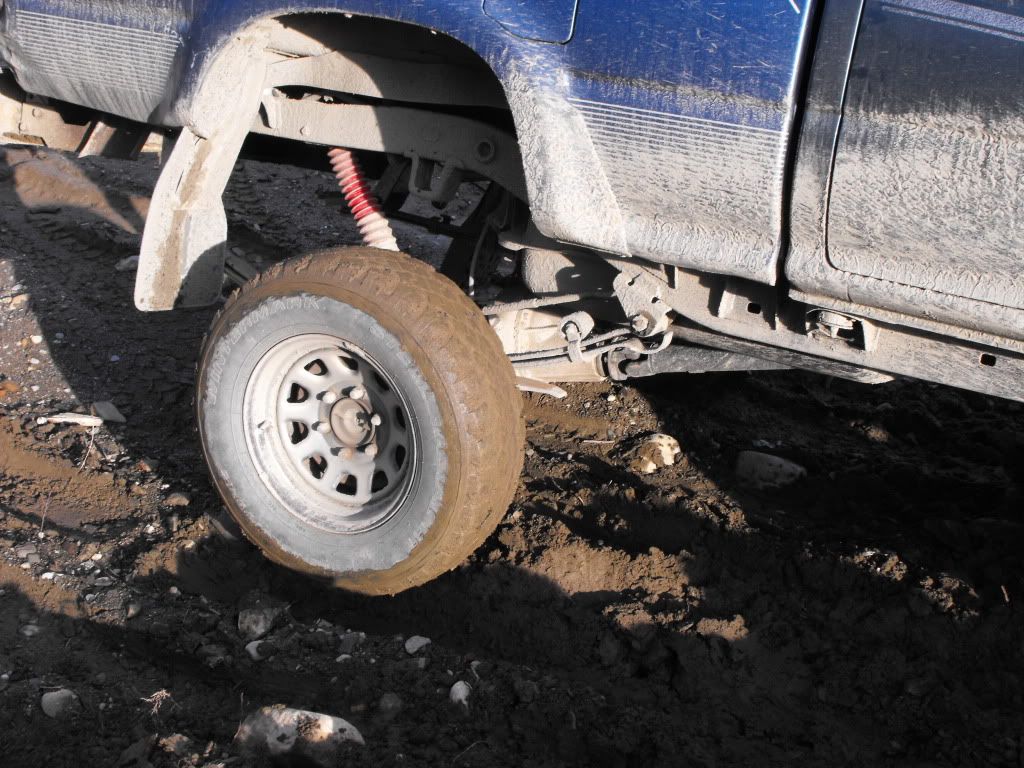
Next came SDOR 1.5" ball joint spacers and new ball joints
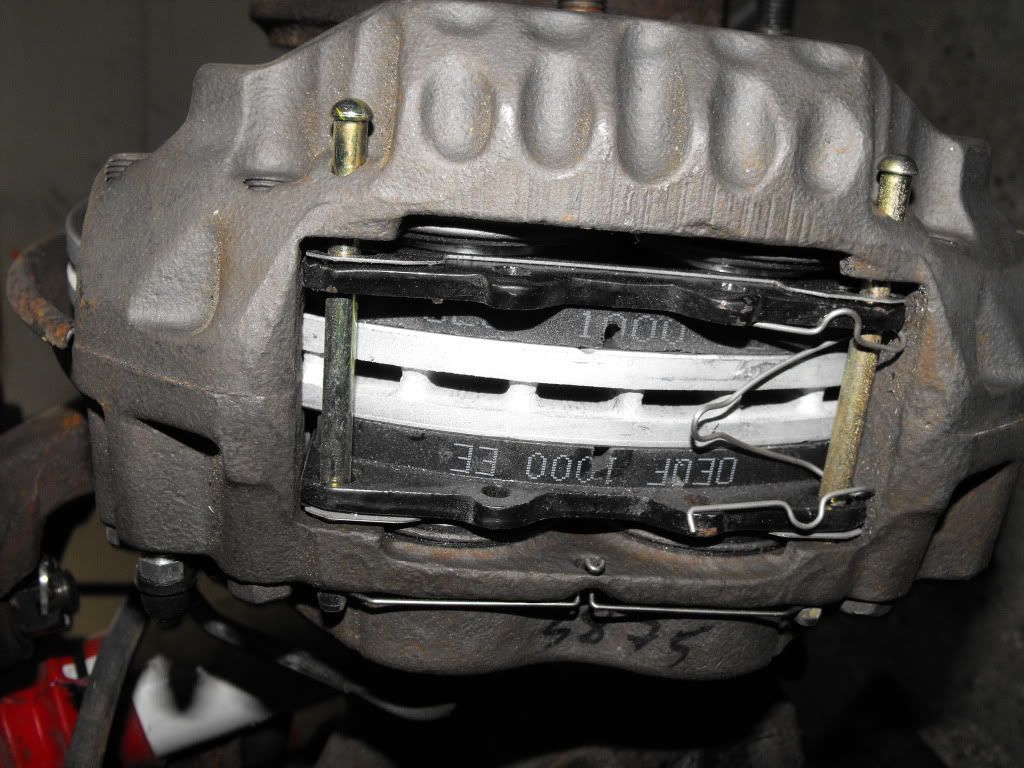
Then I put on a set of Powerslot rotors and new brakes

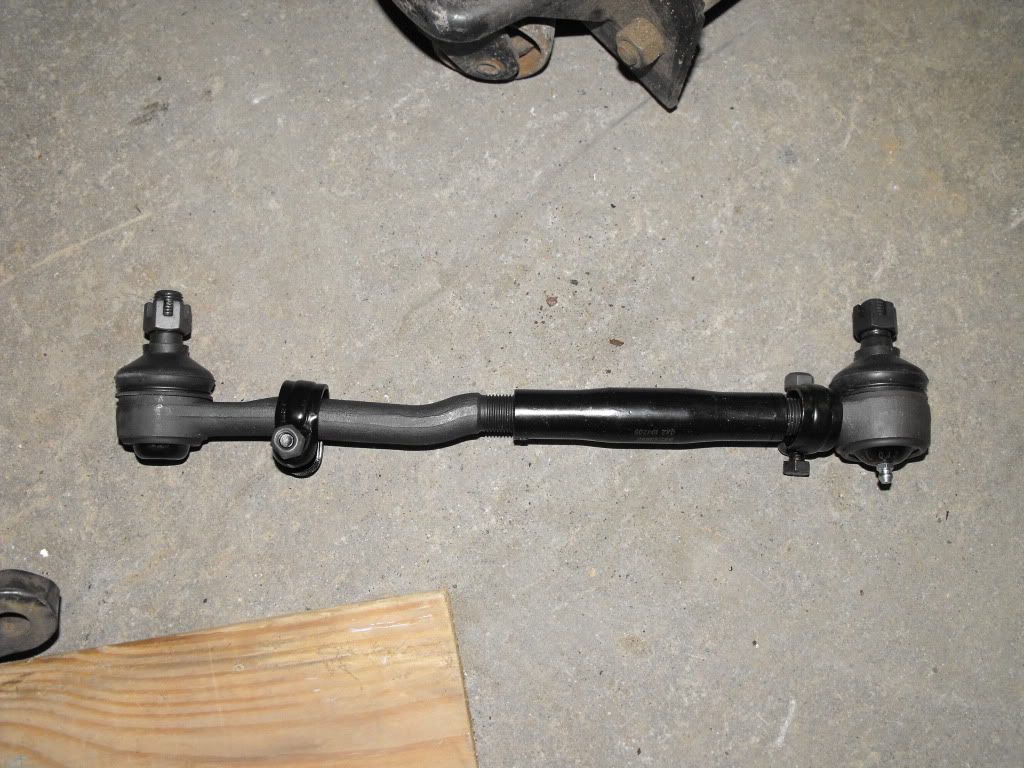
And some new tie rods,
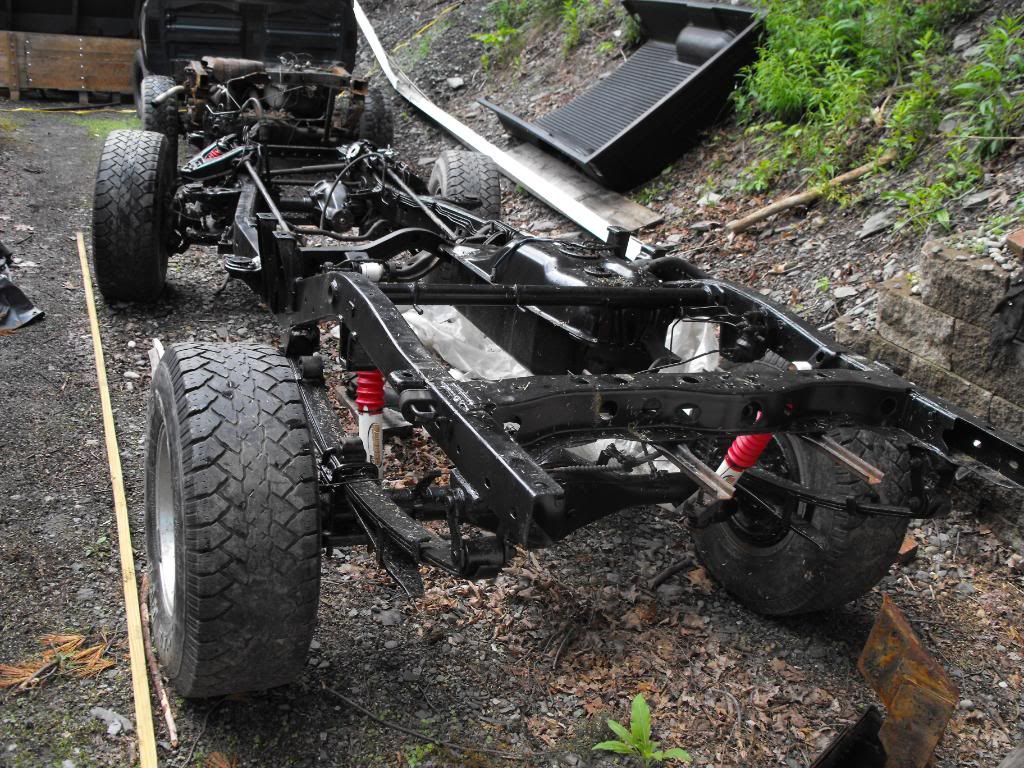
More scrap metal...
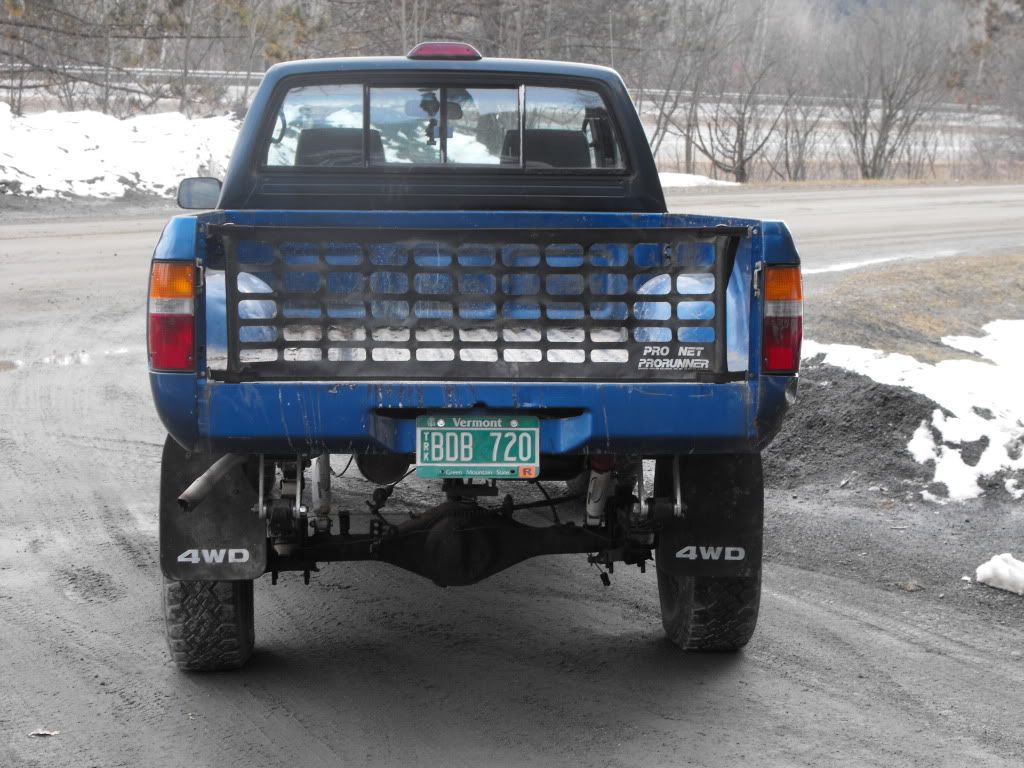
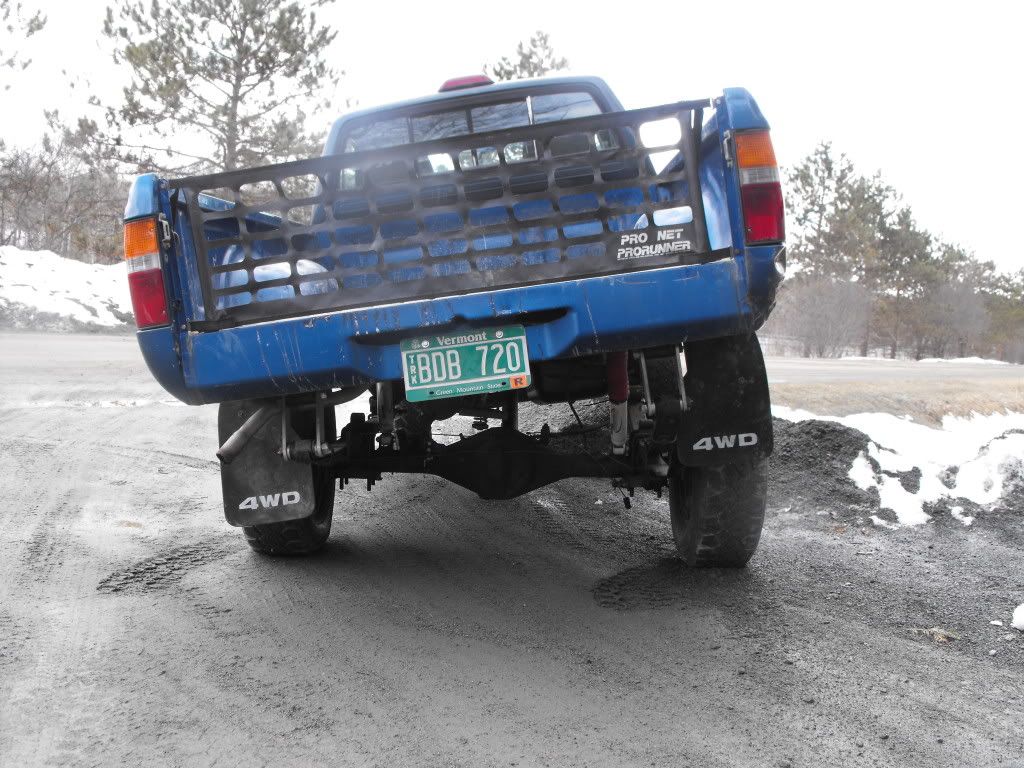
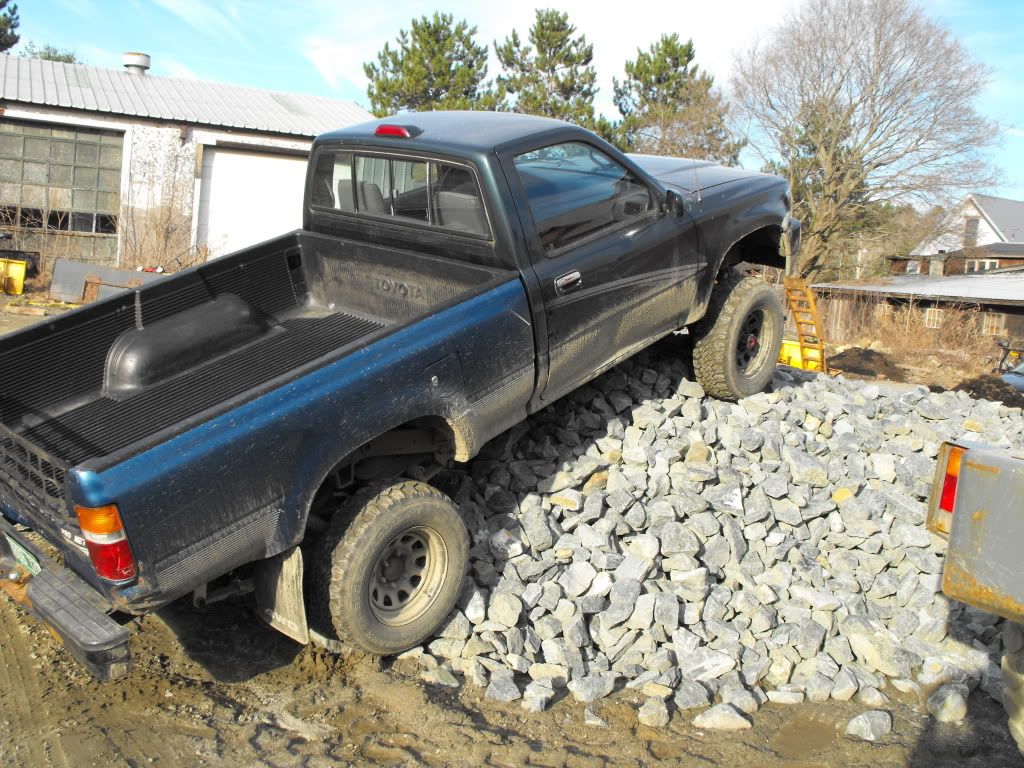
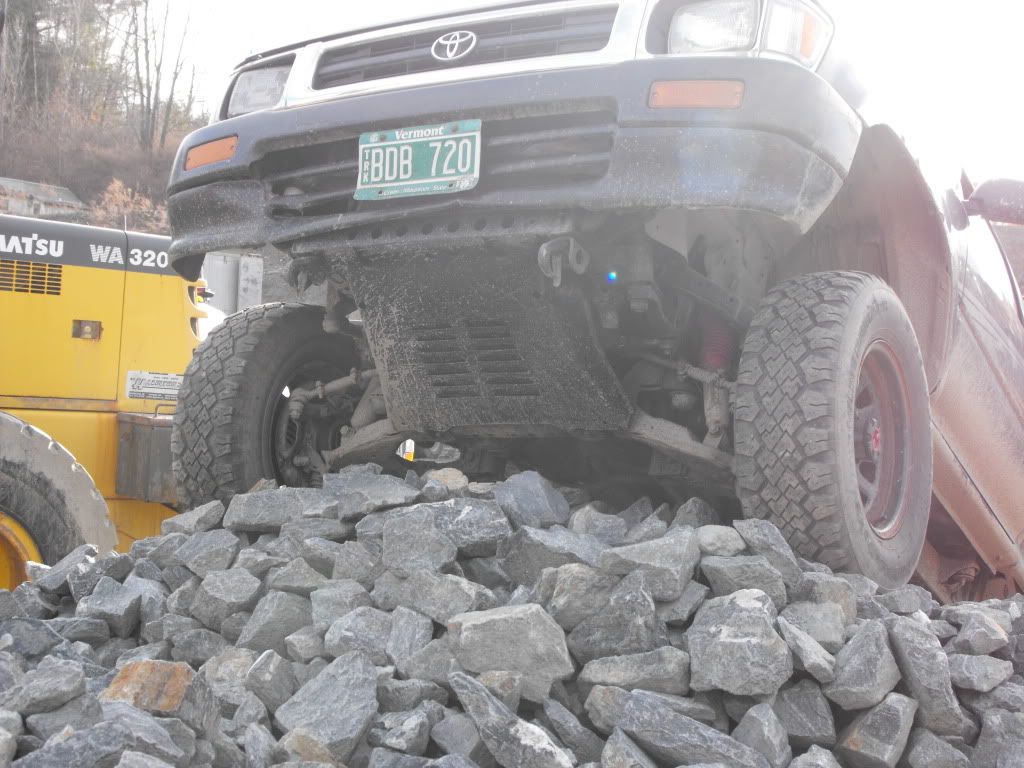
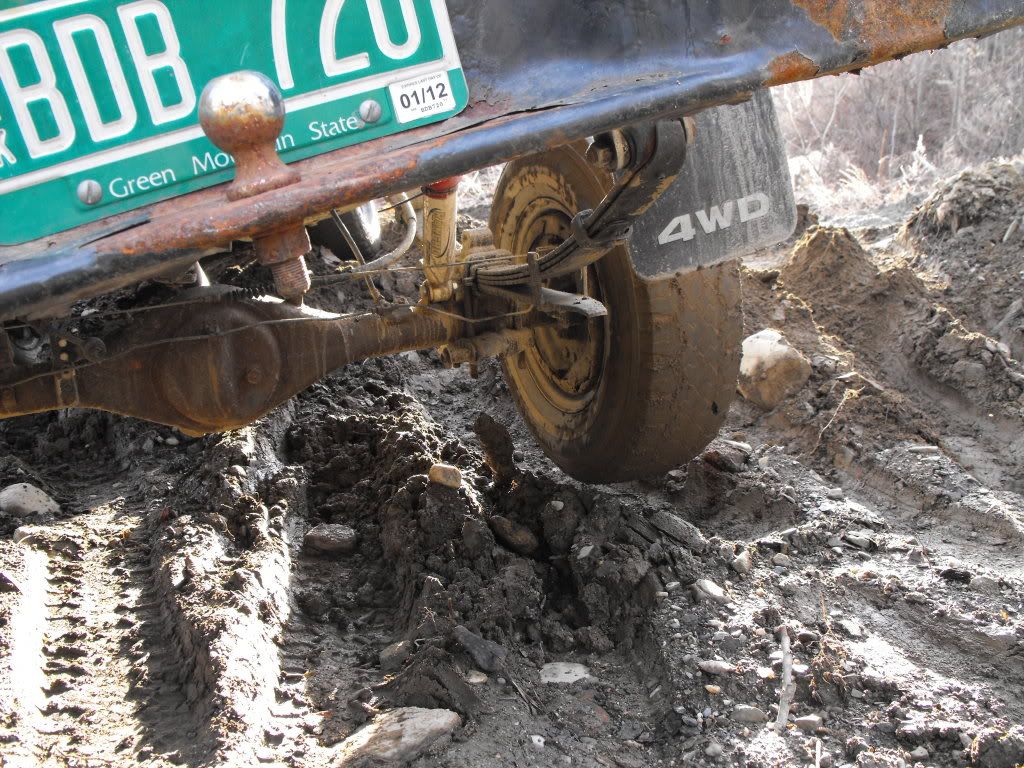
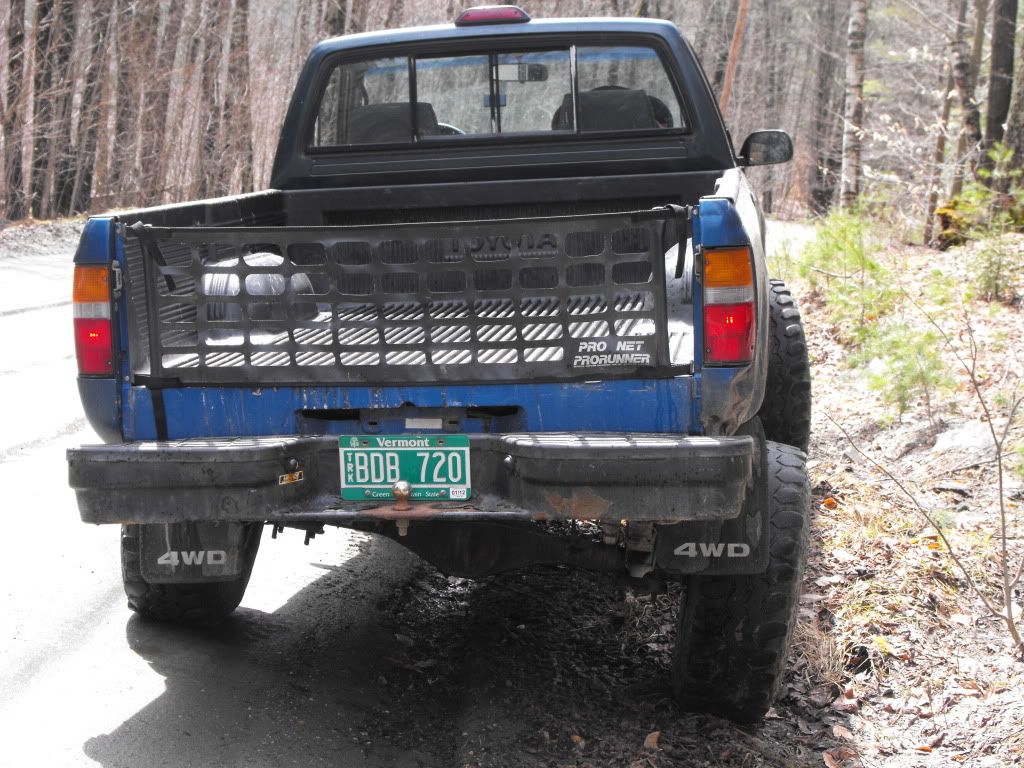
Then it was finally ready for the road, and another test at a construction yard...
I'm starting this thread as a place to keep track of my progress with my build. I never made a build thread for it and thought now would be as good as ever! I have owned my Toyota for about 6 years now and have already completed a frame swap/ re-build of 2 trucks into 1. Due to family/money/time issues it took me almost 3 years to finish putting it all back together.
In the spring of 2008 I parked my truck (green truck) because of a rusted out frame and control arms (looked like swiss cheese) and decided to do a frame swap.
At this point I bought an identical 94 pickup (blue truck) from my brother in-law. It came from Florida a few years before but had been sitting in his yard for a couple years due to a blown motor (timing chain wore though mixing oil and coolant). For whatever reason I don't have any pictures of the trucks before I started, but this was the first one I could find. I already took the bed off the green truck and sold it to help fund the project.
And one from the front
From there I disassembled the blue truck and painted the frame with the Eastwood frame restoration kit. I had photos of lifting the cab off with an excavator but they got lost during an external hard drive failure.
Here's the frame painted and with new shocks.
Then it sat all winter in the snow waiting until spring of '09. I got back to work on it and took apart the green truck and cut up the bad frame for scrap metal. After I removed the good motor(22RE, 65,000mi) I took it to a friend of mine (who was a Toyota mech, now he works for Honda). He helped me put in a new Marlin clutch, head gasket and timing chain kit. After that I got the motor mounted on the new frame.
Then I got ready to put the cab back on.
After the cab was back on, winter came and it sat again until spring of 2010. During the summer work was really busy and I didn't get as much done as I wanted. But I finished hooking up the wiring, brake lines, radiador, and installed a 4Crawler body lift when I bolted down the cab. At this point I also switched my leaf springs from stock with an add-a-leaf to stock with shackles, so that it would flex better.
In the fall every thing was ready to start it up.
Some minor timing adjustment and it fired up! Man that sounded good after 2 years of work. Once again it sat in the snowbank for winter waiting to be finished.When spring finally came there was lots of work to be done. But first a test run (before BJ spacers and with stock tires)
A little flexing
I got a new windshield put in because the old one was cracked.
Next came SDOR 1.5" ball joint spacers and new ball joints
Then I put on a set of Powerslot rotors and new brakes
And some new tie rods,
More scrap metal...
Then it was finally ready for the road, and another test at a construction yard...


 Mar 5, 2012 | 01:47 AM
#3
Tearing a truck down to a frame is quite rewarding from my experience. You got the truck looking good. I always liked the green they had on these trucks. Keep up the great work.
 Mar 5, 2012 | 04:59 AM
#5
Thread Starter
Registered User
Joined: Aug 2010
Posts: 165
Likes: 0
From: South Royalton, VT
Thanks Rattlewagon and Terrys87
This has been a LONG but great project and like most it's never really done!
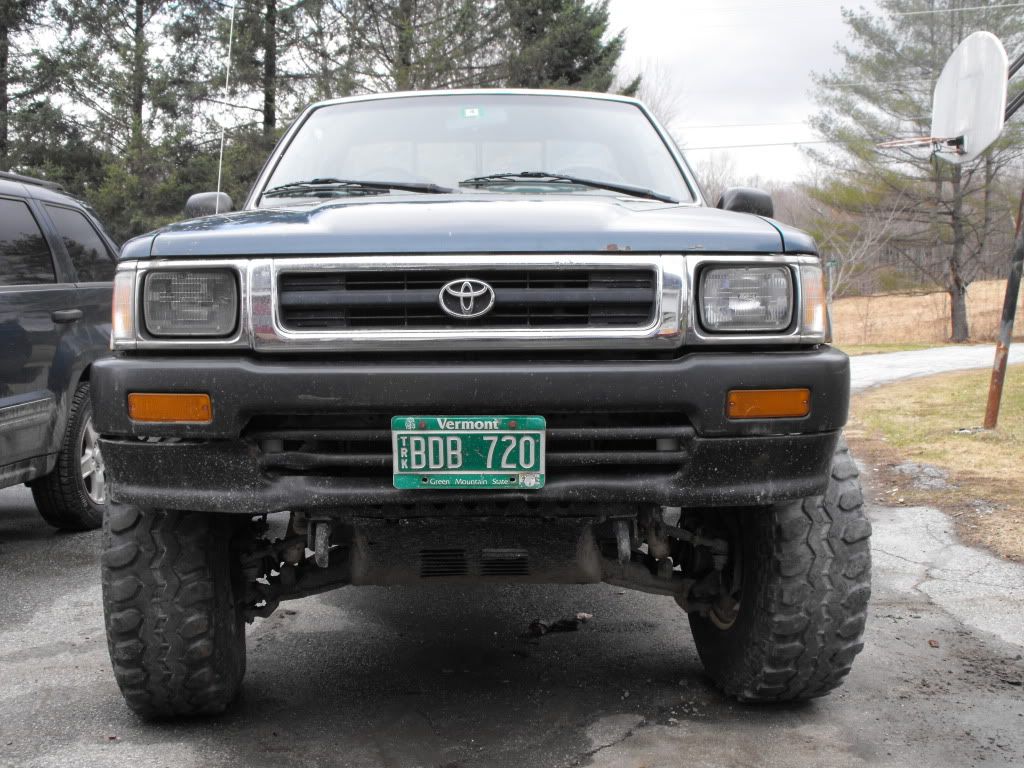
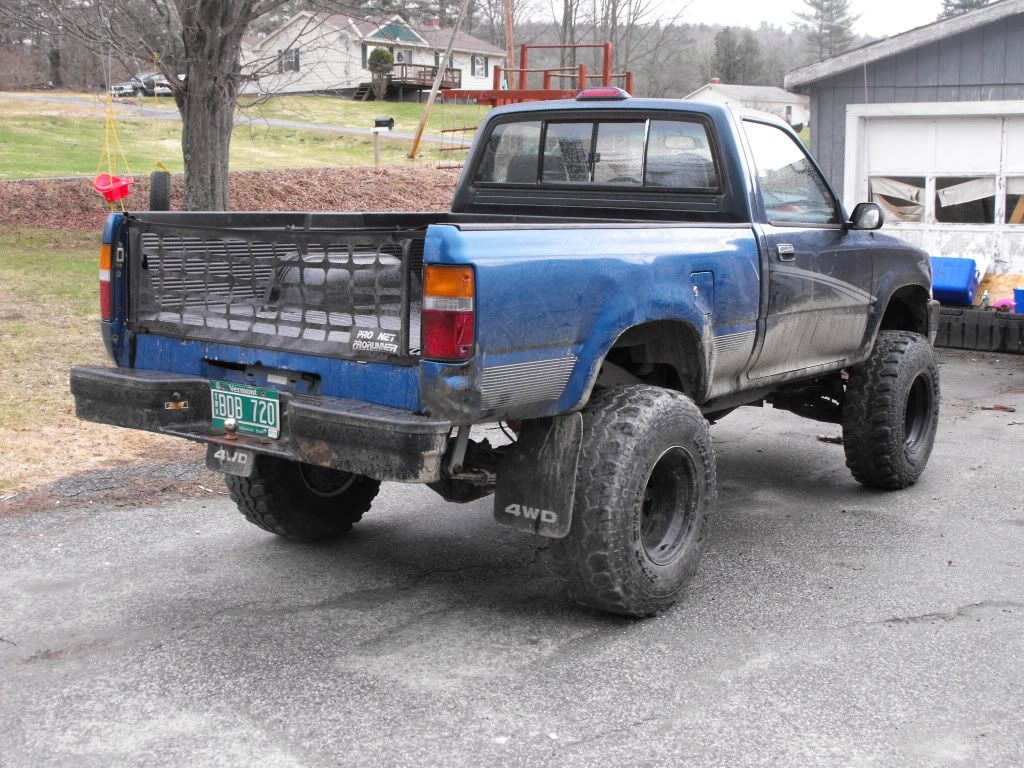
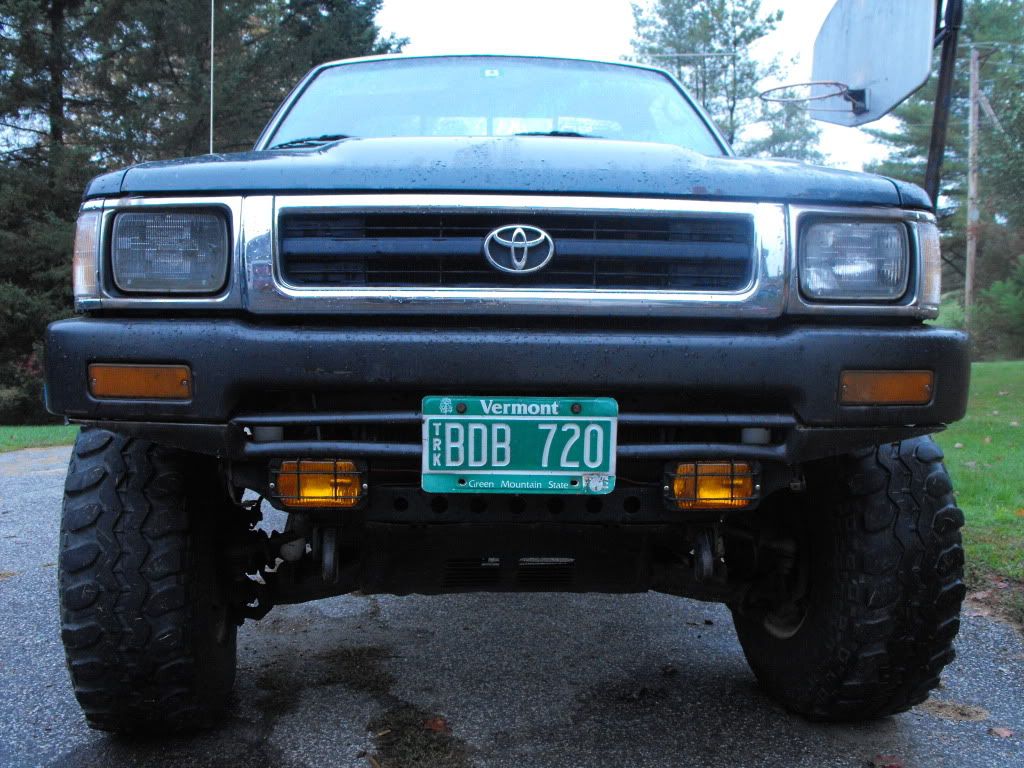
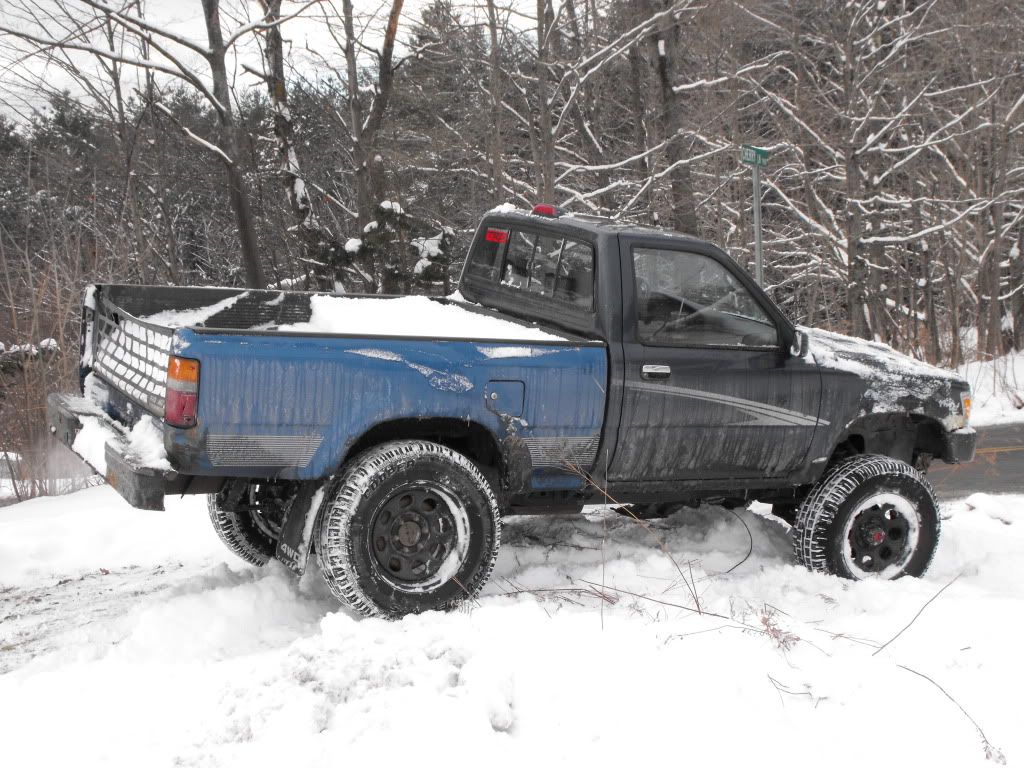
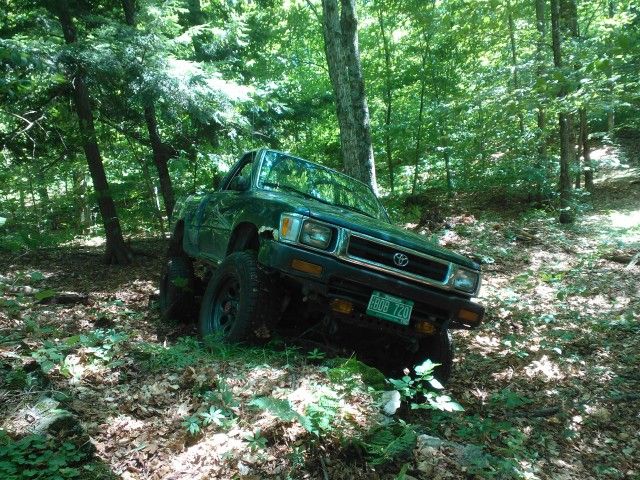
Here's the tires I got in May 2011, 33x12.50s cheap from craigslist.
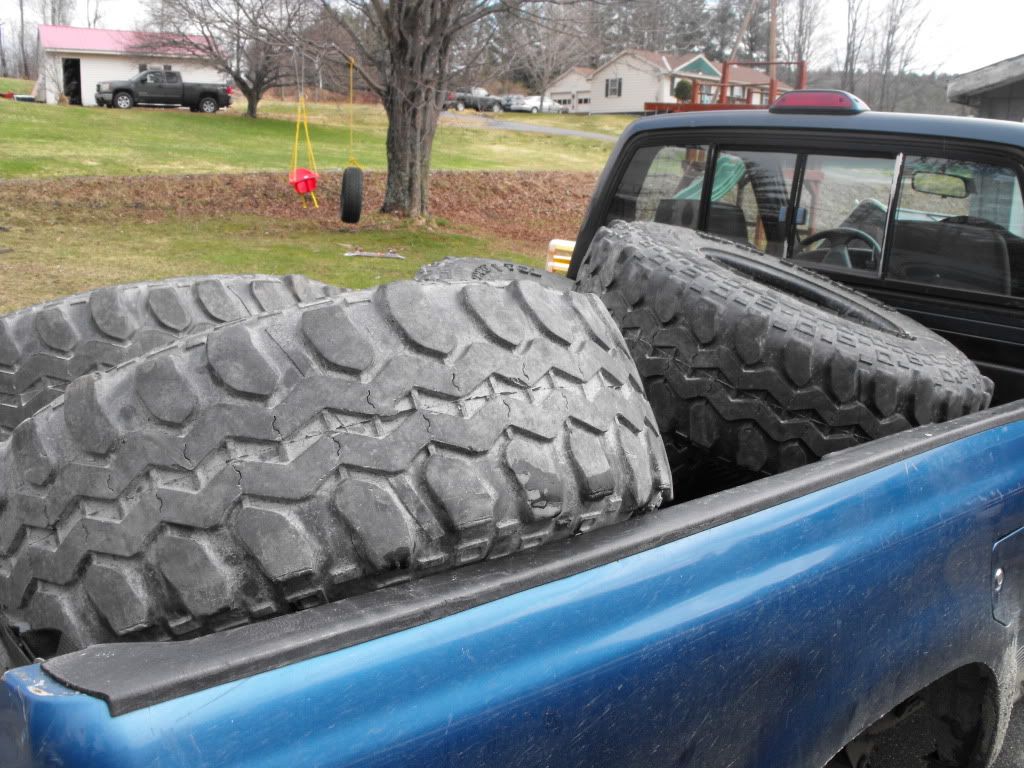
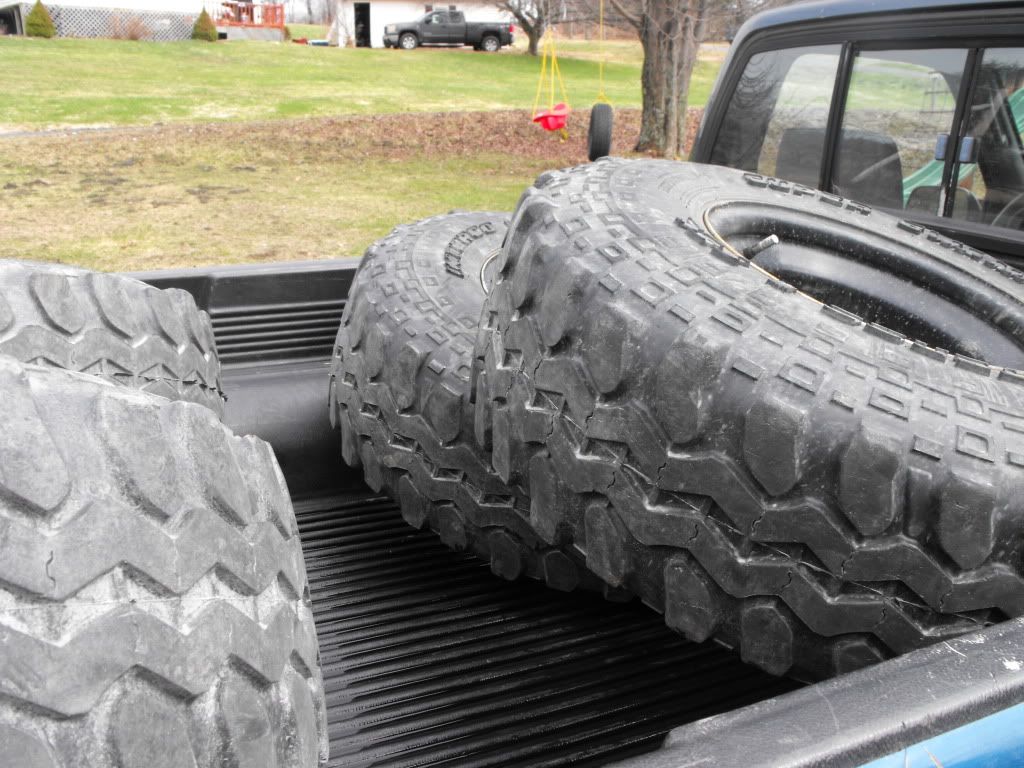
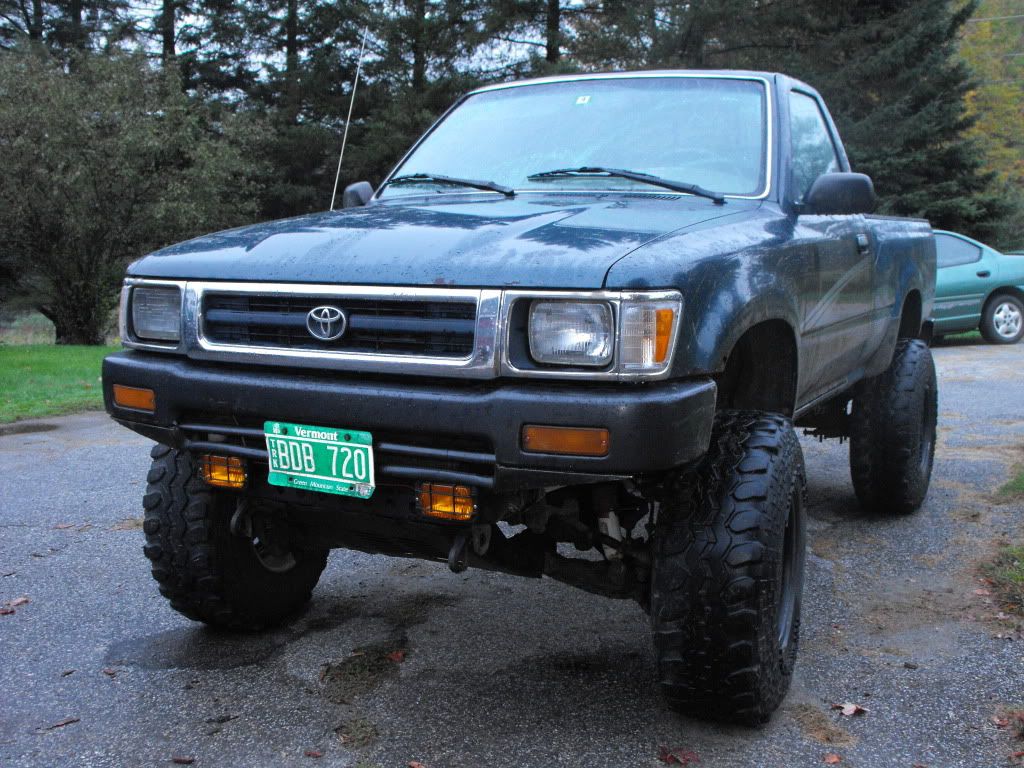
And a couple of comparison shots.
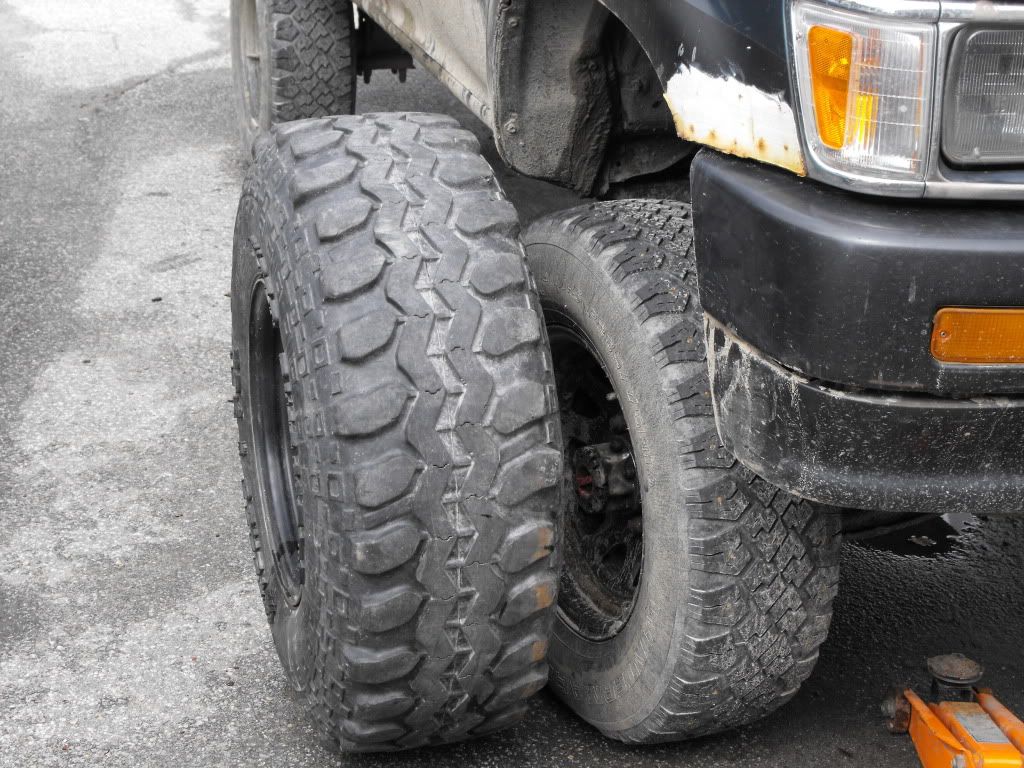
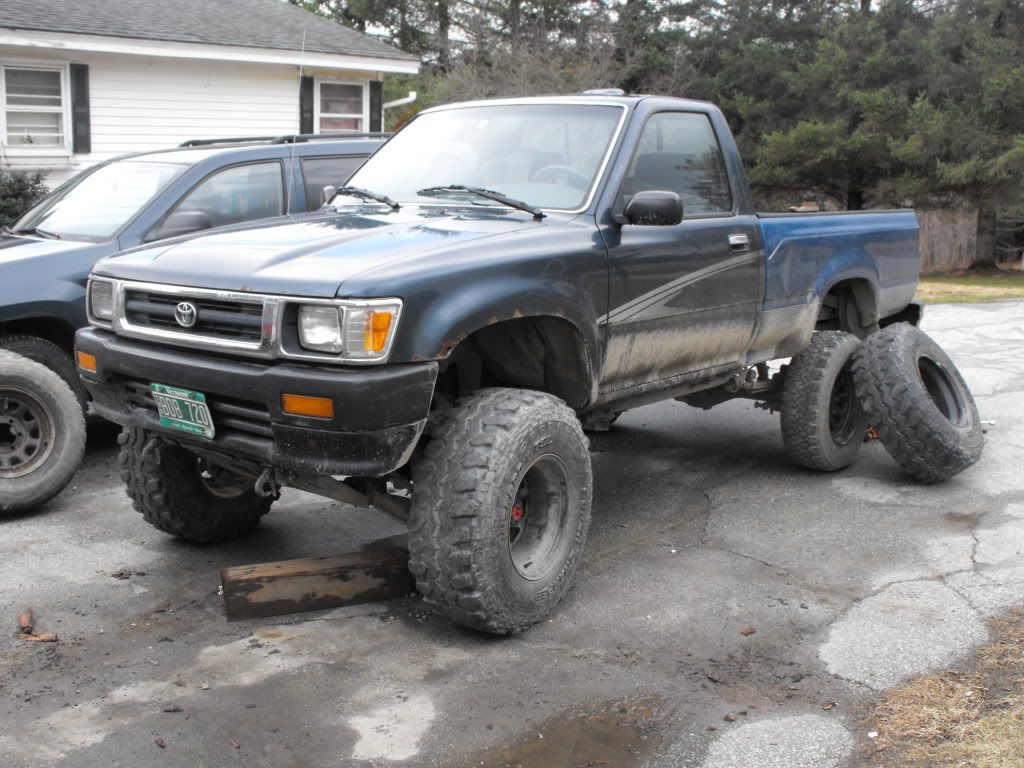
Looks much better with new tires
This has been a LONG but great project and like most it's never really done!
Here's the tires I got in May 2011, 33x12.50s cheap from craigslist.
And a couple of comparison shots.
Looks much better with new tires
Mar 7, 2012 | 04:49 AM
#6
Thread Starter
Registered User
Joined: Aug 2010
Posts: 165
Likes: 0
From: South Royalton, VT
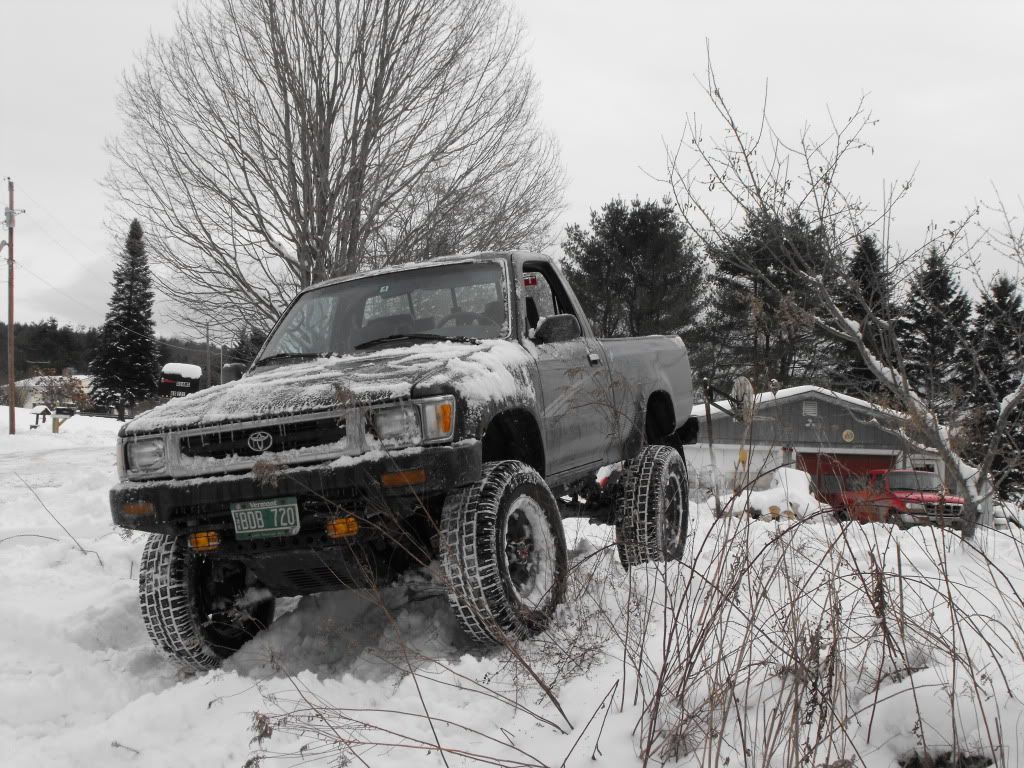
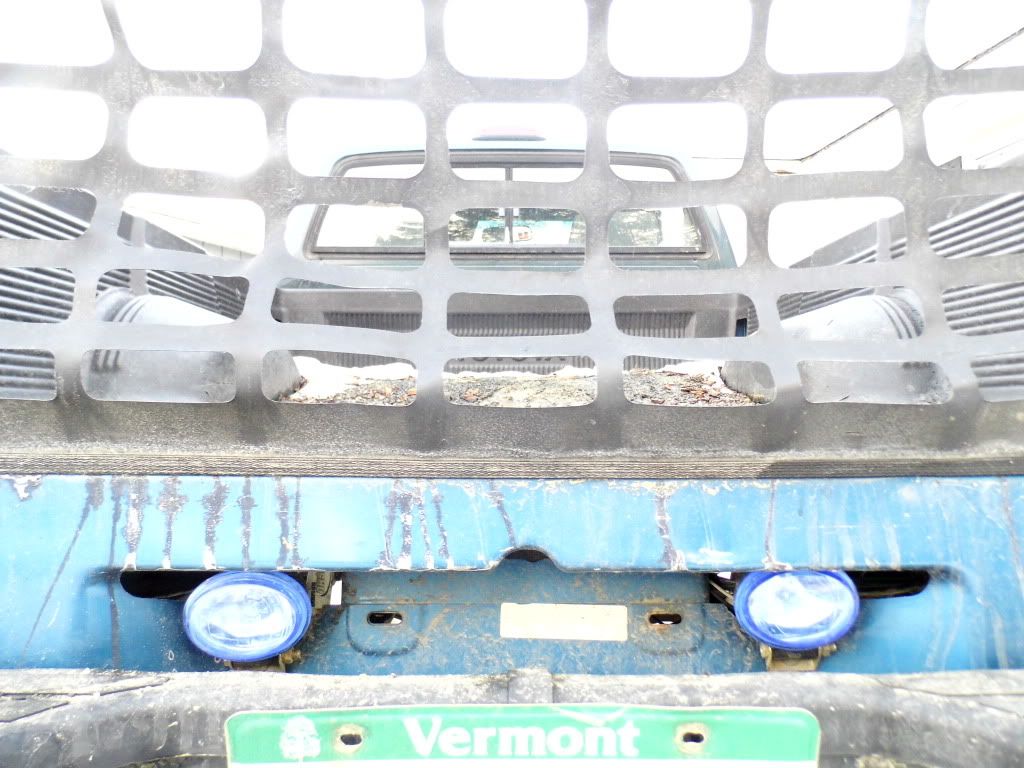
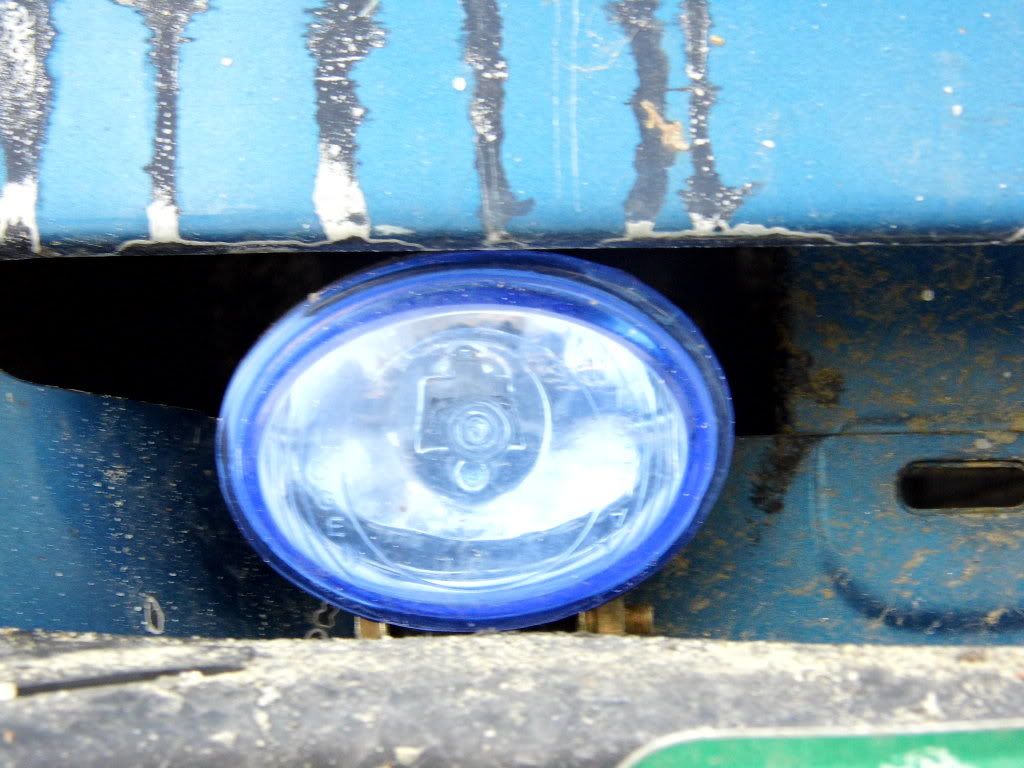
The next thing to do was the valence and fog lights. In Sept. 2011 (after hurricane Irene) I jammed up the valence on a large rock at a severely washed out brook crossing in a driveway. So I took it off, but it looked too open in front because of my body lift. I had another valence, but I didn't want to just put it on so I trimmed until it only covered my front gap. I was given some NIB Ushio brand (made in Japan) fog lights for free and I decided to mount them at the same time.
Before
After
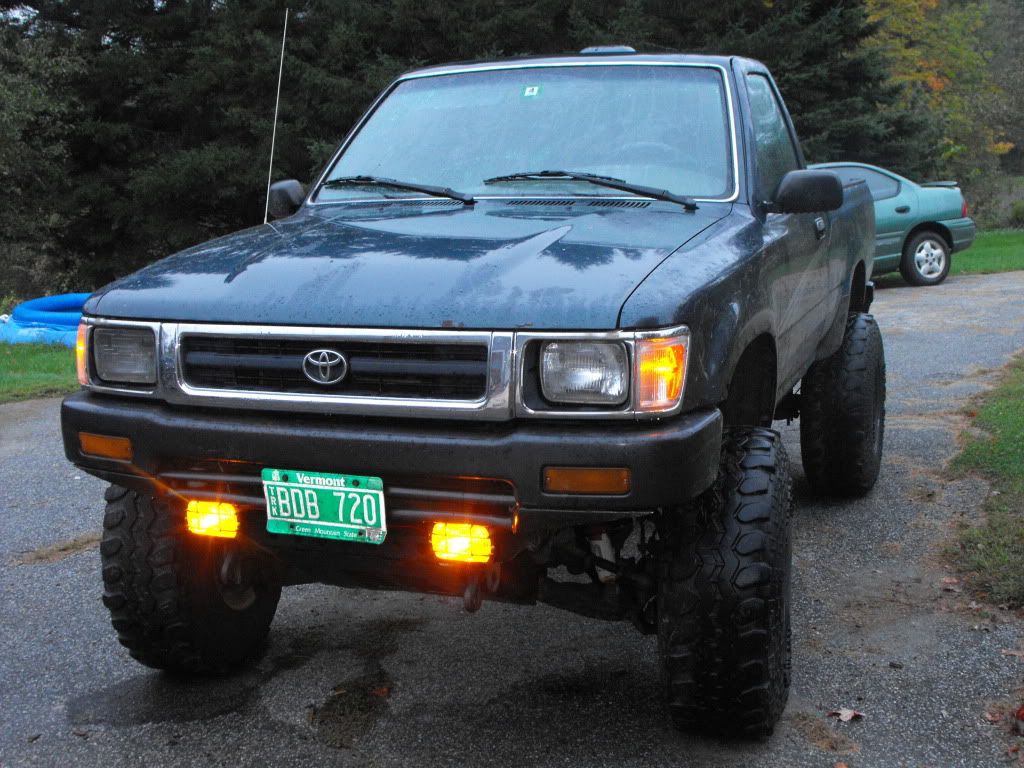
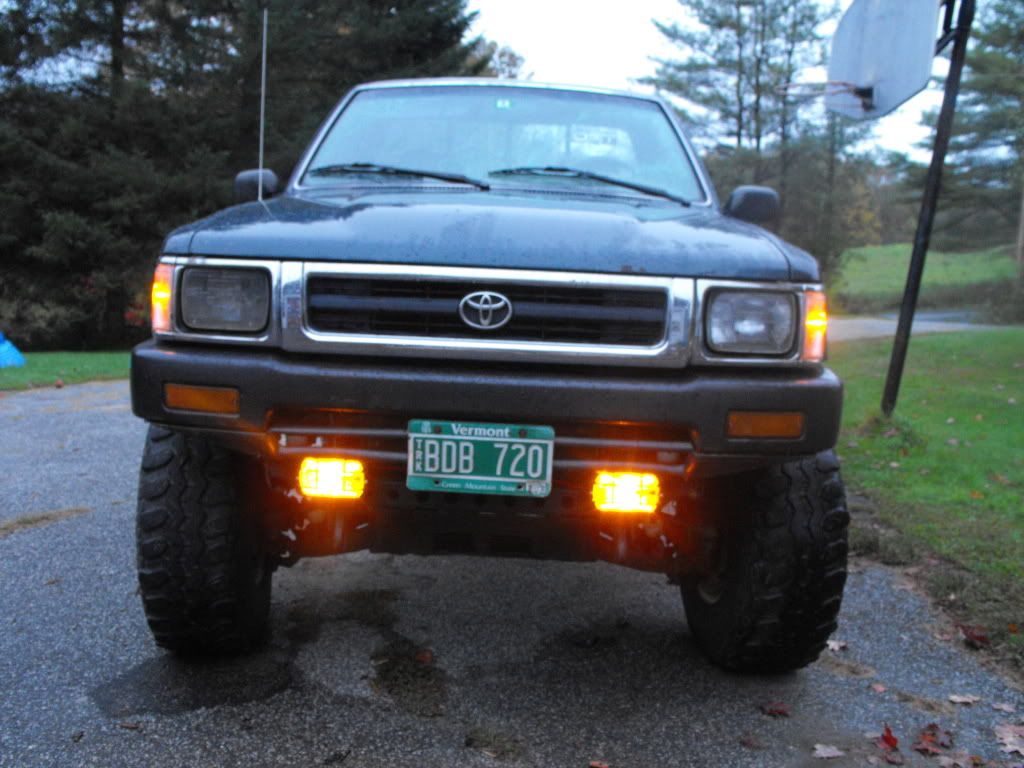
The fog lights really light up reflectors at night!
Before
After
The fog lights really light up reflectors at night!
Trending Topics
Mar 7, 2012 | 06:04 PM
#8
Thread Starter
Registered User
Joined: Aug 2010
Posts: 165
Likes: 0
From: South Royalton, VT
Thanks Whelan 709, It was a lot of work taking apart two trucks, but the cab was a lot easier to lift with a Yanmar B50 excavator(my father's)! It cost me about $1200 including the tires from craigslist and not including price of the original green truck.
Mar 8, 2012 | 02:36 AM
#9
Thread Starter
Registered User
Joined: Aug 2010
Posts: 165
Likes: 0
From: South Royalton, VT
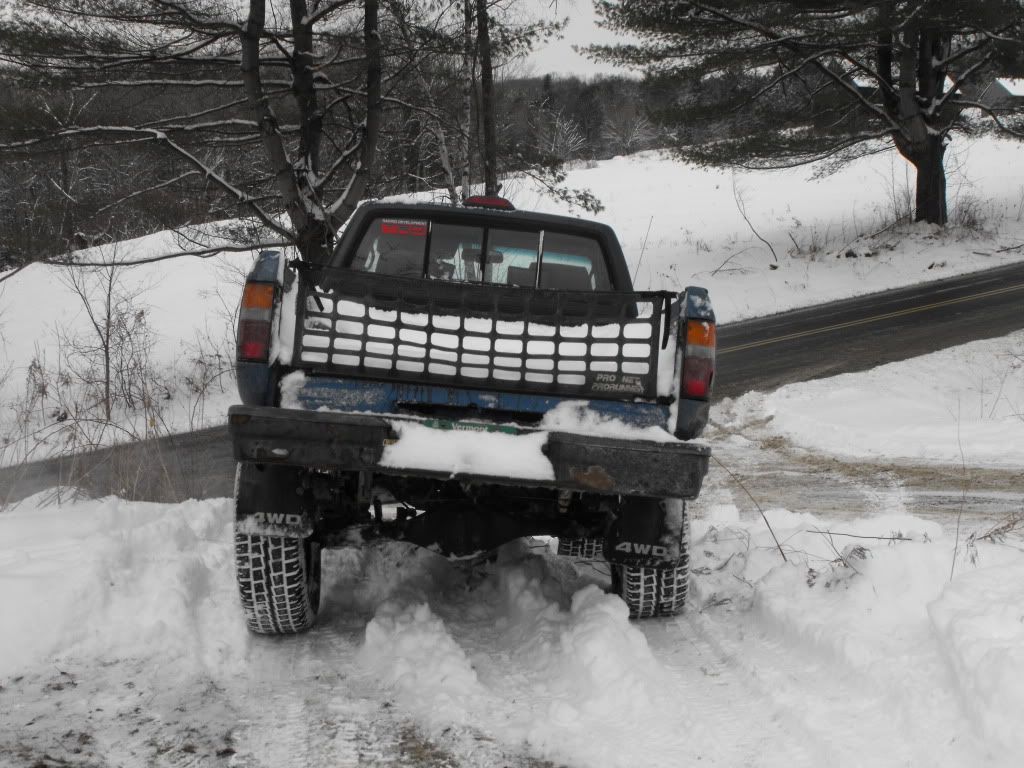
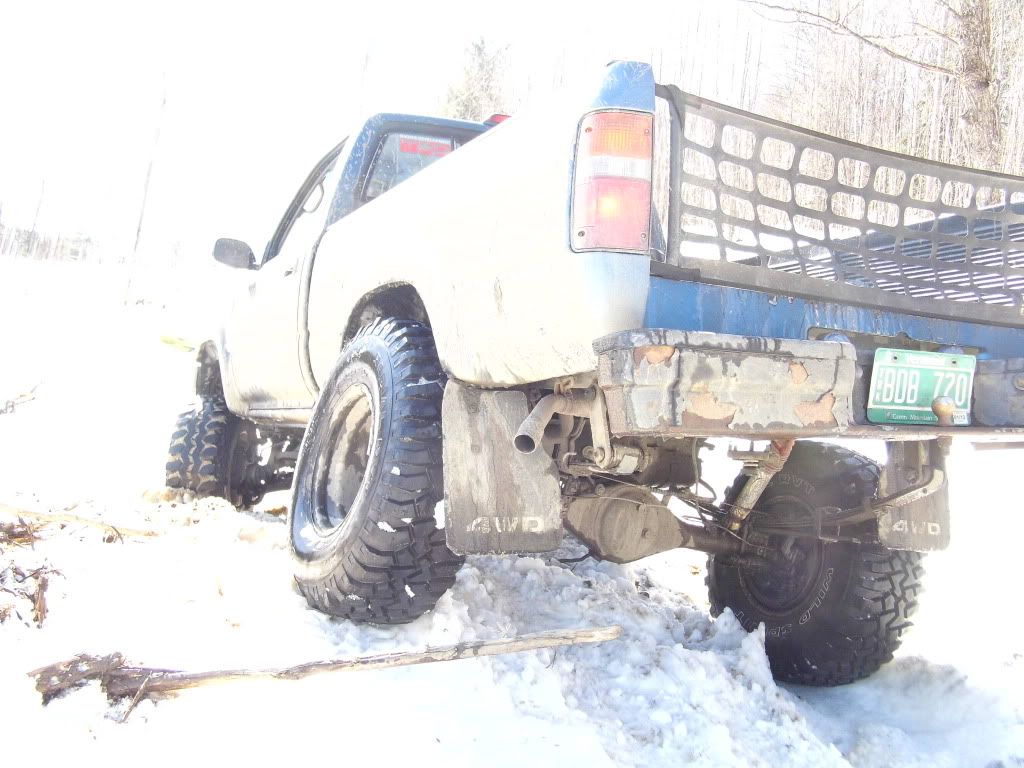
Some pictures from this winter. For snow tires I was given a set of 265-70/17 studded Cooper Discoverer M/S off my mother's Ford expedition(sold). So I bought a set of 17" soft 8 style steelies to mount them on.
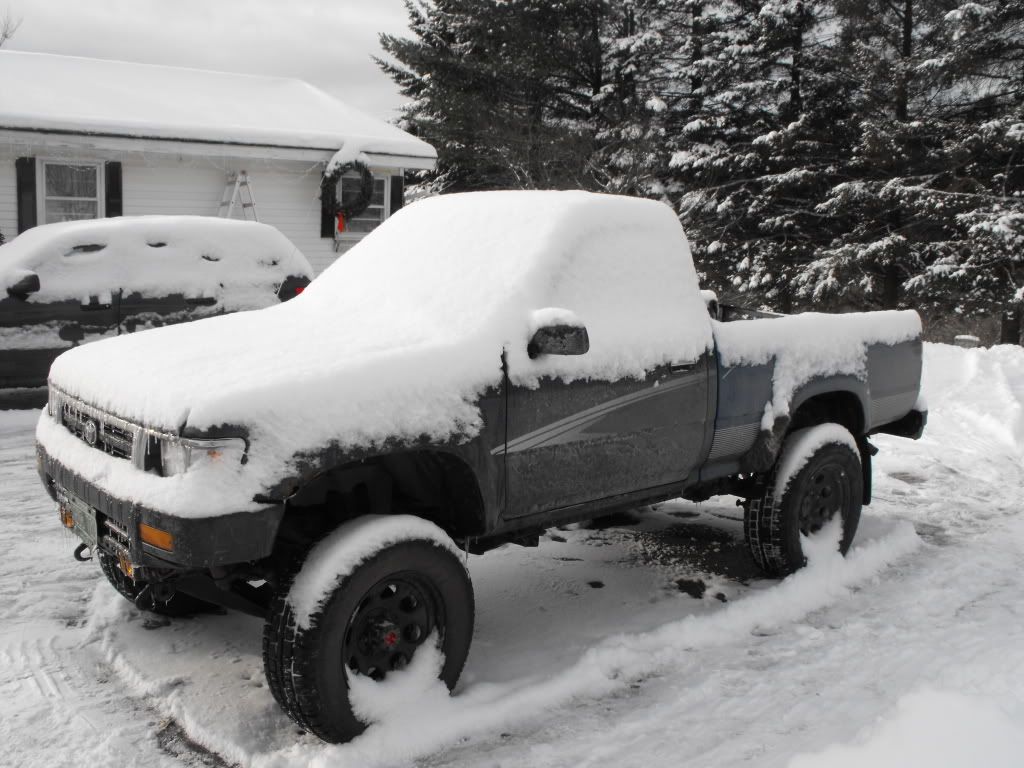
And some snowbank wheeling.
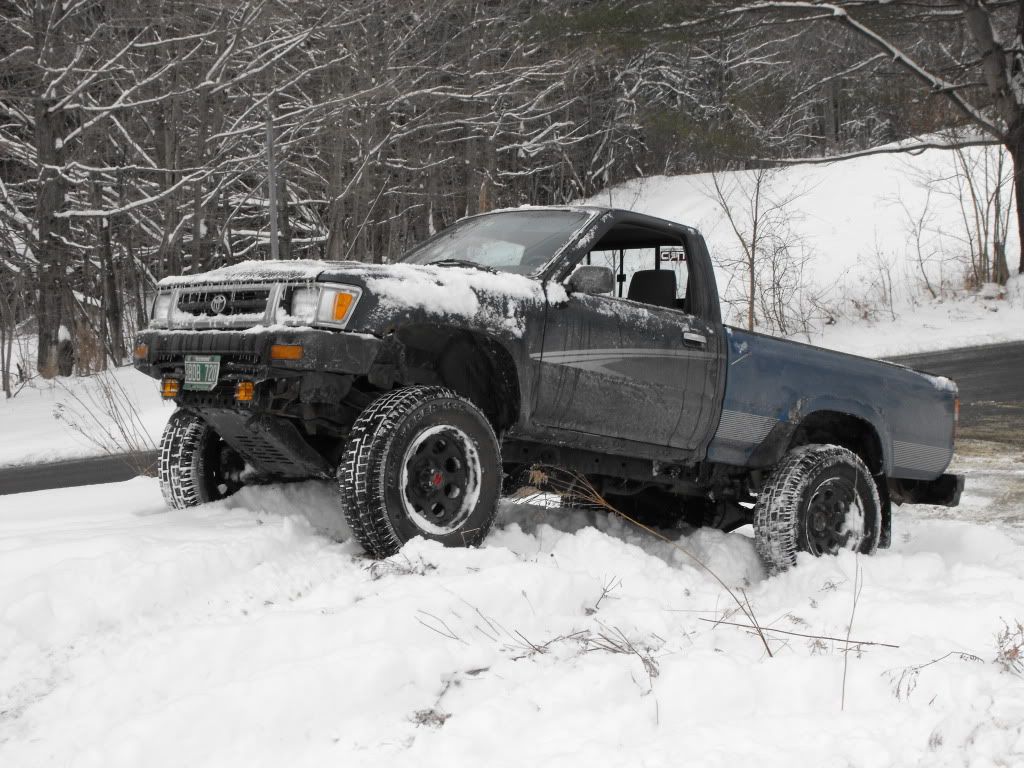
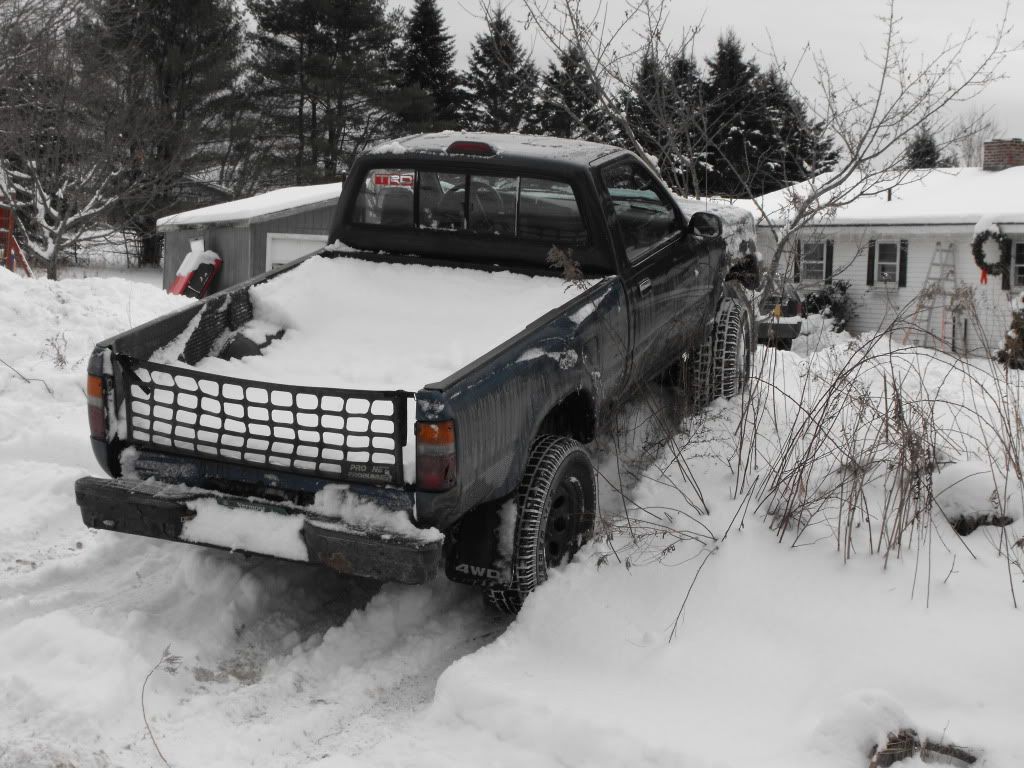
And some snowbank wheeling.
Last edited by FourwheelinVT; Mar 8, 2012 at 02:37 AM.
Mar 24, 2012 | 03:24 AM
#10
Thread Starter
Registered User
Joined: Aug 2010
Posts: 165
Likes: 0
From: South Royalton, VT
I'm still trying to get this thread up to date before I start some new projects. So after the fog lights and snow tires I decided to mount some back-up lights. I got a cheap set of driving lights from the auto store and mounted them beside the license plate.
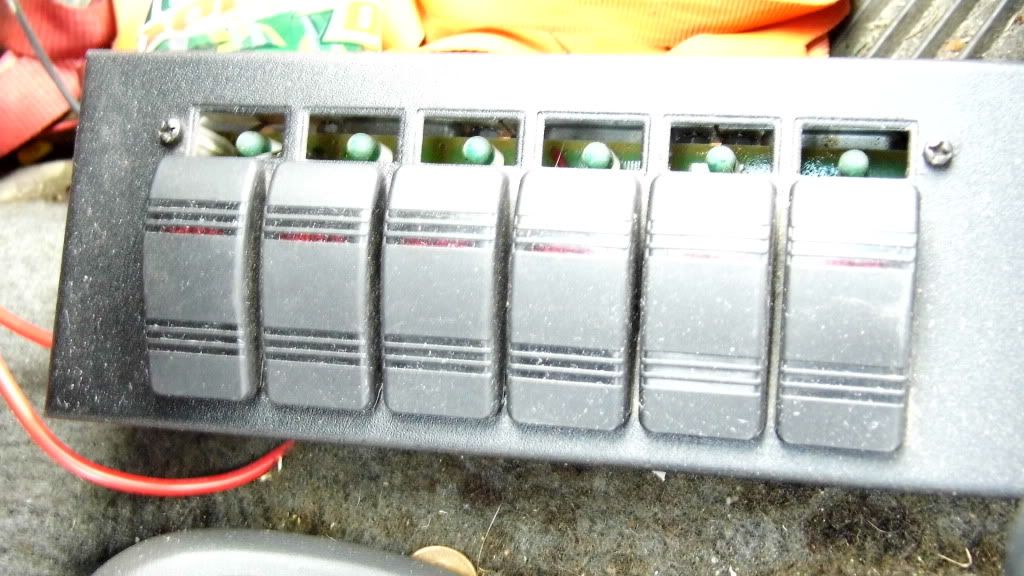
When I had installed the foglights I just used a single cheap switch on the dash. I needed another for the back-up lights, so I installed a switch panel that I had lying around. Now there will be room for future projects that need a switch.
When I had installed the foglights I just used a single cheap switch on the dash. I needed another for the back-up lights, so I installed a switch panel that I had lying around. Now there will be room for future projects that need a switch.
Mar 25, 2012 | 05:15 AM
#11
Thread Starter
Registered User
Joined: Aug 2010
Posts: 165
Likes: 0
From: South Royalton, VT
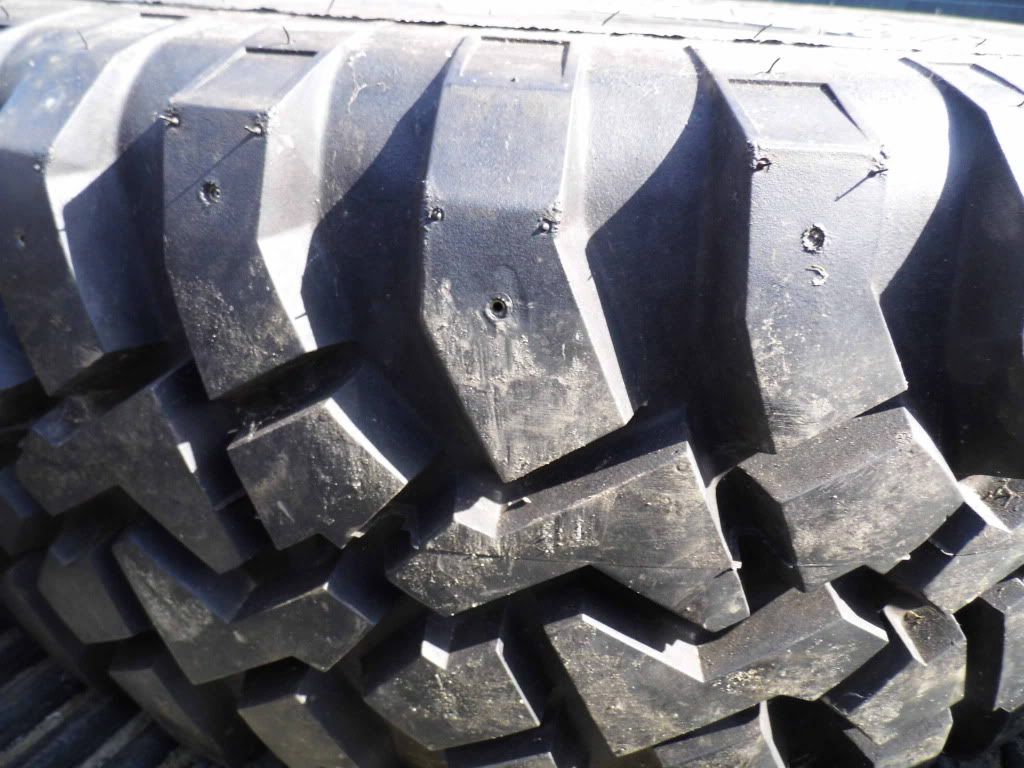
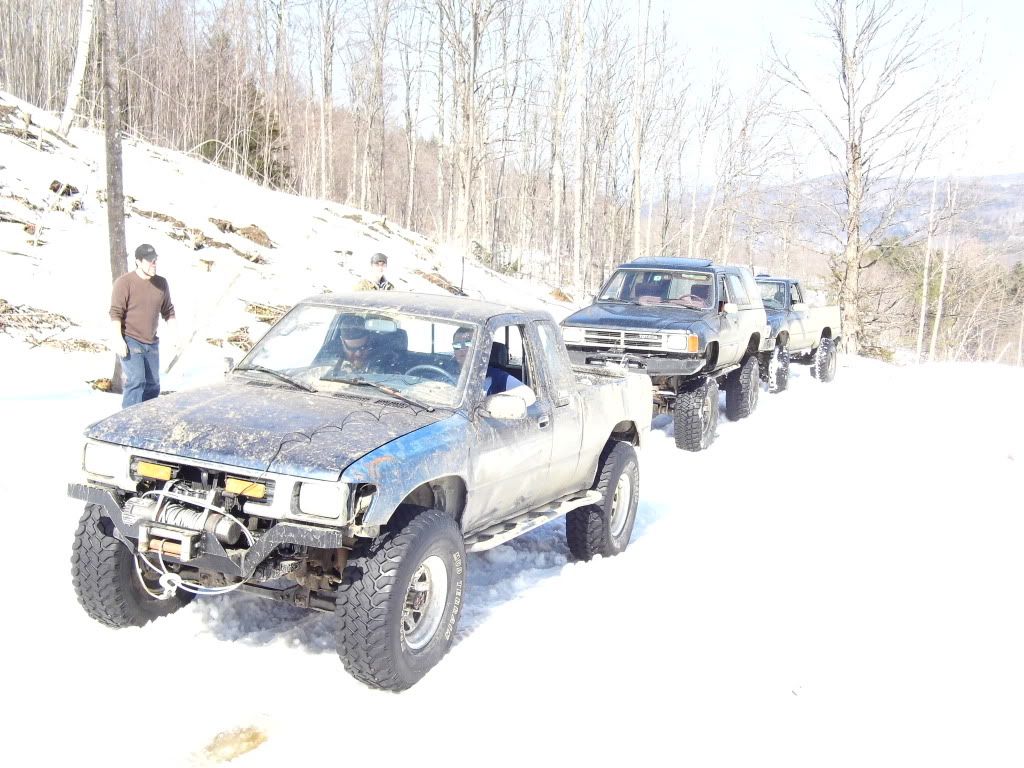
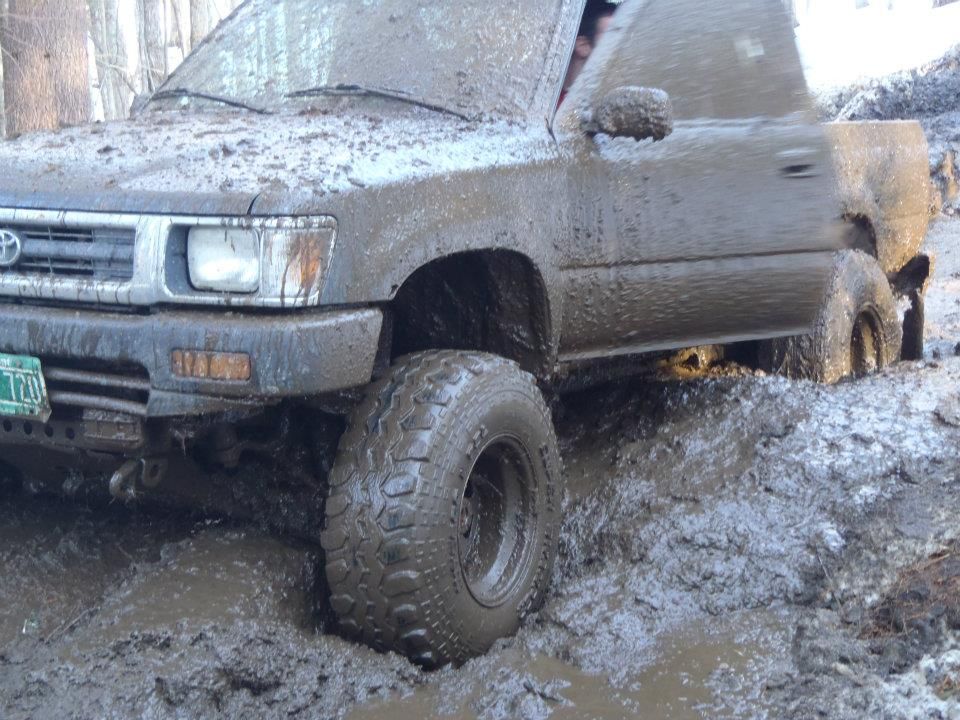
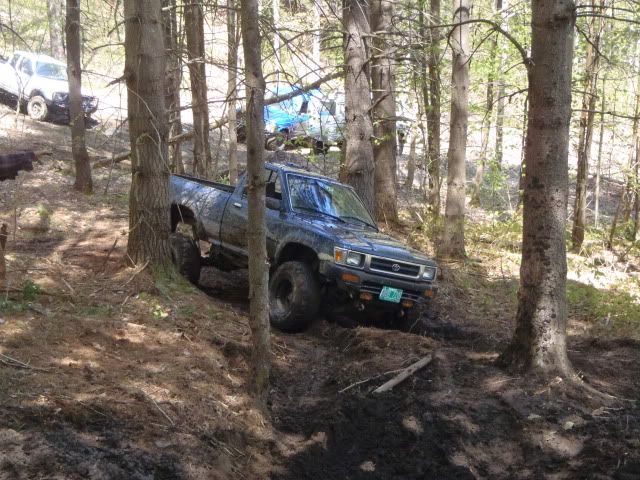
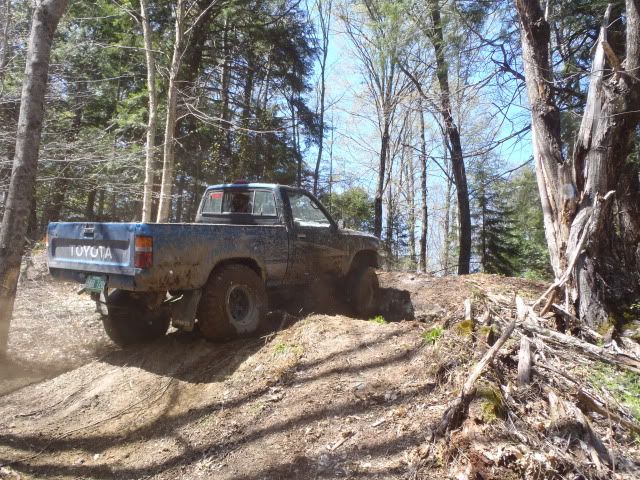
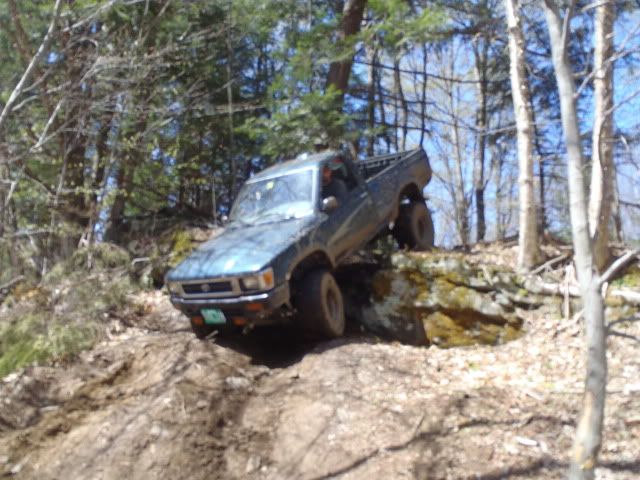
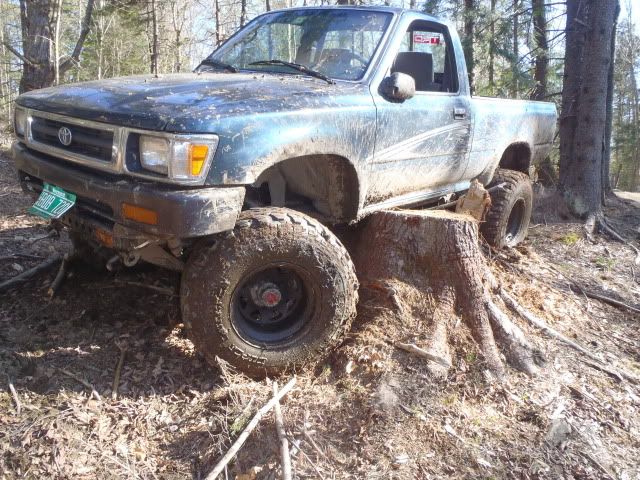
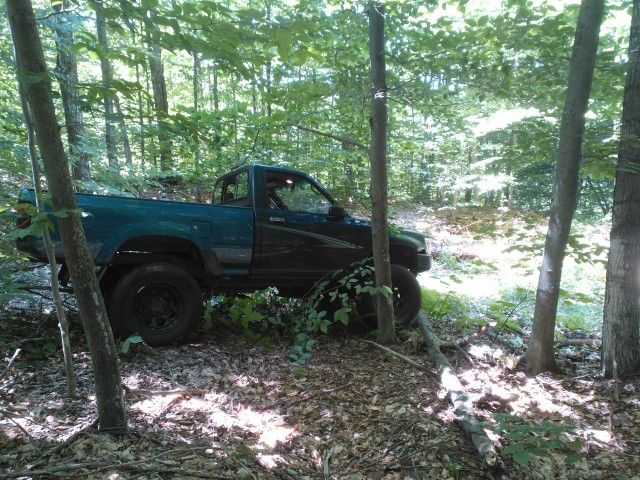
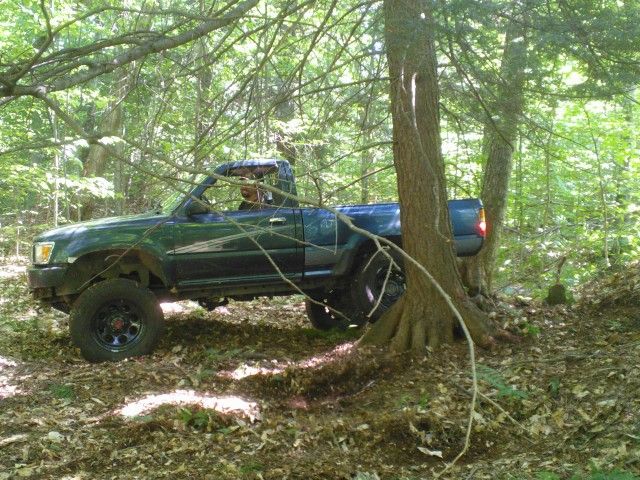
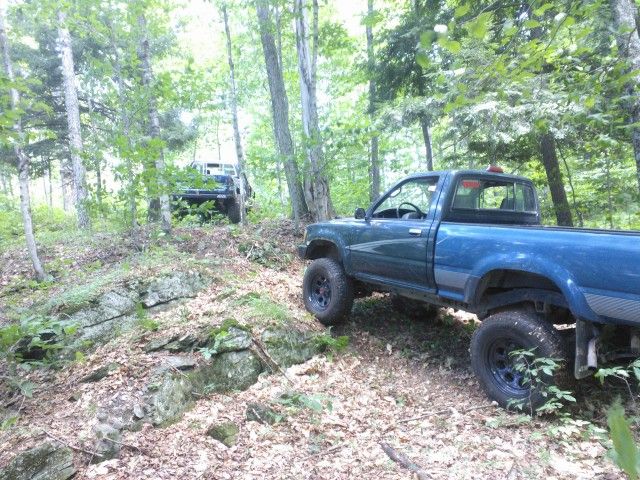
Over the last couple of weeks I have been collecting parts from craigslist for my truck. First I picked up a pair of like new 33x12.50 radial RTV mud tires that cost $75 for the pair.
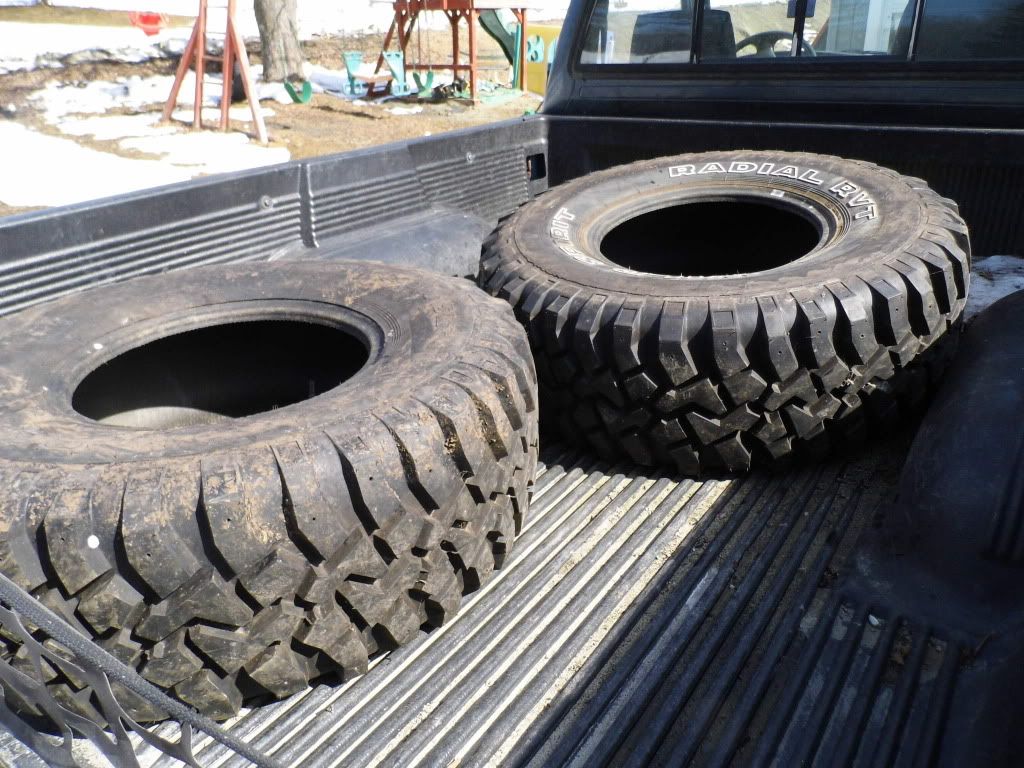
And I got them mounted just in time for a weekend trail run with rattlewagon and riddarunna.
After all that fun, my control arm bushings are in need of replacement. So I ordered a set of Energy Suspension poly bushings.
Then I got some better gears ( front and rear 4.56 diffs) from craigslist for $250. They came out of a '95 4runner. Sorry I don't have any pics of the gears yet. I also grabbed a pair of chevy springs for $50.

The plan is to do all of this in two stages, front and back. I'm going to do the front diff swap and control arm bushings at the same time and then do the rear diff and chevy springs with a u-bolt flip. It should be awesome when all that is done.
And I got them mounted just in time for a weekend trail run with rattlewagon and riddarunna.
After all that fun, my control arm bushings are in need of replacement. So I ordered a set of Energy Suspension poly bushings.
Then I got some better gears ( front and rear 4.56 diffs) from craigslist for $250. They came out of a '95 4runner. Sorry I don't have any pics of the gears yet. I also grabbed a pair of chevy springs for $50.
The plan is to do all of this in two stages, front and back. I'm going to do the front diff swap and control arm bushings at the same time and then do the rear diff and chevy springs with a u-bolt flip. It should be awesome when all that is done.
Last edited by FourwheelinVT; Mar 27, 2012 at 02:35 PM.
Mar 27, 2012 | 02:44 PM
#13
Thread Starter
Registered User
Joined: Aug 2010
Posts: 165
Likes: 0
From: South Royalton, VT
I'm not sure how tight they actually are because I've never adjusted them. When I do my control arm bushings, I'll be getting new adjuster bolts too, so then I will have a better idea. Also I still have my sway bar hooked up and the shocks are stock length because I bought them before I did the frame swap and build.
Mar 28, 2012 | 09:01 AM
#14
Registered User
Joined: Jan 2007
Posts: 1,987
Likes: 0
From: Chico Republic, NOR*CAL
I run my sway bar as well. I like it on road trips... I'd say shocks and lowering those torsion bars will give you way more play. I installed my bj spacers solely to get more travel. Obviously once they were on the truck was 1.5" taller so I relaxed the t-bars until the nose was level again. Now my ride is real soft.
 Feb 20, 2014 | 12:10 AM
#19
Thread Starter
Registered User
Joined: Aug 2010
Posts: 165
Likes: 0
From: South Royalton, VT
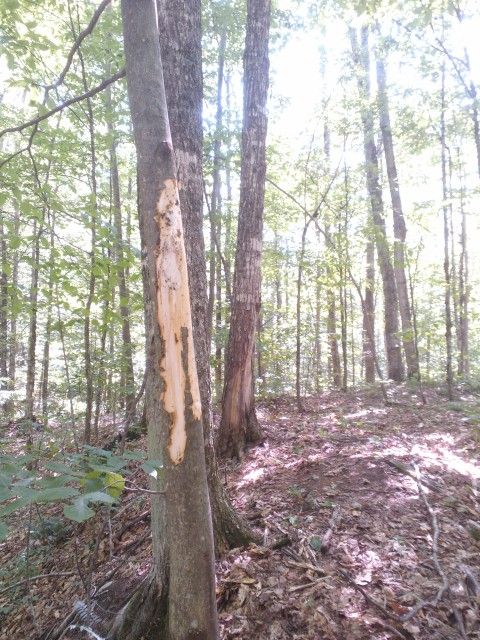
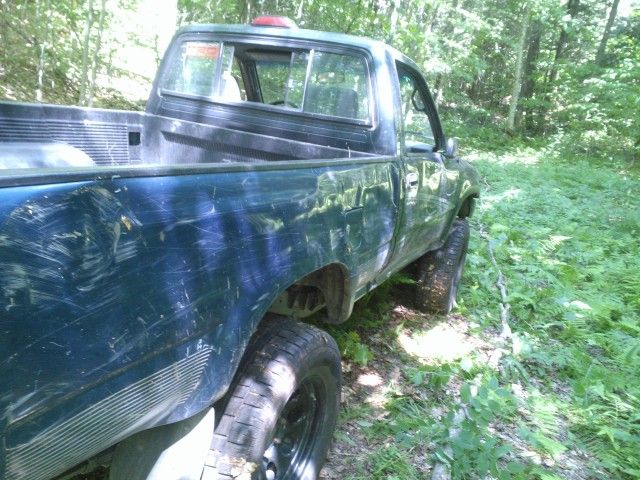
Thanks, I will be updating this soon. Life has been very busy, so I haven't posted much. Lots to catch up on. I will be rebuilding it again due to more frame rust and a small accident with a tree! Only this time it's not my DD any more. It needed more support for the frame (sliders, bumpers and skids) because I cracked it along the bottom of the inner frame rail plate. Too much twisting. Third times a charm, right?


