
arlindsay1992's 1987 4Runner Build Up Thread
 May 2, 2016 | 10:37 AM
#102
Thread Starter
Registered User
iTrader: (8)
Joined: May 2011
Posts: 1,517
Likes: 354
From: Southeast Virginia
I think the bad Maaco jobs are the ones where the customer buys the $299 package which is a single stage paint with no trim removal, just taping. So you end up with paint over all the dents, overspray on all the trim, and the cheapest paint available. Plus taping leaves hard edges in the paint which is an invitation for eventual peeling. I've already removed all the trim, so no overspray, no hard edges. I'm doing all the bodywork. I know it's not a professional job by any means but for the most part it'll have a straight body, no look like a golf ball. Then on top, it's getting sealer, base coat, and clearcoat. I'm not looking to win any shows. I'm still going to wheel this truck. I don't want a perfect body but I do want a nice truck so I have no reservations going with Maaco for paint.
 May 11, 2016 | 03:01 AM
#105
Thread Starter
Registered User
iTrader: (8)
Joined: May 2011
Posts: 1,517
Likes: 354
From: Southeast Virginia
The last bit of bodywork was the dents in the tailgate. I have a couple pictures but they are nothing special. Just the typical fill, sand, repeat to smooth out the dents. Once this was done I finally had a rust and dent free truck!
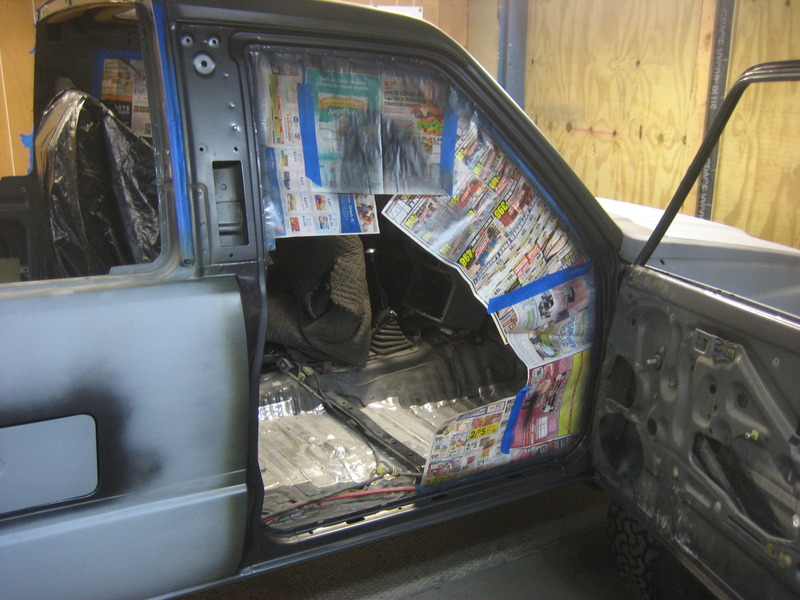
With all the bodywork done, the absolute last thing to do before taking it to the paint shop was to paint the door jambs. I had bought two cans of color matched rattle cans from AutomotiveTouchup.com. They have all sorts of different products from paint pens, to spray cans, to quarts and gallons of sprayable paint for spray guns. They are a bit pricey but the stuff is quality. I paid just under $50 for two cans of spray paint but I'm happy I did. Follow the instructions on the can and it turns out great. They also sell their own brand acrylic lacquer clear but I used Duplicolor acrylic lacquer clear to save a couple bucks.
Lots of newspaper and tape.
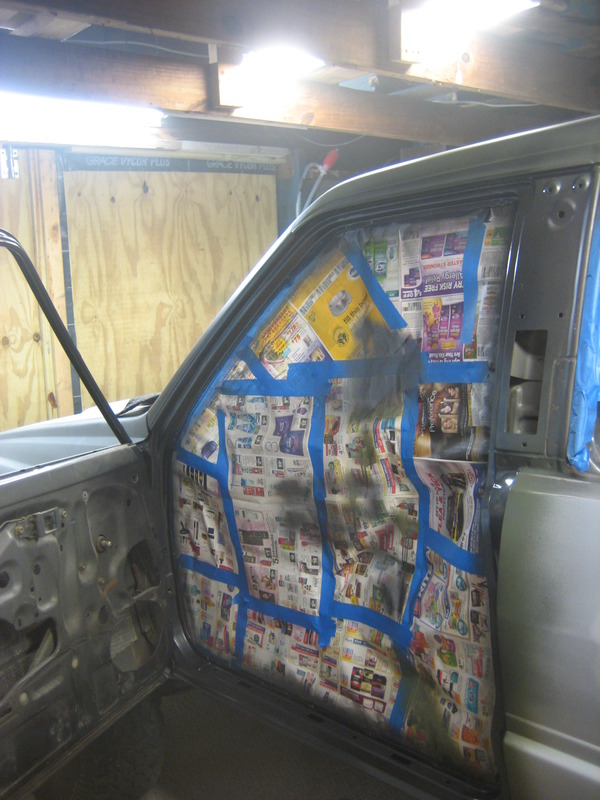
The passenger seat isn't installed so I wasn't worried about overspray as much. I still covered the dash and driver's seat.
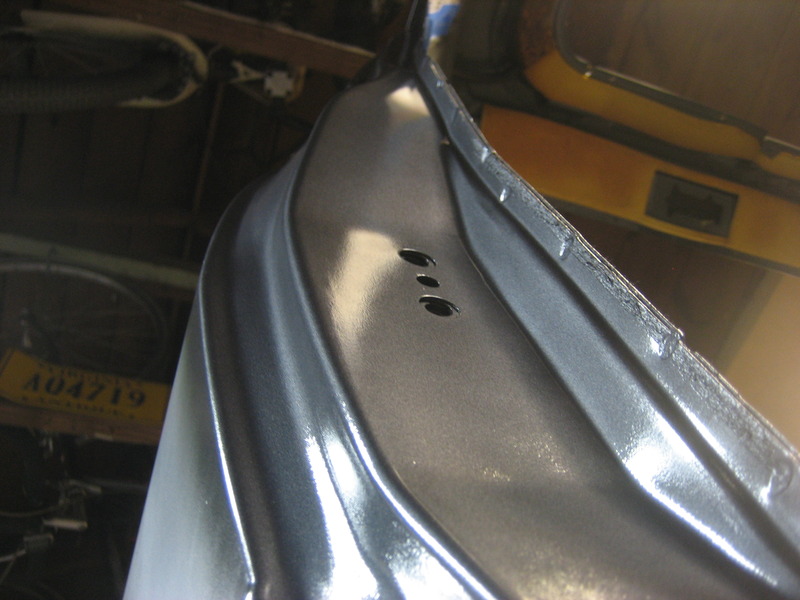
Here's the final product. I'm very pleased. It lays down really even and came out great.
So at 11 PM on Friday I was finally done. Went out of town for Mother's Day weekend so I couldn't drop it off til Monday. First thing Monday I stopped by Dunkin Donuts and grabbed a dozen donuts for the painters and dropped the truck off. The owner said he'd have it back by the end of the week. Yesterday just as I'm walking out of work I get a call saying they are done! Finished in just over 24 hours! I rushed over there and boy does it look great. Unfortunately, they hadn't put the windshield in. One of the employees called after he was done and said it was finished but he didn't know they were putting the windshield in too. Apparently they normally tape the repair order to the windshield which doesn't work for me. The owner apologized and I said the windshield guy is coming early tomorrow (which is today). So hopefully the windshield guy comes early and the rain comes late because I want to get this thing back together.
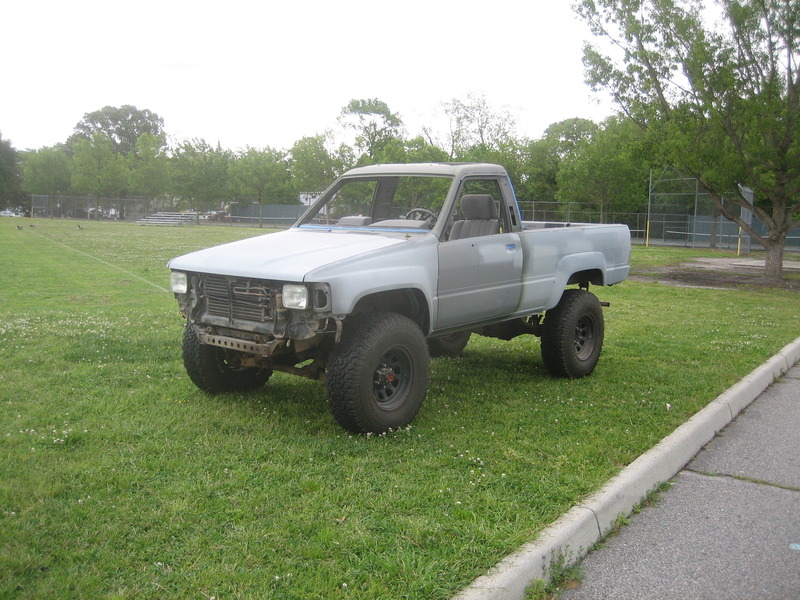
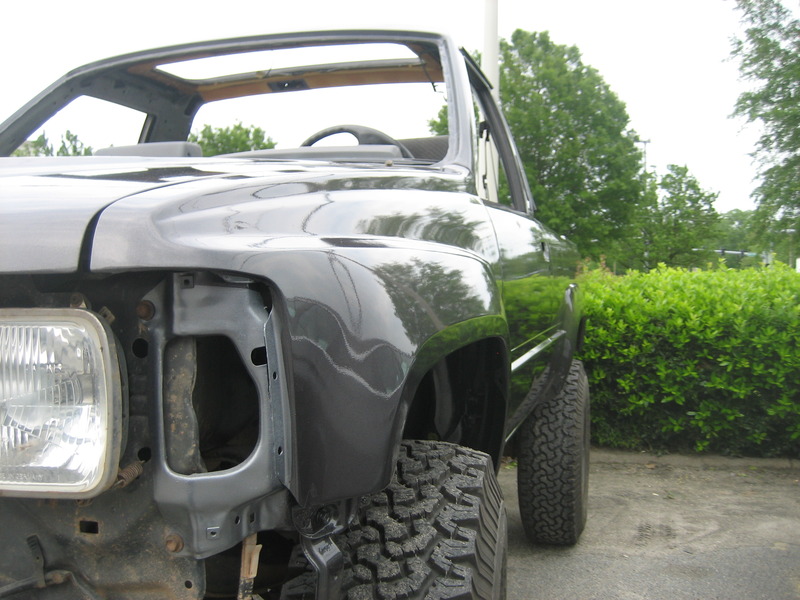
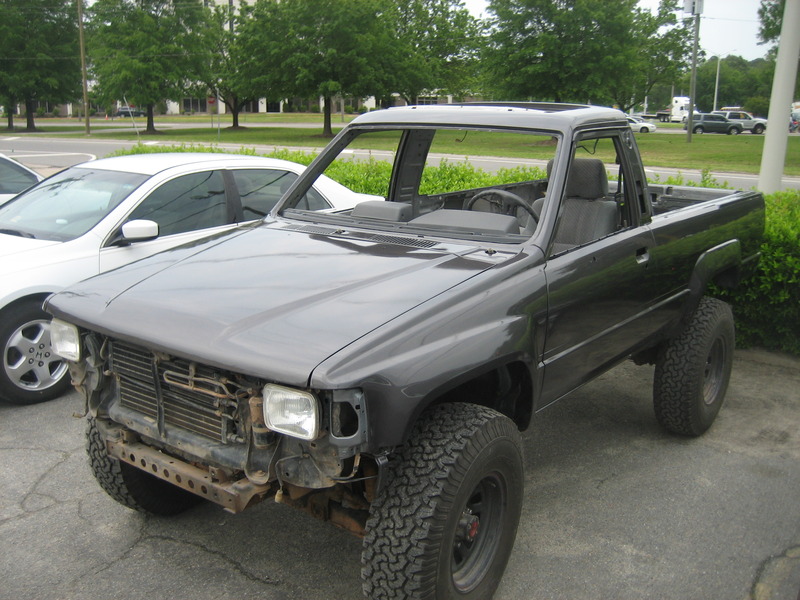
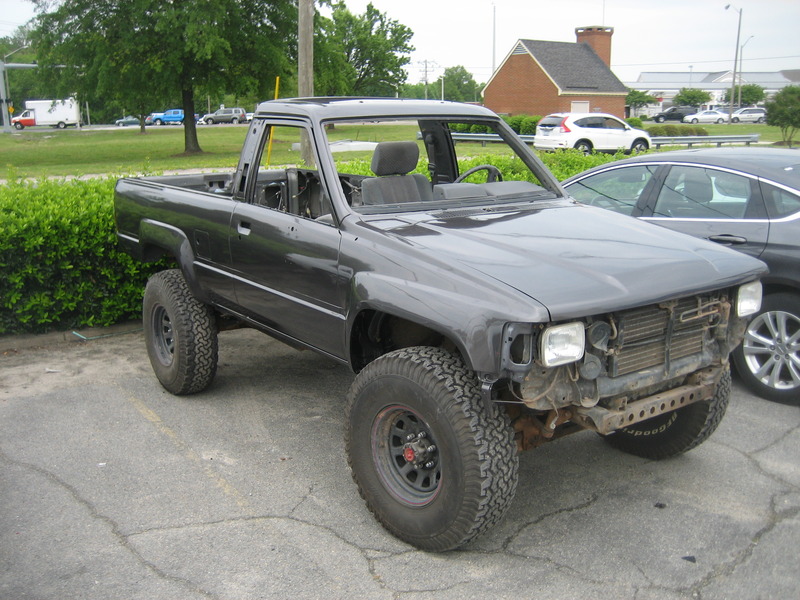
I took a bunch of pictures but I want to hold off on posting them til I get the truck back. But here's a teaser just to give you a taste.
The truck looks great. I noticed one little spec of dust on the paint on the leading edge of the hood but other than that I'm very, very happy. I noticed a lot of flaws in my bodywork but that's something I was expecting. Nothing is huge and obnoxious, most people won't ever notice but of course I see them. I'm not too upset though. Like I've said this is not a show truck and I plan to continue taking it off road. I just wanted it to look good and not be a rust bucket.
With all the bodywork done, the absolute last thing to do before taking it to the paint shop was to paint the door jambs. I had bought two cans of color matched rattle cans from AutomotiveTouchup.com. They have all sorts of different products from paint pens, to spray cans, to quarts and gallons of sprayable paint for spray guns. They are a bit pricey but the stuff is quality. I paid just under $50 for two cans of spray paint but I'm happy I did. Follow the instructions on the can and it turns out great. They also sell their own brand acrylic lacquer clear but I used Duplicolor acrylic lacquer clear to save a couple bucks.
Lots of newspaper and tape.
The passenger seat isn't installed so I wasn't worried about overspray as much. I still covered the dash and driver's seat.
Here's the final product. I'm very pleased. It lays down really even and came out great.
So at 11 PM on Friday I was finally done. Went out of town for Mother's Day weekend so I couldn't drop it off til Monday. First thing Monday I stopped by Dunkin Donuts and grabbed a dozen donuts for the painters and dropped the truck off. The owner said he'd have it back by the end of the week. Yesterday just as I'm walking out of work I get a call saying they are done! Finished in just over 24 hours! I rushed over there and boy does it look great. Unfortunately, they hadn't put the windshield in. One of the employees called after he was done and said it was finished but he didn't know they were putting the windshield in too. Apparently they normally tape the repair order to the windshield which doesn't work for me. The owner apologized and I said the windshield guy is coming early tomorrow (which is today). So hopefully the windshield guy comes early and the rain comes late because I want to get this thing back together.
I took a bunch of pictures but I want to hold off on posting them til I get the truck back. But here's a teaser just to give you a taste.
The truck looks great. I noticed one little spec of dust on the paint on the leading edge of the hood but other than that I'm very, very happy. I noticed a lot of flaws in my bodywork but that's something I was expecting. Nothing is huge and obnoxious, most people won't ever notice but of course I see them. I'm not too upset though. Like I've said this is not a show truck and I plan to continue taking it off road. I just wanted it to look good and not be a rust bucket.
 May 12, 2016 | 06:18 AM
#111
Thread Starter
Registered User
iTrader: (8)
Joined: May 2011
Posts: 1,517
Likes: 354
From: Southeast Virginia
Been too busy putting it back together. The interior is about 50% done and the exterior is about 75% done. Of course the last 10% always takes the longest (and costs the most too). I still need to buy my ARB front bumper, TG rear bumper, and 4XI sliders. Right now I'm driving around bumperless. Looks like I'm going to have to put the factory parts back on. Not really excited about that since they've been sitting behind the garage since I removed them. The inside won't cost me anything but time.
Last night I got it back together enough to take the girlfriend out on a nice little drive late a night, and today I took the very important first drive to work. I'll post up some pictures later today of how it looked when I picked it up and how it's coming along.
Last night I got it back together enough to take the girlfriend out on a nice little drive late a night, and today I took the very important first drive to work. I'll post up some pictures later today of how it looked when I picked it up and how it's coming along.
May 20, 2016 | 01:47 PM
#114
Thread Starter
Registered User
iTrader: (8)
Joined: May 2011
Posts: 1,517
Likes: 354
From: Southeast Virginia
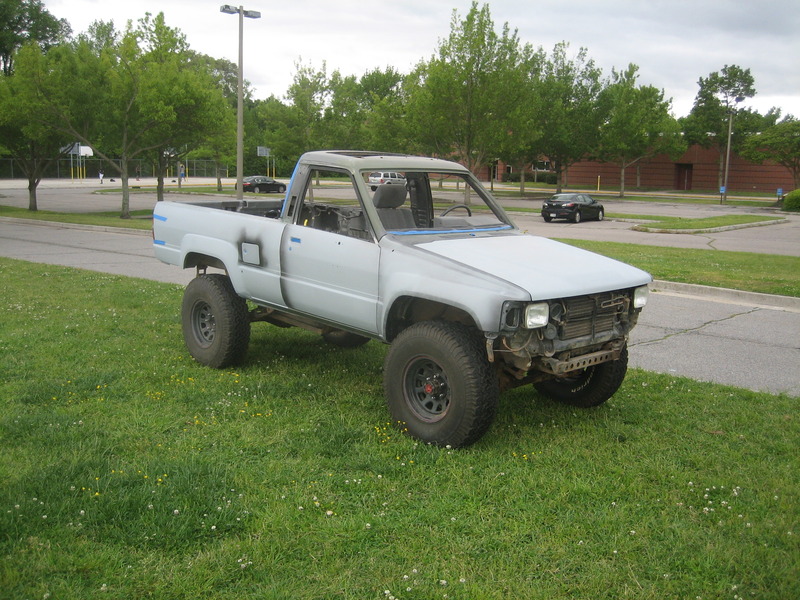
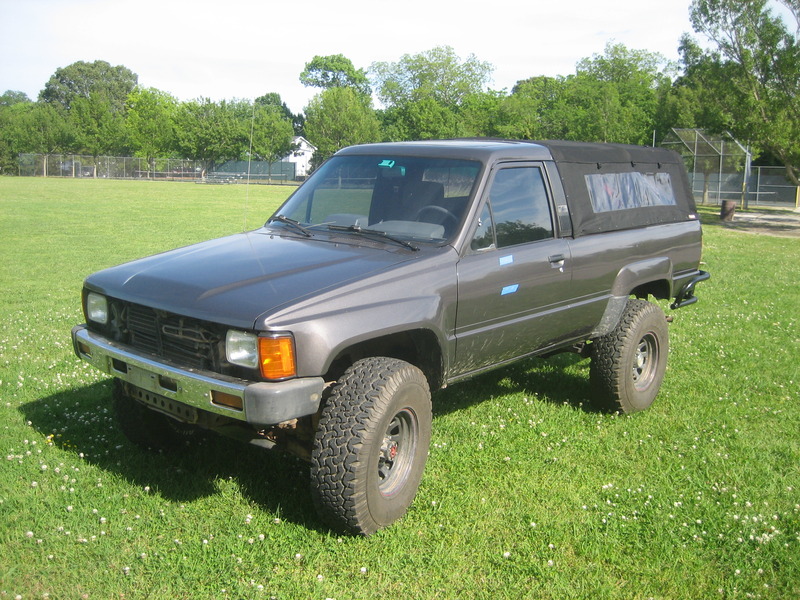
Haha, sorry for the delay guys. Here's the pictures. I'm pleased with the paint job. There are a few specs of dust in the paint here and there and one spot on the hood where the clear looks a bit messed up like they tried to lift a bug out of it or something. If it were anywhere else I wouldn't be too concerned but it's right in my line of sight when I'm driving so I'm going to take it back to them and see if they think they can safely fix it. Other than that, I'm happy. I can definitely see where my bodywork skills are lacking but they are all the kind of thing that no one else will notice but me. Anyway, onto the pictures.
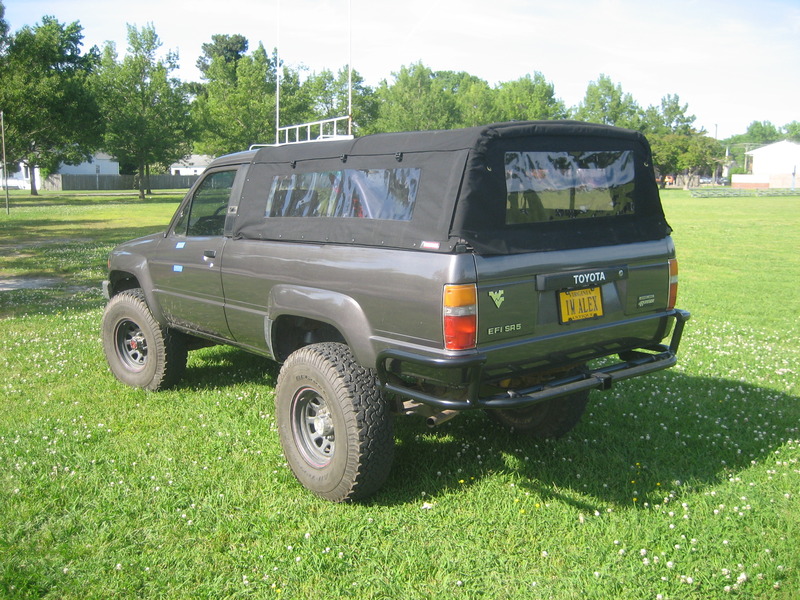
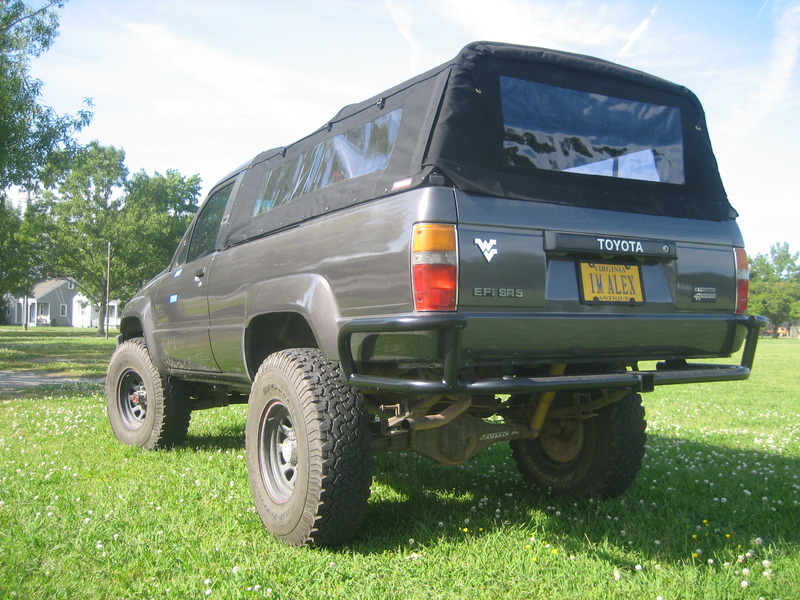
Here's the truck the first time I saw it after paint. Taken the same day as the teaser picture above. As you can kind of see, I forgot to tell them to paint the upper door frames satin black as they should be on 4Runners. I haven't decided yet if I want to go back and paint them black myself or just leave it.
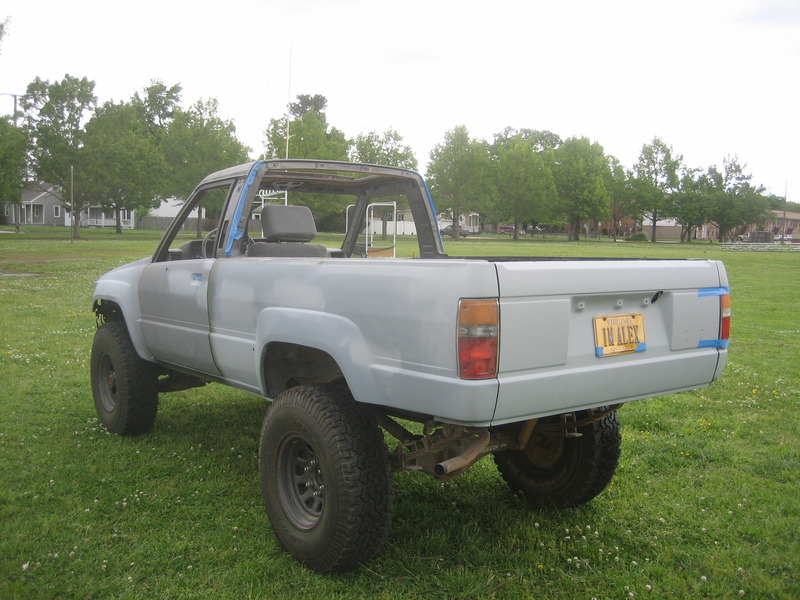
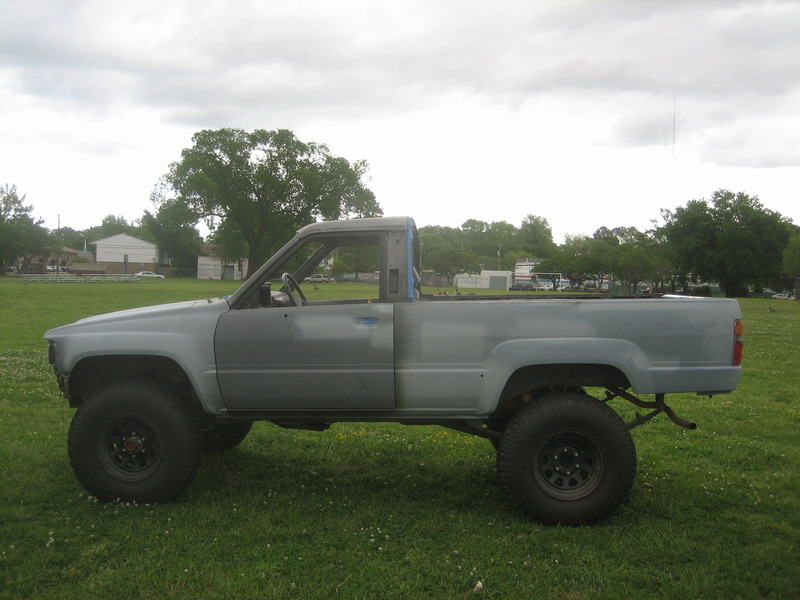
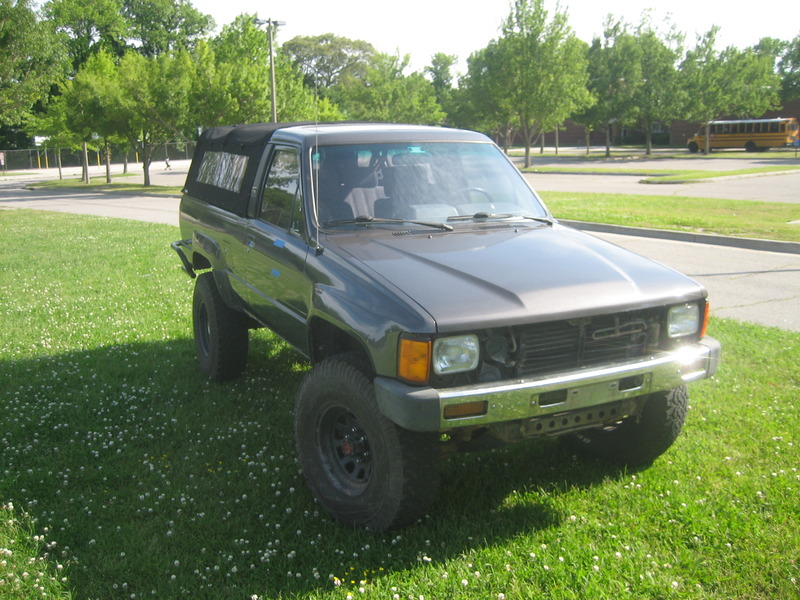
Over the past week I've been slowly putting it back together. The first order of business was the interior so I could take my girlfriend on the first drive. It's mostly done except the tailgate internals are still out of it. I need to tint the rear window before I can put all that back together. Anyway, here it is as of today. Still a work in progress.
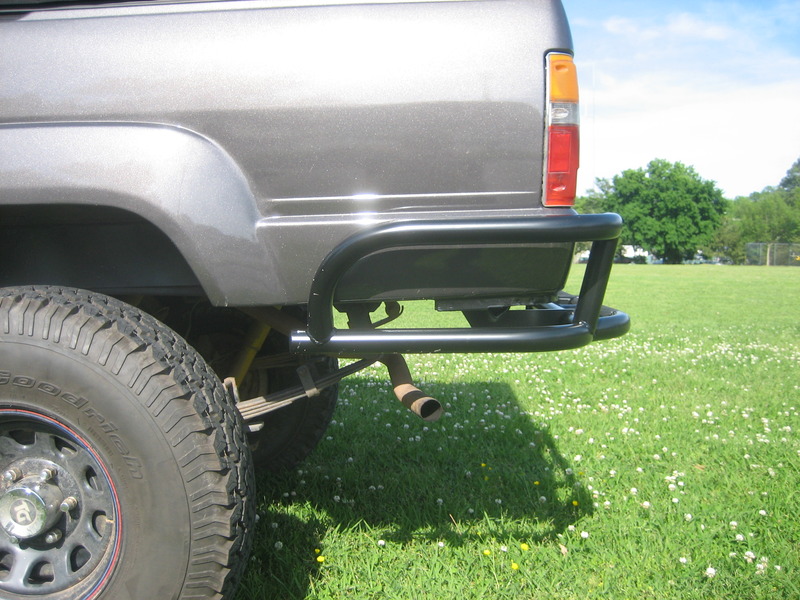
The rear bumper is from Trail Gear. Bought it from 4WheelParts on eBay for $321 shipped. It's painted with VHT Roll Bar & Chassis gloss black which I've used a lot in the past. It sprays nice, looks good, and hold up really well.
I wish the TG bumper tucked up a little closer to the body. Probably would be better if I hadn't chopped the lower part of the rear quarters.
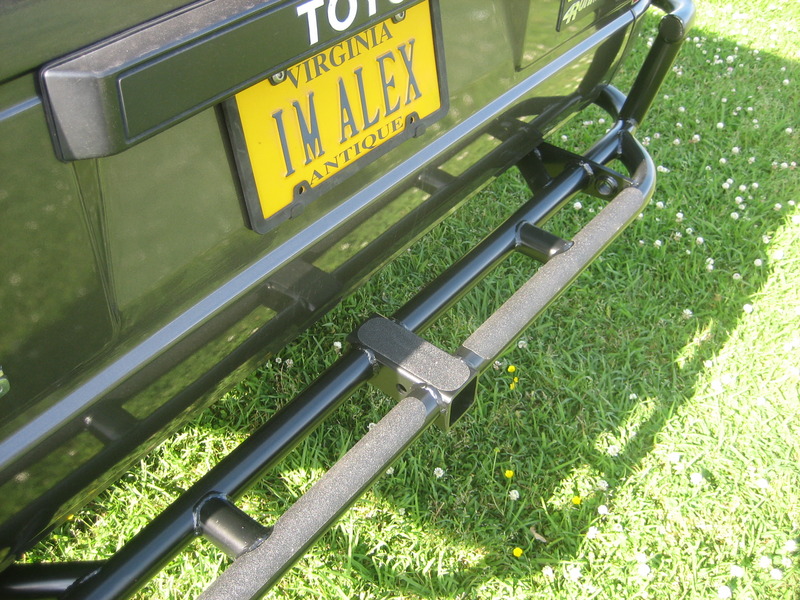
Grip tape on the bumper so I can step on it if necessary and not slip.
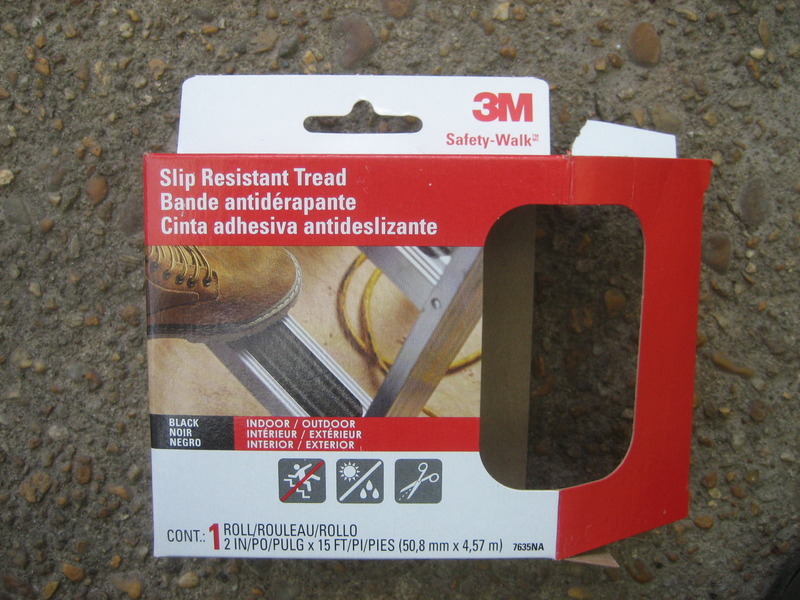
Here's the stuff I used. Got it from the paint section at Home Depot. Seems to stick really well. It's very flexible. If it was too stiff it might try to lift off of curved surfaces but this stuff doesn't seem like it's going to have any issues.
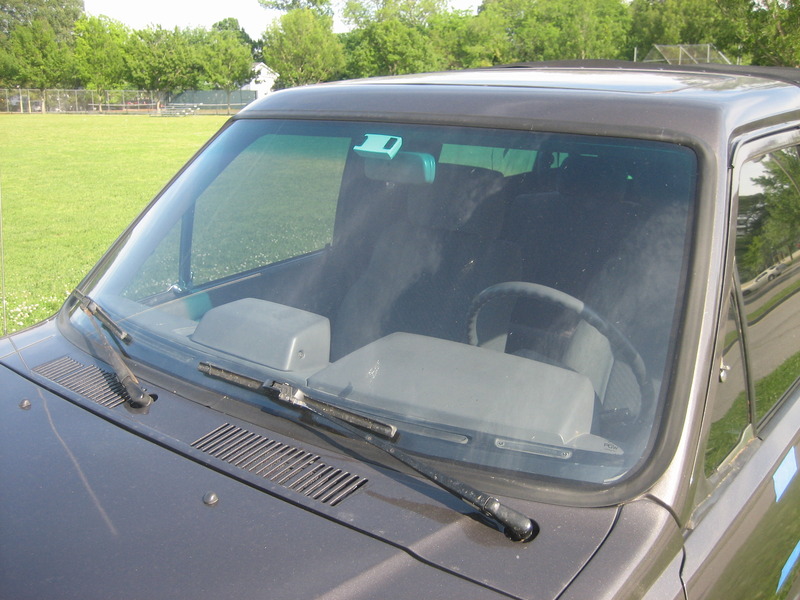
The new crack free windshield with universal rubber trim! No more chrome for me.
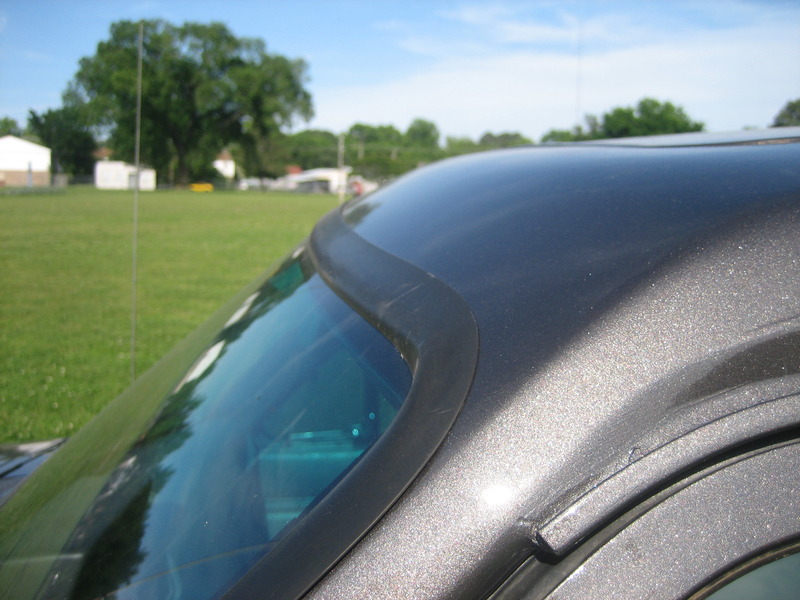
Fit is decent. It looks nice around the top.
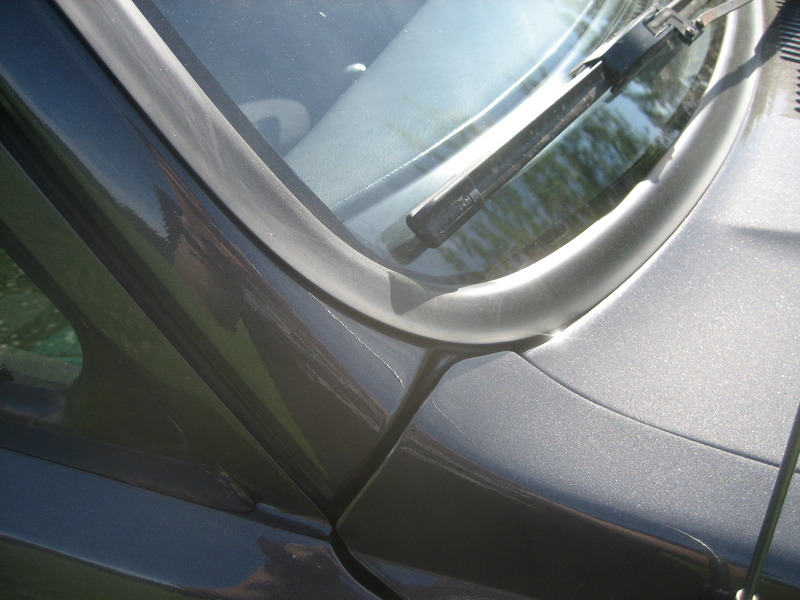
But it's a bit too wide for the sides so it leaves a slight gap.

Bottom looks good.
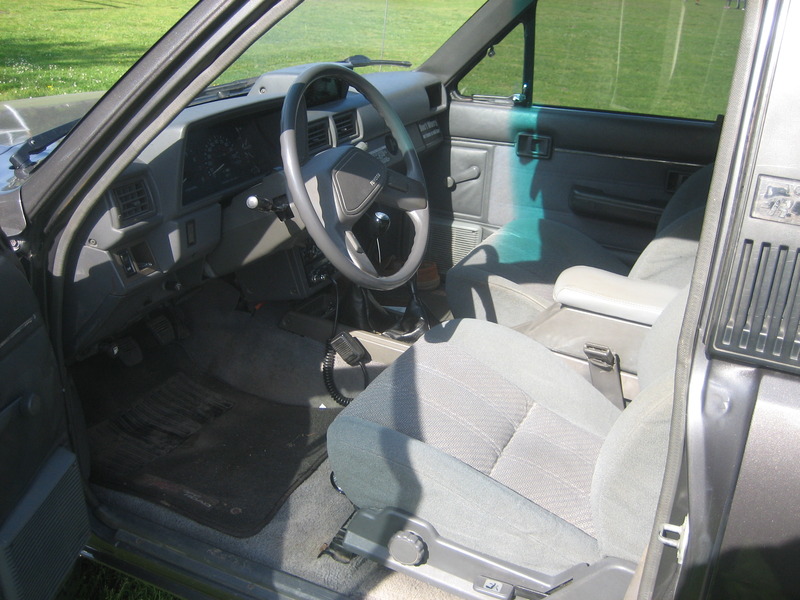
And the interior. I'm really digging the new center console. I never had a place for my right elbow before. Sure is nice plus I get twice as much storage. The seat heaters are installed in the seats but I still need to wire them in. I'd like to get a dashcap to cover my cracked dashpad. Mine is cracked but the steering wheel is blocking it in this picture. I also have the vent register for the passenger side but I don't want to install it until after I install the dashcap since it is very difficult to remove with cracking it all to hell.
And that's where it is today. Still lots of odds and ends to tie up. Hopefully the SAS can start soon. Then lockers, then lower T-case gears... The list never ends.
Here's the truck the first time I saw it after paint. Taken the same day as the teaser picture above. As you can kind of see, I forgot to tell them to paint the upper door frames satin black as they should be on 4Runners. I haven't decided yet if I want to go back and paint them black myself or just leave it.
Over the past week I've been slowly putting it back together. The first order of business was the interior so I could take my girlfriend on the first drive. It's mostly done except the tailgate internals are still out of it. I need to tint the rear window before I can put all that back together. Anyway, here it is as of today. Still a work in progress.
The rear bumper is from Trail Gear. Bought it from 4WheelParts on eBay for $321 shipped. It's painted with VHT Roll Bar & Chassis gloss black which I've used a lot in the past. It sprays nice, looks good, and hold up really well.
I wish the TG bumper tucked up a little closer to the body. Probably would be better if I hadn't chopped the lower part of the rear quarters.
Grip tape on the bumper so I can step on it if necessary and not slip.
Here's the stuff I used. Got it from the paint section at Home Depot. Seems to stick really well. It's very flexible. If it was too stiff it might try to lift off of curved surfaces but this stuff doesn't seem like it's going to have any issues.
The new crack free windshield with universal rubber trim! No more chrome for me.
Fit is decent. It looks nice around the top.
But it's a bit too wide for the sides so it leaves a slight gap.
Bottom looks good.
And the interior. I'm really digging the new center console. I never had a place for my right elbow before. Sure is nice plus I get twice as much storage. The seat heaters are installed in the seats but I still need to wire them in. I'd like to get a dashcap to cover my cracked dashpad. Mine is cracked but the steering wheel is blocking it in this picture. I also have the vent register for the passenger side but I don't want to install it until after I install the dashcap since it is very difficult to remove with cracking it all to hell.
And that's where it is today. Still lots of odds and ends to tie up. Hopefully the SAS can start soon. Then lockers, then lower T-case gears... The list never ends.


